How to Put on Fake Eyelashes: 7 Easy Steps

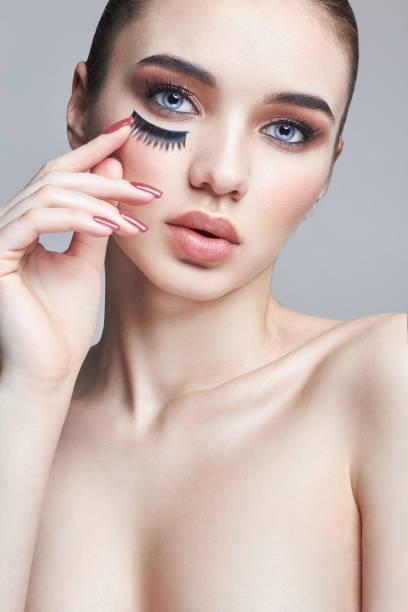
Are you tired of your natural lashes and want to try something new? Well, fake eyelashes are a great way to enhance your eye makeup game. However, putting them on can seem daunting for beginners. But don’t worry, we’ve got you covered!

In this article, we will guide you step-by-step on how to put on fake eyelashes like a pro.

Different Types of Fake Eyelashes

  • Strip Lashes: These are the most common type of fake eyelashes that come in a strip form. They are suitable for all eye shapes and sizes.
  • Individual Lashes: These lashes come in small clusters and are perfect for adding volume and length to specific areas of the lashes.
  • Magnetic Lashes: As the name suggests, these lashes have a magnetic strip that sticks to another magnetic strip placed under your natural lashes. They are easy to use and don’t require any glue.
  • Accent Lashes: These lashes are shorter in length and are designed to add a subtle flare to the outer corners of your eyes.

Now that you know the different types of fake eyelashes, let’s move on to the application process.

Step-by-Step Guide on How to Put on Fake Eyelashes

Step 1: Prepare Your Lashes

  • Remove any eye makeup using oil-free makeup remover.
  • Curl your natural lashes using an eyelash curler.
  • Apply mascara to your natural lashes. This will help blend your natural lashes with the fake ones later on.

Step 2: Measure and Trim the Lashes

  • Hold the false lashes against your natural lash line to see how much excess you need to trim.
  • Use small scissors to trim the lash strip from the outer corner only. Avoid trimming from the inner corner as it can make your eyes appear smaller.

Step 3: Apply Glue to the Lash Strip

Apply a thin layer of lash glue along the entire lash strip. Make sure to use a high-quality glue that won’t damage your natural lashes.

Step 4: Wait for the Glue to Dry

Wait for about 30 seconds for the lash glue to become tacky. This will make it easier to apply the lashes without them sliding around.

Step 5: Place the Lash Strip on Your Natural Lash Line

Using tweezers or your fingers, place the lash strip as close to your natural lash line as possible. Start from the center and then move towards the outer corner and inner corner.

Step 6: Press and Secure the Lash Strip

Once you’ve placed the lash strip in the right position, gently press down using your fingers or a lash applicator. Make sure to secure the corners properly.

Step 7: Apply Mascara and Eyeliner

Finally, blend your natural lashes with the fake ones by applying mascara. You can also apply eyeliner to hide any gaps between your natural and fake lashes.

Best Natural-Looking False Eyelashes

Lilly Lashes Lite Faux Mink Lashes: Experience the luxury of cruelty-free faux mink lashes that offer both a lightweight, comfortable feel and a naturally stunning appearance. Choose from a diverse range of styles, including wispy, fluttery, and bold, to suit your unique look.

Kiss Falscara Natural Wispy Wisps: Elevate your lash game with these flexible, reusable wispy lashes that seamlessly blend with your natural lashes. Crafted from a lightweight material, these lashes provide a comfortable fit and can be used up to 10 times for that perfect fluttery look.

Ardell Demi Wispies: These lashes are expertly made from soft synthetic fibers and offer a classic, natural look. With various lengths and styles to choose from, you can effortlessly enhance your lashes to match your mood.

Salon System Naturalash 116: Achieve a flawless, natural appearance with Salon System’s Naturalash 116, crafted from 100% human hair. These lashes are designed to mimic your own lashes, providing lightweight comfort and versatility with an array of curl and length options.

Eylure Fluttery Lashes 177: For those craving a bold, dramatic flutter, Eylure’s Fluttery Lashes 177 deliver the perfect touch of drama. Made from soft synthetic fibers, these lashes offer a striking look with various length and style choices.

Tips

  • Invest in a high-quality lash glue that won’t damage your natural lashes.
  • Measure and trim the lashes according to your eye shape to ensure a perfect fit.
  • Use tweezers or a lash applicator to apply the lashes for better precision.
  • Don’t forget to blend your natural lashes with the fake ones using mascara.
  • Practice makes perfect. Don 

FAQs

  1. Do I need to curl my natural lashes before applying fake eyelashes? Yes, it’s recommended to curl your natural lashes before applying fake eyelashes as it helps blend your natural lashes with the fake ones.
  2. How long do fake eyelashes last? Fake eyelashes can last for up to a week if properly cared for. However, it’s recommended to remove them at the end of each day and not sleep with them on.
  3. Can I reuse fake eyelashes? Yes, you can reuse fake eyelashes multiple times depending on the quality and how well you take care of them.
  4. Will fake eyelashes damage my natural lashes? No, fake eyelashes won’t damage your natural lashes if applied correctly and removed gently.
  5. Are magnetic lashes better than traditional glue-on lashes? It depends on personal preference and skill level. Magnetic lashes are easier to apply but may not be suitable for all eye shapes, whereas traditional glue-on lashes require more skill but provide a more secure hold.

Final Takeaway

Putting on fake eyelashes can seem overwhelming, but with the right tools and techniques, anyone can master it. Remember to invest in high-quality lashes and lash glue, practice measuring and trimming, and blend your natural and fake lashes using mascara for a seamless look. Follow our step-by-step guide and tips, and you’ll have beautiful, fluttery lashes in no time.

DANCE MAKEUP

There’s nothing quite like watching your child light up the stage at an eisteddfod or dance concert. Hair and makeup play just as big a role as the costume, ensuring each dancer looks their best under the stage lights.

For many parents—and even dancers applying their own makeup—creating the perfect stage look can feel overwhelming, especially if makeup isn’t your strong suit.

To help, we’ve put together some essential tips for achieving dance makeup that truly stands out.

First, let’s take a look at a before-and-after photo of the lovely Isabella. Her makeup highlights her features, making them pop beautifully on stage!

Great makeup starts with the right tools! Investing in a good-quality yet affordable brush set can make all the difference in achieving a polished look. Priceline offers budget-friendly options, including Manicare and Models Prefer brushes. For a reliable choice, Real Techniques brushes are among my personal favorites!

Step 1 – Primer

Dancers often wear their makeup for an entire day, so choosing the right products to enhance longevity is essential. Primer plays a crucial role in keeping foundation in place and creating a smooth base for application.

One of my favorite primers is the Laura Mercier Primer, available at David Jones, but if you’re looking for a budget-friendly option, the Face of Australia Primer from Priceline is a great choice for under $12.

For teenagers with oily skin, a mattifying primer helps control shine, especially in the T-zone. I highly recommend the Make Up For Ever Step 1 Mattifying Primer for this.

Don’t forget to prep your lips! Apply a nourishing lip balm like Lanolips or Paw Paw Ointment to keep them soft. Regularly exfoliating with a toothbrush is a simple trick to remove dead skin and keep your lips smooth.

Step 2 – Eyes

I always start with the eyes first, especially for stage makeup, as eyeshadow fallout can get messy. Doing this before foundation allows for easy cleanup and gives the primer more time to settle into the skin.

Prepping the Eyes

  • Apply your foundation over the eyelid and under the eyes to create an even base.
  • Use an eye primer to ensure eyeshadow adheres properly and stays in place. This also prevents smudging and creasing throughout the day.
    • Top picks: Too Faced Shadow Insurance (Mecca Maxima) or Urban Decay Eyeshadow Primer Potion.
    • Budget-friendly option: Face of Australia Eye Primer (Priceline, under $9).
  • If you don’t have an eye primer, concealer can work as an alternative.

Eyeshadow Application

  • Set the base – Apply a nude eyeshadow over the entire lid.
  • Define the crease – With a small fluffy brush, blend a soft brown shade into the crease and down toward the lash line.
  • Deepen the outer lid – Layer a medium brown/taupe shade on the outer lid, blending well. Gradually build intensity by adding darker brown, then black, ensuring the black remains closest to the lash line. Use a clean blending brush to seamlessly blend the shades together.
  • Brighten the inner lid – Apply a shimmery gold or bronze shade to the inner lid and inner corners to open up the eyes.
  • Highlight the brow bone – Use a pearl shimmer shade just below the eyebrows.
  • Lower lash line – With an angled brush, apply lighter shades toward the inner corner and darker shades on the outer lash line for added dimension.

For a great dance-friendly eyeshadow palette, try the CHI CHI Nudes Palette (Target, under $23) or Models Prefer Nude Palettes (Priceline).

Finishing Touches

  • Clean up fallout using micellar water and cotton buds or a makeup wipe.
  • Line the eyes:
    • Apply gel or liquid eyeliner along the upper lash line.
    • Line the lower lash line, stopping just short of the outer corner, then extend it horizontally for a lifted effect. A pencil liner works well here.
  • Mascara: Coat the top and bottom lashes for added volume.
  • False lashes:
    • Trim strip lashes to fit your eye shape.
    • Apply lash glue and wait about 20 seconds until tacky before placing them on the lid.
    • To create a lifted effect, position the outer corner slightly above the lash line.
    • Press the false lashes into your natural lashes using tweezers or fingers.

For stage-perfect lashes, I recommend Modelrock’s Pick and Mix lashes—affordable at under $2 per pair. Styles 212, 259, and 236 are great for stage performances.


Step 3 – Base

With the eyes complete and the skin prepped, it’s time to perfect the base.

Foundation

  • Use a buffing brush to blend a waterproof foundation into the skin.
  • For stage makeup, choose a shade one to two shades darker than your natural skin tone to ensure your features stand out under bright lights.
  • I used the Atelier Paris Waterproof Foundation on Isabella, but a great alternative is Revlon ColorStay Foundation.
  • Investing in a high-quality foundation is worthwhile, as it lasts longer and eliminates the need for frequent touch-ups.

(For local dance mums and students, I offer color-matching if you’re interested in ordering Atelier Paris foundations.)

Concealer

  • Apply concealer in a V shape under the eyes, down the nose bridge, and on the center of the forehead and chin for a brightened, even complexion.
  • I used MAC Pro Longwear Concealer, but Maybelline offers great budget-friendly options as well.

Blending is key—use a smaller buffing brush or a damp beauty sponge for a seamless finish.

Step 4 – Contour, Blush & Highlight

Once your base is perfectly blended, set everything in place with a translucent powder. A colorless powder is best to avoid altering the foundation shade. I recommend Ben Nye Translucent Powder, available from Scotty’s.

Contour

  • Using a contour powder, apply a line just below the cheekbones and blend upwards (making a “fish face” helps find the right placement).
  • Blend contour along the temples, jawline, and sides of the nose for added definition.
  • I used the Anastasia Contour Palette, but a great budget alternative is Models Prefer Contour Powder from Priceline for just $10.

Blush

  • Use a fluffy brush to apply a rosy pink blush to the cheekbones for a natural flush.
  • On Isabella, I used NARS Deep Throat, but any soft pink blush works well.

Highlight

  • Apply a highlighter to the tops of the cheekbones for a radiant glow.
  • My favorite is The Balm Mary-Lou Manizer, available at David Jones and Sephora for under $30.
  • A great budget-friendly option is the Models Prefer Highlighter, available at Priceline for under $11.

Blending is key—make sure all the products transition smoothly for a flawless, stage-ready finish!

Step 5 – Brows & Lips

Brows

  • Fill in the eyebrows using a brow pencil or an eyeshadow that is one shade lighter than your natural brow color.
  • Apply with an angled brush for precision and blend well for a natural yet defined look.
  • Remember, eyebrows frame the eyes, so shaping them correctly enhances the overall makeup!

Lips

  • Outline the lips with a red lip liner to define the shape and prevent feathering.
  • Fill in the lips with a long-lasting red lipstick for a bold, stage-ready look.
  • Revlon ColorStay is a fantastic option for a vibrant, long-wearing red.

Step 6 – Setting Spray

To lock in the makeup and ensure it lasts under the bright stage lights, finish with a makeup setting spray.

  • Skindinavia Setting Spray is my go-to for long-lasting wear.
  • For a budget-friendly option, the Models Prefer Setting Spray from Priceline (under $15) works well to keep everything in place.

A few spritzes will help prevent smudging, fading, or melting—so your dancer’s look stays flawless from the first step to the final bow!

Let the show begin!!!!!