HOW TO SHAVE DOWN THERE

Thinking about shaving “down there”? You’re not alone!  This guide will walk you through everything you need to know to shave your pubic hair safely and comfortably,  whether you’re a seasoned groomer or just starting out. We’ll cover prepping your skin, choosing the right tools, and avoiding irritation to keep things smooth sailing (or should we say, shaving?).

STEPS TO SHAVE PUBIC HAIR

TRIM HAIR DOWN

To streamline your shaving routine and minimize the risk of razor burn and ingrown hairs, trim your hair to its shortest length, ideally less than a quarter of an inch, before stepping into the shower. This not only saves time during the shaving process but also promotes a smoother and more comfortable experience.

EXFOLIATE PUBIC AREA

After trimming any long hairs as needed, use a gentle scrub, a loofah or exfoliating gloves and lightly exfoliate the pubic area. Taking time to exfoliate skin before you shave helps remove any dead skin which can cause ingrown hairs to develop.

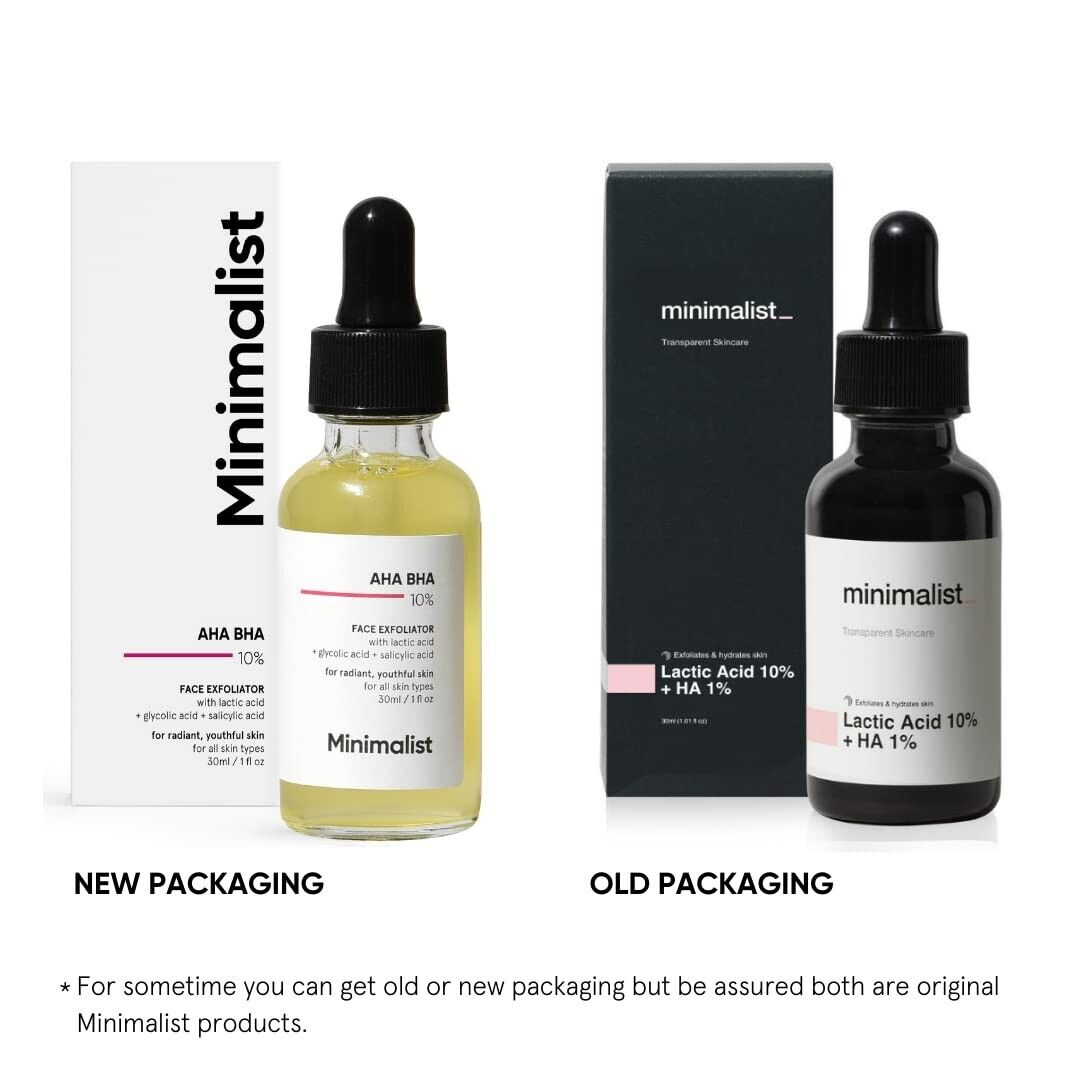
Chemical Exfoliant: Chemical exfoliants use AHAs (alpha hydroxy acids) or BHAs (beta hydroxy acids) to gently dissolve dead skin cells on the surface of the skin. This can help prevent ingrown hairs and keep the area smooth. Look for products with lactic acid or glycolic acid (AHAs) as these tend to be gentler on sensitive skin.

Exfoliating Scrub: Exfoliating scrubs use physical exfoliants, like sugar or jojoba beads, to buff away dead skin cells. Opt for a gentle scrub specifically formulated for sensitive skin to avoid irritation. Look for scrubs with calming ingredients like oatmeal or aloe vera.

APPLY SHAVING CREAM OR GEL

Ensure your skin is damp but not overly wet to prevent shaving cream slippage. Opt for shave gel instead of soap or body wash, as it is specifically designed to provide a smooth glide for razors. According to New York dermatologist Dr. Elyse Love, it is advisable to use a sharp razor blade and shaving cream for all body areas to achieve the closest shave. This is particularly crucial for sensitive skin, such as the underarms and bikini line, as inadequate care during shaving may lead to irritation. Explore our recommended list of the top shaving creams for women to enhance your shaving experience.

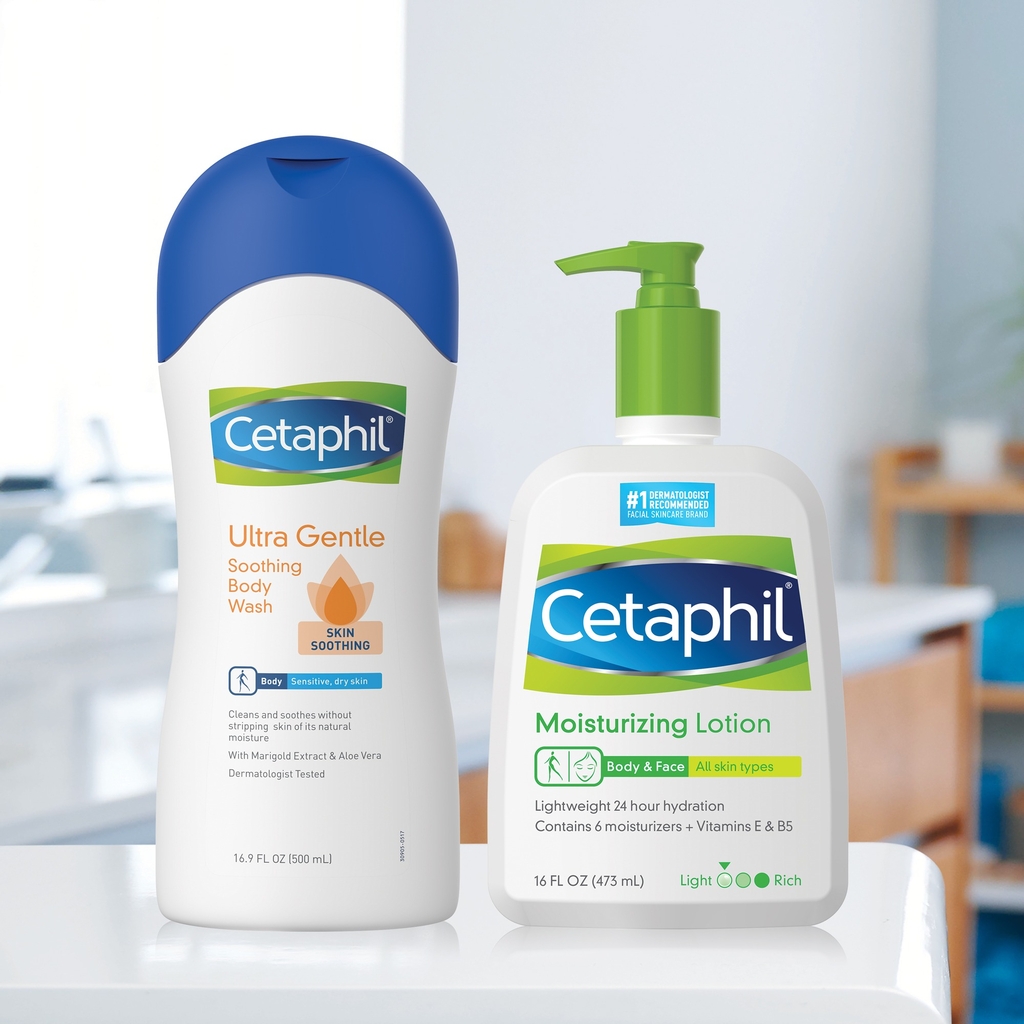
Cetaphil Ultra Gentle Shave Cream: This fragrance-free shaving cream is formulated for sensitive skin and provides a good lather for a comfortable shave. It is also hypoallergenic and non-comedogenic, meaning it won’t clog your pores.

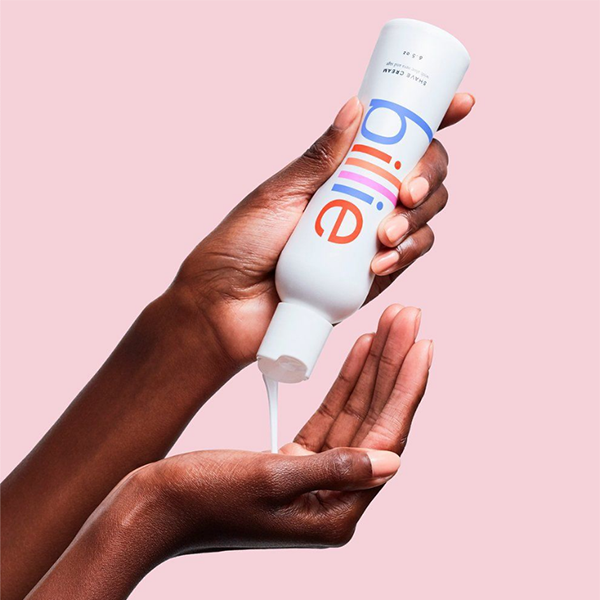
Billie Shave Cream: Another fragrance-free option, Billie Shave Cream is designed specifically for women who shave their pubic hair. It contains hydrating ingredients like aloe vera and coconut oil to help soothe and moisturize the skin. Plus, the packaging is cute and discreet.

USE SHARP RAZOR

To minimize the risk of razor burn, impact, and irritation, always choose a sharp, clean razor blade when shaving. If your blades start feeling rough on your skin, tug at your body hair, or cause increased itching after shaving, it’s a clear sign that it’s time for a replacement. Don’t compromise on the potential for skin irritation and razor burn. If you have irritated skin, consider choosing razors specifically designed for sensitive skin.

Another benefit of using a separate razor for the pubic area is to prevent the spread of bacteria in case of cuts or scratches during shaving. This precaution ensures a more hygienic shaving experience.

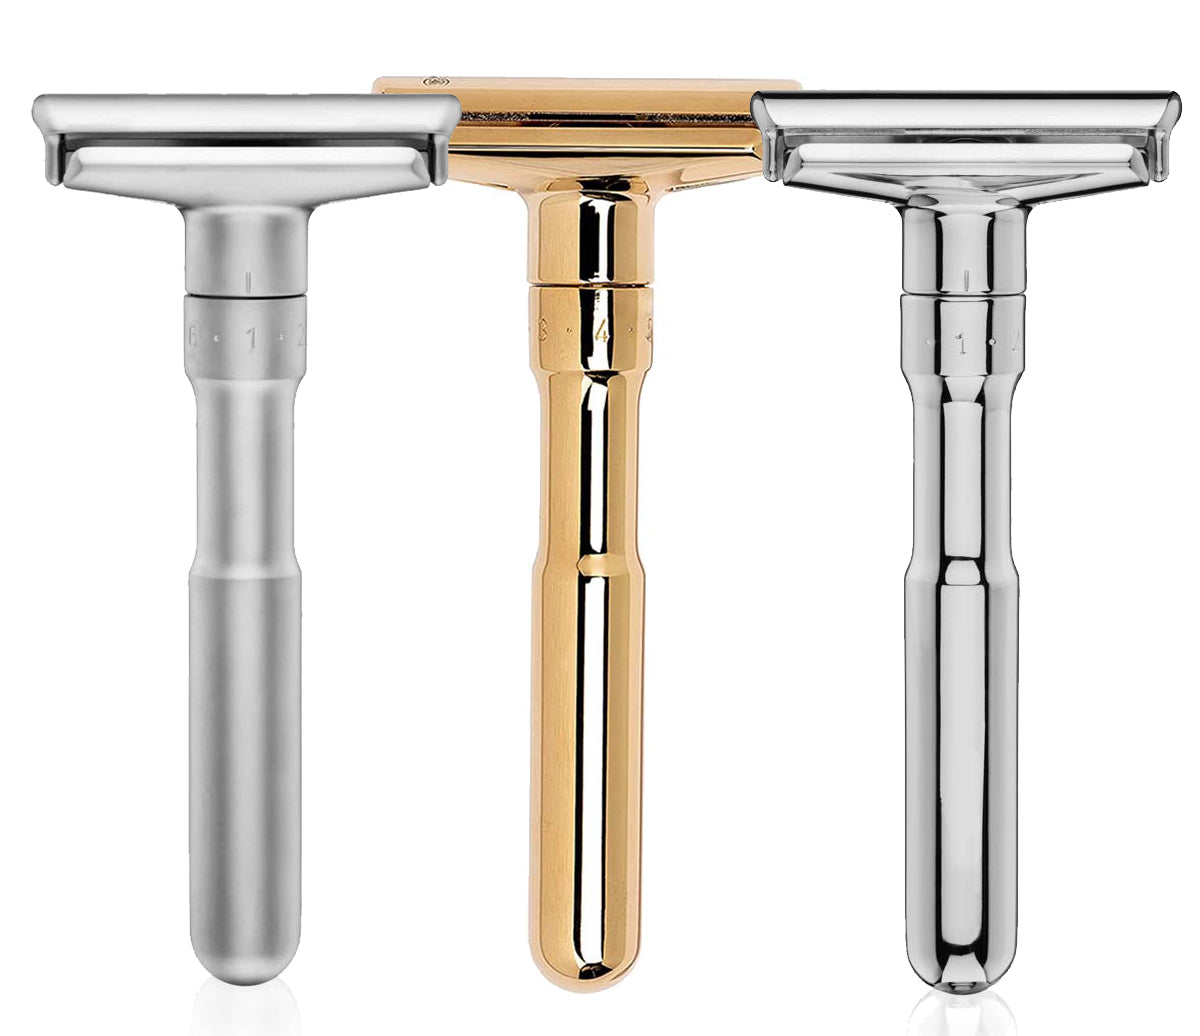
Merkur Futur Adjustable Safety Razor: This is a safety razor, which means the blade is encased in a metal guard, minimizing the risk of nicks and cuts. The Futur is also adjustable, allowing you to customize the blade exposure for a close yet comfortable shave. It’s a great option for those who are new to safety razors or prefer more control over the shaving experience.

Billie Women’s Razor: This 5-blade razor is designed specifically for women’s shaving needs. The blades are sharp yet coated with a lubricating strip enriched with aloe vera and vitamin E to provide a smooth and irritation-free shave. The handle is comfortable to hold and has a rubber grip for better control, even in wet conditions.

RINSE YOUR RAZOR

Maintaining your razor’s effectiveness requires diligent rinsing. After each stroke, ensure thorough rinsing of the razor blade. This step is crucial to dislodge any trapped hair or accumulated shaving cream, preventing hindrances to its optimal performance. Keep in mind that using your fingers to remove obstructions from the razor is strongly discouraged due to the risk of cuts. Instead, rely on the water pressure from your faucet or shower to effortlessly clear any debris and maintain a clean, efficient razor.

CLEANSE THE AREA

After finishing shaving, use warm water to gently wash away all the shaving cream. Make sure to rinse thoroughly to leave your skin feeling fresh. Once done, pat your skin dry with a clean towel. This helps to remove any remaining water and ensures a comfortable, dry finish. Taking these simple steps can contribute to a smooth and irritation-free post-shaving experience.

MOISTURIZE

Don’t forget an important step after shaving – moisturize your skin. Skipping this can make a big difference in how your skin feels. After shaving, your skin might feel dry because of all the exfoliation. To fix this, use a scent-free lotion to rehydrate your skin. It’s a simple but crucial step for a smooth and comfortable post-shave experience.

Eucerin Calming Body Lotion: This fragrance-free, dermatologist-recommended lotion is formulated with colloidal oatmeal to soothe and calm irritated skin. It’s also lightweight and non-greasy, so it absorbs quickly without leaving a greasy residue.

Cetaphil Daily Facial Moisturizer: While labeled for facial use, this fragrance-free, gentle moisturizer is also perfect for the delicate skin in your pubic area. It provides long-lasting hydration without clogging pores and contains hyaluronic acid to help retain moisture.

TIPS AND CONSIDERATIONS

SHARPNESS MATTERS

Always use a sharp razor for a smoother shave and to avoid irritation. Dull razors can cause nicks and discomfort. Remember, if your razor feels rough or tugs at your hair, it’s time for a replacement. Keeping your razor sharp is a key step in achieving a comfortable shaving experience.

AVOID SHARING RAZORS

Sharing razors may seem convenient, but it’s not a good idea. It can spread bacteria and lead to skin issues. Stick to using your own razor to maintain hygiene and prevent skin problems. Your razor is a personal item, and keeping it to yourself is an important part of your grooming routine.

LISTEN TO YOUR BODY

Pay attention to how your skin reacts during and after shaving. If you notice excessive nicks or irritation, it’s a sign to stop. Pushing through discomfort can worsen the situation. Give your skin a break, and if needed, consult with a dermatologist for personalized advice on how to care for your skin.

CONSIDER ALTERNATIVES

Shaving is just one method of hair removal. If you find shaving isn’t working well for you, consider alternatives like trimming or waxing. Trimming is a quick and easy way to manage hair length without the risk of irritation. Waxing provides longer-lasting results, though it may require professional assistance. Explore these alternatives to find the method that suits your preferences and skin needs best.

FAQ

1. What if I get razor burn or irritation?

Rinse with cool water after shaving to close your pores. Apply a fragrance-free moisturizer to soothe the skin. Aloe vera gel can also be calming for irritation.

2. How often should I replace my razor blade?

Dull blades are more likely to cause nicks and irritation. Replace your razor blade after a few shaves, or sooner if it feels dull.

3. Can I share my razor with someone else?

Sharing razors can spread bacteria. It’s best to have your own razor for pubic shaving to avoid any risk of infection.

CONCLUSION

By incorporating these tips into your grooming routine, you can navigate the process of shaving “down there” with confidence, promoting both comfort and skin health. The key lies in a balanced approach, combining proper tools, techniques, and attention to personal hygiene for a smooth and satisfying shaving experience.

Chemical Peel for Back Acne: Revealing the Secret to Clearer Skin

Acne, a common skin condition, can affect individuals of all ages and has the potential to impact one’s self-esteem. While most people associate acne with the face, it can also appear on other parts of the body, including the back. Back acne, or “bacne,” can be particularly stubborn and difficult to treat due to the presence of more sebaceous glands in that area. But, there is a solution that has gained popularity in recent years: chemical peel for back acne. Keep reading to discover how a back chemical peel works to eliminate back acne and leave your shoulders smooth, ready to be confidently shown off. 

What Is a Chemical Peel?

A chemical peel is a dermatological procedure that involves using a chemical solution to remove the outermost layers of the skin. This process promotes exfoliation and stimulates the growth of new, healthier skin cells. Chemical peels come in various strengths, ranging from superficial to deep, depending on the specific needs of the patient. The chemicals commonly used in these peels include alpha-hydroxy acids (AHAs), beta-hydroxy acids (BHAs), trichloroacetic acid (TCA), and phenol.

One example of a chemical peel solution is a combination of salicylic acid (BHA) and glycolic acid (AHA). The salicylic acid helps penetrate the oil-filled pores on the back, while glycolic acid exfoliates the surface layer of the skin.

How Does a Chemical Peel Help Combat Back Acne?

Chemical peels can effectively address back acne by targeting several underlying causes of the condition. Here’s how the process works:

Exfoliation and Deep Cleansing

Chemical peels work by exfoliating the skin, removing dead skin cells, excess oil, and other impurities that clog the pores. By eliminating these blockages, chemical peels help prevent the formation of new acne lesions and promote a clearer complexion.

Reduction of Sebum Production

The chemical solution used in a peel can help regulate sebum production, which plays a significant role in the development of acne. By controlling oil production, chemical peels minimize the chances of pore blockage and subsequent acne outbreaks on the back.

Antibacterial Action

Certain chemical solutions used in peels possess antibacterial properties, making them effective against the bacteria responsible for acne breakouts. By eradicating acne-causing bacteria, chemical peels reduce inflammation, redness, and the likelihood of new acne lesions forming on the back.

Stimulation of Collagen Production

Chemical peels trigger the production of collagen, a vital protein that gives the skin its elasticity and firmness. This stimulation helps improve the overall texture and appearance of the skin, reducing the scarring and hyperpigmentation associated with severe back acne.

For individuals with moderate to severe back acne, a medium-depth chemical peel containing trichloroacetic acid (TCA) may be recommended. TCA peels are particularly effective in treating acne scars and hyperpigmentation.

When Should You Consider a Chemical Peel for Back Acne?

While a chemical peel can be a powerful tool in combating back acne, it is essential to determine if it is the right option for you. Consider the following factors when deciding whether to undergo a chemical peel for your back acne:

Severity of Acne

If you have mild to moderate back acne that has not responded well to over-the-counter treatments, a chemical peel may offer the improvement you desire. However, if your acne is severe or accompanied by cysts or nodules, it might be best to consult a dermatologist for a more comprehensive treatment plan.

Skin Sensitivity

Chemical peels involve the use of active ingredients that can cause temporary redness, flaking, and sensitivity. If you have particularly sensitive skin, it is crucial to discuss this with a skincare professional or dermatologist to determine the most suitable type and strength of chemical peel for your individual needs.

Time Availability

The recovery period following a chemical peel varies depending on the depth of the peel. Superficial peels may cause minimal downtime, while deeper peels can require several weeks of healing. Consider whether you can accommodate the necessary recovery time before scheduling a chemical peel for back acne.

Step-by-Step Guide

While it is always recommended to have a professional perform a chemical peel, especially for more intensive peels, here is a general step-by-step guide:

Preparation: Start by cleansing the back thoroughly with a gentle cleanser to remove any dirt or impurities. Pat the skin dry.

Protective Measures: Apply a thin layer of petroleum jelly or a protective barrier, such as a silicone gel, around sensitive areas like the neck, shoulders, and any open wounds or cuts. This will prevent the chemical solution from coming into contact with unaffected areas.

Application of Chemical Peel: Using a brush or applicator, carefully apply the chemical peel solution evenly across the back, focusing on acne-prone areas. Avoid applying the solution near the eyes, mouth, or other sensitive areas. Follow the instructions provided by the product manufacturer or as advised by a dermatologist.

Waiting Time: Allow the chemical peel solution to sit on the back for the recommended duration. This can range from a few minutes for superficial peels to up to 30 minutes or more for deeper peels. It’s crucial to adhere to the specified time to avoid potential complications.

Neutralization or Rinse: After the designated waiting period, neutralize the chemical peel solution by either rinsing it off with cool water or using a neutralizing agent as instructed. This step ensures complete removal of the chemical solution and stops its effects on the skin.

Moisturization: Gently pat the skin dry and apply a soothing, hydrating moisturizer to help alleviate any potential dryness or irritation. Look for products that are non-comedogenic and specifically formulated for post-peel care.

Post-Treatment Care: Follow the post-peel care instructions provided by the dermatologist or product manufacturer. This usually involves avoiding direct sun exposure, using sunscreen, and refraining from picking or scratching at the treated skin to prevent scarring.

Example: Samantha, a licensed esthetician, performs chemical peels for back acne at her spa. She follows strict hygiene protocols, such as wearing gloves and maintaining a clean working space. Samantha carefully evaluates each client’s skin condition, chooses the appropriate type and strength of chemical peel, and ensures that they have realistic expectations regarding the results and potential downtime. She conducts a patch test on a small area of the client’s back before proceeding with the full treatment to check for any adverse reactions.

Comparing Chemical Peels with Other Treatments

To help you make an informed decision about treating your back acne, let’s compare chemical peels with some of the alternative treatments mentioned previously:

Effectiveness: Chemical peels, when performed correctly and customized to the individual’s needs, can deliver significant improvements in back acne. They work by targeting multiple factors that contribute to acne formation, including oil production, inflammation, and bacteria. However, other treatments like oral medications or laser therapies may be more suitable for severe or resistant cases of back acne.

Downtime and Convenience: Chemical peels can have varying recovery times depending on their depth. Superficial peels may require little to no downtime, while deeper peels can result in several days or weeks of redness, flaking, and sensitivity. In comparison, topical treatments or laser therapies often have shorter recovery periods or none at all, making them more convenient for individuals with busy lifestyles.

Long-Term Results: Chemical peels can provide long-lasting results when accompanied by proper skincare maintenance and sun protection. However, for chronic or hormonal acne, oral medications or hormonal therapies may be more effective in managing the condition over an extended period.

Safety Considerations: Chemical peels, especially deep peels, carry a higher risk of potential side effects such as burns, hyperpigmentation, or infection. Alternative treatments like topical products or light therapies generally have a lower risk profile but may be less potent in addressing severe cases of back acne.

Tips for Success with Chemical Peels for Back Acne

Consult a Skincare Professional: Before undergoing a chemical peel, consult with a qualified dermatologist or licensed esthetician. They can assess your skin condition, recommend the most appropriate type and strength of peel, and guide you through the process.

Follow Pre- and Post-Peel Instructions: Adhere to the instructions provided by your skincare professional regarding pre-peel preparations and post-peel care. This includes avoiding sun exposure, using sunscreen diligently, and refraining from picking or scratching at the treated skin.

Gradually Increase Peel Strength: If you are new to chemical peels, start with milder strengths and gradually work your way up to deeper peels. This allows your skin to acclimate and minimizes the risk of adverse reactions.

Maintain a Consistent Skincare Routine: Incorporate a gentle cleanser, moisturizer, and sunscreen into your daily skincare routine even when not undergoing a chemical peel. Consistency in skincare can help manage acne and maintain the results achieved through chemical peels.

Patience is Key: It’s important to remember that significant improvements may take time and multiple sessions. Be patient and follow the recommended treatment plan to achieve the desired outcome.

Conclusion

A chemical peel for back acne offers a powerful solution for those struggling with persistent bacne and acne scars. With its targeted approach, it effectively treats the underlying causes of acne and promotes skin rejuvenation. By exfoliating the skin and stimulating collagen production, a chemical peel can help you achieve smoother, clearer, and more radiant skin on your back. Remember to consult with a skincare professional to determine the most suitable type and strength of chemical peel for your specific needs. Embrace the opportunity to reclaim your confidence and enjoy the freedom of baring your beautiful, acne-free back.