The 16 Types Of Ear Piercings: Which one is right for you?

Earrings are an indispensable accessory for our lovely ladies, aren’t they? They not only enhance the beauty of the face but also express the personality and style of a woman. Each piercing is a unique story of individuality. Join us to discover the allure of different ear piercing names, and select the most suitable and beautiful style for you.. Explore and be amazed!

Do ear piercings hurt?

Yes, ear piercings can hurt. The amount of pain you experience will depend on a few factors, including the location of the piercing, your pain tolerance, and the skill of the piercer. Typically, it involves a brief, intense sensation—described as a quick pinch or sting as the needle passes through the ear tissue. Despite the momentary discomfort, many find the visual outcome well worth it. Factors like anxiety or fear can influence pain perception, and the actual sensation varies from person to person. Stay tuned for more insights!

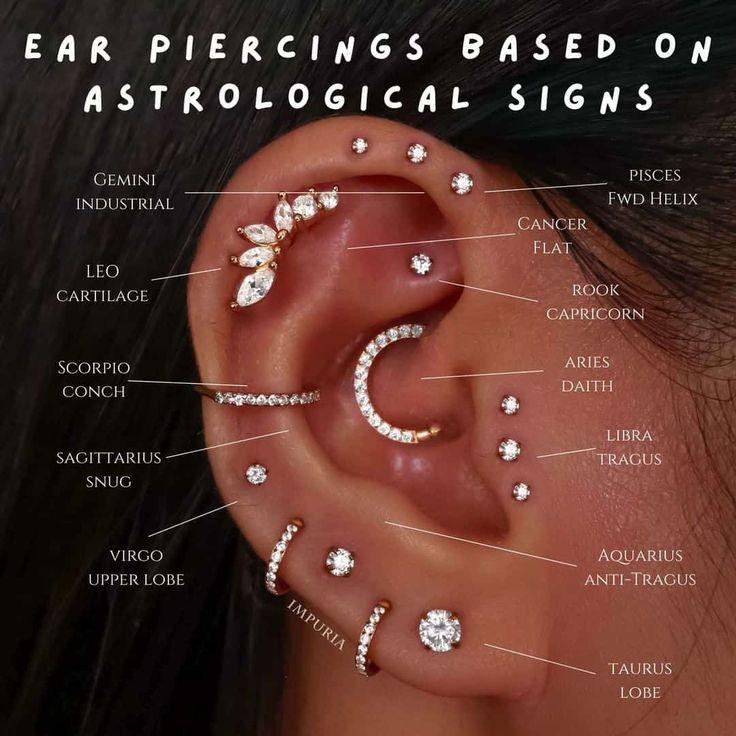
What are the different types of ear piercings?

Lobe piercing

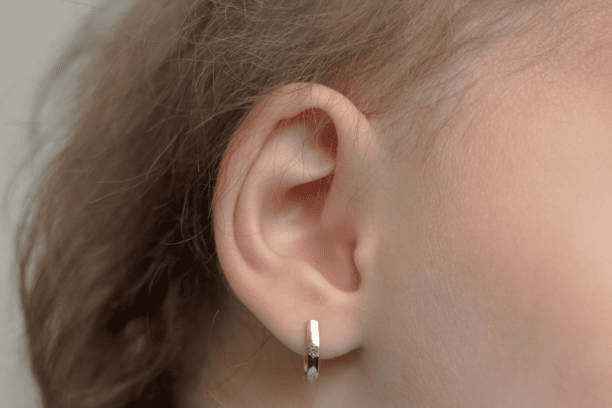
For many people, the initial piercing choice is the standard lobe placement, appreciated for its minimal pain. What sets it apart is its simple healing process, avoiding cartilage. This adaptable and low-maintenance piercing opens doors to variations like upper-lobe placements, just above the first one. Healing Time for lobe piercing: 4 to 6 weeks.

Upper Lobe Piercing

An upper lobe piercing is positioned a bit higher on the earlobe, allowing for approximately 4 piercings depending on your ear size. Despite the elevation, since it’s still a fleshy area, the healing time remains the same as the regular lobe piercing mentioned earlier. Healing Time for upper lobe piercing: 4 to 6 weeks.

Transverse Lobe Piercing

Imagine a stylish transformation of your earlobe—instead of the usual front-to-back piercing, a transverse lobe piercing involves threading a barbell from side to side. This unique approach results in a distinctive look, with little balls on either side of your earlobe. It’s a cool way to switch up the traditional lobe placement and add a touch of individuality to your style. Healing Time for transverse lobe piercing: 2 to 3 months, sometimes up to 10 months.

Tragus Piercing

When opting for a tragus piercing, the target is the small piece of cartilage partially covering your ear canal. Whether you go for a stylish stud or a trendy hoop, the tragus placement provides a unique look. Keep in mind that this piercing may involve a bit more discomfort than a lobe piercing due to the piercer navigating through cartilage. Healing Time for tragus piercing: 3 to 6 months, sometimes up to 8 months.

 Anti-Tragus Piercing

The anti-tragus, the ridge above your earlobe, is the target for these piercings, typically adorned with hoops or barbells. Confirm with your piercer about available space, especially if you have stretched lobes or wear other earrings. Anti-tragus piercings might bring more discomfort due to thicker cartilage. Keep it clean and refrain from sleeping on the newly pierced side. Healing Time for anti-tragus piercing: 3 to 6 months.
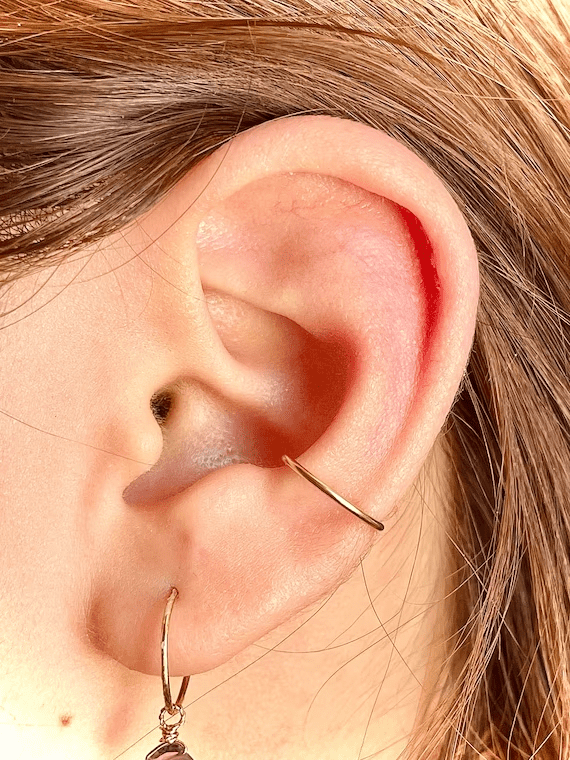
Orbital Piercing

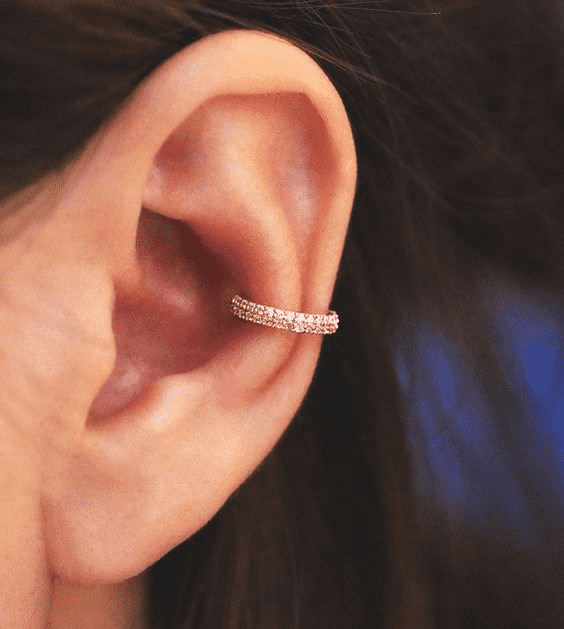
An orbital piercing involves creating two holes in the same part of the ear, allowing for a hoop-shaped piece of jewelry to pass through both. This versatile piercing can be done in various locations, but it’s often seen in the helix or the lobe. Explore the possibilities and express your style with this unique and trendy piercing. Healing Time for Orbital Piercing: 6 to 8 weeks

Snug Piercing

Snug piercings are horizontal and located above the anti-tragus region, with visible entry and exit points from the front of the ear. However, not every ear is suitable for a snug piercing, as the available space in that area varies. It’s crucial to consult with your piercer to determine feasibility. Healing Time for snug piercing: up to 6 months 

Rook Piercing

This image has an empty alt attribute; its file name is Eu8mPDD-rF_SkRigLfEX9gMiOx1Uj-p5UH0JAvsf0YyTK6vaYaCbqlwyNmvw6HGmWI7m-fQDRRS9nbgEiGm_ngvj2f_pOEJwBB2dOYlSntzpnb_J3BvJmtwWRd9fZFavFzH54eWar9CNED4rWNx77po

A rook piercing passes through the cartilage in the upper part of your ear, adjacent to the daith placement. It targets the ridge between the outer and inner sections of your upper ear. Healing Time for rook piercing: 10 months to a year.
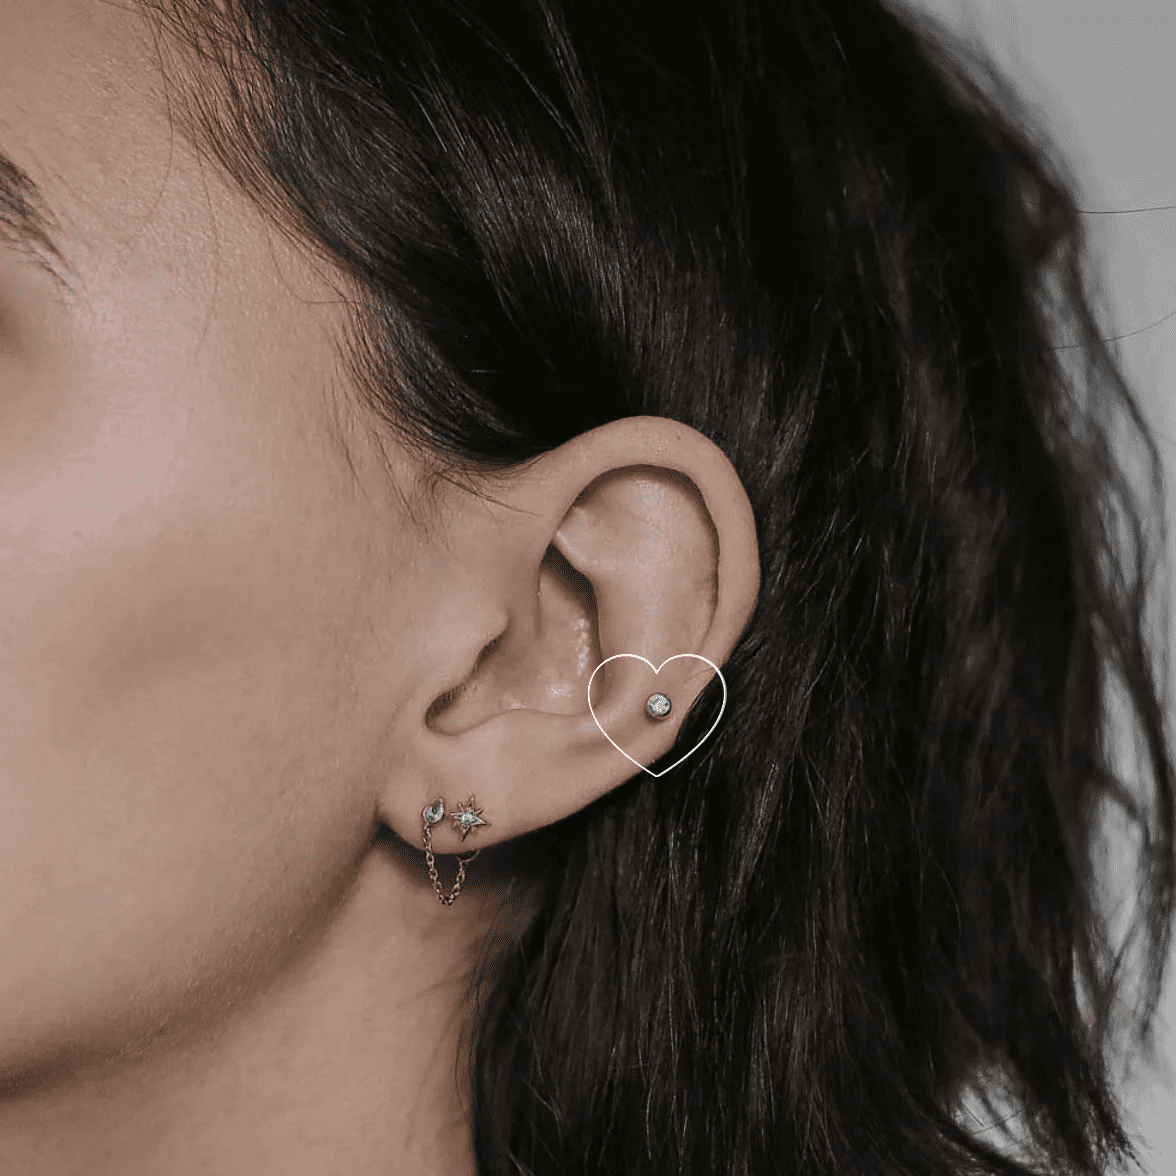
Conch Piercing

A conch piercing, whether in the upper or lower region, involves piercing through a significant amount of cartilage, causing more discomfort than other piercings. Healing usually takes six to nine months, with a need for at least two daily cleaning sessions. Healing Time for conch piercing: from 3 to 9 months.

Daith Piercing

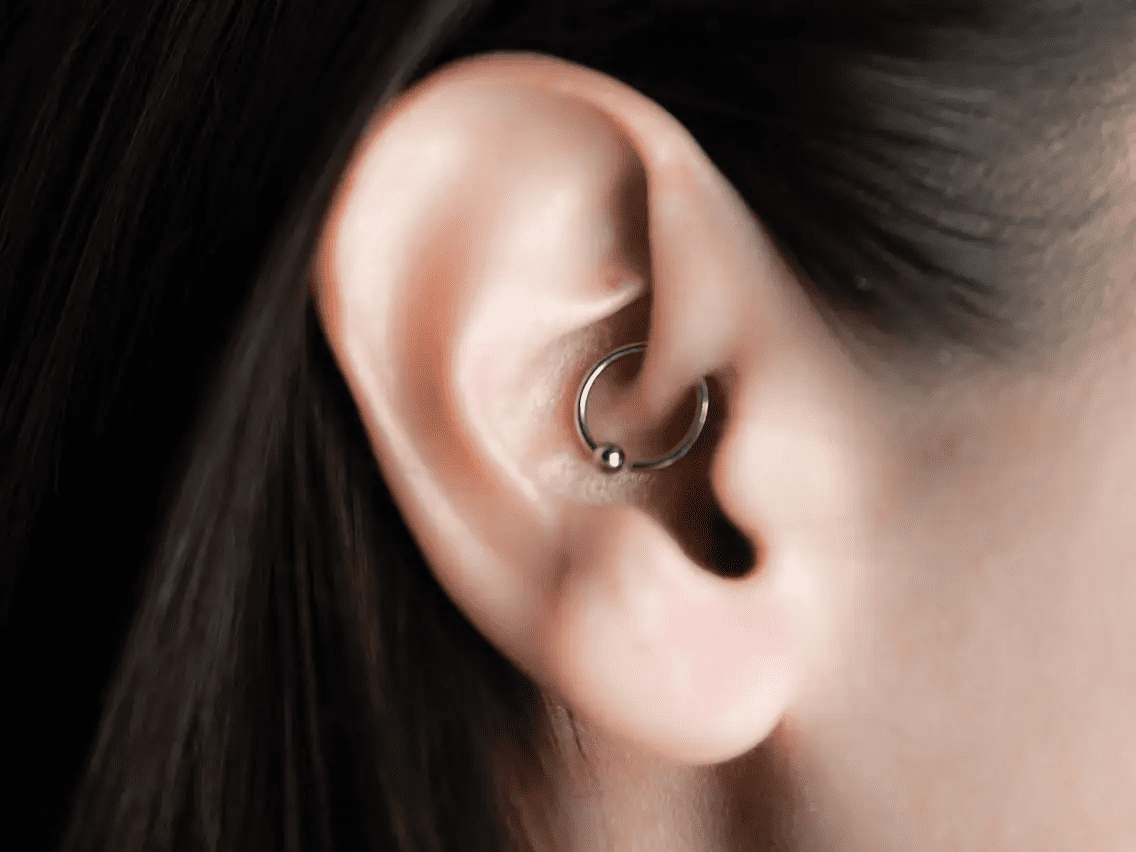
Explore the world of daith piercings, placed on the cartilage inside your ear and often adorned with a stylish hoop. Surprisingly, some people choose daith piercings in the hope of alleviating migraine symptoms. Healing Time for daith piercing: up to 9 months.

Auricle

Situated between the lobe and the helix on the outer part of the ear, the auricle, also known as a “mid-helix” piercing, graces the ear about halfway up, aligning with the tragus. Ideal for hoops and studs, this piercing involves thinner cartilage in the area, resulting in relatively lower pain during the process. Healing time for auricle: 3 to 9 months
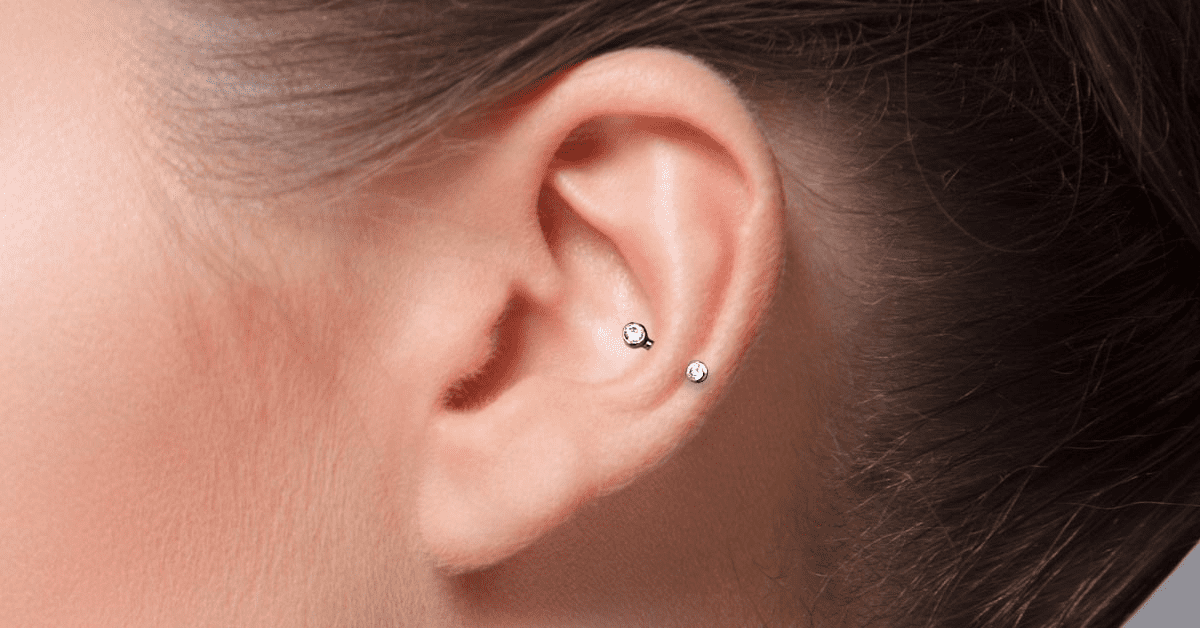
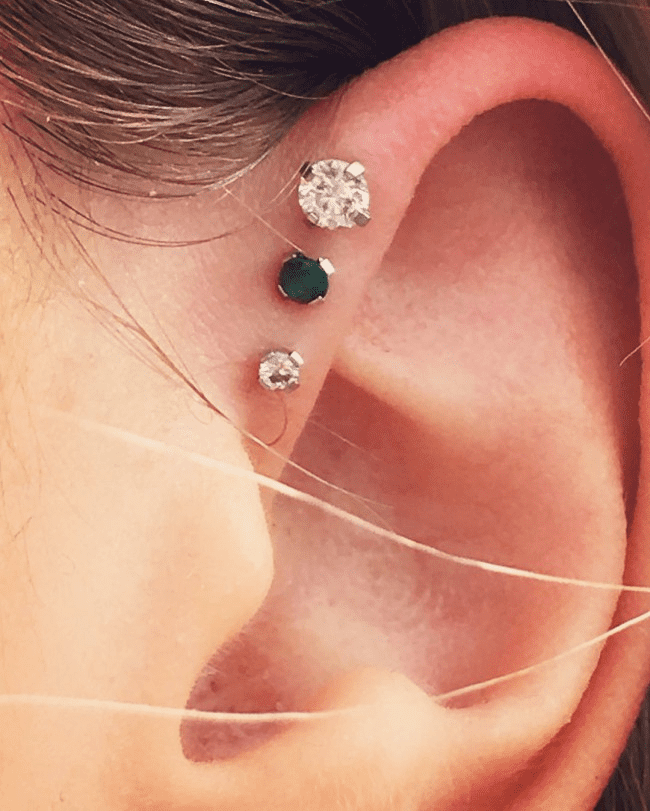
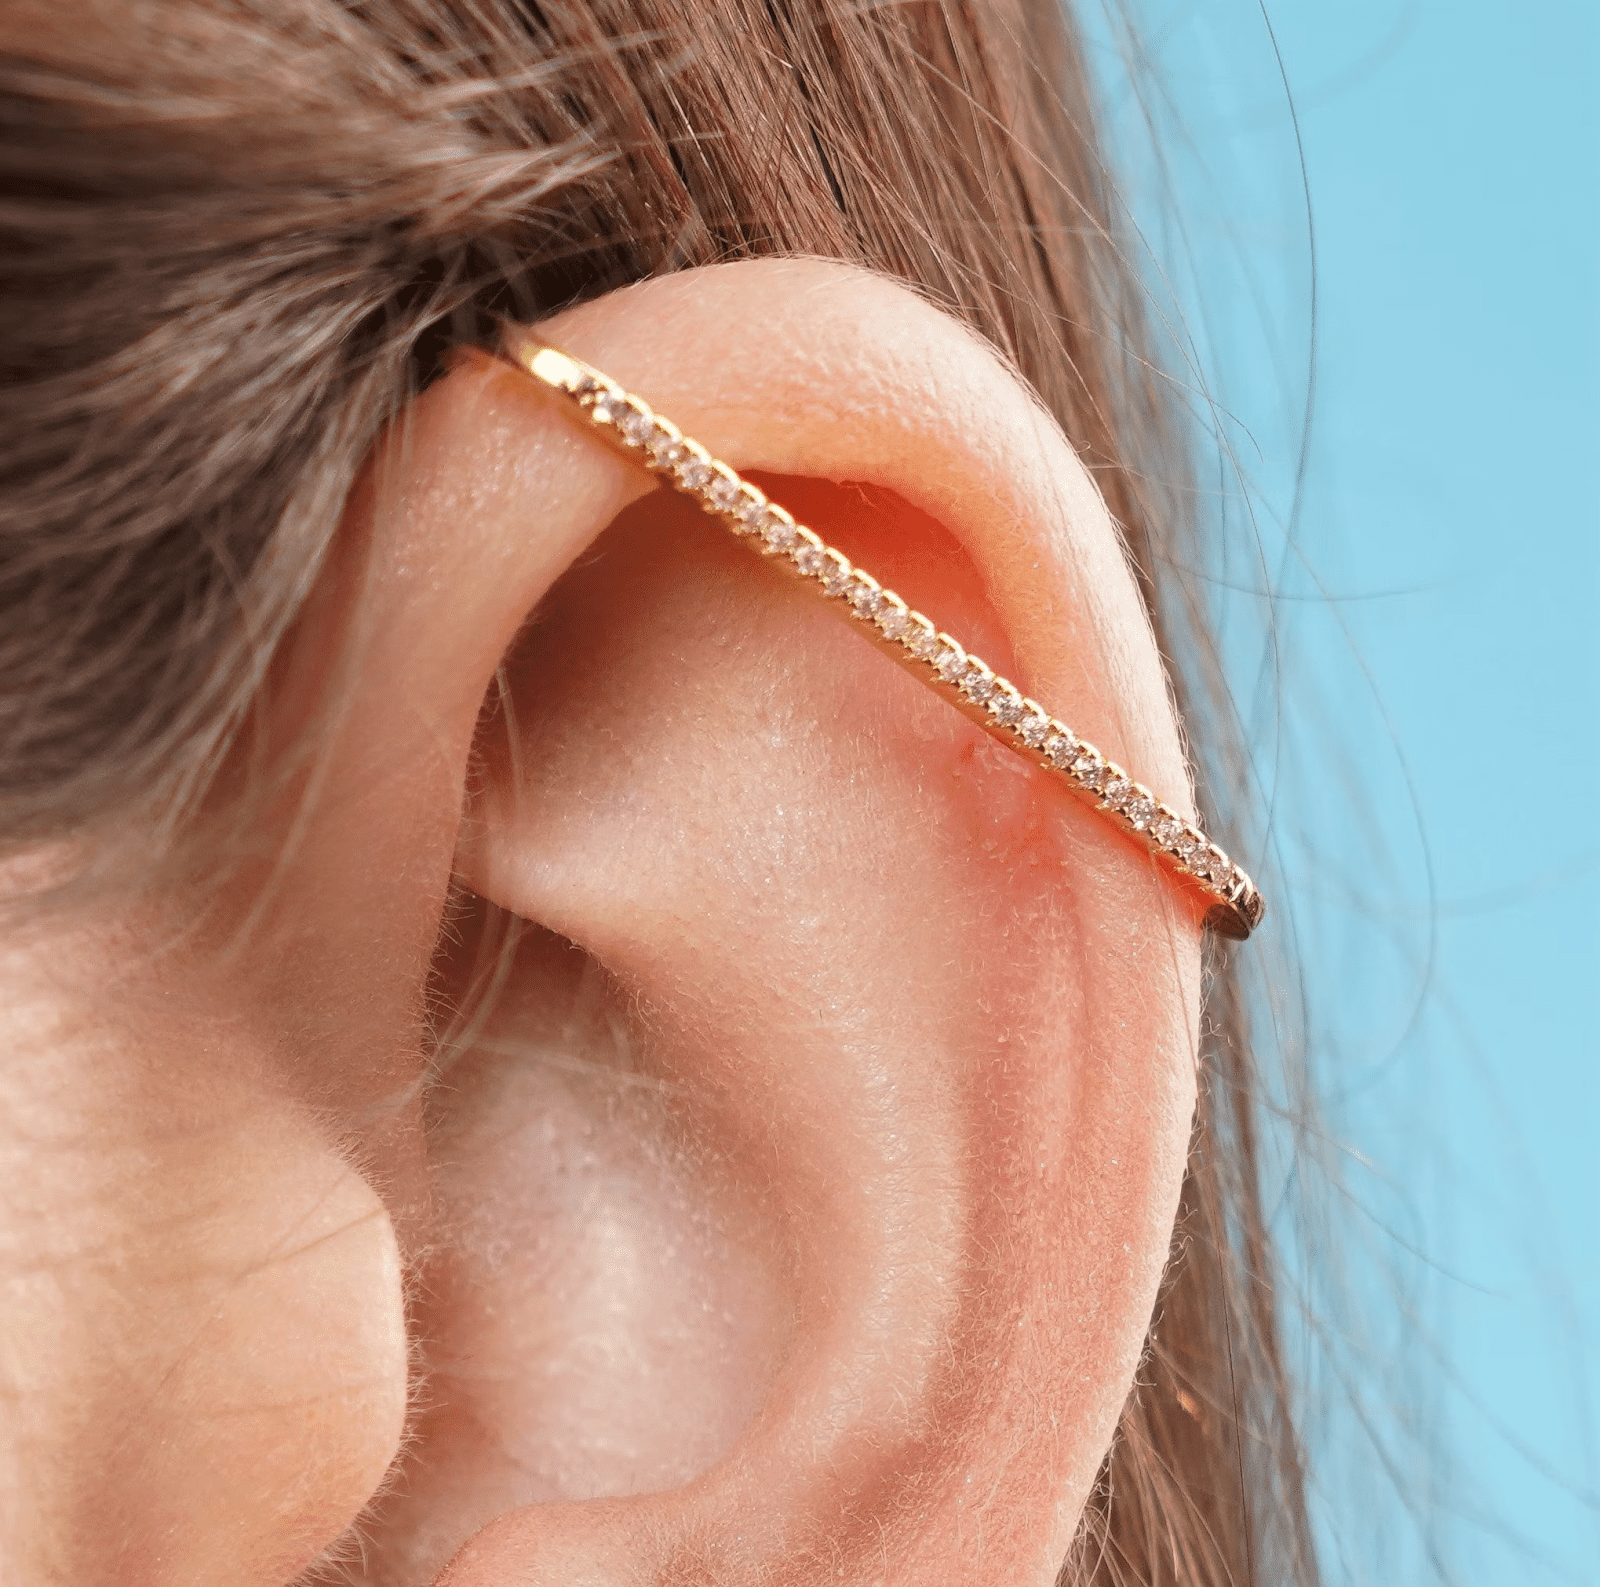
Helix Piercing

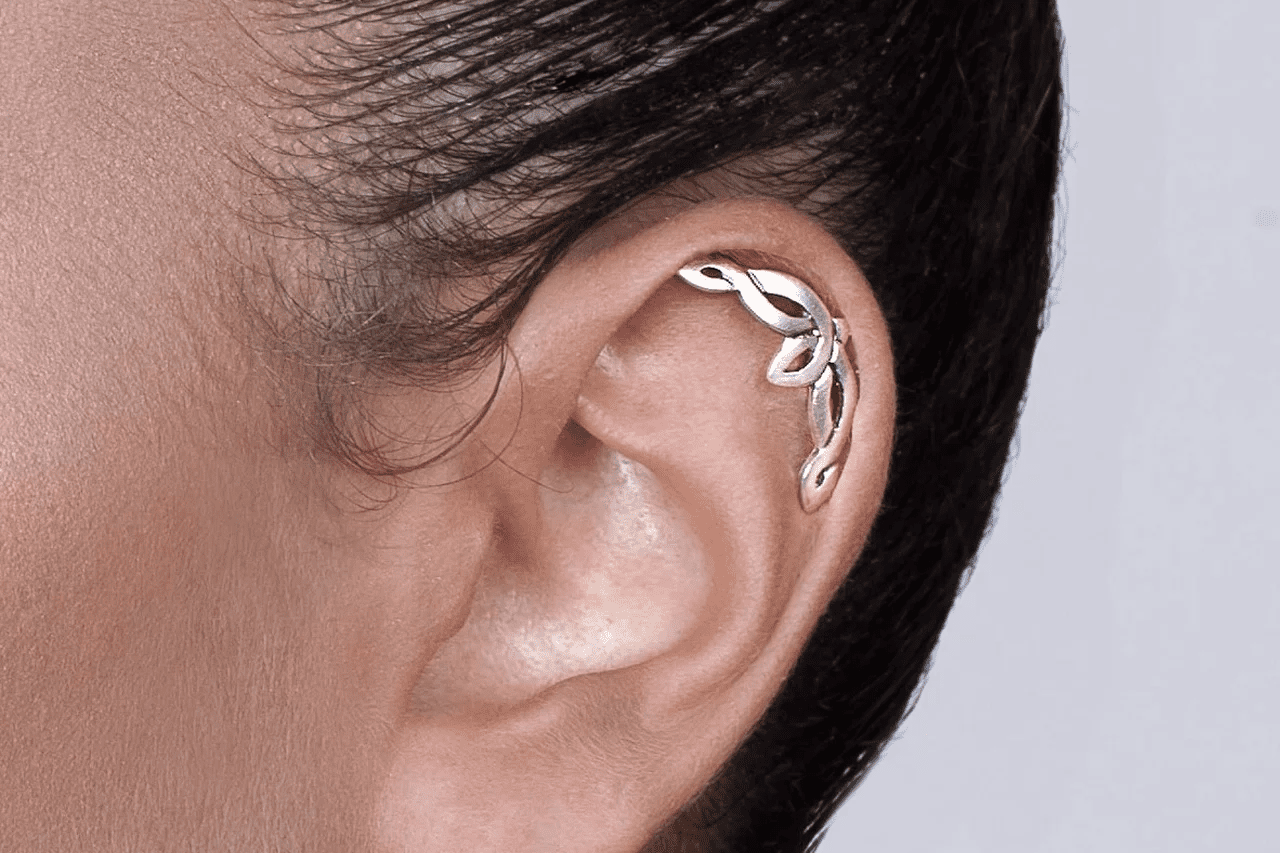
Helix piercing involves creating a hole in the upper ear cartilage, usually along the outer rim. It offers versatility with different placements and jewelry choices like studs, hoops, or cartilage cuffs. The process uses a small needle, and healing times vary but commonly take a few months. Healing Time for helix piercing: 3 to 6 months.

Forward Helix Piercing

A forward helix piercing is positioned on the upper and outer cartilage near your face, with a healing time of approximately three to nine months. Once healed, maintenance is relatively straightforward. Healing Time for forward helix piercing: 3 months, sometimes up to 6 months.
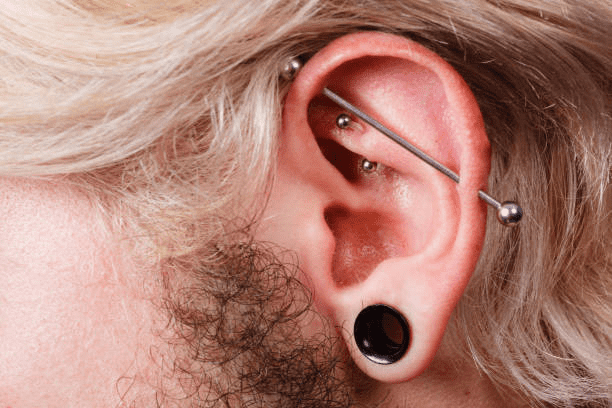
Industrial Piercing

An industrial piercing involves connecting two piercings with a barbell, often placed on the upper cartilage of the ear. The process may be more intense as it requires two piercings instead of one. Healing Time for industrial piercing: 6 to 9 months.

Ear piercings pain chart 

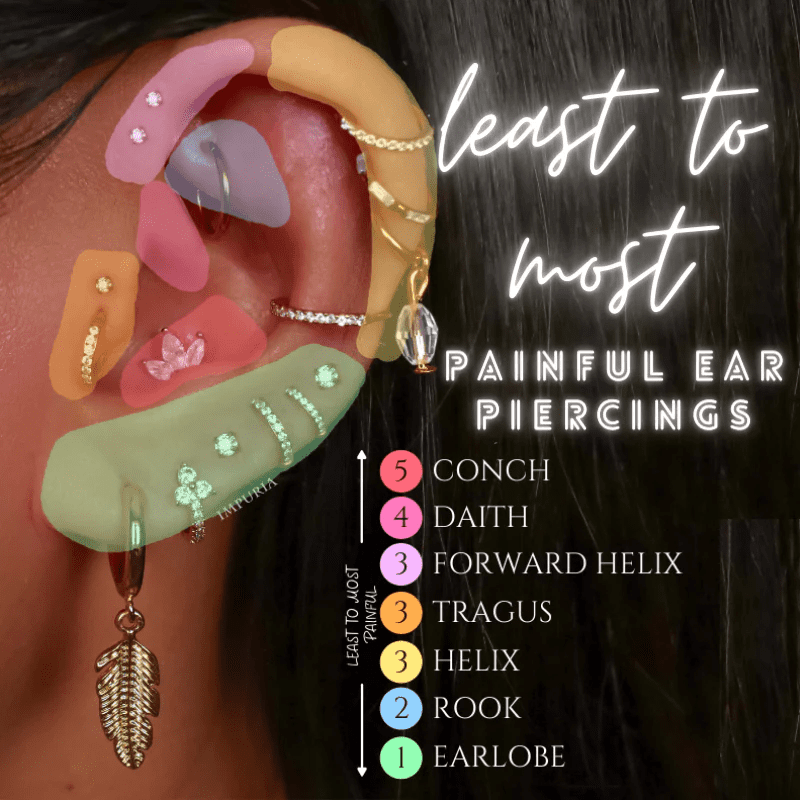
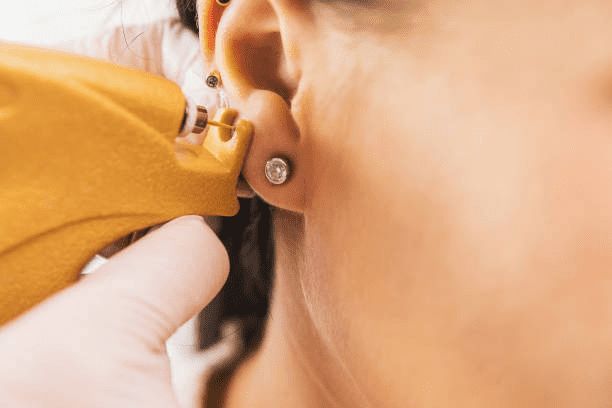
Among the various types of piercings, the lobe piercing stands out as one of the most common and least painful. Utilizing a hollow needle, this procedure is typically performed through the earlobe, causing a sensation often likened to a sharp prick or pinch.

Contrastingly, cartilage piercings, such as orbital, forward helix, daith, conch, and anti-tragus, are typically more painful, tend to be more uncomfortable due to the thickness and lower sensitivity of the cartilage. The pain associated with cartilage piercings is often described as a sharp, stabbing sensation.

Although the discomfort from an ear piercing is brief, lasting only a few seconds, residual sensations may linger for a few days. It’s not uncommon to experience redness, swelling, and tenderness around the piercing site during the initial stages of healing.

If you are worried about the pain of a particular ear piercing, talk to your piercer. They can offer advice and information to manage pain and ensure a smooth experience.

Infection from Ear Piercing: What are the causes?

Infection from ear piercing is a common complication that can occur anywhere on the ear, including the earlobe, ear rim, and cartilage. Infections can result from various factors. Firstly, bacterial invasion stands out as the most common cause of infection from ear piercing. If the piercing needle is not adequately sterilized, bacteria can enter the wound, whether due to the unhygienic hands of the person performing the piercing or if the pierced individual fails to maintain proper hygiene of the wound. The structure of the skin and tissue in the ear is another factor. The skin and tissue in the ear can harbor numerous bacteria, especially in individuals with oily or sensitive skin, putting them at a higher risk of infection from ear piercing. Additionally, a weakened immune system, such as in individuals with diabetes or HIV, further elevates the risk of infection.

How To Clean Ear Piercing?

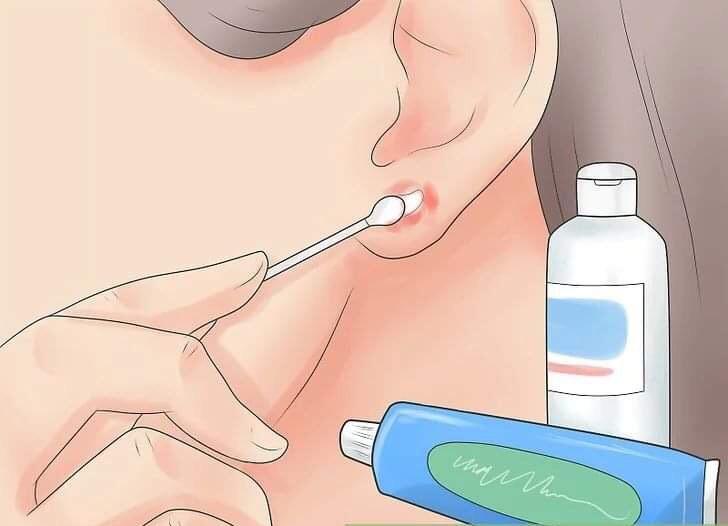
Ensuring your ear piercing stays clean is a straightforward yet vital process that significantly contributes to preventing infection and ensuring proper healing. There are two commonly used types of ear piercing cleaning solutions: saline solution and specialized ear piercing cleaning solution.

  Here’s a step-by-step guide to ensure effective and safe cleaning:

  • Dip the gauze pad or cotton ball into the saline solution or sterile saline, squeezing gently to remove excess.
  • Clean the ear piercing: Gently wipe the ear piercing with the soaked gauze pad or cotton ball, ensuring you clean both the front and back of the piercing.
  • Rinse with water: After cleaning the ear piercing with saline solution or sterile saline, rinse it with water to remove any residue.

Conclusion

The world of ear piercings is a captivating tapestry of self-expression, where each type tells a unique story of individuality. From the classic elegance of lobe piercings to the intricate beauty of daith and beyond, the possibilities are as diverse as they are stylish. Whether you’re a seasoned piercing enthusiast or a newcomer, remember to choose reputable professionals, read reviews, and select a trustworthy studio for a safe and stylish journey into the art of ear piercings. Your ears, your canvas—explore, adorn, and embrace the beauty of self-expression!

FAQs

  1. Which ear piercing is most beautiful?

Beauty is subjective, but many people find standard helix piercings on the upper side of the outer ear to be particularly attractive.

  1. What’s the most painful ear piercing?

Industrial piercings are often considered the most painful ear piercings, as they involve two piercings connected by a barbell, resulting in a more intense sensation.

  1. What is the rarest ear piercing?

The snug piercing, also known as the anti-helix, is considered one of the rarest ear piercings due to its location and the perceived level of pain associated with it.

  1. Do piercings hurt more than tattoos?

In general, piercings tend to hurt less at the moment but have a longer healing time, while tattoos may hurt more during the process but have a shorter healing period. The perception of pain varies among individuals.

  1. Which ear piercings are hardest to heal?

Rook piercings are situated in the cartilage at the top of the inner ear, passing through a thick section that can make it more painful and challenging to heal compared to other ear spots.

WHAT TO WEAR TO A 70’S DISCO PARTY

Get ready to boogie! Dust off your platform shoes and dig out your bell-bottoms, because we’re taking a trip back to the era of all things groovy – the 70’s disco scene! This guide will transform you into a dazzling disco queen or a funky dance floor king. We’ll cover all the essential threads, from head-to-toe glitter to iconic silhouettes, so you can rule the dance floor in authentic 70’s style. Let’s get ready to shine bright under the disco ball!

TIPS FOR WHAT TO WEAR TO A 70S PARTY

The 70s were a decade of bold style and infectious grooves.  A 70s party is your chance to unleash your inner flower child or disco diva!  Here are some tips to help you create a killer outfit that’ll have you dominating the dance floor:

  • Embrace the Flare: Bell-bottoms are a must-have for any 70s look. Pair them with a flowy top or a crop top for a casual vibe, or dress them up with a sequined jumpsuit.
  • Get Groovy with Prints: Think paisley, florals, and geometric patterns. Don’t be afraid to mix and match for a truly psychedelic look.
  • Shine On: Sequins, metallics, and anything that shimmers under the disco ball are perfect for capturing the glam spirit of the 70s.
  • Accessorize Like a Champion: Platform shoes, chunky jewelry, headbands, and wide-brimmed hats will take your outfit to the next level. Peace signs and fringe are always groovy additions.
  • Don’t Forget the Hair and Makeup: Big, bouncy curls, feathered hair, and smokey eyes were all popular in the 70s. Have fun experimenting and creating a look that complements your outfit.

Bonus Tip:  Think about the different subcultures of the 70s. Did you channel your inner hippie with tie-dye and fringe? Or maybe you’re a disco king in a polyester leisure suit?  Choosing a specific style can make your outfit even more unique.

11 DISCO-INSPIRED OUTFIT IDEAS

DRAMATIC VELVET FLARES

When it comes to making a statement on the 70s disco dance floor, dramatic velvet flares are a guaranteed showstopper. The luxurious texture of velvet instantly elevates your look, while the dramatic flare silhouette screams “disco queen.”  Imagine the fabric catching the light from the disco ball as you spin and groove – it’ll be mesmerizing!  Pair these pants with a fitted top that tucks in to accentuate your waistline, or go for a halter top to balance the volume on the bottom. For an extra dose of 70s glam, consider a top with sequins, ruffles, or a plunging neckline. Don’t forget platform heels to further elongate your silhouette and make those flares truly flow. 

A ZIP-UP JUMPSUIT

A zip-up jumpsuit can be a perfect choice for a 70s disco party!  It captures the era’s love for all-in-one pieces and can be dressed up or down depending on the fabric and details.  For a classic disco look, opt for a form-fitting jumpsuit in a bold color or with a touch of metallic shine. A wide-legged jumpsuit with a plunging neckline is another glamorous option. If you’re aiming for a more casual vibe, a denim jumpsuit with bell-bottoms and a funky patterned top underneath is a great way to go. Accessorize your jumpsuit with platform sandals, a chunky belt, and big hoops for a complete and unforgettable 70s disco outfit.

DO YOUR HAIR LIKE A 70S QUEEN

When it comes to outfits, don’t forget about your accessories and hairstyle. Look to famous stars for ideas. You can go for a straight and cool look like Marcia Brady or try something fun with feathered hair like Farrah Fawcett. Other popular hairstyles from this time include the shag cut, Afro, and mullet. If you don’t want to change your hair for your outfit, you can easily use a wig instead.

BELL SLEEVES

Bell sleeves are like the disco ball itself – a symbol of the era’s dazzling flair. They instantly add a touch of whimsy and movement to any outfit, perfect for throwing your arms up and grooving to the beat.  For a classic disco look, pair a flowy, long-sleeved bell-sleeve top with high-waisted flared pants. The silhouette creates a beautiful, elongated line that flatters most body types. But bell sleeves are versatile! You can also go for a more playful look with a bell-sleeve crop top and high-waisted shorts. This combination keeps things cool for dancing and lets the sleeves take center stage. And don’t be afraid of bold colors or patterns!  Paisley, florals, and even stripes can work with bell sleeves, depending on the overall vibe you’re aiming for. 

TRY A LEISURE SUIT A LA JOHN TRAVOLTA

One of the most famous moments in movies is John Travolta’s dance move from “Saturday Night Fever.” It sparked a fashion trend with the leisure suit becoming really popular. These suits were slim-cut and had wide lapels, giving off a sexy vibe that was typical of 70s fashion. It’s no wonder people still love wearing them today to remember the 70s. To get the classic 70s look, wear a white leisure suit and grow long sideburns. For something different, you can try a bold color like purple, orange, or yellow.

A SHAGGY FAUX FUR JACKET

For a disco outfit, a shaggy faux fur coat is a must-have outerwear piece. In the disco era, big fur coats were very popular, and now you can enjoy the trend in colorful faux fur without harming animals, thanks to brands like Rotate Birger Christensen. Complete your disco look with a matching mini-bag.

GO-GO BOOTS

No 70s disco party is complete without a pair of go-go boots! These knee-high wonders, often with a chunky heel and a platform sole, are the epitome of disco footwear. They instantly elevate your outfit and add a touch of playful rebellion. Go-go boots come in a variety of materials and colors, allowing you to personalize your look. Classic black or white leather is always a safe choice, but don’t be afraid to experiment with metallics, patent leather, or even bold colors like red or purple. The platform sole not only adds height but also makes dancing more comfortable, letting you strut your stuff on the dance floor all night long.

A GLAM DUSTER JACKET

A glam duster jacket can be a surprisingly versatile addition to your 70s disco outfit, adding a touch of unexpected coolness. While not the most traditional choice, it injects a dose of 70s glamor in a different way. Imagine a long, flowing sequined duster shimmering over a sleek jumpsuit or a mini dress. The dramatic silhouette creates a sense of mystery and intrigue, perfect for a grand entrance. The key to rocking a glam duster jacket at a disco party is to choose the right fabric. Sequins, metallics, or even crushed velvet will catch the light and add a touch of disco flair.

A FRONT-TIED CROP TOP 

A front-tie crop top is a perfect pick for a 70s disco party, offering a cute and playful vibe that’s ideal for showing off your moves. It captures the era’s love for midriff-baring silhouettes and allows for some fun customization.  Choose a vibrant solid color or a groovy patterned fabric to make a statement. The beauty of the front-tie element lies in its adjustability. You can create a more revealing look for maximum dance floor confidence, or leave it looser for a relaxed vibe.  Pair it with high-waisted flared jeans or denim shorts for a classic 70s combination. For a touch of glam, opt for a sequined or metallic crop top.

A GOLD MINIDRESS

A gold mini dress is the epitome of a 70s disco dream! It embodies the era’s love for all things glamorous and eye-catching.  Imagine the fabric catching the light from the disco ball, transforming you into a dazzling disco queen. Whether it’s made of shimmering sequins, metallic lamé, or a luxurious gold satin, this dress will ensure you shine all night long. The beauty of a gold mini dress lies in its versatility. You can keep it simple and let the dress be the star of the show, or add layers of 70s flair with accessories. Pair it with platform sandals and chunky gold hoops for a classic disco look. For a touch of drama, consider a long, flowing sequined duster jacket draped over your shoulders.

DISCO BALL ACCESSORIES

Disco balls are the heart and soul of any 70s party, reflecting light and creating a mesmerizing dance floor atmosphere. But you can take your love of disco balls a step further by incorporating them directly into your outfit! Disco ball accessories are a fun and festive way to add a touch of sparkle and shine to your look. There are endless possibilities when it comes to disco ball accessories. Think headbands adorned with miniature disco balls, earrings that dangle with reflective facets, or even a purse shaped like a miniature disco ball. For a truly eye-catching look, consider a belt or a statement necklace that incorporates disco ball elements.

70S THEME PARTY INVITATIONS

OPTION 1: FAR OUT INVITATION

Background: Use bold colors, geometric patterns, or a psychedelic swirl design.

Text: Write in a groovy font like bubble letters or a classic 70s typeface.

Wording:

  • You’re invited to a totally groovy 70s bash!
  • Dust off your platforms and dig out your bell-bottoms!
  • Get ready to boogie on down to the funkiest tunes of the decade.
  • When: [Date] at [Time]
  • Where: [Location]
  • RSVP: [Contact info]

OPTION 2: DISCO BALL INVITATION

Background: A black background with a giant disco ball reflecting colorful squares.

Text: Glittery silver or gold font that pops against the black background.

Wording:

  • It’s time to shine bright like a disco ball!
  • You’re invited to a night of groovin’, shakin’, and movin’ to the hottest 70s disco hits!
  • Dress to impress (think sequins, flares, and platforms)!
  • When: [Date] at [Time]
  • Where: [Location]
  • RSVP: [Contact info]

BONUS TIP:

  • Add a little extra to your invitations! Include a small peace sign sticker, a cutout of a platform shoe, or even a mini disco ball ornament.
  • For a digital invitation, consider using a fun online invitation maker with 70s themed templates.

Get creative and let your invitations set the tone for a far out and funky 70s party!

FAQ

1. What’s the overall vibe I should aim for?

Go for bold, colorful, and glamorous! Sequins, metallics, and anything that shimmers are perfect. Don’t be afraid of prints, flares, and platform shoes.

2. Are there different substyles within 70s fashion I can choose from?

Answer: Absolutely! You could channel your inner flower child with tie-dye and fringe, or go full-on disco diva in a sequined jumpsuit. There’s also the 70s rocker vibe with leather pants and band tees.

3. I’m not a huge fan of dresses or skirts. Can I still achieve a 70s look?

Definitely! High-waisted flares or wide-leg pants with shoes paired with a crop top or a tucked-in blouse is a classic 70s combination.

CONCLUSION

So, there you have it! With these tips and ideas, you’re well on your way to rocking the dance floor at your next 70s disco party. Remember, the key is to embrace the era’s bold spirit and have fun with your look. Don’t be afraid to experiment, mix and match, and unleash your inner groovy self. Now get out there, dig out those platforms, and boogie on down!