
This puffy 3D origami heart is a fun twist on the traditional flat version. If you enjoy making origami hearts or want a unique way to express your love and care, this design is perfect!
With fewer steps than the classic origami heart, this version puffs up beautifully, making it a great decoration for gift boxes or the centerpiece of an origami gift.
MATERIAL
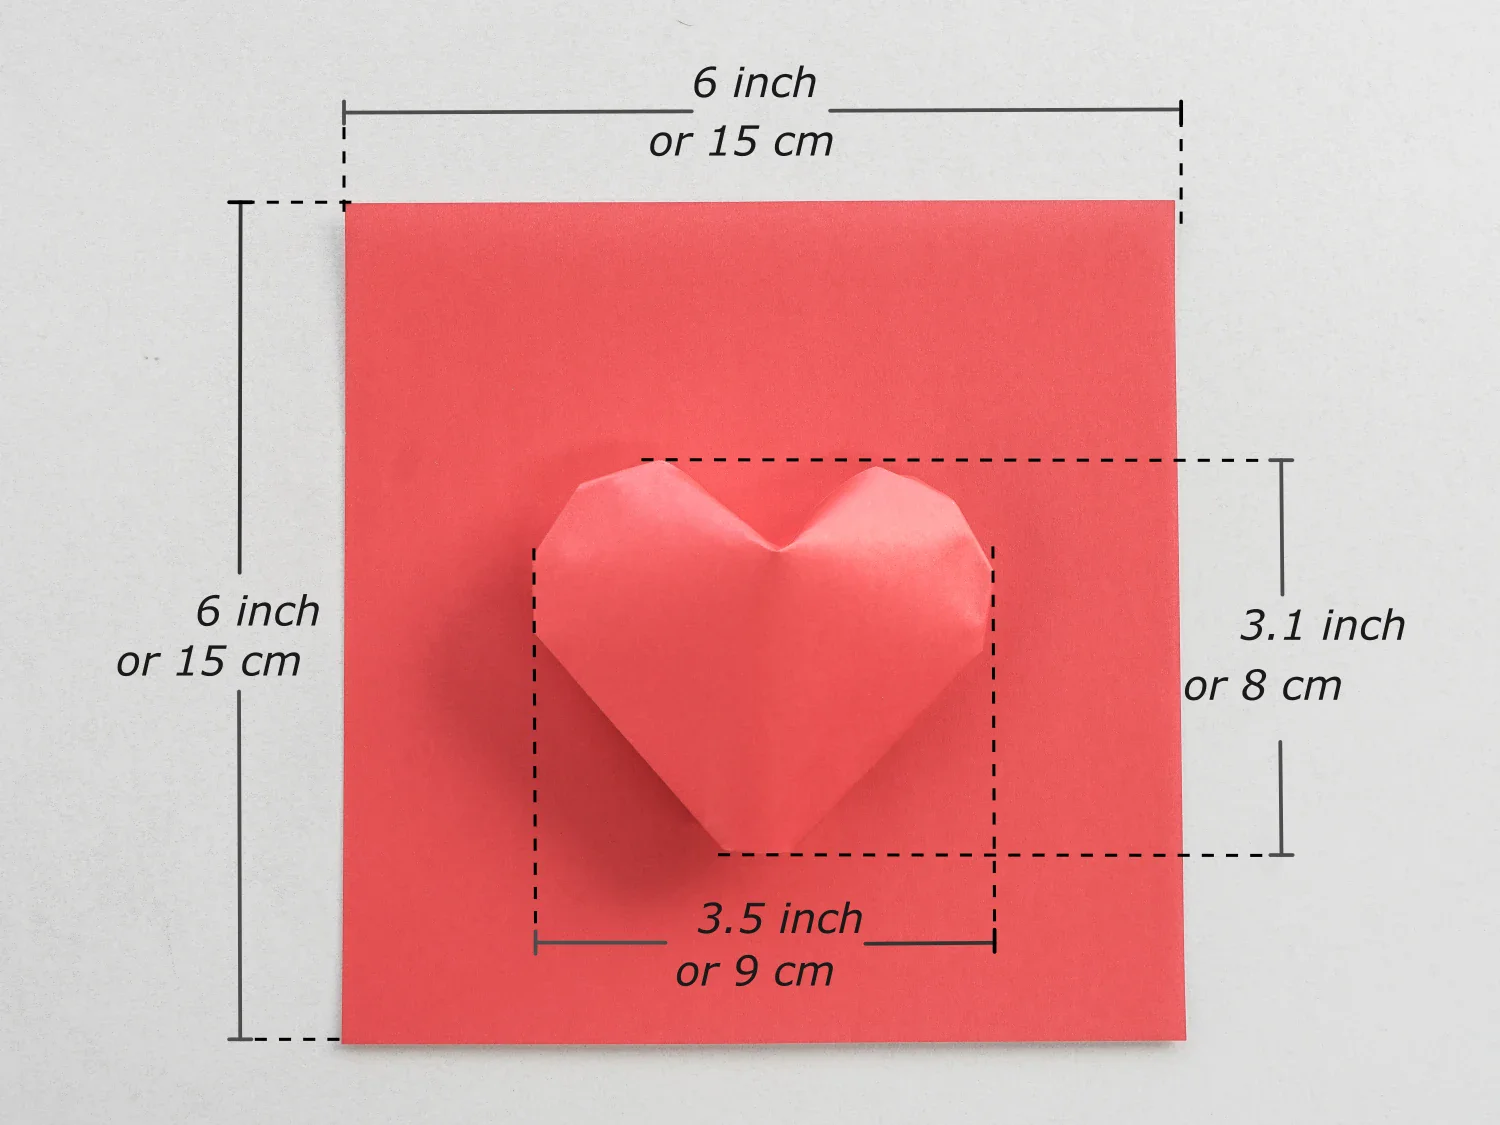
Use a 15×15 cm origami paper with one red side and one white side. The finished puffy heart will match the colored side of the paper. You can also experiment with patterned paper for a unique touch!
Easy Origami Puffy Heart Video
Instructions
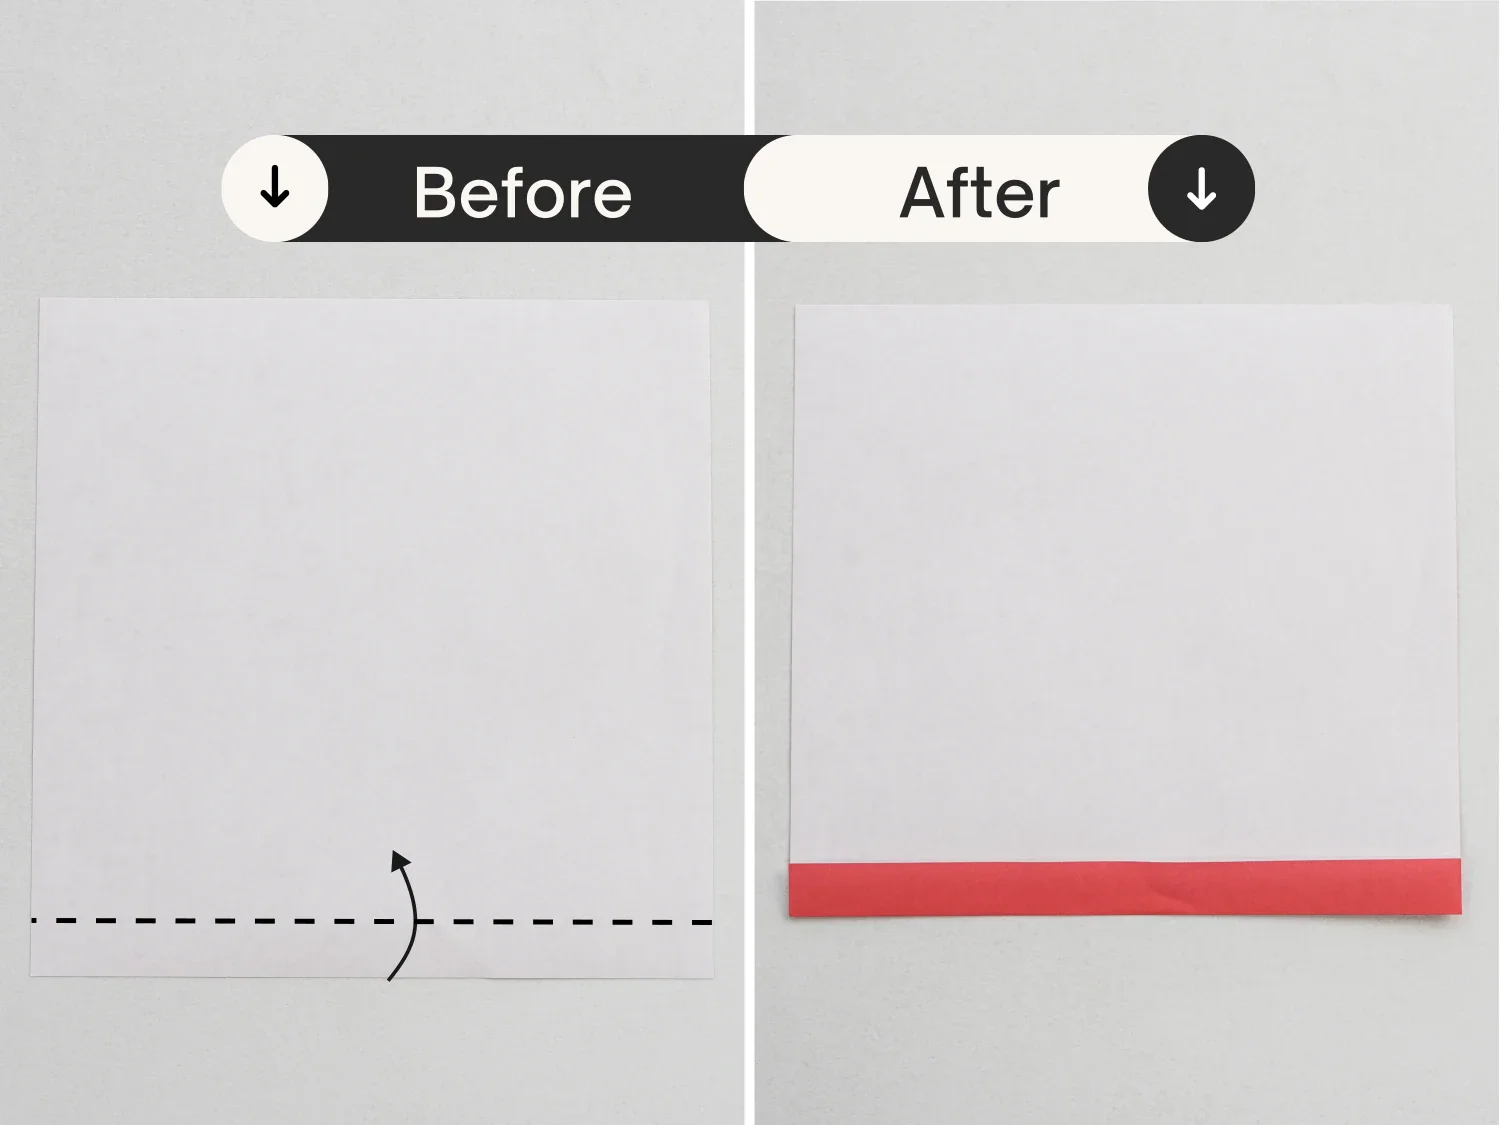
Step 1: With the white side facing up, fold the bottom edge up slightly along the dotted line.
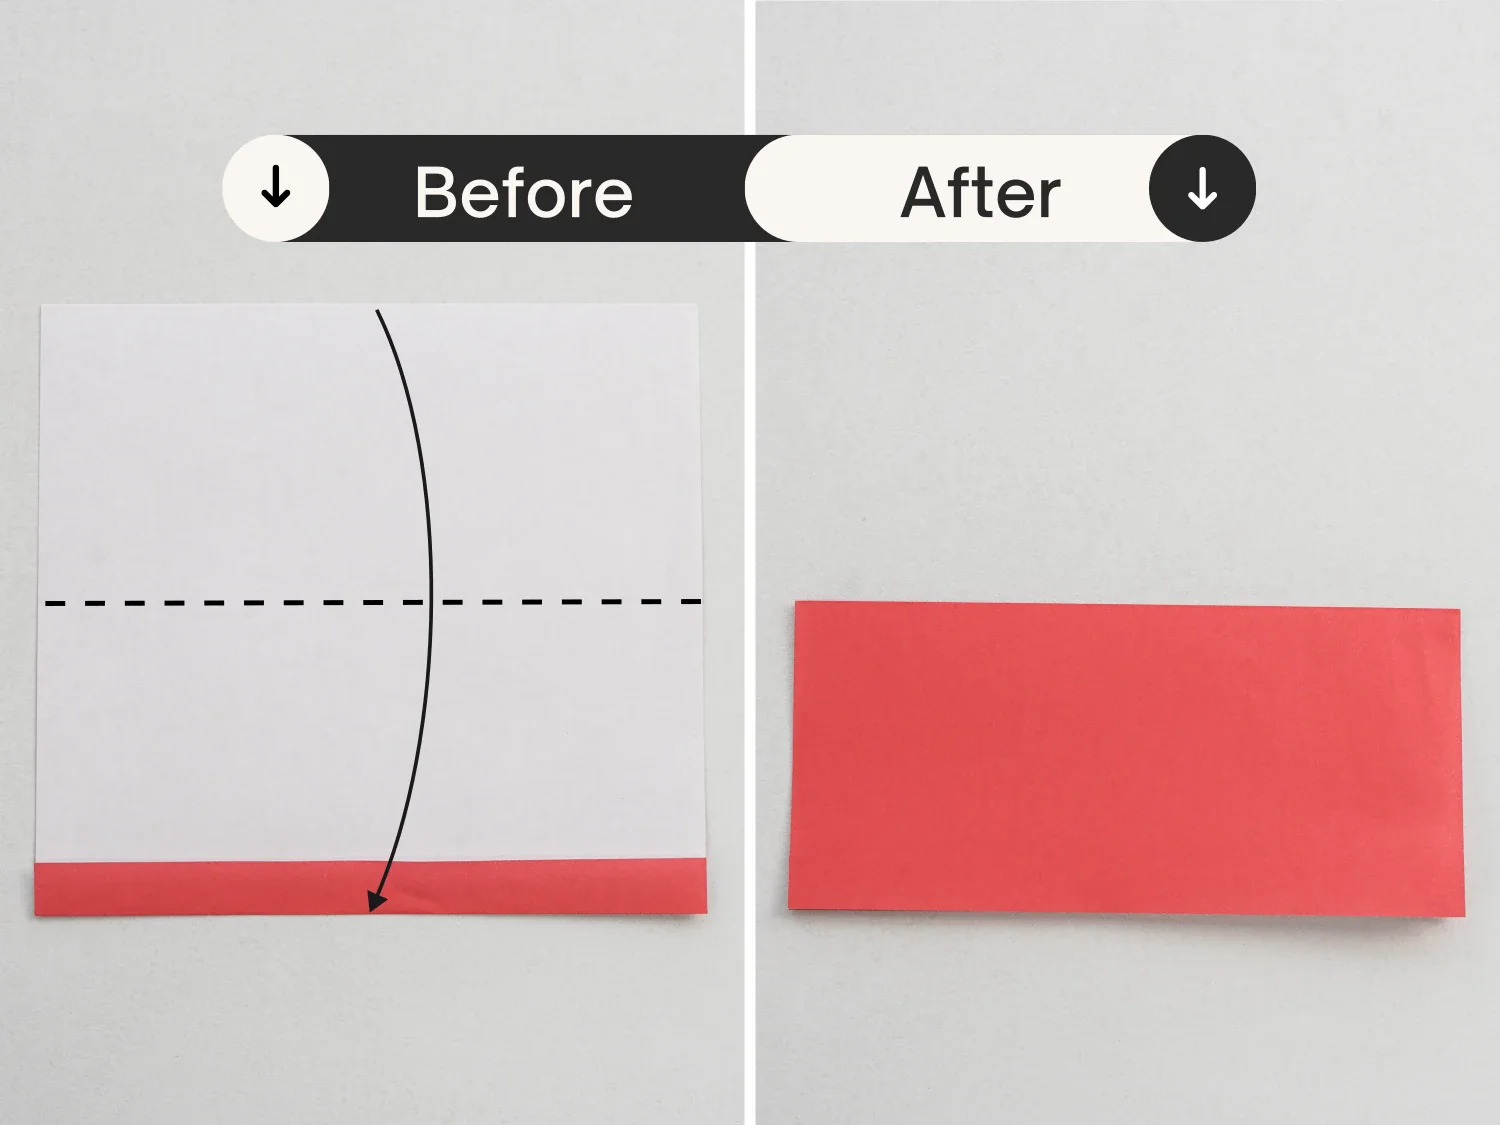
Step 2: Fold the paper in half horizontally.
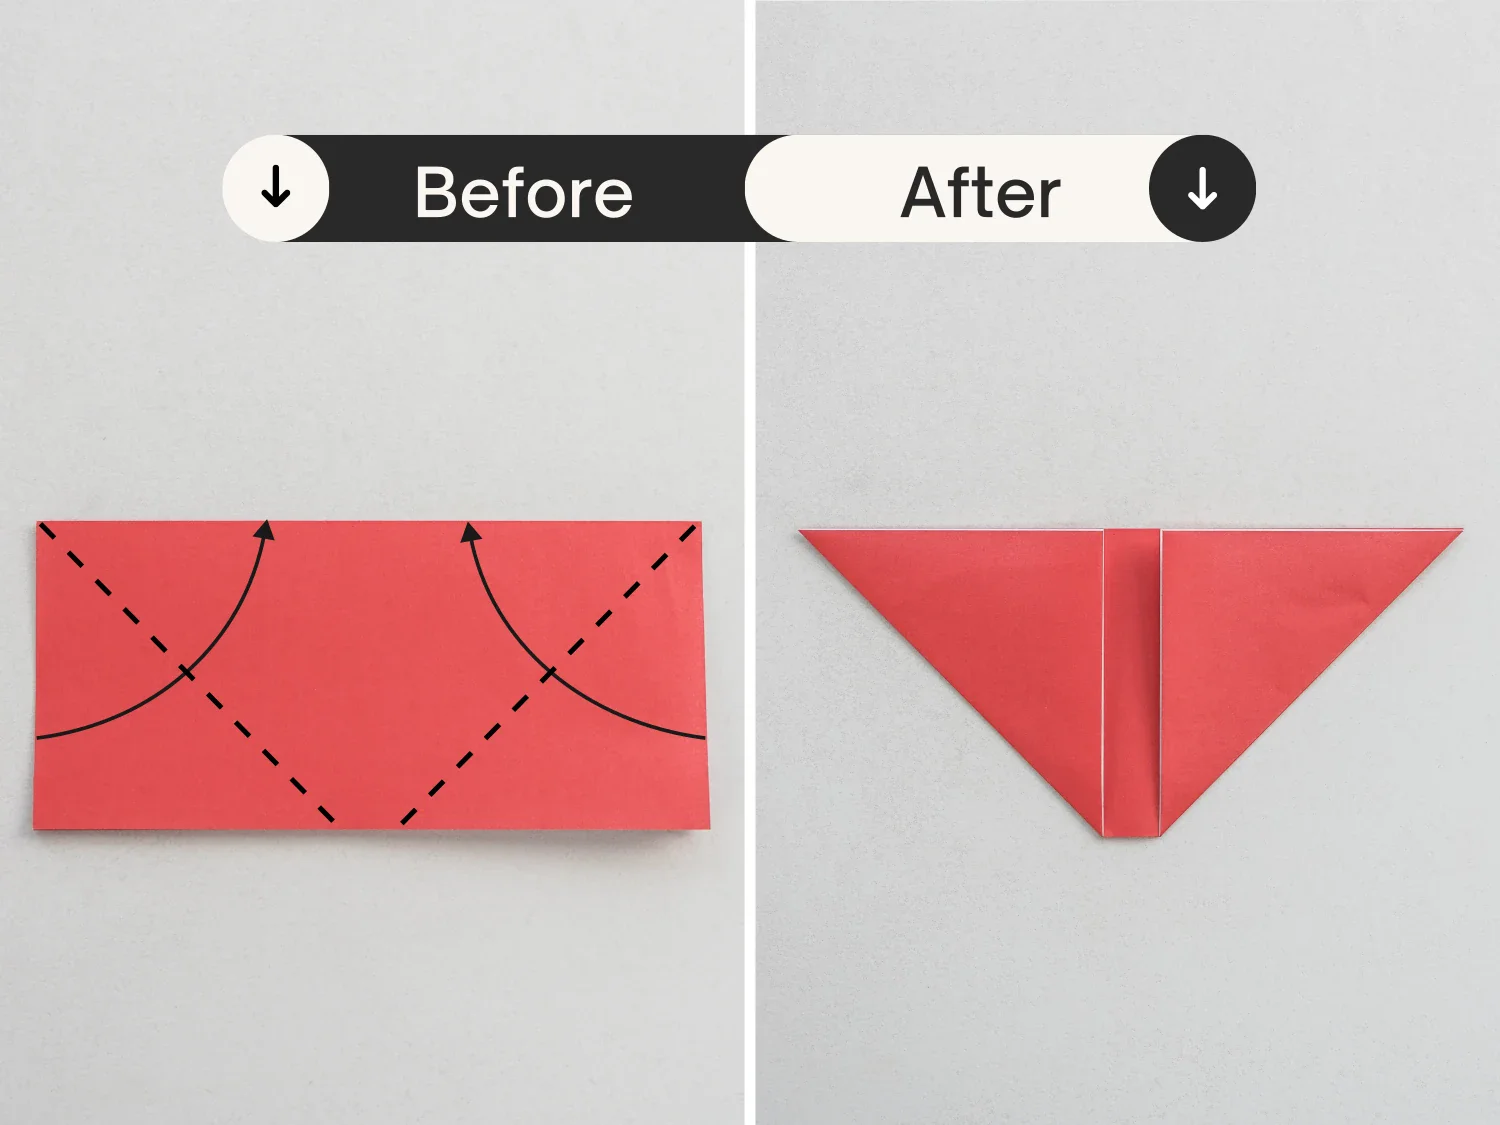
Step 3: Diagonally fold the bottom left and right corners up to meet the top edge.
Step 4: Fold the top edges of both triangles down to the right hypotenuse.
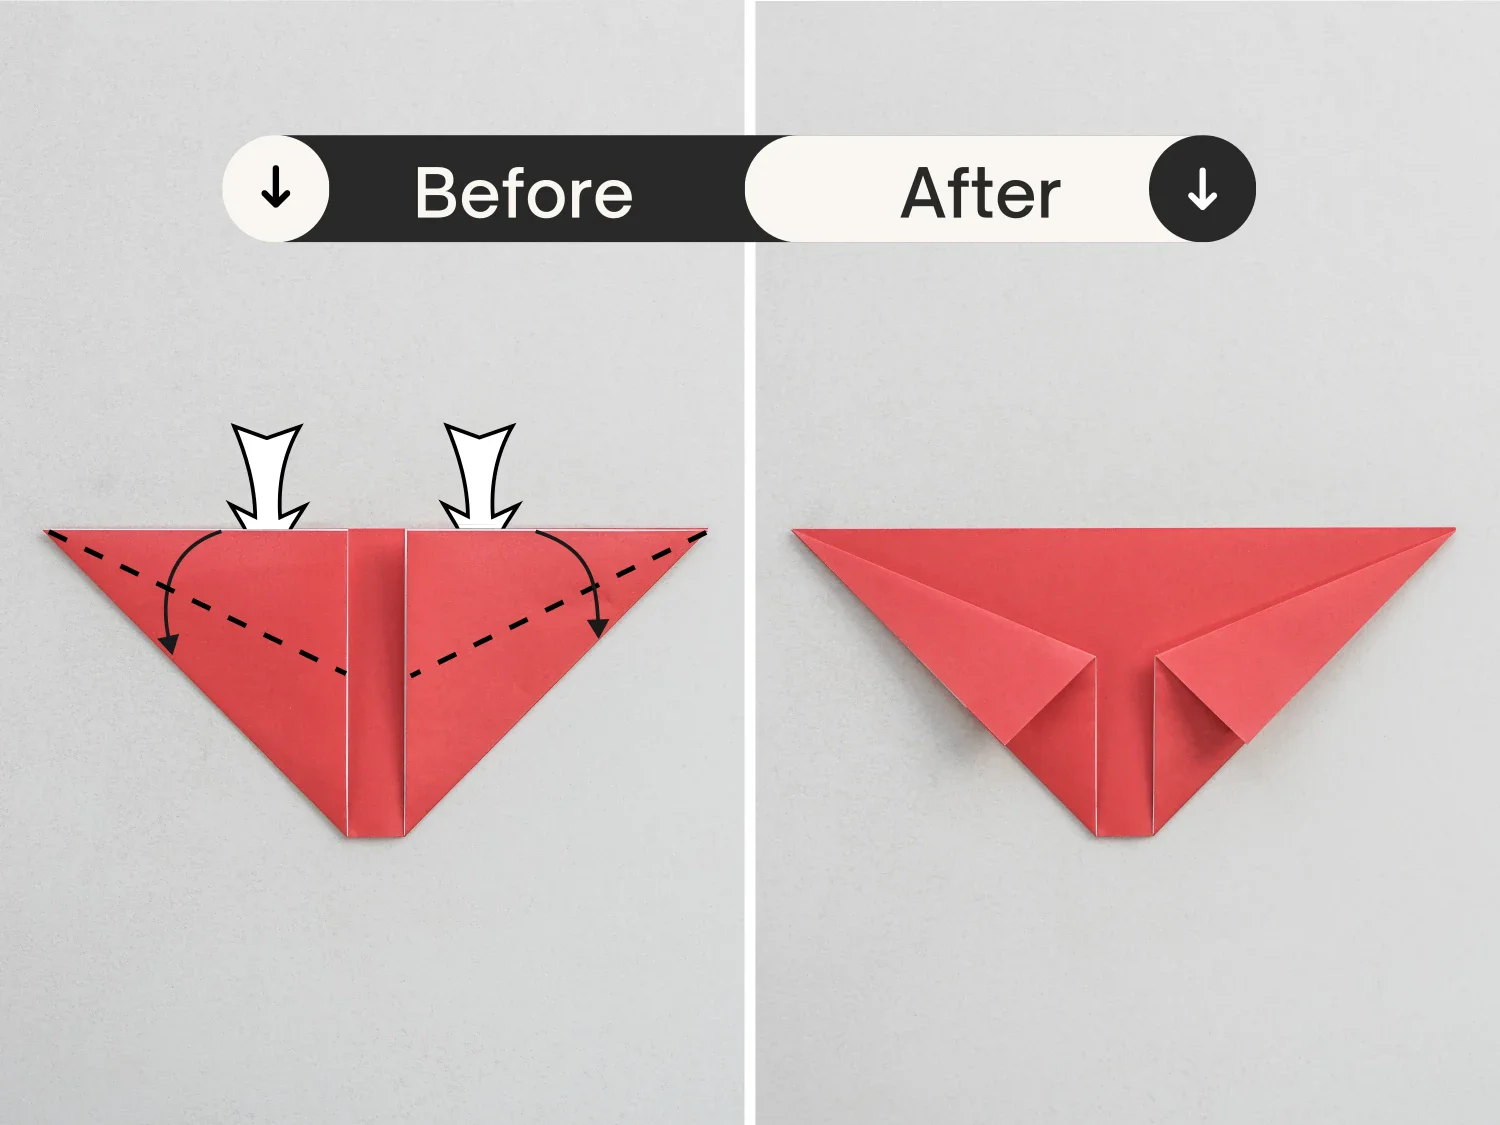
Step 5: Crease them well, and unfold them.
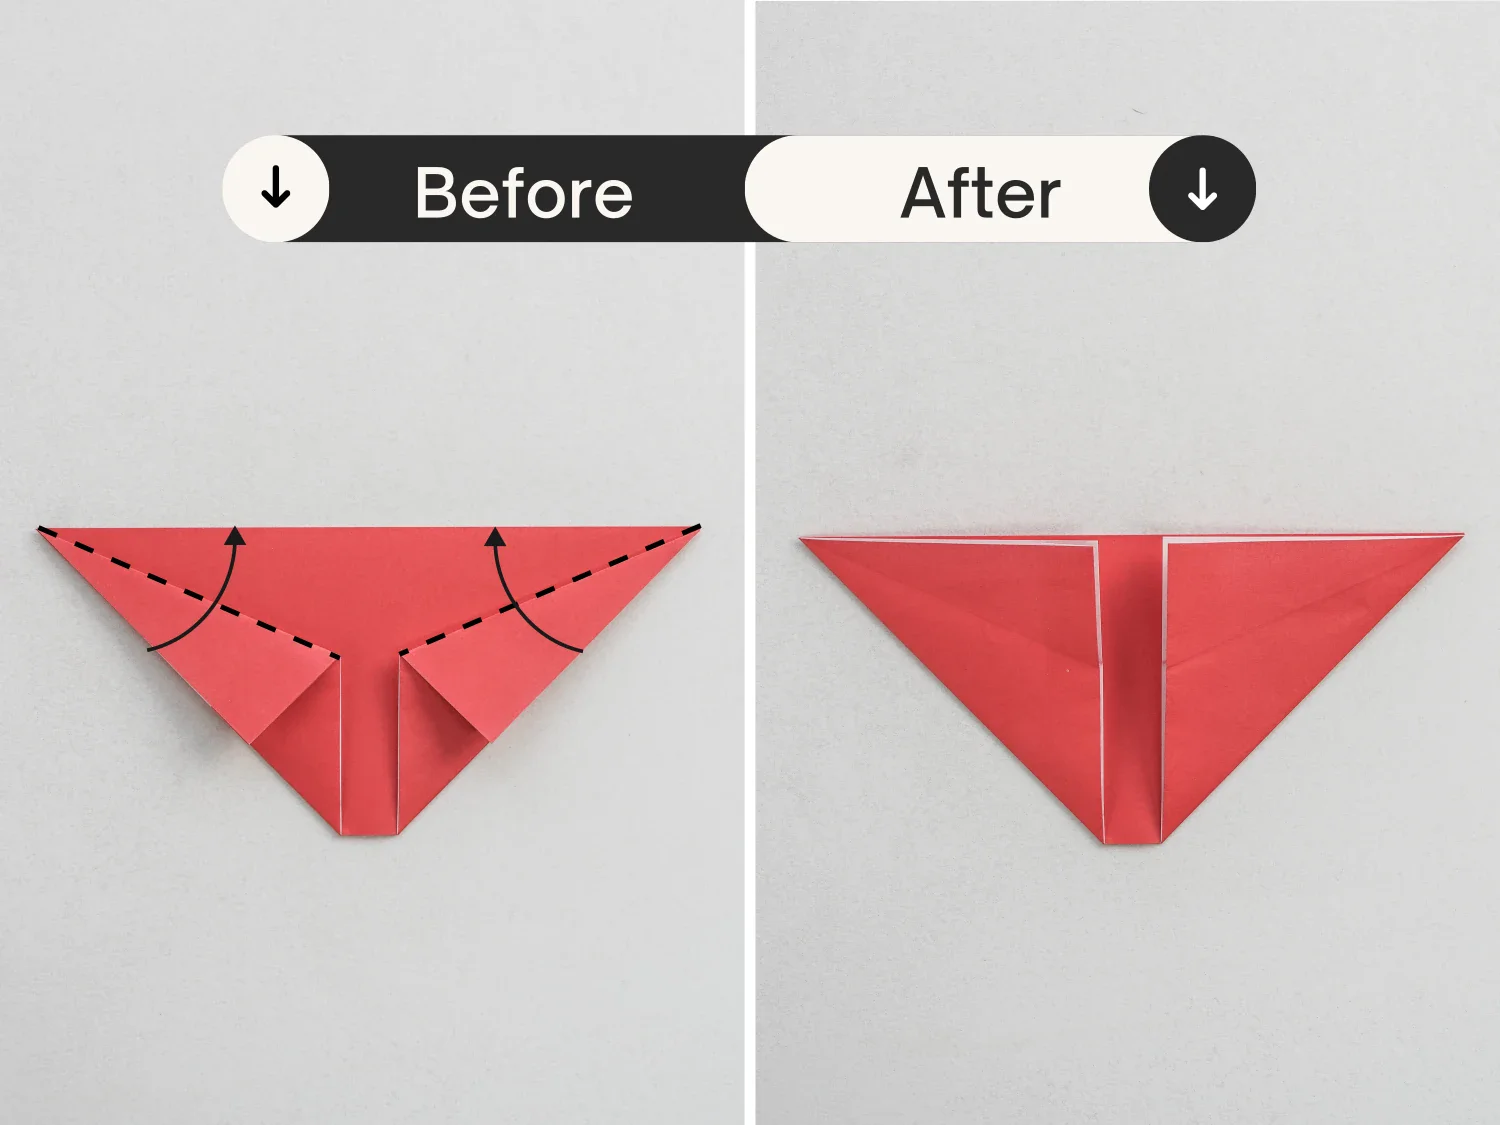
Step 6: Fold the left and right corners to the left edges of the triangles, to meet the points where the creases you just made are located, creating two small triangles.
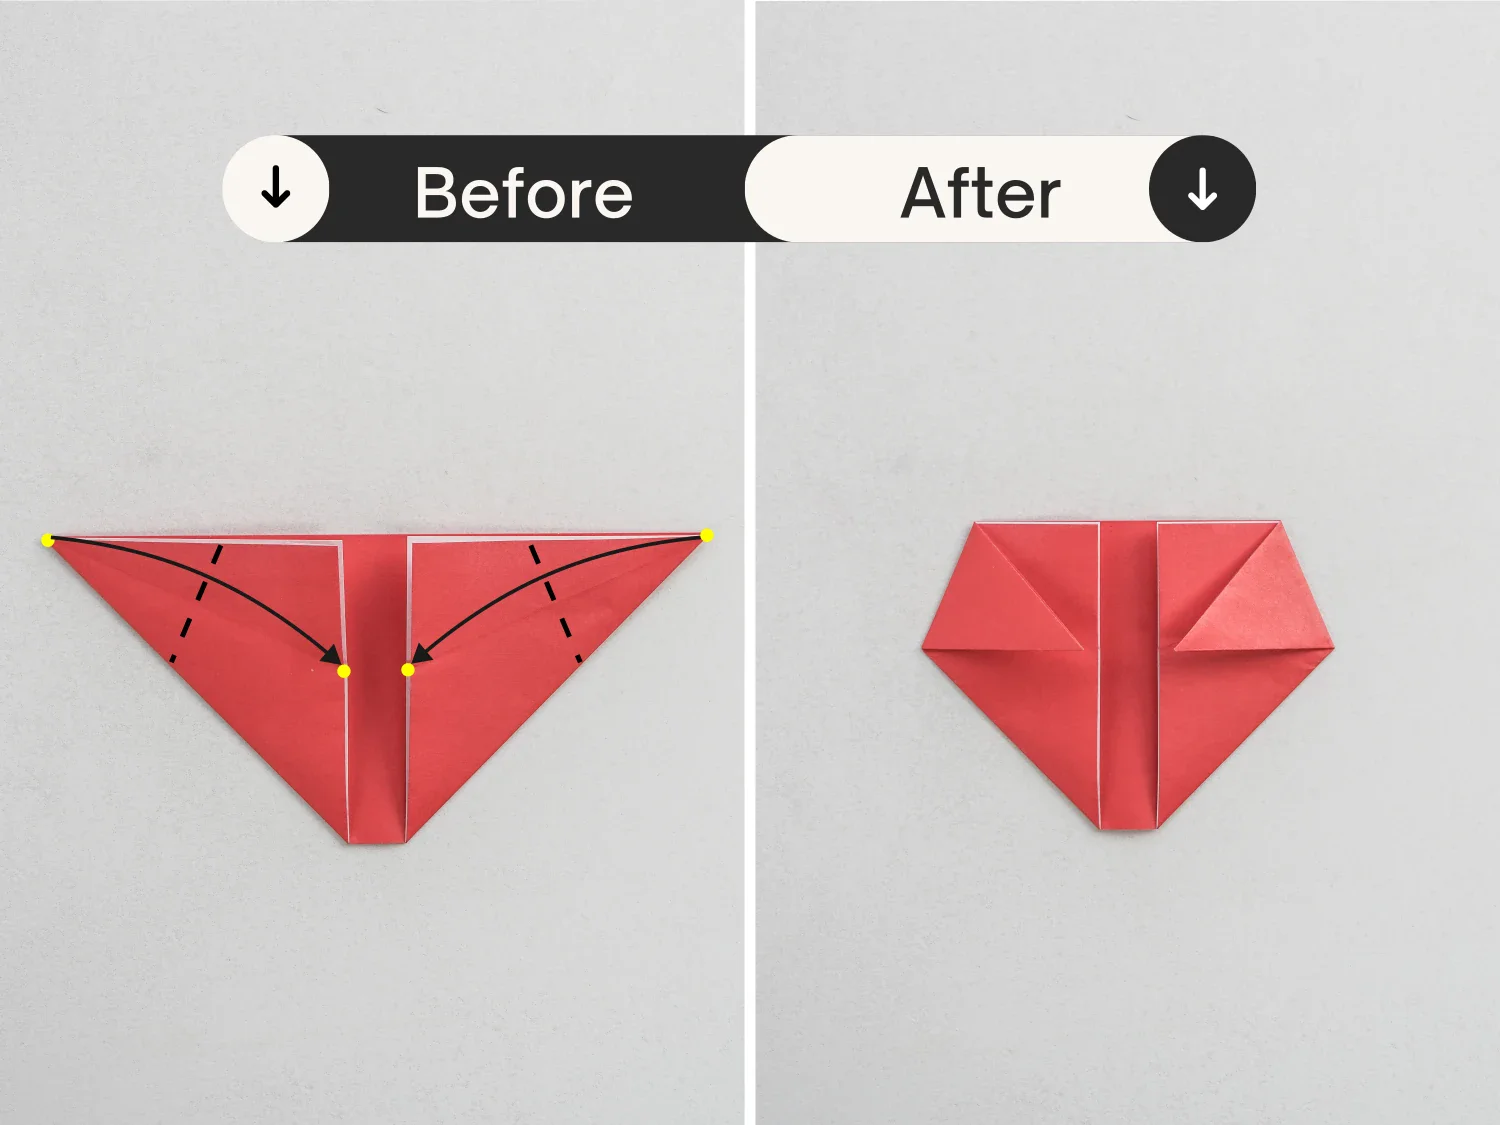
Step 7: Gently open the small triangle on the right, lift the two layers beneath it, and tuck them inside. Repeat the process on the left side.
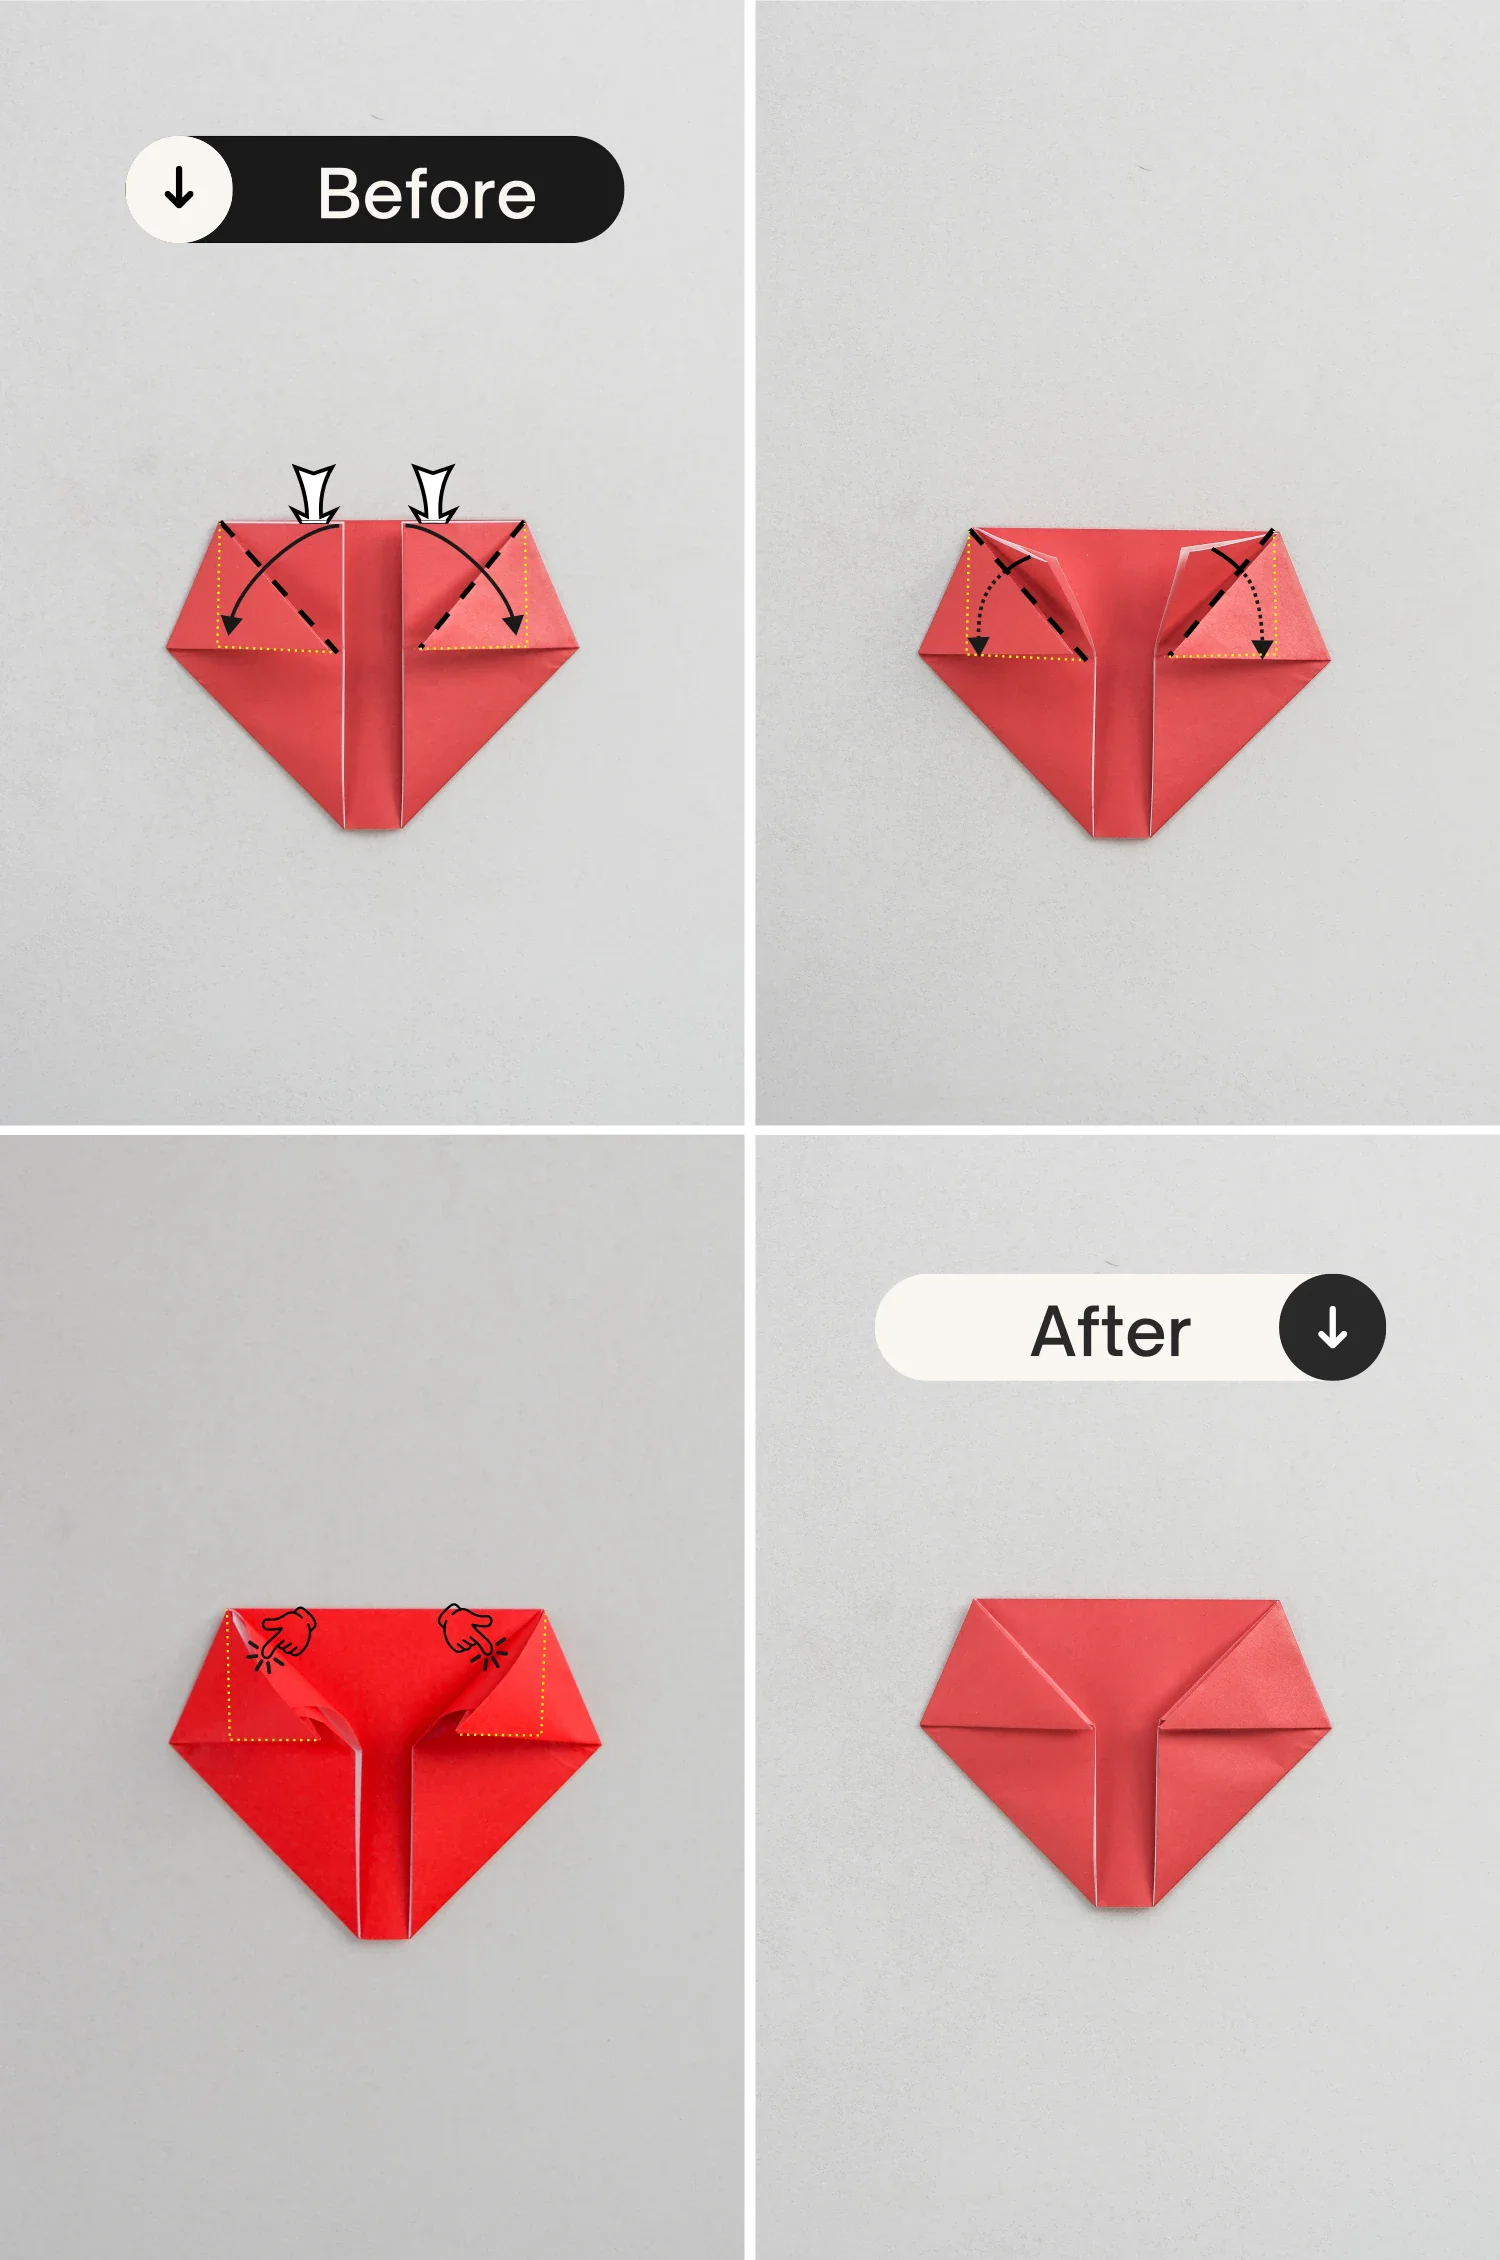
Step 8: Slightly fold the four corners at the top toward the center to give the heart a rounder shape.
Blow into the bottom opening to puff it up while gently pressing down on the middle of the top edge.
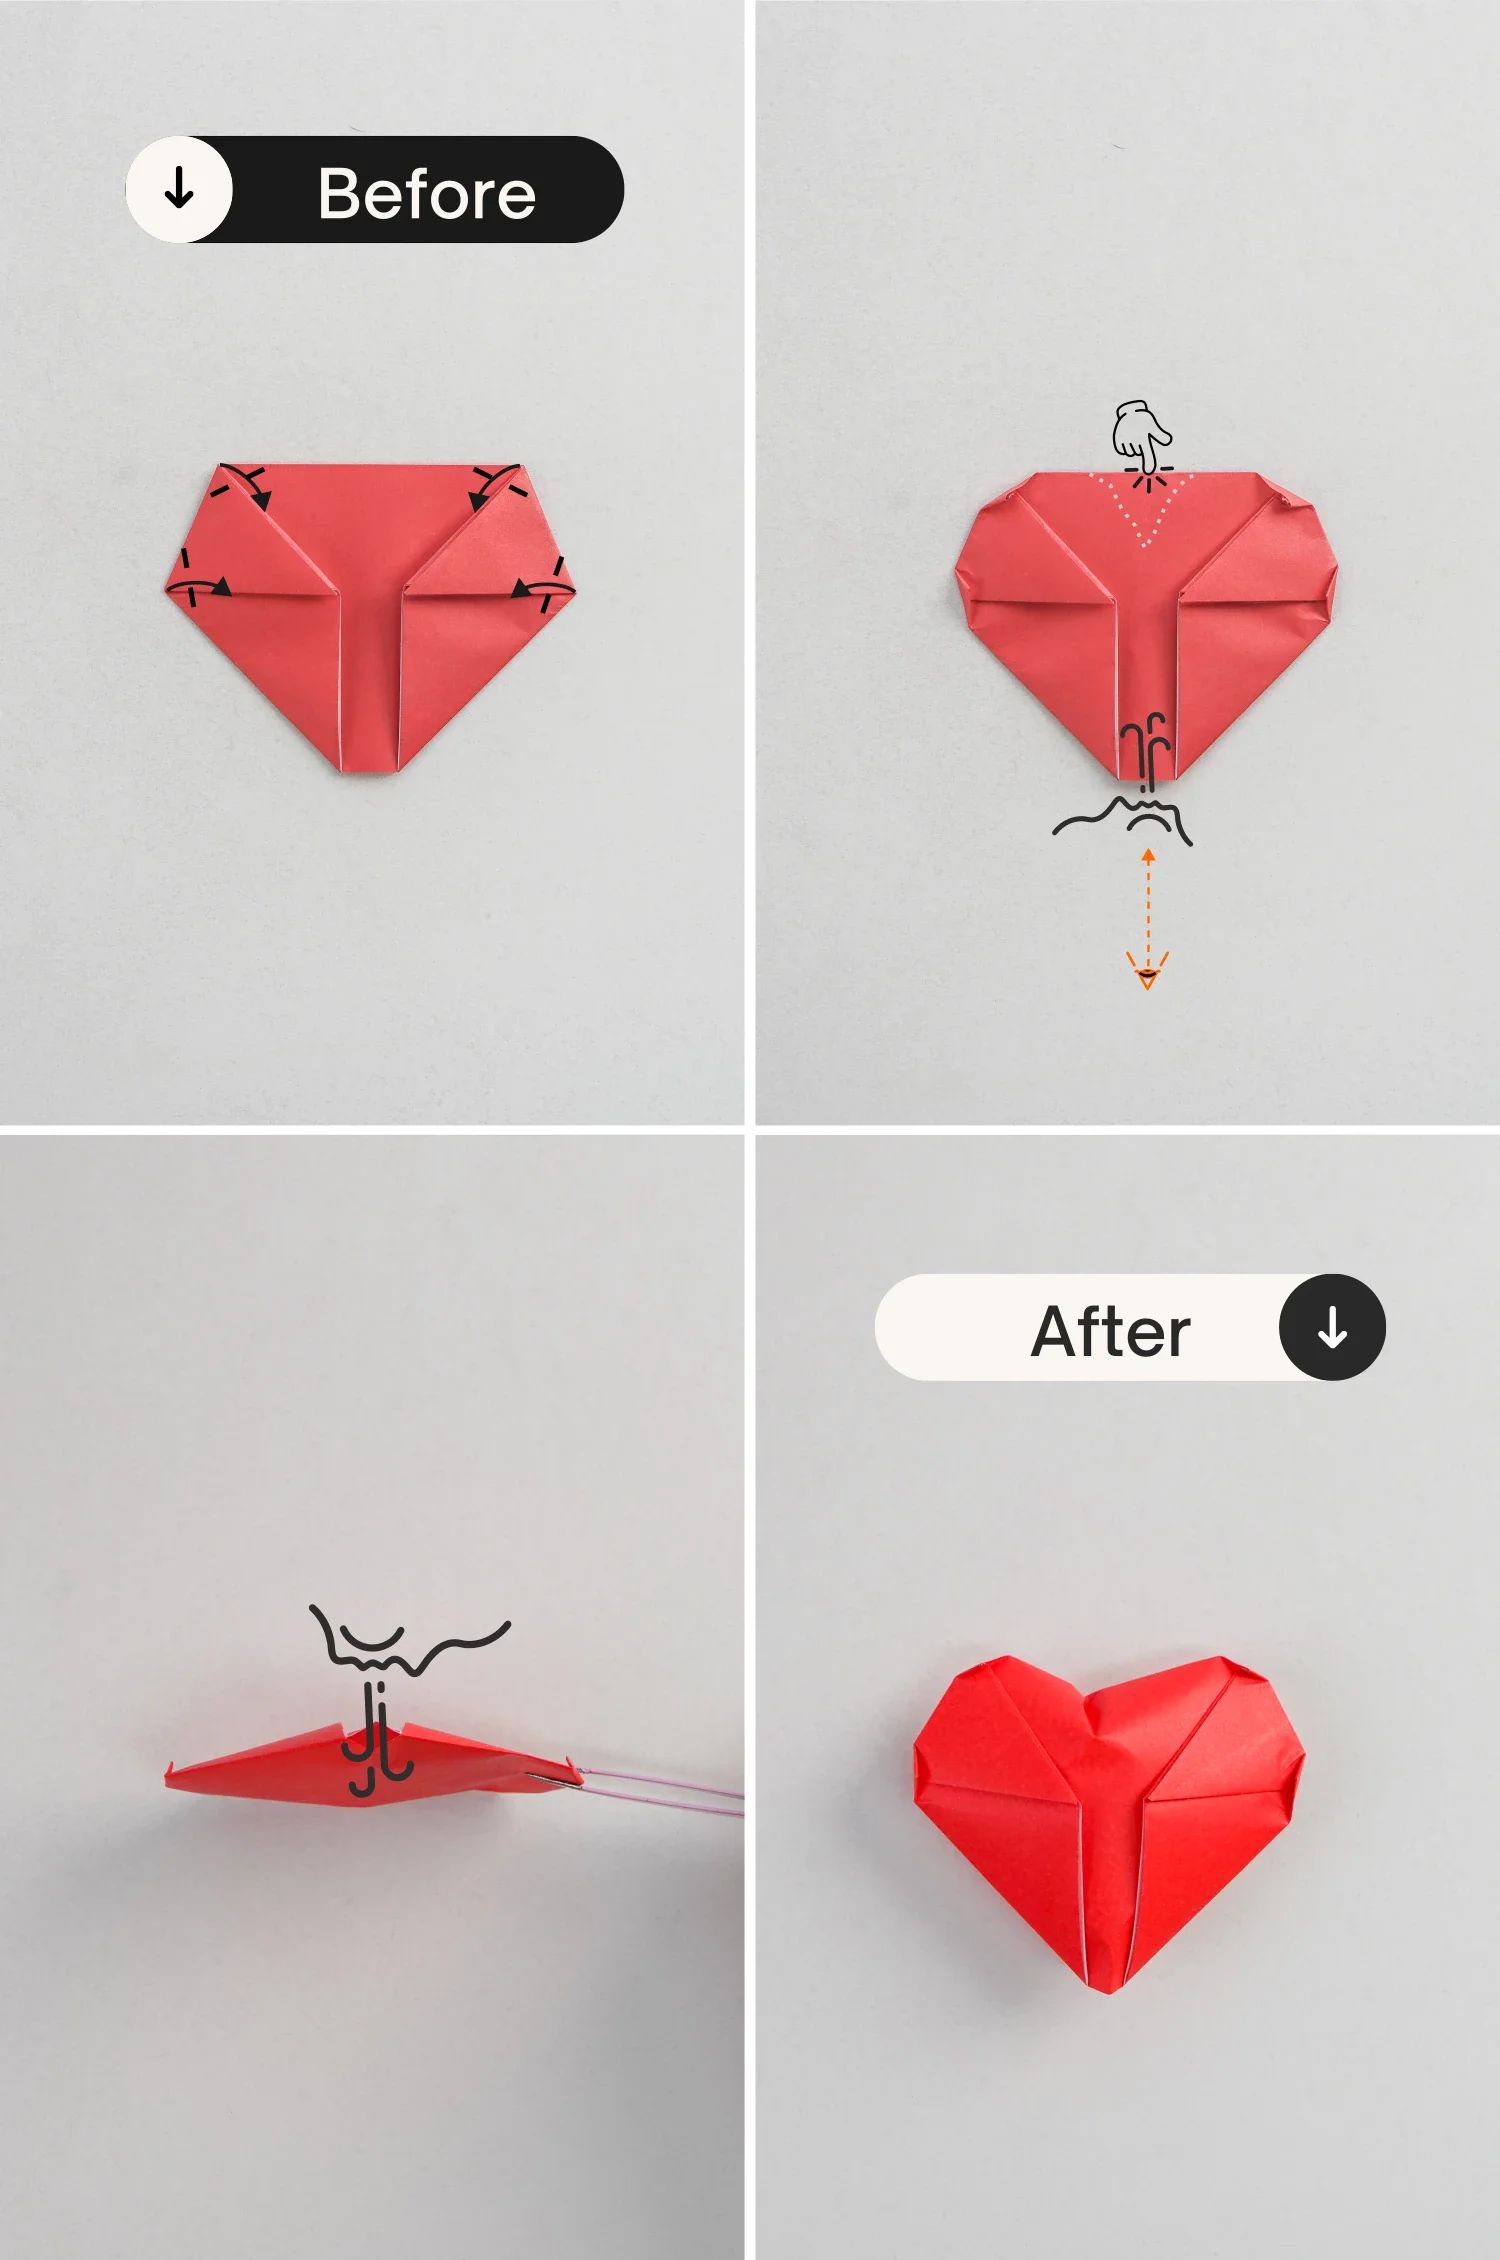
Step 9: Flip the paper over, this is the final shape of the cute puffy heart.
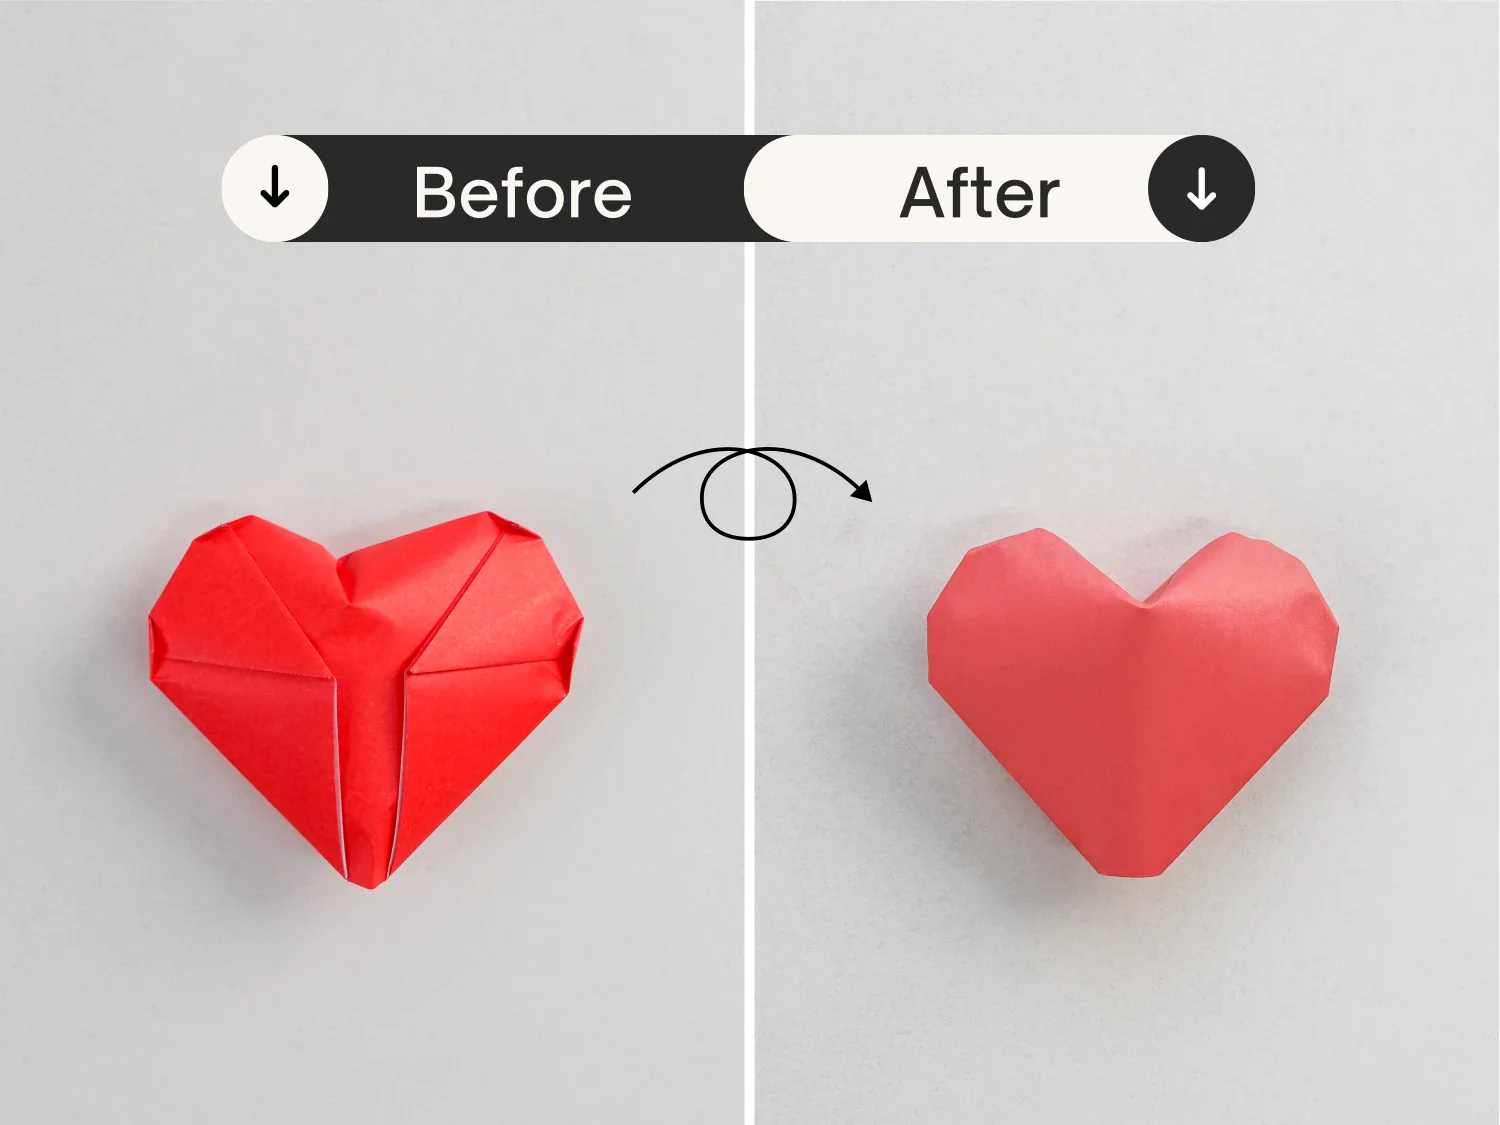
And there you have it.


