Silver hair has become a standout trend in recent years, and it’s easy to see why. Whether you’re looking to fully embrace your natural silver or add shimmering highlights, there are countless ways to incorporate this striking color into your look.
From subtle highlights to multicolored ombres and full silver tresses, there’s a style for everyone. Whether you’re seeking a low-maintenance option or something more dramatic, silver hair can be customized to suit your hair type, skin tone, and personal style.
Here are 25 bold and trendy silver hair color ideas to inspire your next salon visit.
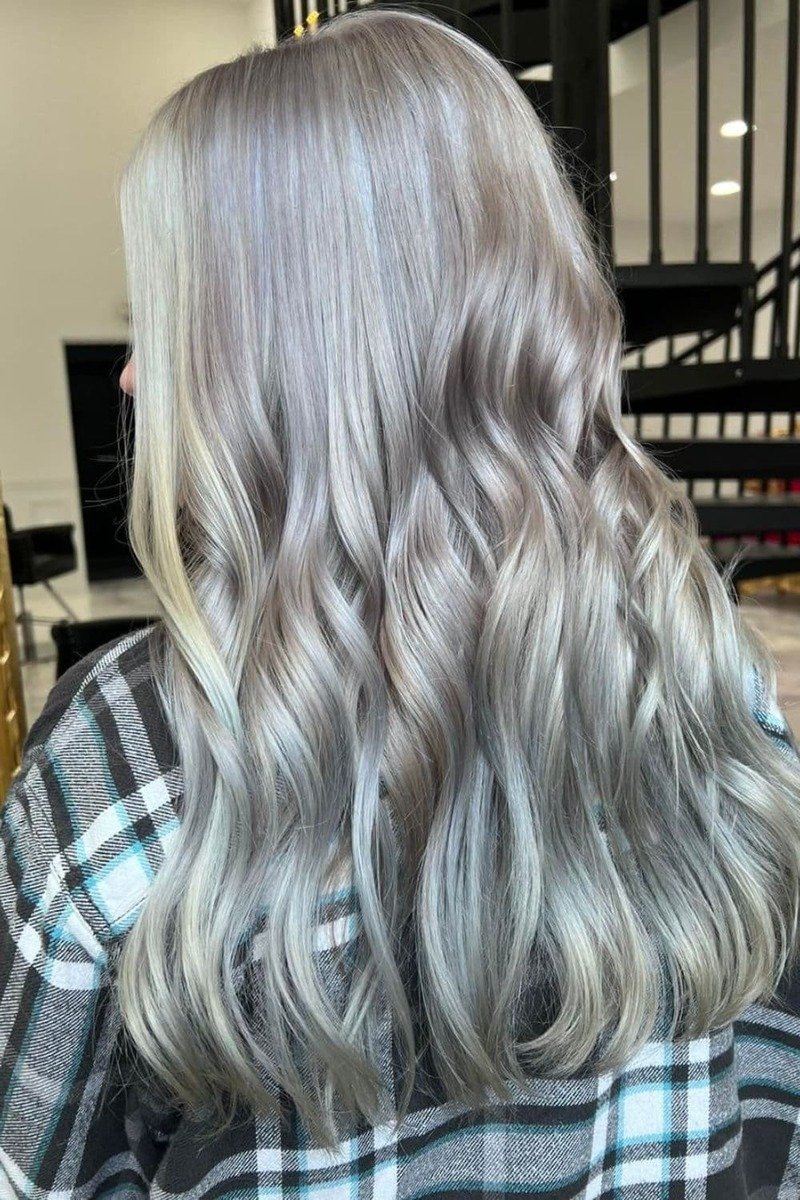
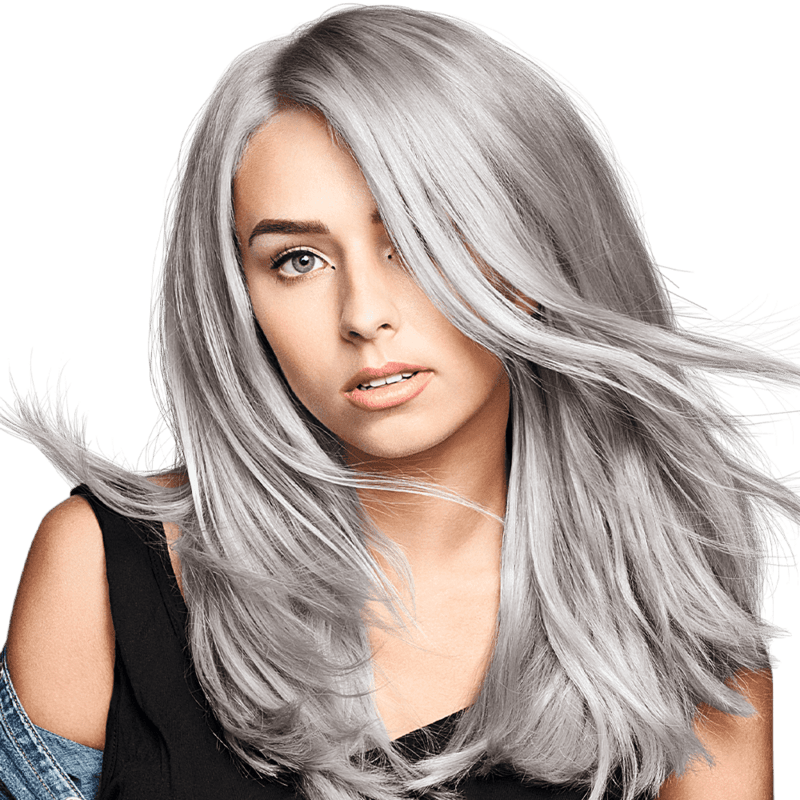
NATURAL SILVER HAIR COLOR
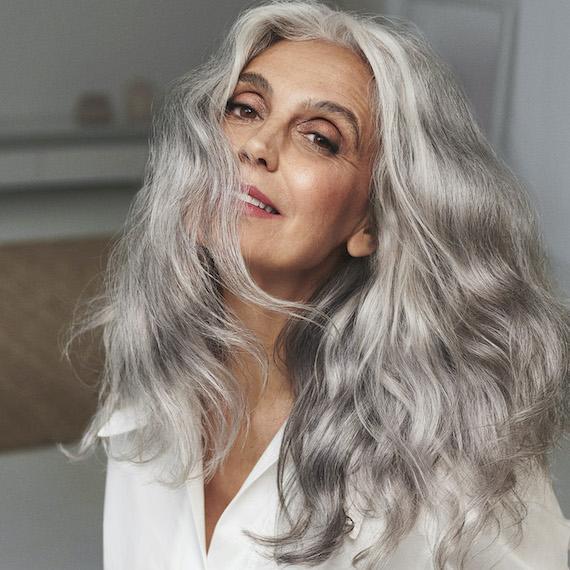
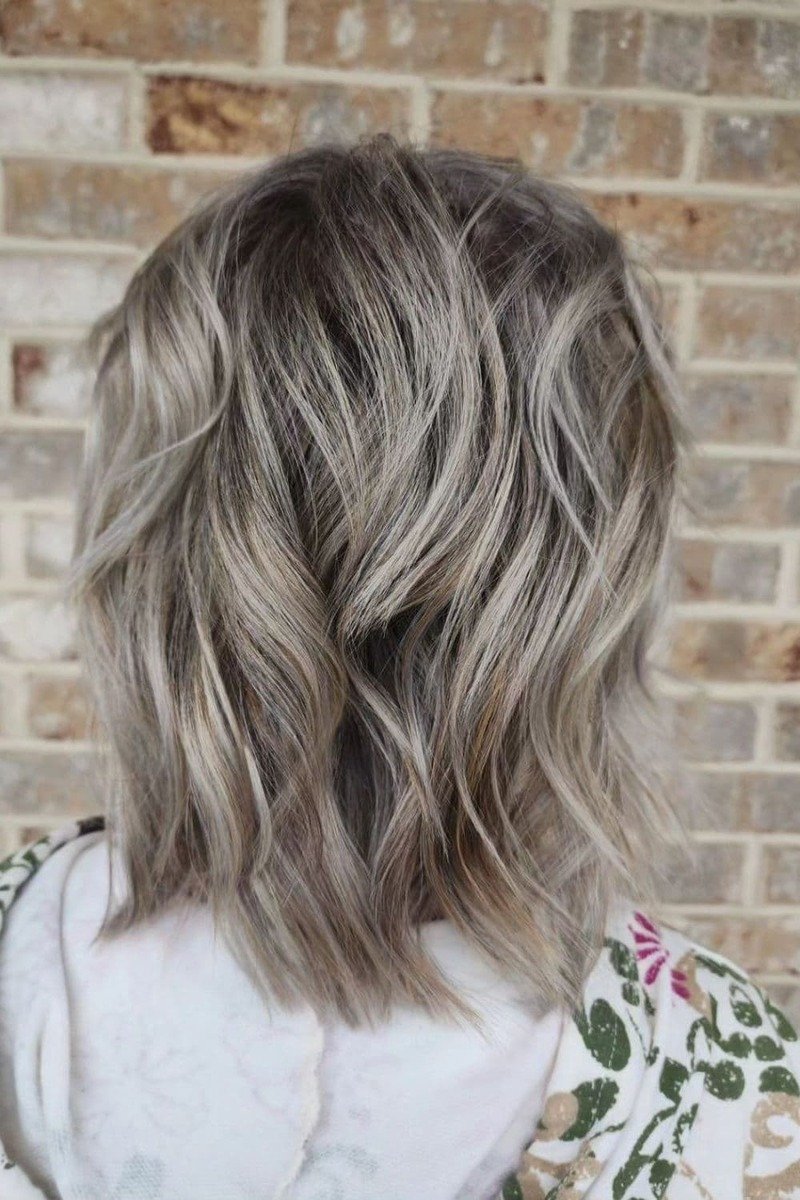
Dyeing your hair a natural silver color can be a stunning and bold choice, whether you’re embracing your naturally graying hair or looking for a dramatic transformation.
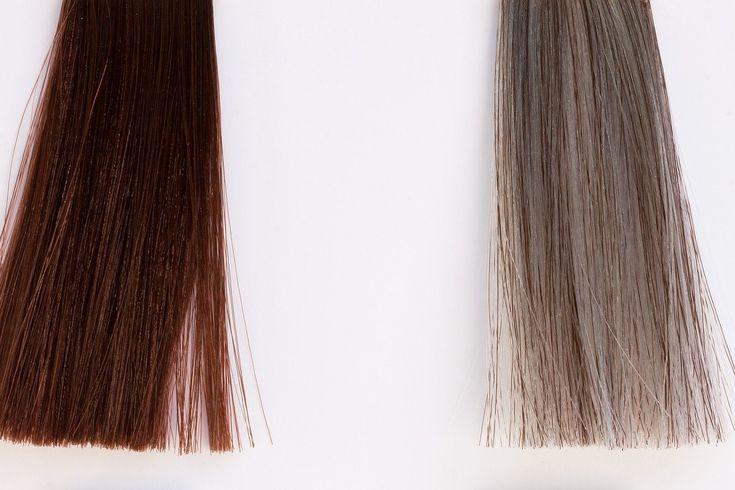
Silver hair offers a range of shades, from light silver-gray to darker steel gray, making it a versatile option that complements various skin tones and personal styles.
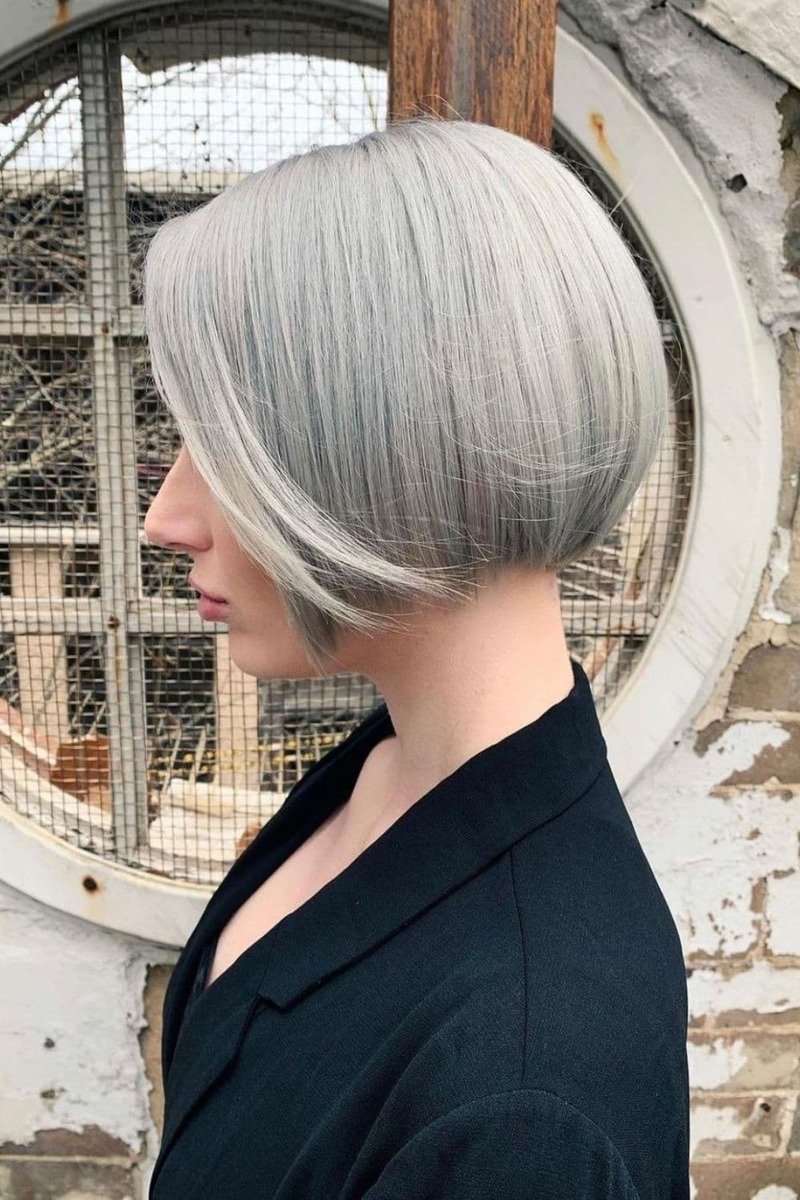
SHORT SILVER-GRAY HAIR
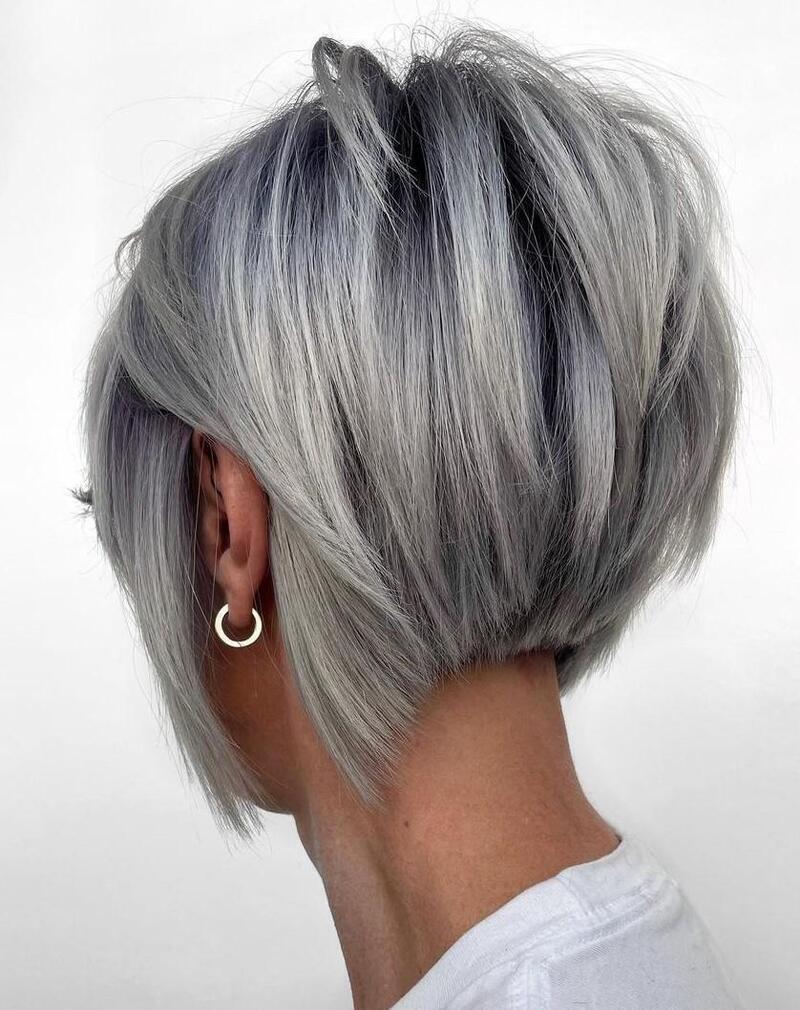
Short silver-gray hair offers a chic, classic look that suits all ages, hair types, base colors, and skin tones. Whether you prefer a long bob or a cute pixie cut, there’s a short silver hairstyle that’s perfect for you.
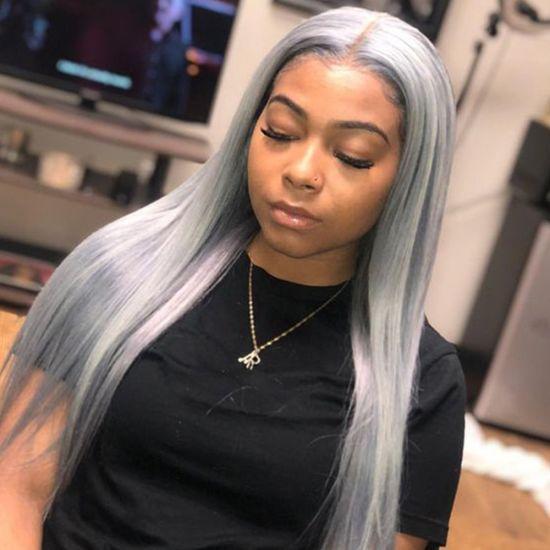
PLATINUM SILVER HAIR
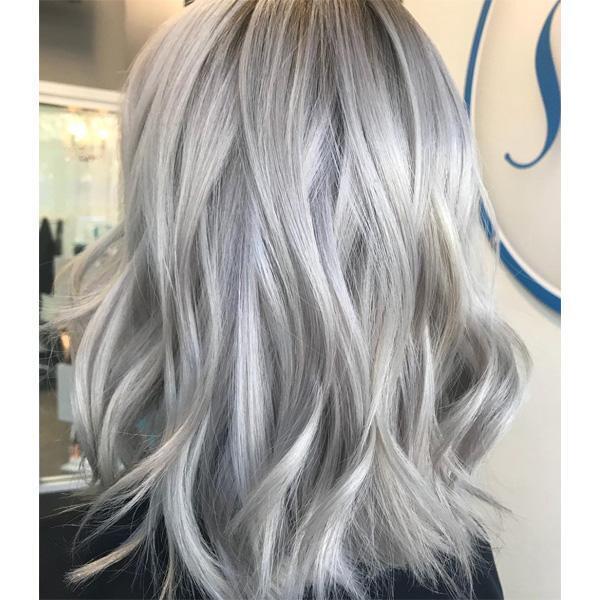
For a standout color, consider platinum silver. This ultra-light shade boasts an icy finish, often nearing white, and creates a stunning, multi-tonal effect that adds a touch of elegance and sophistication to any look.
PURPLE-SILVER HAIR
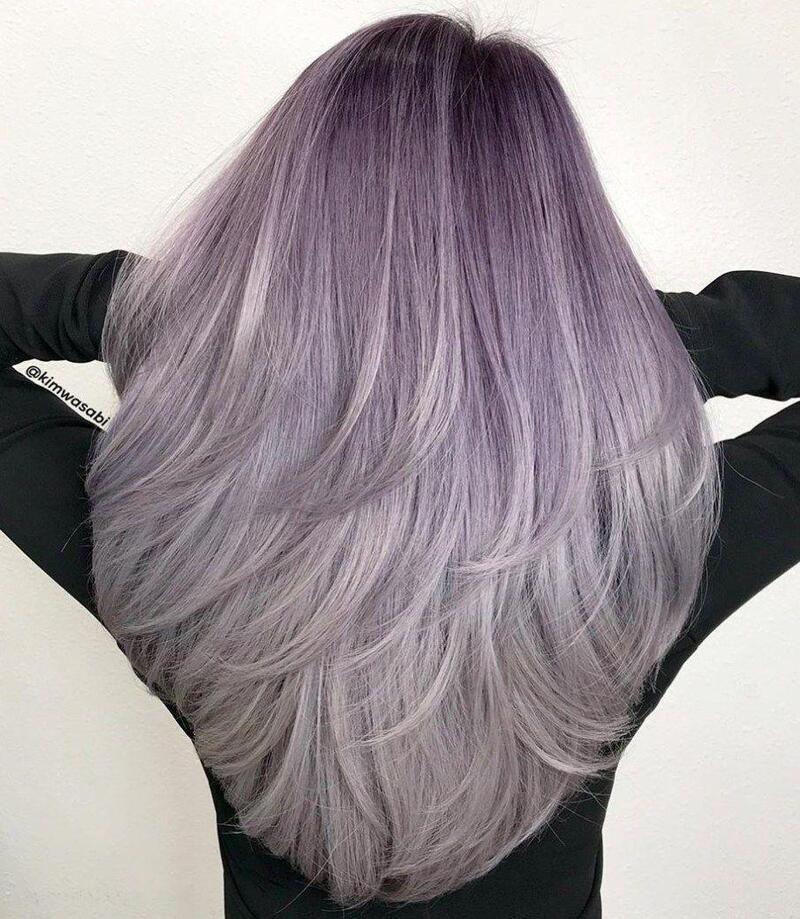
For a unique twist on silver hair, consider incorporating purple hues. Shades like lavender, lilac, mauve, and eggplant offer a wide range of customization options. You can use these colors for highlights, lowlights, or an ombre effect to create a personalized and striking look.
SILVER AFRO-TEXTURED HAIR
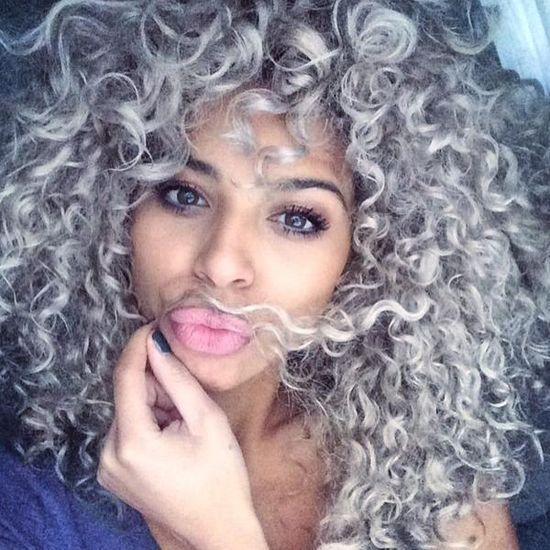
Silver Afro-textured hair offers a stunning and elegant look that highlights your natural texture and curl pattern. This fashion-forward color can be styled in various ways, from loose and voluminous to polished and sleek, adapting to any occasion and personal preference.
SILVER BALAYAGE
A balayage is a natural-looking technique for incorporating shades of silver into your hair. It creates a soft, blended transition between your base color and the silver, resulting in a low-maintenance, lived-in look.
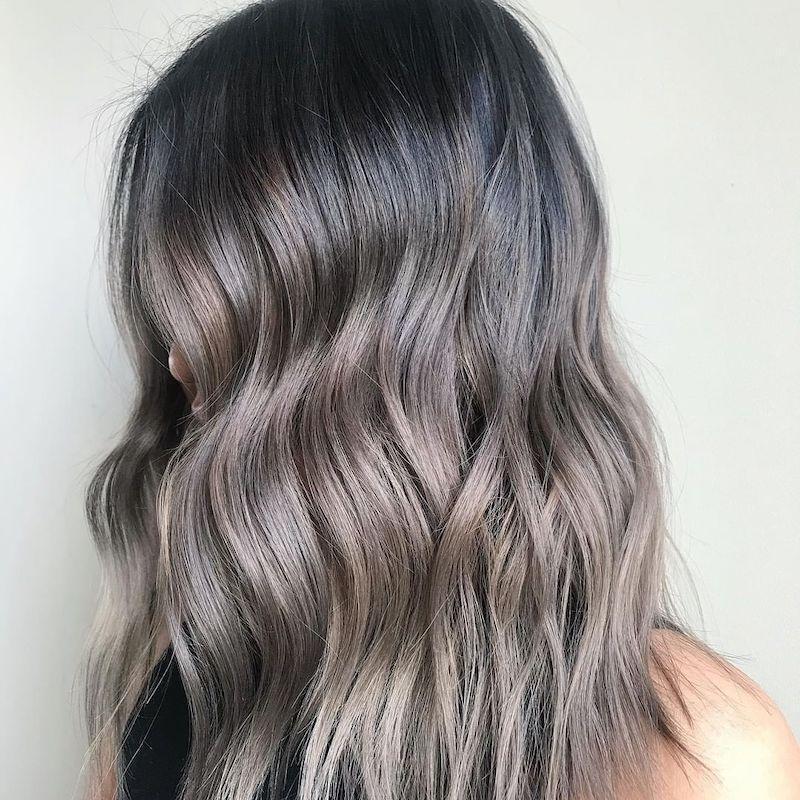
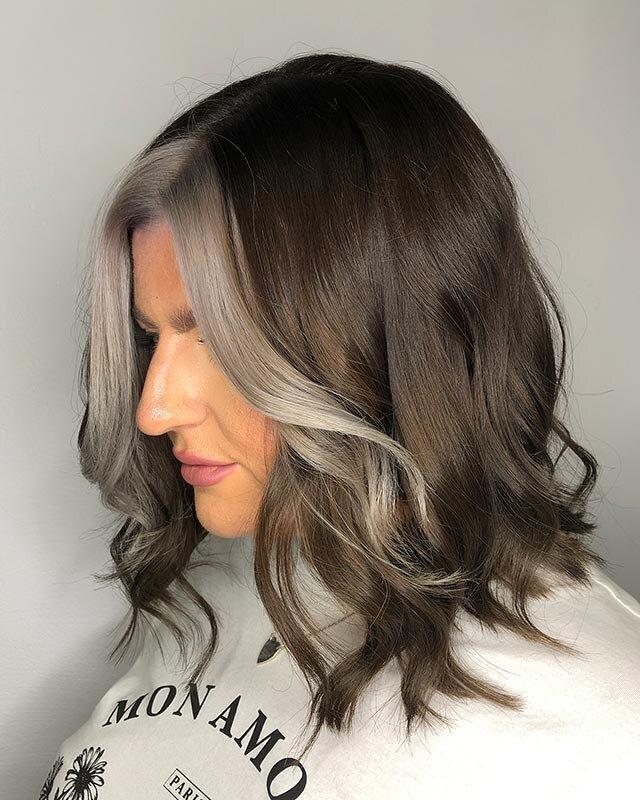
SILVER HIGHLIGHTS WITH SHADOW ROOT
Add dimension to your hair with a shadow root and silver highlights. This technique creates a smooth, gradual transition between darker base colors and silver highlights, offering a lower-maintenance alternative to an all-over silver look.
SILVER QUICK WEAVE
A silver quick weave is an easy and convenient way to experiment with hair color, length, and texture without committing to a lengthy or semi-permanent process. This protective style allows you to showcase your fashion-forward personality with a customized, one-of-a-kind look.
SILVER MONEY PIECES
Money pieces are a popular hair coloring technique that creates face-framing highlights. Silver money pieces add a stunning touch to your look, seamlessly blending this color whether you have long, short, dark, light, straight, or curly hair.
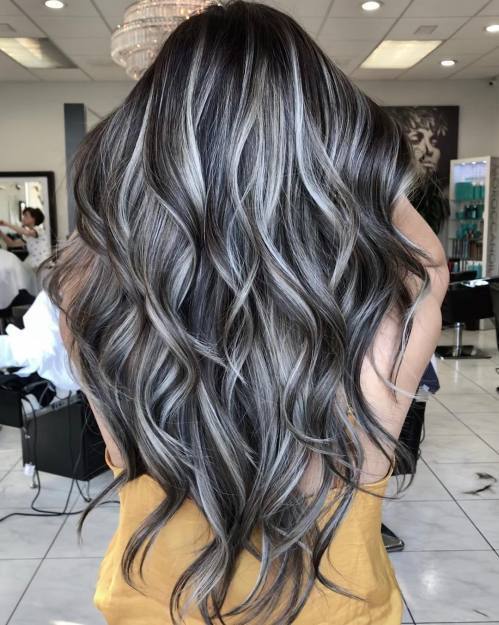
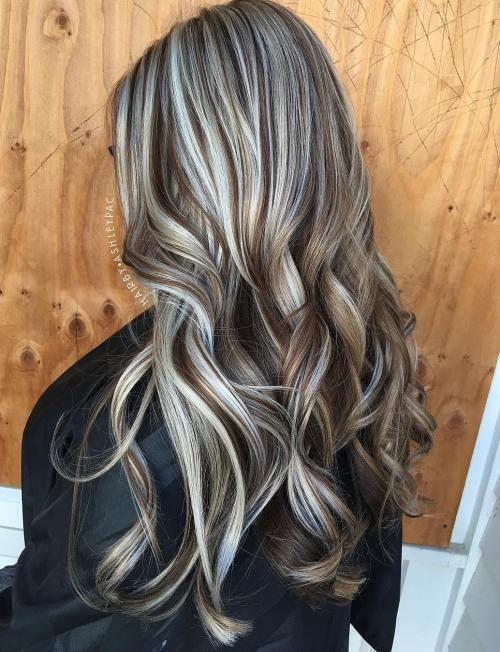
SILVER HAIR WITH LOWLIGHTS
Lowlights are a popular coloring technique that adds depth and dimension by incorporating darker shades into the hair. Strategically placed lowlights can subtly break up a solid silver hue, creating a more natural and visually interesting style.
BLACK HAIR WITH SILVER HIGHLIGHTS
Enhance your black hair with silver highlights for a striking and sophisticated look. You can customize the placement and intensity of the highlights to suit your personal style.
SILVER OMBRE
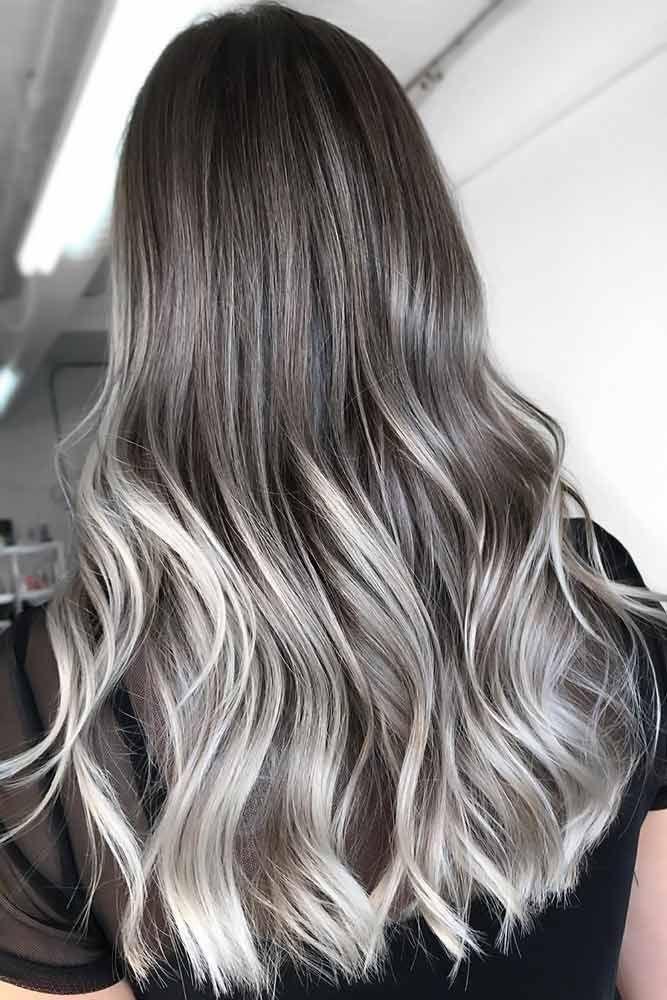
Balayage is a gentle way to add silver highlights to your hair, creating a seamless blend between your base color and the silver. This low-maintenance technique gives you a natural, lived-in look.
LONG BLONDE HAIR WITH SILVER HIGHLIGHTS
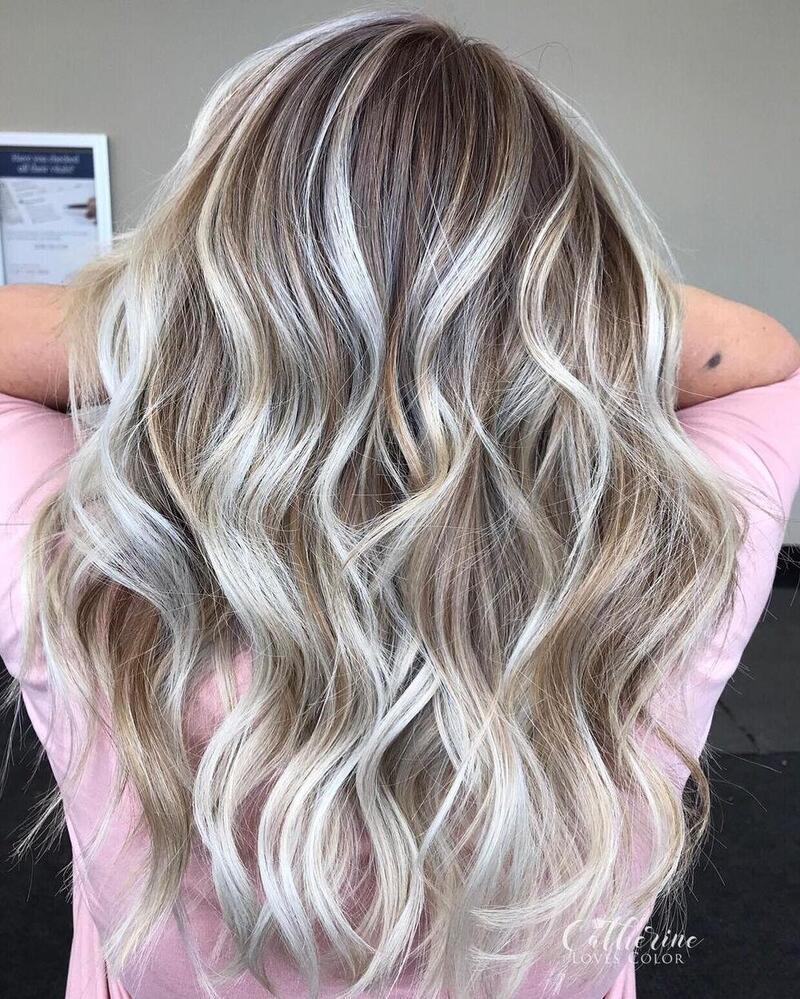
Add shimmer and shine to long blonde hair with silver-toned highlights. Place them strategically to frame the face or scatter them throughout for an edgy, artistic effect.
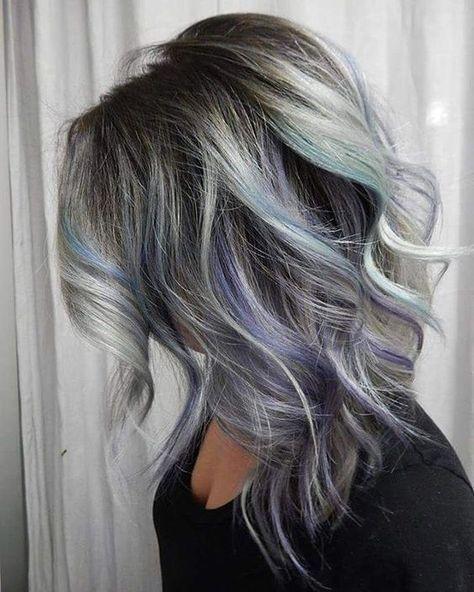
BLUISH-SILVER HAIR
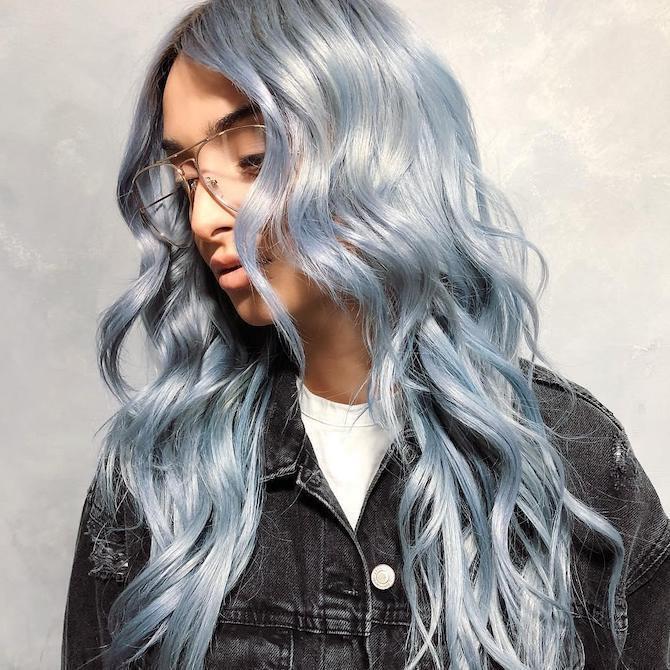
For a unique twist on silver hair, consider adding a blue tone to your locks. Bluish-silver hair ranges from pale pastels to deeper navies, creating a cool and ethereal look inspired by the sky.
SILVER HAIR WITH WHITE MONEY PIECES
White money pieces offer a mesmerizing contrast to silver hair. This stylish combination accentuates your facial features and enhances the overall impact of your silver locks, making them truly stand out.
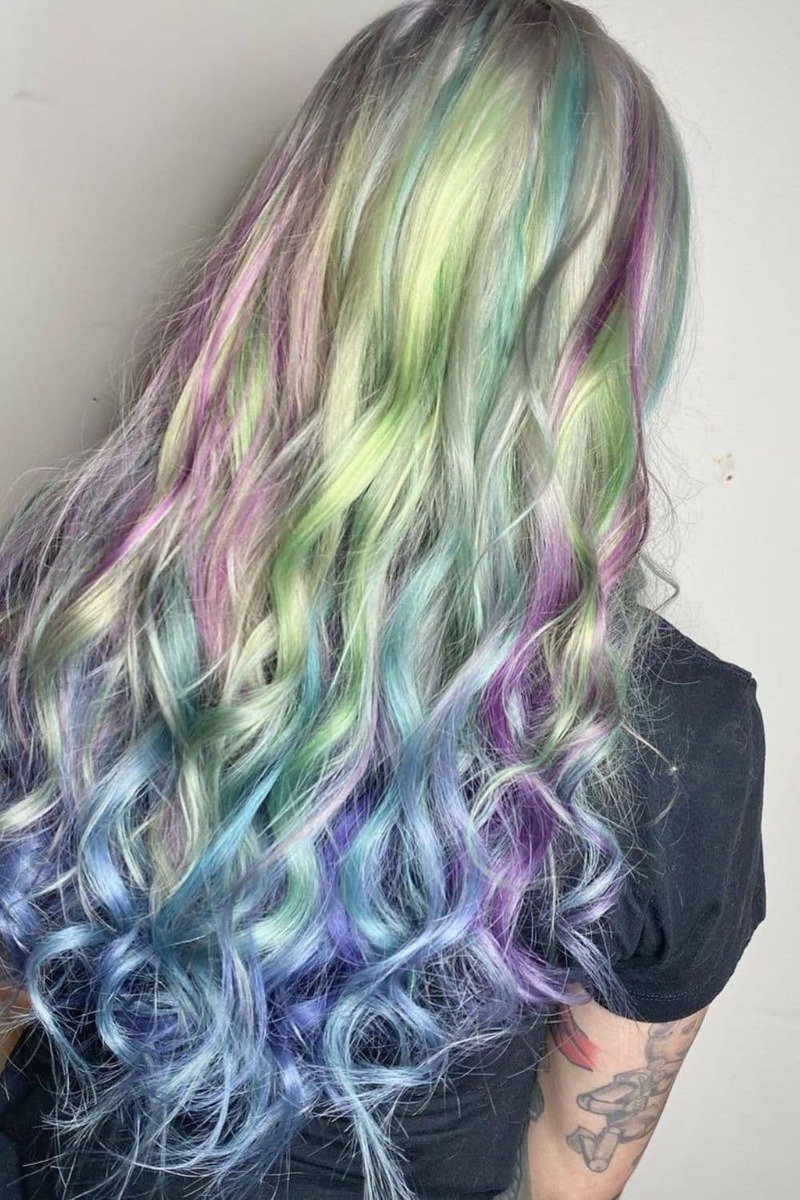
SILVER MERMAID HAIR
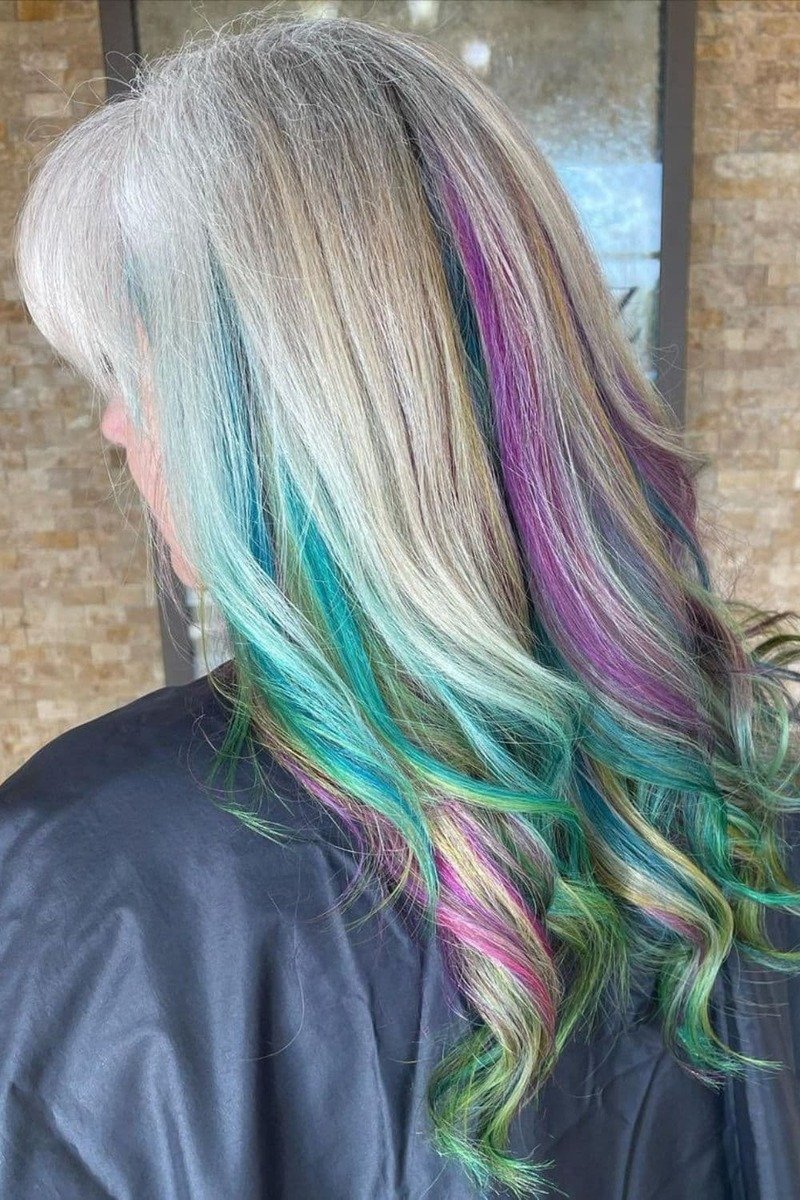
Mermaid hair is a vibrant trend that incorporates multiple colors to create a fun and enchanting look. This dynamic style allows for a creative and artistic expression, showcasing your charisma and charm through a spectrum of captivating hues.
BROWN HAIR WITH SILVER HIGHLIGHTS
Blend silver highlights into brown hair for an understated, natural-looking mix. This style combines the warmth of brown with the coolness of silver, creating a beautiful contrast and adding dimension to your locks.
SILVER HAIR WITH PASTEL PIECES
Add a touch of whimsy to your silver hair with pastel highlights, lowlights, peek-a-boo color, or an ombre. This playful technique creates an ethereal look that suits all hair types.
MEDIUM-LENGTH METALLIC SILVER HAIR
Metallic silver hair is a bold and striking look that is particularly striking on medium-length hair. This intense, reflective style is sure to turn heads with its futuristic and chic appearance.
DEEP SILVER
Deep silver hair is rich, intense, and highly saturated. Whether worn as an all-over shade or integrated into highlights, balayage, or ombre, deep silver hair exudes confidence and showcases your individuality.
SILVER PIXIE CUT
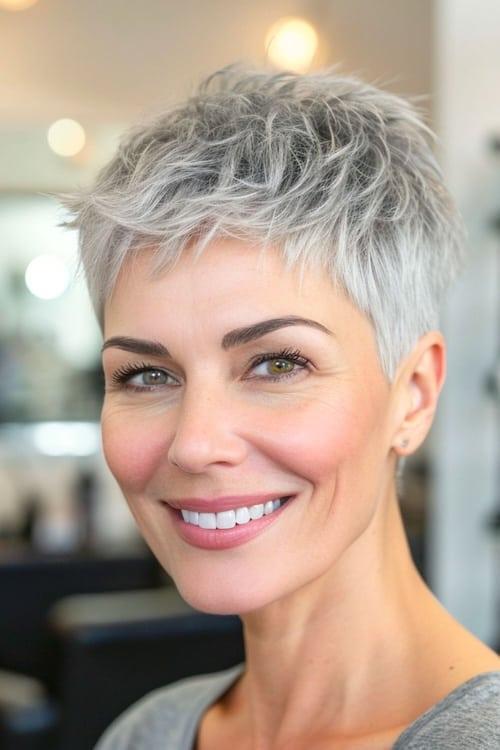
If you’re looking for a distinctive and stylish haircut, consider a silver pixie cut. This short, sassy style is suitable for everyone and will help you stand out from the crowd.
SILVER-PINK HAIR
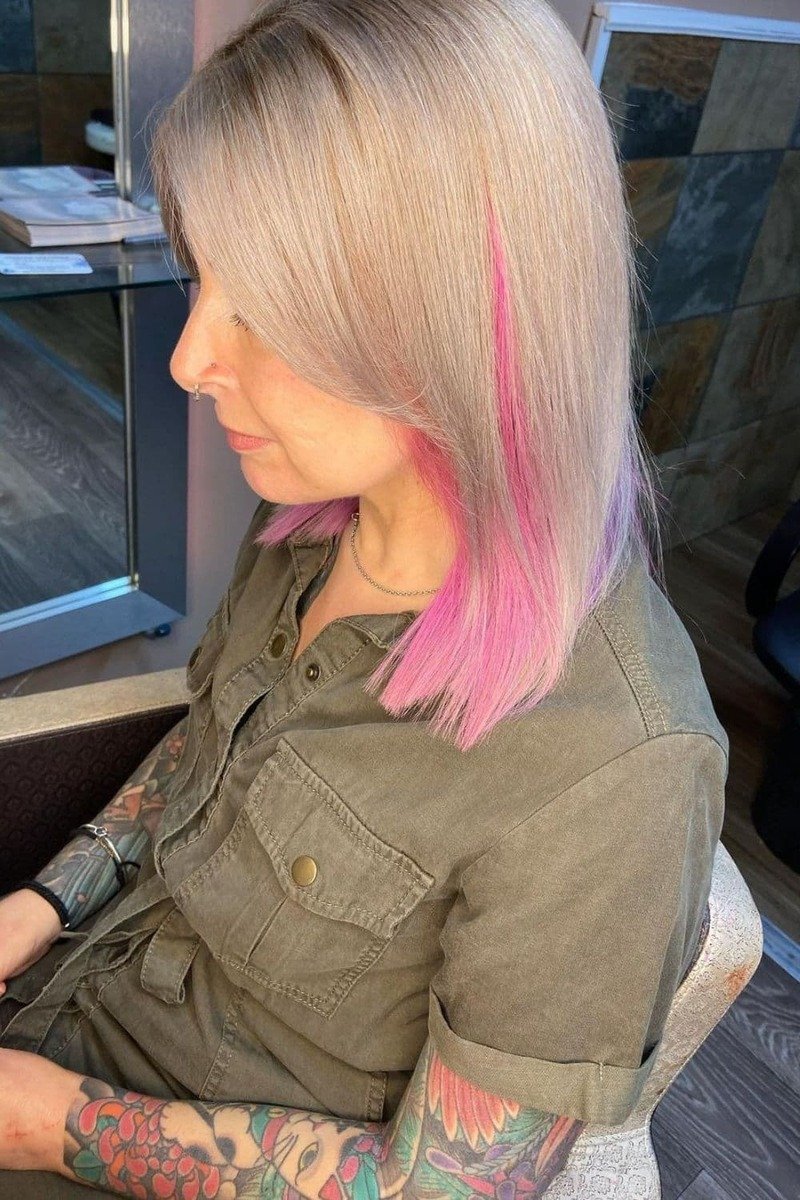
Incorporating shades of pink into your silver hair creates a vibrant, fashion-forward contrast that works with any hair type, length, or texture. Consider a silver-pink ombre or balayage, ranging from soft pastels to bold hot pinks or magentas. Alternatively, you can add pink highlights or lowlights for a more classic touch.
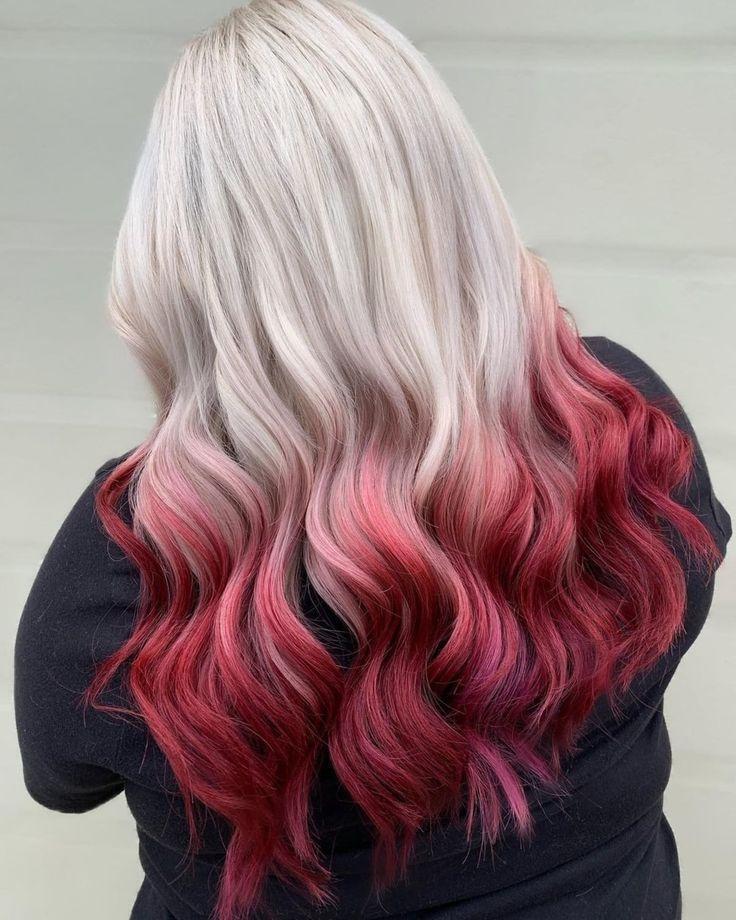
SILVER-TO-RED OMBRE
A silver-to-red ombre provides a striking and vibrant contrast between the cool silver and the warm red. This look can be customized with various shades of red—or any other color—allowing you to tailor the ombre to your personal style and preferences.
CURLY SILVER HAIR
Curly hair looks stunning in silver. This bold and beautiful hue complements all curl patterns and lengths, highlighting your hair’s unique texture.
ASH-COLORED SILVER HAIR
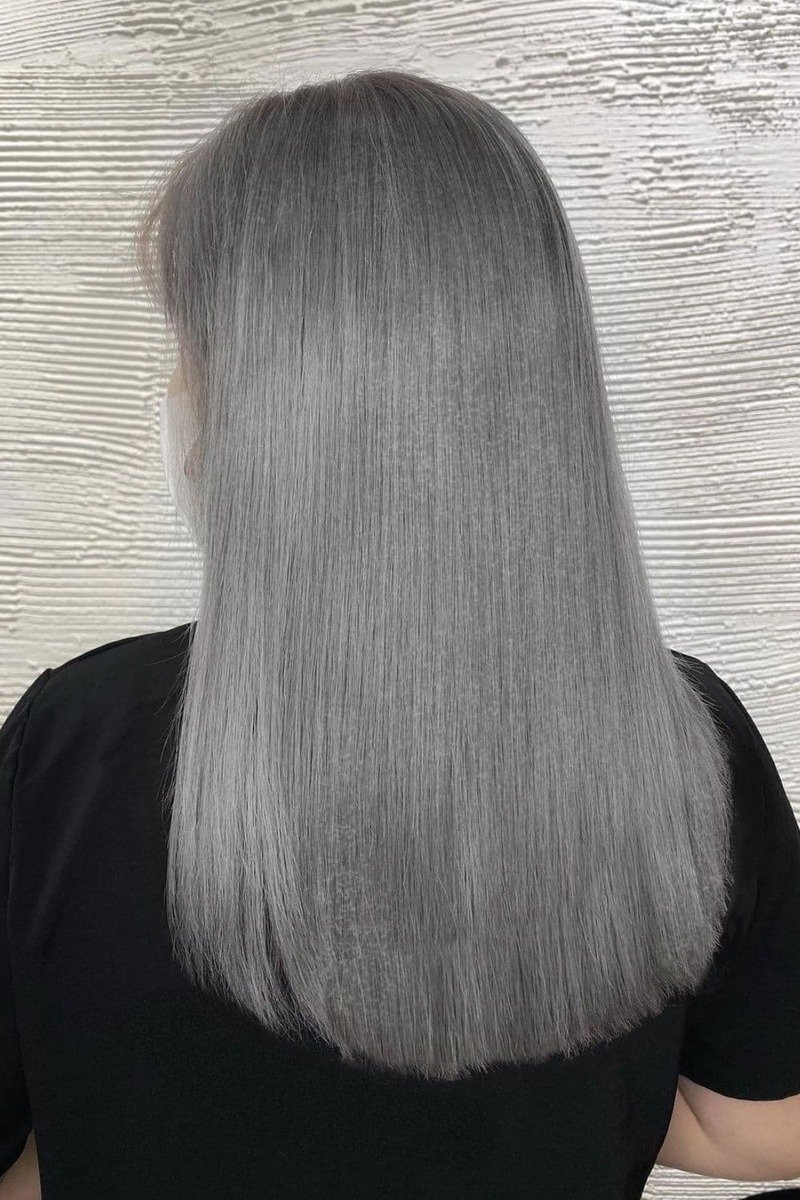
Blend the coolness of ash tones with silver hair color for a muted, smoky, and refined appearance. This timeless color combination enhances a range of skin tones and creates a striking contrast with various eye colors.
CONCLUSION
Silver hair offers a versatile and stylish option for anyone looking to refresh their look. From subtle silver highlights and soft balayage to bold contrasts with vibrant colors like pink or red, silver can be customized to suit a wide range of styles and preferences. Whether you opt for a natural, understated look with silver highlights, or go for a dynamic, eye-catching ombre or mermaid style, silver hair adds a touch of sophistication and creativity to any appearance. Experiment with different techniques and combinations to find the perfect silver hair color that enhances your unique style and personality.