
Henna, also known as Mehndi, is an exquisite artistic symbol that can be crafted on hands and feet, making it an ideal adornment for occasions ranging from the ordinary to the traditional. In India, applying henna patterns on the hands and feet of the bride is not just a form of decoration but also a wish for health and prosperity in her marital journey. These works of art may blend lace-like patterns, inspiration from nature, the lover’s name, depictions of animals, Hindu deities, and iconic designs, expressing blessings, luck, joy, and love. Below are 31 simple and easily achievable henna hand designs, especially suited for those newly exploring this art form.
EASY ARABIC HENNA DESIGNS
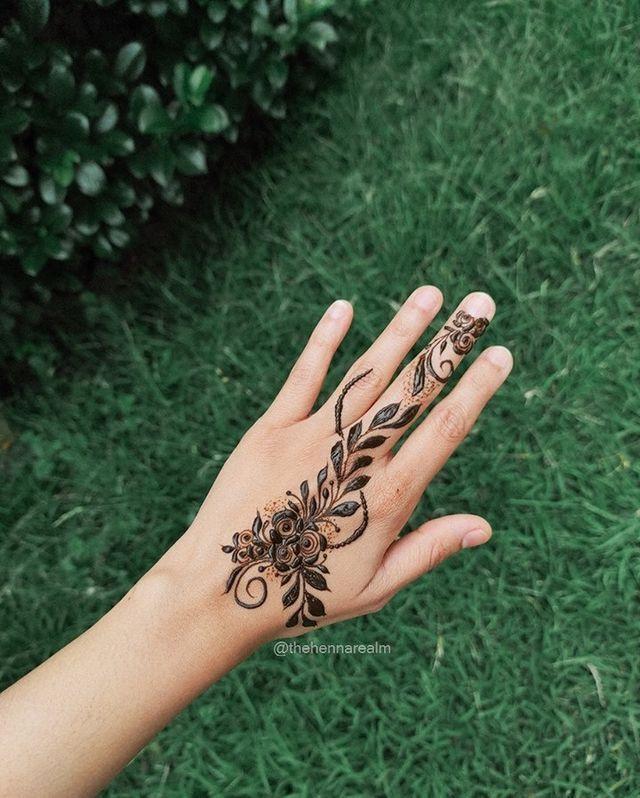
Arabic henna designs encompass uncomplicated yet swift and captivating mehndi patterns. This lovely hand design incorporates mehndi elements like leaves, flowers, and paisley, making it an ideal choice for beginners to experiment with.
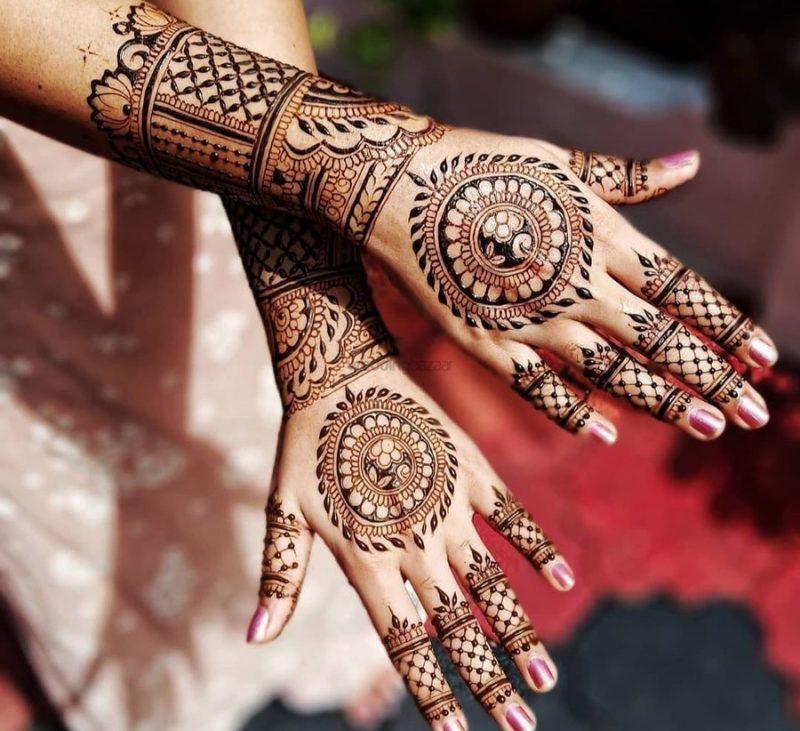
BEAUTIFUL COMBINATION HENNA DESIGN

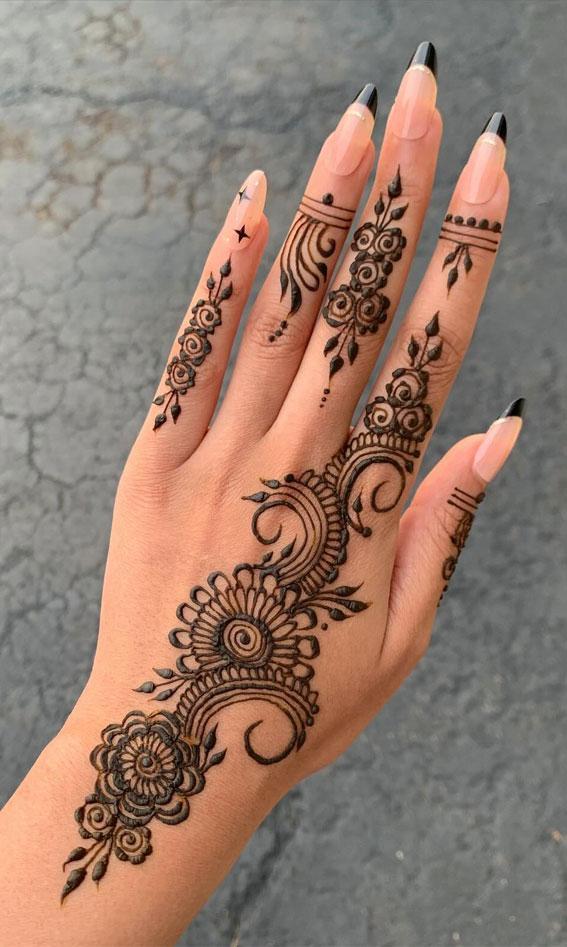
This is a timeless compilation of Mehndi designs tailored for those who appreciate minimalistic and beautiful henna patterns on their hands and legs. Experiment with this uncomplicated henna design for your traditional occasions. The captivating combination of a bold circle surrounded by leaves adds an enchanting touch. This design is suitable for both front-hand and back-hand henna art.
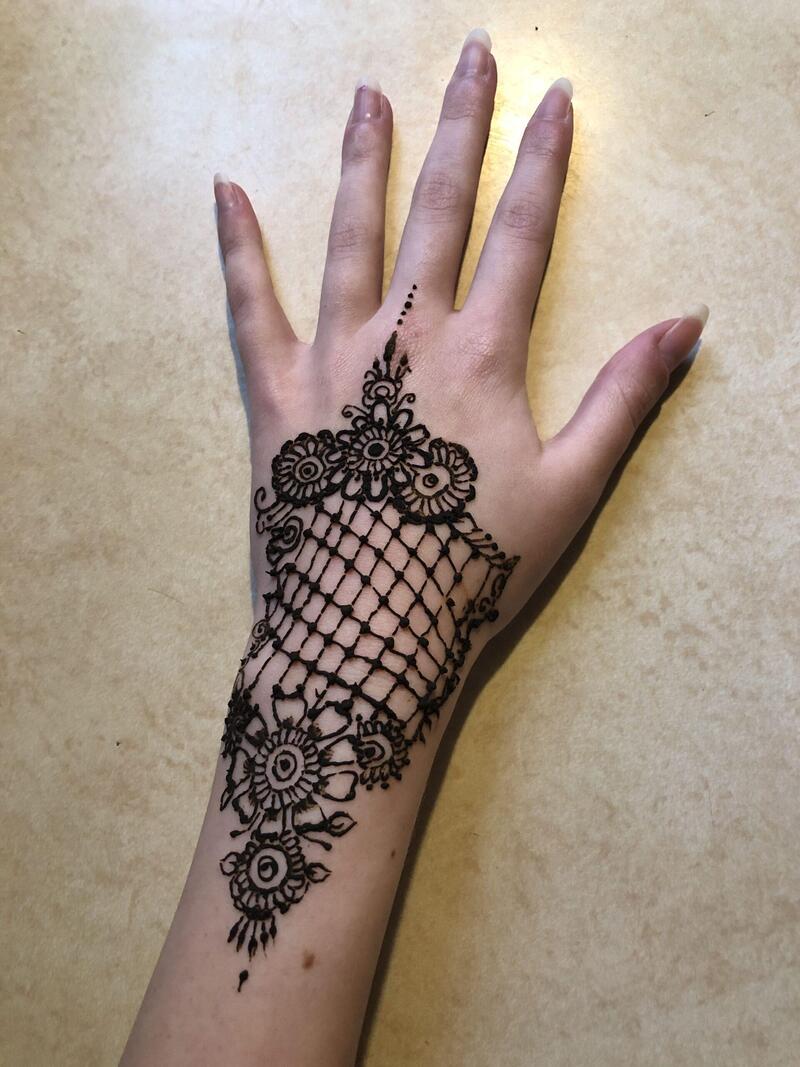
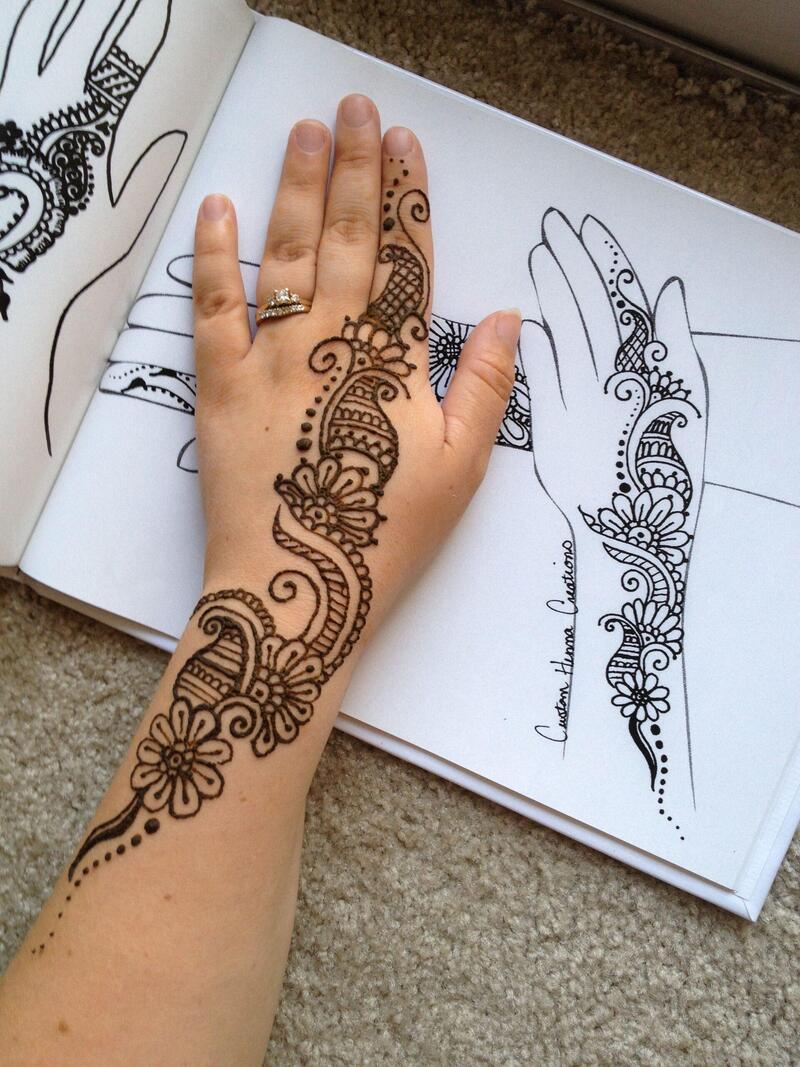
SIMPLE HENNA DESIGN WITH JAAL PATTERN

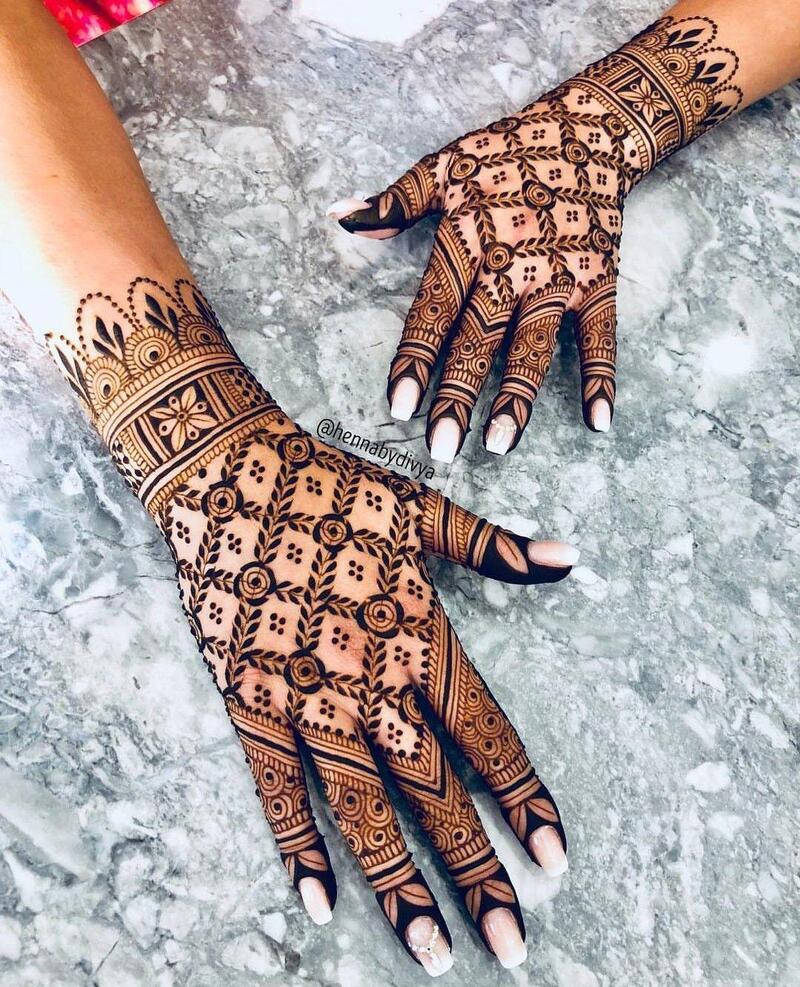
A stylish mehndi design featuring an uncomplicated jaal pattern across the palms. The criss-cross lines and motifs render this henna design ideal for beginners. It can be duplicated on both sides of the hand. If you seek henna designs suitable for various occasions, this option proves to be an excellent choice.
MULTICULTURAL CHARACTERS
Drawing inspiration from this bride is a great idea if you’re incorporating two distinct cultures into your wedding celebration. In vibrant multicultural wedding held in New York,many brides paid homage to her Chinese heritage by incorporating the Chinese double happiness character into henna tattoo on hand, seamlessly blending her background with the groom’s Indian culture. To extend the cultural experience, she arranged for a henna artist in the wedding lounge area, allowing guests to adorn themselves with personalized designs.
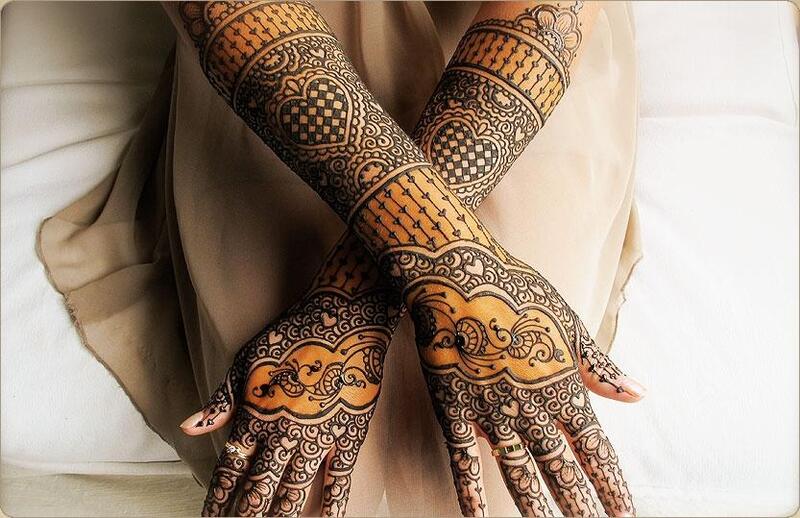
ELBOW LENGTH

Opting for henna designs on the forearms ensures a longer-lasting imprint compared to those on the palms or fingers, symbolizing enduring happiness for both you and your partner. During her intimate wedding in Tennessee, this bride embraced a unique approach as her henna began at the cuticles and gracefully extended up her arm to the elbow, creating the illusion of an elegant lace glove.
LAVISH LACE
This intricately designed lace masterpiece is so lifelike that it seamlessly mirrors the embellishments on the bride’s sari. The invitation suite also featured henna-inspired details, resulting in a delightful fusion of themes that carried through every facet of the wedding.
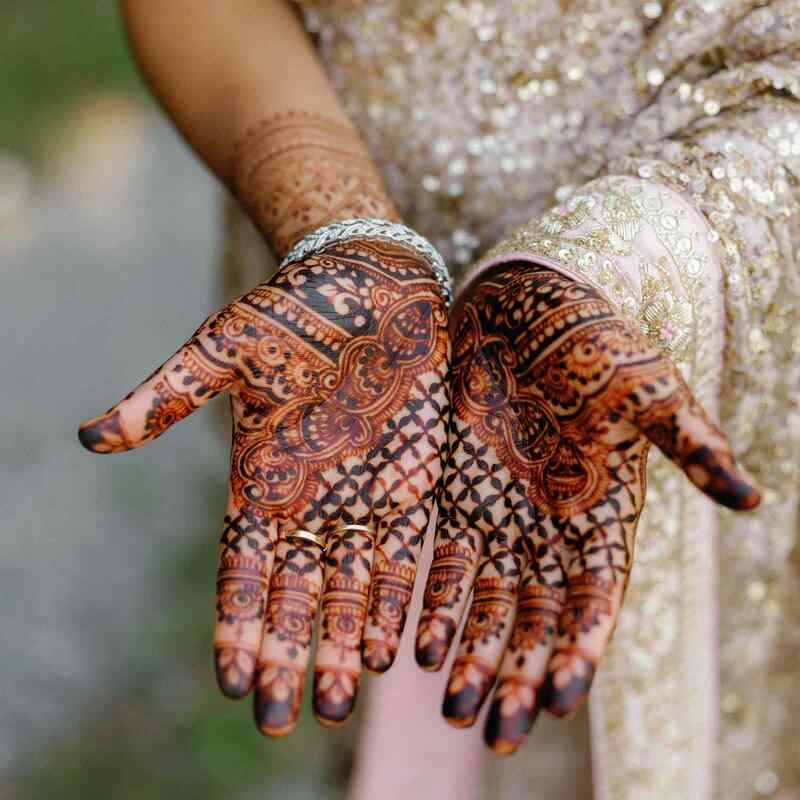
COLOR MATCHING
Crafted from natural ingredients, henna paste offers limited options in terms of color. In a stroke of luck or perhaps through intentional ingredient mixing, this bride achieved a red henna design that flawlessly complemented her red sari adorned with gold embroidery. She wore this ensemble for both her Hindu and Christian Nashville nuptials.
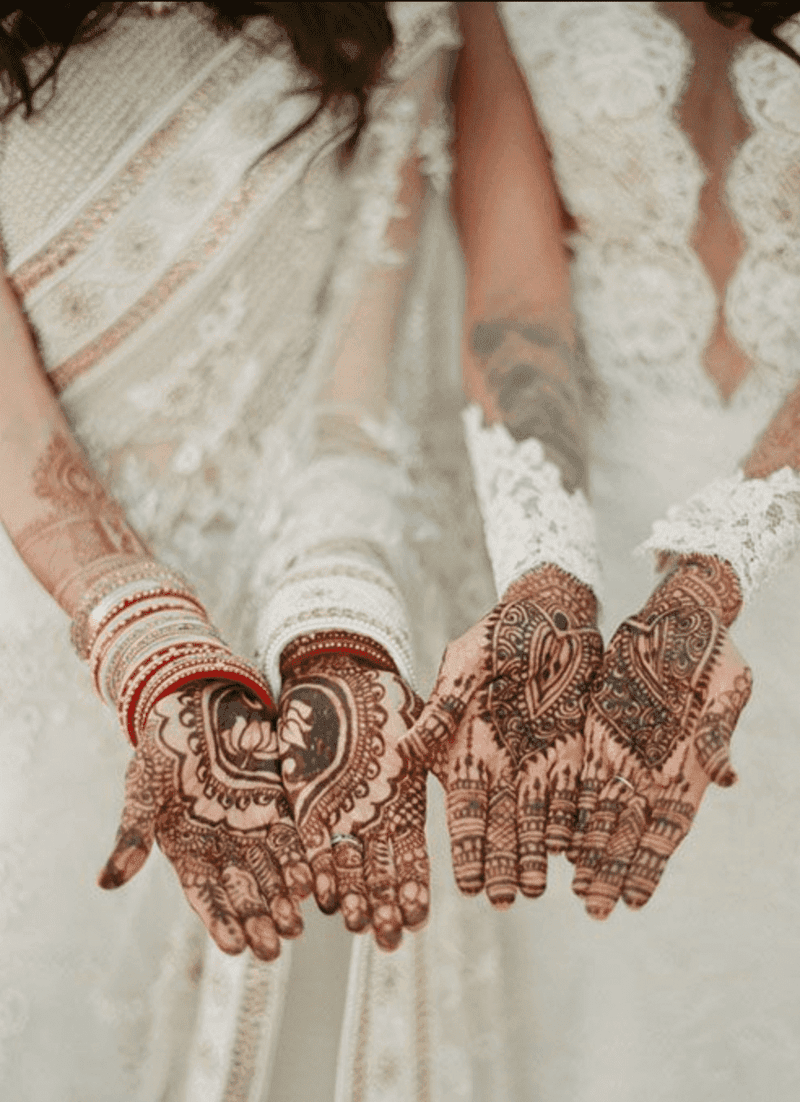
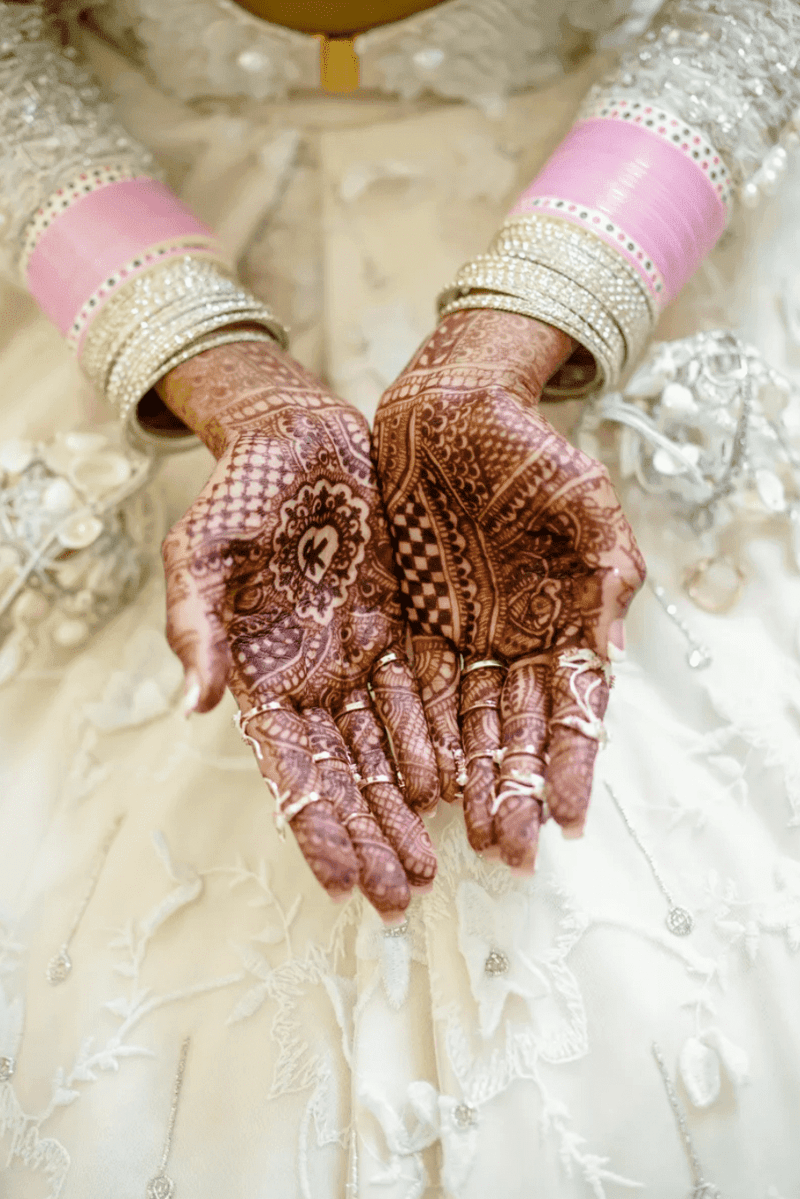
PERSONALIZED DESIGN
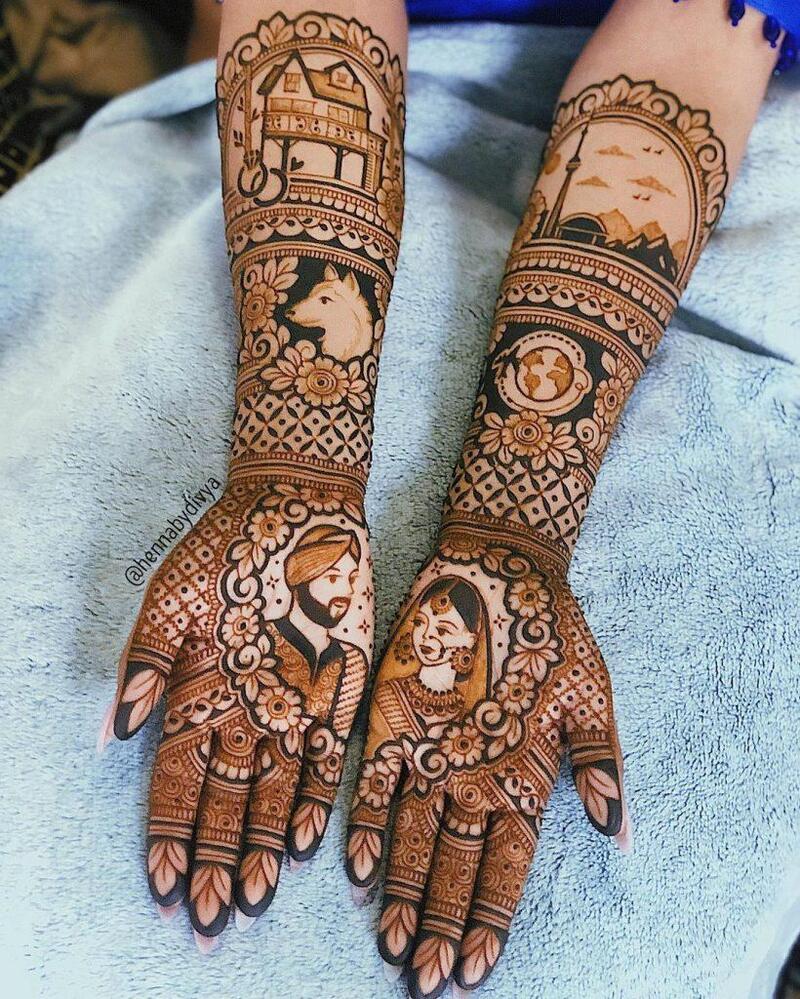
Utilize your henna designs as a canvas to narrate a story, just as demonstrated by this bride. In this creative approach, have your henna artist incorporate an illustration of your partner on one palm and a representation of yourself on the other. When you bring your hands together, it beautifully portrays the narrative of the two of you uniting as one.
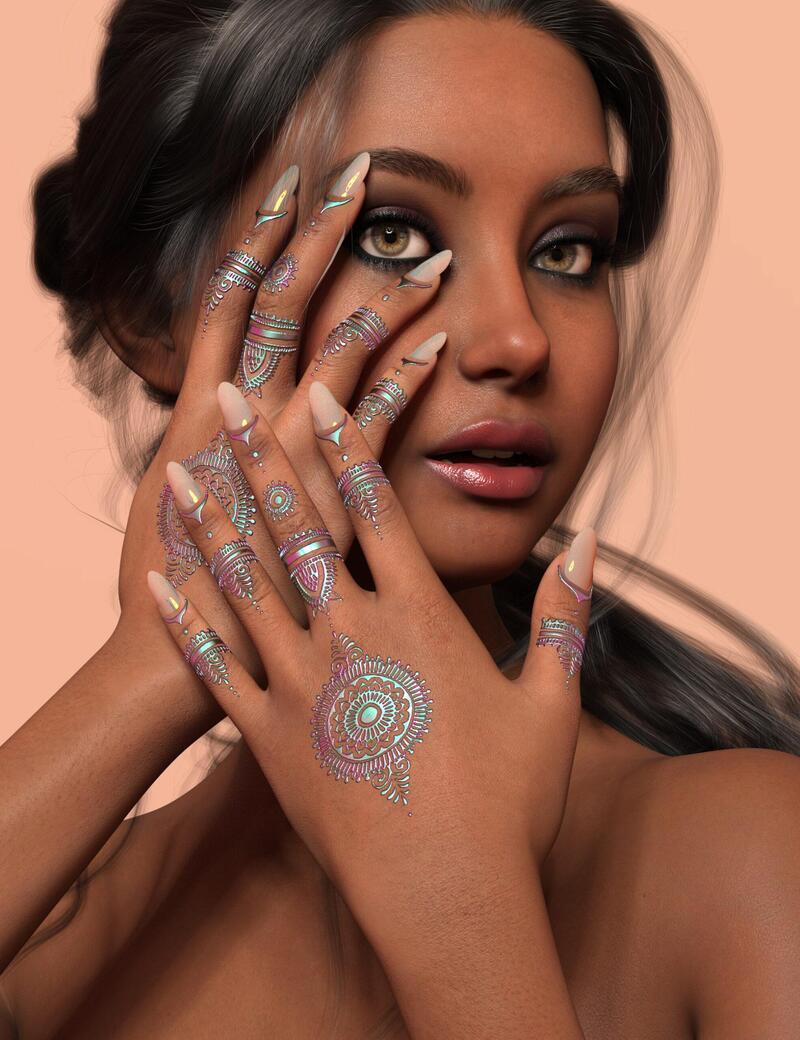
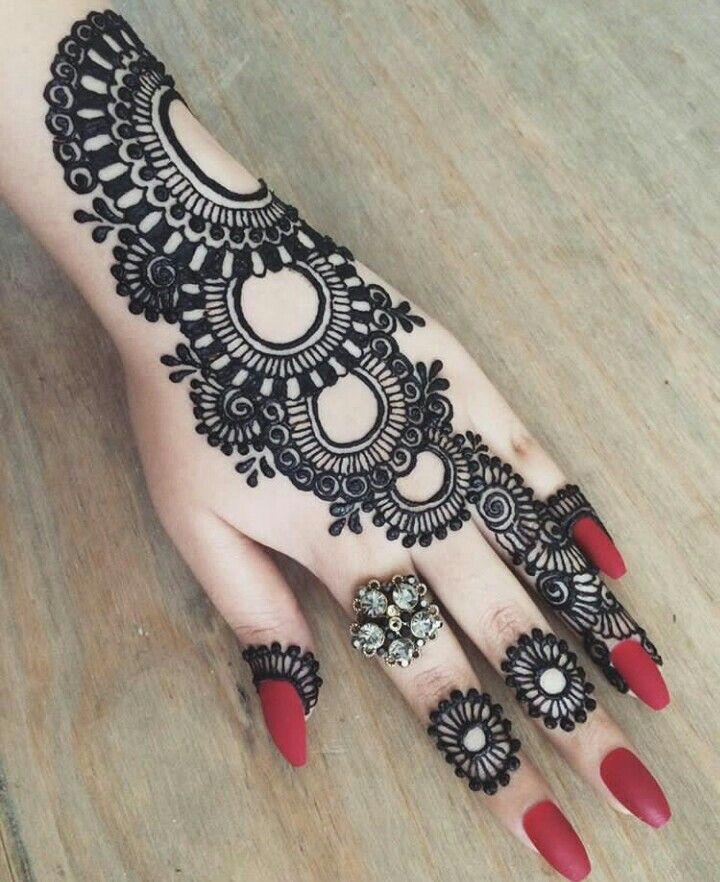
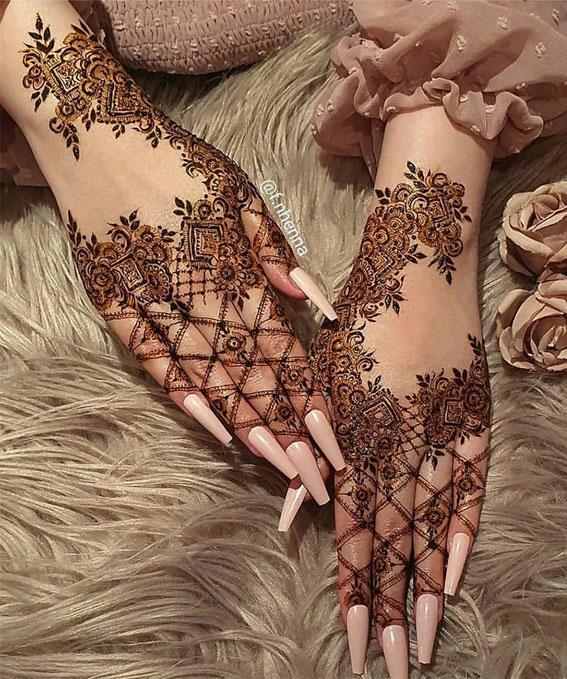
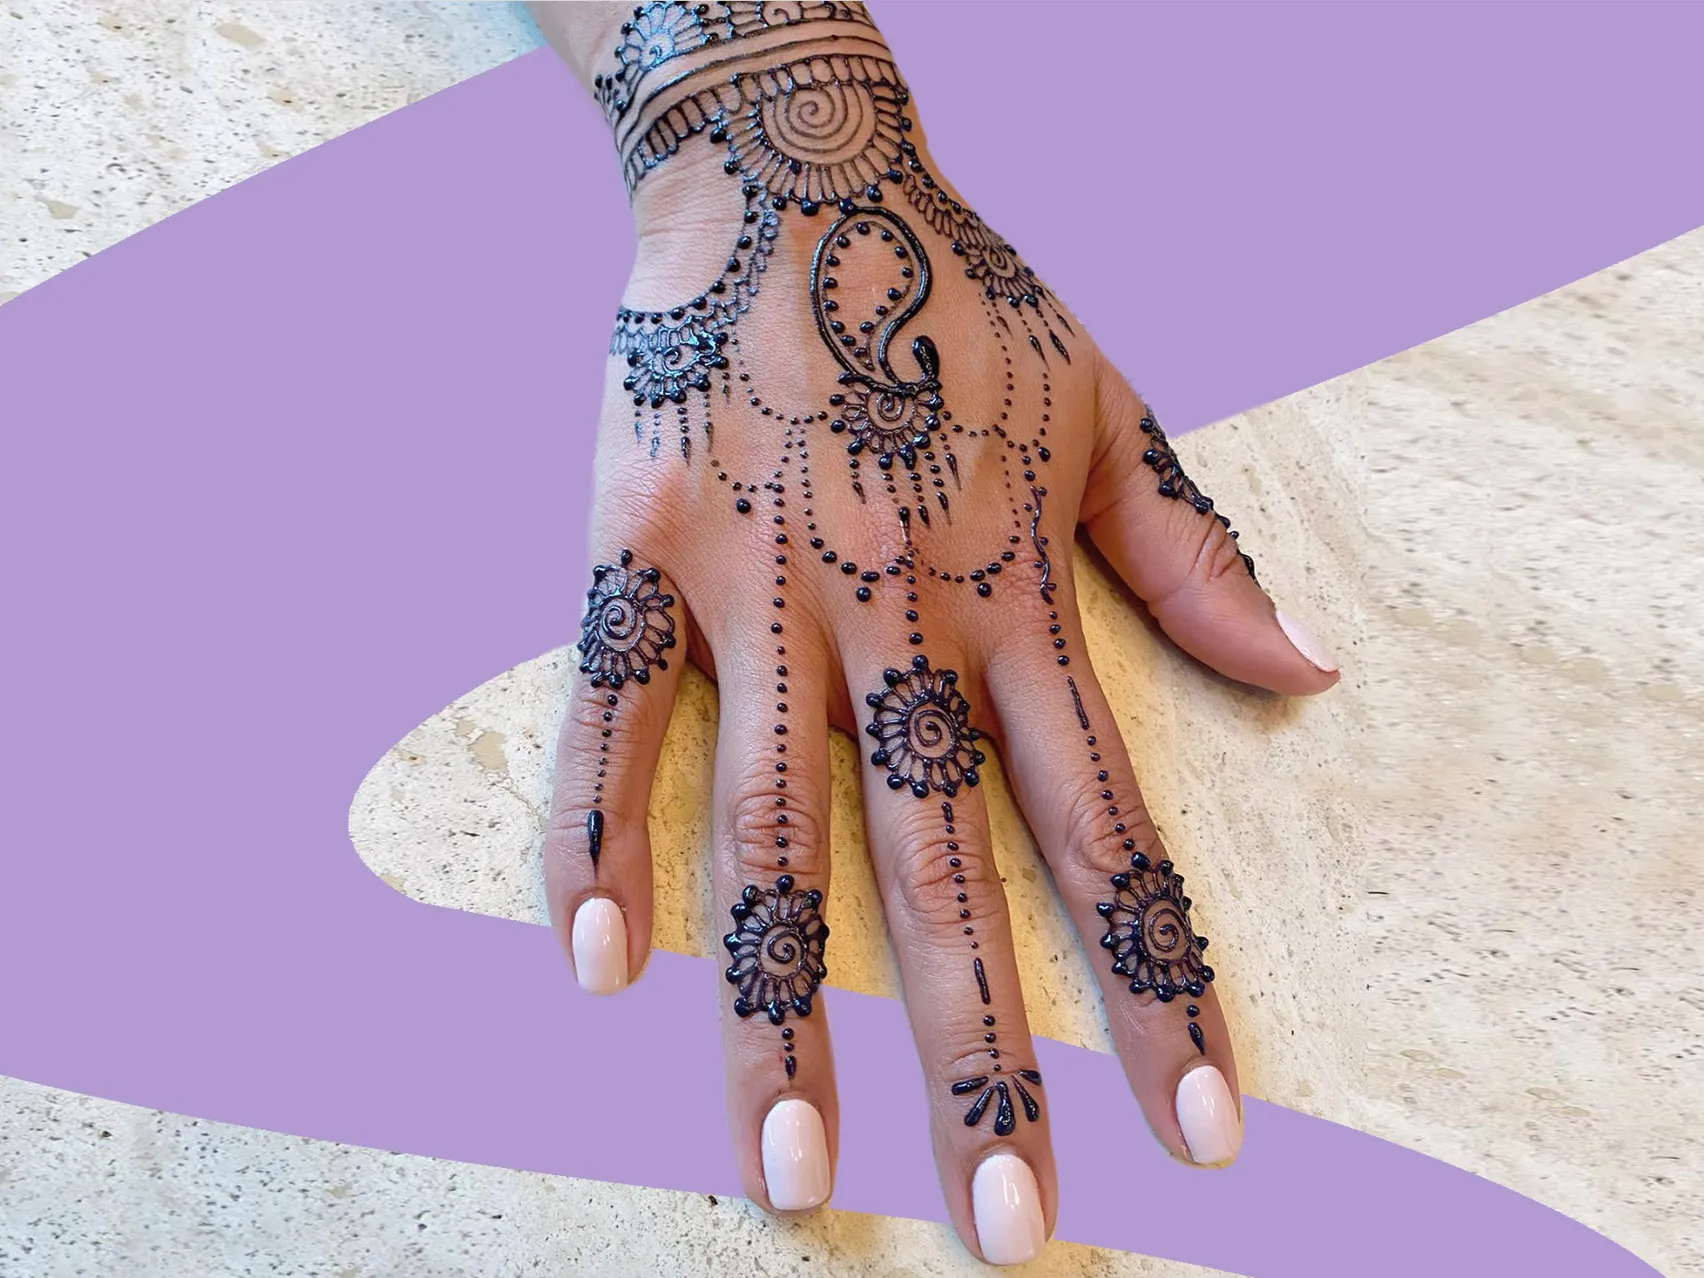
SPIRIT FINGERS
Mandalas stand out as prevalent symbols in wedding henna designs, with the term translating to “circle” in Sanskrit, symbolizing unity and wholeness. In this instance, the incorporation of a fishnet-like pattern on the fingers imparts a sultry, gloved appearance to the bride’s overall design.
WELL OUTFITTED

The delicate lacework of this bride’s mehndi art beautifully echoed the patterns on her vibrant, buttercup-hued sari, worn during her Hindu ceremony. The artistic details also complemented the lace embroidery on the dress she chose for her lakeside nuptials in New York. If multiple outfit changes are on the agenda for your big day, we recommend selecting a henna design that harmonizes with all of your ensembles.
PROTECTIVE MEASURES
Applying henna designs to the backs of your hands and wrists, as per Katariwala, is believed to bring protection to both you and your marriage. The mehndi art showcased here boasts a rich, burnt-orange hue, adding an extra layer of dimension to the stunning artwork.
MIRROR IMAGE
While some brides integrate illustrations symbolizing their identity and their beloved, this bride elevated the stakes by featuring custom portraits on the palms of her hands during her weeklong Knanaya wedding. In addition to the customary henna motifs, she incorporated her name and her groom’s name on her wrists in a bracelet-like fashion. And indeed, her wedding henna design endured beyond the final day.
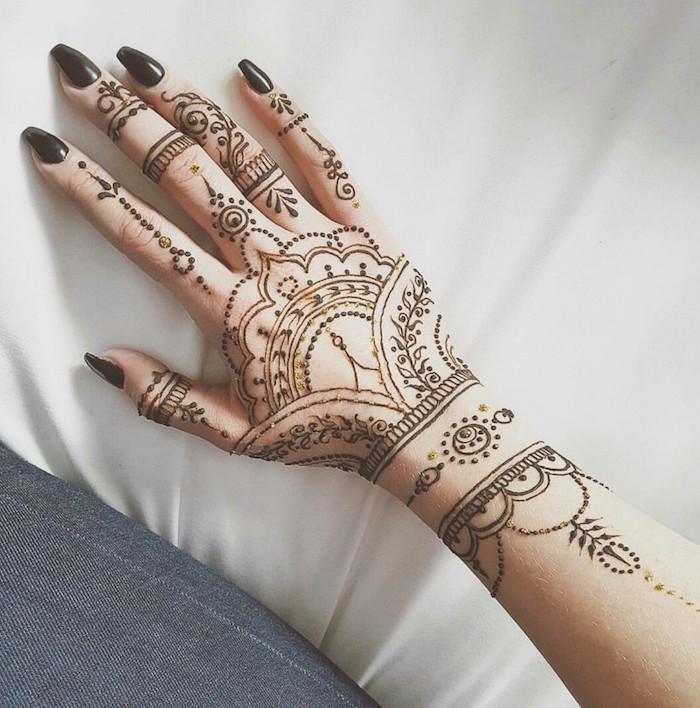
A MINIMALIST APPROACH
The intersection of minimalism and mehndi art is seldom seen, but this asymmetrical design breaks the mold. The om symbol on the right palm symbolizes the self as the union of mind, body, and spirit. The bride went a step further by incorporating her groom’s name into the piece.
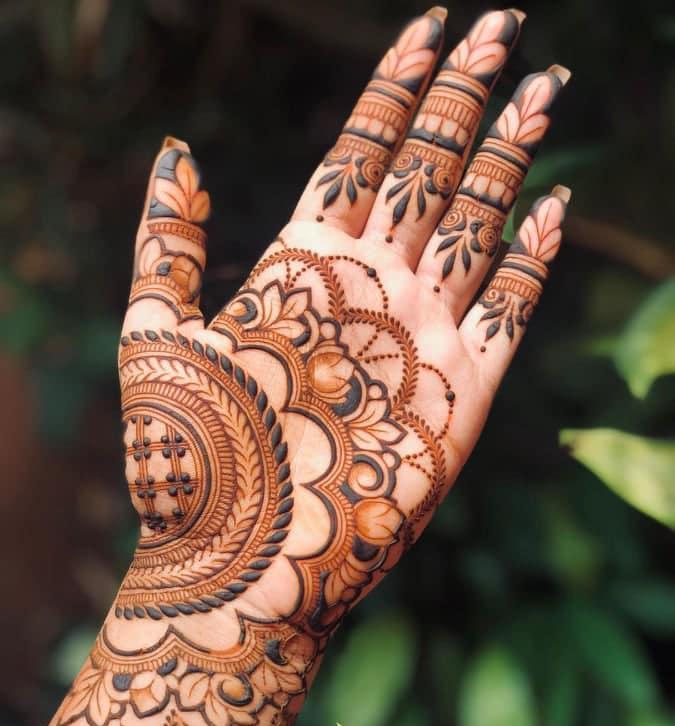
REGAL FLOURISH
Seeking inspiration for your henna design? Look no further than your attire. This masterpiece reflected the intricate gold embroidery of the bride’s luxurious brocade. The delicate patterns on her fingers featured tiny lotus blooms, aligning with the Sahasrara on her palms, symbolizing unity. The magnificent trim imparted a regal touch to the overall look.
MATCHING SET

While henna is traditionally associated with the bride, it can also be a shared experience with your partner. In this garden-inspired wedding in Memphis, the bride’s henna design complemented the floral embroidery on her lehenga. Simultaneously, the groom paid homage to his partner by having her name and two hearts adorned on his left hand.
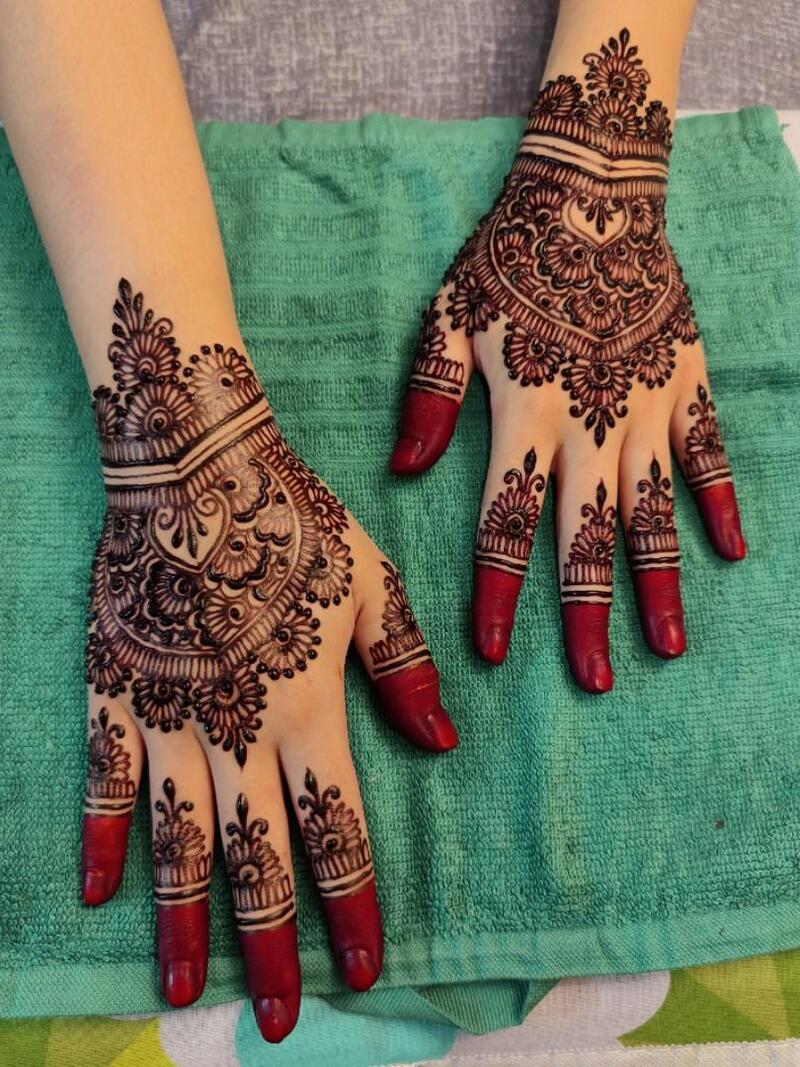
HANDFULS OF ROSES
Opting for floral designs is a widespread preference among brides, particularly if the flower holds significance in their life or wedding. The elaborate details included a prominent bloom on the palm of each hand, smaller blossoms on both the front and back of each finger, and a mandala adorned with roses on the back of each hand.
OPEN PALMS
Attention to detail is crucial for your henna design. Prior to her enchanting beach wedding in Vietnam, this bride adorned herself with intricate mehndi artwork. The detailed elements matched the opulence of her beaded ivory lehenga.
FLORAL ARTISTRY
Florals hold the same intrinsic significance in weddings as they do in bridal henna art, symbolizing beauty and new beginnings, both auspicious ways to commence a marriage. For her contemporary wedding in Santa Barbara, this bride embraced the full trifecta, incorporating vines and leaves.
LATTICEWORK
Every wedding embraces a unique aesthetic, so why not leverage your henna art to enhance your event’s design concept? For her wedding, themed around a lush garden, this bride’s henna featured latticework and organic elements, beautifully accentuating the floral motif. The visual narrative created a seamless and captivating continuity throughout the celebration.
DOUBLE DOWN
Cultures converge in this intricately winding wedding henna design. Amidst the classic paisley and floral motifs, the Chinese symbol for double happiness finds a place—a fitting addition for this bride’s multicultural nuptials in California.
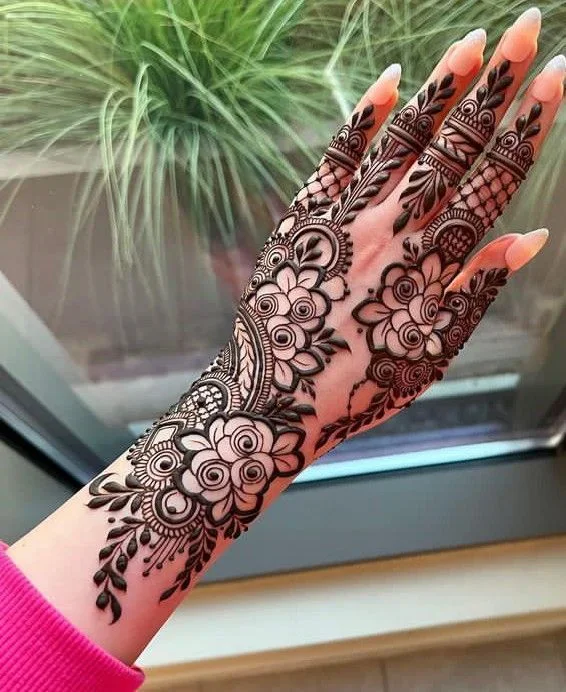
PAISLEY PRINT
Paisley designs are another prevalent motif in the realm of henna. Traditionally associated with fashion, these curving shapes hold an auspicious symbolism representing fertility. In this instance, they seamlessly intertwine with flowers and mandalas, adorning the palms and extending down each finger.
BRIGHT PURPLE
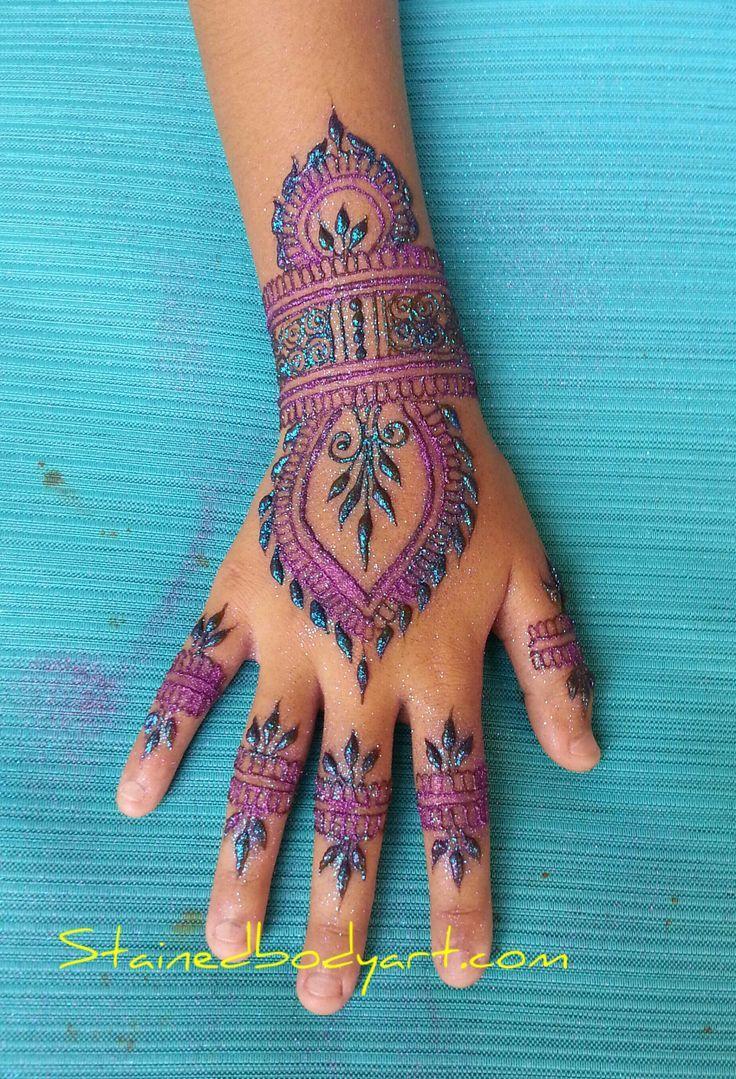
Henna designs typically come in the colors of white, red, black, or gold, but you have the option to choose another captivating hue. Ahead of her Jewish-Pakistani wedding, this bride opted for mehndi art in a vibrant purple shade, perfectly complementing her beaded frock. The artwork showcased a intricate design of mandalas, lace details, and alternating bands.
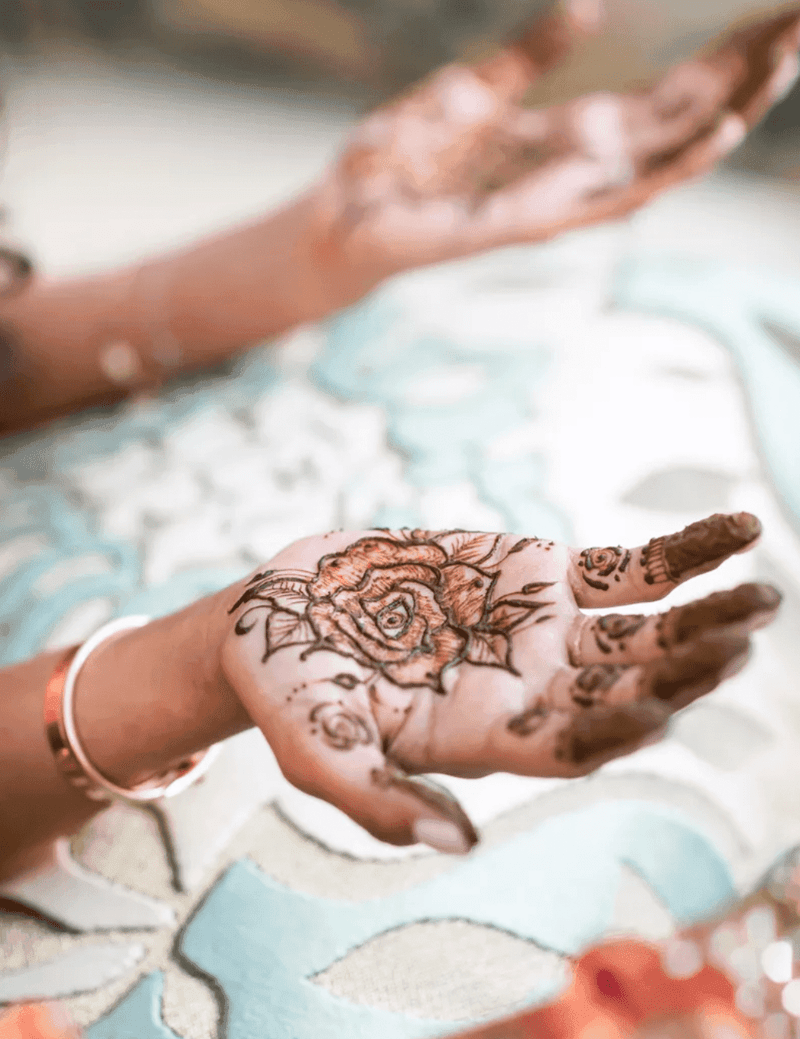
BIG BLOOMS
Although flowers commonly grace wedding henna designs, we appreciate the eloquence of this solitary bloom. The petals gracefully highlight the natural curve of the bride’s index finger and echo the beaded buds on the lace sleeves that cascade to her wrists. In a harmonious touch, the groom also showcased a corresponding vine mehndi on his pinky finger during their enchanting autumnal wedding in Minneapolis.
CALL TO ARMS
For those embracing multiple outfit changes, much like this bride did at her Wes Anderson–inspired wedding in Baja California, take advantage of the skin exposure. The cohesive twisting design of the mehndi, spiraling from her fingertips to her elbows, adds a captivating touch.
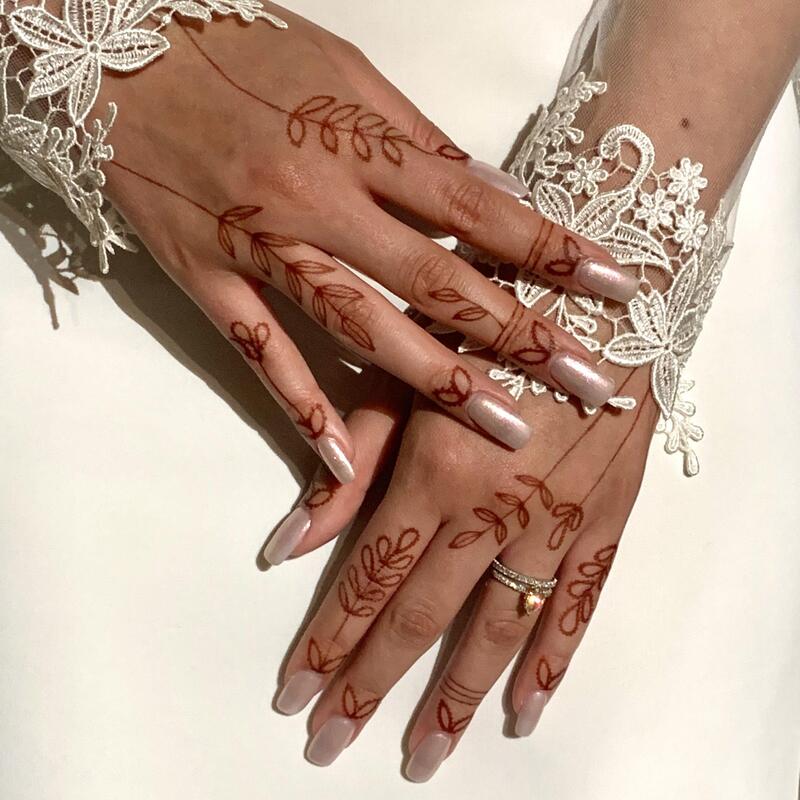
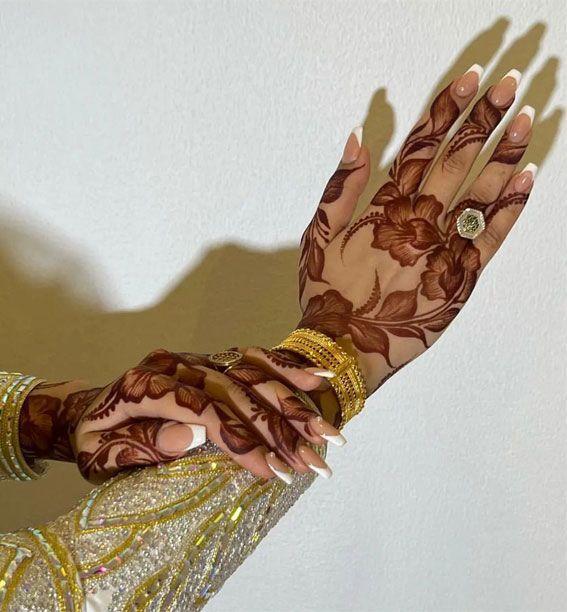
NUPTIAL VINES
Vine and leaf motifs within henna designs symbolize strength, devotion, and perseverance. While this mehndi artwork carries significant meaning, it’s the leafy fingertips that truly capture attention. The flourishing vines extend onto the backs of the hands and fingers, elegantly highlighting the wedding and engagement rings.
FULL COVERAGE

Opting to showcase henna art from your fingertips to your elbows is a visually striking decision for your design. During this multi-day Indian wedding in Mexico, the bride ensured the inclusion of the classic mandala along with other intricate elements such as flowers and swirls.
CONTRASTING COLORS

Why settle for a singular hue when you can flaunt multiple? This bride chose a hand-focused design that blended contrasting tones, making a statement at her wedding weekend in New Hampshire. Paired with jet black, the vibrant orange color truly stood out.
GLOVE-LIKE DESIGN
Certain brides choose henna designs that serve as a bold fashion statement. The mehndi art on this bride, done ahead of her modern Indian wedding in Los Cabos, Mexico, takes on the appearance of a stylish glove. Featuring netted detailing on the fingers and scalloped edges resembling lace trim on the wrists, it exudes a chic and fashionable look.
COMPLEMENTARY DESIGNS
Certainly, choosing details and symbols that reflect your identity and relationship is crucial, but it’s also essential to consider how your henna designs will complement the rest of your ensemble. Take this bride, for example, who displayed an elbow-length masterpiece in red and black for her fashion-forward, bohemian wedding. She opted for nude polish on her fingernails to ensure that the artwork didn’t overshadow her nails.
CONCLUSION
Easy henna hand designs are not just patterns on the skin; they serve as a canvas for self-expression. Henna is not limited to hands but extends to henna on foot designs as well. Whether drawing from tradition or embracing modern interpretations, brides worldwide use henna to convey elegance, symbolism, and uniqueness in their wedding celebrations.


