
Get ready to make a statement at your prom with these stunning and unique hairstyles. From classic updos to trendy braids and loose waves, there’s a style to suit every taste and occasion. Whether you’re looking for something glamorous, edgy, or simply elegant, this collection has something for everyone.
VOLUMINOUS BRAIDED PONYTAIL
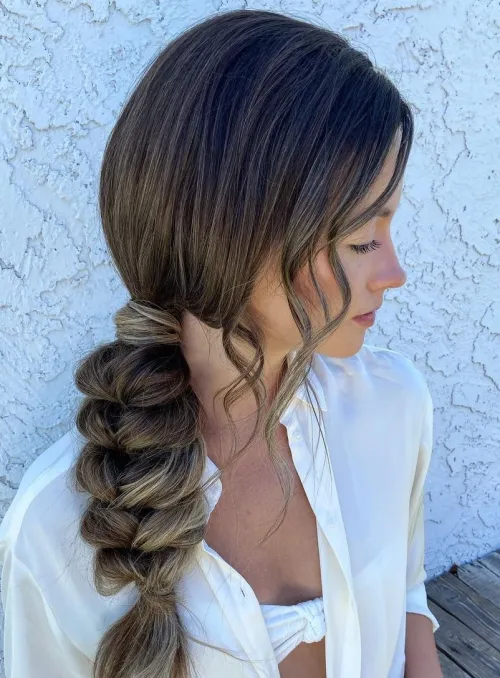
We can’t get enough of this chunky side plait for prom—it’s both textured and smooth. If you have naturally straight hair that struggles to hold a curl, this hairstyle is perfect for you.
BRAIDED BUN WITH TWISTS
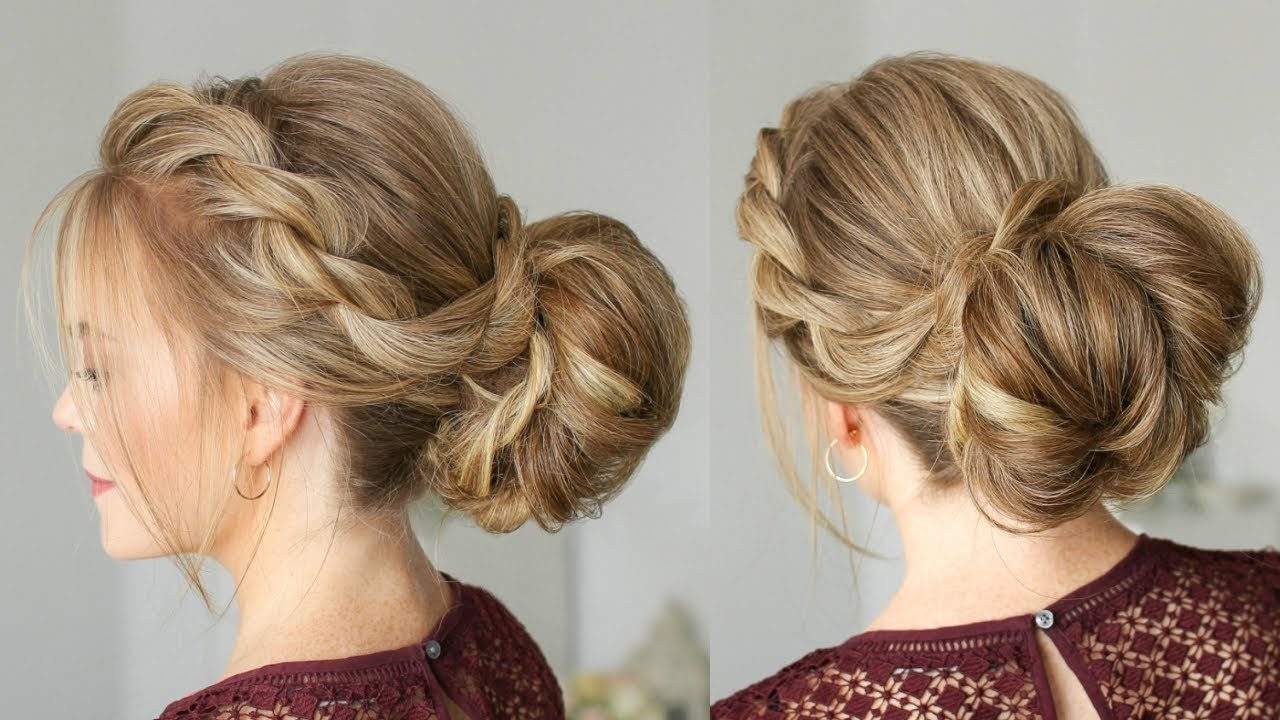
Sophisticated and elaborate hairstyles are the perfect complement to open-shoulder sparkly dresses. We’re particularly drawn to the rope braid details around the front, which add a personalized touch to this stunning look.
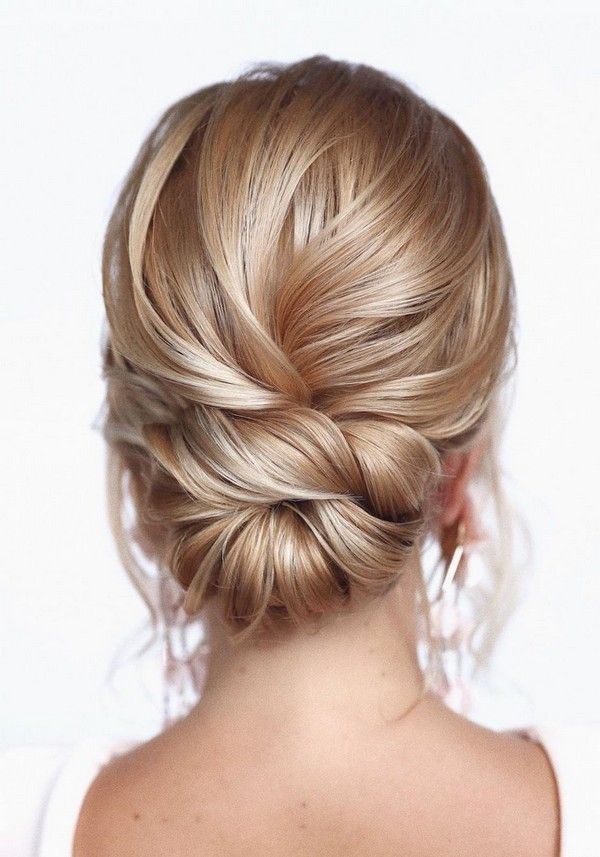
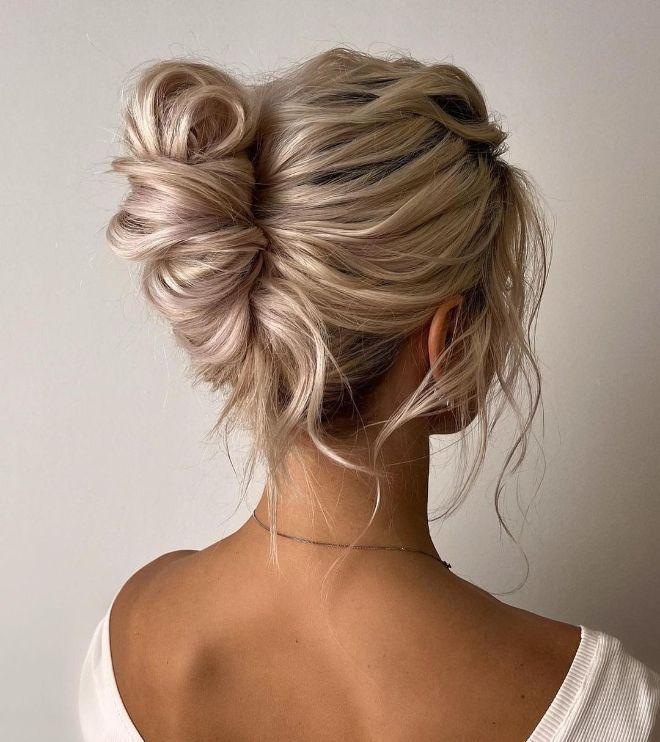
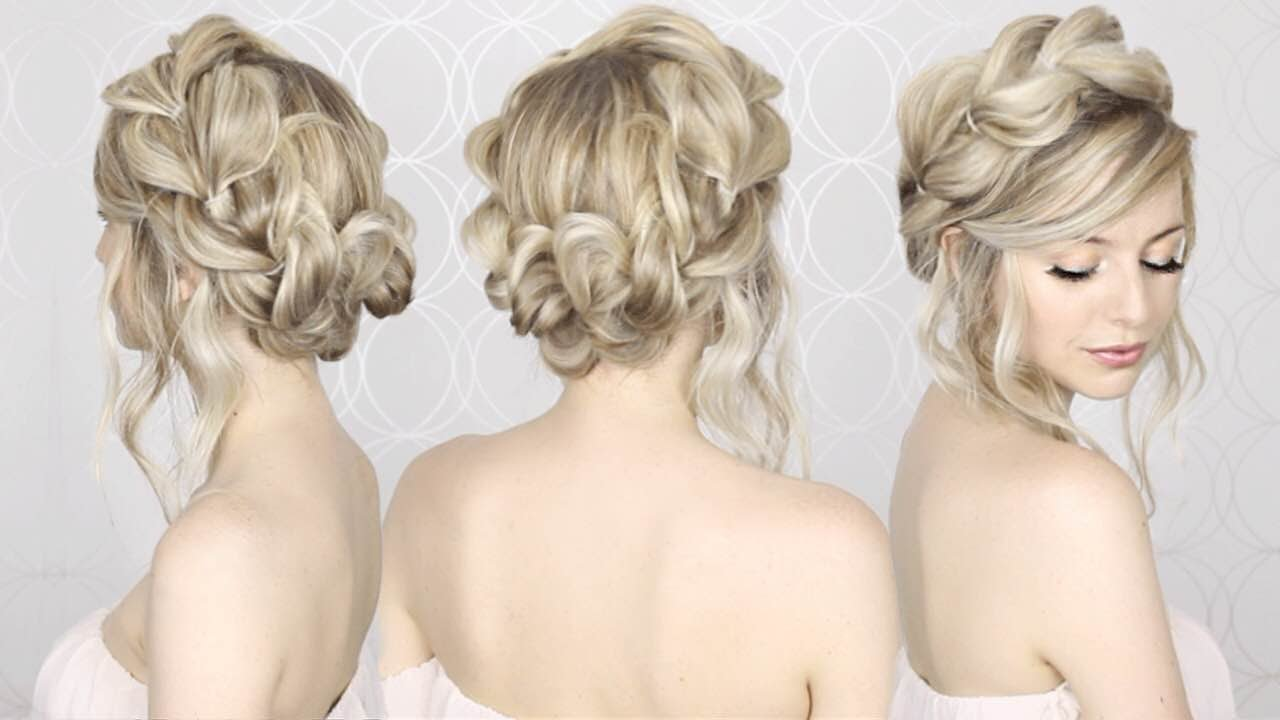
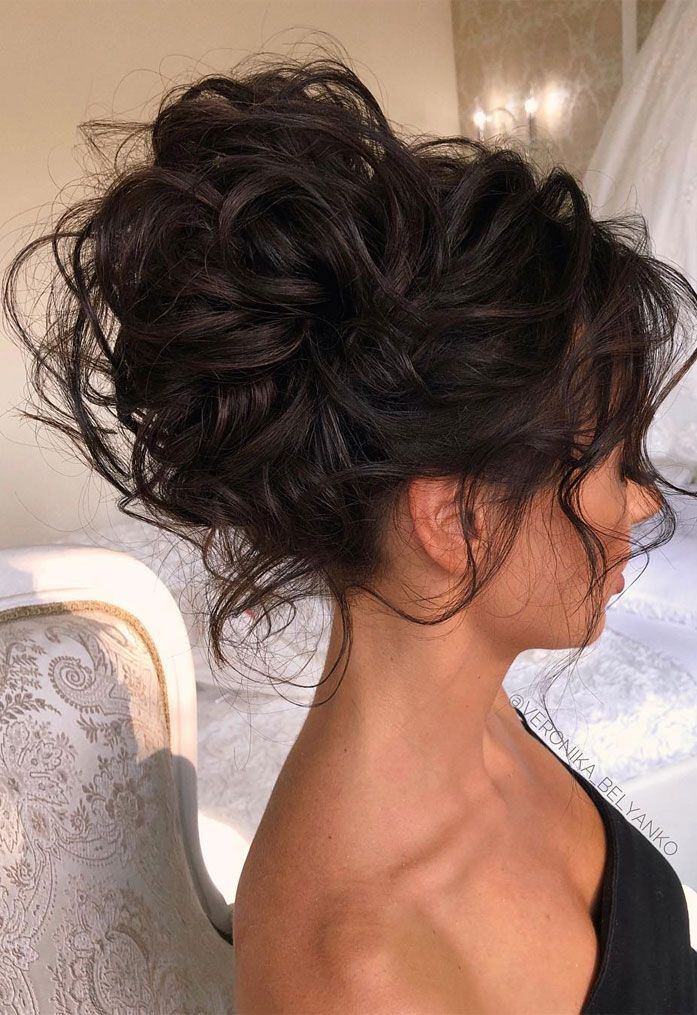
HIGH MESSY BUN WITH WAVY WISPY BITS
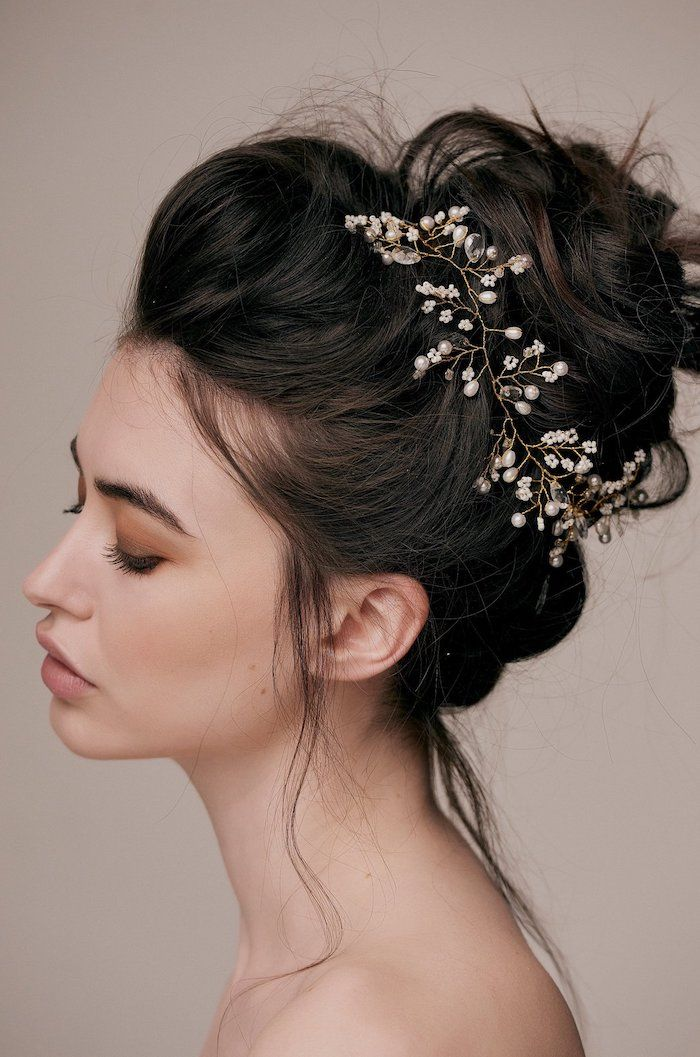
Thinking about doing your own prom hair? This hairstyle is perfect for you: it’s easy to create but looks sophisticated and elegant, making it ideal for a special night out.
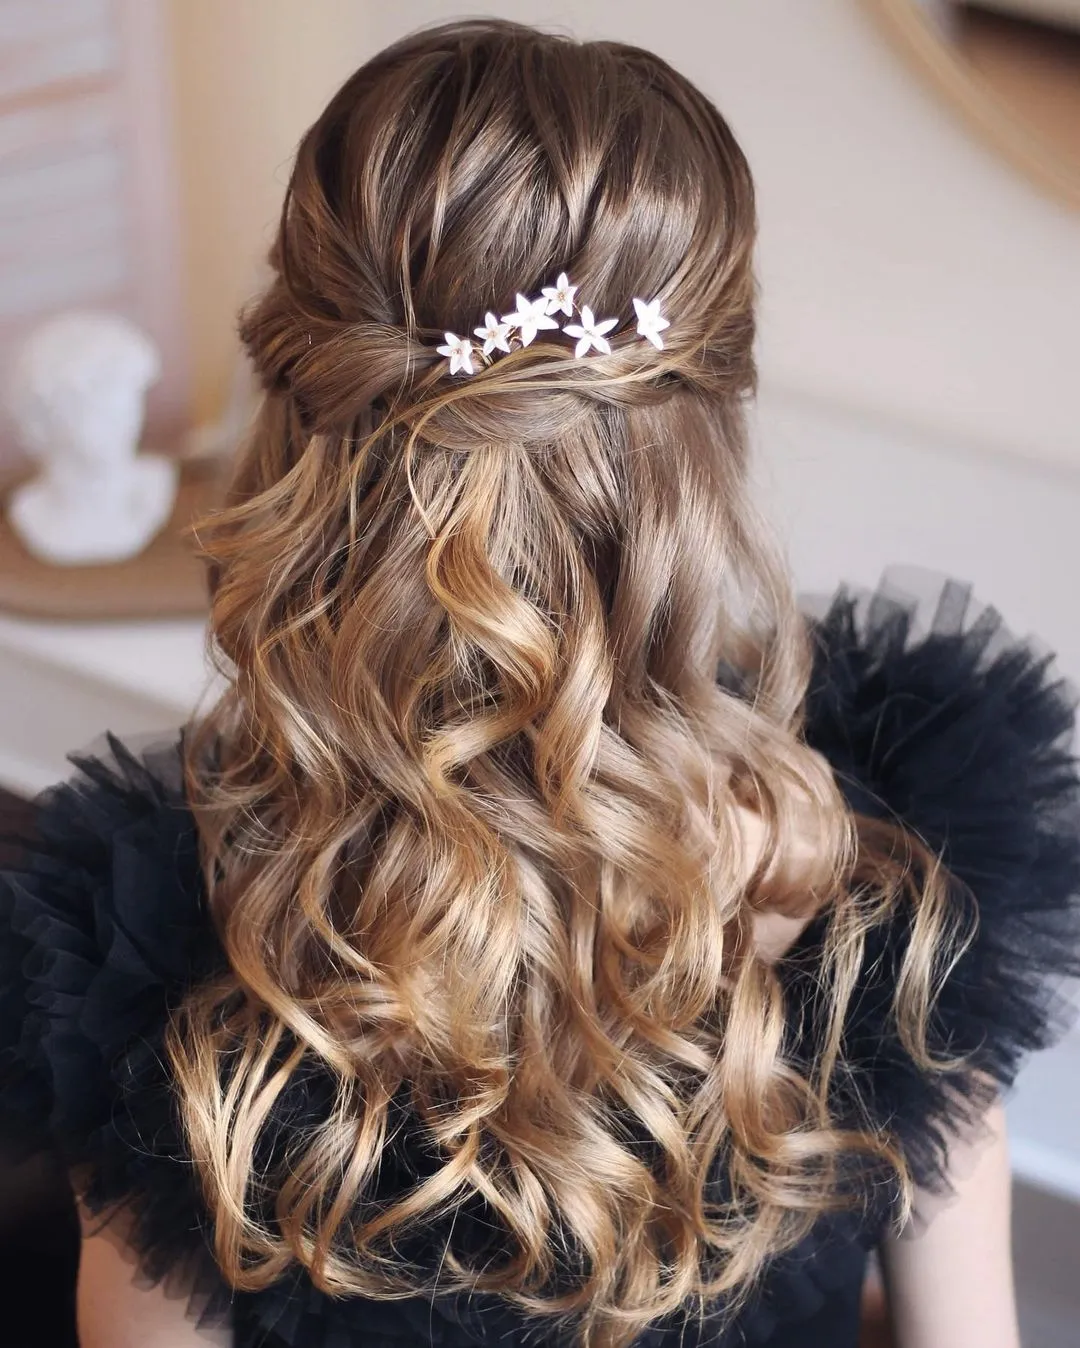
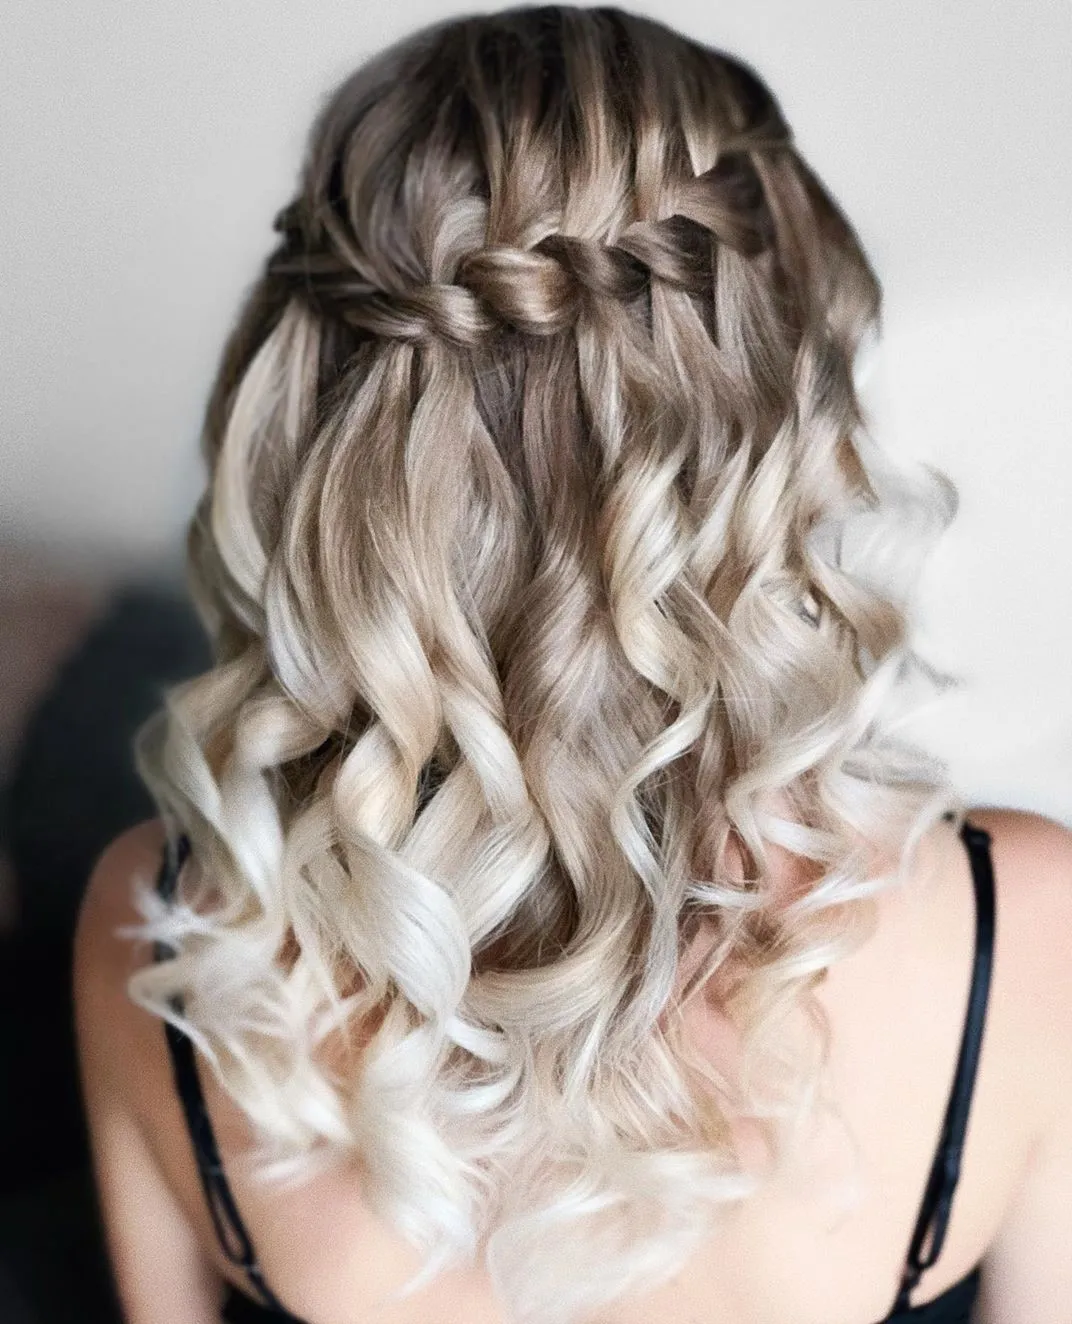
SOFT WAVY PROM HALF UP HAIRSTYLE
A soft, feminine half-up style is a perfect choice for those with medium hair length. To add a touch of glamour, consider accessorizing with crystal bobby pins or a clip for a sparkling and elegant look.
TEXTURED WAVES AND A FLOWER BAND
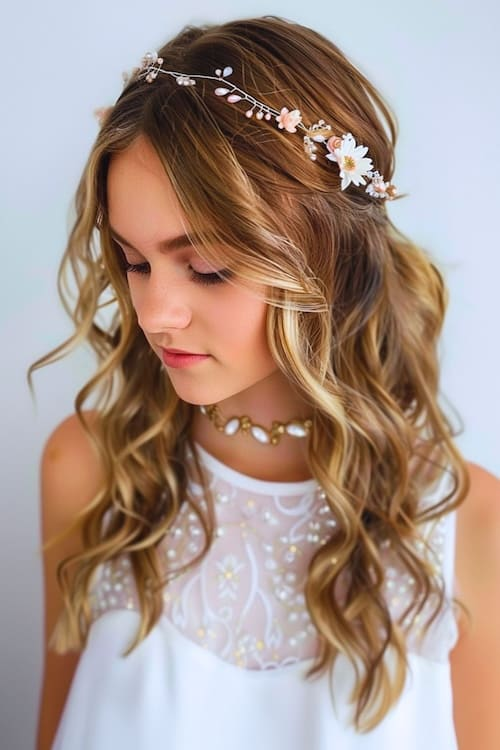
If none of the prom updos caught your eye, simply curl your hair and leave it down. You’ll need straighteners or a curling iron, along with some strong or medium-hold hairspray to keep your curls in place.
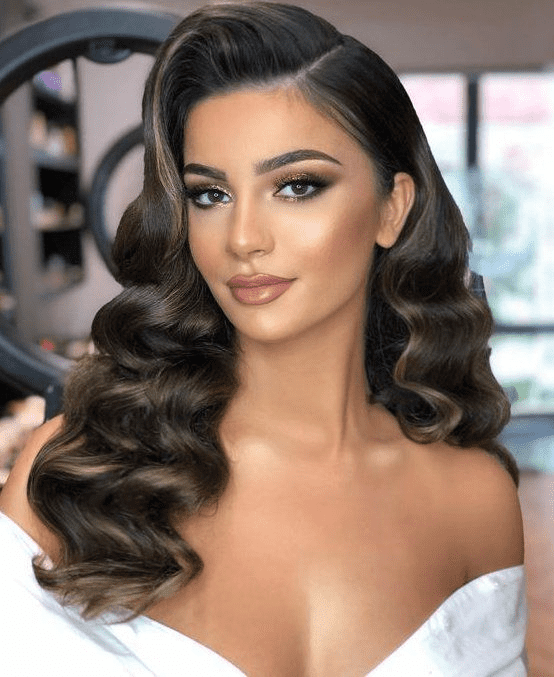
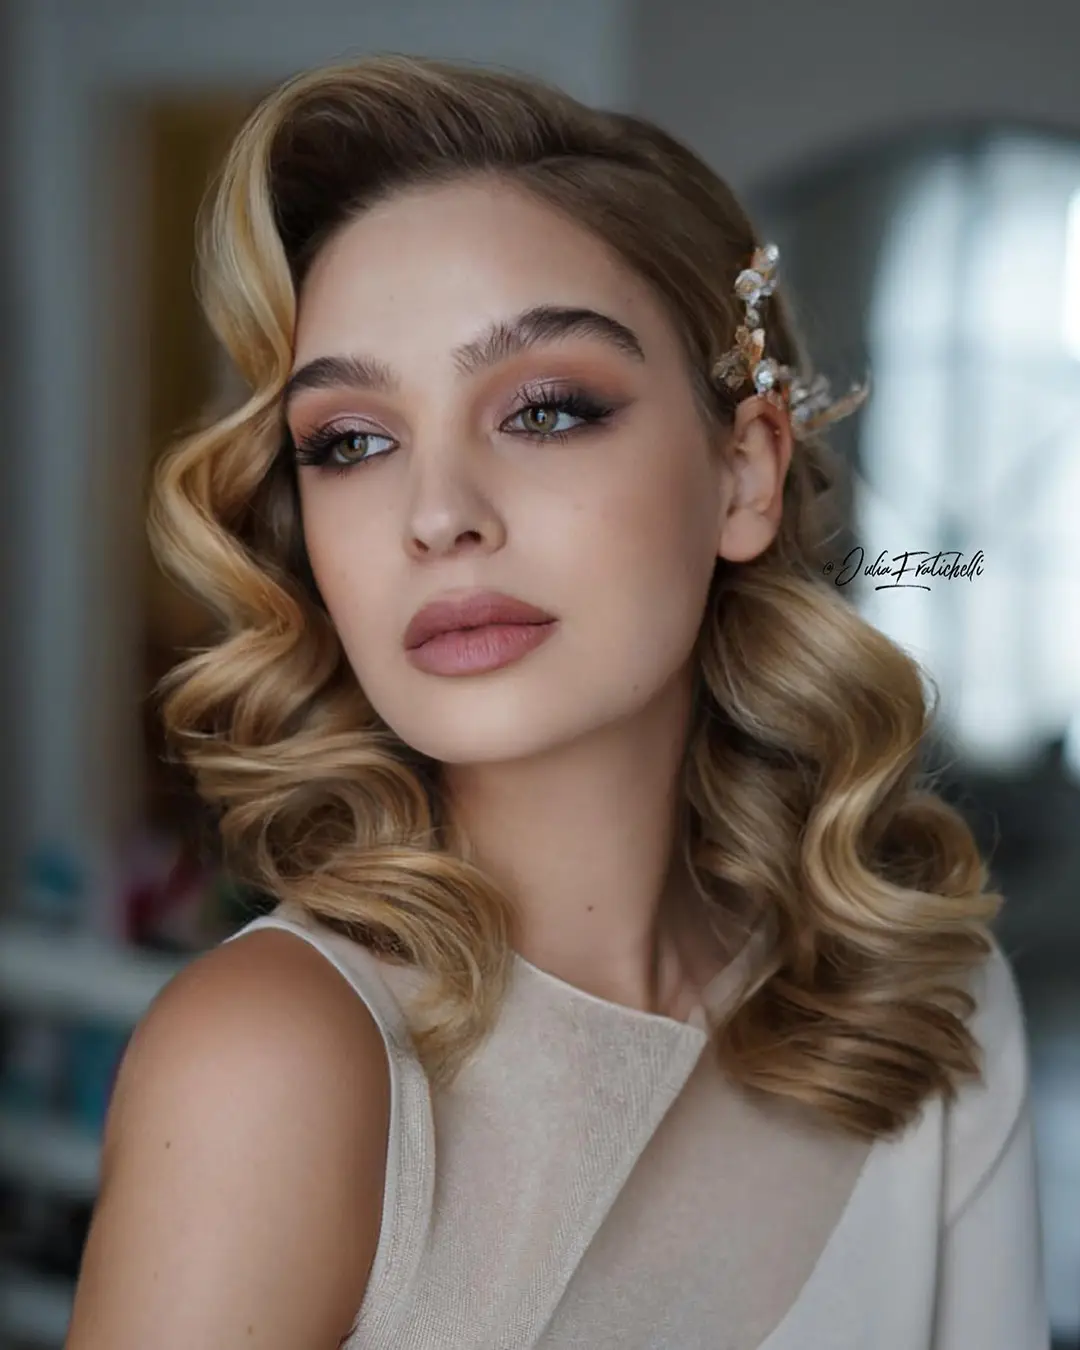
HOLLYWOOD WAVES FOR PROM
This vintage-inspired hairstyle is a fantastic way to showcase your long hair. Set your hair in pin curls and gently brush them out for a classic look. If you’re unsure about doing it yourself, consider asking a professional hairstylist to create this elegant style for your prom.
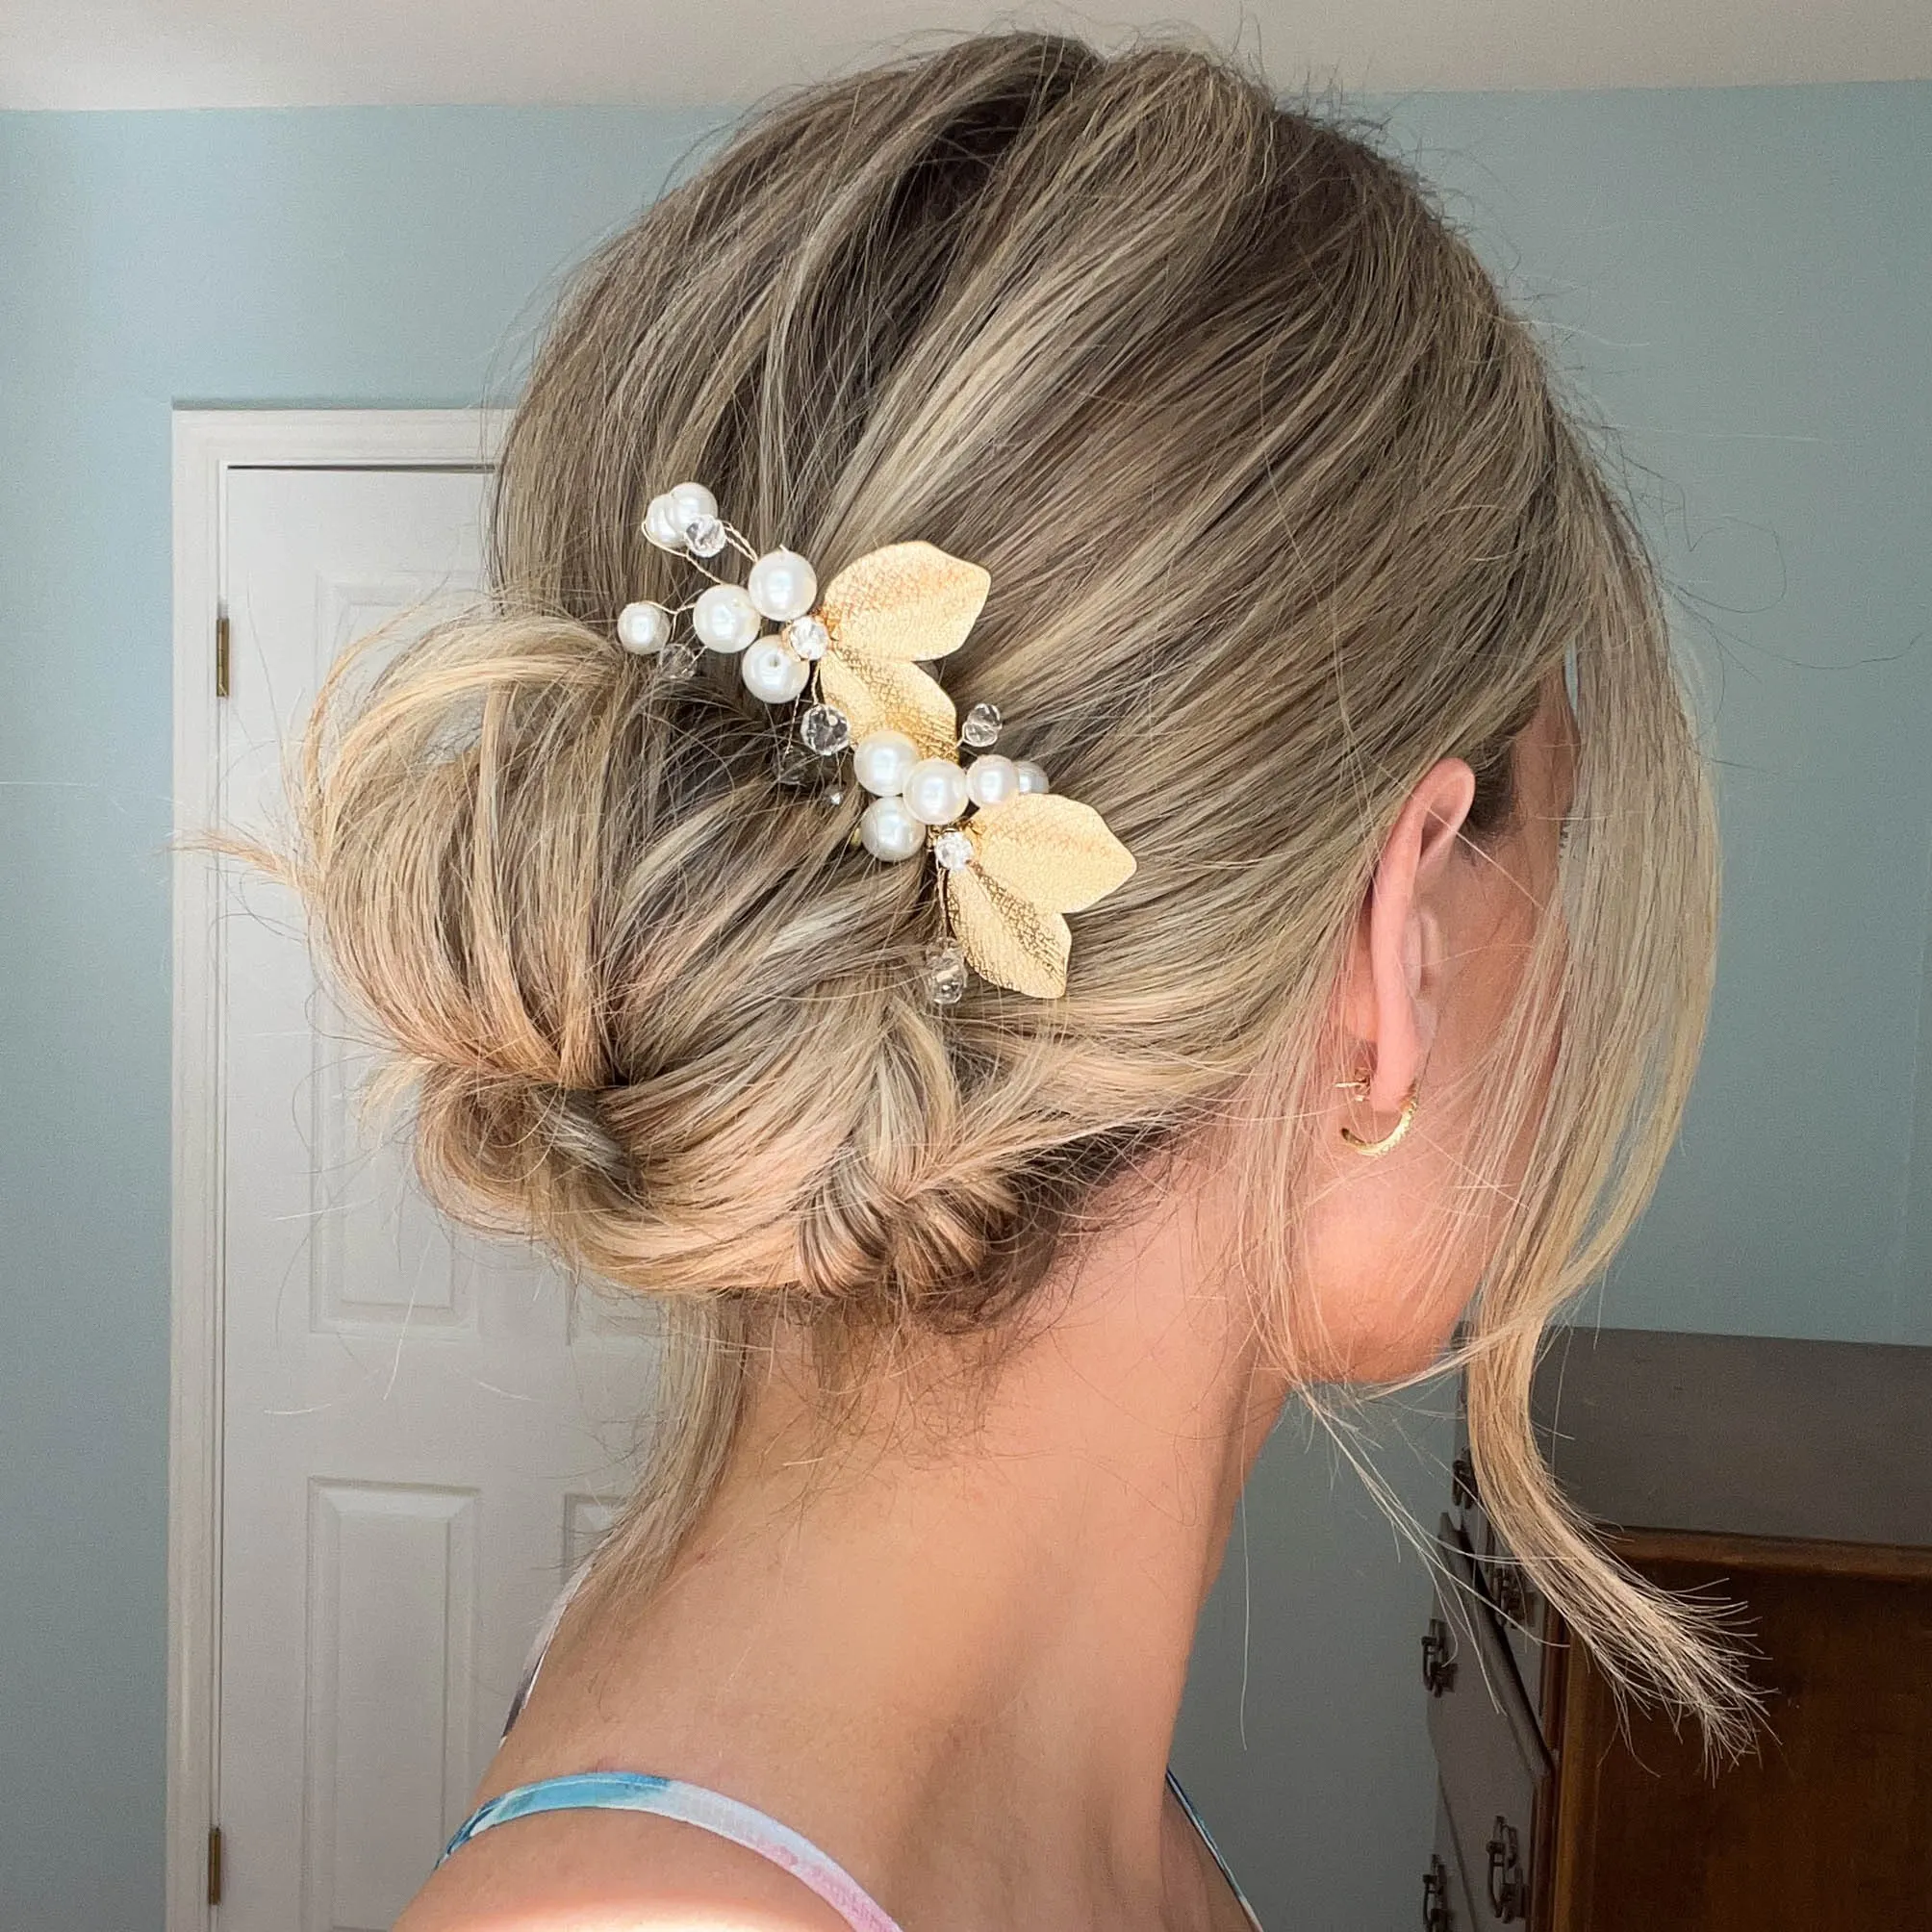
POLISHED CHIGNON PROM HAIR
Still undecided on a prom updo? Choose a chic, classic chignon and elevate it with a few pearl pins for a touch of elegance and sophistication.
HIGH BUN WITH FRINGE LOCKS
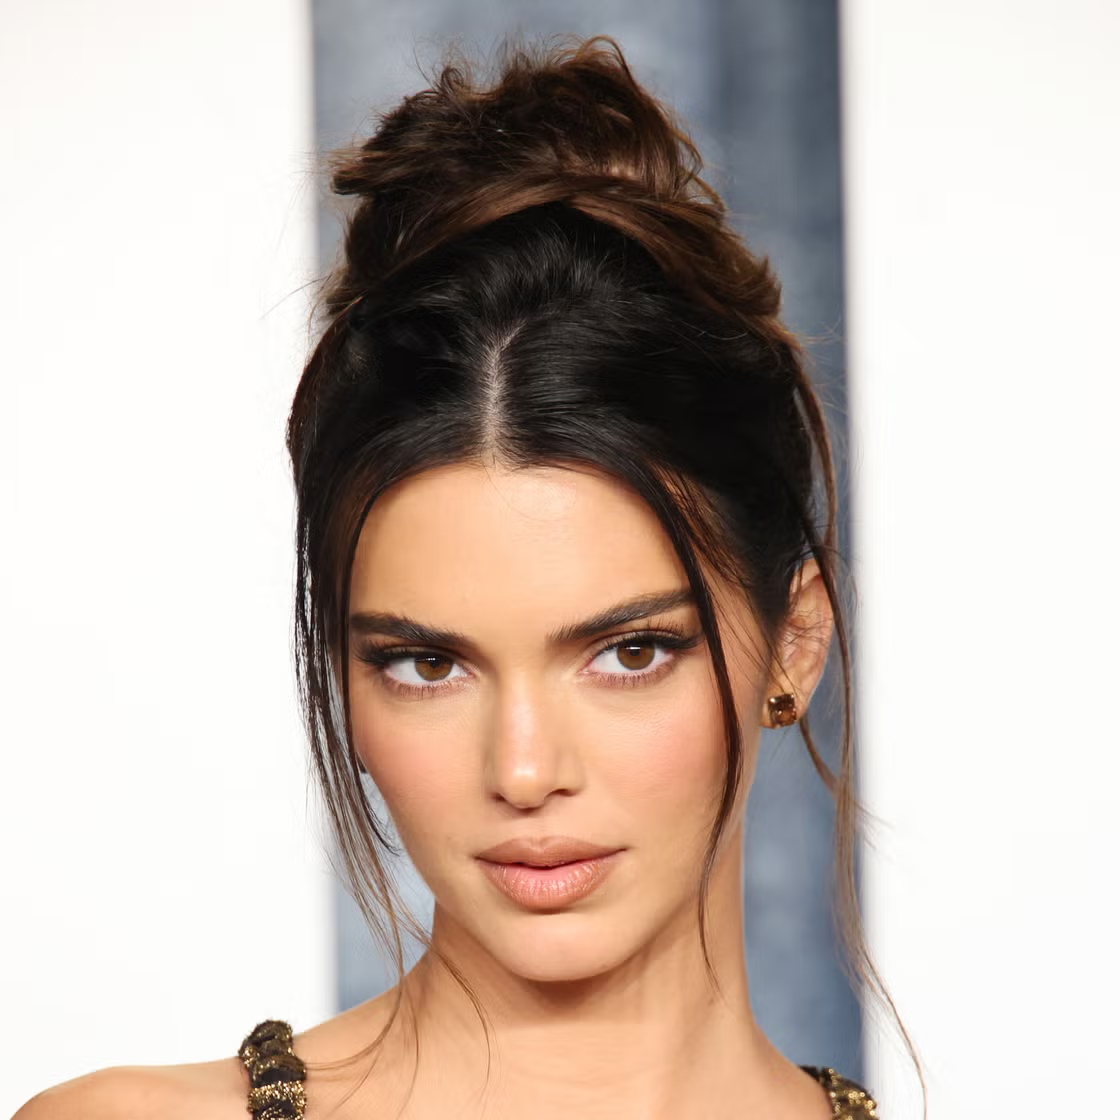
Bun hairstyles continue to be a timeless choice for prom, providing universally flattering elegance. It’s an ideal option for someone who values simplicity with a touch of sophistication and allure.
PULLED BACK BRAIDS AND CURLS
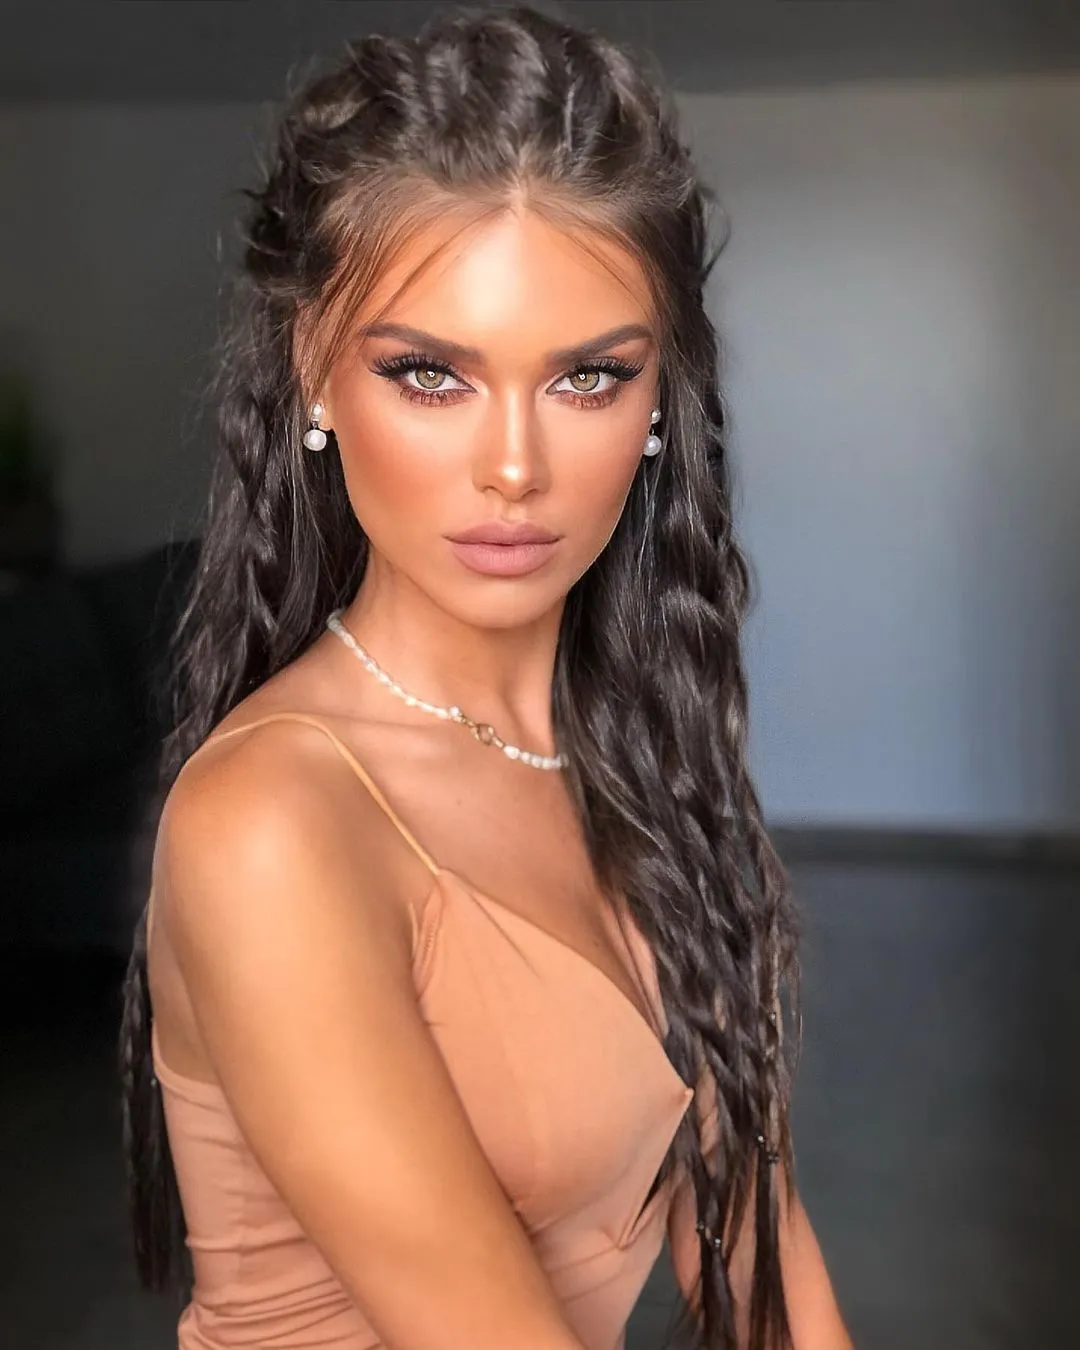
Braids and curls make a lovely combination for romantic dates, birthdays, and, of course, prom night. For a prom look, complement the hairstyle with trendy latte makeup to enhance your overall elegance.
MESSY PROM FRENCH TWIST
By adding texture to your prom hair, you can easily elevate the classic style to a whole new level of sophistication. For this charming French twist, for example, introducing some carefree waves will be enough.
GLAM HOLLYWOOD CURLS
Even if your prom doesn’t involve an actual red carpet, your hair can still have red-carpet-worthy appeal. Choose stunning slick-back waves to infuse your prom look with a touch of Old Hollywood glamour.
HALF UP SOFT CURLS

This style is perfect for women with naturally wavy or curly hair. Bridal hair specialist Sarah Whittaker recommends using hydration lotion and heat protectant to keep your curls moisturized and well-maintained.
HALF PONYTAIL WITH SWEEPING BANG
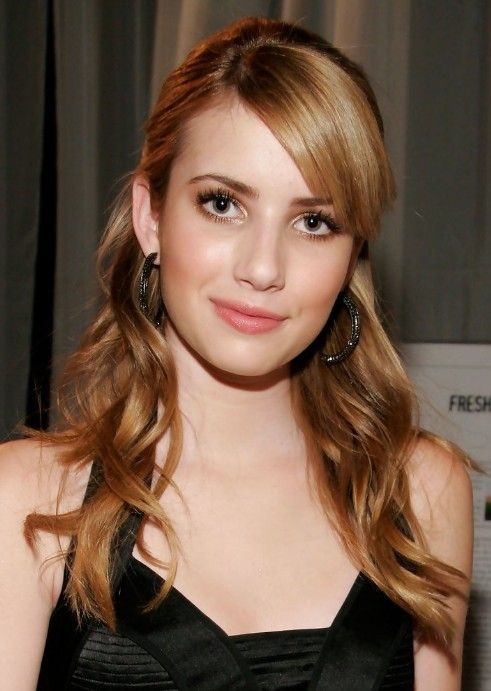
Choosing a half-up hairstyle is a dependable option for those who are unsure about their prom hair. If your hair is naturally thick and straight, skip the curls and highlight your smooth locks with a half ponytail for a sleek and polished look.
SLEEK AND STRAIGHT PROM STYLE
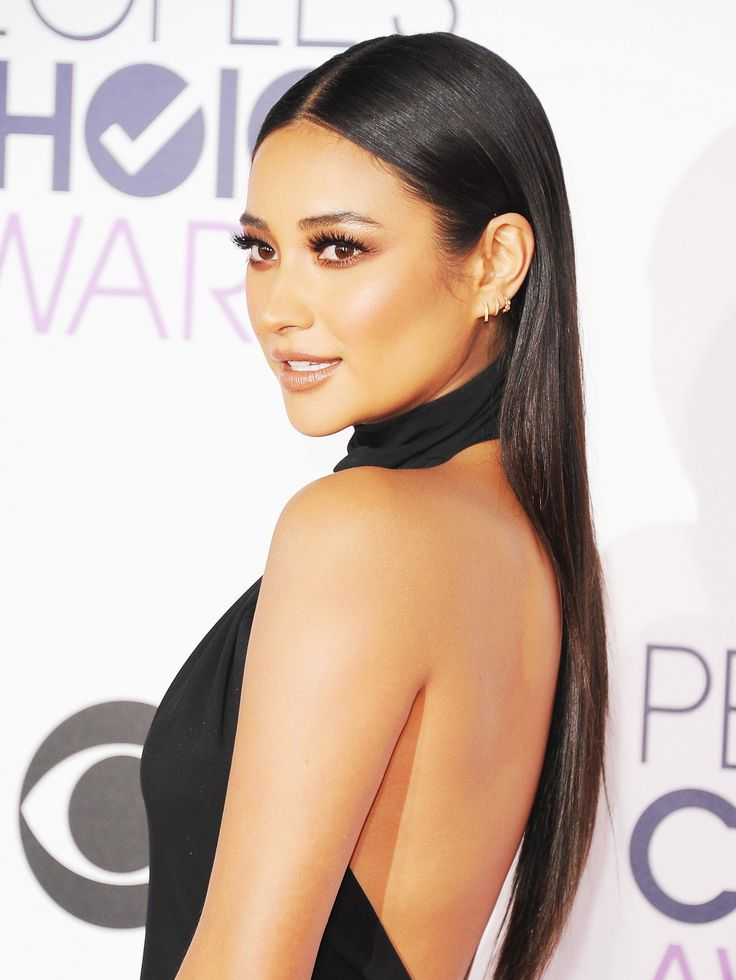
Those with straight hair don’t need to resort to curls, as long, sleek hair is equally attractive. Plus, you won’t have to worry about whether your curls will last throughout the prom night.
LOVELY TWISTED LOW BUN
This textured updo is perfect for brides and graduates alike. For a bit of edge, add some tousled locks throughout your hair and especially in the bun itself, giving your low bun a stylish and effortless look.
ELEGANT SOFT WAVES AND BANGS
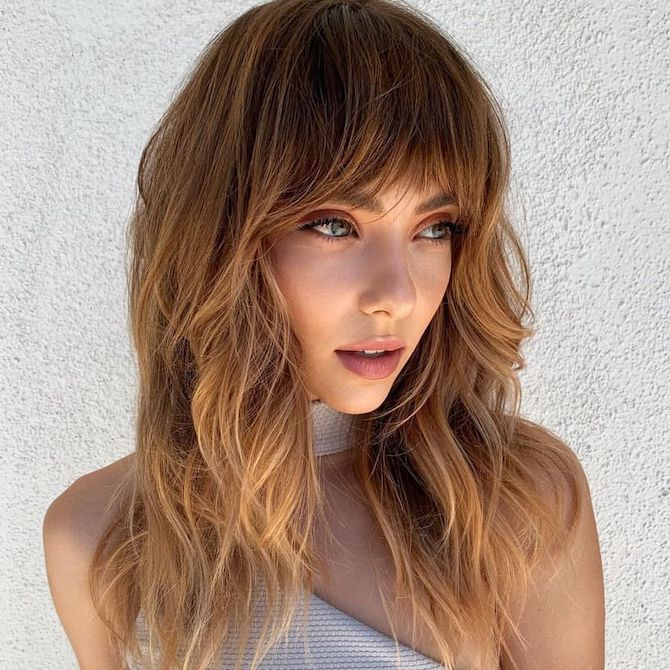
To create a lively and spirited vibe at prom, opt for a hairstyle featuring bouncy curls and bangs that gently frame your face. Enhance the look by choosing a rich hair color that complements your skin tone.
HALF UP HALF DOWN PROM HAIRSTYLE WITH TWISTS
A romantic and feminine half-up style is a versatile choice that complements various outfits and occasions. Its textured look and elegant appeal make it a popular option for prom hairstyles, especially for those with long or medium hair.
BRAIDED BUN WITH FACE FRAMING TENDRILS
A voluminous and textured hairstyle with chunky French braids and loose curls around the face is a stunning choice for prom. Pair it with an open-back dress and complete the look with elegant dangly earrings for a glamorous and sophisticated appearance.
LOW MESSY BUN
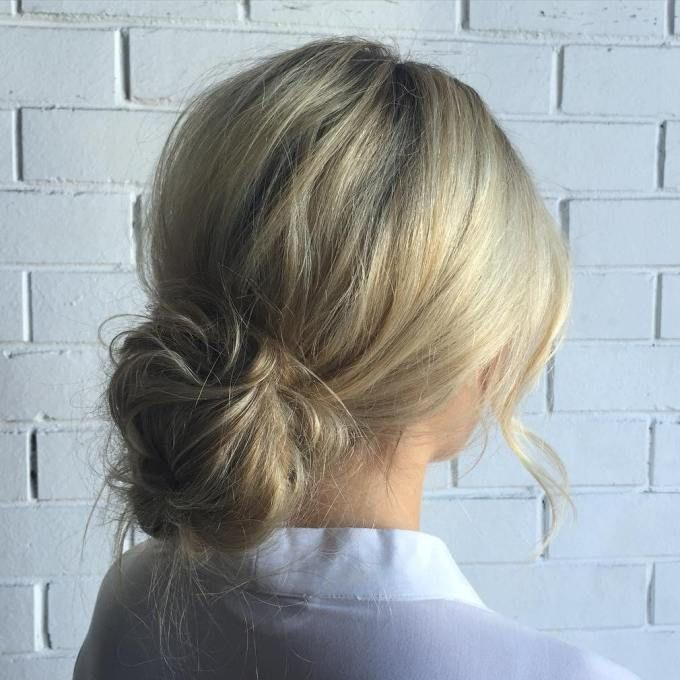
For a sophisticated and ladylike look, consider this elegant prom updo. Its soft, textured style is both chic and understated, making it a perfect complement to your gown.
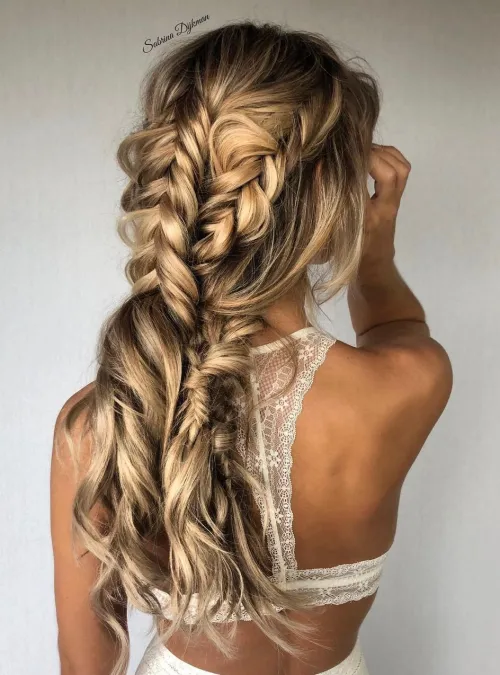
SOFT BRAID WITH REAL FLOWERS
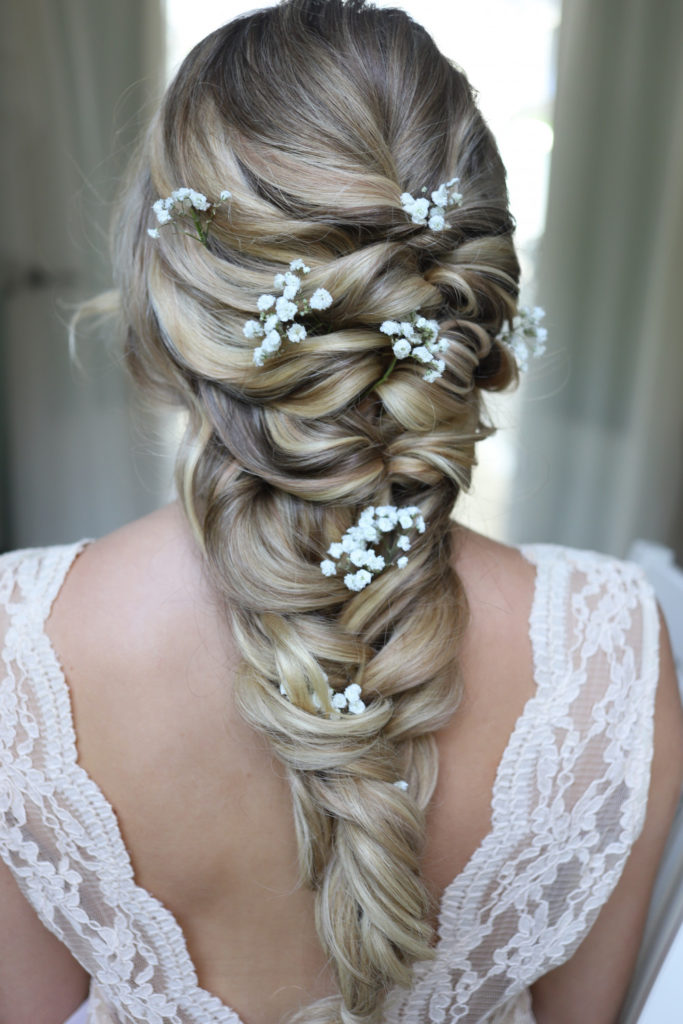
Embrace your inner mermaid with this tousled and free-spirited braid prom hairstyle. Combining multiple braiding elements, this look is perfect for those seeking a bohemian and whimsical style. Complete the ensemble with wildflowers that match your dress for a truly enchanting appearance,
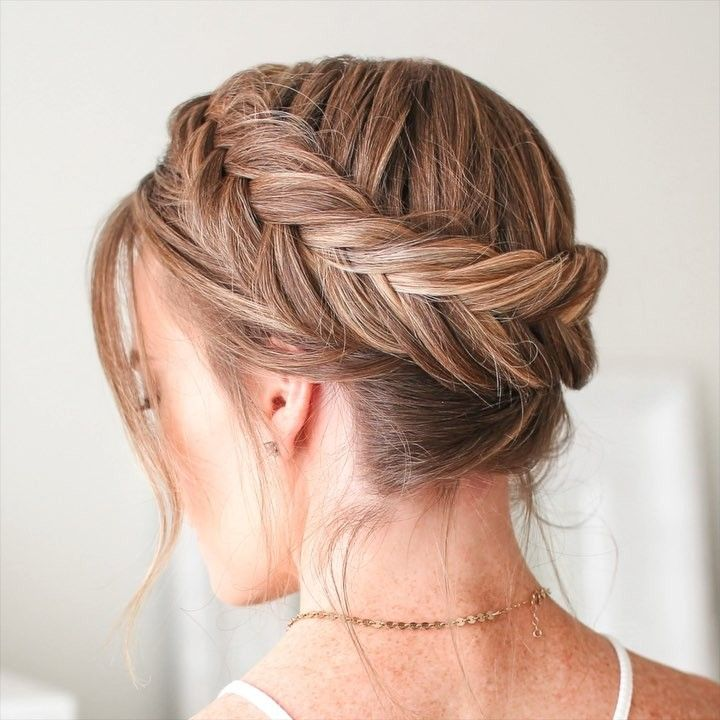
CROWN BRAID PROM HAIRSTYLE
A crown braid, with its textured and voluminous style, is a popular choice for those seeking a romantic yet rustic look. Suitable for various hair lengths and textures, this hairstyle involves creating two Dutch or French braids on each side of the head and joining them at the back to form a crown-like effect.
FULL GLAM BRUNETTE BUN
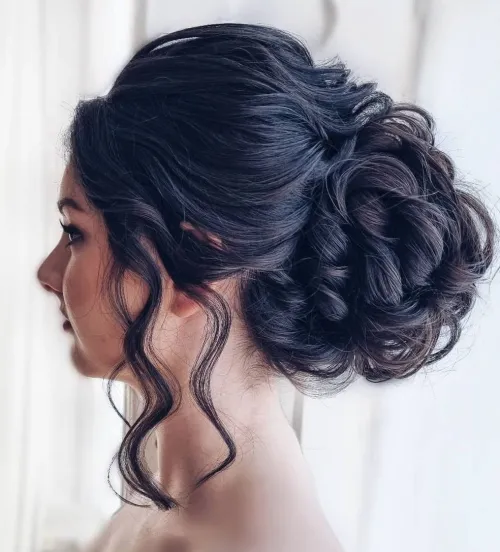
A large, textured bun is a popular choice for prom hairstyles, especially when paired with a ballgown. This elegant updo perfectly complements a formal dress, giving you a red carpet-worthy appearance.
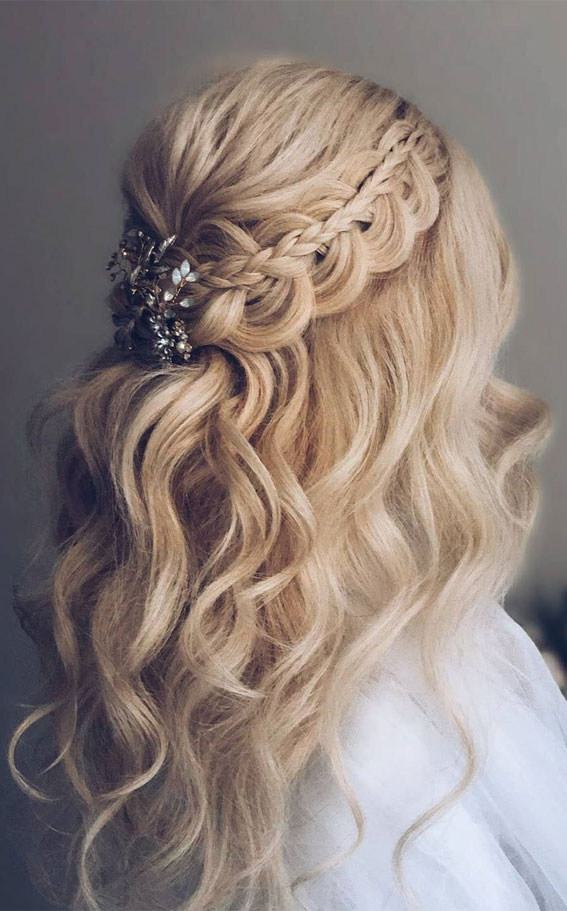
MESSY BUN WITH TWO FISHTAIL BRAIDS
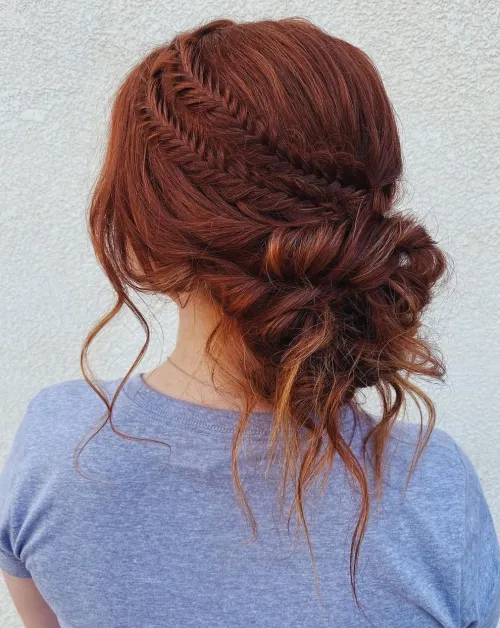
If you’re unsure how to style your hair for prom, consider this stunning combination: a braided crown paired with a loose, messy bun. This dreamy duo will create a show-stopping look that’s both elegant and effortlessly chic.
TOUSLED FISHTAIL BRAID DUO
If updos aren’t your style and half-up hairstyles feel too casual for the big night, try a relaxed and effortless look. Consider using clip-in extensions to add fullness and length, giving your hair a touch of extra glamour without the fuss.
TEXTURED HIGH BUN WITH LOOSE CURLS
Add some oomph to your hair with this adorable updo that features plenty of volume and texture. Loose tendrils around the front will frame your face and soften your features, creating a flattering and stylish look.
LOW PONYTAIL HAIRSTYLE FOR PROM
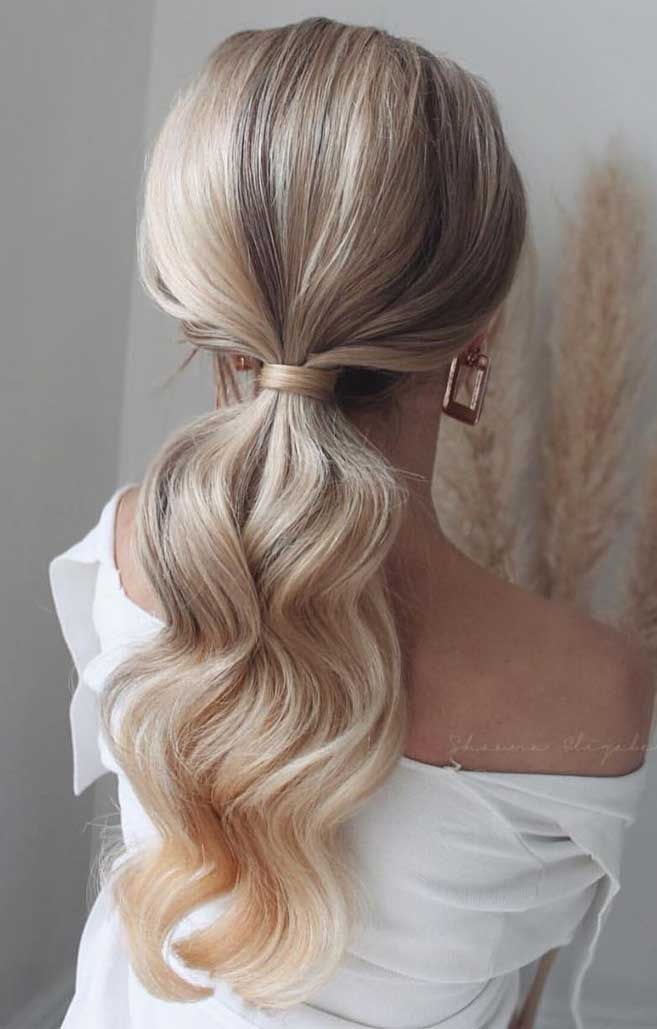
Ponytails are a top choice for prom hairstyles right now. Versatile and trendy, they work beautifully with medium to long hair. To perfect the look, go for loose, brushed-out waves rather than tight curls for a more relaxed and stylish finish.
LOW TWISTED BUN
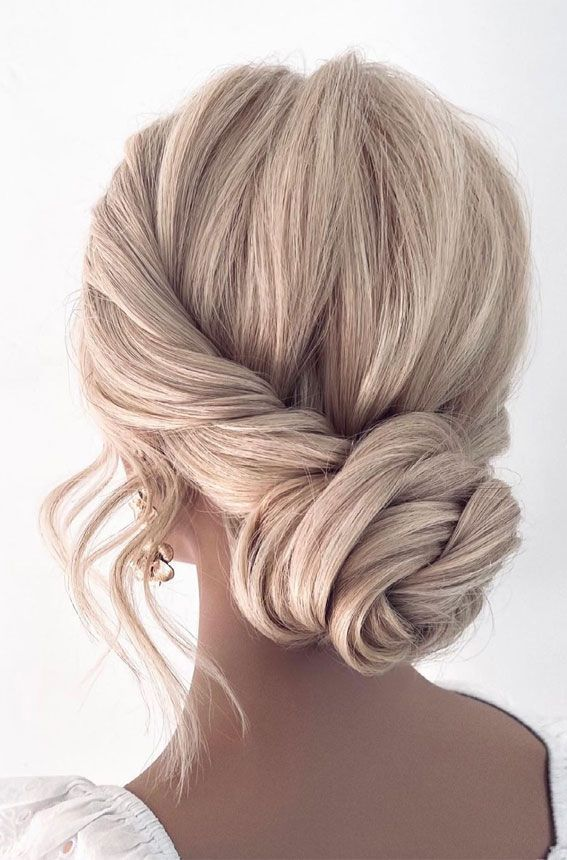
Buns are a top choice for prom hairstyles for long hair due to their versatility and elegance. This charming updo keeps your hair neatly in place, so you won’t have to worry about curls falling out or feeling overheated.
BIG AND BEAUTIFUL CURLY HAIR
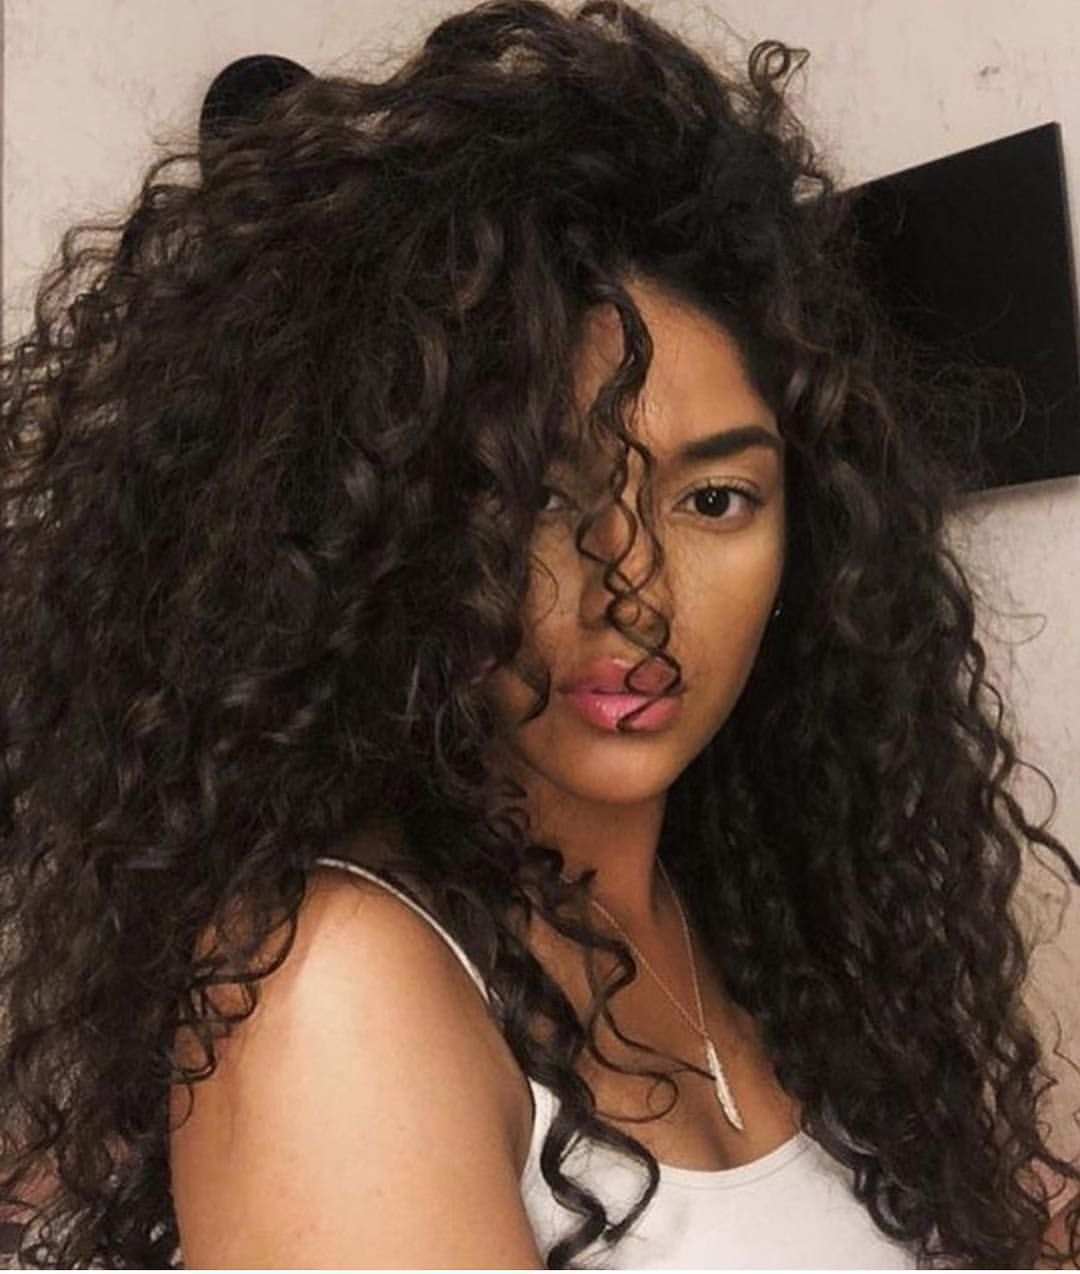
If you’re lucky enough to have naturally curly hair, enhance your curls by blow-drying with a diffuser and using a curl-enhancing serum. Sweep your hair to one side for a striking and stylish look that highlights the natural texture of your locks.
SOPHISTICATED HIGH PONYTAIL FOR PROM
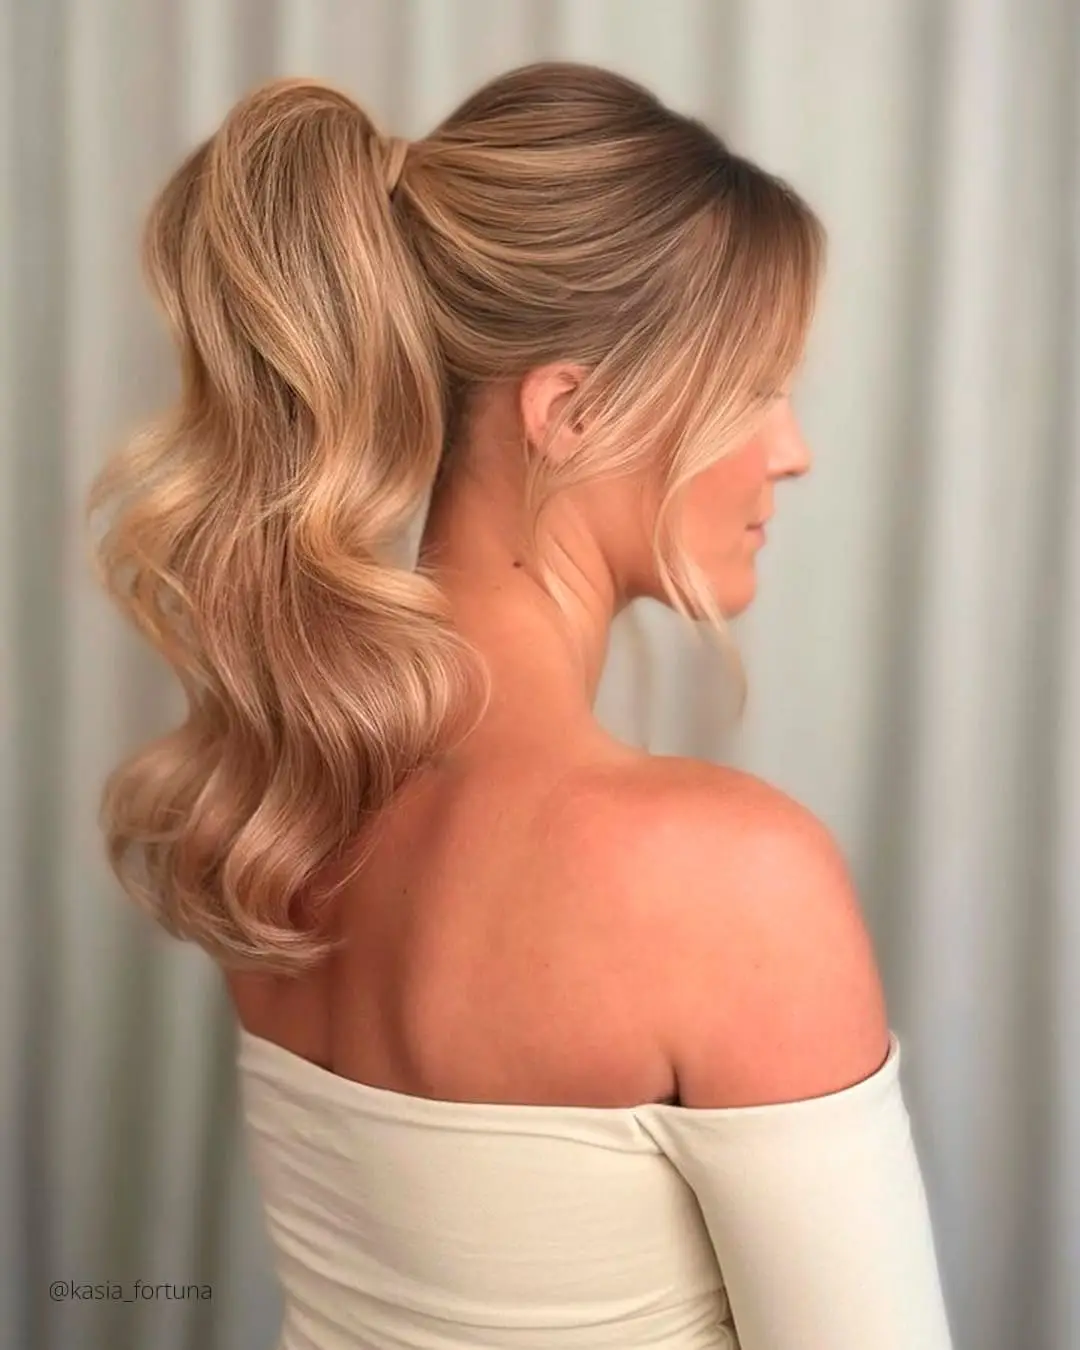
We adore this super sleek Hollywood waves high ponytail. Ideal for prom or any special occasion, this elegant and understated hairstyle is sure to make a stunning impression.
HALF UP STYLE WITH LOOSE CURLS AND FISHTAIL BRAIDS
The half-up, half-down style is a perfect compromise for those who prefer not to wear all their hair up but want something more elegant than just letting it fall freely. Enhance this look with a fishtail braid and a small plait on one side for added charm and sophistication.
CONCLUSION
In short, exploring the many unique prom hairstyles for 2025 will provide endless possibilities for you to express your personal style and make a memorable impression. Whether you choose an elegant bun, a chic braid or voluminous curls, there is always the right hairstyle that can completely enhance your prom look and boost your confidence. From timeless classics to modern trends, there is a perfect hairstyle for everyone to shine on their special night. Choose a hairstyle that reflects your personality from these 30 hairstyles and enjoy a truly unforgettable prom night.


