If you’re eager to eliminate those stubborn brown spots, the good news is that there are various solutions available. While brown spots are typically benign and pose no health risks, it’s crucial to monitor any that change in color, size, or texture and to visit your dermatologist regularly. Although treatment for benign spots isn’t necessary, their removal or fading can be both cosmetically and psychologically rewarding. After all, who wouldn’t want a clearer, more even skin tone?
What should I know about spots?
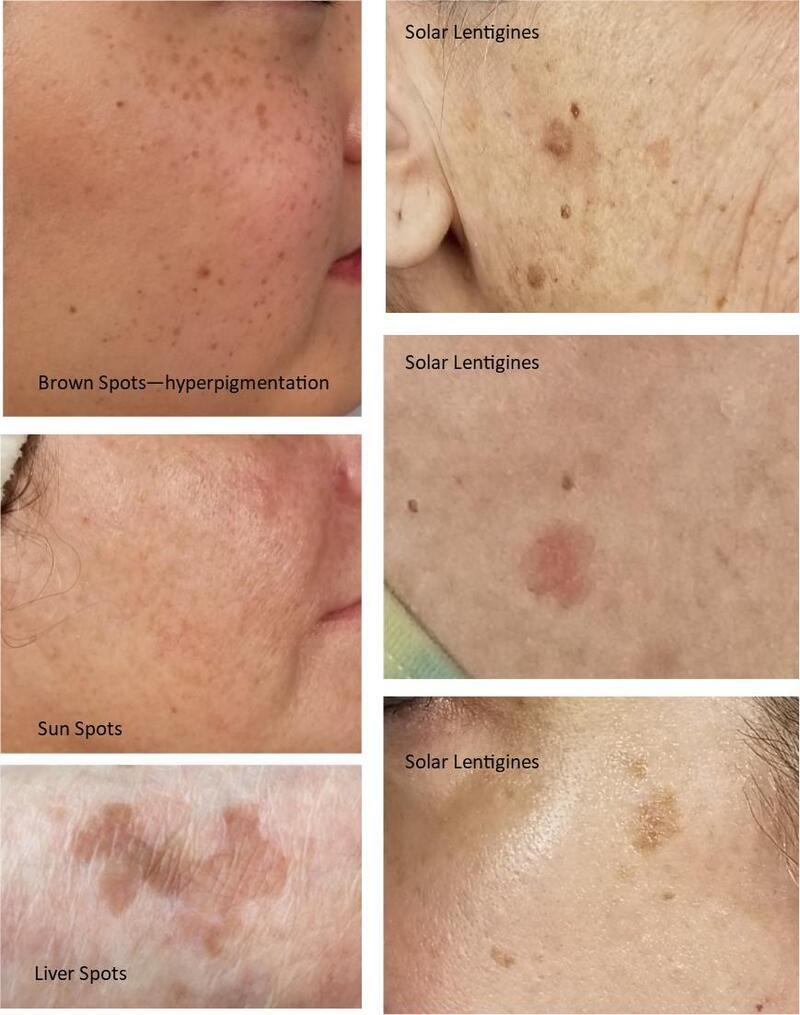
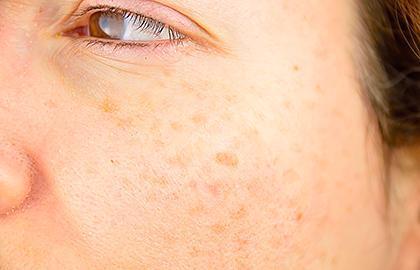
Brown spots, also known as age spots, liver spots, solar lentigines, or sun spots, are flat, oval areas of increased pigmentation that vary in size. Typically gray, tan, brown, or black, these spots appear on areas of the skin that have received the most sun exposure over the years, such as the face, backs of hands, tops of feet, forearms, shoulders, and upper back. They can affect anyone, regardless of sex or race; however, brown spots are more common in individuals with fair skin, a history of frequent sun exposure, regular tanning bed use, and those over 40 years of age.
What causes spots?
Brown spots are caused by overactive pigment cells known as melanocytes. Ultraviolet (UV) light accelerates the production of melanin, the skin pigment responsible for a tan or darker skin. After years of UV exposure, melanin can clump together or be produced in high concentrations, leading to the appearance of brown spots.
There are three main types of benign skin pigmentation resulting from overactive melanocytes: freckles, solar lentigines, and melasma.
FRECKLES
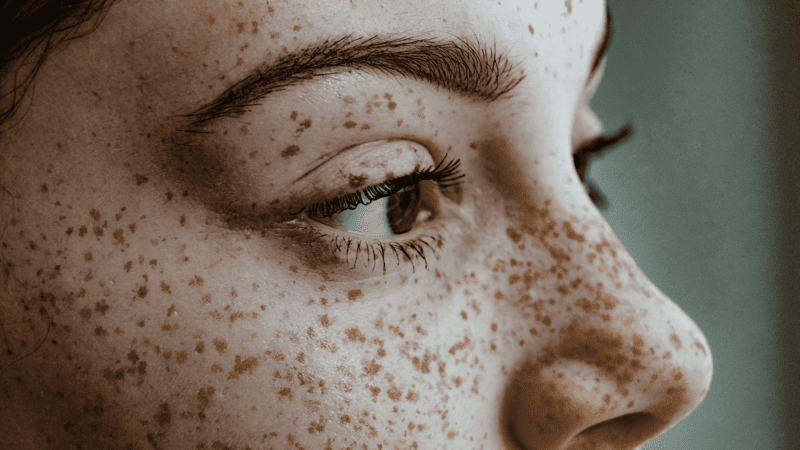
Freckles can be seen as a genetic gift from Mother Nature. These small, flat spots range in color from pale to dark brown and result from an overproduction of melanin in response to UV light exposure. Typically, real freckles are found on younger skin, especially in children, and are most common among individuals with red hair and fair skin that burns easily. They tend to be more noticeable in sun-exposed areas during the summer months and often fade during the winter season.
SOLAR LENTIGINES
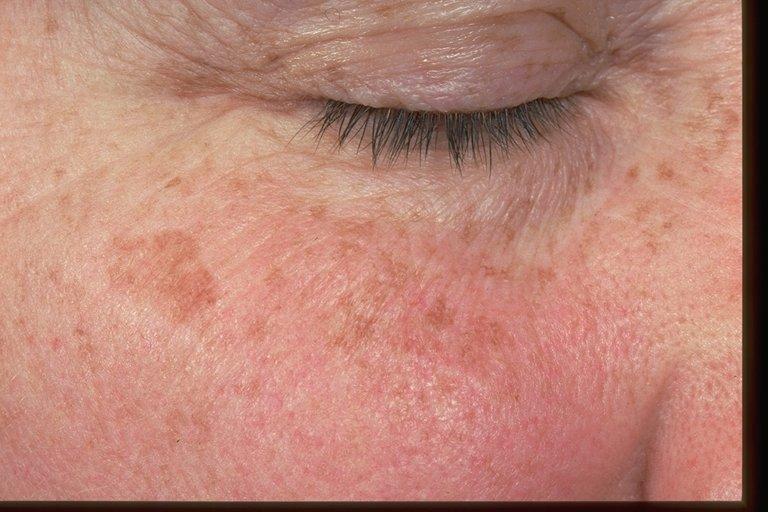
Solar lentigines, commonly known as age spots, are dark patches that develop from prolonged sun exposure and are generally harmless. These flat, actinic keratosis lesions can appear yellowish, gray, or light brown, with clearly defined edges. Some may have a dry or slightly scaly texture. Unlike freckles, which are smaller and more diffuse, lentigines are larger and more distinct, typically found on areas such as the face, hands, and chest, accumulating over time due to sun exposure. Unlike freckles, they do not fade in winter and can occur anywhere on the body; they are usually benign.
On the other hand, actinic keratosis represents another form of sun damage that may have the potential to become cancerous. These spots are flat or slightly raised, reddish-brown, and have a more abrasive appearance, often with a scaly surface. Surprisingly, nearly 60 million Americans are affected by this type of sun damage to their skin.
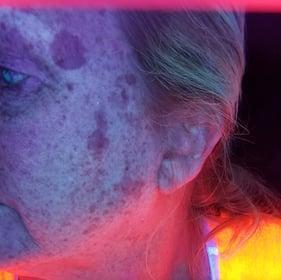
A Woods Lamp (black light) evaluation allows us to detect cumulative skin damage before it becomes visible to the naked eye. It can be eye-opening to observe the extent of sun damage that has already occurred. Since there is always a chance that new lesions may develop in the future, the best preventive measures include avoiding sun exposure, using a broad-spectrum high-SPF sunscreen, and wearing protective clothing and hats.
MELASMA

If you have a Mediterranean-type olive complexion or are of Latin, Asian, or Middle Eastern descent, you are more likely to develop melasma. This condition manifests as large dark patches of pigmentation caused by overactive melanocytes, often appearing as mask-like areas on the cheeks, temples, above the upper lip, and/or forehead. Melasma is believed to be influenced by excessive or repeated sun exposure, as well as hormonal changes. It can develop during the use of birth control pills, hormone replacement therapy, or pregnancy, which is why it is sometimes referred to as a “pregnancy mask.” While melasma may be visually unappealing, it is not dangerous and does not cause any physical discomfort.
Another type of brown spot is known as post-inflammatory hyperpigmentation (PIH), which occurs as a result of skin injury. PIH is more common in individuals with darker skin tones and appears as patches triggered by inflammation from conditions such as acne, eczema, or trauma. After the initial condition resolves, dark spots may remain, and their fading over time can vary from person to person.
Words of caution and when you should see a doctor
Another type of brown spot is known as post-inflammatory hyperpigmentation (PIH), which occurs as a result of injury to the skin. PIH is more prevalent among individuals with darker skin tones and manifests as patches triggered by inflammation from conditions such as acne, eczema, or trauma. After the initial skin condition resolves, dark spots may remain, and their tendency to fade over time can vary from person to person.
What spots can be treated?
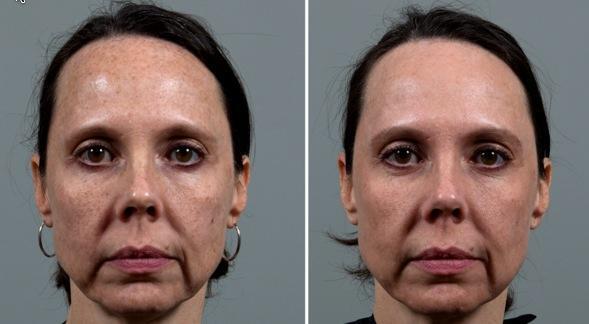
Brown spots, including liver spots, freckles, solar lentigines, and other benign pigmented lesions that develop after years of sun exposure, can be removed or faded from almost any area of your body. Conditions such as melasma, sun-related brown spots, and post-inflammatory hyperpigmentation can also be effectively treated. However, actinic keratoses and any abnormal-looking lesions should be evaluated and treated by a physician.
Types of spot treatments
Since the pigment is located at the base of the epidermis—the outermost layer of skin—any treatments aimed at lightening brown spots must penetrate this layer effectively.
Medications and prescription lightening creams containing hydroquinone or kojic acid (pigment-bleaching agents) can be used alone or in combination with retinoids (like tretinoin) and mild steroids to gradually fade spots over several months. However, these treatments may cause temporary side effects, including itching, redness, burning, or dryness. It’s essential to use a broad-spectrum sunscreen with an SPF of at least 30 during treatment.
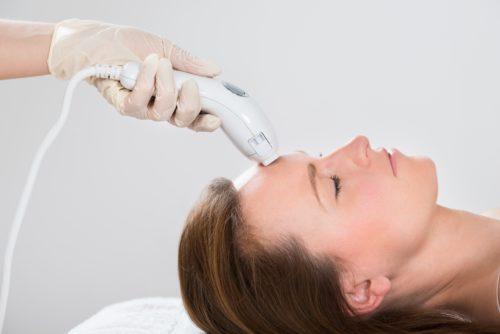
FotoFacial or IPL (Intense Pulsed Light) treatments emit a range of light waves that pass through the skin to target and destroy melanin, breaking up the spots without damaging the skin’s surface. Typically, two to three sessions are required, and after treatment, spots may appear like coffee ground speckles that flake off and gradually fade over several weeks or months. It’s crucial to avoid sun exposure for at least four weeks before treatment and to use sun protection liberally afterward to ensure optimal results.
Cryotherapy, or freezing, destroys the excess pigment by applying liquid nitrogen or another freezing agent to the spots. This treatment is quick but can be painful, and afterward, there may be some discomfort, blistering, or temporary redness and swelling. As the area heals, the skin may appear lighter. Cryotherapy is generally used for single brown spots or small groupings, but it carries a slight risk of permanent darkening of a spot (PIH), lightening of surrounding skin, or scarring.
Chemical peels involve applying an acid that removes the outer layer of skin to allow new skin to grow in its place. Several treatments may be necessary before seeing results, and strong sun protection is advised following the procedure. Temporary redness is common, with a slight risk of permanent changes in skin color.
Microdermabrasion is a less aggressive option that smooths the outer layers of skin using inert crystals to exfoliate. This treatment requires multiple sessions over several months to achieve desired results and is not recommended for those with rosacea or small red veins on the face. After microdermabrasion, mild redness may appear but typically resolves within a few hours, with flaky skin for three to four days. It can be effective, especially when combined with chemical peels.
Non-ablative laser spot removals destroy melanocytes without harming the skin’s surface. At YouBaby Skin Spa, we use a picosecond laser and PICO Genesis Spot treatments, which deliver light deep into the skin at a trillionth of a second. This breaks up melanocytes, allowing them to be eliminated by the body’s lymphatic system. The treated area may darken, resemble bruising, or form a crust for a few days, but fades over the following weeks, improving both the spots and the skin’s texture. Several treatments are recommended to build upon the results of previous sessions as the skin regenerates collagen and absorbs the debris.
Ablative laser resurfacing is a more aggressive treatment that removes sun-damaged cells to refresh the skin and fade spots. This method removes the outermost layer of skin, allowing new skin to grow back, but requires considerable recovery time and healing. One or two treatments can effectively address age spots quickly.
Prevention
To help prevent the reappearance of brown spots and the formation of new ones after treatment, follow these tips to limit your sun exposure:
- Avoid the Sun Between 10 a.m. and 2 p.m.
The sun’s rays are most intense during this time, so try to schedule outdoor activities for earlier or later in the day. - Use Sunscreen.
Apply a broad-spectrum sunscreen that protects against both UVA and UVB rays 15 to 30 minutes before going outdoors. Choose a sunscreen with a sun protection factor (SPF) of at least 30. Be sure to apply it generously and reapply every two hours, or more frequently if swimming or sweating. - Cover Up.
Wear tightly woven clothing that covers your arms and legs, along with a broad-brimmed hat, which offers better protection than a baseball cap or golf visor. Consider clothing specifically designed for sun protection, labeled with an ultraviolet protection factor (UPF) of 40 to 50 for optimal safety. - Never Use Tanning Beds.
Avoid tanning beds, as they can contribute to skin damage and increase the risk of developing new brown spots.
CONCLUSION
Spot removal is not a new concept, and the type of treatment varies, offering different outcomes. In some cases, spots may never be completely eliminated but can fade significantly, becoming much lighter. Proper home care is essential after any removal treatment to maximize your results. Alongside sunscreen, common aftercare typically includes a tyrosinase inhibitor (which targets the enzyme responsible for melanin formation) and a lightening agent.
We design an individualized program tailored to your skin type, the specific spots you have, and the treatment administered. Share your goals with us, and we will guide you to the appropriate treatment options.