Let’s be real—goddess braids are straight-up magical! The moment you get them done, it’s like pow—an instant confidence boost. You’ll be serving looks left and right, channeling your inner queen. There are 36 gorgeous goddess braids hairstyles to obsess over—everything from bold warrior braids to pretty halo plaits. Each one is handpicked to hype up your natural beauty and complement your features, and we guarantee you will say “wow” because of their appeal! These braids transform you into royalty, hunty. Let’s get started!
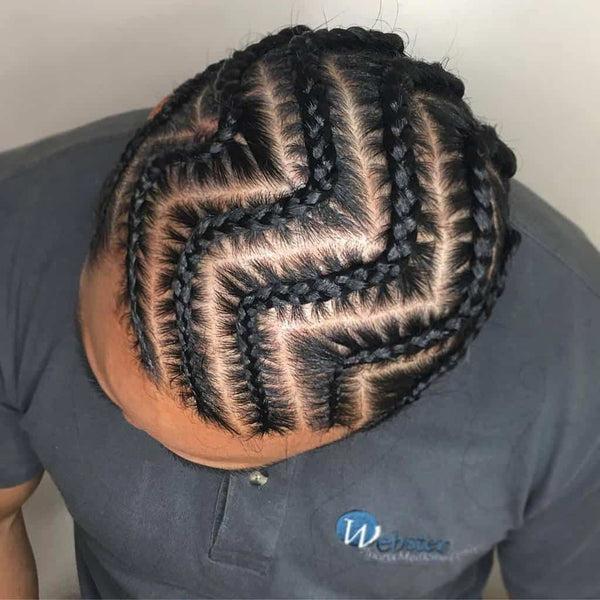
GODDESS BRAIDS IN A ZIGZAG UPDO
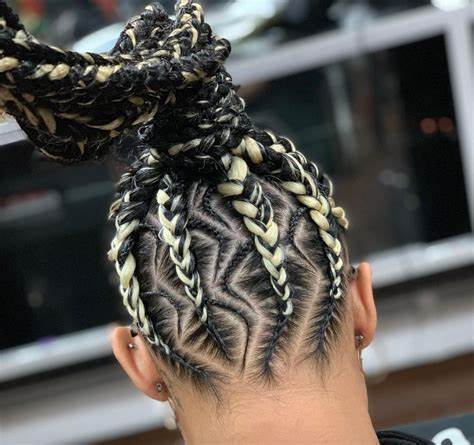
Goddess braids styled in a zigzag updo offer a blend of playful charm and sophistication. The braids are first arranged in a zigzag pattern across the scalp, creating a striking visual effect and setting it apart from traditional straight-back styles. Once the zigzag pattern is in place, the braids are gathered into an updo—whether it’s a high bun, a series of twists, or an elaborate design that continues the zigzag theme. This style highlights the intricate braiding pattern and is also a practical way to keep hair away from the neck and face, making it a versatile choice for both casual and formal occasions.
GODDESS BRAIDS WITH ACCENTS OF GOLD THREAD
Goddess braids embellished with gold thread exude an air of regal elegance and luxury. The braids are usually large and striking, and the gold thread woven through them adds a shimmering effect that catches the light and attracts attention. Depending on your preference, the gold thread can be applied sparingly for a subtle sparkle or wrapped more densely for a bold statement. This style transforms a classic goddess braid into a more festive and glamorous look, making it a popular choice for events like weddings, celebrations, and holidays where a touch of shine and opulence is desired.
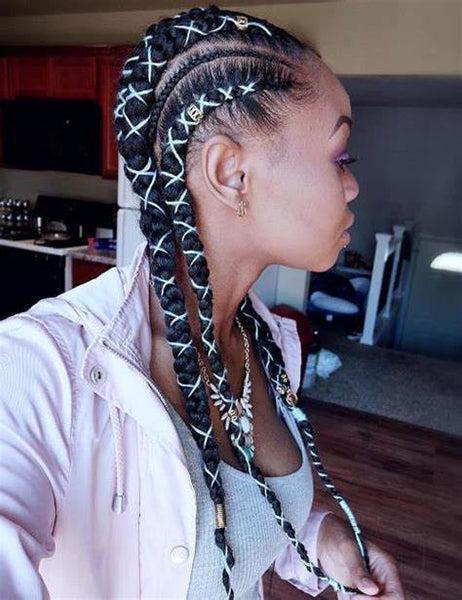
GODDESS BRAIDS WITH LACY PATTERNS
Goddess braids with lacy patterns offer an intricate and delicate twist on the classic style. The term ‘lacy’ describes the intricate designs created on the scalp using thin braids woven together to resemble lace fabric. This eye-catching style stands out for its detailed craftsmanship and the skill required to achieve it. The braids can be arranged in various patterns, from geometric shapes to curves and swirls, mimicking a lacy overlay on the scalp. Due to its elaborate nature, this type of goddess braid is often reserved for special occasions and serves as a statement hairstyle that’s both elegant and artistic.
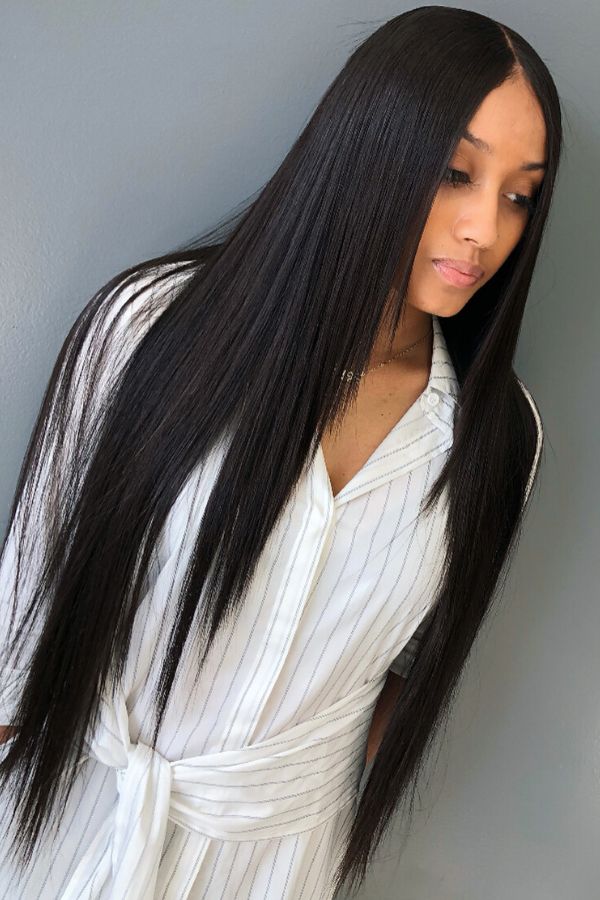
GODDESS BRAIDS HUMAN HAIR
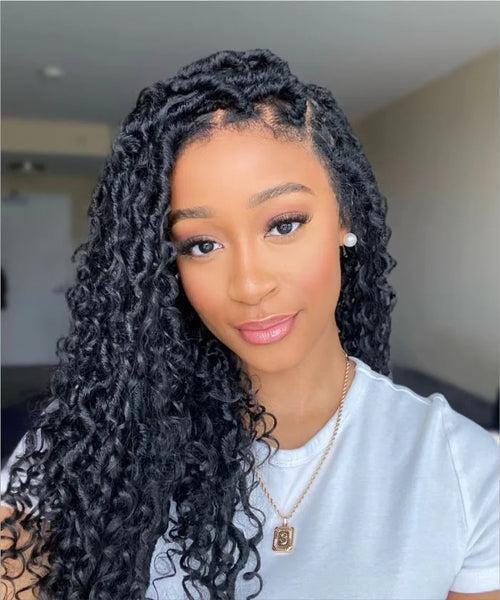
Goddess braids made with human hair involve using 100% human hair extensions to create a protective style. This approach provides a more natural look and feel, allowing the braids to move and flow like natural hair. Human hair braids can be washed, conditioned, and heat-styled, similar to one’s own hair, and can be dyed to match the wearer’s hair color or to add highlights. While they are a premium option and generally more expensive than synthetic alternatives, human hair braids offer superior versatility and a more realistic appearance. This makes them a favored choice for special occasions or for those seeking a high-quality, long-lasting braided style.
GODDESS SMALL BOX BRAIDS
Goddess small box braids are a refined variation of traditional box braids, characterized by their smaller size. Hair is sectioned into small squares (or boxes) across the scalp, with each section braided individually from root to tip. These braids can vary in length from waist-length to bobbed styles, and despite their smaller size, they offer versatility for different looks, including updos, buns, and ponytails. The smaller braids often appear more natural and can create a fuller look, though the installation process can be time-consuming. To enhance the goddess effect, some braids may feature curly or wavy ends, adding a soft, romantic touch. This style is ideal for those seeking a protective option that reduces daily manipulation of their natural hair, and it can be maintained for several weeks.
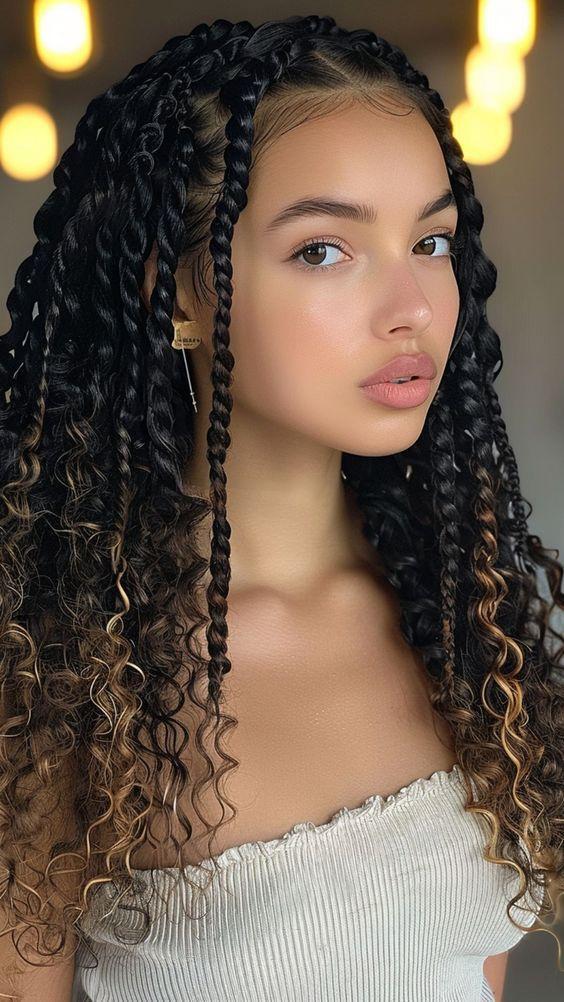
GODDESS TWIST BRAIDS
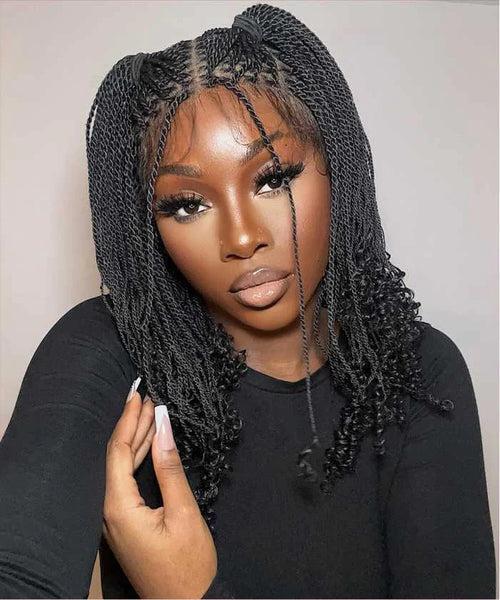
Goddess twist braids are a variation of goddess braids that use the two-strand twist technique instead of the traditional three-strand braid. This method creates a softer, more voluminous appearance compared to braids. Additionally, twist braids are gentler on the scalp and hair, as they typically exert less tension.
GODDESS BRAIDS WITH COWRY SHELLS
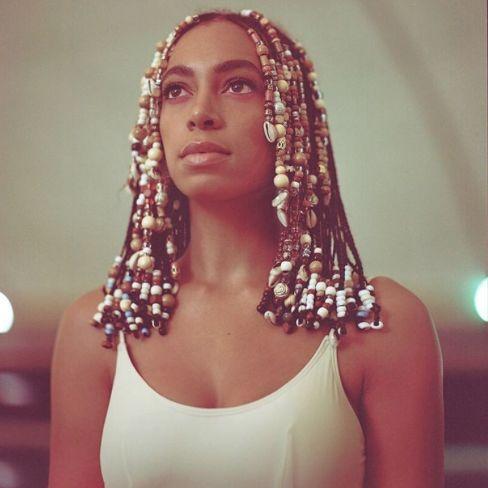
Cowry shells are used to embellish goddess braids, either attached to the ends or spaced along the length of the braids. This decorative touch adds a cultural or bohemian flair to the hairstyle, with the shells’ natural white color providing a striking contrast against the hair.
GODDESS BRAIDS WITH A HEADBAND
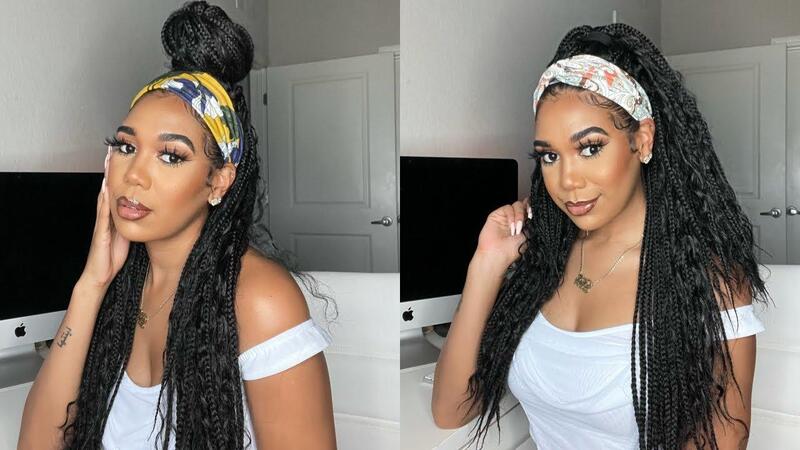
In this style, a headband is paired with goddess braids, serving either to push the front braids away from the face or as a decorative accessory. The headband can range from a simple, elegant band to a more elaborate design, potentially embellished with jewels or flowers.
MEDIUM GODDESS BRAIDS
These braids strike a balance between long, flowing braids and shorter, more practical ones. They provide enough length for versatile styling options—like buns, ponytails, or half-up, half-down looks—while avoiding the added weight of extra-long braids.
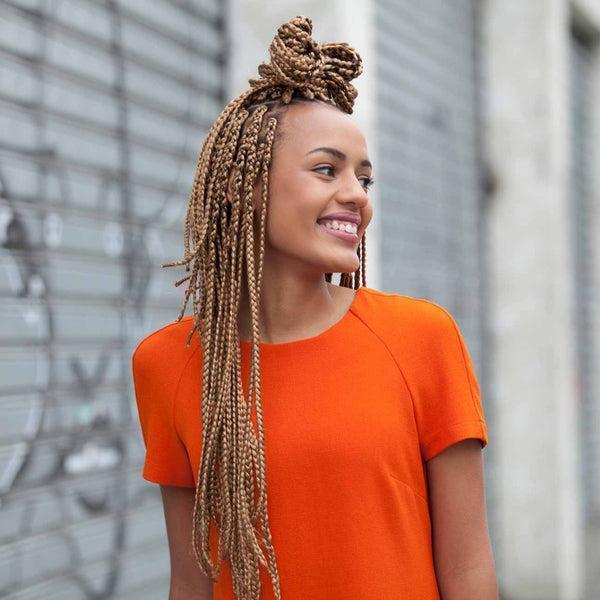
BLONDE GODDESS BRAIDS
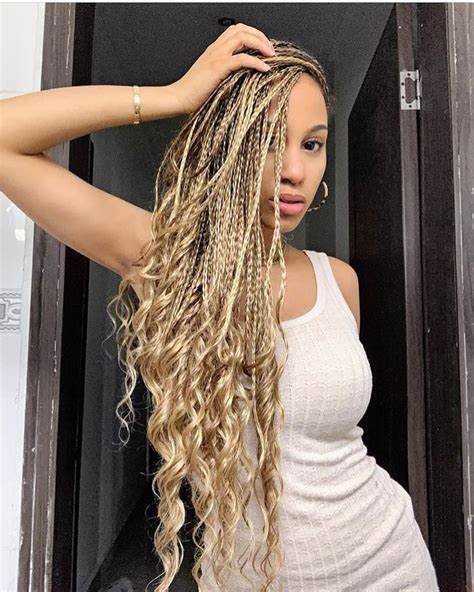
Blonde goddess braids can be created with natural blonde hair or by adding blonde extensions. This results in a striking, high-contrast effect, particularly for those with darker hair. The blonde hue adds a contemporary twist to the classic style, with options ranging from platinum to honey blonde.
GODDESS BRAIDS PONYTAIL
The goddess braids ponytail gathers the braids at the crown or back of the head into a ponytail. The braids can be left as they are, woven into a single, thicker braid, or twisted together. This style merges the neatness of goddess braids with the practicality and sporty appeal of a ponytail.
SHORT GODDESS BRAIDS
Short goddess braids are perfect for those with shorter hair or those who prefer braids that don’t extend far beyond the shoulders. While still styled in the goddess braid fashion, these shorter braids offer a lighter, more manageable option.
GODDESS CROCHET BRAIDS

This protective style starts with braiding the natural hair into cornrows, followed by using a crochet hook to add hair extensions. Goddess crochet braids often feature curly or wavy pieces left out at the ends, creating a voluminous and flowing effect. It’s a versatile option that typically requires less time and exerts less tension on the scalp compared to other braided styles.
GODDESS MOHAWK BRAIDS
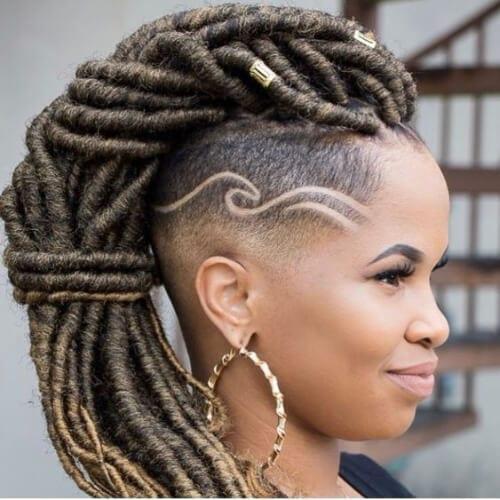
The Goddess Mohawk merges the daring style of a Mohawk with the elegance of goddess braids. The sides of the head can be braided, twisted, or slicked back with gel to highlight the raised “Mohawk” in the center. The central braids are typically thick and prominent, running from the forehead to the nape of the neck, creating a classic Mohawk silhouette.
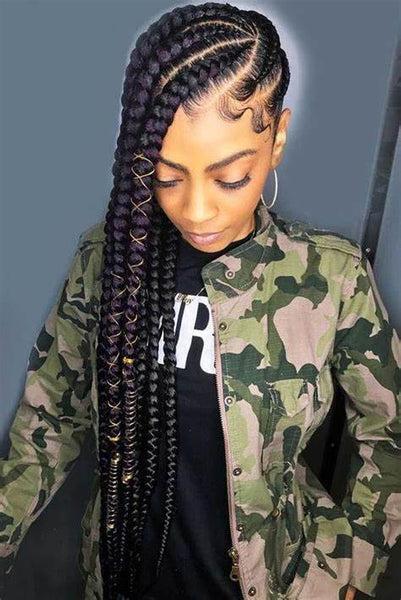
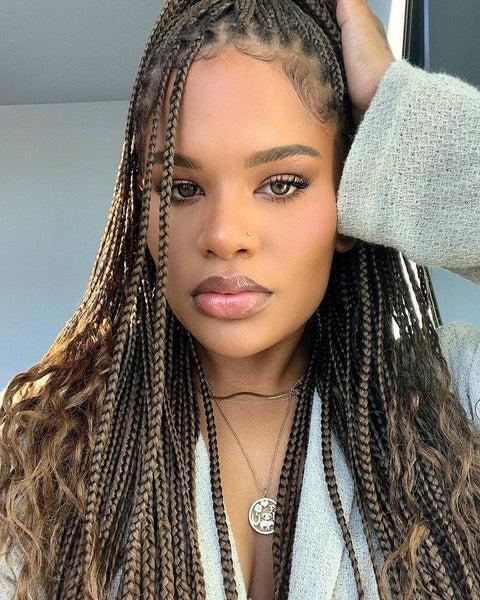
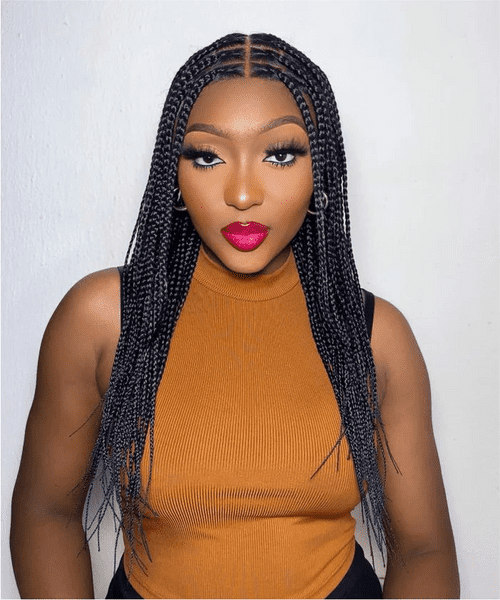
GODDESS BRAIDS WITH A MIDDLE PART
This hairstyle features a bold middle part with goddess braids on either side. The braids can flow straight back or be styled into different designs, maintaining the symmetry created by the middle part. The hair is parted down the center to achieve a balanced look, with goddess braids installed on each side. These braids are typically directed away from the face, flowing down the back or arranged around the head in a crown-like fashion. The middle part frames the face, offering a flattering appearance for many face shapes.
GODDESS BRAIDS FISHTAIL
Goddess braids merge into a fishtail braid at the back, starting with classic goddess braids—thicker cornrows braided close to the scalp. As the braids reach the back of the head, they transition into a fishtail braid. This braid is crafted by splitting the hair into two sections and alternately crossing thin strands from each side, creating a herringbone pattern that mimics a fish’s tail. The fishtail braid adds an intricate touch to the protective and stylish goddess braids.
GODDESS BRAIDS WITH A BOW
Goddess braids with a bow blend the sophistication of goddess braids with the playful or feminine touch of a bow. Goddess braids, which are thicker and larger than traditional cornrows, can be styled in various ways—straight back, in a halo, or in intricate patterns. As a protective hairstyle, goddess braids can last from several days to weeks, offering a stylish way to promote hair growth while keeping hair neat and well-styled.
GODDESS BRAIDS BUN
Goddess braids styled into a bun create an elegant and polished appearance, ideal for formal events or professional settings. The bun adds a classic flair to the protective nature of goddess braids, neatly tucking the hair away and delivering a sophisticated silhouette.
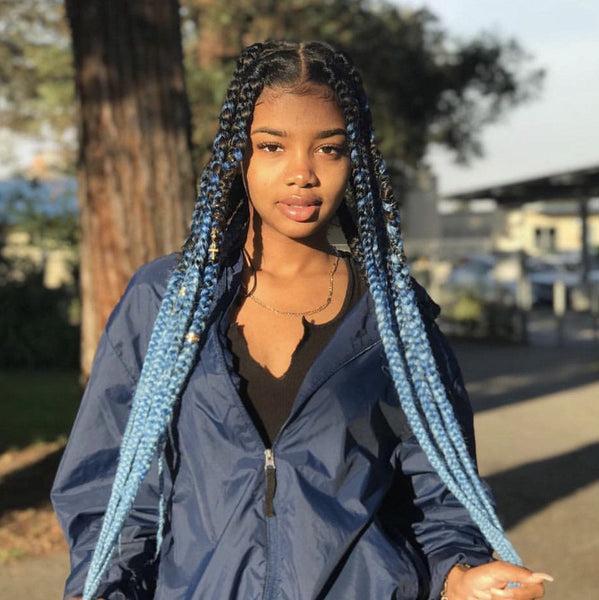
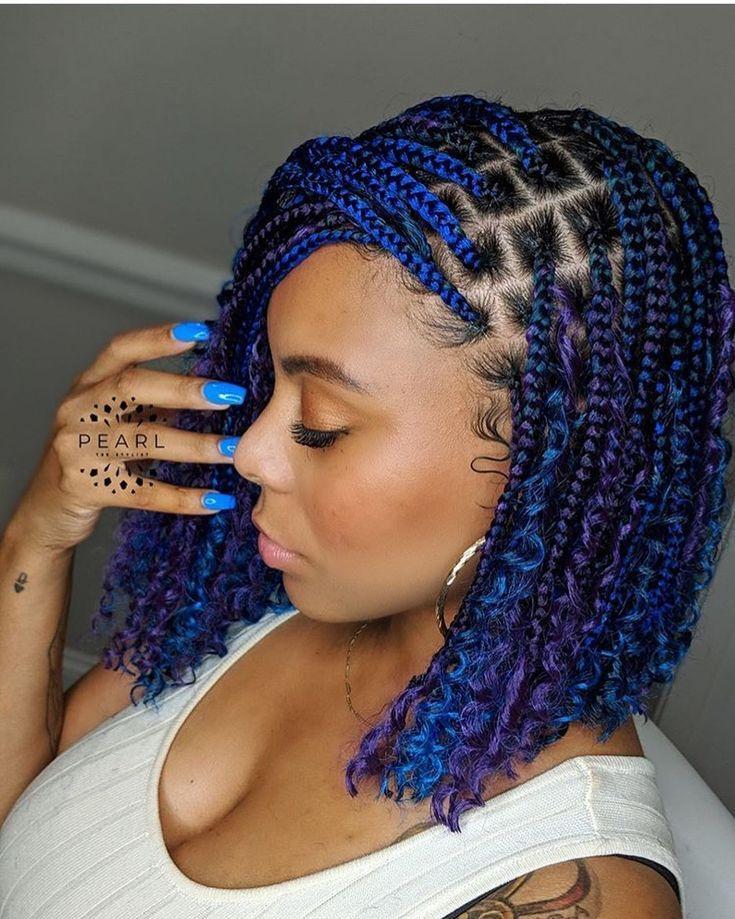
COLORFUL GODDESS BRAIDS
Colorful goddess braids infuse vibrant hues into the classic goddess braid style, achieved either with colored hair extensions or by dyeing natural hair. This contemporary twist on a traditional look offers a way to express personal style and can range from subtle highlights to bold, eye-catching colors.
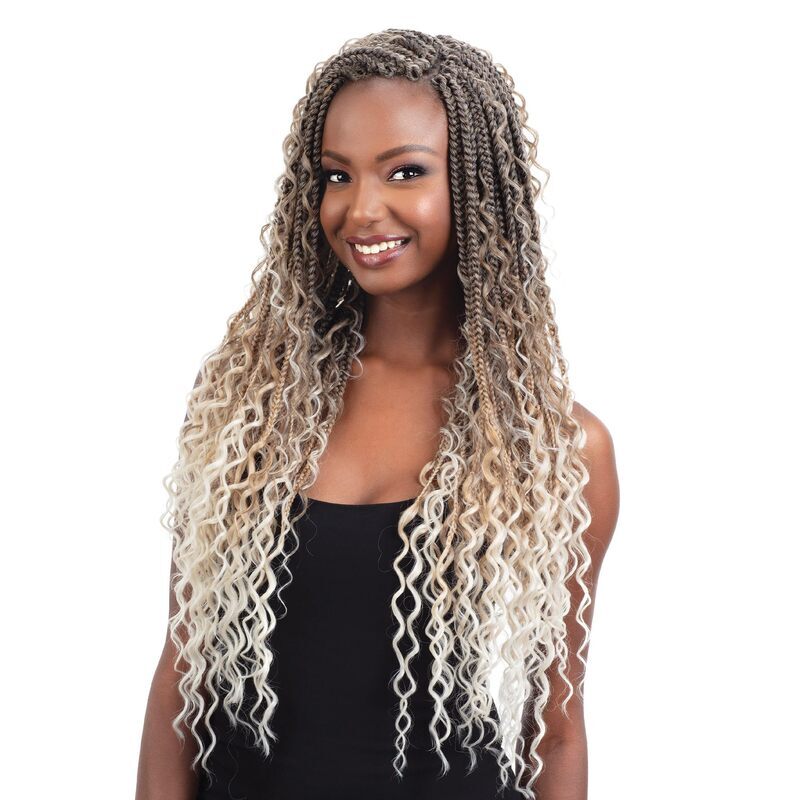
GODDESS BRAIDS WITH LOOSE ENDS
Goddess braids with loose ends offer a stunning and versatile look by blending the sleekness of cornrows or large, flat braids with the free-flowing beauty of loose hair. In this style, braids are plaited close to the scalp and left loose at the ends, resulting in a mix of textures and a relaxed, bohemian feel.
DIAMOND PARTING GODDESS BRAIDS
Diamond parting goddess braids are a striking variation of the classic goddess braids, characterized by a distinctive diamond-shaped pattern in the parting of the hair. This geometric design adds an extra layer of complexity and style to the braids, creating a precise and eye-catching aesthetic that is both unique and fashionable.
MERMAID GODDESS BRAIDS
Mermaid goddess braids create a beautiful, sea-inspired look. Begin by braiding the hair close to the scalp into cornrows, then blend the ends into curls at the ends of the hair. Finish the beachy vibe by embellishing the braid ends with white strands of hair the color of sea sand. This whimsical, coastal style not only showcases your natural hair’s growth but also evokes a charming, aquatic atmosphere. Use this unique braided design to channel your inner sea queen.
GODDESS BRAIDS HALO
Goddess halo braids, or crown braids, are a classic and elegant hairstyle that features braiding the hair in a circular pattern around the head, creating the appearance of a halo or crown. This style offers a regal and romantic touch and can be customized to fit different hair types and lengths.
GODDESS FEED IN BRAIDS
Goddess feed-in braids involve adding extensions to individual loose braids to achieve added length and volume. The feed-in technique integrates extensions seamlessly, avoiding the need for tiny strands of natural hair. The result is a bohemian style with a polished finish, ideal for enhancing medium to coarse textures. The extensions provide flexibility in length, color, and texture, creating loose, undone braids that exude an effortlessly chic goddess vibe.
JUMBO GODDESS BRAIDS
Jumbo goddess braids are a striking and elegant hairstyle that combines the boldness of larger braids with the intricate, regal appearance of goddess braids. This style features fewer, thicker braids that make a strong statement while also serving as a protective option for natural hair.
LONG GODDESS BRAIDS
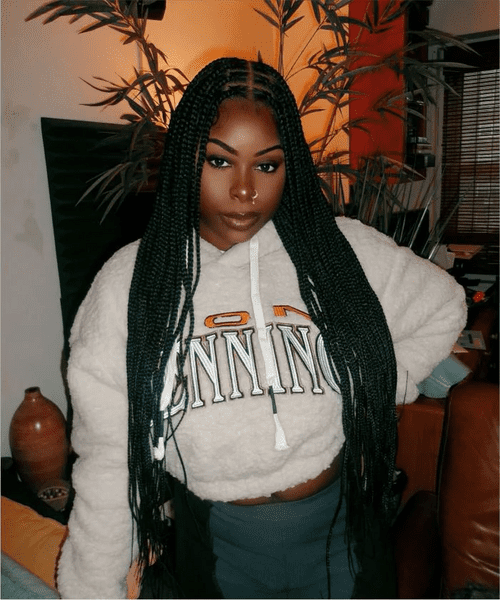
Long goddess braids offer a stunning, elongating hairstyle. Begin by braiding the natural hair into cornrows close to the scalp, then extend the braids into extra-long goddess braids that flow gracefully down the back. These extended braids create an elegant and eye-catching look. Enhance the style with gold beads or cuffs at the ends for a touch of glamour. You can also wrap the braids into a bun or ponytail for a different look. Long goddess braids provide a striking way to protect and style your natural hair as it grows, allowing you to feel like a goddess with these glamorous, flowing braids.
GODDESS BOB BRAIDS
Goddess bob braids offer a stylish and modern twist on the classic braided bob, combining the ethereal charm of goddess braids with the sleek, defined lines of a bob haircut. This hairstyle is known for its blunt, even length and often includes softer, more feminine braiding patterns, such as curls or waves.
GODDESS BRAIDS WITH CURLS
Goddess braids with curls create a captivating and feminine look by blending the sleekness of braids with the playful charm of curls. This style typically features cornrow-style goddess braids with the ends left loose and curled, or includes curly extensions to add volume and length.
GODDESS KNOTLESS BRAIDS
Goddess knotless braids offer a relaxed, effortless look by avoiding knots for a more natural, carefree style. Unlike traditional braids, these are freehanded, allowing your natural hair texture to shine through and the braids to gradually loosen over time. The result is a low-maintenance style with a graceful, feminine touch. Ideal for medium to long, natural or textured hair, they work best with medium to large braids to achieve a full, thick appearance.
SIDE-SWEPT GODDESS BRAIDS
Side-swept goddess braids offer an elegant twist on the classic goddess braid hairstyle. This style features the braids swept to one side, creating a graceful, asymmetrical look that is both striking and sophisticated.
GODDESS BRAIDS WITH BEADS
Goddess braids with beads create a captivating and personalized look by combining the elegance of large, cornrow-style braids with the vibrant, decorative touch of beads. This hairstyle, rich in cultural heritage, serves as a contemporary symbol of beauty and identity.
BOHEMIAN GODDESS BOX BRAIDS
Bohemian goddess box braids combine the free-spirited essence of goddess braids with the structured elegance of box braids, offering the best of both worlds. This dreamy boho style blends loose, crimped goddess braids with defined parts and uniform box braid tails, providing versatile styling options. Whether worn flowing freely or crafted into trendy updos, this hybrid protective look requires minimal maintenance and promises carefree summer beauty all season long.
TRIPLE-LAYERED GODDESS BRAIDS
Triple-layered goddess braids elevate the bohemian style to dramatic new heights. Featuring three intricately braided rows stacked down the back, this bold look adds striking volume and dimension to your protective style. Embrace your inner goddess with the captivating movement and flair of these stacked braids. Perfect for festivals, vacations, or everyday life, triple-layered goddess braids bring effortless glamour to all your warm-weather adventures.
GODDESS BOX BRAIDS
Goddess box braids merge two popular protective styles into a single, low-maintenance look. These braided wigs blend the bohemian, crimped texture of goddess braids with the neat uniformity of classic box braids. Featuring defined parts and braided lengths, goddess box braids offer versatile styling options—wear them down, pulled up, or twisted into a top knot. Enjoy the ease and flexibility of this dynamic style throughout long summer days and weekend getaways.
HALF-UP, HALF-DOWN GODDESS BRAIDS
Half-up, half-down goddess braids are the perfect summer protective style. Featuring braided hair pulled up and flowing loose down the back, this look is both feminine and chic. The half-up design offers airflow on warmer days while keeping your lengths protected in elegant, free-flowing plaits.
GODDESS BRAIDS UPDO
The goddess braids updo creates a sophisticated braided look. Begin by braiding the hair into cornrows close to the scalp. Then, braid the ends of these cornrows into larger, flowing goddess braids. Gather the goddess braids into a high ponytail and coil them into a bun, leaving a few braids out to frame the face. Secure the bun with pins. This updo highlights the intricate braid pattern while keeping the hair neatly off the neck. The goddess braids updo is a stunning protective style ideal for formal events or weddings.
CLASSIC GODDESS CROWN BRAIDS
The classic goddess crown braid begins at the hairline and gracefully curves around the head. This single, thick braid resembles a regal circlet, making it perfect for special occasions or weddings. For added flair, small braids can intersect the main crown braid, enhancing its elegance.
CONCLUSION
There you have the list of 36 goddess braids hairstyles. So, why not embrace your inner goddess and explore the endless possibilities of these captivating hairstyles? With a little practice and imagination, you can create a truly unique and unforgettable look that will leave everyone saying “wow.”