26 BEST COFFIN NAIL DESIGNS THAT YOU WILL LOVE

Choosing the ideal nail shape can be just as important as selecting the perfect color. While rounded lipsticks or almond-shaped nails offer distinct vibes, coffin nails stand out for their edgy yet feminine appeal.

To pull off this style, you’ll need some length. Rêmmber to distinguish a coffin nail from its lookalikes: the ballerina nail, which has rounded outer edges, and the square nail, which lacks the tapered shape. However, with a little nail filing expertise, you can achieve this look at home by shaping your nails into a square before gently filing the sides to create a tapered effect.

Continue scrolling to explore the 26 coffin nail designs we’ve compiled!

Black glitter

Long, black coffin nails exude pure villainous vibes. Add a touch of sparkle and you’ve got the ultimate power look.
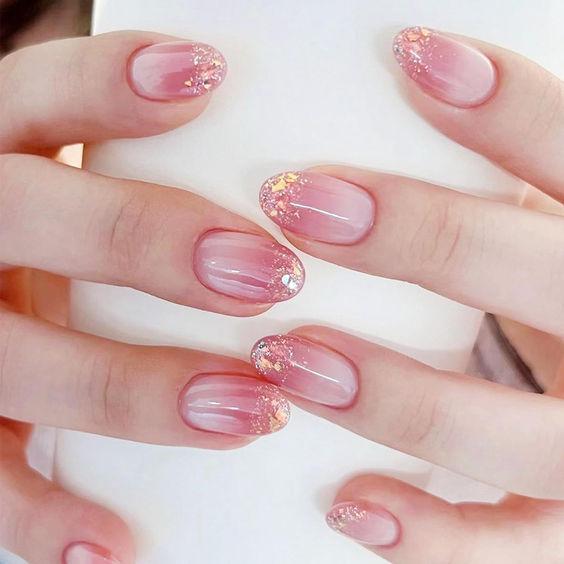
Light pink

A light pink manicure is an eternal classic. It effortlessly accentuates the feminine charm of the coffin nail shape.

Nudes on Nudes

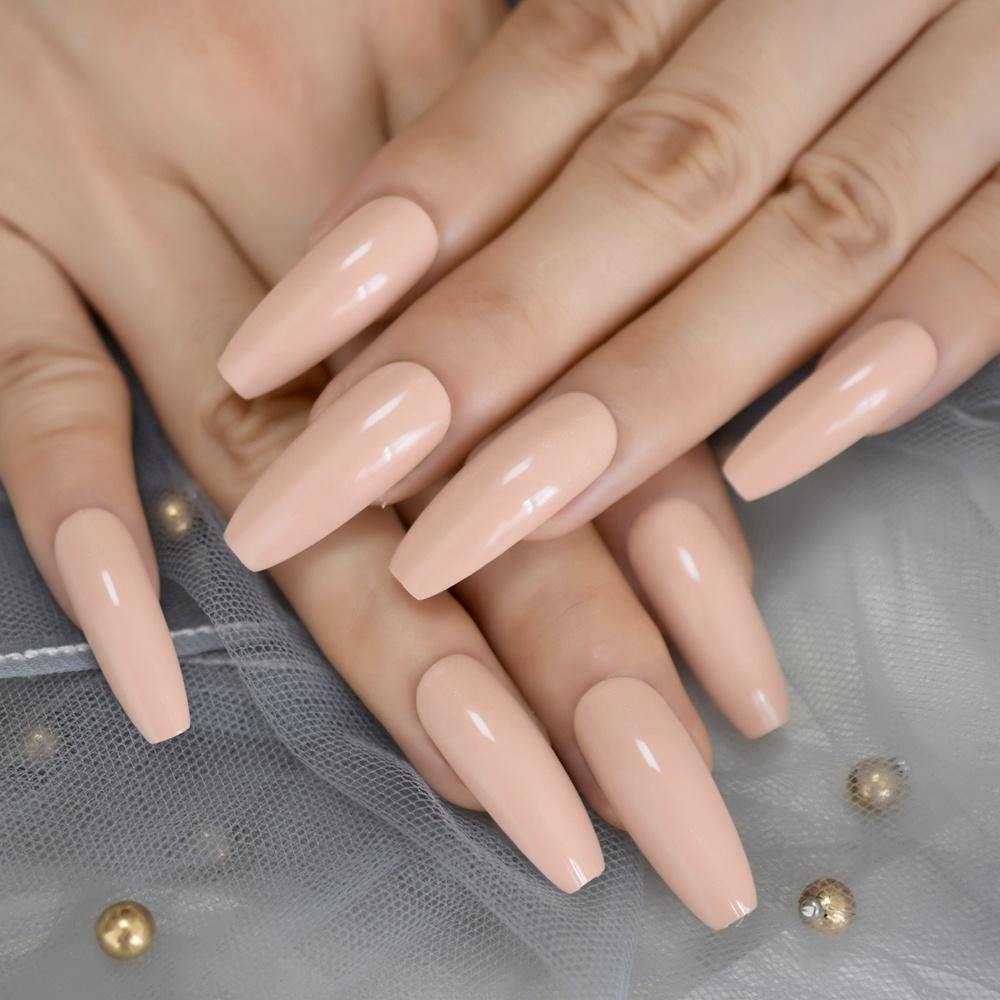
Nude manicures are timeless, but don’t be afraid to experiment with different shades within the same color family. Play with varying tones of nude to match your mood.
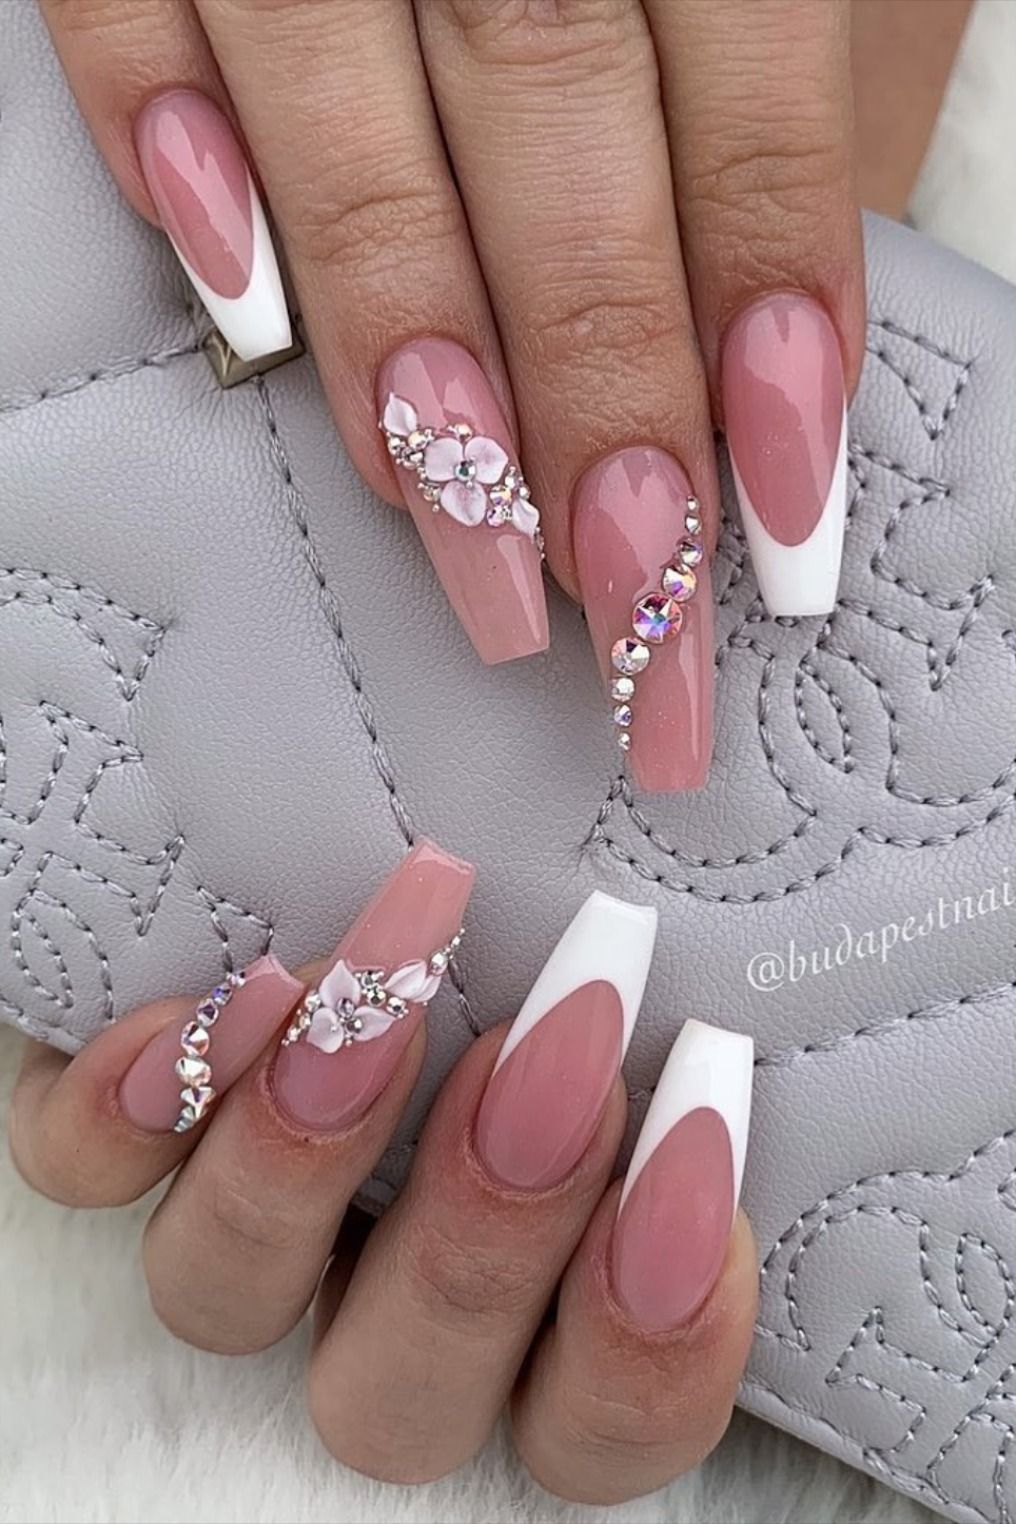
Flowers

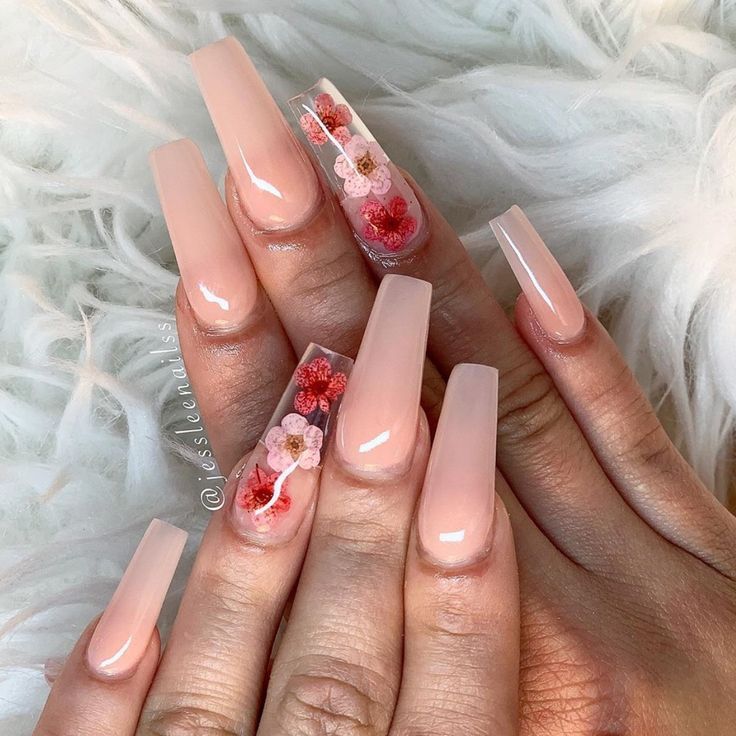
Long, clear coffin extensions provide the perfect canvas for standout nail art. Take this stunning floral design, for instance – it’s the epitome of springtime elegance.
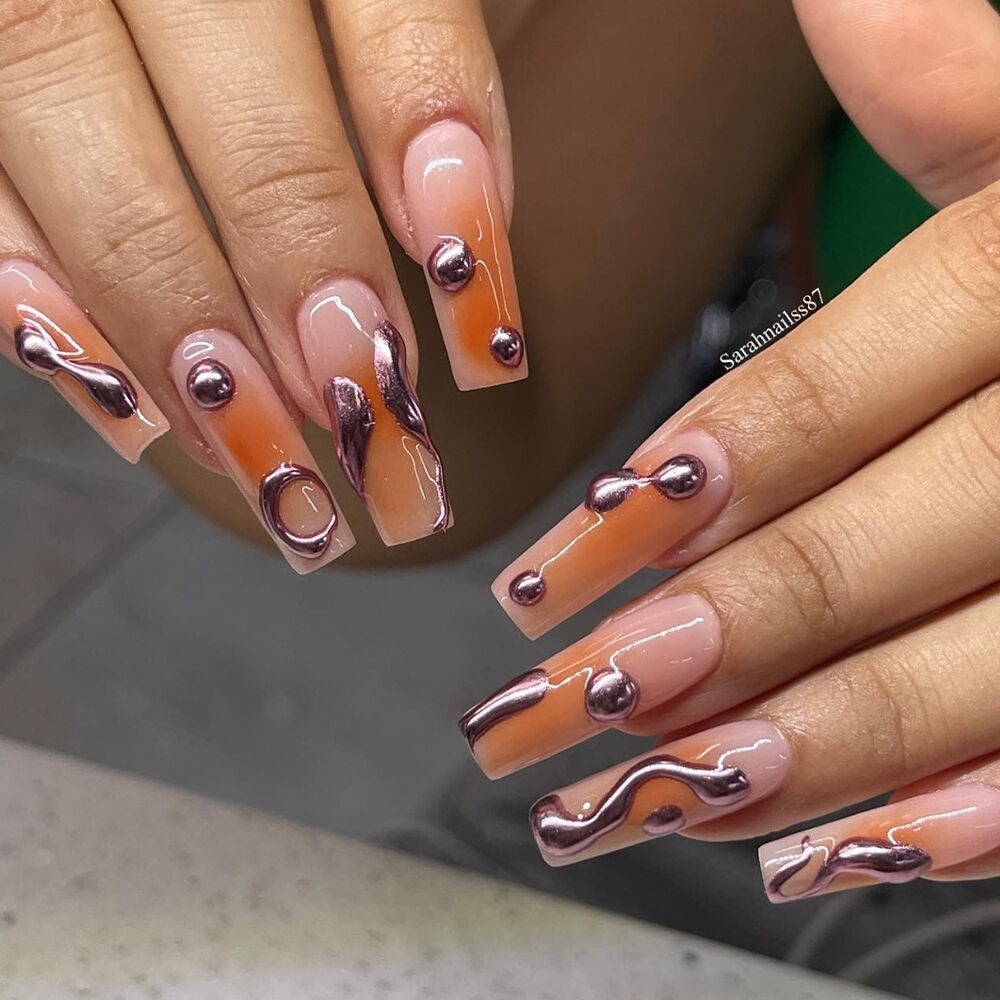
Fall shades

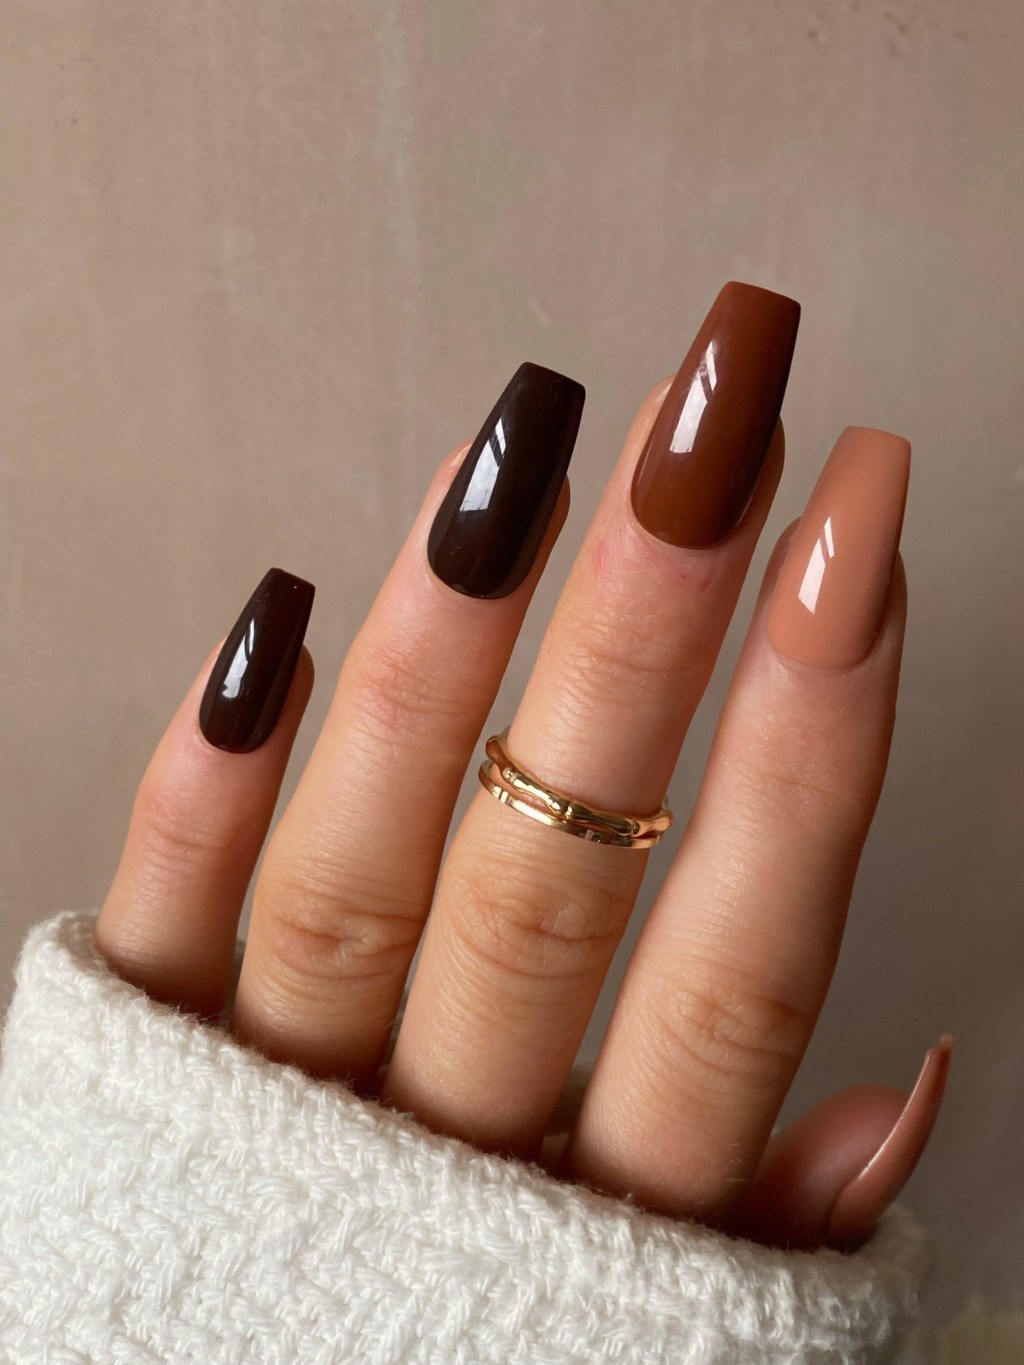
Instead of a traditional ombre effect on individual nails, this manicure features a seamless transition from brown to orange across both hands. It’s the ideal color combination for the autumn season.

Hearts and lip prints

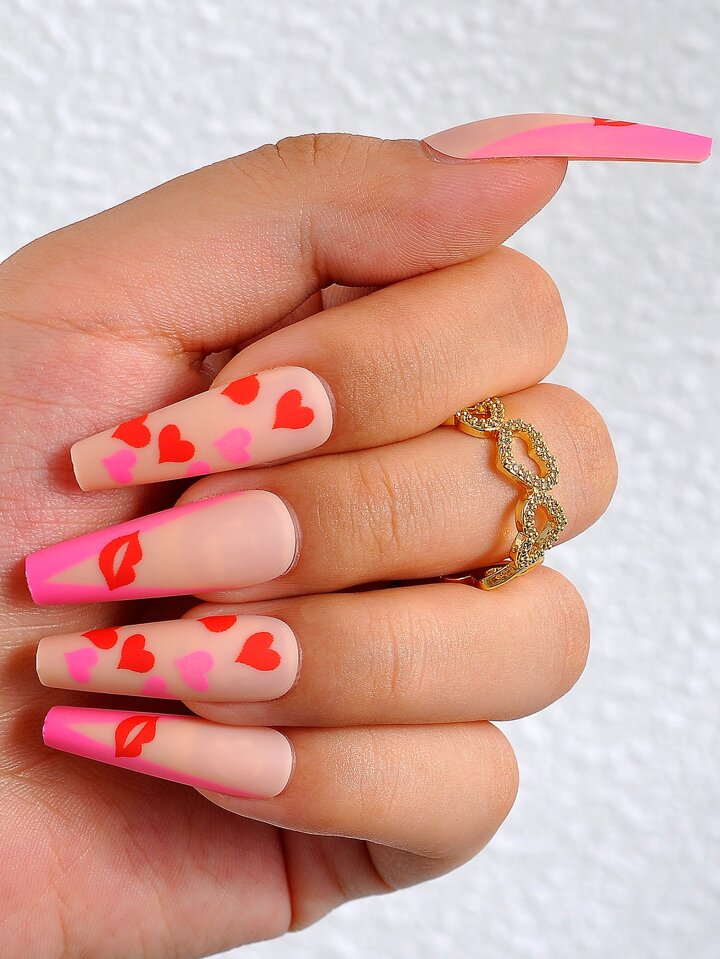
Red and pink nail art is a classic choice for any occasion, whether you’re celebrating Valentine’s Day or simply indulging in a romantic design.

Dark brown

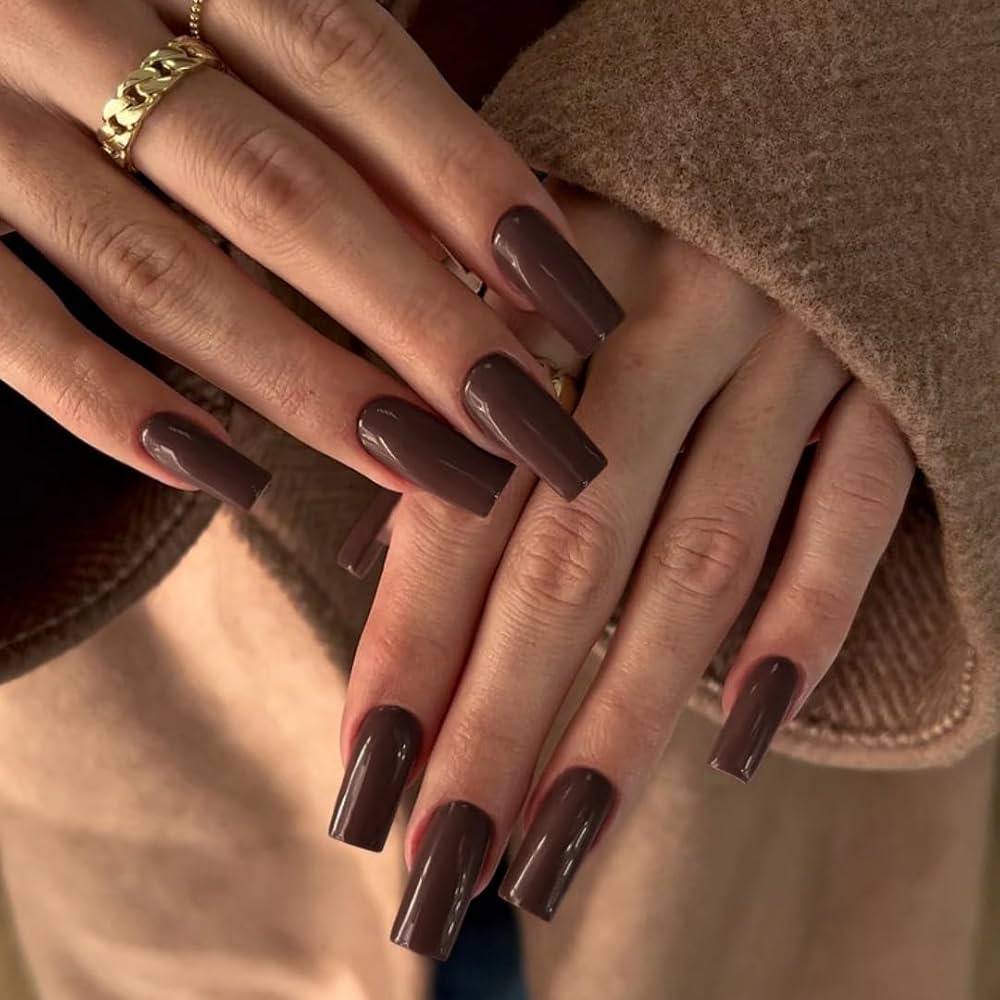
A deep, glossy brown manicure is the perfect way to highlight the edgy appeal of the coffin nail shape.

Modern French Mani

This modern take on the classic French manicure is both sexy and sophisticated. The timeless black tip complements the nude base, making it a low-maintenance choice that effortlessly hides nail growth.

Trippy Swirls

Feeling groovy? This swirling design is pure ’70s nostalgia. Whether you’re a child of the era or simply love a playful pattern, the possibilities for color combinations are endless.

Orange shades

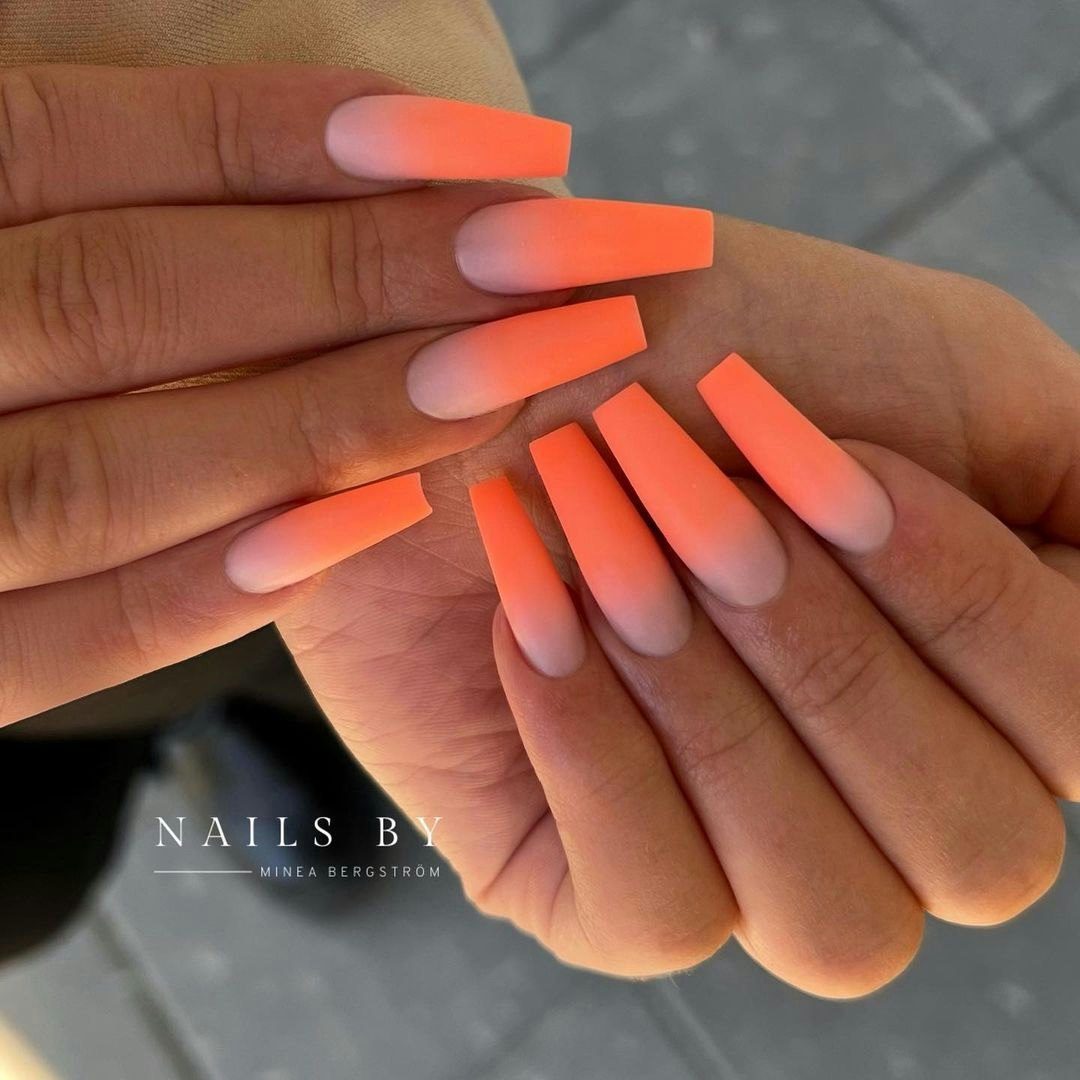
For a subtle yet striking look without the commitment of intricate designs, try pairing two shades of the same color on each hand. This manicure is a playful take on minimalism, and opting for a vibrant hue like bright orange adds a fun and energetic touch.

Nude Flames

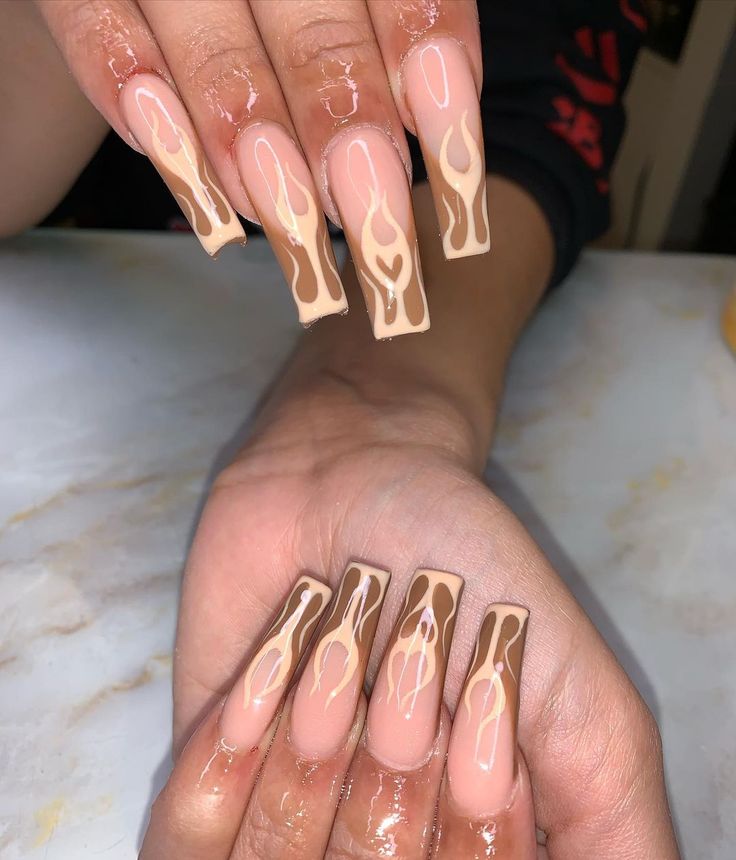
New to coffin nails? Start with a bold statement without overwhelming your look. Nude flames offer a striking contrast against a muted base, creating a cool and edgy design that’s perfect for nail art newbies.

Liquid Chrome

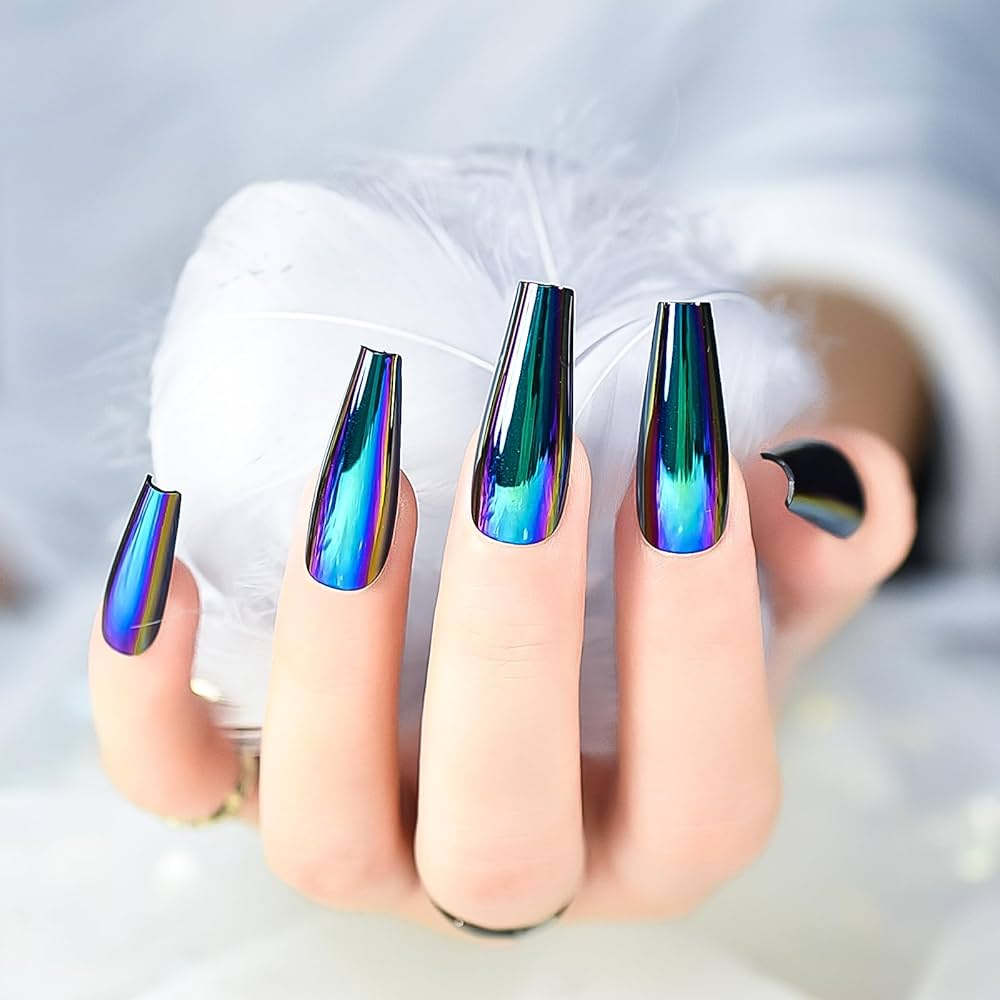
Elevate your manicure with a touch of texture. This mesmerizing liquid chrome finish is truly eye-catching and guaranteed to turn heads.

Malachite Tips

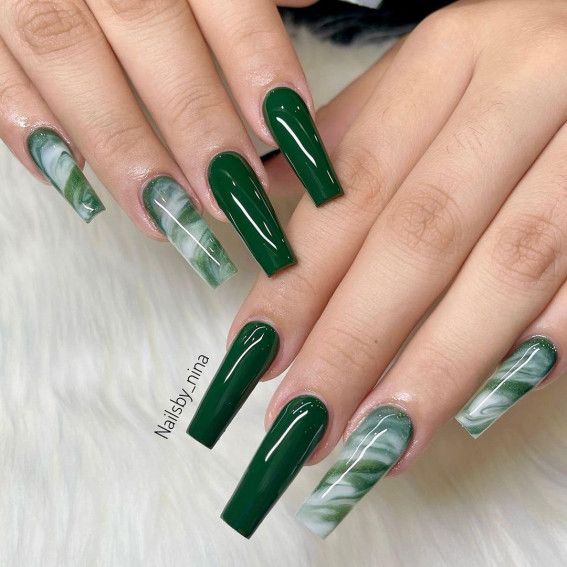
Embrace the protective energy of malachite with a bold green nail design. Inspired by Barbie Ferreira, you can opt for a French manicure twist with delicate gold accents or dive in headfirst with a full-coverage malachite manicure.

Tie-Dye Mania

This versatile design allows for endless creativity. Experiment with your favorite color combinations, playful shapes, and dazzling embellishments to create a truly unique look. For an extra-bold statement, paint the underside of your nails for a full-on tie-dye effect.

Gold Foil

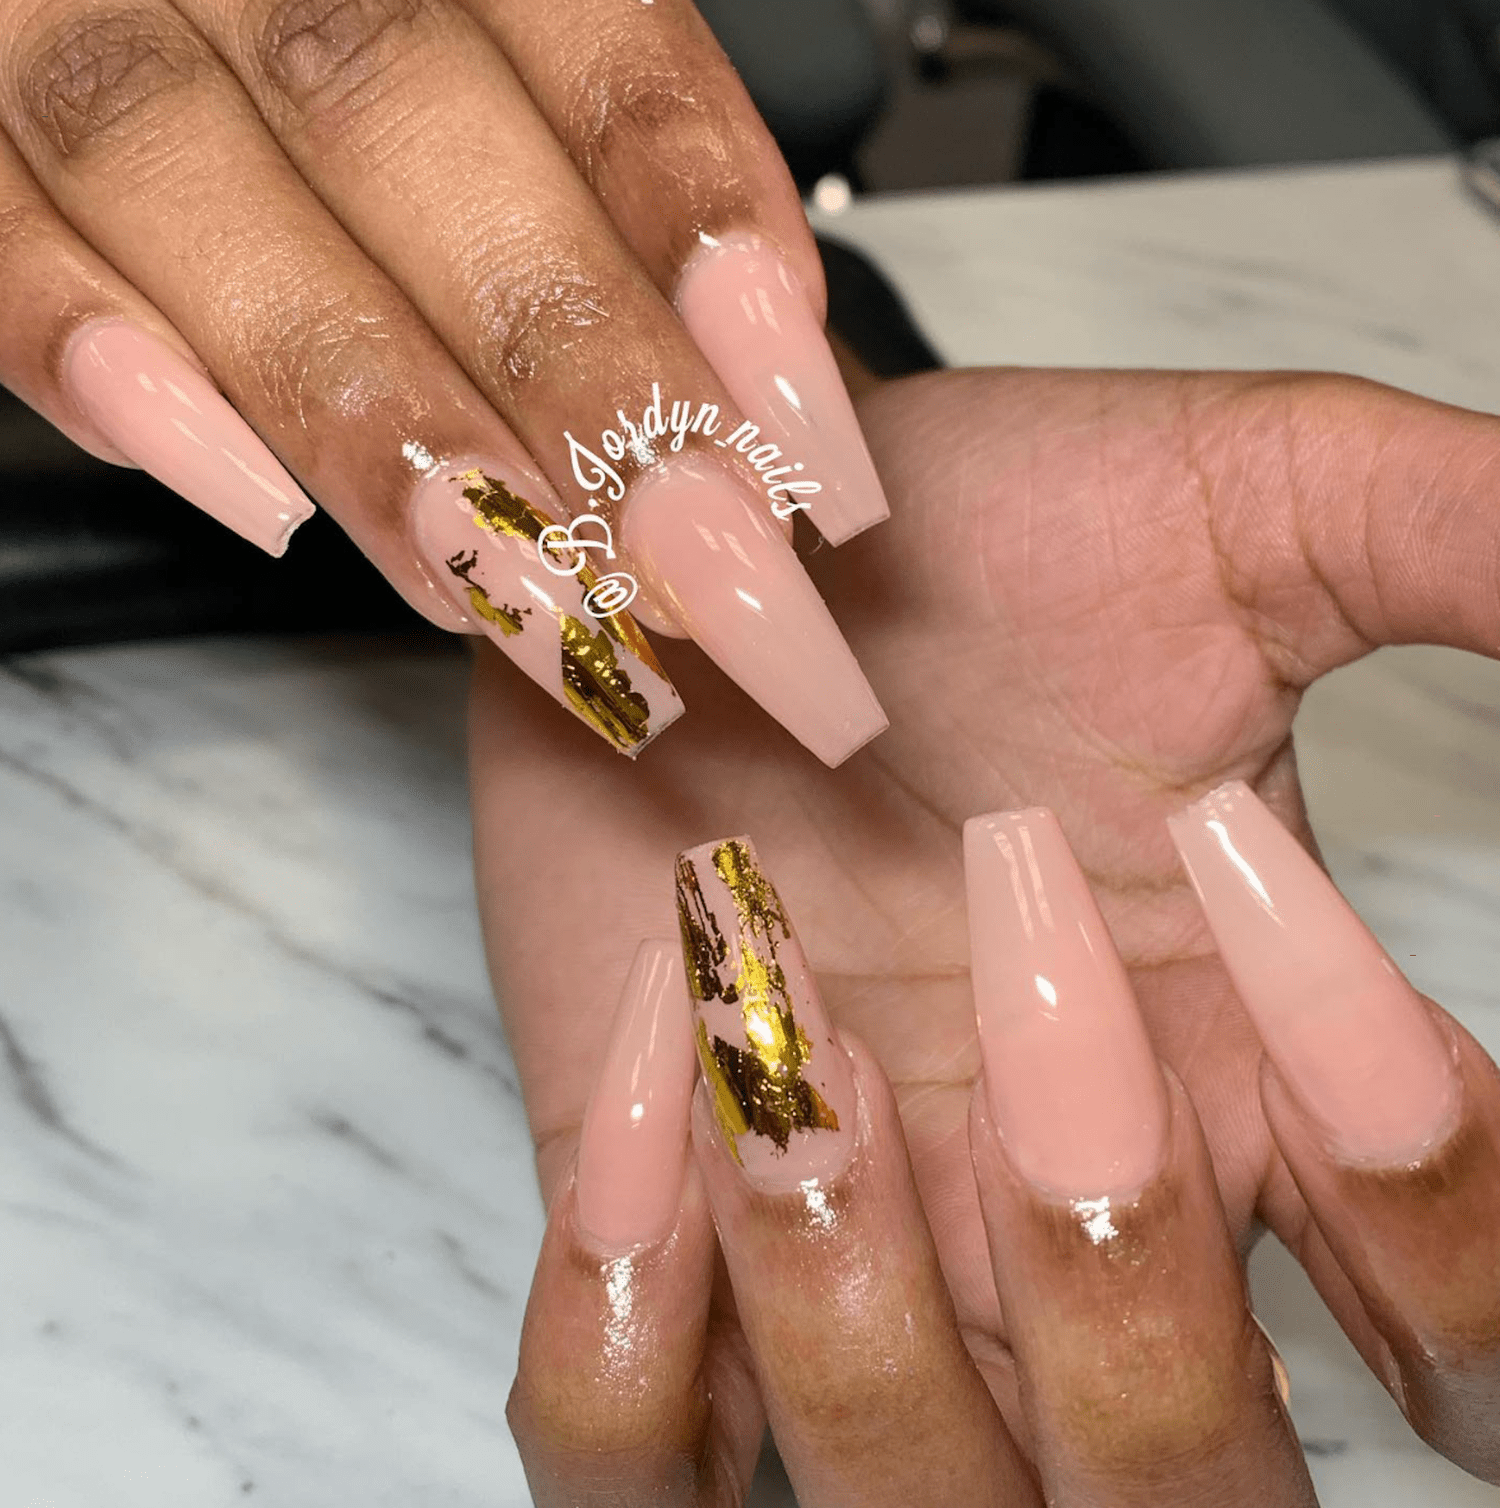
A touch of gold can elevate any manicure. Opt for a minimalist approach by adding delicate gold foil accents to a few nails over a classic nude base. It’s a simple yet sophisticated look that exudes timeless elegance.

Zodiac Sign

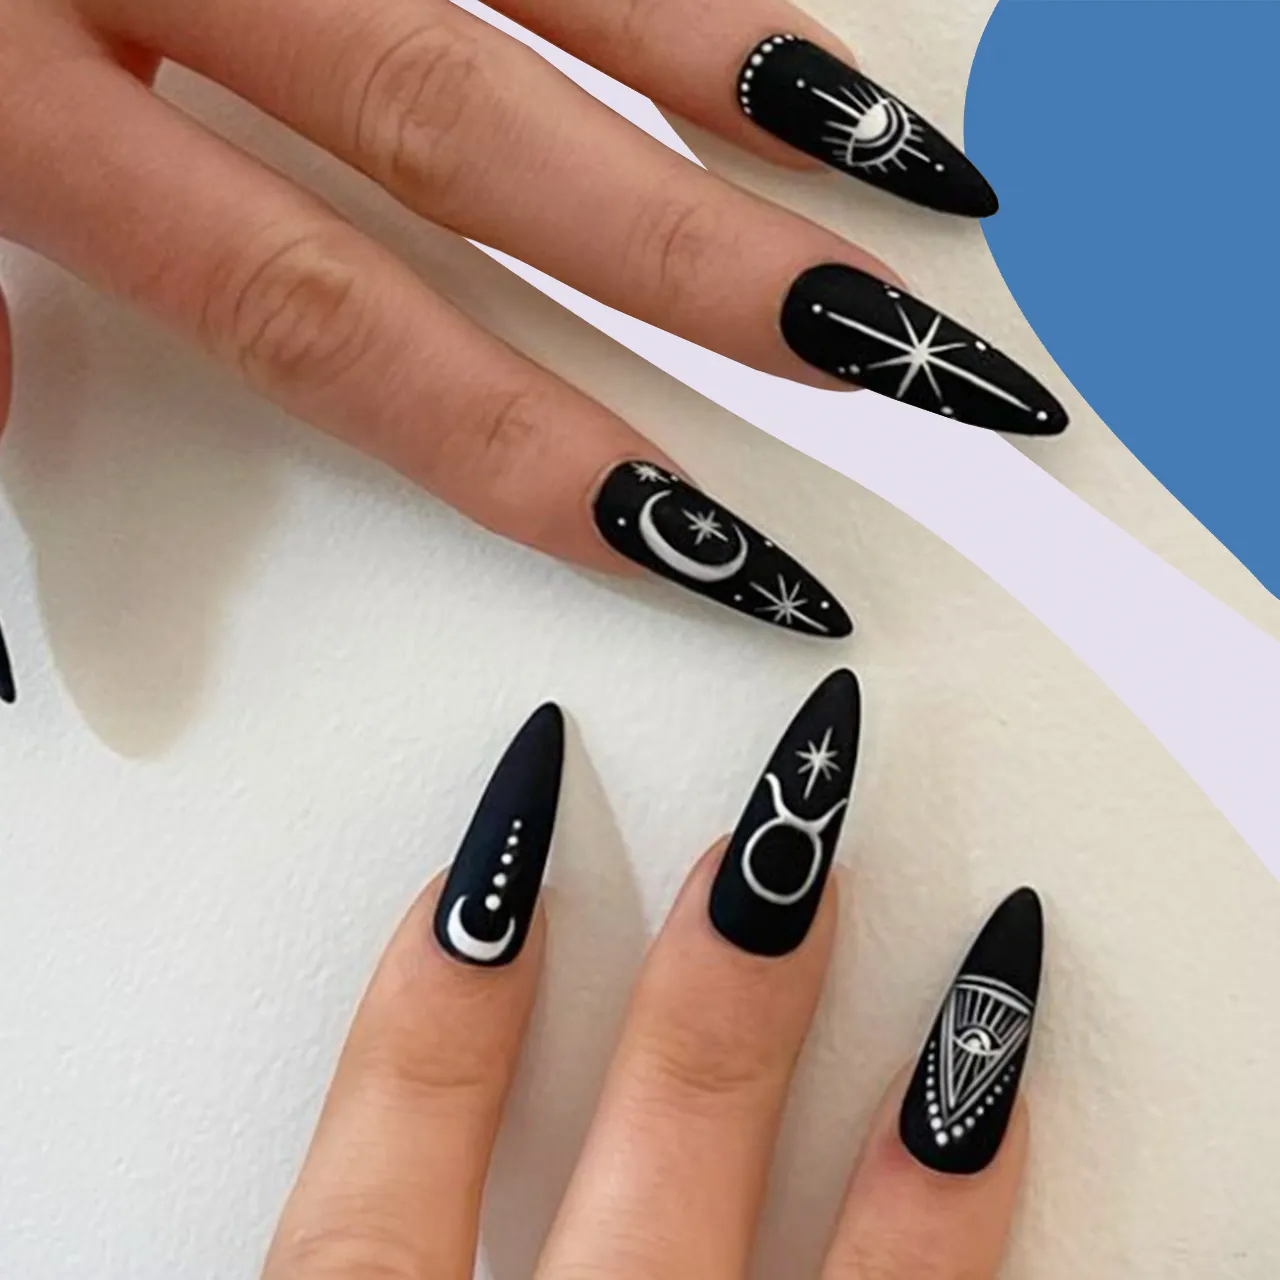
This nail art design is your cosmic calling. Start with a playful French tip in your favorite color, then let your zodiac shine on your middle three nails. Personalize your manicure with symbols or motifs that represent your star sign.
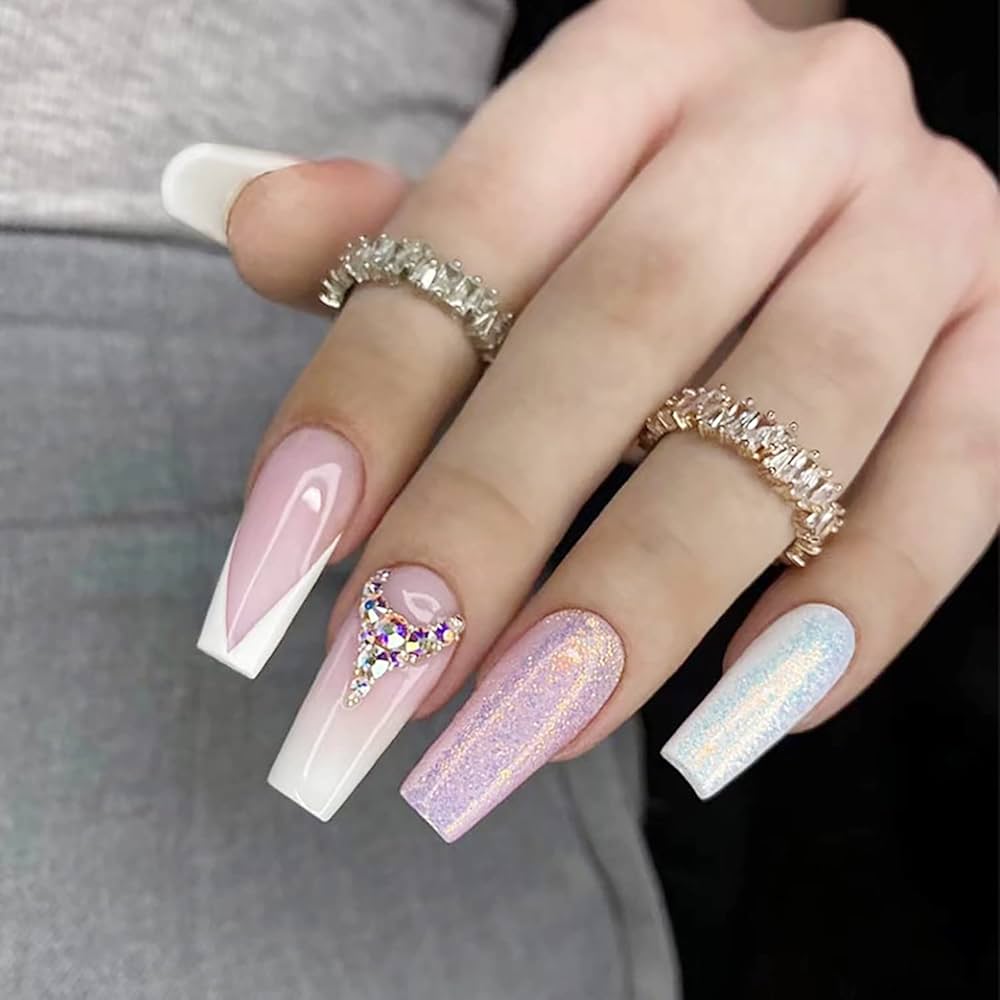
Mismatched

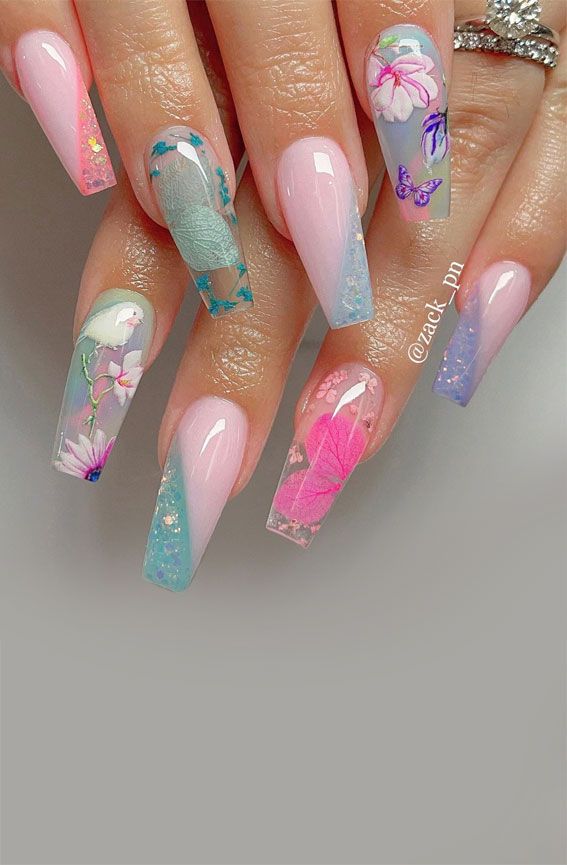
With its intricate blend of translucent hues, ethereal aura designs, and eye-catching 3D elements, it’s a masterpiece of nail art.

3D art

Sculpting gel is the secret weapon for creating cool, abstract 3D nail art. Combined with the edgy coffin nail shape and ethereal aura designs, you can craft a true masterpiece that’s sure to turn heads.
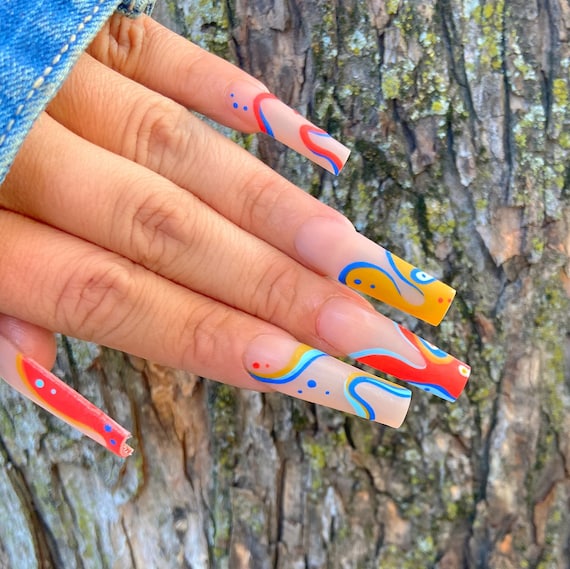
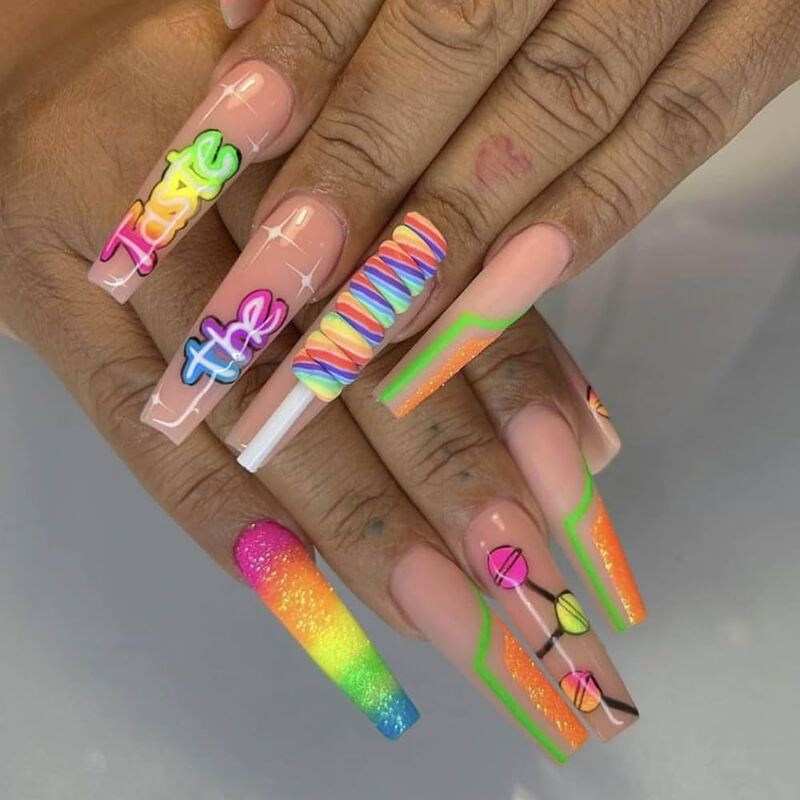
Rainbow swirls

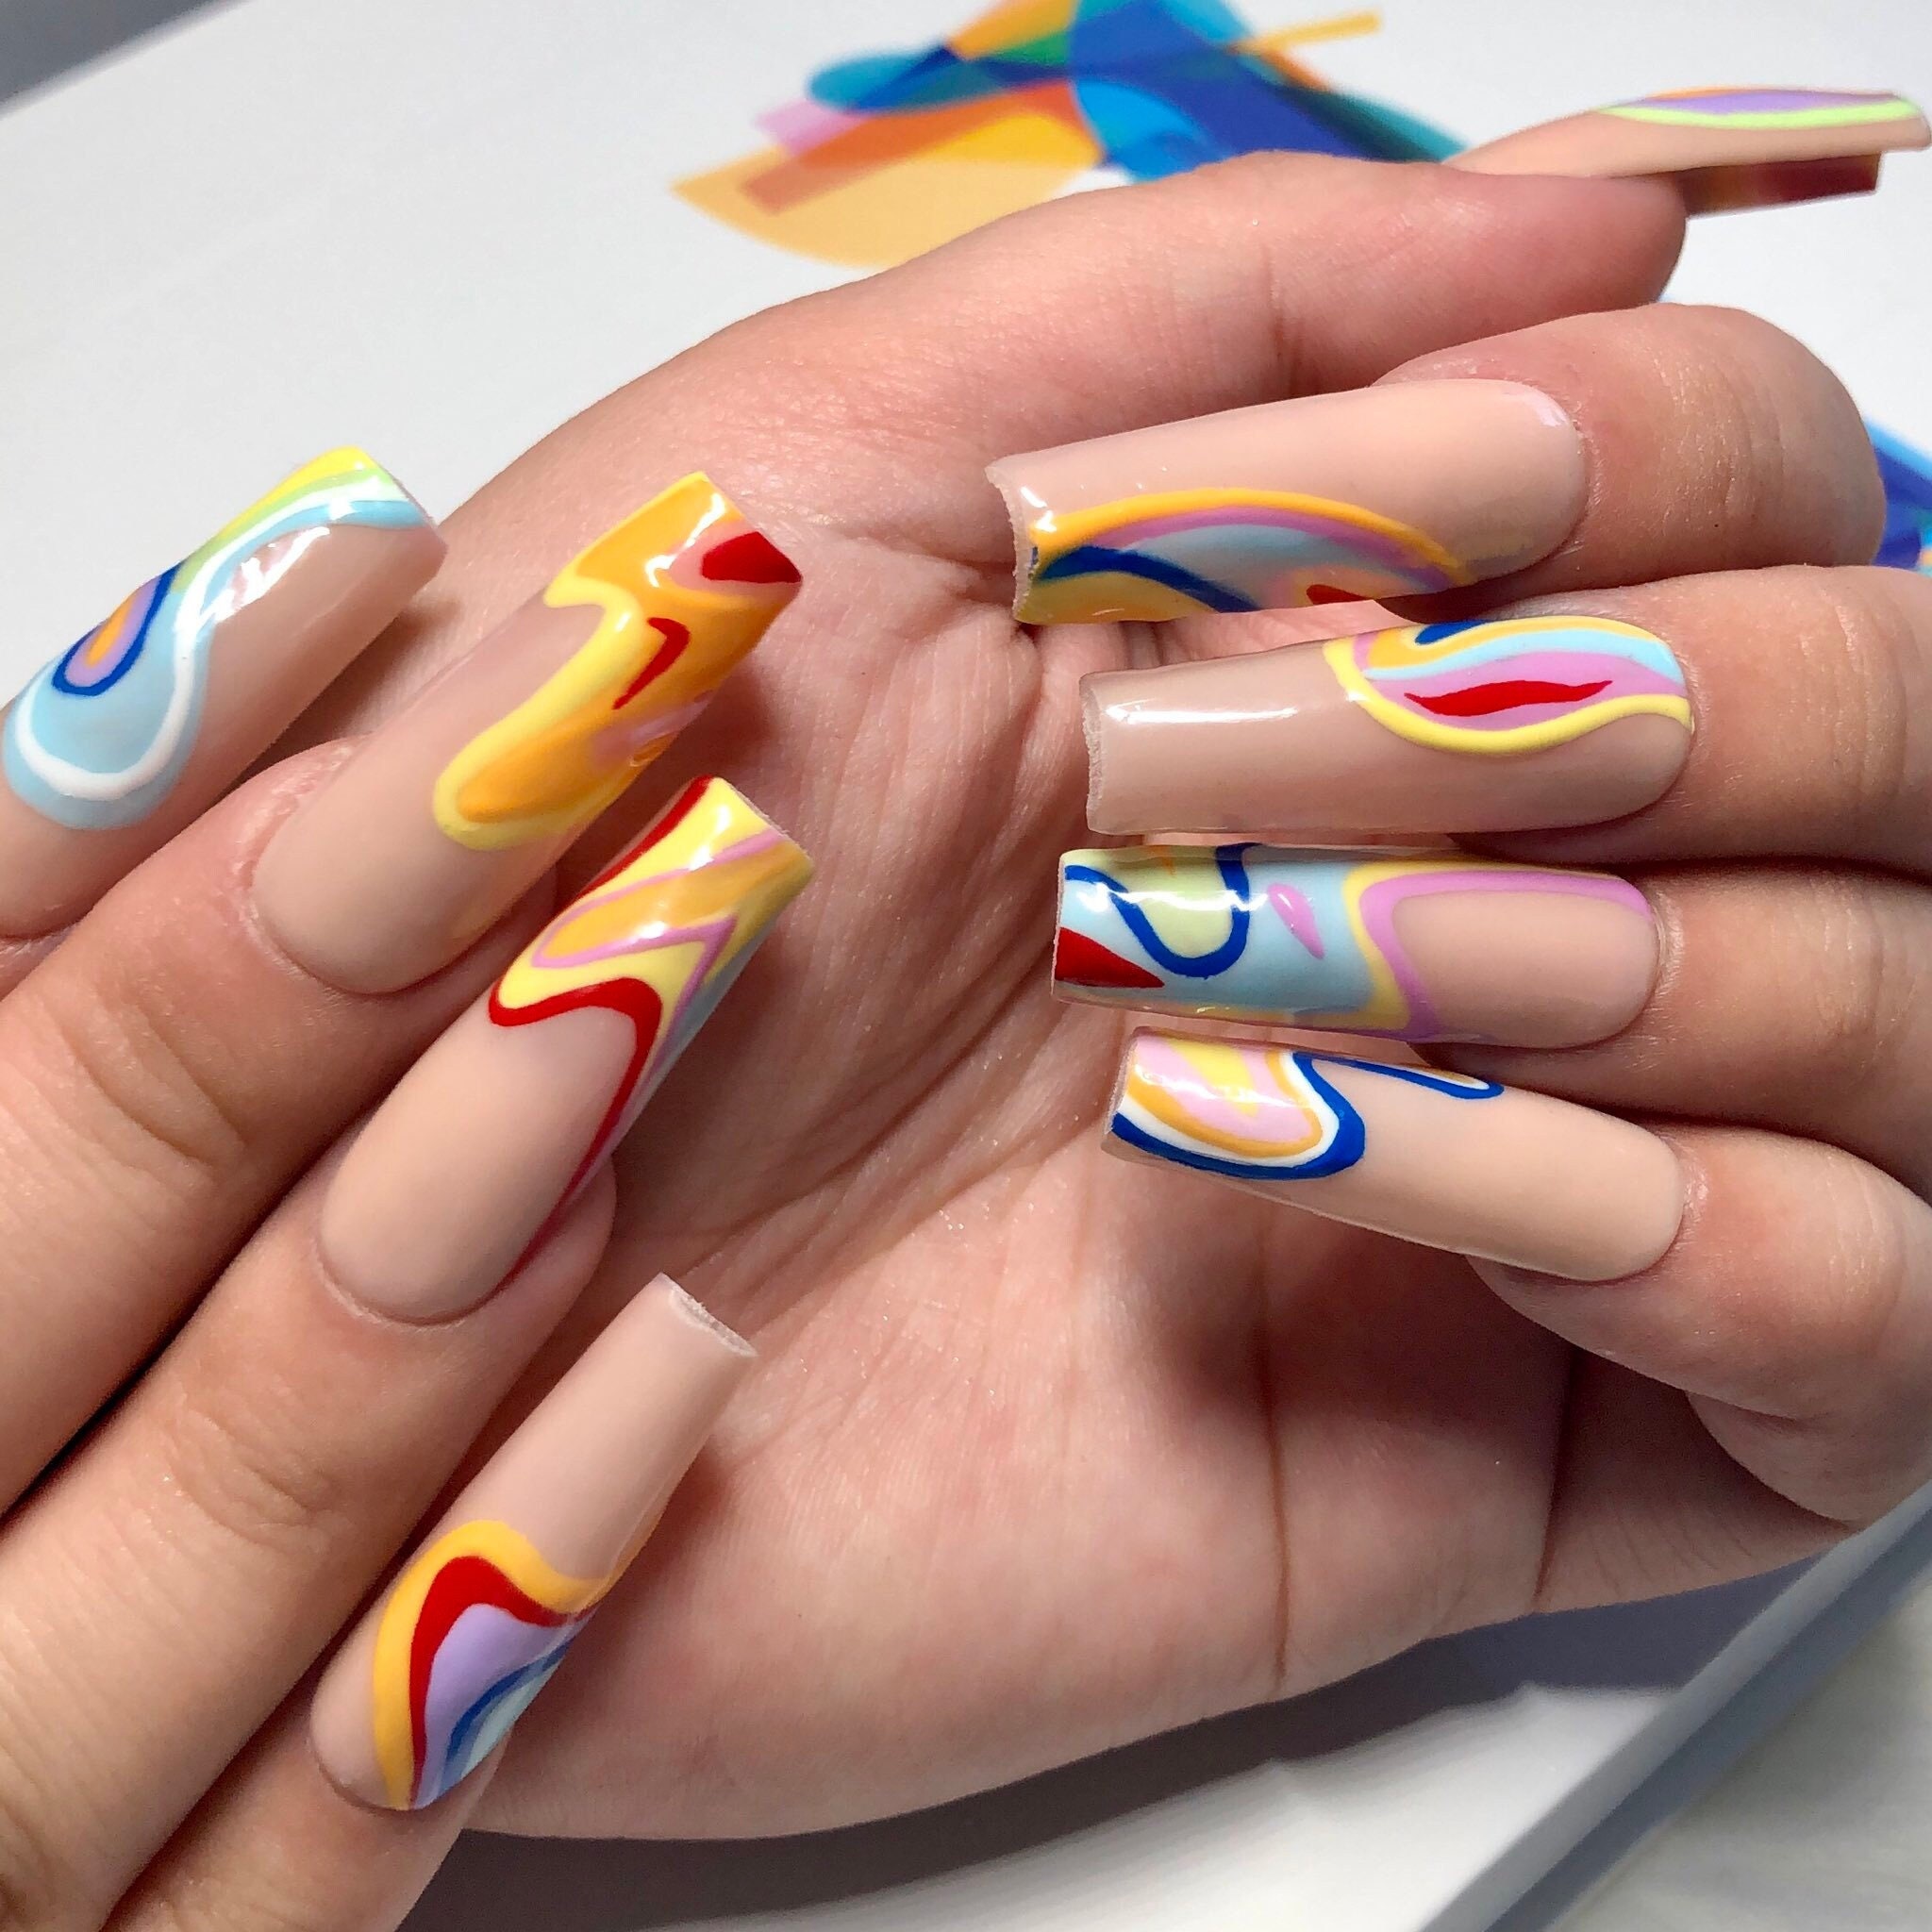
If dopamine dressing were translated into nail art, it would undoubtedly look something like this. Bright, bold, and bursting with joy, this manicure is the perfect embodiment of the trend.

Off White

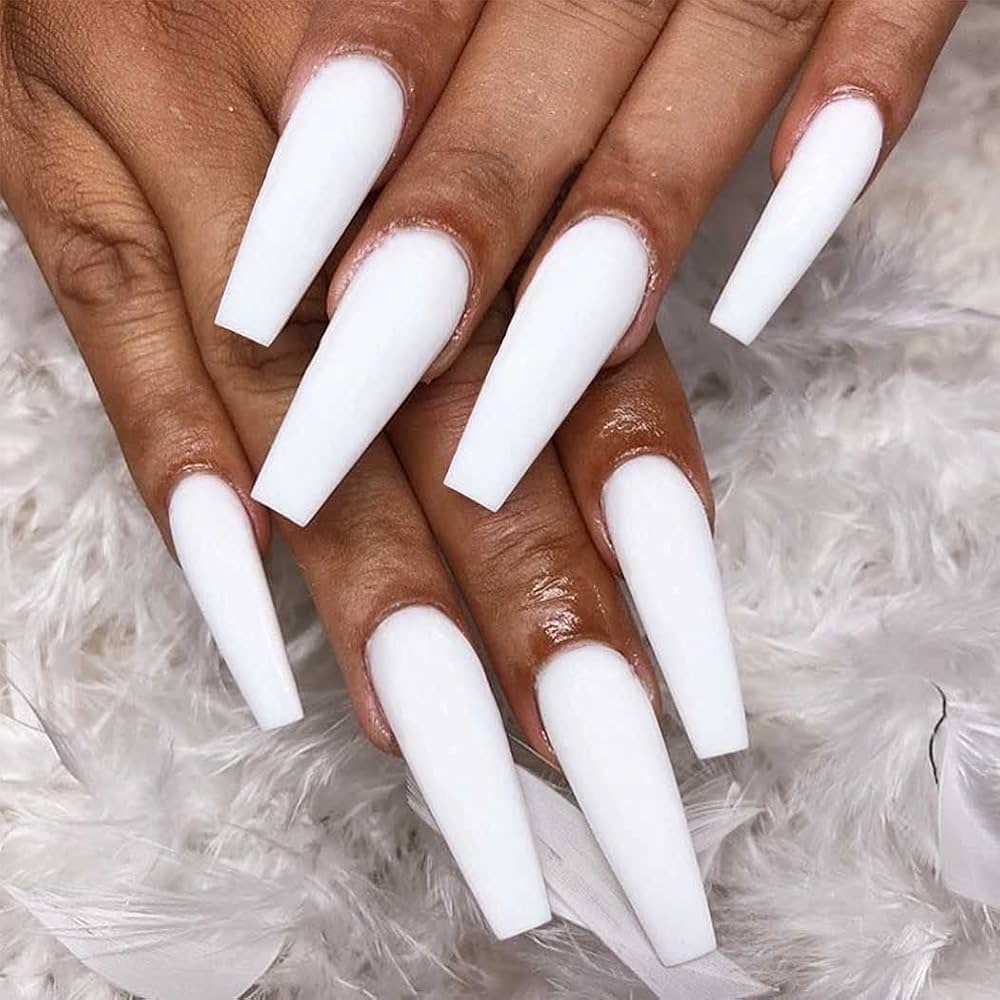
For a sophisticated and timeless look, opt for a creamy off-white shade on a mid-length coffin nail. This classic choice exudes elegance.

Neon details

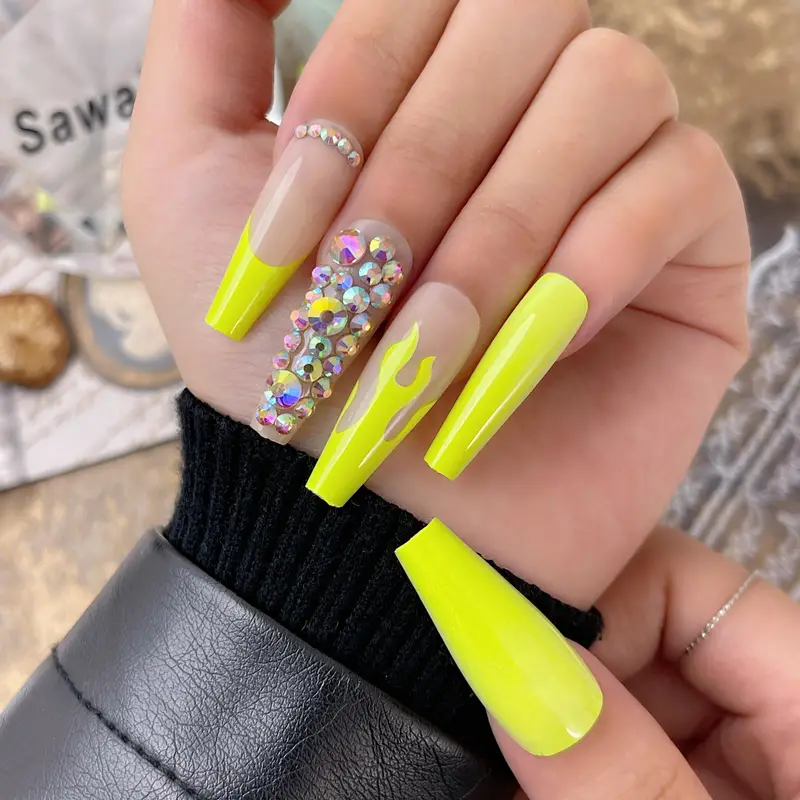
Neon nails are a bold and playful choice. If the intensity of a solid neon color feels overwhelming, consider a gradient ombre with a neon finish for a softer yet eye-catching effect.

French ombre

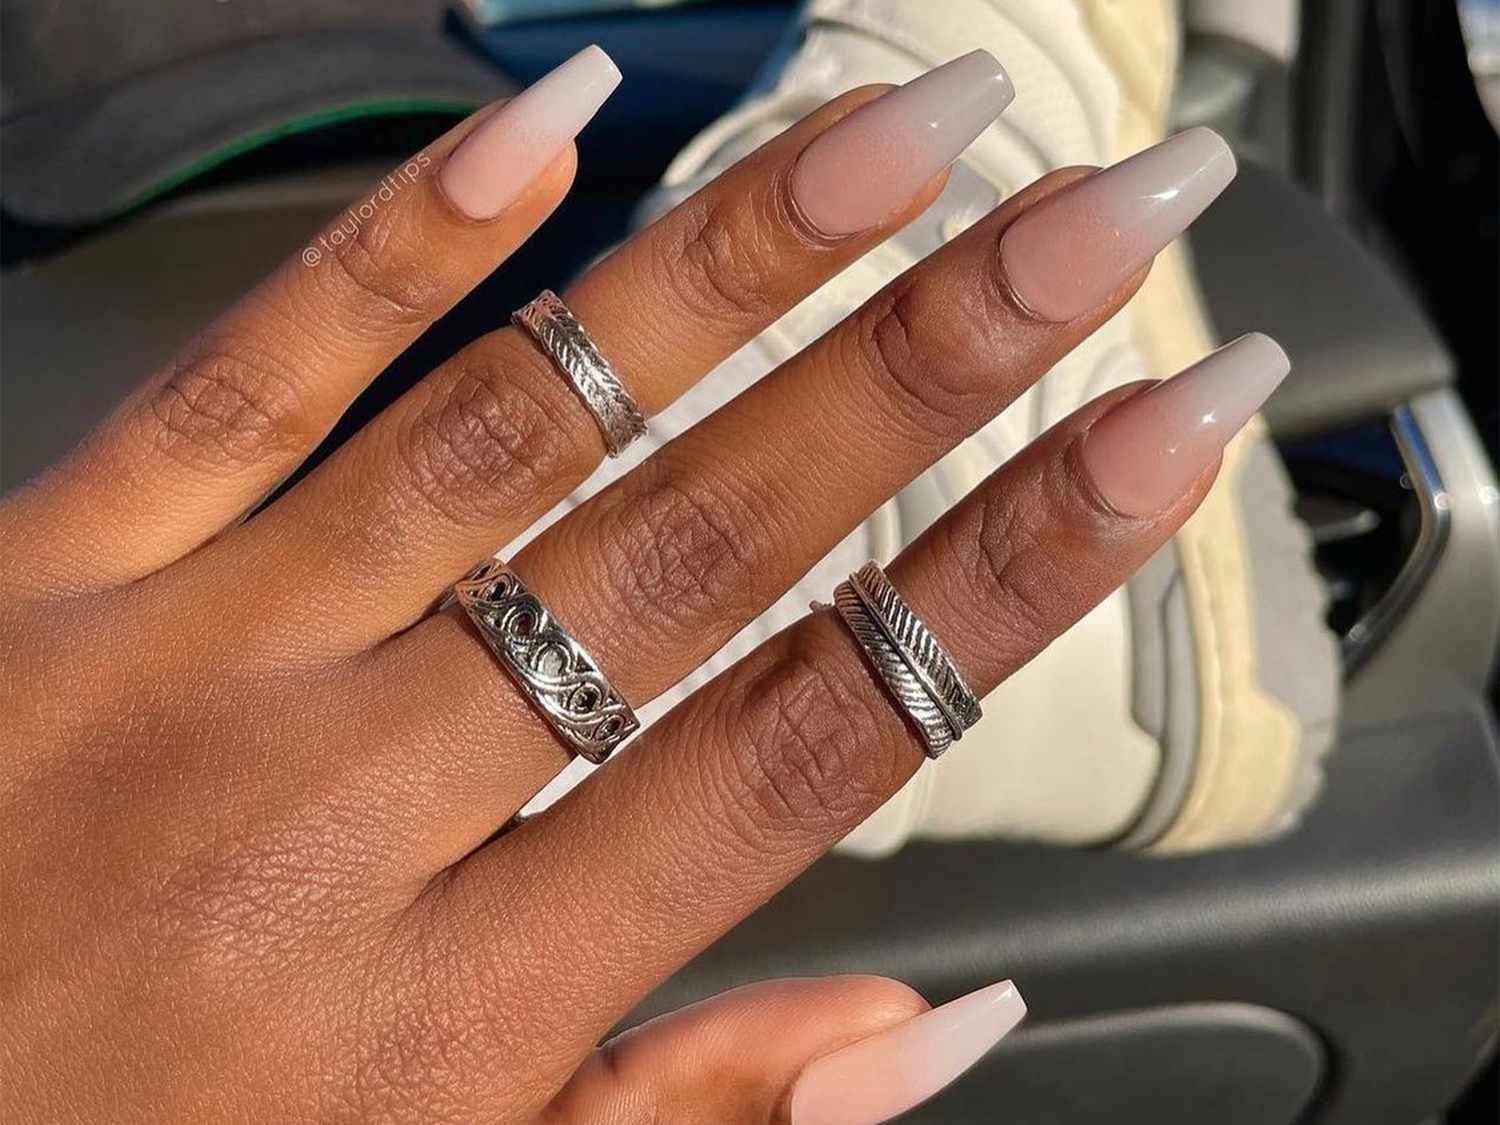
A soft, gradient effect replaces the traditional sharp lines of the French manicure for a more natural and understated look.

Mermaid

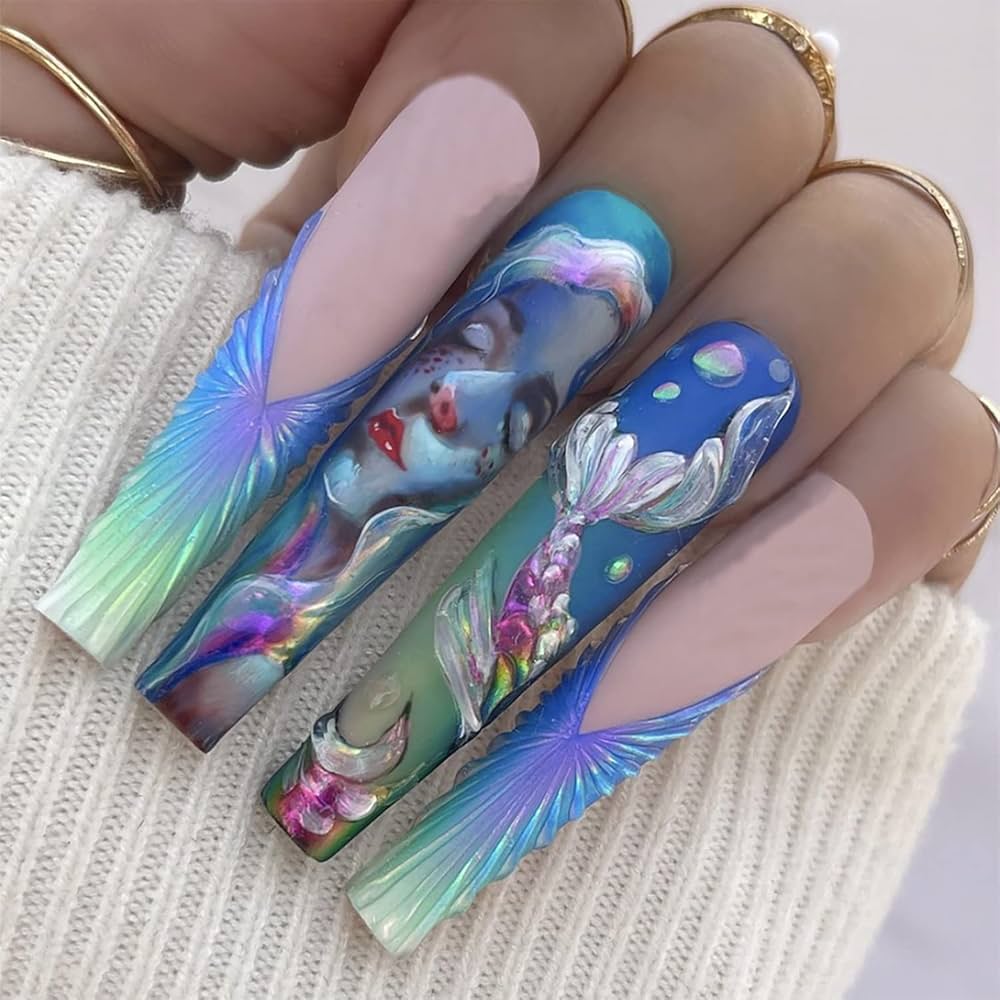
Dive deeper into the mermaidcore trend with scalloped, purple tips. These perfectly complement iridescent dresses and mermaid waves, adding a touch of oceanic magic to your look.
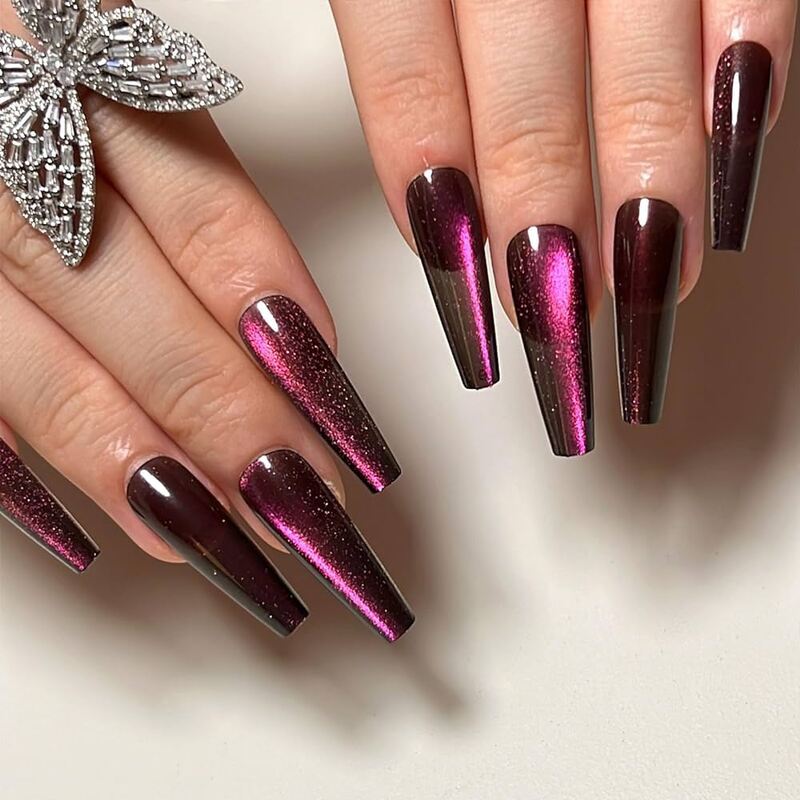
Cat eye

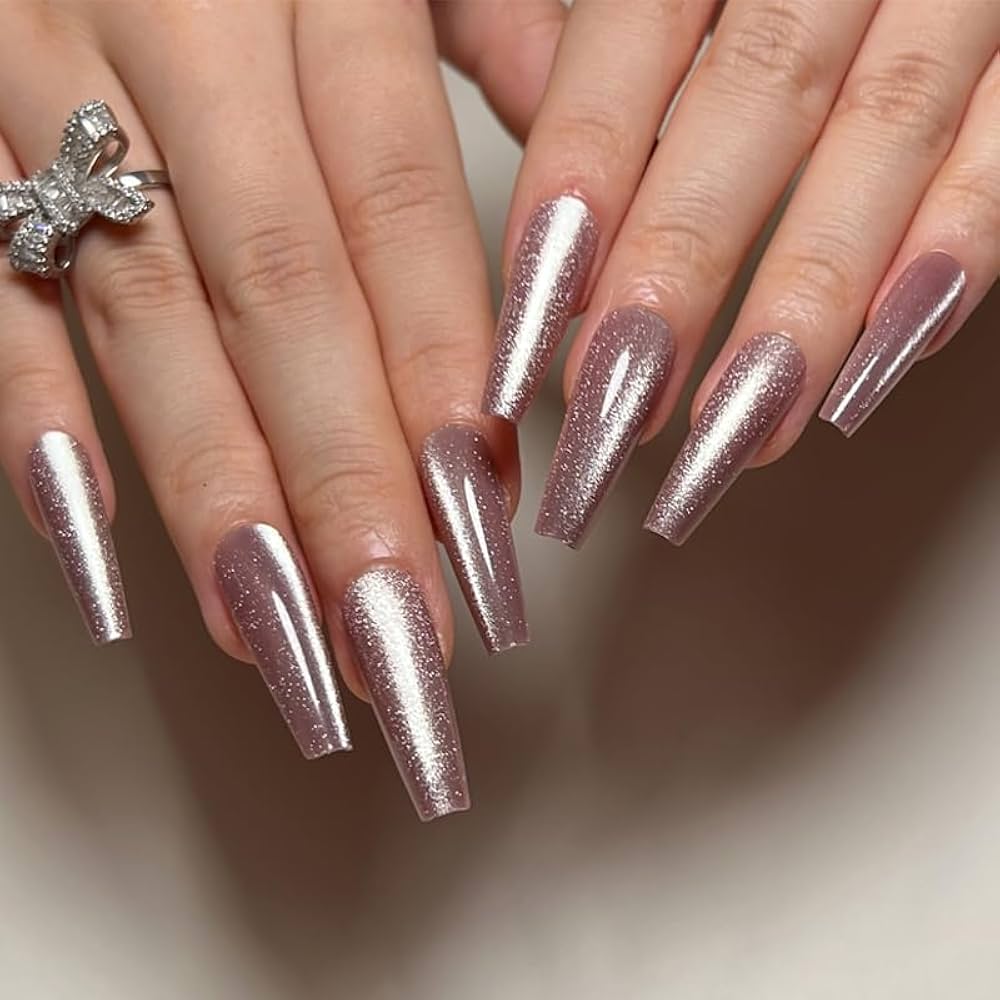
Those mesmerizing, reflective manicures you’ve seen all over Instagram are created using magnetic cat-eye nail polish. The coppery shade is particularly stunning, offering a luxurious and metallic finish with a captivating depth.

Bold solid

Cobalt blue is a stunning choice for the edgy coffin nail shape. The vibrant hue perfectly complements the nail’s angular design, creating a bold and eye-catching look.

Cheetah print tips

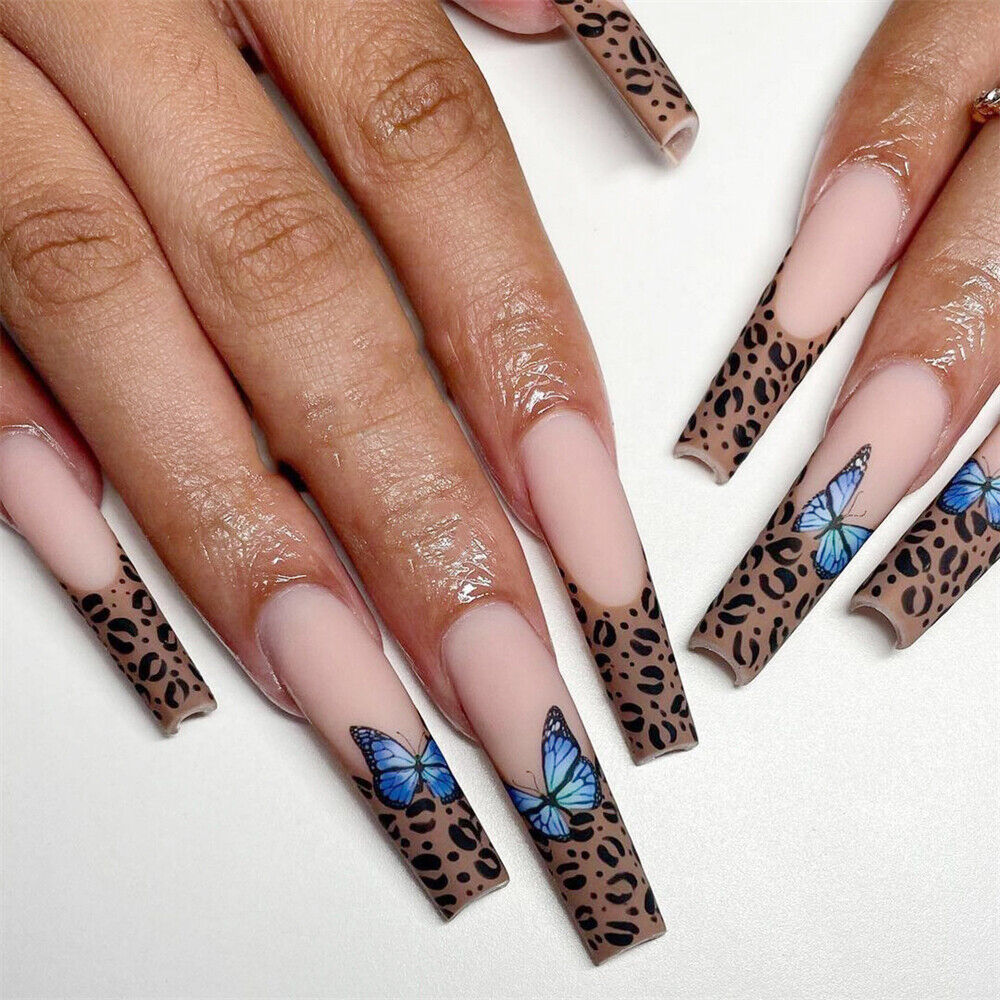
For an even bolder look, elevate your cheetah print tips with a metallic accent at the base of each nail. This unexpected contrast adds a touch of luxury and glamor to the already fierce design.

CONCLUSION

The coffin nail shape offers a versatile canvas for endless design possibilities. From classic neutrals to bold, experimental looks, there’s a coffin nail design to suit every style and occasion. Whether you prefer a minimalist approach or a maximalist masterpiece, this nail shape provides the perfect foundation for showcasing your personal flair. So, embrace the edgy elegance of the coffin nail and let your creativity soar!

7 BEST BIRTHDAY NAIL SET IDEAS WITH LASTING QUALITY

Calling all birthday nail enthusiasts with a birthday coming up! Ready to ditch the chip worries and rock a stunning manicure that lasts? Look no further! We’ve curated 7 of the best birthday nail set ideas specifically designed for birthday nails, ensuring both eye-catching designs and long-lasting wear. Get ready to celebrate your special day with fabulous nails that won’t quit!

OUR TOP PICKS

BEST POLISH: ESSIE GEL COUTURE LONGWEAR NAIL POLISH + TOP COAT KIT

If you’re aiming for a gel manicure look without the UV drying light, Essie Gel Couture Longwear Nail Polish is an excellent choice. This polish, which has a thick, non-dripping formula, applies like regular polish and dries to a hard, glossy finish that mimics a professional salon manicure. We wore these nails for over two weeks and experienced minimal chipping, comparable to professional gel manicures. Removal is straightforward with acetone, leaving your nails healthy and undamaged.

While lamp-cured gel polishes dry faster, Essie Gel Couture takes about 15 minutes to fully dry. However, its staying power is impressive, and we loved the vibrant colors and the well-preserved condition of our nails after removal. If you want a gel-like manicure without the need for a UV lamp, this polish is the best option.

  • Shades: 1
  • Dry Time: 15 minutes
  • Lamp Included: No

BEST FOR TRAVEL: LE MINI MACARON LE MAXI DELUXE GEL MANICURE SET

The Le Mini Macaron compact kit is ideal for on-the-go manicures. We gave it top marks for ease of use, drying time, finished appearance, and nail health post-removal. Despite gel kits often being intimidating for beauty newbies, this kit from Le Mini Macaron is user-friendly and fun, even for beginners. The gel lacquer dries quickly with the included LED lamp, leaving nails glossy and hard in just one minute. However, the travel-friendly lamp is small, so you’ll need to dry your thumb separately.

While we loved the quick-drying, glossy finish, the polish began peeling within a few days and was completely gone soon after. Longer-lasting results might be achieved by using a nail-prepper product, applying thinner coats, or drying nails for a longer time. Despite the short staying power, our nails were not damaged, making this kit an excellent travel choice.

  • Shades: 2
  • Dry Time: 1 minute
  • Lamp Included: Yes

BEST VALUE: GELLEN GEL NAIL POLISH KIT

For a more comprehensive option, the Gellen Gel Starter Kit is a great choice. We awarded this kit perfect scores for ease of use and were impressed with the 12 included bottles of polish, various nail embellishments, grooming tools, and UV lamp. The instructions recommend drying each coat for 60 seconds under the light, but we found our nails were still tacky after a minute. Extending the drying time to 90 seconds yielded better results.

Once painted and dried, we loved the appearance of our gel manicures. The colors were vibrant, and the polish dried smooth with a glossy finish. However, the lacquer began to chip around day six and was completely peeled off by day eight, making soak-off removal unnecessary. While we wish the polish lasted longer, this feature-rich kit offers great value.

  • Shades: 12
  • Dry Time: 90 seconds
  • Lamp Included: Yes

BEST FOR BEGINNERS: SALLY HANSEN SALON PRO GEL STARTER KIT

If you’re new to gel nails, Sally Hansen’s beginner-friendly Salon Starter Kit is perfect for you. This kit earned a perfect score for ease of use, thanks to its simple three-step process and lightning-fast drying time. Curing your nails with the included LED lamp takes only about 30 seconds.

Once dried, our nails were smooth, super shiny, and hard without any stickiness. Although the kit comes with only one color, additional bottles can be purchased separately. Despite the promise of up to two weeks of wear, our manicures didn’t last very long. The gel began to peel when we cleaned around the house, even with gloves on. This kit may not be ideal for those who work with their hands, but it’s a great option for anyone looking to try gel nails at home.

  • Shades: 1
  • Dry Time: 30 seconds
  • Lamp Included: Yes

BEST BUDGET: SENSATIONAIL GEL STARTER KIT

Looking for a budget-friendly option? The SensatioNail Gel Starter Kit is a solid choice. The instructions can be a bit confusing, so we recommend reading through them thoroughly before starting. While this kit wasn’t the easiest to use initially, the process should be smoother the second time around. We were pleasantly surprised by how quickly the lacquer dried with the included LED lamp, but for the best results, we suggest applying thinner layers of paint and taking your time.

The brand claims up to two weeks of wear, but we noticed chipping after about a week—slightly longer than regular polish but not as durable as a professional gel manicure. Although this affordable kit comes with only one polish color, you can purchase additional bottles individually to expand your collection.

  • Shades: 1
  • Dry Time: 3 minutes
  • Lamp Included: Yes

BEST FOR NAIL CARE: RED CARPET MANICURE PRO 45 STARTER KIT

If you prioritize skincare, it’s important to care for your nail beds and cuticles too. This comprehensive kit includes everything from cuticle oil to sealing top and base coats, along with cleansers, foil wraps, cuticle pushers, and more. The gel hardened into a shiny gloss on our nails in just 45 seconds and stayed smooth with minimal chipping for nearly two weeks.

We did notice that the brushes were a bit uneven and frayed, making it challenging to cover all the edges perfectly. However, with a steady hand, we applied the glossy shades, confident that our nails and skin were protected. After removing the polish two weeks later, we were pleased to find our nails as strong as ever.

  • Shades: 1
  • Dry Time: 45 seconds
  • Lamp Included: Yes

BEST OVERALL: MOROVAN NAIL KIT

Morovan’s Poly Gel Kit earned perfect scores for drying time, finished look, staying power, ease of removal, and nail integrity post-removal. We only marked it down for ease of use due to a slight learning curve. However, the instructions were thorough and easy to follow, and the illustrated how-to booklet was very helpful.

This set includes everything needed for a professional-level manicure, plus some fun embellishments and extras. It comes with eight polish shades, including six solid opaques and two ombrés. The kit also includes a primer, a dehydrator, a base coat, a top coat, an LED lamp, and various tools for grooming your nails and cuticles.

The most challenging component was the nail extensions, as the kit includes extension gel and shaping foil to help you create your desired length and shape. Once the gel was applied, the drying process was smooth and straightforward.

After two weeks, only two extensions had fallen off, and the stunning color and shine remained. When it was time to remove the polish, the gel came off easily with the help of a scraping tool. If you’re up for the challenge of DIY gel extensions and want a long-lasting manicure, this kit is an excellent choice.

  • Shades: 8
  • Dry Time: 2 minutes
  • Lamp Included: Yes

FACTORS TO CONSIDER WHEN BUYING AN AT-HOME GEL KIT

STAYING POWER

One of the main attractions of at-home gel nails is their promise of professional-level longevity. The products, tools, and formulas should provide similar results to what you’d get at a salon. However, many kits we tried didn’t last more than a week. Various factors can influence this, including improper use of the kits, daily wear and tear on your nails, and not thoroughly removing natural oils from your nails before painting. For best results, carefully read all instructions and follow the manufacturer’s nail care suggestions, and consider wearing reusable gloves when cleaning and doing dishes.

INCLUDED SHADES

While some at-home gel kits come with multiple polish shades, many starter sets only include one or two. However, additional colors are often available for individual purchase, allowing you to gradually expand your collection with shades you’ll actually use. An extra bottle of white nail polish is great for classic French manicures and the trendy “glazed donut” nails.

CURING LAMP

Most kits come with a UV or LED lamp, which is essential for curing and drying gel polish. As celebrity nail artist Elle Gerstein explains, “Gel polish needs a UV light to cure/dry and provides a chip-free manicure that lasts much longer than regular nail polish.” Depending on the lamp’s bulbs and wattage, each coat will take anywhere from 30 seconds to three minutes to cure. Most of our top picks, except for Essie’s Gel Couture Longwear Nail Polish, include an LED/UV lamp.

REMOVAL

Gel manicures typically require soak-off removal. This involves soaking 10 cotton pieces in pure acetone, placing them on your nails, wrapping them in foil, and letting them sit for about 15 minutes. After soaking, the polish usually scrapes off easily. If you prefer not to make multiple trips to the store, consider the Red Carpet Manicure Pro 45 Gel Starter Kit, which includes foil wraps, gel polish remover, and more.

CONCLUSION

So there you have it! With these seven fantastic nail set ideas, you can celebrate your birthday with stunning nails that last. Whether you crave a classic French manicure, a touch of playful glitter, or a bold, eye-catching design, there’s a perfect option for you. So go forth, embrace your beautiful nails, and rock a birthday mani that shines as bright as you do!