Finger Waves Long Hair: How to Achieve the Vintage Glamour Look

Are you tired of the same old hairstyle and want to try something new? Finger waves are a classic hairstyle that has been around since the 1920s. This timeless look is perfect for any occasion, whether it be for a night out or a formal event. With long hair, you can take this retro hairstyle to the next level. 

In this article, we will explore everything you need to know about finger waves long hair.

What are Finger Waves?

Finger waves are a hairstyle where the hair is styled in an S-shaped wave pattern. This technique involves using your fingers, a comb, and gel to create sleek, defined waves. Finger waves were popular in the 1920s and 1930s but have made a comeback in recent years.

What product do you need to create finger waves?

Hair Setting Lotion or Gel: You’ll need a hair setting lotion or gel to help shape and hold the waves. These products provide the necessary hold and flexibility for finger waves.

Wide-Tooth Comb: A wide-tooth comb will help you section and smooth your hair as you create the waves.

Rat Tail Comb: A rat tail comb is a fine-toothed comb with a narrow, pointed end. It’s used to create precise, defined waves.

Hair Clips or Bobby Pins: These will help you section and secure your hair as you work through the styling process.

Hair Dryer: You may need a hair dryer to set the waves and help them dry in place.

Hairspray: Hairspray is used to lock in the waves and provide additional hold.

How to Achieve Finger Waves Long Hair

Preparation

  • Start with clean, damp hair. You can either dampen your hair with water or use a spray bottle to mist it lightly.
  • Apply a generous amount of hair setting lotion or gel evenly throughout your hair. Make sure to distribute it from roots to ends.

Section Your Hair

Use the wide-tooth comb to divide your hair into smaller sections. The number of sections will depend on your hair’s thickness and the size of the waves you want. Typically, you’ll create 1-2 inch wide sections.

Creating Waves

  • Take a small section of hair from one of the larger sections you’ve created.
  • Comb this small section smooth.
  • Using the rat tail comb, start creating the finger wave by making an “S” shape with the hair. Hold the hair in place with your fingers.
  • You may need to hold the wave in place for a few seconds to let it set.

Securing the Waves

Once you’ve created a wave, use hair clips or bobby pins to secure it in place. Pin the wave to your scalp to help it set.

Repeat

Continue this process for each section of hair, working your way around your head. Be patient and take your time to create well-defined waves.

Drying

You can use a hair dryer on a low heat setting and a diffuser attachment to speed up the drying process. Alternatively, you can let your hair air dry, but this will take more time.

Setting with Hairspray

  • Once your waves are completely dry, carefully remove the clips or pins.
  • Spray your hair with a generous amount of hairspray to lock in the waves and provide hold.

7 Gorgeous Finger Wave Hairstyles for Long Hair

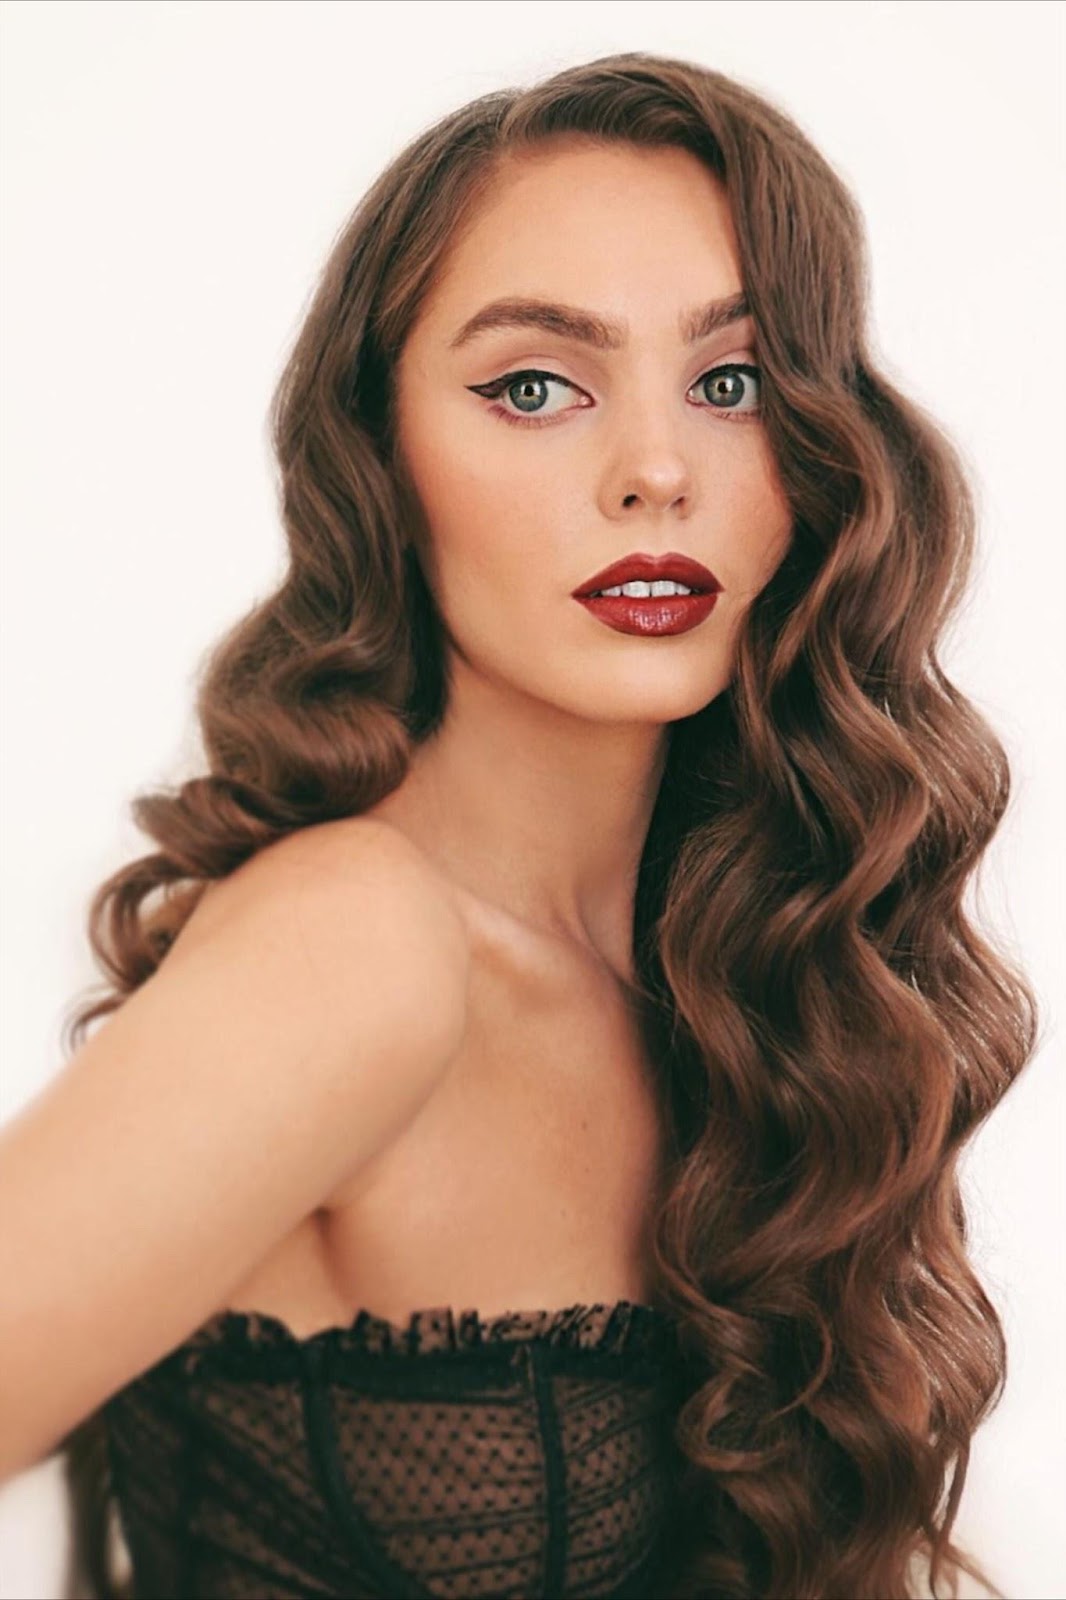
Classic Hollywood Glamour Waves

Get ready to rock a classic red carpet look! Start by creating those iconic deep and uniform finger waves throughout your lush, long locks. Let them flow gracefully and sweep them over to one side for that timeless Hollywood glamour. Seal the deal with a trusty dose of hairspray to ensure those waves stay fabulous all day or night long.

Half-Up Finger Waves

This style is all about striking that perfect balance between vintage charm and modern chic. Keep the lower half of your long tresses down and free-spirited while you work your magic by crafting delightful finger waves on the upper section. Begin at the front and work your way back, then gather those waves and pin them up at the back, allowing the rest of your hair to dance with effortless beauty.

Retro Side-Swept Wave

Ready for some vintage vibes with a twist? Part your hair on one side and start creating those finger waves on the side with fewer locks. Begin at the front and work your way back, then elegantly sweep those waves over to the side with more hair. Secure them with bobby pins, and you’ll have a charming, attention-grabbing look that’s as timeless as it is chic.

Mermaid Waves with Finger Wave Accent

It’s time to blend the best of both worlds! Let most of your long hair flow naturally, boasting soft waves or loose curls, and then add a touch of glamour with a single, eye-catching finger wave accent on one side. This unique style effortlessly combines today’s beachy waves with a sprinkle of classic charm, making it ideal for anyone who loves a bit of old-school flair.

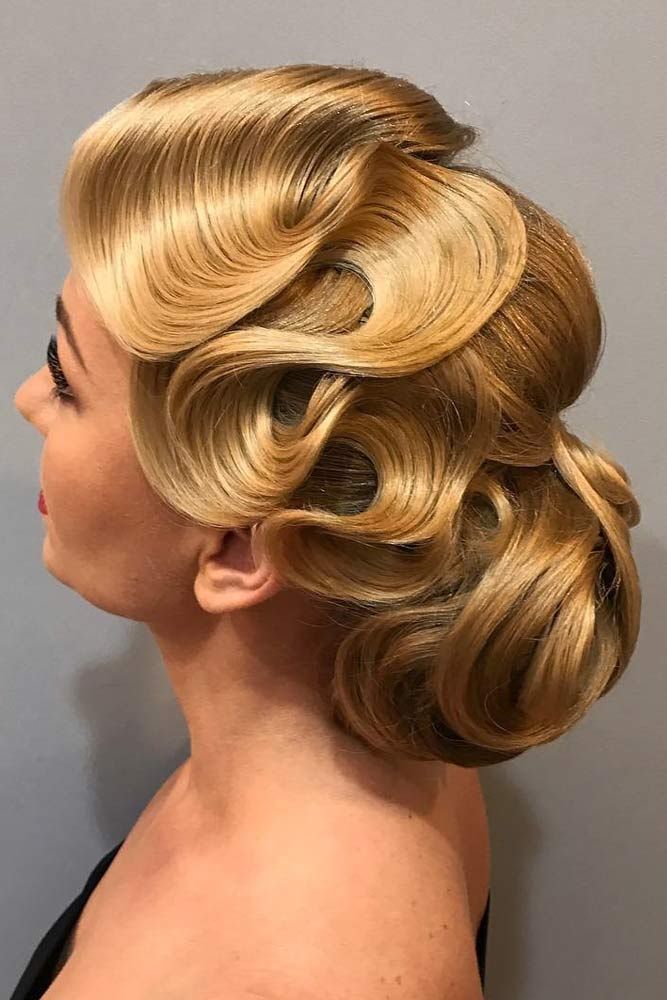
Finger Waves with Updo

Elevate your elegance game with finger waves that embrace your long hair, then gather them at the nape of your neck and fashion them into a low bun or chignon. This chic hairstyle is like a fusion of timeless finger waves and the sophisticated charm of an updo. It’s perfect for formal events, date nights, or anytime you want to feel effortlessly classy.

Finger Waves with Ponytail

Looking for a sophisticated yet practical style? Craft those finger waves on the top and sides of your hair, and then bring them together with the rest of your long locks into a high or mid-height ponytail. Seal the deal with a stylish hair tie or wrap to create a look that gracefully marries vintage allure with the convenience of a ponytail.

Braided Finger Waves

Let’s add some texture and flair to your long locks! Begin by creating those finger waves on the top section, and then transition into a loose or intricate fishtail braid with the remaining strands. This creative style combines the timeless elegance of finger waves with the artistry of braiding, resulting in a look that’s uniquely captivating.

tips for Maintaining Finger Waves

Once you have achieved finger waves long hair, you want to make sure they last as long as possible. Here are some tips for maintaining your finger waves:

  • Sleep with a Silk Scarf: Wrapping your hair in a silk scarf at night will help maintain your waves. This will prevent your hair from getting frizzy and tangling.
  • Avoid Touching Your Hair: The more you touch your hair, the more likely your waves will fall out. Avoid running your fingers through your hair throughout the day.
  • Use Hairspray: Hairspray will help keep your waves in place. Be sure to use a strong hold hairspray that won’t weigh your hair down.

FAQs

  1. Can you achieve finger waves long hair with natural hair? Yes, finger waves can be achieved with natural hair. However, it may take longer for the waves to set and may require more product.
  2. How long does it take to achieve finger waves long hair? It can take anywhere from 30 minutes to an hour to achieve finger waves long hair. However, this may vary depending on your hair length and thickness.
  3. Can I achieve finger waves using a curling iron or straightener? No, finger waves require gel and a comb to create defined waves. Curling irons and straighteners do not provide the same effect.
  4. What is the best way to remove finger waves? To remove finger waves, simply wash your hair with shampoo and conditioner. If your hair feels greasy, you can use a clarifying shampoo.
  5. Can finger waves be done on all hair types? Finger waves can be done on most hair types. However, it may be more difficult to achieve on hair that is extremely thick or coarse.

Final Takeaway

Finger waves long hair may seem like a daunting task, but with the right tools and techniques, it can be achieved by anyone. This classic hairstyle is perfect for any occasion and adds a touch of glamour to your look. Remember to practice and be patient when attempting this style. With time and dedication, you will be able to master the art of finger waves long hair.

How Long Does a Blowout Last? What You Need to Know

Have you ever treated yourself to a fabulous blowout and then wondered how long does a blowout actually last?  Well, buckle up, because we’re about to dive into the world of hairstyling and unravel this beauty mystery together!

You walk out of the salon with hair that looks like it’s straight out of a magazine – all bouncy, voluminous, and oh-so-glamorous. But here’s the thing, my friend, a blowout isn’t just a one-size-fits-all deal. It’s a blend of technique, products, and a touch of magic that can leave you looking fabulous for different lengths of time.

So, if you’re curious about what makes a blowout last, how you can prolong its enchanting effects, and maybe even how to rock those post-blowout days, stick around. We’re about to break it all down and spill the tea on this hairstyling adventure!

What Is a Blowout?

A blowout is like that Cinderella moment for your hair when it goes from “just woke up” to “red carpet ready” in a matter of minutes. Imagine stepping into a salon with your hair feeling a bit lackluster and leaving with locks that are voluminous, sleek, and oozing confidence.

Here’s the lowdown: A blowout is a professional hairstyling technique where your hair is washed, dried, and styled using a blow dryer, round brush, and sometimes a sprinkle of hairstylist’s wizardry. It’s not just a simple drying process – it’s an art form that can transform your hair’s texture, add volume, and smoothen it out for a polished finish.

Think of it as your hair’s best day ever. The stylist works their magic section by section, creating that perfect blend of curves, flips, and sways. They might use different brush sizes to achieve different effects, like extra volume or those elegant, cascading waves that Instagram dreams are made of.

But here’s the kicker: A blowout isn’t just for special occasions or celebs hitting the red carpet. Nope, it’s become a go-to beauty treat for anyone who wants to feel like a million bucks on any regular day. So, whether you’re looking to conquer a big presentation, slay a first date, or just give yourself a confidence boost, a blowout is like your hair’s secret weapon – no capes required.

How Does a Blowout Work?

At its core, a blowout is a meticulously crafted process that turns your hair into a work of art. It’s like having your very own personal stylist working their charm on your locks. Here’s the breakdown of how it all goes down:

Prep and Wash: It all starts with a good wash. Your hair is cleansed with shampoo and conditioner to get rid of any dirt, excess oil, or product buildup. This clean slate sets the stage for a blowout masterpiece.

Product Potion: After your hair is squeaky clean, the stylist applies a cocktail of styling products. These products can range from heat protectants to creams that enhance volume, smoothness, or texture. The choice of products depends on your hair type and the desired outcome.

Section by Section: The stylist divides your hair into sections. This is where the real craft begins. They work on each section individually, ensuring every strand gets the attention it deserves.

Brush, Brush, Brush: Armed with a round brush, the stylist gets to work. They use a combination of brushing and heat from a blow dryer to manipulate your hair’s shape. The round brush helps create volume, bounce, and those enviable curves. As they work, you might feel like you’re getting a mini scalp massage – it’s part of the experience!

Cool Down: Once a section is perfectly styled, the stylist might hit you with a blast of cool air. This helps set the style and ensures it holds its shape for longer.

Repeat and Perfect: The process is repeated for each section of your hair. It’s all about achieving a harmonious look that complements your unique features.

Finishing Touches: Once all sections are done, the stylist might add a bit of shine serum, hair spray, or any final touches to lock in the style and keep it looking fabulous.

How Long Does a Blowout Last?

On average, a blowout can last anywhere from 2 to 5 days. But, of course, this isn’t a hard and fast rule. The exact duration can be influenced by a bunch of factors that play into the equation. Here’s what you need to consider:

Hair Type: Your hair type plays a major role. If you’ve got naturally straight hair, your blowout might hold up a bit longer. On the flip side, if your hair is naturally curly or prone to frizz, you might find that your blowout starts to lose its oomph sooner.

Climate: Mother Nature isn’t always on our side. Humid or rainy weather can be a blowout’s nemesis. High humidity levels can cause the hair to absorb moisture from the air, leading to frizz and a shorter blowout lifespan.

Lifestyle: What you do in those days after the blowout matters. If you’re hitting the gym, lounging by the pool, or doing anything that might expose your hair to sweat or moisture, it can affect how long your blowout lasts.

Sleep Habits: How you sleep matters too. If you’re tossing and turning like a human tornado during your beauty sleep, your blowout might not survive the night.

Maintenance: The TLC you give your hair matters. Using a silk pillowcase, avoiding excessive touching, and using dry shampoo can all help prolong the life of your blowout.

Products: Using the right products can work wonders. Dry shampoo can soak up oil and add volume, while hair sprays or serums can help maintain the style.

Hair Health: The healthier your hair, the better it holds a blowout. Regular trims and deep conditioning can improve your hair’s overall quality.

How Can I Make My Blowout Last Longer?

Start with a Solid Foundation:

A good blowout starts with a clean canvas. Ensure your hair is thoroughly washed and conditioned before the blowout process begins.

Ask your stylist to use products that suit your hair type and style goals. These products create a foundation that helps the blowout hold up longer.

Hands Off!

Avoid touching your hair unnecessarily. The oils from your hands can transfer to your hair, causing it to lose its freshness faster.

Sleep Smart:

Tie your hair up in a loose, high ponytail or use a silk/satin pillowcase to minimize friction and maintain the blowout while you sleep.

Use Dry Shampoo:

Dry shampoo is your best friend for extending the life of your blowout. It helps absorb excess oil, adding volume and freshness to your hair.

Embrace Shower Caps:

If you’re not planning to wash your hair, wear a shower cap to protect it from moisture in the bathroom.

Keep Cool:

Use cool air settings on your hairdryer when restyling or freshening up your blowout. This helps set the style without overheating your hair.

No Fuss Styling:

Minimize heat styling during the days after your blowout. Excessive heat can weaken the blowout’s structure.

Tame with Texturizing Spray:

A texturizing spray can help revive your blowout by adding some texture and hold. Just spritz and fluff to give your hair new life.

Avoid Humidity:

If it’s humid outside, consider using an anti-humidity hair spray to help keep frizz at bay.

Maintain Overall Hair Health:

Regular trims and deep conditioning treatments keep your hair healthy, making it more likely to hold the blowout style.

Be Mindful of Activities:

If you’re hitting the gym or doing any activities that could make you sweat, try to keep your hair off your face and use a sweatband.

Plan Your Blowout Timing:

Consider scheduling your blowout closer to days when you want to look your best, and plan your activities accordingly.

FAQs

  1. Can I wash my hair during a blowout’s lifespan? Washing your hair during the blowout’s lifespan can diminish its effects. If you need to cleanse, consider using a gentle dry shampoo or opt for a lightweight rinse without full washing.
  1. What products are best for maintaining a blowout? Choose products recommended by your stylist based on your hair type. Heat protectants, dry shampoos, texturizing sprays, and lightweight hair sprays can be useful for maintaining a blowout.
  2. How often can I get a blowout? Getting a blowout too frequently can stress your hair. It’s generally recommended to space them out every 1 to 2 weeks to prevent excessive heat damage.
  1. Can blowouts work on all hair types? Yes, blowouts can work on various hair types, but the techniques and products might differ. Discuss your hair type with your stylist to achieve the best results.
  2. Can I do a blowout at home? While it might not replicate a salon blowout perfectly, you can achieve a decent blowout at home with the right tools and techniques. Practice makes perfect!
  1. How do I choose the right stylist for a blowout? Look for stylists with experience in blowouts and positive reviews. Consult with them about your hair type and desired style to ensure they understand your needs.
  1. Can I color or treat my hair before a blowout? It’s generally best to color or treat your hair before a blowout, as chemicals can affect the longevity of the style. Discuss your plans with your stylist for personalized advice.