How to Silk Press Natural Hair like a pro

If you’ve ever dreamed of having gorgeously straight and smooth hair while keeping your natural texture intact, you’re in for a treat with the silk press. It’s like a magical hair transformation that allows you to switch up your style temporarily. Whether your hair is curly, coily, or wavy, the silk press can give you that sleek, elegant look you’ve been cravin. Unlike traditional methods of straightening hair, silk pressing leaves your locks with a silky, bouncy finish that looks and feels natural. 

In this article, we’ll discuss everything you need to know about silk pressing natural hair – from what it is and how to do it to its pros and cons.

What is a Silk Press?


A silk press is a hair straightening technique that uses a combination of blow-drying and flat ironing to achieve a smooth, silky finish. It is a popular technique for people with naturally curly or textured hair, as it can help to reduce frizz and create a more manageable style.

The process involves using heat to temporarily break down the protein bonds in the hair, allowing it to be molded and styled into straighter patterns. The term “silk press” comes from the silky and smooth finish that the hair gets after the process is complete.

Unlike chemical relaxers, which permanently alter the hair’s structure, silk pressing only lasts until the next time you wash your hair. Additionally, silk pressing doesn’t involve the use of harsh chemicals, making it a safer and gentler alternative for those who prefer not to use chemicals on their hair or have sensitive scalps.

how to do a silk press on natural hair at home

Materials You’ll Need

  • Shampoo and conditioner
  • Wide-tooth comb or detangling brush
  • Heat protectant spray or serum
  • Blow dryer with a nozzle attachment
  • Ceramic flat iron (with adjustable temperature settings)
  • Clips or hair ties
  • Silk or satin scarf or bonnet
  • Silk or satin pillowcase

Step 1: Start with Clean Hair

Silk pressing should always be done on freshly washed and conditioned hair. This will ensure that your hair is free from any product buildup or oils that can interfere with the straightening process. After washing, apply a heat protectant to protect your hair from heat damage.

Step 2: Detangle Your Hair

While your hair is still damp, use a wide-tooth comb or detangling brush to gently remove any knots or tangles. Begin at the tips of your hair and work your way up to the roots to avoid excessive breakage.

Step 3: Apply Heat Protectant

Apply a heat protectant spray or serum evenly throughout your hair. This will create a barrier between your hair and the heat from the flat iron, reducing the risk of damage.

Step 4: Blow Dry Your Hair

Attach a nozzle to your blow dryer for more precise air control. Using a medium to low heat setting, begin blow drying your hair in sections. Use a paddle brush to guide the heat through your hair, stretching it out as you go. Aim to get your hair as straight as possible during this step.

Step 5: Section Your Hair

Divide your hair into small, manageable sections using clips or hair ties. Smaller sections allow for more even and effective straightening.

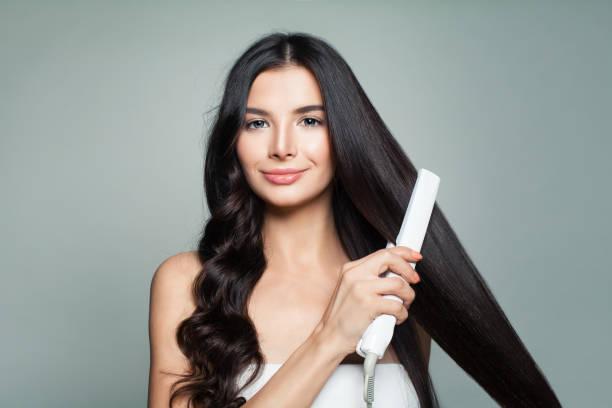
Step 6: Straighten Your Hair

  • Set your ceramic flat iron to an appropriate temperature for your hair type. Lower temperatures are suitable for fine hair, while higher temperatures are better for coarse or thick hair. Start with a lower temperature and gradually increase it if needed to avoid excessive heat damage.
  • Take one of the sections you’ve created and run the flat iron down a small portion of hair, starting as close to the roots as you can without burning yourself. Use a slow, steady motion to straighten the hair. Repeat this process for each section of your hair until it’s all straightened.

Step 7: Silk Wrap Your Hair

After straightening each section, wrap it around your head in the direction you want it to fall, creating a silk wrap. Use clips or pins to secure it in place. This helps to set the hair and maintain its sleekness.

Step 8: Let Your Hair Cool

Allow your hair to cool down in the silk wrap for at least 10-15 minutes. This helps the hair’s cuticles close and maintain the straightened style.

Step 9: Style and Finish

Carefully unwrap your hair from the silk wrap and style it as desired. You can add a little oil or serum for extra shine and smoothness

Pros and Cons of a Silk Press

Like any hair styling technique, silk pressing natural hair has its pros and cons. Here are some of the most important ones:

Pros 

  • Give your hair a smooth, sleek finish that can last for several days.
  • Help to reduce frizz and make your hair more manageable.
  • Once your hair has been silk pressed, you can style it in a variety of ways, such as straight, curly, or wavy.
  • Can be used on all hair types, including naturally curly or textured hair.

Cons 

  • Can be a time-consuming process, especially if you have thick or long hair.
  • If not done correctly, a silk press can damage your hair. It is important to use a heat protectant spray and to avoid over-flat ironing your hair.
  • If you get a silk press done at a salon, it can be expensive.

How long does silk press last on natural hair?

The longevity of a silk press on natural hair can vary depending on several factors, including your hair’s texture, the quality of the silk pressing technique, your hair care routine, and your environmental conditions. On average, a well-done silk press can last anywhere from 1 to 2 weeks. However, for some individuals with extremely curly or coily hair, the results might start reverting to their natural texture sooner. 

To prolong the life of your silk press, it’s essential to protect your hair while sleeping with a silk or satin scarf or bonnet, avoid excessive moisture or humidity, and use lightweight hair products to minimize the risk of reversion. Regular maintenance and touch-ups can also help extend the duration of your silk press.

FAQs 

  1. Is a silk press damaging? Silk pressing can cause heat damage if not done properly or excessively. To minimize damage, always use a heat protectant and only flat iron your hair when it’s completely dry.
  2. Can I silk press my hair at home? Yes, you can silk press your hair at home, but it’s important to use the right tools and techniques to avoid damaging your hair. Make sure you have a high-quality flat iron with adjustable temperature settings, a heat protectant, and a shine serum or oil to finish the look.
  3. Can I silk press my hair if it’s already been chemically treated? It is not recommended to silk press your hair if it has been chemically treated, as it can lead to further damage and breakage. Instead, consider other styling methods that are gentle on chemically treated hair.
  4. How often should I silk press my hair? The frequency of silk pressing your hair depends on your hair type, its condition, and your personal preferences. However, it’s generally recommended to wait at least 2-4 weeks between each silk pressing session to give your hair time to recover and minimize the risk of heat damage.

Final Takeaway

Silk pressing natural hair is a great way to achieve a sleek and bouncy look without the use of harsh chemicals. By following the right steps and using the right tools, you can achieve the perfect silk press that leaves your hair looking and feeling silky smooth. However, it’s important to keep in mind the potential risks and drawbacks of silk pressing and explore alternative styling methods that may work better for your hair type and condition. With the right knowledge and guidance, you can achieve any hairstyle you desire while keeping your hair healthy and beautiful.

How to Do Box Braids: A Beginner’s Tutorial

Box braids are a popular and stylish protective hairstyle that has been around for decades. They are versatile, low-maintenance, and can last for weeks with proper care. If you’re looking to try out box braids for the first time or simply want to improve your technique, this article will provide you with a comprehensive guide on how to do box braids.

Choosing the Right Hair Extensions

The first step in creating box braids is selecting the right type of hair extensions. You can choose between synthetic or human hair extensions, depending on your budget and preference. Here are some factors to consider when choosing:

  • Texture: Look for hair extensions that match your hair’s texture as closely as possible.
  • Length: Choose extensions that are at least three inches longer than your natural hair to allow for braiding.
  • Color: Pick a color that complements your skin tone and personal style.

You should buy 6-8 packs of synthetic hair if you’re aiming for long, thick braids. For shorter and thinner box braids, you might require fewer packs. Seek out smooth and soft synthetic hair, which is less prone to frizz, either at your local beauty supply store or through online retailers. The commonly used synthetic hair types for box braids are the soft-pressed Kanekalon Expression hair and pre-stretched Kanekalon hair. Alternatively, you can opt for human hair extensions or yarn hair. When uncertain about the quantity, it’s wise to purchase more hair than you think you’ll need. Any leftover hair can be saved for future styles or returned if the retailer permits.

Preparing Your Natural Hair

  • Wash and Condition: Start by washing your hair with a sulfate-free shampoo and a nourishing conditioner. Ensure that you rinse thoroughly to remove any product residue. Follow up with a deep conditioning treatment to hydrate and strengthen your hair. Leave the conditioner on for the recommended time to allow your hair to absorb all the moisture and nutrients it needs.
  • Detangle: Gently detangle your hair using a wide-tooth comb or a detangling brush. Start from the tips and work your way up to the roots to minimize breakage and pain. If your hair tends to tangle easily, feel free to use a rat-tail comb for those stubborn knots.
  • Stretch: If you have very curly or coily hair, you may choose to stretch it before braiding to make the process more manageable. You can do this by blow-drying your hair on a low-heat setting or using stretching techniques like banding or braiding.

How to Do Box Braids on yourself

Now that you have your hair extensions and natural hair prepped, it’s time to start braiding. Follow these steps:

Materials You’ll Need

  • Wide-tooth comb
  • Rat-tail comb (optional)
  • Hair clips or hair ties
  • Hair extensions (kanekalon or synthetic braiding hair)
  • Hair mousse or styling gel
  • Hair oil or moisturizer (optional)
  • Scissors (for trimming)

Step 1: Section Your Hair

Begin by using a wide-tooth comb to create four distinct box-shaped sections in your hair. Start by parting your hair down the middle, from your forehead to the nape of your neck, and then create another part from ear to ear. Leave the first section you plan to braid undone. Ensure that these sections are evenly partitioned, resulting in a neatly defined box shape with a straight line at the roots. Employ three large hair clips to secure the other three sections, keeping them conveniently out of your way. This initial division into four sections helps streamline the braiding process and prevents unworked hair from getting in your way as you braid. It might be helpful to use a mirror to ensure precision while creating these sections.

Step 2: Prepare the Braiding Hair

Take a portion of your sectioned hair, roughly measuring 1.5 to 2 inches (3.8 to 5.1 cm), and divide it further into thirds. Next, select a section of synthetic hair that’s slightly thicker than your natural hair section. Within the synthetic hair section, remove approximately one-third of it, leaving you with two strands—one thicker and one thinner. Alternatively, you can split the entire synthetic extension into three equally sized strands and then combine two of them to create the thicker and thinner sections.

Cross the 2 sections of hair at their centers, and fold the thinner strand backward upon itself. This action results in three hair strands of approximately equal thicknesses since the thin strand has been folded to create a single, thicker strand. To maintain a secure grip on the extension, use your thumb and forefinger to hold it firmly at the base of the loop.

Step 3: Start Braiding

Place the synthetic hair atop your natural hair, right at the roots. While keeping the three distinct synthetic hair strands, select one strand to act as your central or anchor strand, which you’ll merge with your natural hair. Align the loop of your partitioned hair directly over your natural hair’s roots, gently pinching your anchor strand together with your natural hair.

Step 4: Add More Braiding Hair

With the anchor strand of synthetic hair and your natural hair strand held together, initiate the braiding process with the synthetic hair. Guide the right-hand strand beneath the anchor strand, shifting the right-hand strand to the middle position. Subsequently, pull the left-hand strand under the center strand (which was previously the right-hand strand), positioning it now in the center. To keep things looking seamless, make sure to blend the braiding hair with your natural locks.

Step 5: Braid to the End

Continue braiding until you’ve reached your desired braid length. You can choose to leave a small portion of your natural hair unbraided at the ends for a more natural look or braid all the way to the ends.

Step 6: Secure the End

Continue this sequence throughout the entire length of your hair, and once you’ve reached the end, secure it in place using a hair elastic. If the braid holds its shape without an elastic, you can skip this step. Maintain consistent tension to achieve a tight, orderly braid, making sure it’s secure but not uncomfortably tight. Applying even, gentle pressure as you braid ensures a uniform and smooth appearance for your braid.

Step 7: Repeat

Braid your hair section by section, allowing yourself breaks whenever necessary. Begin with one section and progress from the lower part of your scalp towards the crown for easier management. As doing an entire head of box braids can be a time-consuming task, taking breaks between sections or when needed is essential. Ensure you braid each section swiftly and consistently to prevent frizziness. Maintain uniform pressure throughout the braiding process to achieve braids of the same thickness and shape.

Step 8: Trim and Style (Optional)

If desired, you can trim any uneven ends and style your box braids. Common styles include leaving them loose, pulling them into a ponytail, or creating updos and buns

Care and Maintenance

Once you’ve completed your box braids, it’s essential to take care of them properly to ensure they last for as long as possible. Here are some tips:

  • Keep Your Scalp Clean: Use a diluted sulfate-free shampoo to clean your scalp. Dilute the shampoo with water to prevent residue buildup between braids. Gently massage your scalp with your fingertips and rinse thoroughly. Focus on cleansing your scalp every 2-4 weeks or as needed.
  • Moisturize Your Braids: Use a water-based moisturizer or leave-in conditioner to hydrate your braids and natural hair. Apply it directly to your scalp and braids, concentrating on the ends. Be cautious not to oversaturate, as excessive moisture can lead to frizz.
  • Protect Your Braids at Night: Invest in a satin or silk bonnet or scarf to protect your braids while you sleep. Cotton pillowcases can create friction, which may cause frizz and damage.
  • Avoid Overstyling: Constantly pulling your braids into different styles or over-manipulating them can weaken your natural hair and cause breakage. Stick to simple styles to minimize stress on your hair.

FAQs

  1. What type of hair extensions are best for box braids? Human hair extensions are best for a natural look and feel, but they can be expensive. Synthetic hair extensions are more affordable and come in a wide range of colors and textures.
  2. How often should I wash my box braids? You should wash your box braids every two weeks to keep them clean and fresh.
  3. Can I swim with box braids? Yes, you can swim with box braids, but it’s essential to wear a swim cap and rinse your hair thoroughly afterward.
  4. How long do box braids last? Box braids can last four to eight weeks, depending on how well you care for them.
  5. Can I do box braids on short hair? Yes, you can do box braids on short hair, but the length of the extensions you choose will depend on how short your natural hair is.

Final Takeaway

Box braids are a beautiful and protective hairstyle that can be done at home with the right tools and techniques. By following this guide, you can create perfect box braids that will last for weeks and keep your hair healthy and protected. Remember to take care of your braids by moisturizing, cleansing, and protecting them from tight hairstyles. Happy braiding!