With the arrival of spring, it’s the perfect time to reinvent and rejuvenate our style choices. The March 2024 hair color ideas introduce a captivating array of hues and cuts designed to refresh your look. From bold and adventurous to soft and elegant, these trends encapsulate the spirit of the season and the latest in hair fashion. Join us as we explore the styles that will define the year ahead!
THE PINK PIXIE
When considering March hair color ideas for 2024, the Pink Pixie cut makes a striking impression. This style goes beyond mere color; it serves as a bold declaration of confidence. Featuring a soft yet vibrant shade of pink, it redefines the concept of short hair. Ideal for women who appreciate a minimalist and aesthetic vibe, this look embodies the fresh trends emerging this year. It’s perfect for those seeking to add a splash of color while still maintaining a natural look that enhances their features.
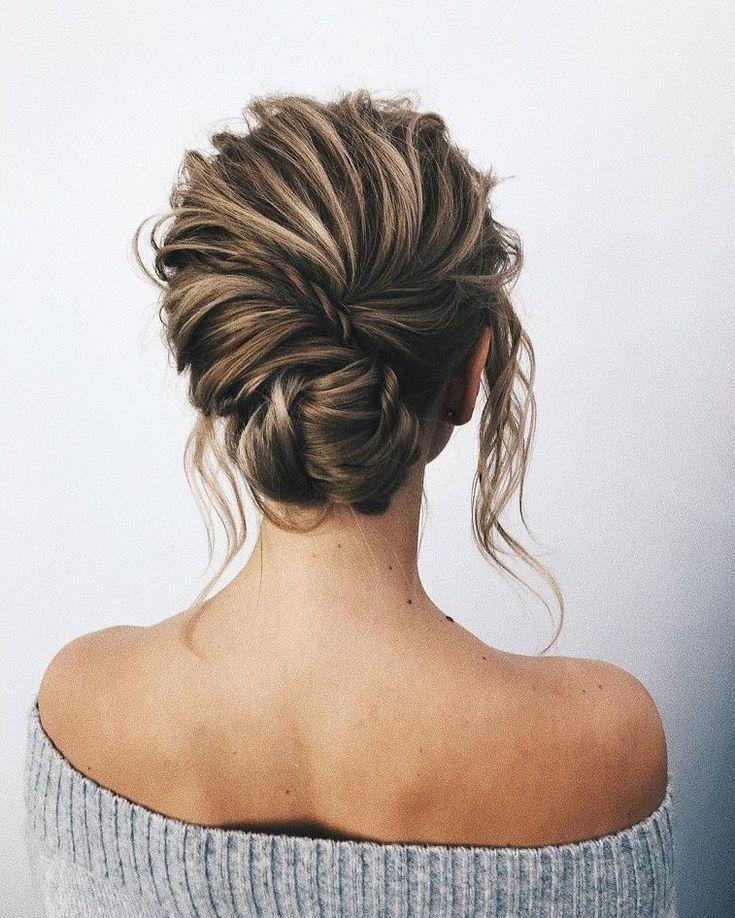
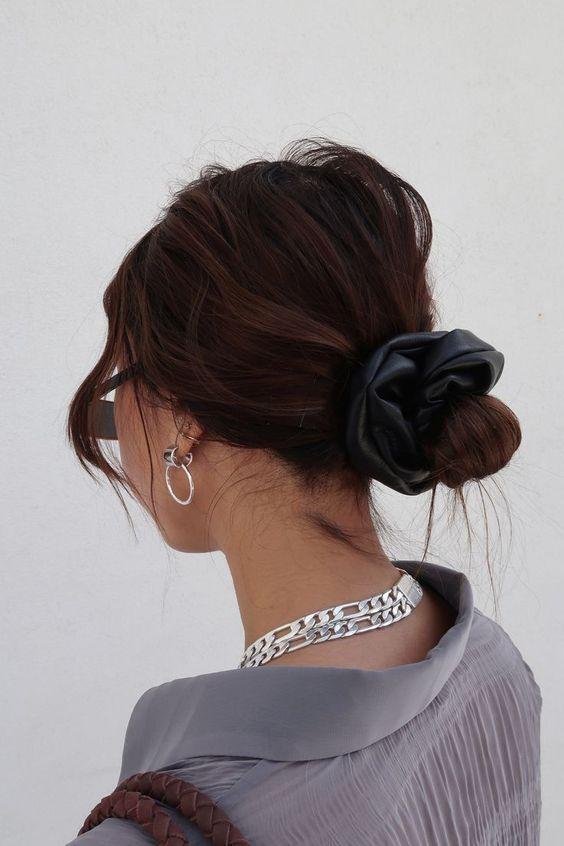
The Velvet Scrunchie Bun

Each of these styles reflects a fusion of personality, era, and creativity, showcasing the diversity of March hairstyles in 2024. They transcend mere trends, serving as personal expressions that convey a story. As you choose your next hairstyle, consider the narrative you want to share and how these inspirations can help you craft your unique tale.
The Bold Velvet Bow
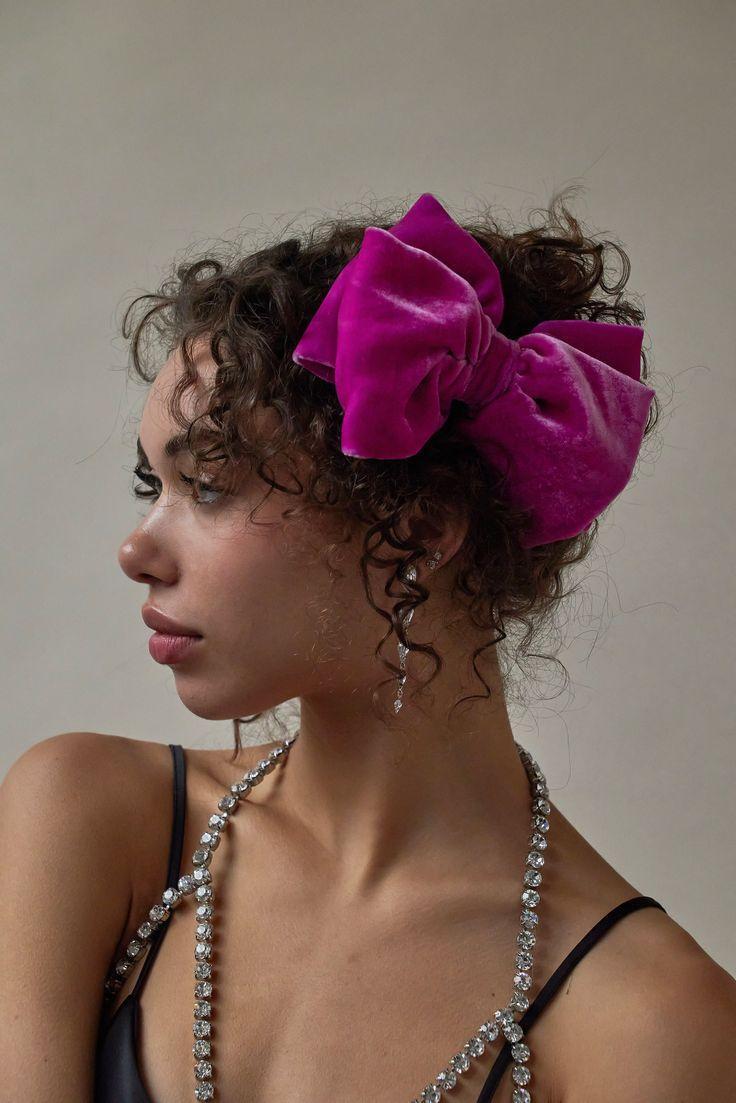
This style celebrates curls, enhanced by a striking velvet bow in a deep, rich color. It boldly asserts that short curly hair doesn’t need to be tame or understated. The bow introduces a vibrant splash of color and a playful touch, making it an ideal choice for a casual day out or whenever you want your curls to take center stage.
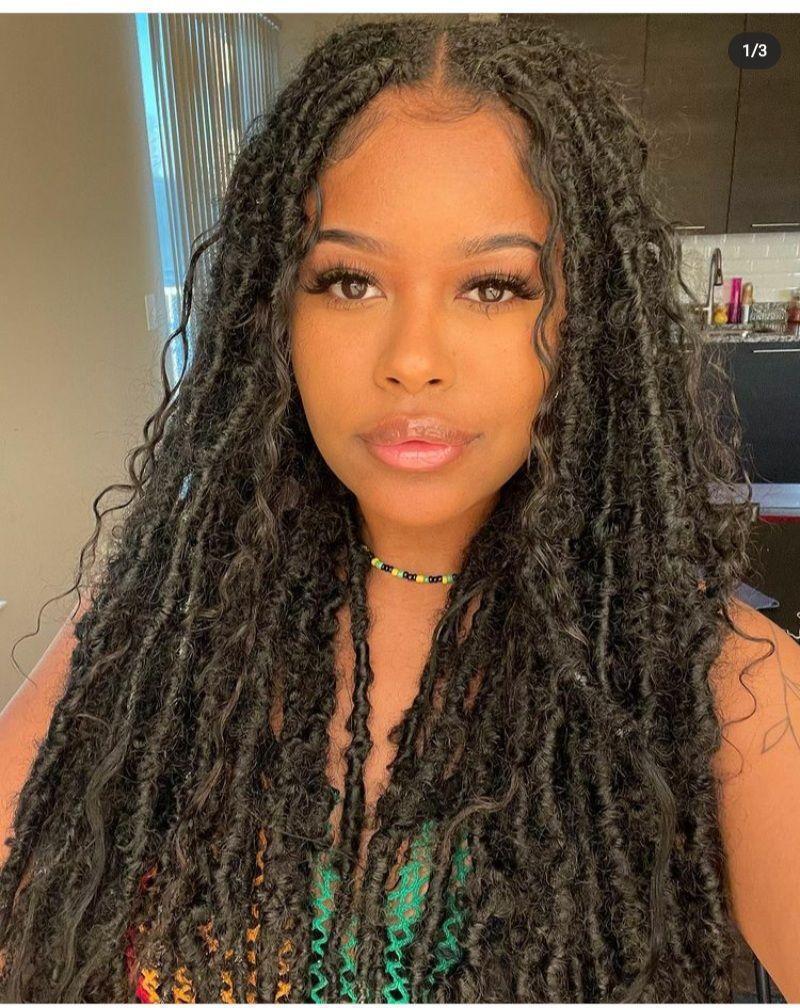
The Nature-Inspired Cascading Curls

For the woman who embodies the spirit of Mother Nature, this style is both wild and meticulously crafted. Curly or wavy hair cascades freely, beautifully intertwined with greenery and delicate white flowers. This look is especially flattering for those with a round face, creating an ethereal touch of nature that’s perfect for outdoor events or any day when you feel particularly connected to the beauty of the earth.
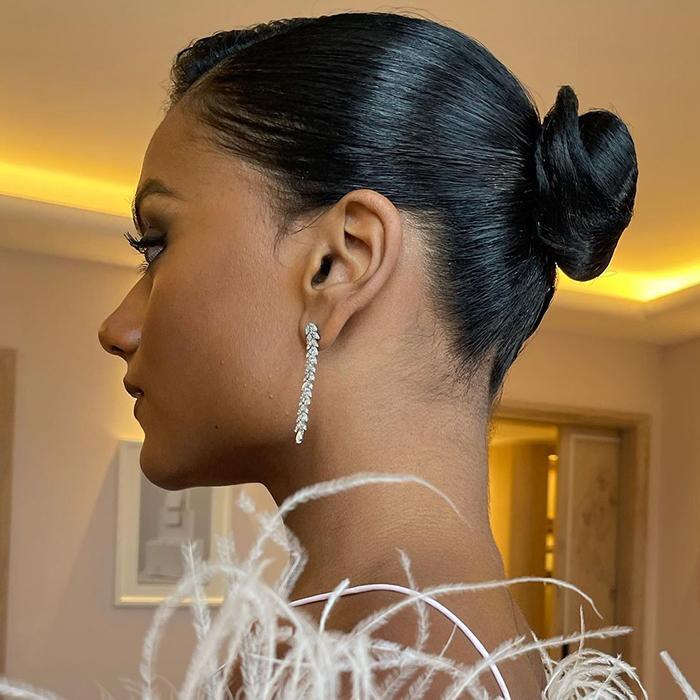
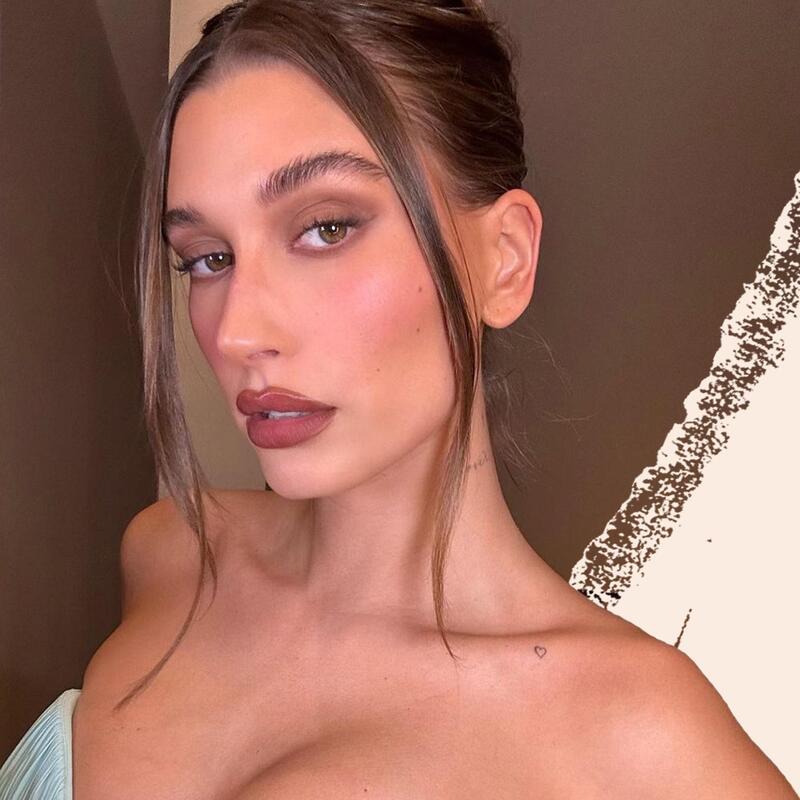
The Pearl-Studded Sleek Bun
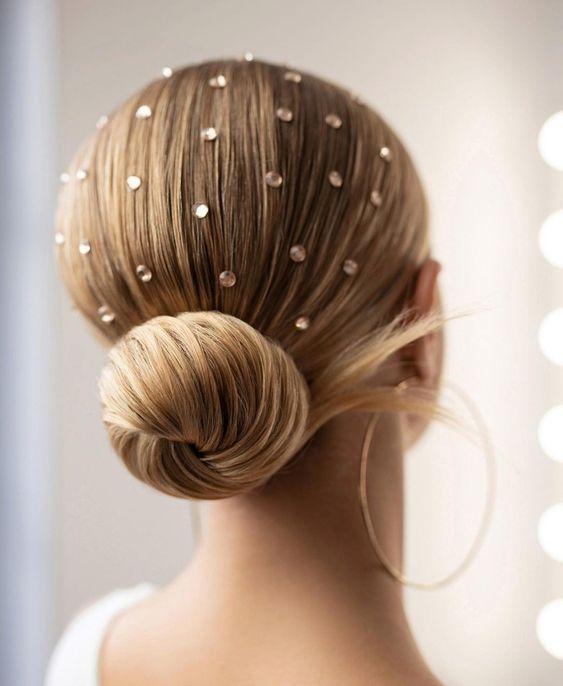
Here we have a stunning embodiment of grace, featuring long hair swept back into a flawless bun. Adorned with delicate pearls, this style exudes regal charm, making it perfect for anyone looking to make a statement at a sophisticated gathering. The pearls add a timeless elegance to the straight hair, transforming this hairstyle into a classic piece of art.
The Striped Ribbon Half-Up
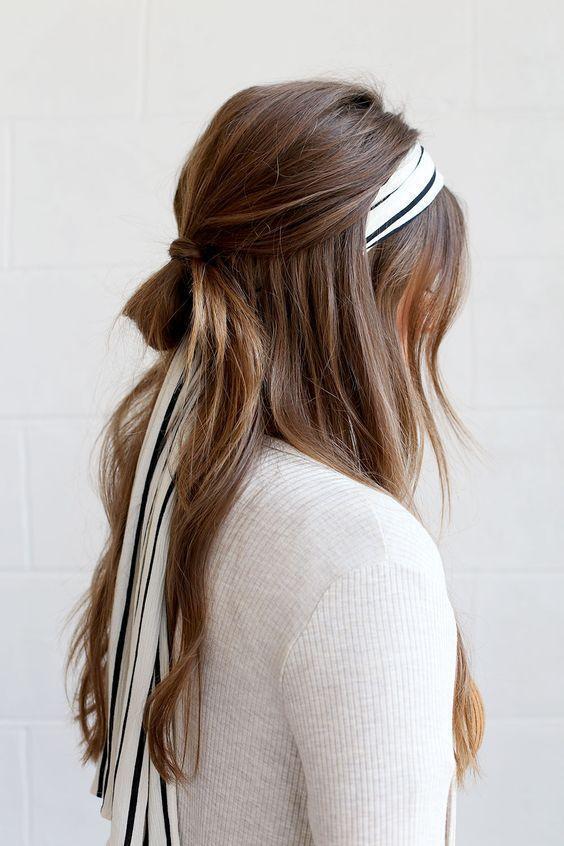
This hairstyle epitomizes simplicity with a twist, ideal for the Amy in your life who prefers a medium-length style. A half-up look secured with a black and white striped ribbon creates a preppy yet aesthetic vibe. Effortlessly chic, it’s a great option for those wanting to add a touch of straight hair allure without the hassle—perfect for an at-home tutorial!
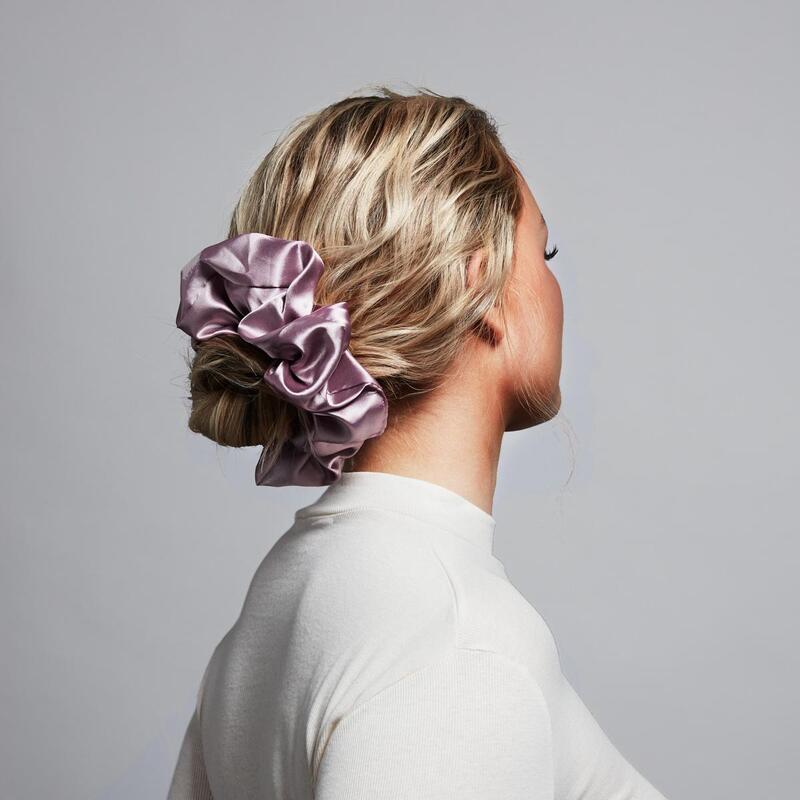
The Sophisticated Bun With A Bow
For the minimalist who embraces understated elegance, a low bun adorned with a large, sleek bow is the perfect choice. This style caters to women with medium or short hair, particularly those with straight textures seeking a quick and chic short hair tutorial. The bow serves as a striking statement piece, transforming an otherwise simple bun into a sophisticated option suitable for any professional or social occasion.
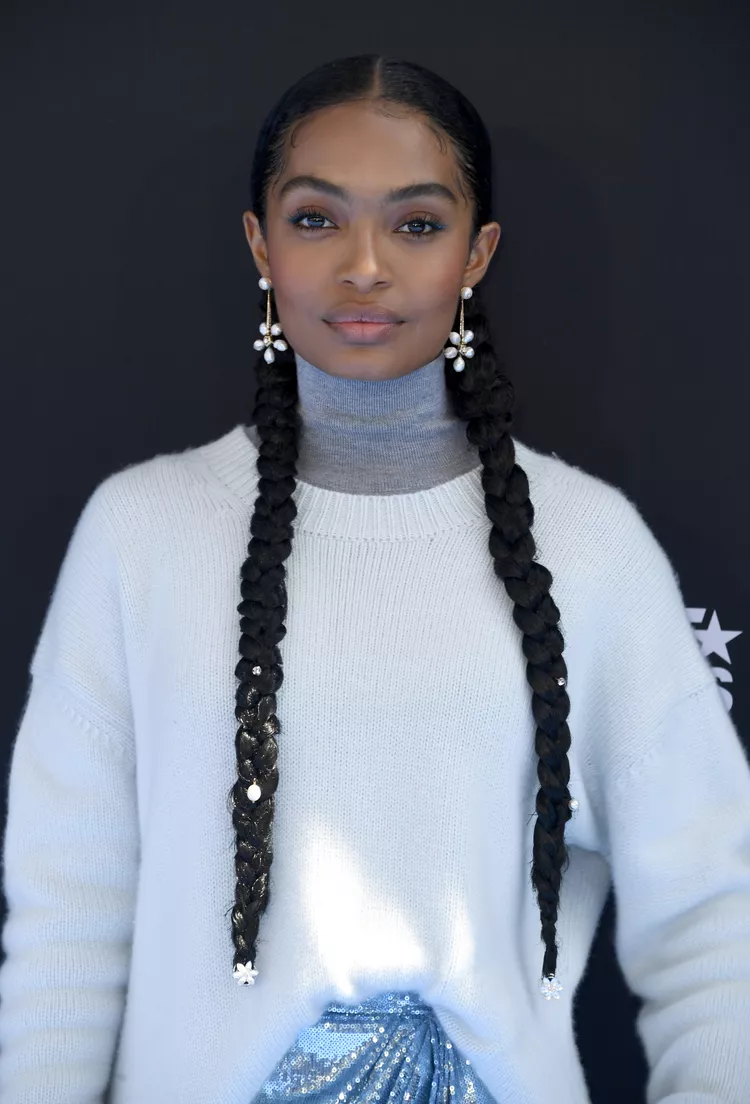
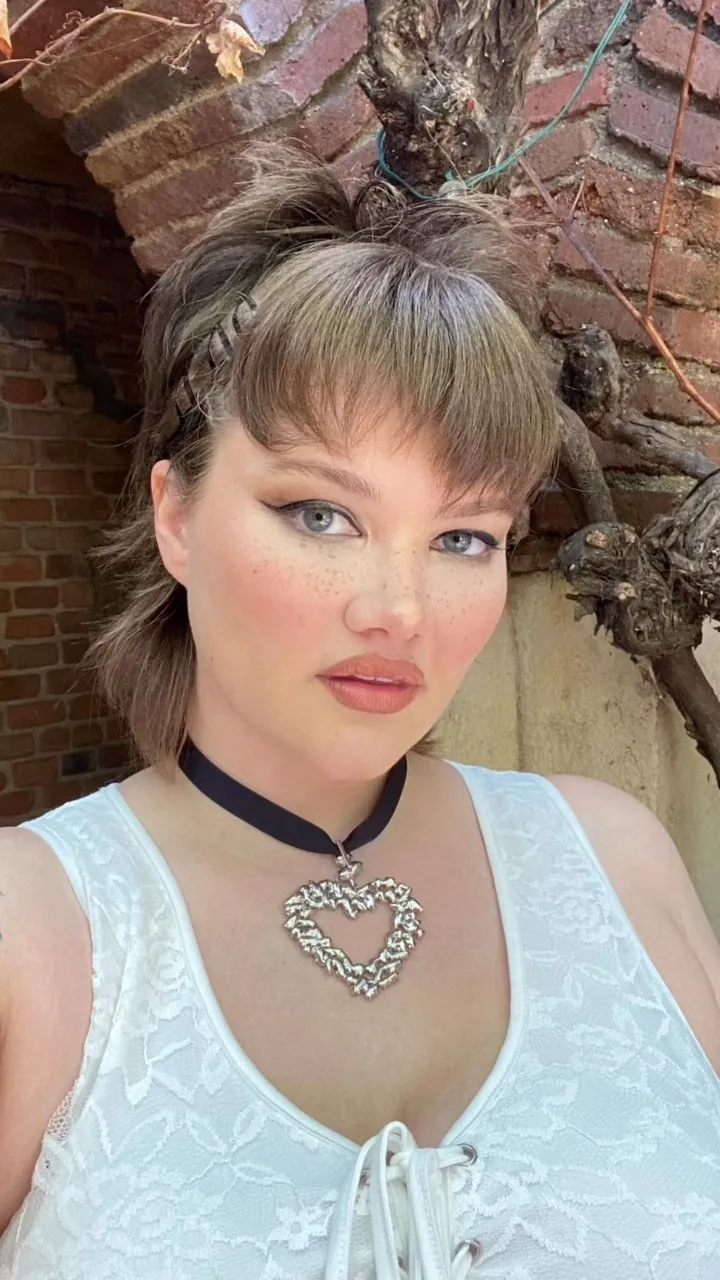
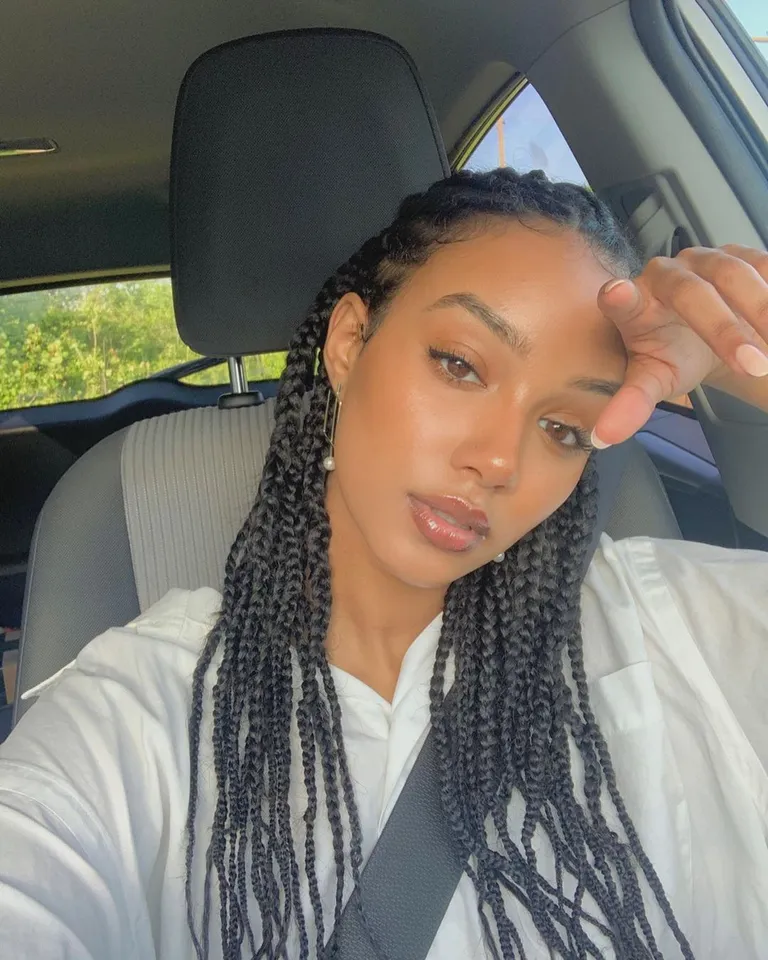
The Ribboned Braid
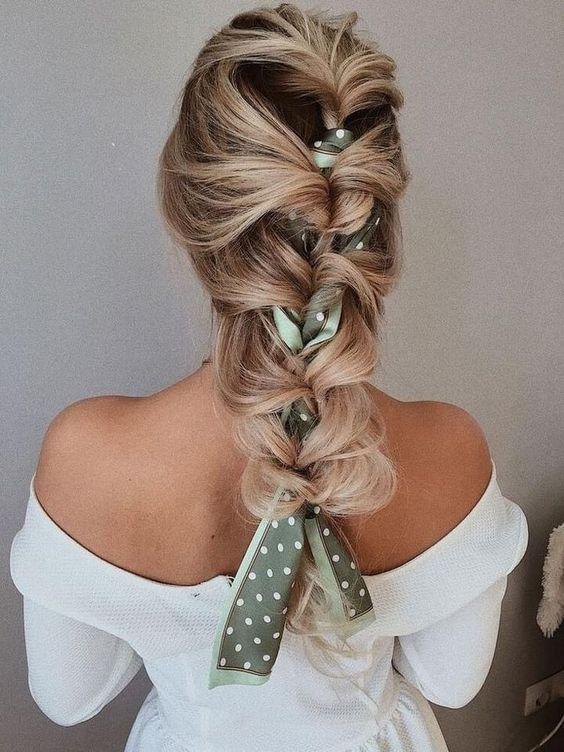
A cascading braid woven with a satin ribbon is the perfect DIY style for someone who enjoys a playful yet elegant look. This hairstyle works beautifully for those with medium or long hair, especially if it features bangs, blending a nod to the carefree spirit of the 90s with a modern twist. The polka-dotted ribbon introduces a touch of charm, making it an ideal choice for a day out or a casual meet-up with friends.
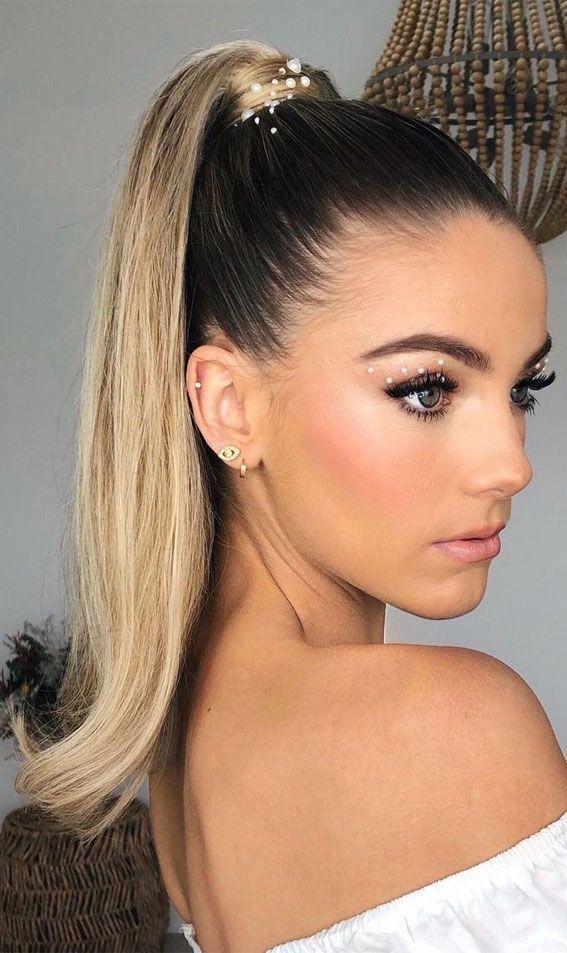
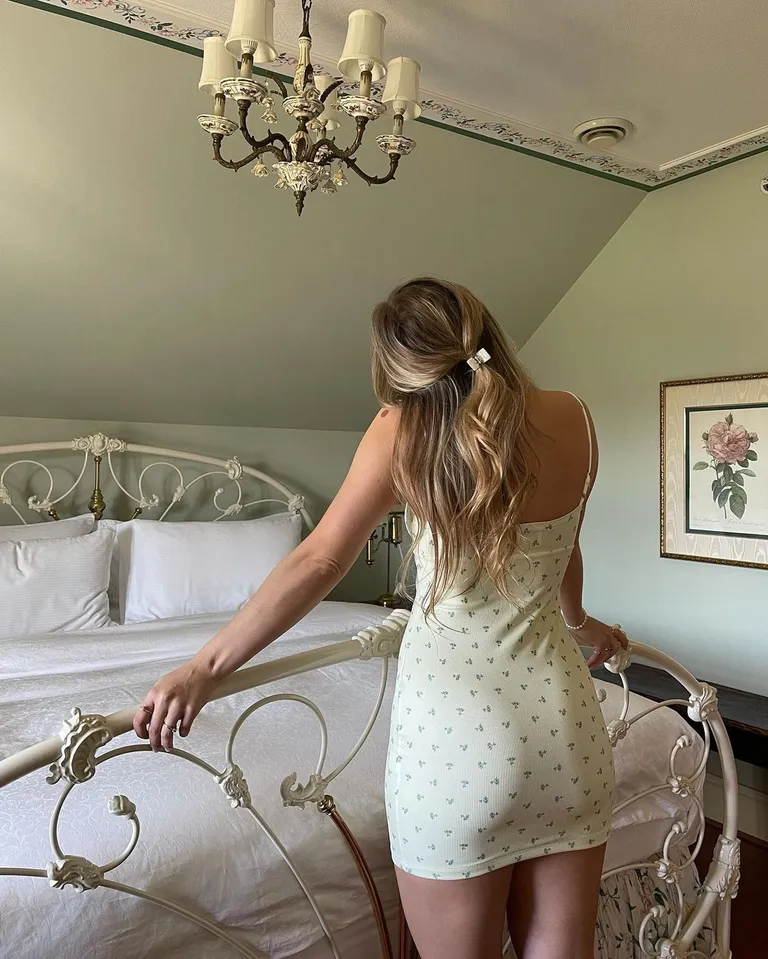
The Enchanted Ponytail
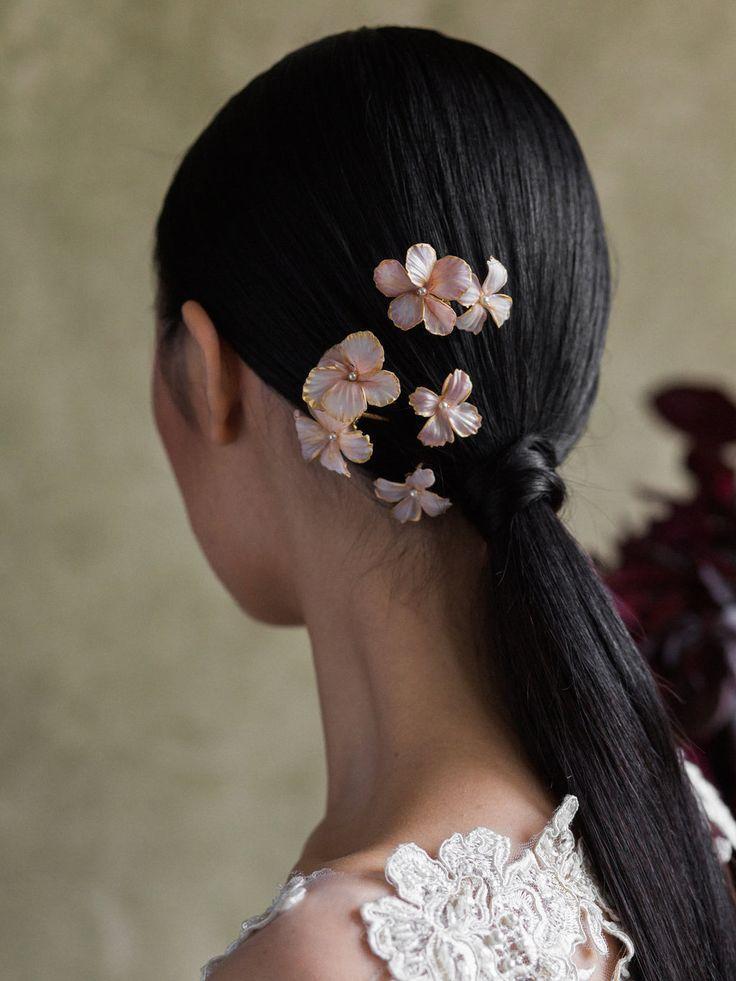
Imagine a sleek ponytail, embodying the essence of effortlessly styled straight hair, transformed into a canvas for delicate, petal-like clips that gracefully adorn one side. This look evokes the tranquility of a serene spring garden, making it perfect for the woman with a round face who wants to add a whimsical touch to her straight hair. It’s a simple yet enchanting style that can be easily replicated at home, ideal for those who prefer to tie back their long hair with an air of sophistication.
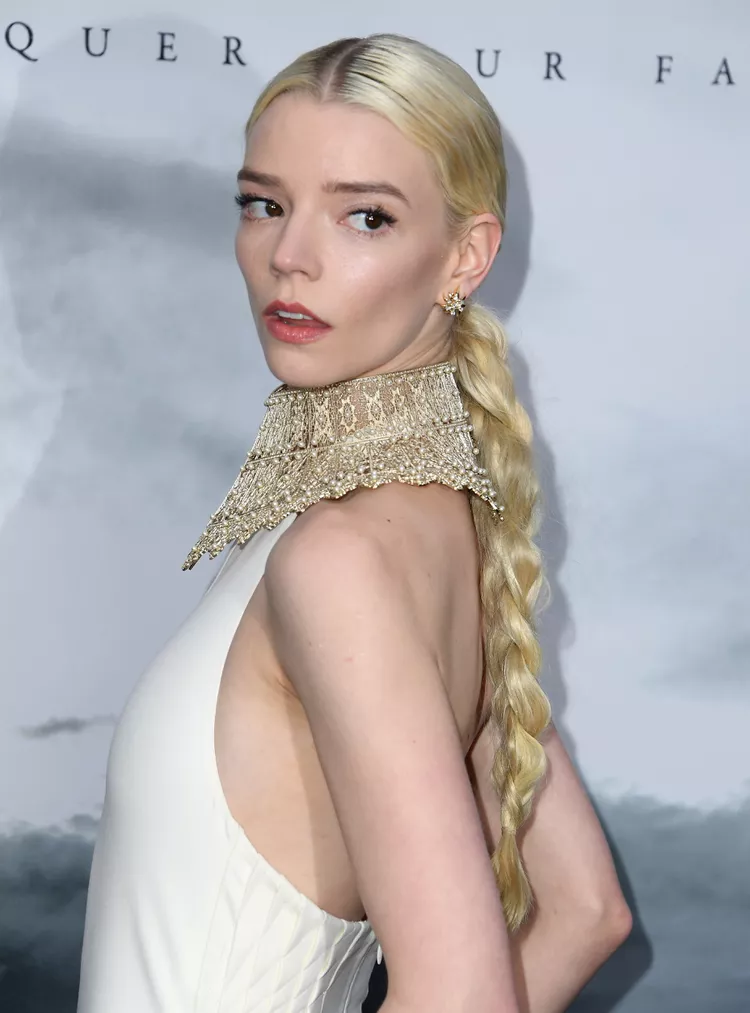
The Classic Braid With A Twist Of Silk
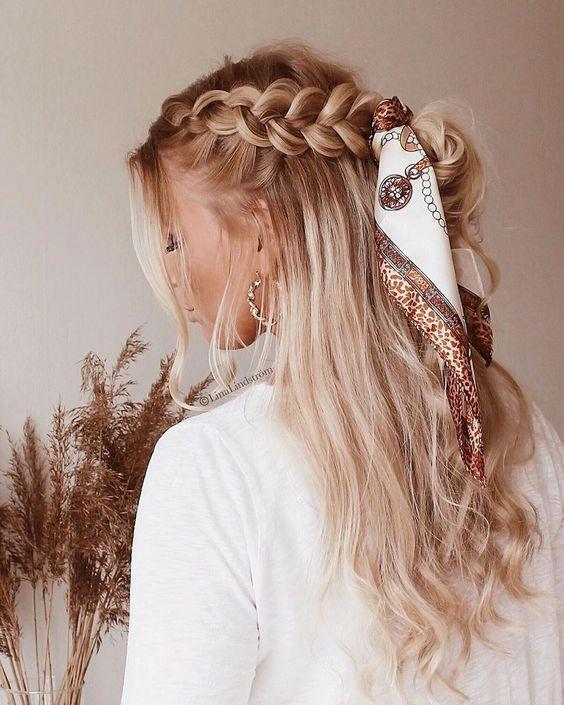
March ushers the classic braid back into the spotlight, but with a twist—literally. A silk scarf woven through the braid adds a vibrant pop of color and texture to blonde or brown hair. This look is perfect for the creative spirit, like the woman named Jo, who shapes her world with her hands and her hair. It combines medium-length hair with bangs for a boho-chic vibe, making it both aesthetic and practical for occasions like a marching band performance or a weekend getaway.
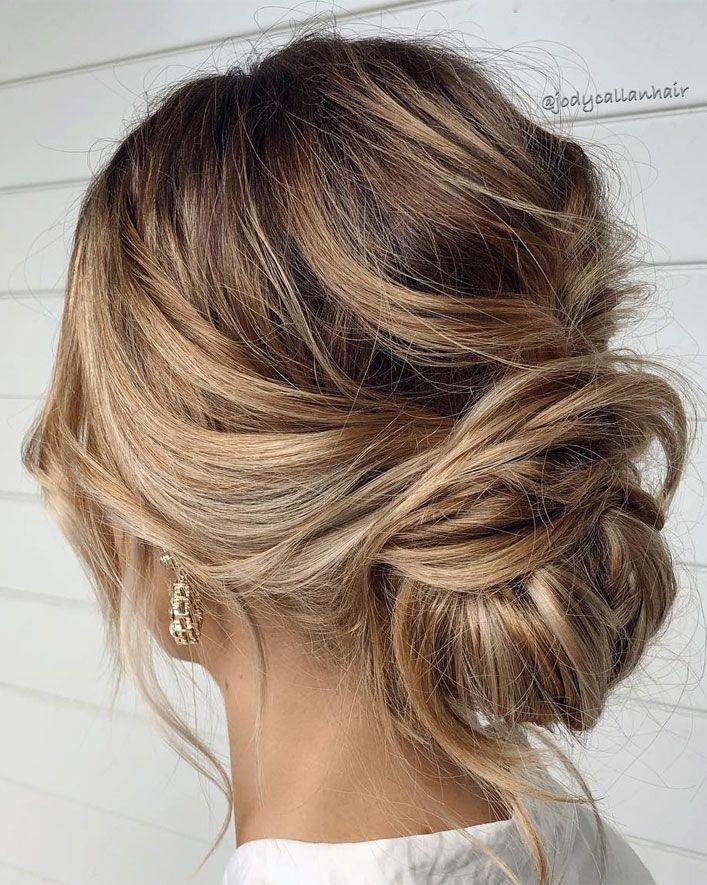
Pearls Of Wisdom
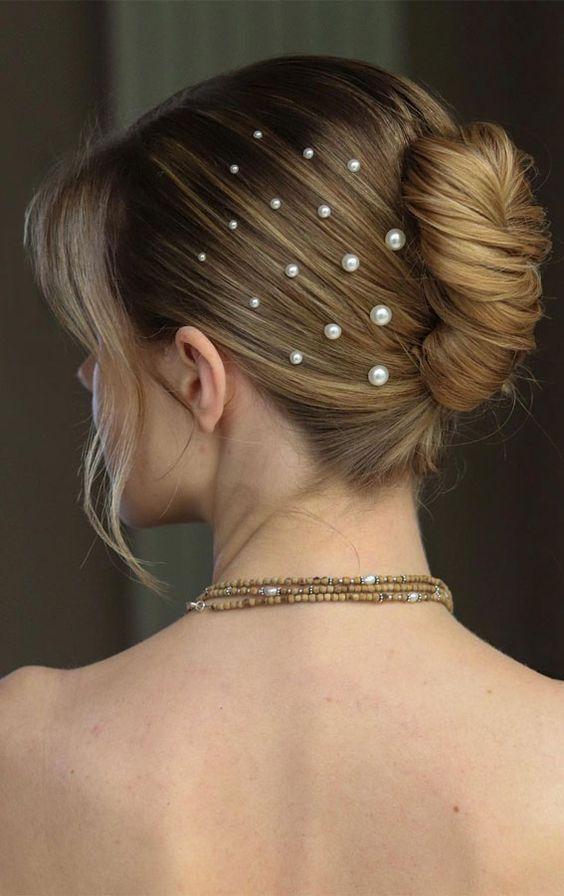
Pearls have made a stylish comeback, not just in jewelry but also as a key element in March’s hair accessory trends. Imagine a neatly tied bun, with each strand meticulously combed back and adorned with pearls that cascade in an artfully arranged pattern. This look is perfect for the woman who embraces a short hair attitude but appreciates the versatility of medium-length styles. It’s a tribute to Meg, a character who embodies both grace and determination, making it ideal for a corporate setting or an evening affair.
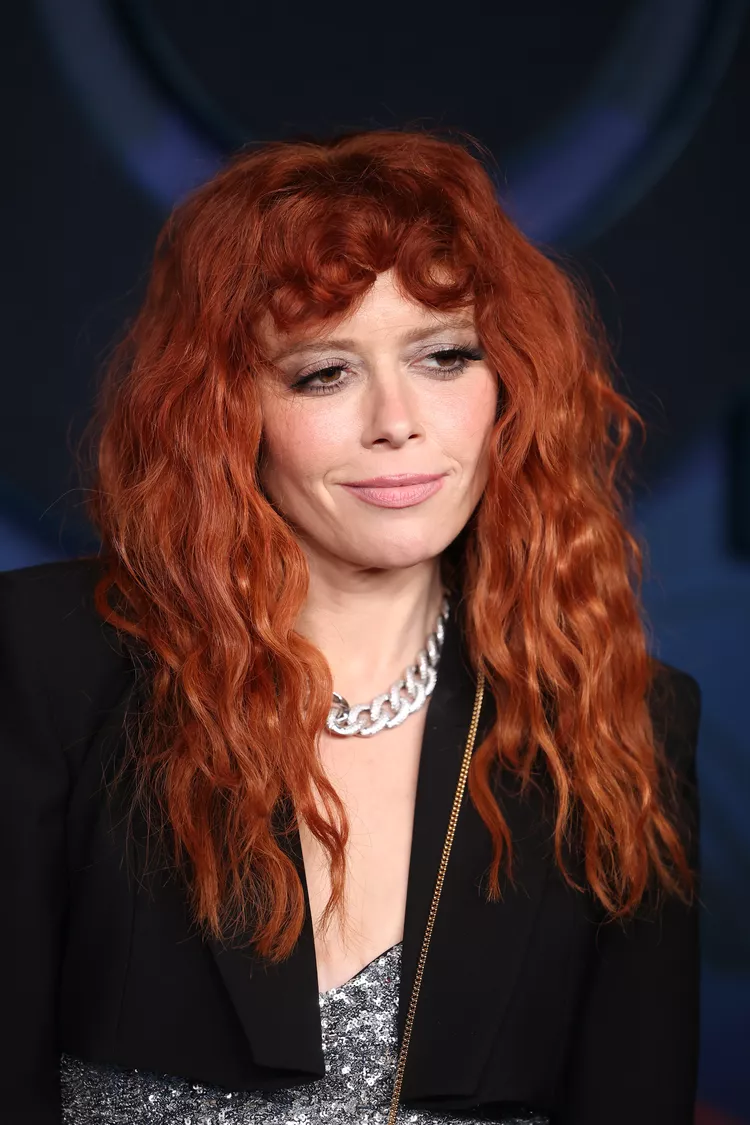
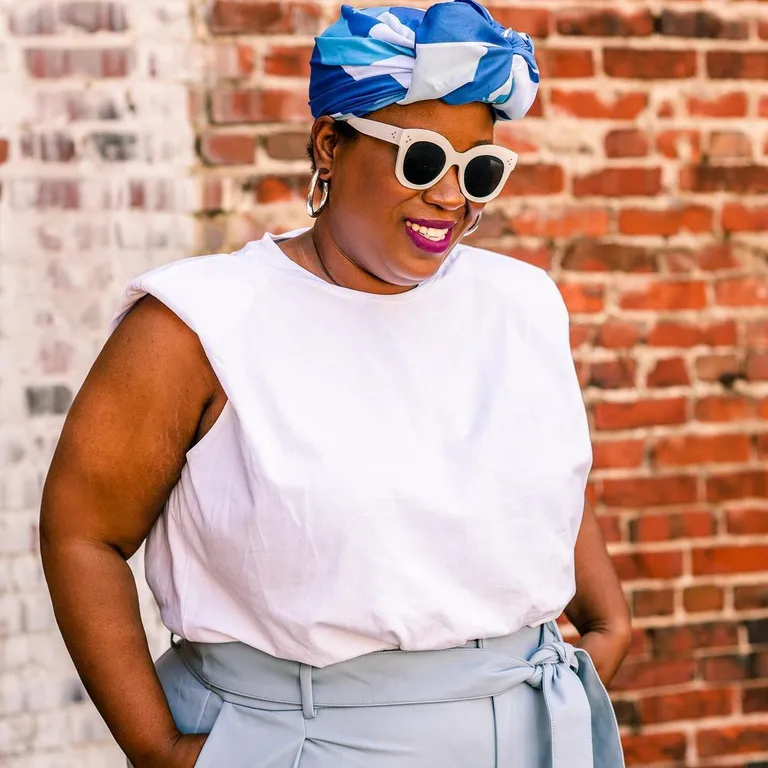
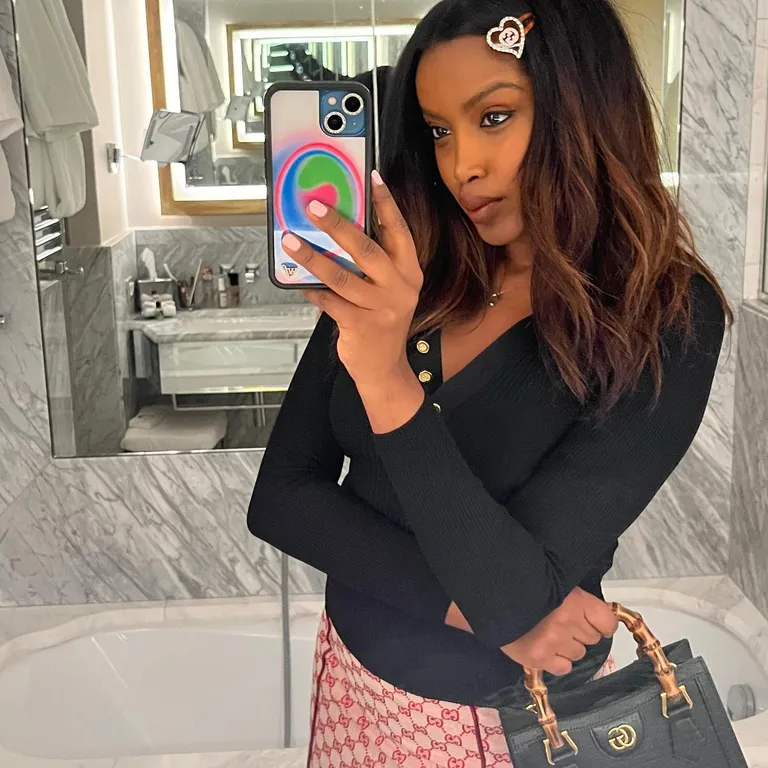
Bohemian Rhapsody

For the free-spirited woman, bohemian waves paired with a fabric headband strike the perfect balance between casual and chic. This long hair look, featuring curly undertones and a side-tied headband, evokes a nostalgic 70s vibe that’s been refreshed for 2024. The headband, adorned with delicate paint-like strokes, serves not just as a functional accessory but as the centerpiece of a story that speaks of artistry and wanderlust. If your hair is medium length with a wavy texture, this style with a side part becomes your canvas for a stunning masterpiece.
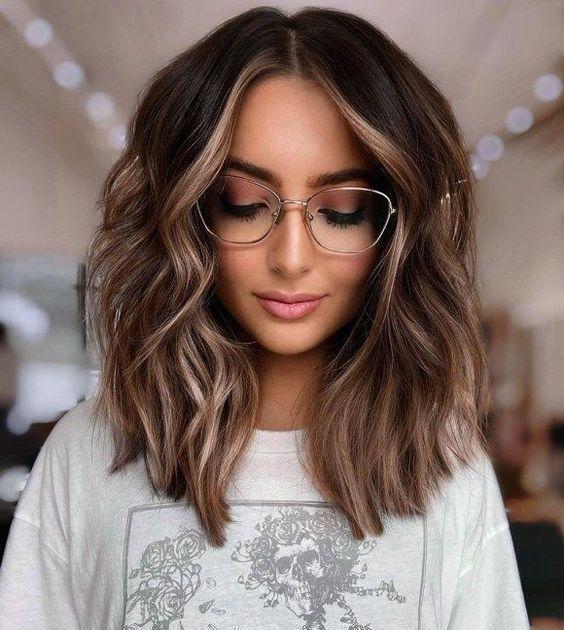
The Classic Cascade
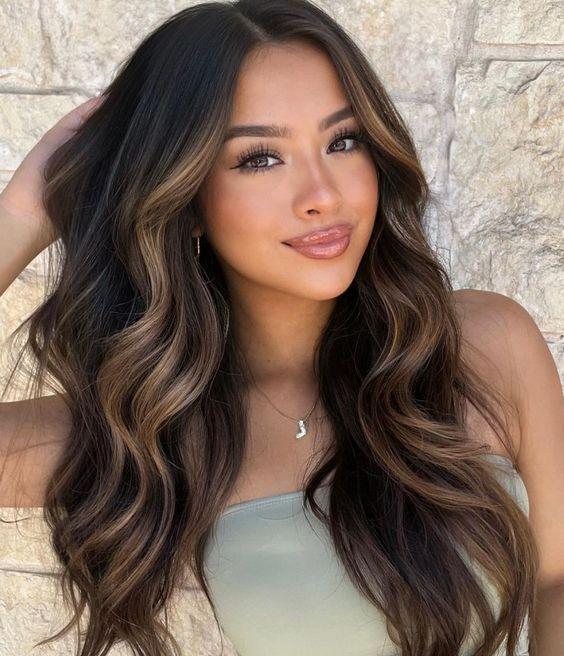
We have the classic cascade of brown and light brown hues that exude timeless elegance. This style is versatile, appealing to a variety of women—from those with round faces seeking flattering hairstyles to those with morena complexions looking for natural yet trendy color ideas.
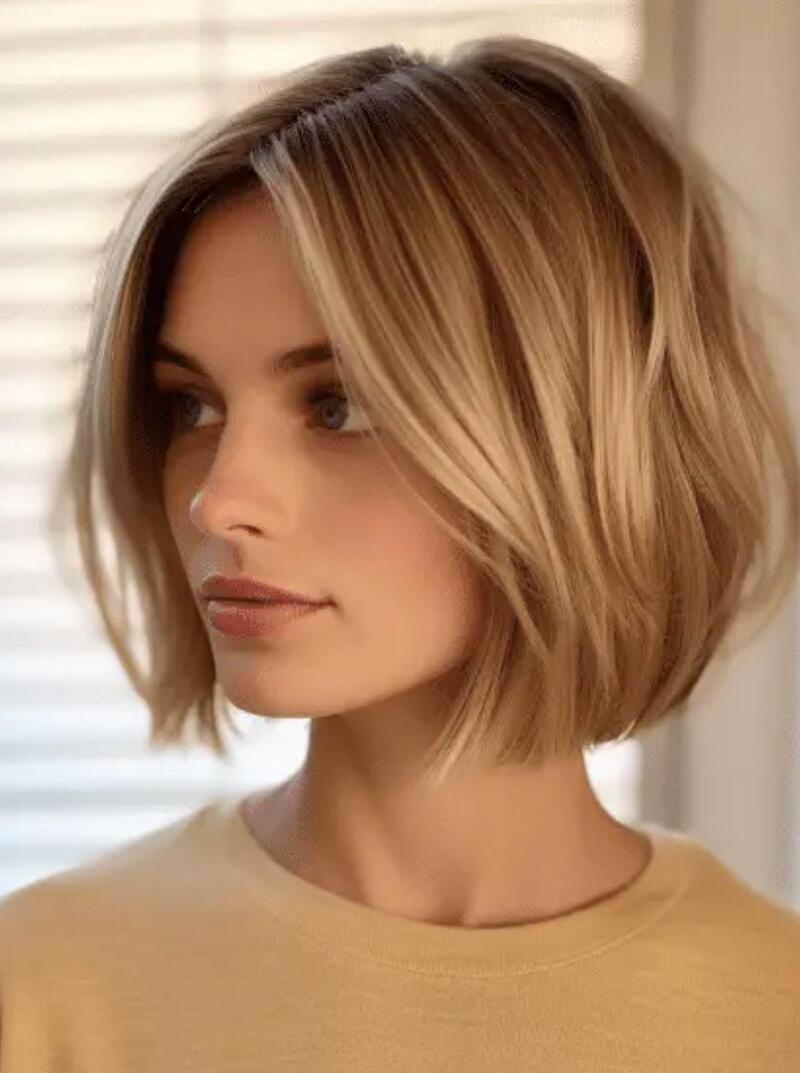
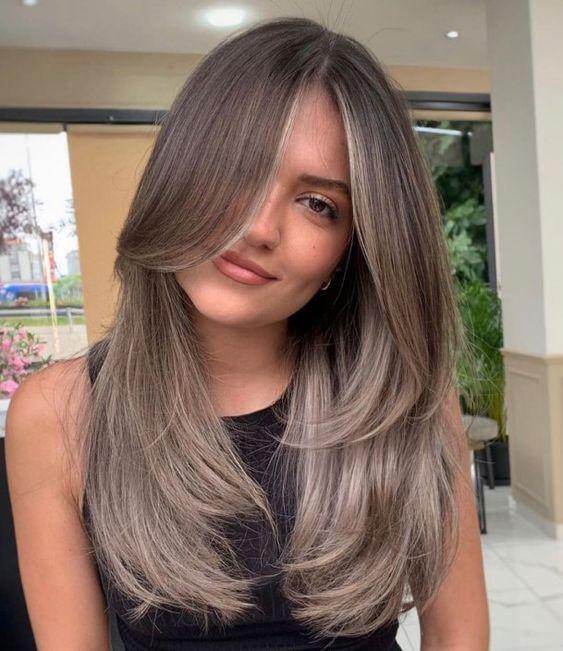
The Taupe Trendsetter
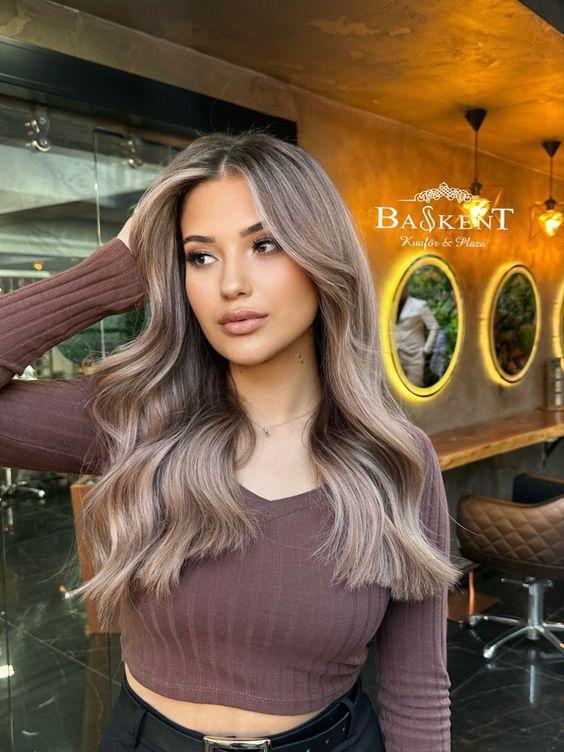
This medium blonde hairstyle radiates sophistication with its seamless blend of taupe and ashy tones. It’s an ideal choice for those aiming for a natural yet polished look that aligns with 2024 trends. The cut is tailored to perfection, making it a stylish option for the fashion-forward woman.
The Modern Moch
This hairstyle celebrates the medium-length cut, perfectly suited for the modern woman. It features a versatile look that blends light brown and subtle blonde highlights, creating a warm mocha palette that is both natural and aesthetically pleasing. This style is ideal for those who appreciate a trendy yet low-maintenance option, suitable for both straight and wavy hair textures.
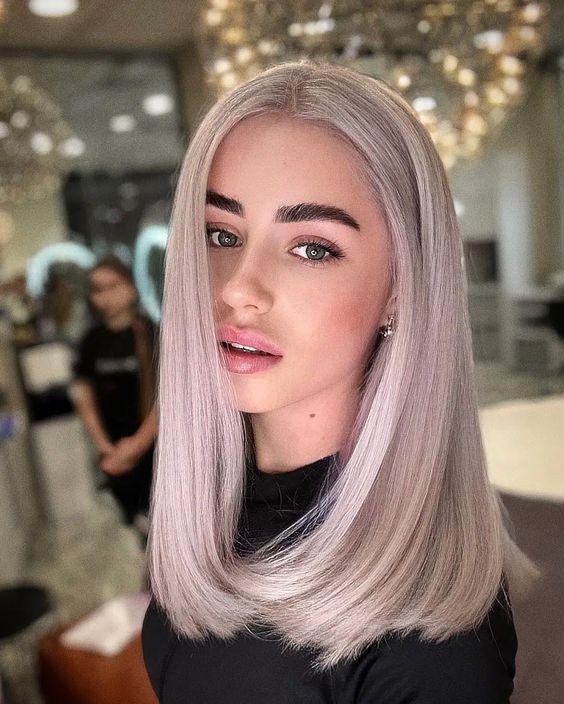
The Smoky Sophistication
Embrace the smoky sophistication of this silvery sheen, which captures the essence of a natural yet trendy aesthetic. This color is more than just a style; it’s a statement of elegance and poise. Featuring a medium cut that flows effortlessly, it’s a versatile look that can be worn straight or with curtain bangs, exuding both class and modernity.
The Lavender Dream

A dreamy lavender shade gracefully transitions into dark roots, creating a captivating look for the modern woman. This hairstyle beautifully combines whimsy and sophistication, embodying the light and playful spirit of March hair color ideas for 2024. It’s perfect for those who appreciate aesthetic and trendy shades, adding a touch of fantasy to their everyday style.
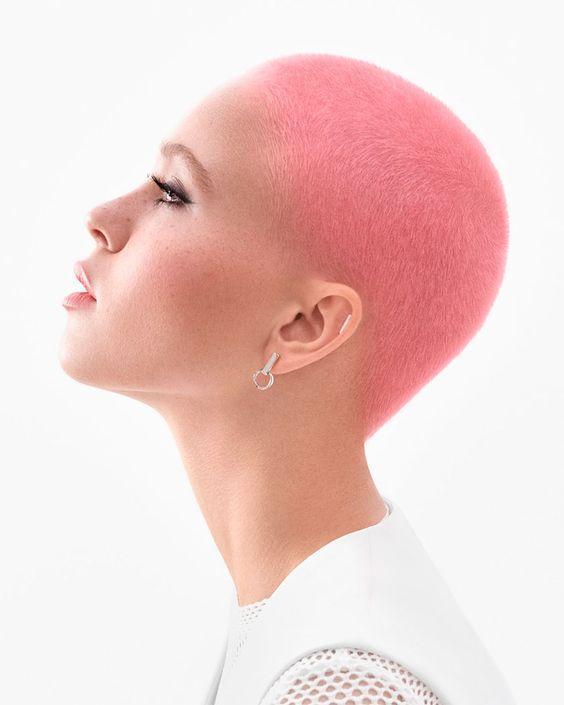
The Audacious Red Buzz
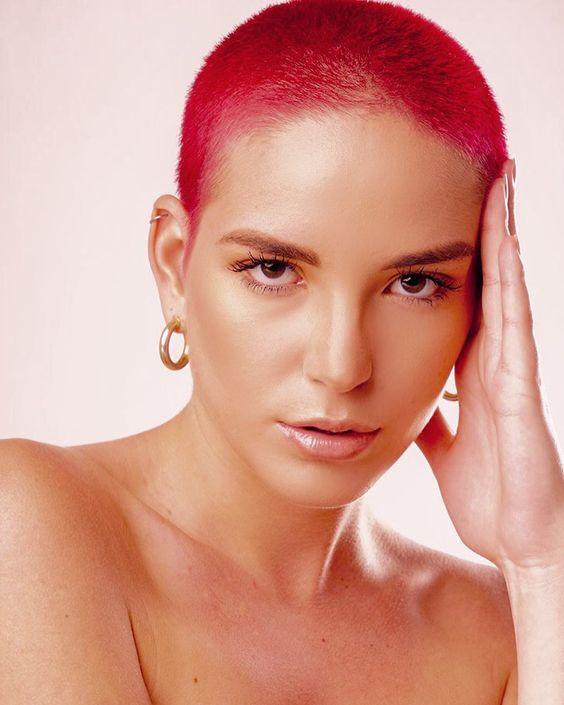
Daring to defy conventions with a stunning red buzz cut, this style is for the woman who fearlessly embraces bold fashion choices. The short, vibrant red hair exudes confidence and introduces a fresh aesthetic that is at the forefront of 2024 trends. It’s a low-maintenance yet high-impact look that radiates empowerment and self-assuredness.
The Blonde Ambition
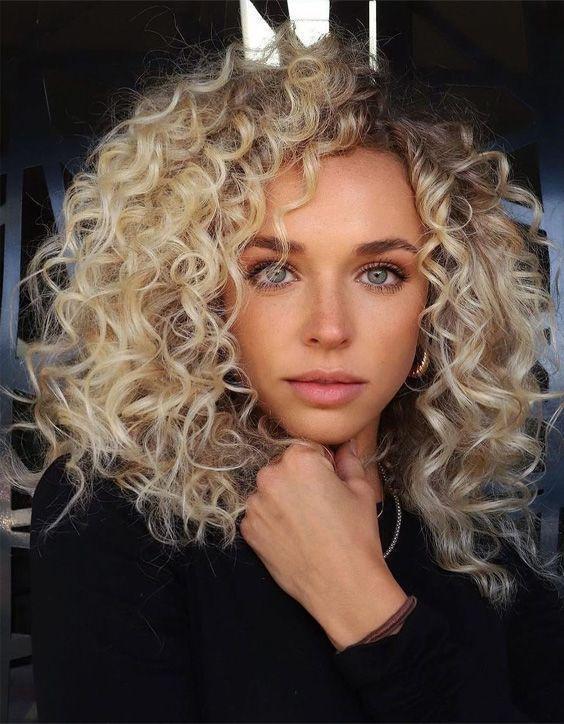
For the bold and spirited, a full head of curly blonde locks serves as the ultimate expression of personal style. These short, curly tresses radiate vitality, capturing the excitement of 2024 trends. The curls add volume and dimension, making this a fantastic option for those with fine hair seeking to inject a touch of flair into their look.
Soft Brown Waves
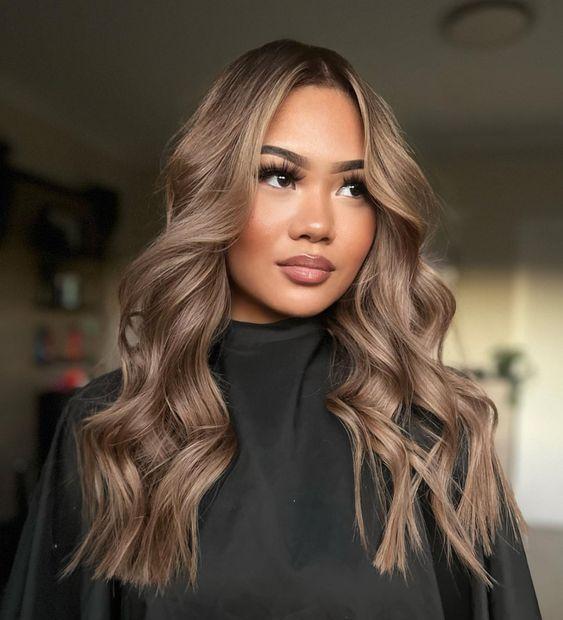
The embodiment of elegance shines through in the soft brown waves of this hairstyle. With medium-length hair cascading in rich light brown tones, it offers a natural and aesthetic appearance. This style is perfect for the sophisticated woman who favors a subtle yet impactful color that enhances her Asian heritage. The gentle waves add a soft, feminine touch, making it a trendy choice for both long and medium styles.
The Purple Wave
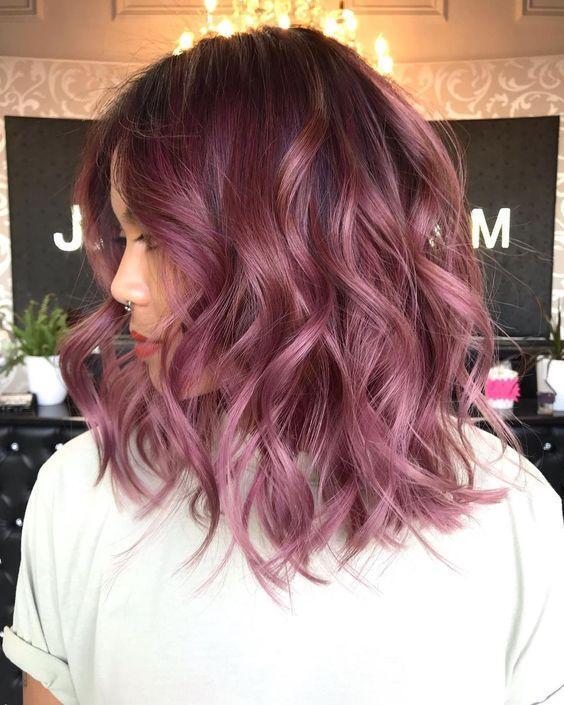
For those who dare to be different, the purple wave is a must-try. This curly hairstyle bursts with vibrant shades of purple, infusing a playful and creative edge into your look. It embodies the aesthetic of March, blending the new and trendy with a whimsical flair. This style not only suits curly-haired beauties but also provides a unique way to incorporate color into natural hairstyles.
Red And Black Ombré
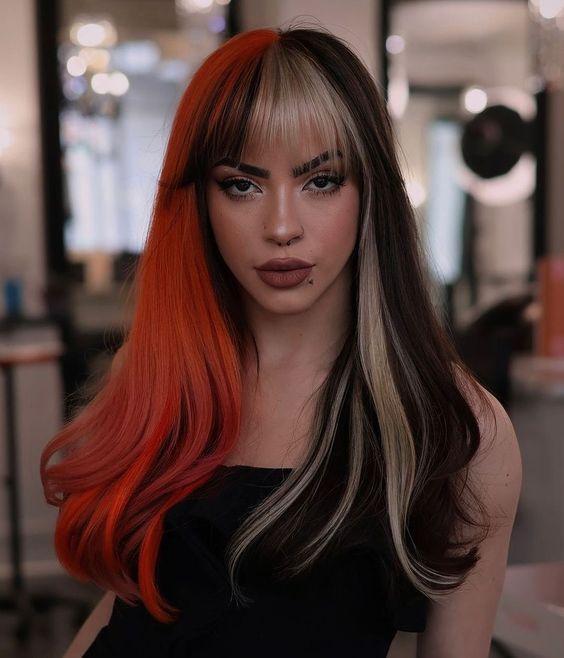
For those ready to ignite their style with a fiery twist, the red and black ombré is a fantastic choice. This striking combination marries the intensity of red with the depth of black, creating a look that is both bold and aesthetically pleasing. The seamless gradient transitions from a deep, mysterious black to a vibrant, energetic red, making it an ideal option for brunettes looking to add some heat to their style.
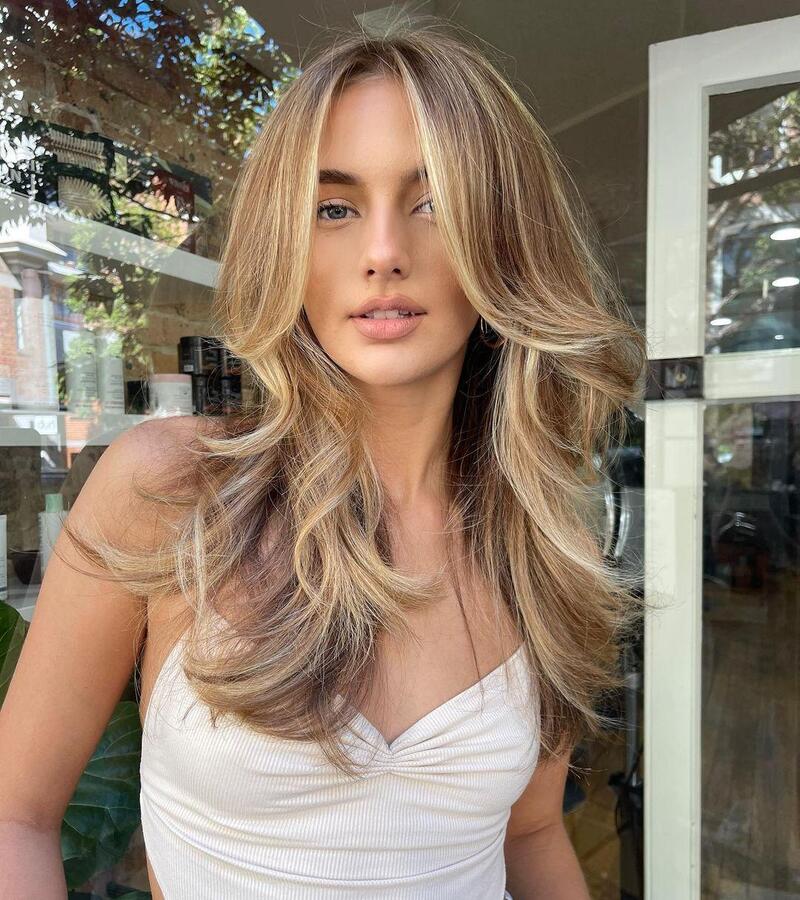
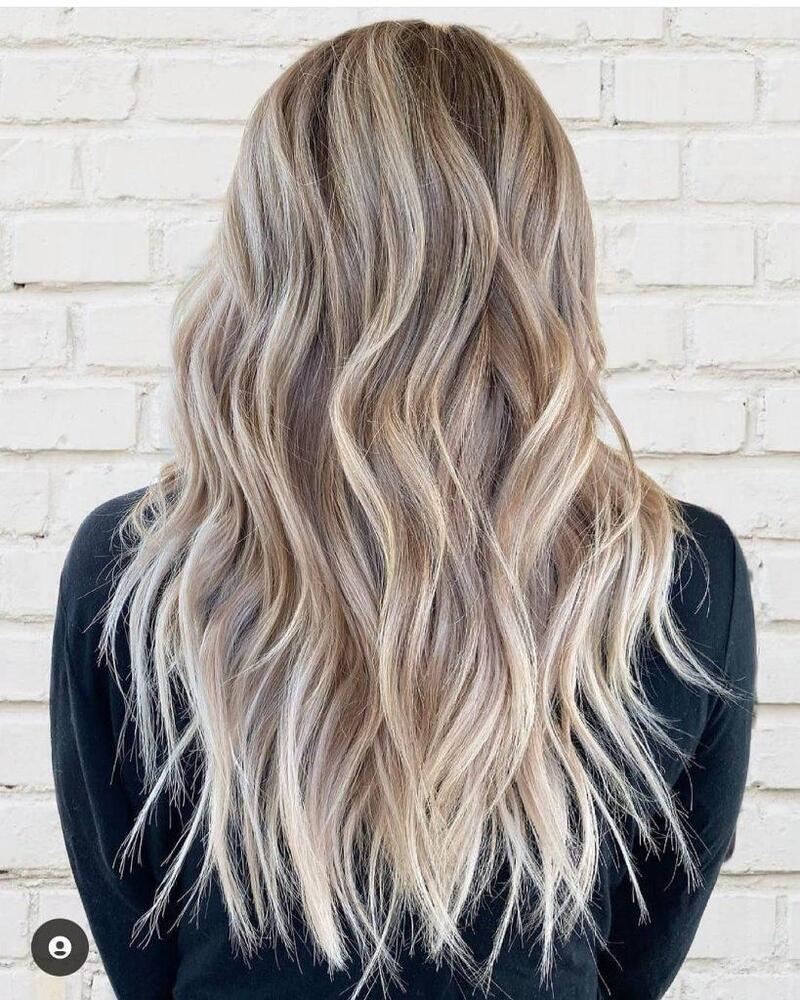
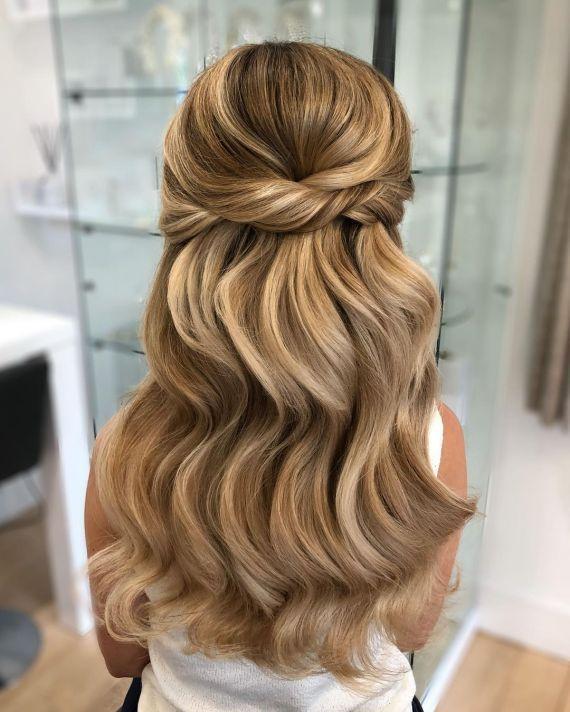
Soft Waves Of Blonde And Brown
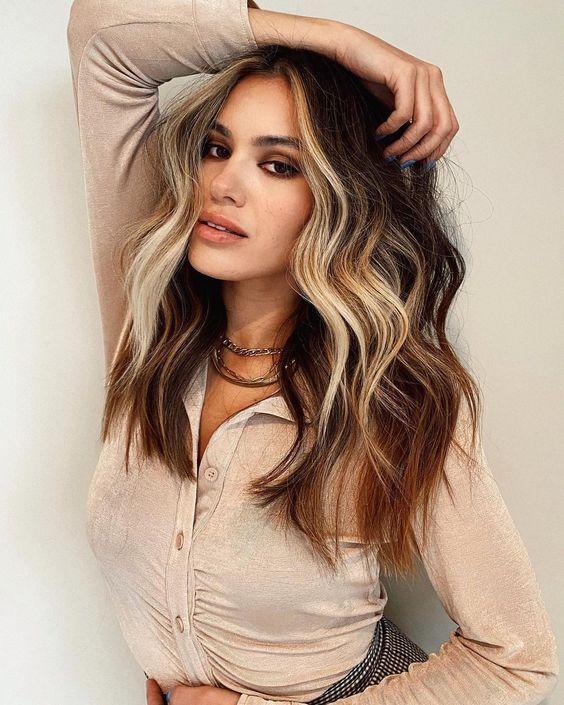
March is the perfect time to embrace the season with a blend of blonde and light brown. This medium-length style features highlights that transition seamlessly from warm brown to sunny blonde, creating a sun-kissed, natural look. It’s an aesthetic choice for those who appreciate a radiant, effortless vibe. The soft waves add texture and movement, making it a versatile option for both casual outings and chic evening events.
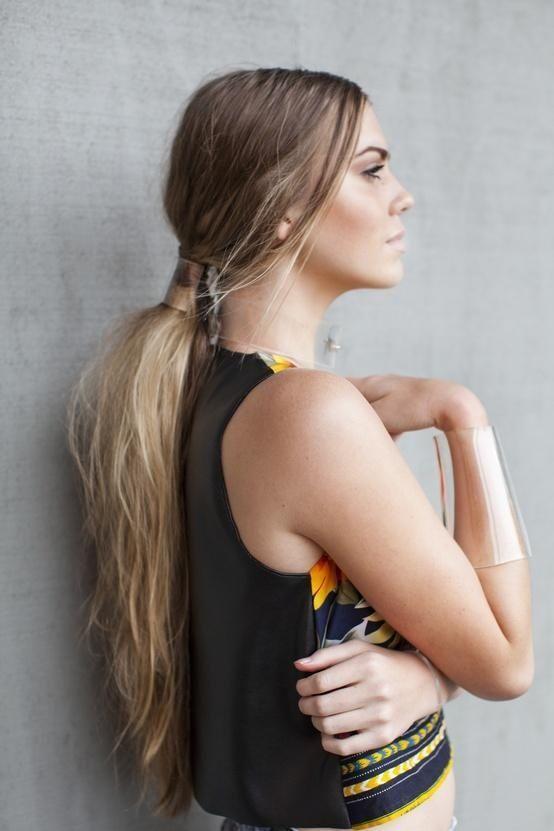
Deep Brown To Light Blonde
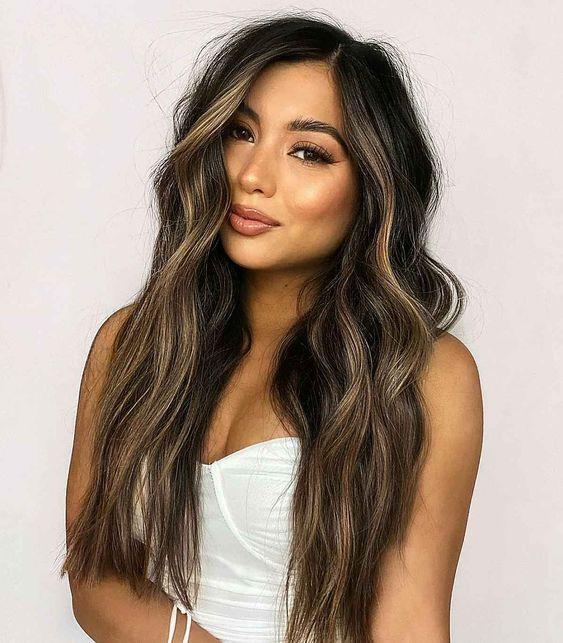
For a more subtle yet equally stylish transition, consider a layered hairstyle that flows from dark brown to medium blonde. This look exemplifies elegance, making it perfect for the woman who wishes to showcase her long hair with sophistication. The layers create a natural flow and movement, highlighting the gradual lightening of color from dark roots to lighter tips. It’s a classic style that remains trendy in 2024.