23 SUMMER HAIRSTYLES FOR A CAREFREE BEAUTY ROUTINE
Summer hairstyles are truly the go-to choice, as the season is all about embracing relaxation and minimizing effort, giving you more time to enjoy the sunshine and carefree vibes. from relaxed or polished updos to an array of braids, these 23 summer styles make your beauty routine more enjoyable and quick, rather than time-consuming.
AIR-DRIED ANYTHING
Your natural texture is your ultimate summer companion. “Effortless summer hair, to me, means embracing your hair’s natural state, whether it’s 3A or 4C, and letting it be bold and free with minimal upkeep,” says Wright. Step out of the shower, ocean, and let your hair do its thing—you might be pleasantly surprised by the outcome.
PLAITED PONY
Minimized styling is essential for summer, and creating a simple, single braid that swings between your shoulder blades is a quick and effective way to manage any texture while maintaining a touch of glamour. This effortless braid keeps your hair in check and exudes a relaxed yet stylish look.
BED HEAD
Some of the best summer hairstyles are defined by what you don’t do. In this case, tousled, messy waves embody the essence of the season, reflecting a carefree, laid-back attitude. These effortless waves signal your dedication to summer vibes, effortlessly exuding a sense of casual, cool sophistication.
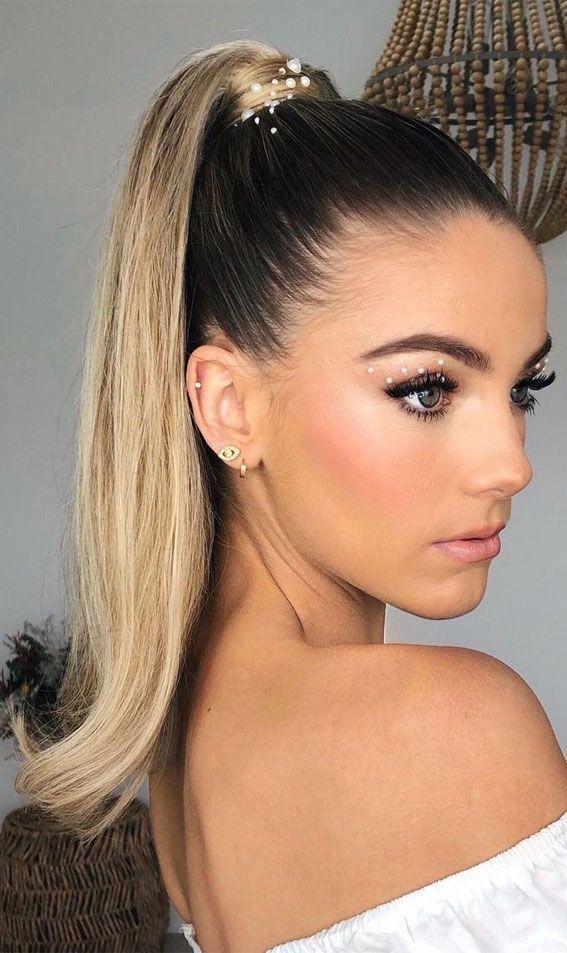
SLEEK HIGH PONY
Quickly refresh day three (or four) hair by smoothing it back from your roots into a high ponytail. Run a straightener through the lengths to achieve a sleek, polished look, effortlessly reviving your style.
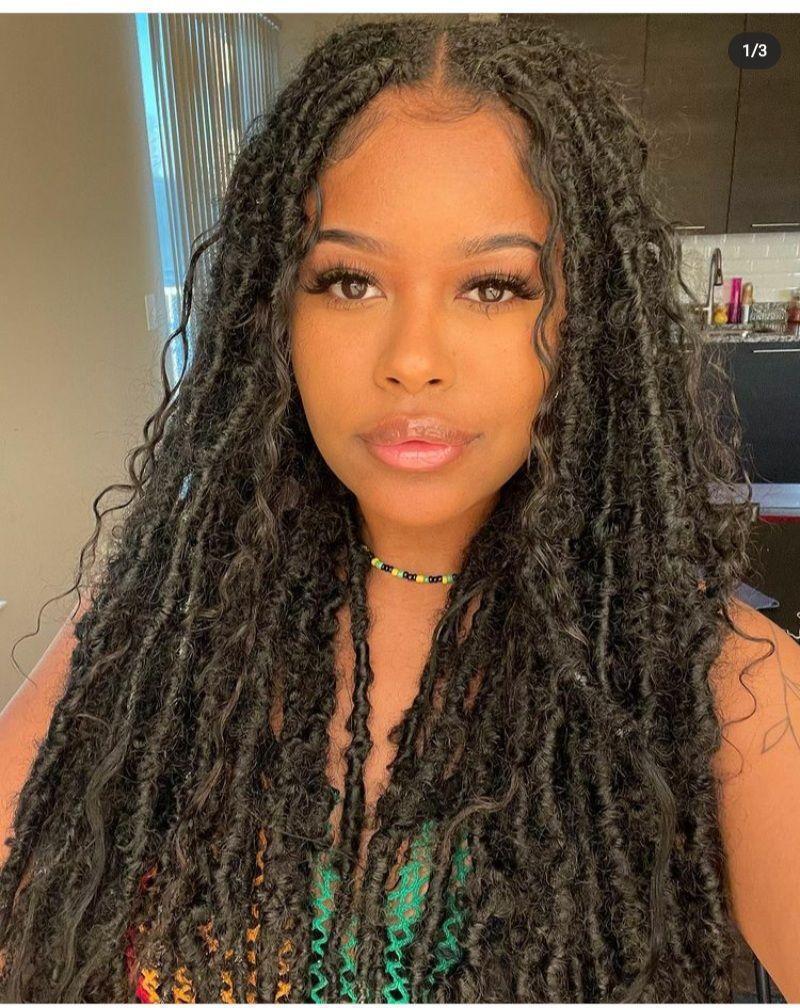
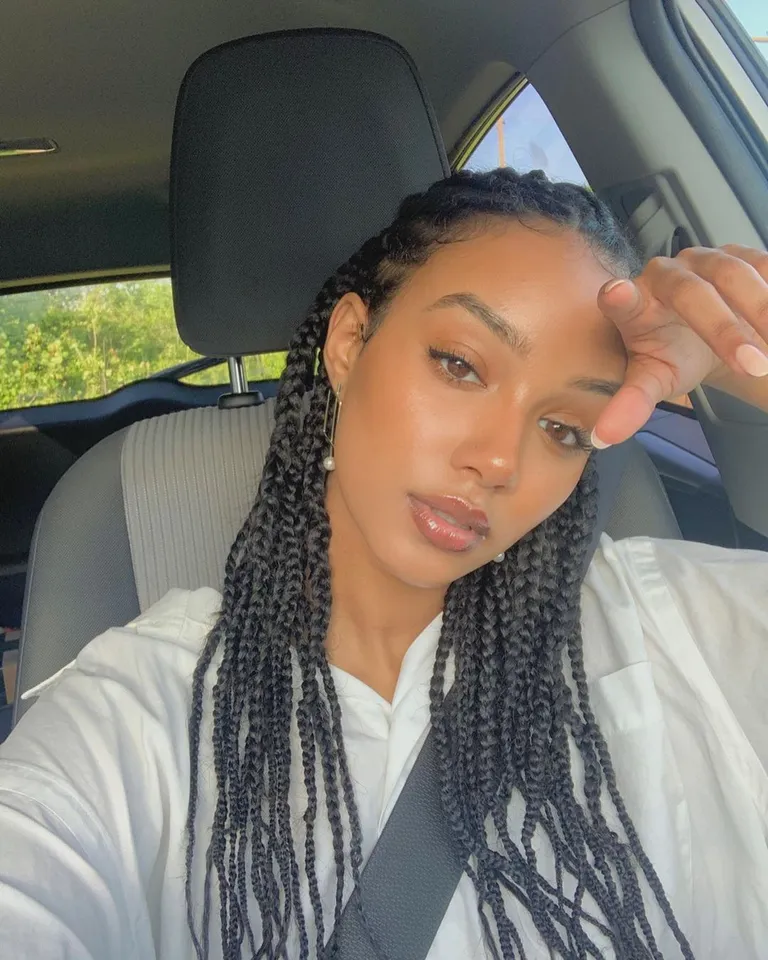
GODDESS LOCS
Goddess locs, a glamorous variation of boho braids, offer a shinier finish and partially undone ends for a classic look with a modern twist. Teyana Taylor’s take on goddess locs is perfect for summer, combining natural texture with partial protection to create an eye-catching and stylish effect.
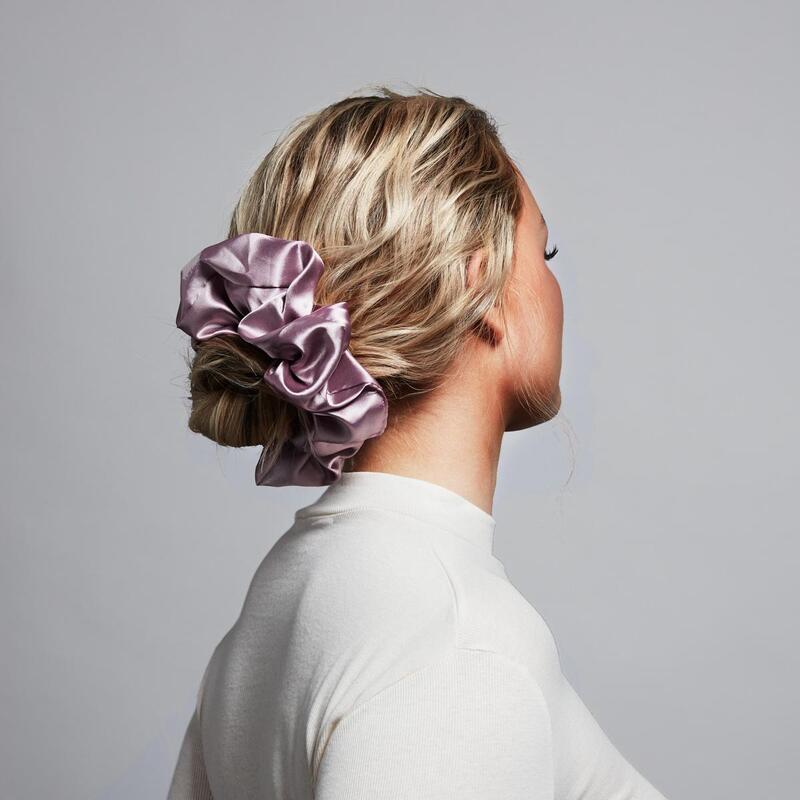
OVERSIZED SCRUNCHIE
Oversized scrunchies are definitely a favorite for me as well. They bring a touch of drama and feminine elegance to any hairstyle. Opting for silk or satin materials not only adds a luxurious feel but also helps maintain healthy hair.
SLICKED-BACK BUN
The timeless slicked-back bun is an ideal choice for summer, offering a chic and practical style that’s easy to achieve. To keep the look smooth and frizz-free, apply a strong-hold gel to tame flyaways and maintain that sleek finish throughout the day.
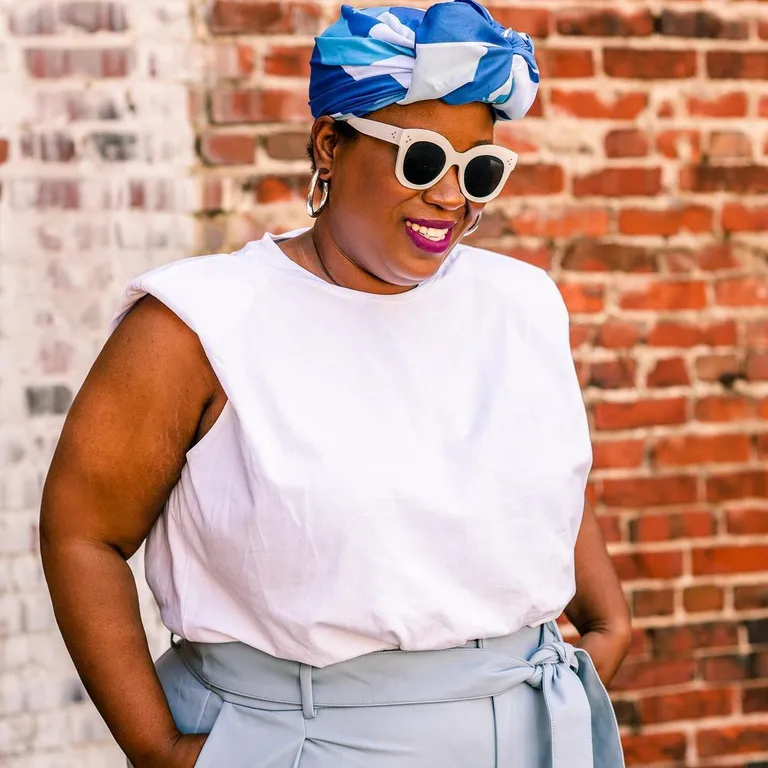
WRAPPED UP
A headscarf or wrap is a stylish and practical way to shield textured hair from the summer elements. It adds a touch of elegance while providing protection against sun and humidity.
BUTTERFLY CUT
This style is, admittedly, easier for those with the hair texture to hold it and a real love for the blowout process, but its lasting appeal is unquestionable. “I recommend a round brush and blow dryer to give your hair big, voluminous body with a classic blowout,” says Fitzsimons.
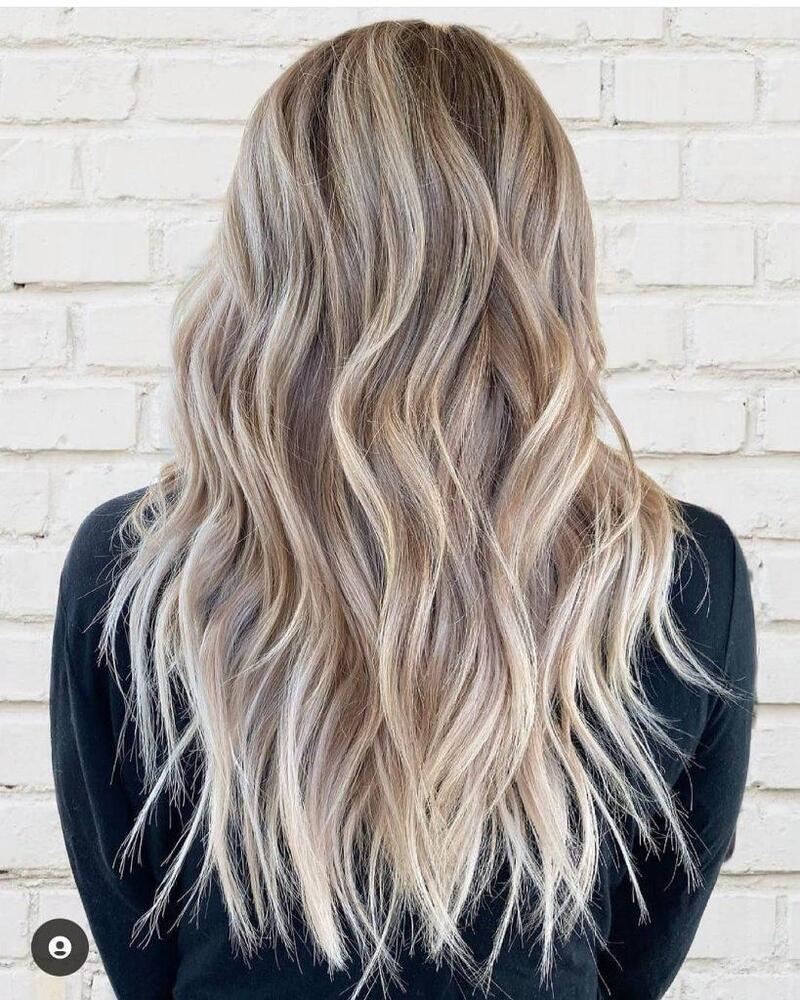
BEACH WAVES
For a timeless warm-weather look, embrace the natural effects of salt water and sun. This style captures the essence of summer, giving you a relaxed, sun-kissed appearance that’s both effortless and iconic.
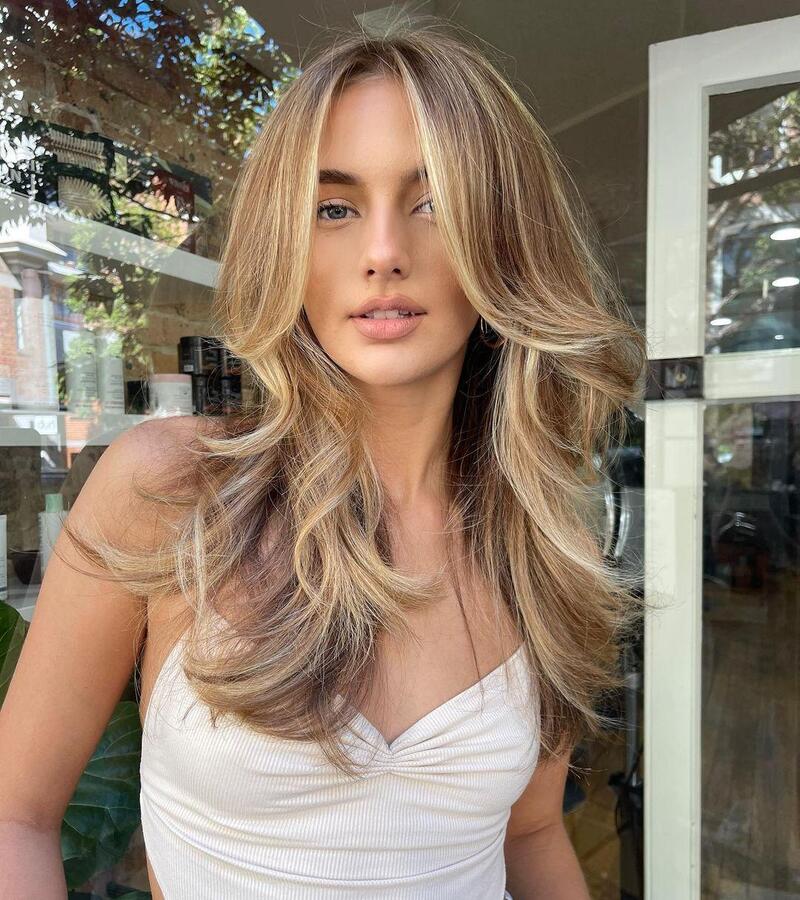
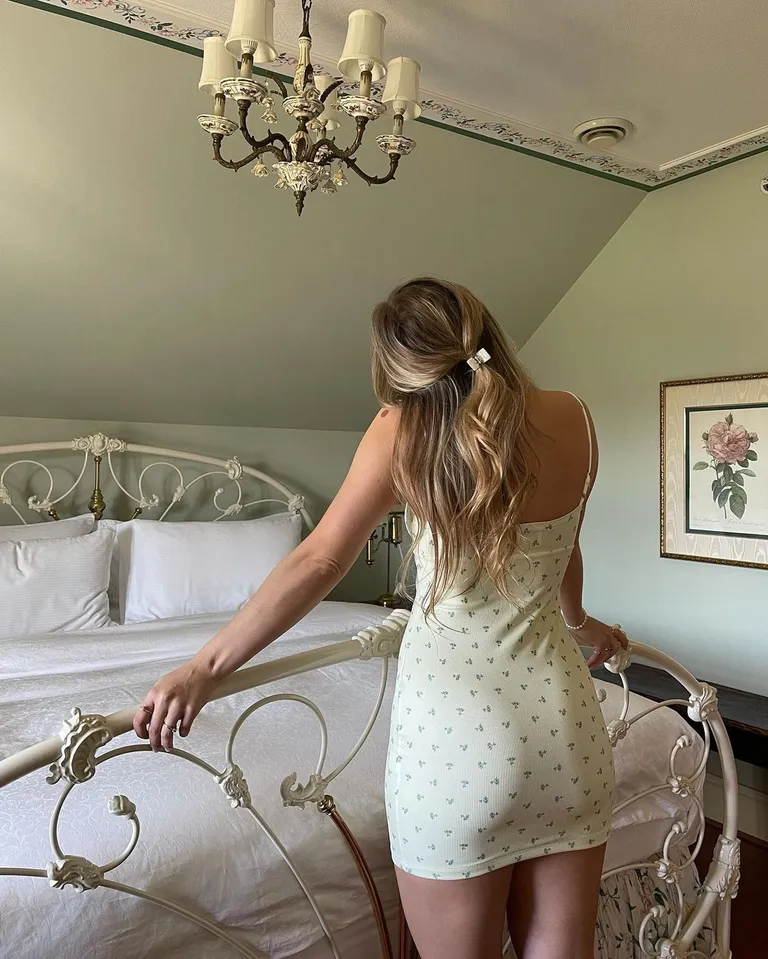
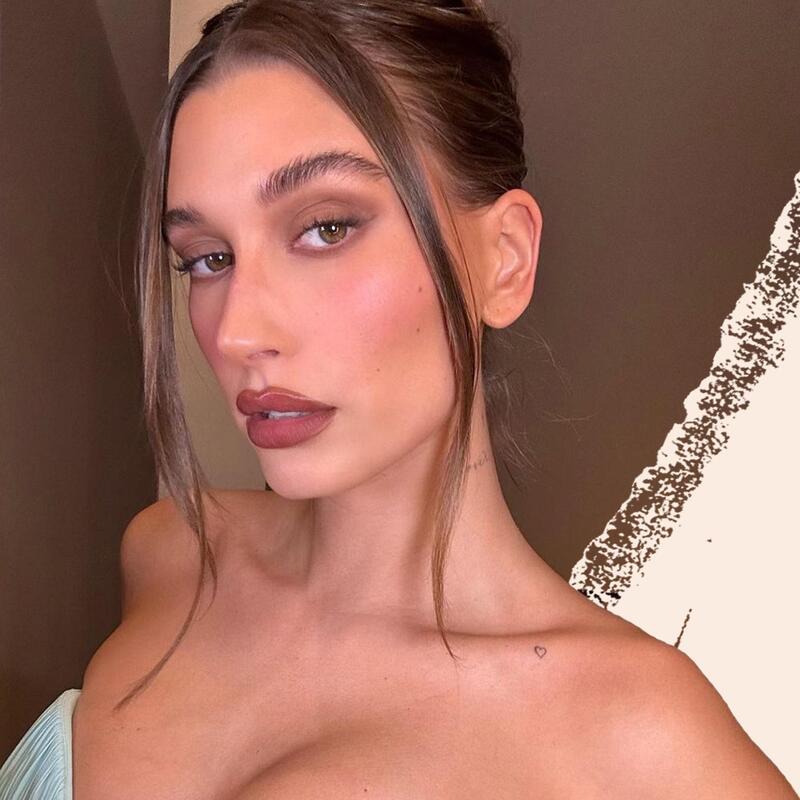
SWEPT BACK
Sweep your hair back into a delicate clasp for a relaxed style that accentuates highlights and balayage. This effortless look highlights your hair’s color and texture, offering a chic yet easy way to showcase your hair’s natural beauty.
TENDRIL TWIST
The classic French twist, also known as “businesswoman hair,” is making a comeback in 2024. To make it summer-ready, add face-framing tendrils or parted bangs for a more relaxed and easygoing feel. This update brings a touch of effortless sophistication to a timeless style, perfect for the season.
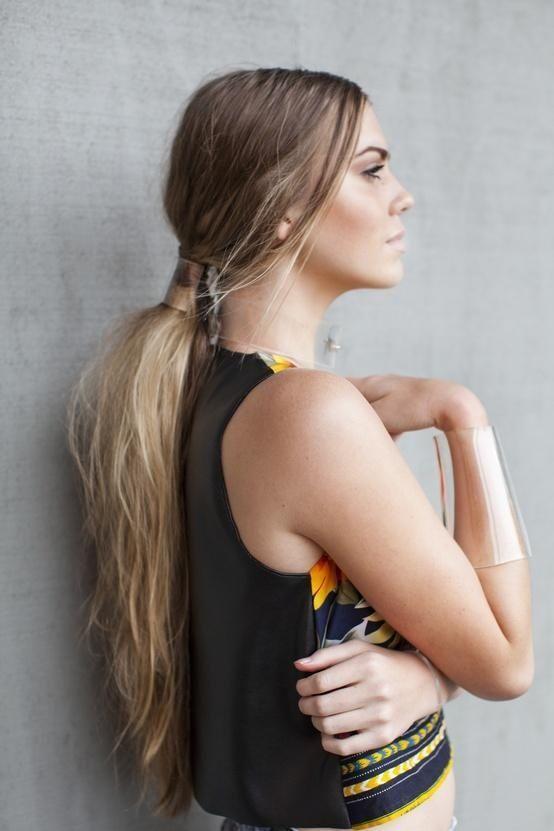
BEACHY PONYTAIL
If loose beachy waves seem stressful, gather your hair into a low ponytail positioned just above the nape of your neck. This style allows you to showcase your curls while keeping things neat and controlled.
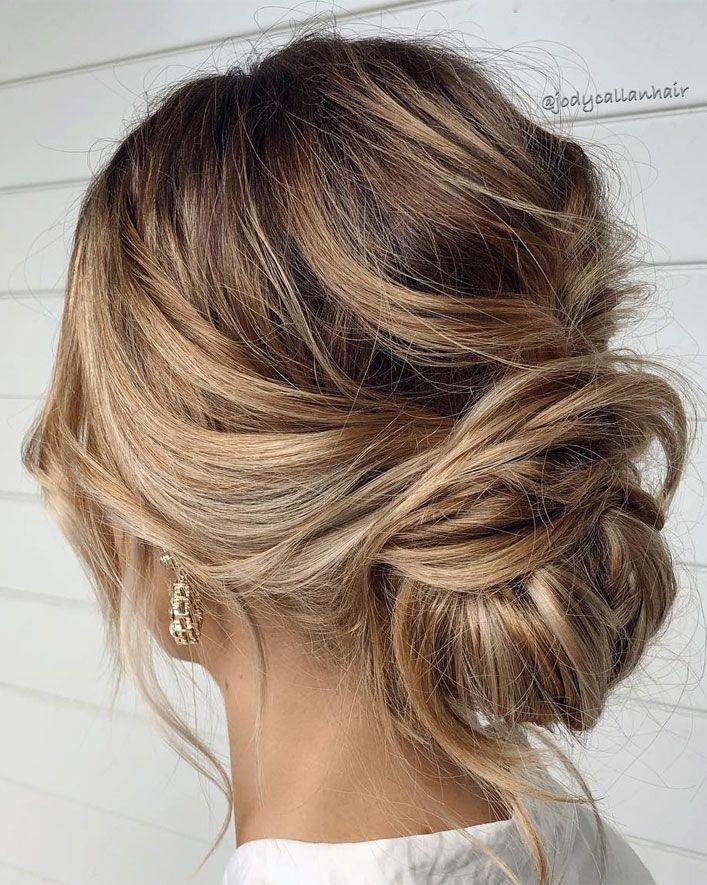
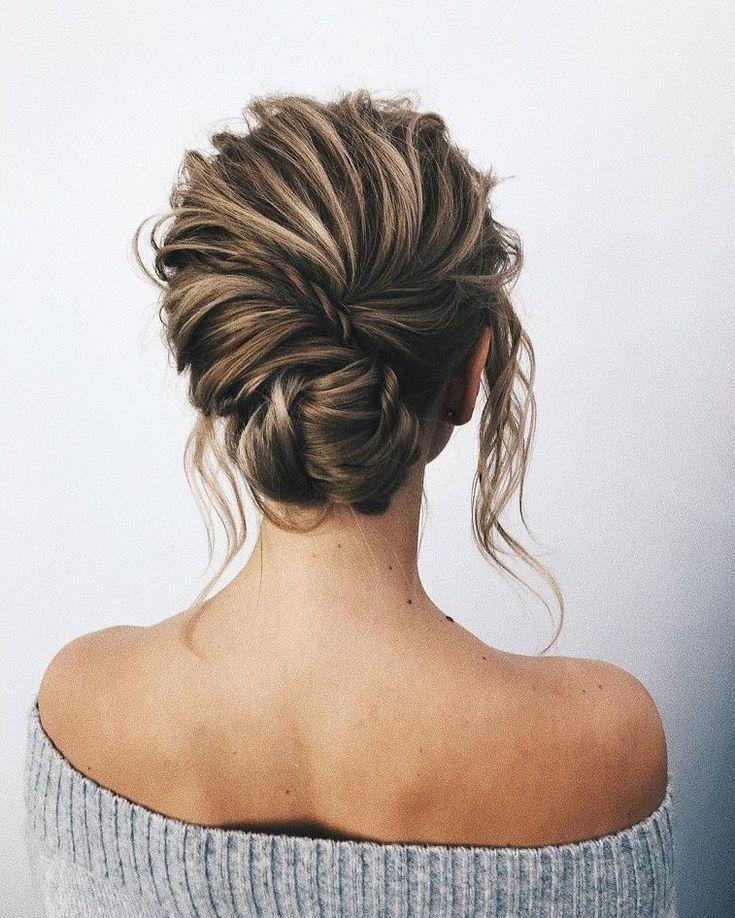
UNDONE UPDO
Loose updos offer the perfect balance of laid-back summer vibes and a touch of evening-ready elegance. These relaxed styles let you embrace a carefree, effortless look while still appearing polished enough for any occasion, from beachside strolls to sunset dinners.
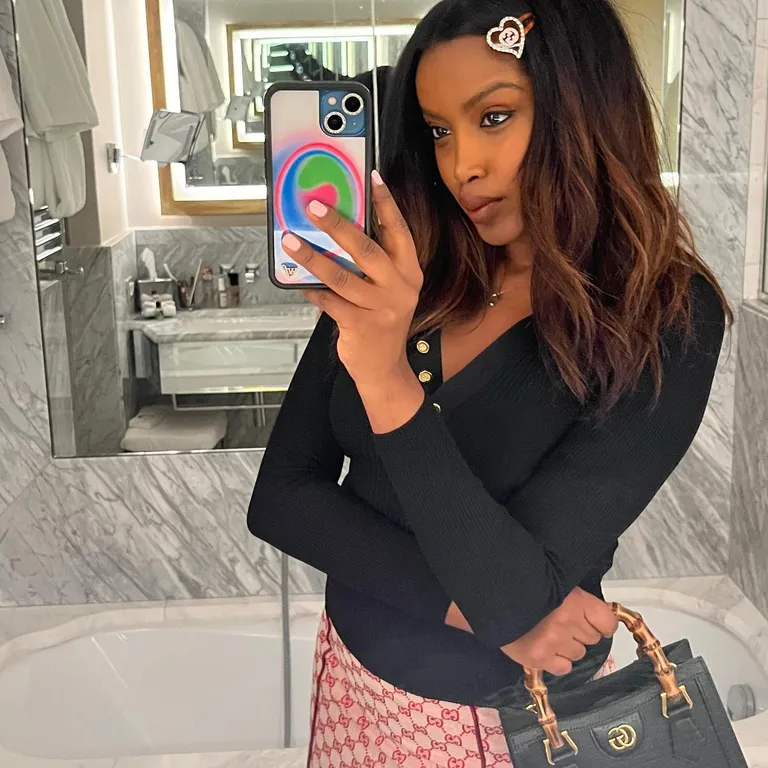
CUTE CLIPS
A fun and easy way to accessorize your hair when you’re on the go or in a rush is by using trendy accessories that pay homage to the ’90s nostalgia. These accessories add a touch of style with minimal effort, making them perfect for quick, chic looks.
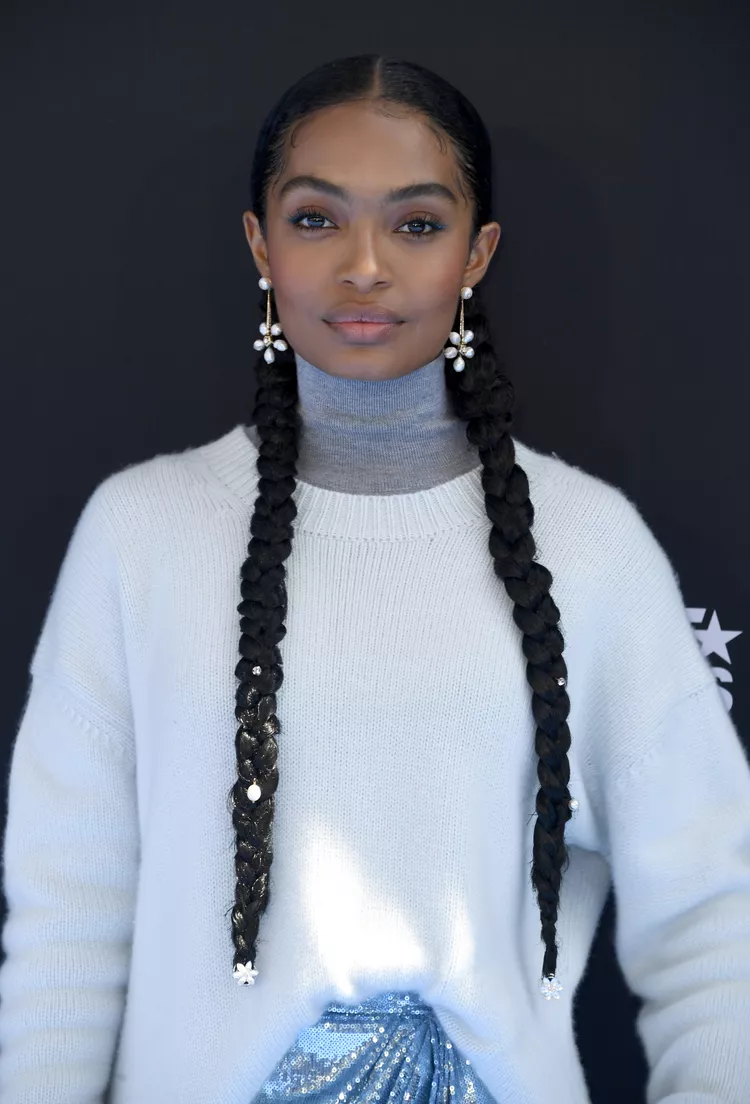
PIGTAIL PLAITS
A pair of plaited pigtails is a classic way to keep your hair out of your face and tidy up your look, no matter your natural texture or how long it’s been since your last wash.
TEXTURED UPDO
The sleekness of a polished style gains a summery twist when you highlight the natural texture within the ponytail or knot. This blend of refinement and organic texture adds a fresh, relaxed vibe to an otherwise polished look.
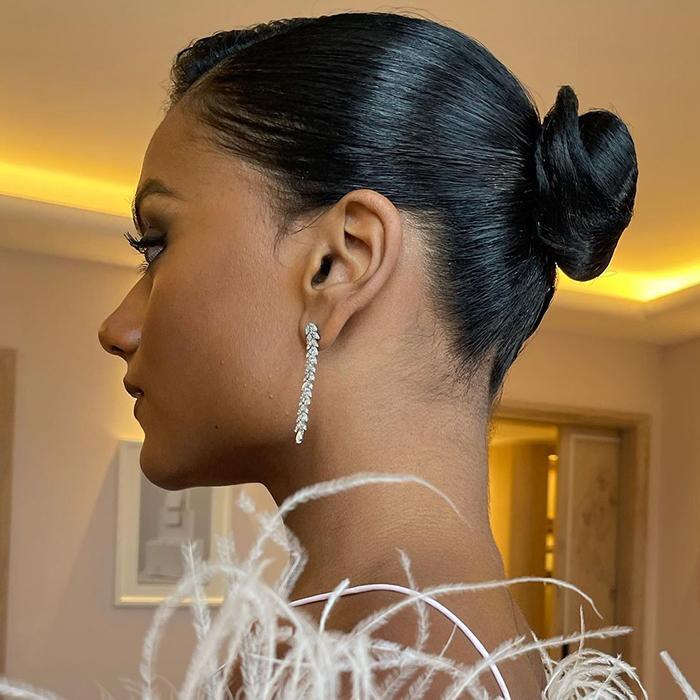
LOW BUN
Longer hairstyles that start to misbehave in the summer can be effortlessly tamed by twisting them back into a low bun. This simple solution keeps your hair neatly in place while adding a touch of elegance, making it perfect for both casual outings and more refined occasions.
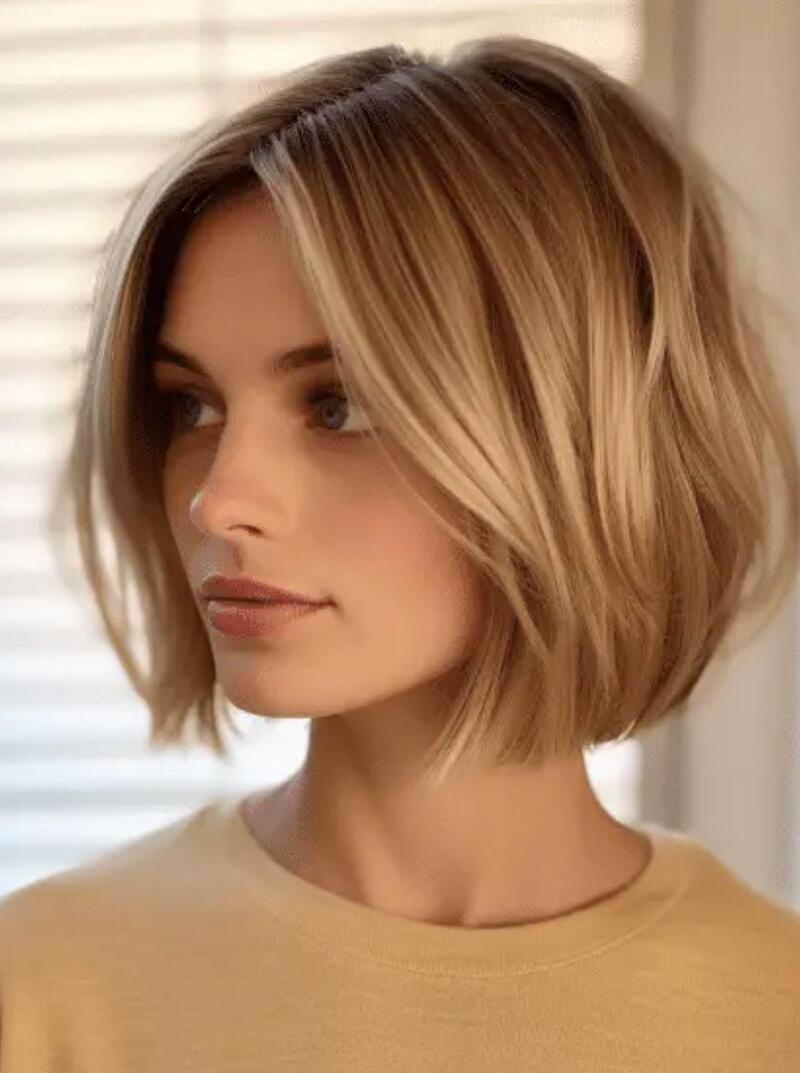
ITALIAN BOB
The Italian bob’s popularity stems from its effortless charm, making it an excellent choice for summer. Cut to fall just below the chin, this style retains weight at the bottom. The Italian bob not only accommodates but actually encourages natural volume, offering a laid-back, yet stylish look that requires minimal maintenance.
HIDDEN LAYERS
If you have shorter layers in the front, pinning a few sections back is a playful way to switch things up while keeping cool. This easy adjustment adds a touch of style and helps manage your hair on warmer days.
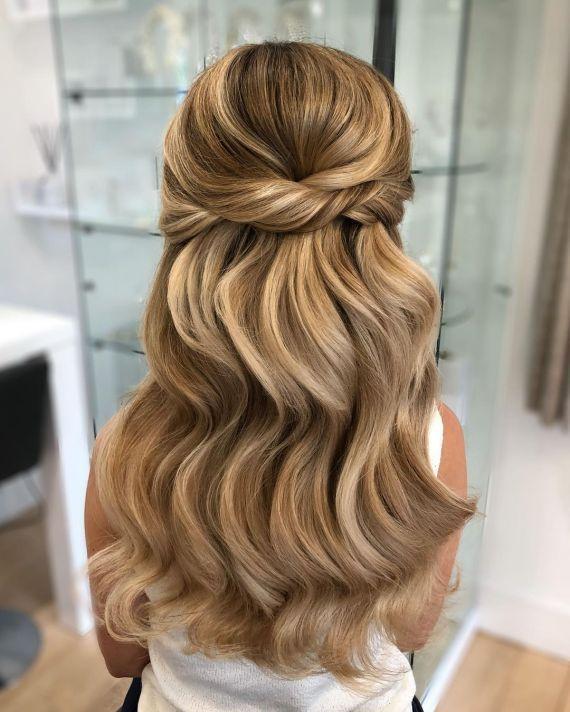
HALF-UP HAIR
“A half-up, half-down styleoffers a versatile look that takes the hair out of the face without it being completely up,” says Fitzsimons. “You can take this look to new heights without heat styling and embracing your natural texture, leaving out your fringe for some playful pieces, or even putting the top half in a bun—you can really tailor this to fit your style.”
BRAIDED BACK
For long, curly, or coily hair, braids are an excellent low-maintenance summer option. A braided-back style is particularly effective if you prefer to keep your hair out of your face during hot weather, providing both practicality and style.
THE FRENCH GIRL
This versatile cut is tailored to graze the cheekbones, jawline, or shoulders based on your preference and is complemented by a blunt, easy fringe. “The ‘French girl’ cut is suitable for all hair types, can enhance the hair’s natural texture, and works for most hair lengths,” says Fitzsimons.
CONCLUSION
In conclusion, summer hairstyles embrace ease and practicality while showcasing effortless style. From relaxed beachy waves and sleek ponytails to chic braids and polished updos, these looks are designed to keep you cool and stylish with minimal fuss. By leveraging natural texture and opting for low-maintenance designs, you can enjoy a season of sun and fun without sacrificing your hair’s appearance.
HOW TO DO MAKEUP FOR BRIDE: A STEP-BY-STEP GUIDE TO DIY WEDDING MAKEUP
A wedding day is a moment people daydream about and meticulously plan well in advance before meeting the person they will eventually marry. When the moment finally arrives, numerous aspects need careful consideration and execution, including selecting the ideal make up for bride. This process involves various steps, such as preparing the skin for a radiant appearance, deciding on the makeup artist, and scheduling time for a trial-run application (or two). It also entails mastering the art of applying makeup that complements the desired look for the bride on her wedding day.
DO A RESEARCH
The internet is brimming with beauty inspiration for your wedding day. If you’re uncertain about the kind of look you want, initiate some research. Explore your favorite celebrity’s latest red carpet appearances through a search engine or visit a professional makeup artist’s Instagram page to peruse photos of their clients.
You can also turn to TikTok or YouTube for comprehensive tutorials that you can recreate. Kim suggests identifying someone with similar facial features for a more personalized guide. Following makeup trends that don’t compliment your face may result in an awkward appearance. Don’t replicate a look just because it’s trending online. Instead, ensure that you genuinely like the chosen style.
CONSIDER YOUR THEME
Your final appearance will be significantly shaped by your overall aesthetic. Prior to applying your makeup, it’s crucial to decide whether a natural, sun-kissed glow, or a blend of both aligns better with you and your event. Taking into account your color scheme, floral decorations, venue, and ambiance. Aligning your makeup with the overarching theme enhances the harmonious and elegant atmosphere of your wedding day.
DETERMINE THE RIGHT SHADES
To achieve a smoother end result, it’s essential to determine which color will best complement your skin tone, whether it’s a warm bronze tone or a cool blue tone. Attention should be paid to the importance of finding the right shade for your skin, suggesting the possibility of mixing different shades to create the perfect combination. Instead of relying on guesswork, consider seeking advice from a professional who can determine the color that best suits your skin tone.
STAY OUT OF THE SUN
In the countdown to your wedding day, one crucial piece of beauty advice is to stay out of the sun. Prolonged exposure to sunlight can lead to skin damage, including sunburn, premature aging, and uneven skin tones, all of which might affect your desired wedding day look. To maintain a radiant and flawless complexion, it’s advisable to minimize sun exposure in the weeks leading up to the big day. Consider using sunscreen with a high SPF, wearing protective clothing, and seeking shade whenever possible. By taking these precautions, you can help ensure that your skin looks its best and remains picture-perfect for your wedding, allowing you to confidently showcase your natural beauty on this special occasion.
PRACTICE MAKEUP FREQUENTLY
In the buildup to your wedding, one valuable beauty tip is to practice your makeup frequently. Regularly experimenting with different looks allows you to refine and perfect the ideal style that enhances your features and complements your wedding theme. Schedule trial runs to familiarize yourself with the application process, ensuring that your chosen makeup look not only suits your preferences but also stands up to the demands of the long-awaited day.
Frequent practice not only builds your confidence in achieving the desired outcome but also enables you to identify any potential challenges and address them well in advance. With each practice session, you’ll gain valuable insights into the products and techniques that work best for you, ensuring that you step into your wedding day with the expertise to create a stunning and long-lasting makeup look.
BOOK A VIRTUAL APPOINTMENT
In the modern landscape of wedding preparations, booking a virtual appointment has become an invaluable step, especially in the era of convenience and technology. Prior to your wedding, consider scheduling virtual appointments with key vendors, such as your wedding planner, photographer, or even beauty professionals. These virtual consultations provide a convenient and efficient way to discuss details, share ideas, and make crucial decisions without the need for in-person meetings.
Whether it’s finalizing the event timeline, reviewing photography preferences, or discussing your desired bridal look, virtual appointments allow for seamless communication from the comfort of your own space. Embracing this digital approach not only streamlines the planning process but also accommodates busy schedules, ensuring that every detail is meticulously addressed, and your vision for the perfect wedding day is brought to life.
PREP YOUR SKIN
On your wedding day, stick with your tried-and-true skincare routine! A clean, familiar canvas is key to achieving natural, beautiful makeup. Skip experimenting with new products and simply cleanse, moisturize (lightly!), and gently exfoliate (if you normally do). Leave any blemishes alone unless you have a trusted spot treatment, and you’re all set for a picture-perfect complexion.
CHOOSE FAMILIAR PRODUCT
When it comes to your wedding day, selecting familiar makeup products is key. The familiarity of these products offers a sense of comfort and confidence since you already know how they perform on your skin. Opting for tried-and-true makeup items ensures that you avoid any potential surprises or adverse reactions that could occur from experimenting with new products. By sticking with the cosmetics you are familiar with, you can trust that they will provide the desired results and enhance your natural beauty. It’s essential to feel at ease and radiate confidence on your special day, and relying on familiar makeup products plays a significant role in achieving that peace of mind.
HOW TO DIY YOUR OWN BRIDAL MAKEUP
STEP 1: PREP YOUR SKIN
Whether you’re applying your makeup on your own or relying on a professional, on your wedding day, start by washing your face and applying a light moisturizer. Stick to your regular skincare routine; now is not the moment for drastic changes. If you usually exfoliate, choose a gentle exfoliating cleanser instead of a harsh scrub. Address any blemishes by lightly dabbing on an appropriate product like Visine, but avoid unnecessary interventions. The goal is to have a clean and soft canvas, providing the perfect base for achieving naturally beautiful skin with your makeup.
Consider your skin’s undertones, whether they lean towards cool or warm, when selecting colors that both match and complement. To identify your undertone, try a simple trick. Place a piece of silver and a piece of gold jewelry on the back of your hand. If the gold appears to blend seamlessly, you likely have warm undertones. Conversely, if the silver seems to harmonize better, you probably have cool undertones.
STEP 2: KNOW THAT PRIMER IS REQUIRED
From the moment you start applying your makeup until you bid farewell to your guests, a multitude of events will unfold. To make sure your makeup withstands the ceremony, dancing, tears, and toasts, consider incorporating a primer into your routine. While occasional touch-ups may still be necessary, they will be significantly reduced. Moreover, a primer serves to even out fine lines, and wrinkles, and conceal open pores. Apply a small amount after moisturizing, but before your foundation, ensuring even coverage across your face and eyelids. This sets the stage for a flawless base for all that follows.
STEP 3: APPLY FOUNDATION
For those with a cool undertone, seek out foundations with a rosier, redder, or blue base. If your undertone leans warm, opt for a foundation with a yellow or golden base. To verify if the shade is suitable, apply a small amount on the center of your lower jawline using a Q-tip. If it seamlessly blends in, you’ve found the right match.
Apply your foundation in thin layers, starting from the center of your face and blending outward with a foundation brush. Ensure a seamless finish, paying particular attention to blending beneath your jaw and along your neck to avoid visible lines. Avoid caking on the foundation, as it can give an overdone appearance and may lead to smearing or streaking.
STEP 4: ADD CONCEALER
Applying concealer before the foundation can lead to much of it rubbing away during the foundation blending process. To address red areas or dark circles, use a concealer brush to apply a liquid concealer, matching your skin tone or going one shade lighter, to problematic areas. Dot the concealer and gently pat the brush against your skin to spread it. If needed, use a makeup sponge dampened with water to blend the concealer further.
For concealing blemishes, start by applying foundation, followed by concealer, and set it with powder. If the blemish is still visible, add more concealer and powder. Ensure you pat the concealer onto the blemish rather than rubbing to achieve a seamless finish.
STEP 5: APPLY HIGHLIGHTER
Highlighter might not be a staple in everyone’s makeup collection, but its purpose is to enhance specific facial features, making eyes appear larger and adding a radiant, youthful dewy look. However, using too much or a formulation with sparkle or glitter can lead to photo disasters, so apply it with a light touch. Highlighters are available in both liquid and powder forms.
When using a liquid highlighter, apply it with a brush after your foundation, forming a check mark shape. Begin near your inner eye, angle down toward your nostril, and then move up your cheekbone, blending toward your temple. Repeat the process above your brows, down the center of your nose, on the center of your forehead, and on your chin.
For powder highlighter, apply it after powdering and brush it under your brows, lightly in the corner of your eyes, and on the tops of your cheekbones. Avoid using powder highlighter under your eyes or over your mouth to prevent a sweaty appearance in photos.
STEP 6: SET YOUR BASE
Now, you face a decision. You can either opt for a cream blush instead of a powder blush or set your base with powder. If you choose the latter, begin by using a translucent powder to set your base and manage any shine. When it comes to powder, remember that less is more; aim for a luminous look rather than a heavy one. With a medium-sized brush, lightly dust over your forehead, the sides of your nose, and on your chin.
Following this, apply a powder bronzer that’s a shade or two darker than your foundation. Brush it in the shape of a 3 on both sides of your face. Begin at your hairline, move down the side of your face, then under your cheekbone, back to the side of your face, and finally below your jaw.
Keep pressed powder handy for those moments when certain areas shine and need a quick dab before a photo or while in the restroom.
STEP 7: BRING COLOR TO YOUR EYES
Wedding experts typically advise against a heavily dramatic eye, suggesting instead the use of eyeliners in shades other than black, along with paler or muted eye shadows that complement your eye color. Highlighters can also be applied to create the illusion of larger eyes. Experiment with brown, grey, and green eyeliners, applying them to both your upper and lower eyelids to enhance your eyes. For a longer-lasting effect, use a cream eye shadow on your eyelids, reserving powder for the crease of your eye. Apply a powder highlighter in the corners of your eyes and under your brow.
Consider the following color recommendations based on your eye color: bronze shades for green eyes, mocha for hazel eyes, navy and dark brown for blue eyes, and purples and grays for brown eyes. If you want to line your eyes with eye shadow, dampen an eyeliner brush with water and brush it into the eye shadow for a defined look.
STEP 8: ADD MASCARA
Given that tears are likely, it’s essential to use waterproof mascara for your wedding day. If you’re not accustomed to wearing false eyelashes regularly, your wedding day is not the ideal time to start. Instead, ensure you have a reliable eyelash curler, a volumizing mascara, and a lengthening mascara. Prior to applying mascara, curl your lashes for added lift. When applying mascara, begin at the root of your eyelashes and wiggle the wand from side to side as you move up to the top. Opt for black mascara, as it complements everyone.
Complete your eye makeup by framing your face with a brow powder slightly darker than your natural color. Brush it along the natural line of your eyebrows, working outward toward the end of your eyes. This final touch will enhance your overall look on your special day.
STEP 9: CREAT LIPS
Much like your facial skin, well-moisturized lips are crucial before applying makeup to prevent dryness or cracks that may emphasize lines once color is added. To achieve this, use a lip hydrator, allowing it to absorb for a couple of minutes before applying color. Select a shade that complements your blush and consider the following tips. While many lipsticks claim lasting hours, opting for a lip stain is a more reliable choice on your wedding day.
For fair skin with cool undertones, consider nude, light mocha, and light mauve. If you have warm undertones, explore sand, nude peach, or shell, steering clear of bright pinks, dark bronzes, and deep mochas. If your skin tone is medium with cool undertones, opt for rosy pink, pomegranate, or cranberry; for warm undertones, go with bronze, copper, and cinnamon, avoiding nudes. Deep skin with cool undertones can experiment with raisin, wine, or ruby red, while warm undertones may prefer honey, ginger, or a coppery bronze, avoiding shades close to orange.
CONCLUSION
In conclusion, mastering the art of bridal makeup involves careful consideration and skill. These 8 tips provide valuable insights to help you become the most beautiful bride on your special day. Remember, when it comes to achieving a flawless finish, exploring techniques like air brush make up can elevate your bridal look to new heights. With attention to detail and a touch of creativity, you’re sure to radiate confidence and beauty as you walk down the aisle on your unforgettable day.