Twists remain a popular and practical choice for men with afro-textured hair. Offering a stylish appearance while minimizing maintenance, twists are a versatile hairstyle that can be worn on both short and long hair.
This protective style falls into three main categories:
- Dreadlock Twists: For those seeking a more textured and defined look.
- Loose Hair Twists: Suitable for both thick and thin hair, offering a variety of styles.
- Sponge Twists: A popular option for short hair, creating a defined and textured appearance.
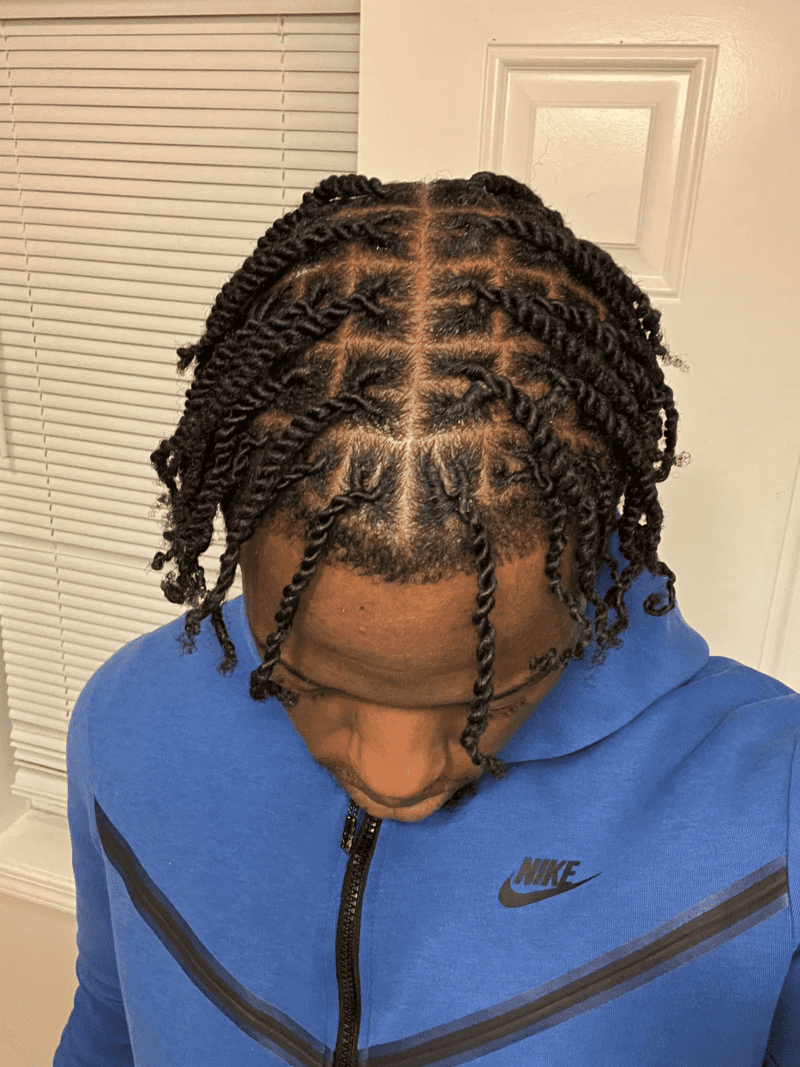
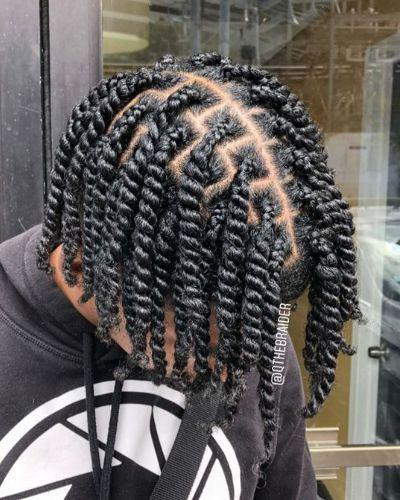
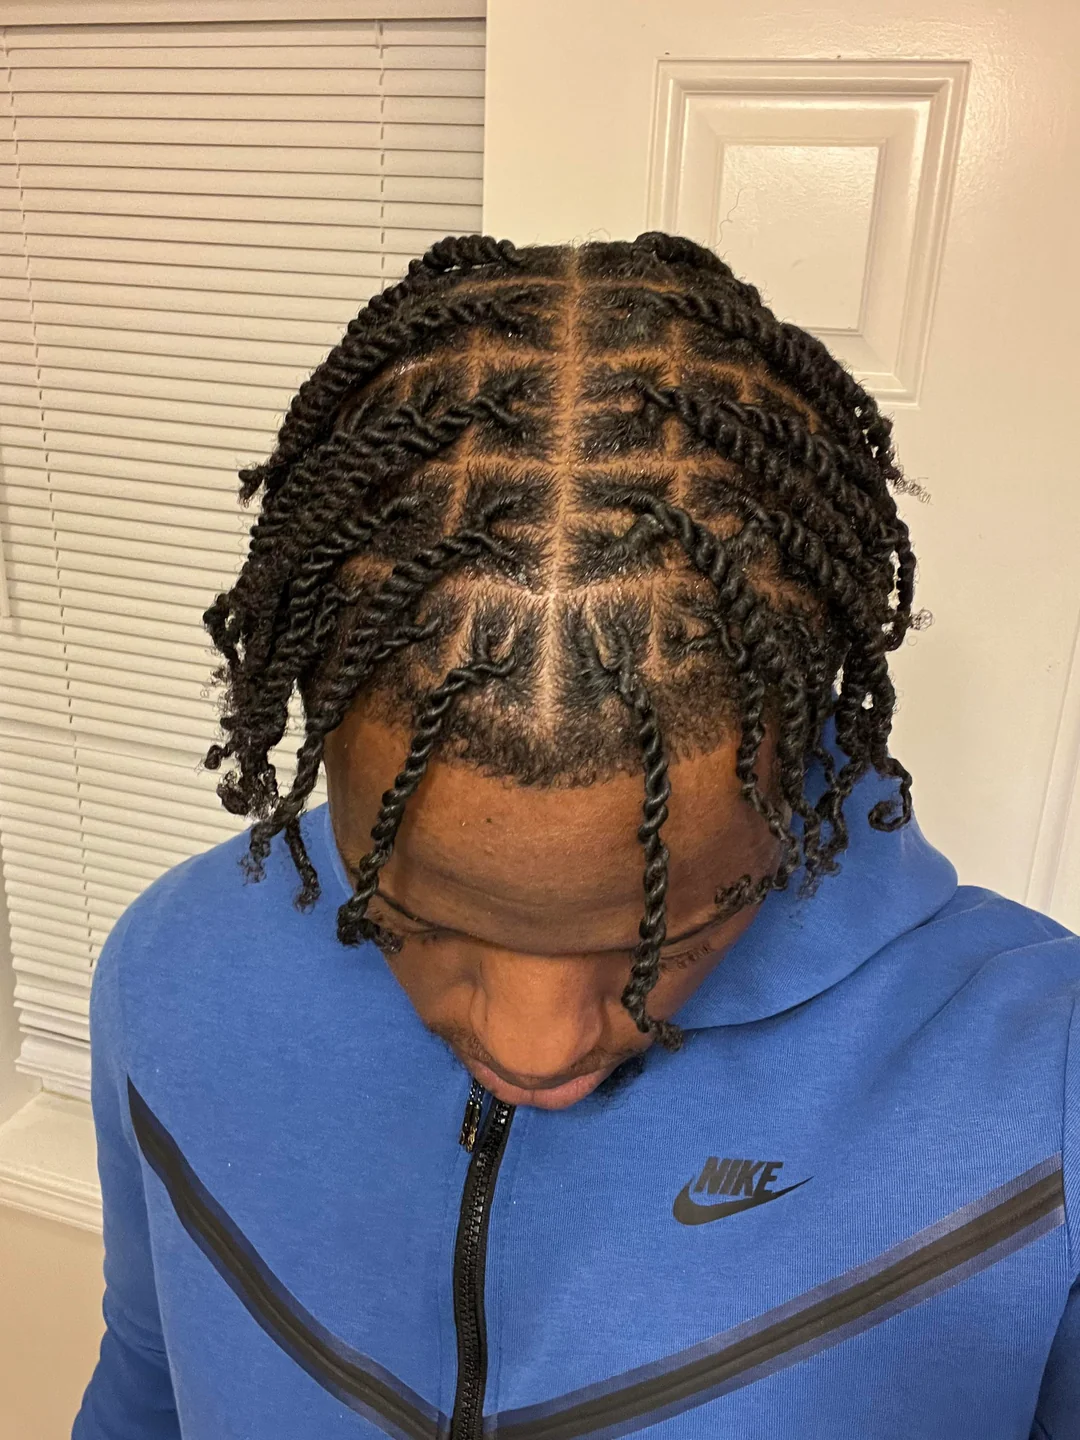
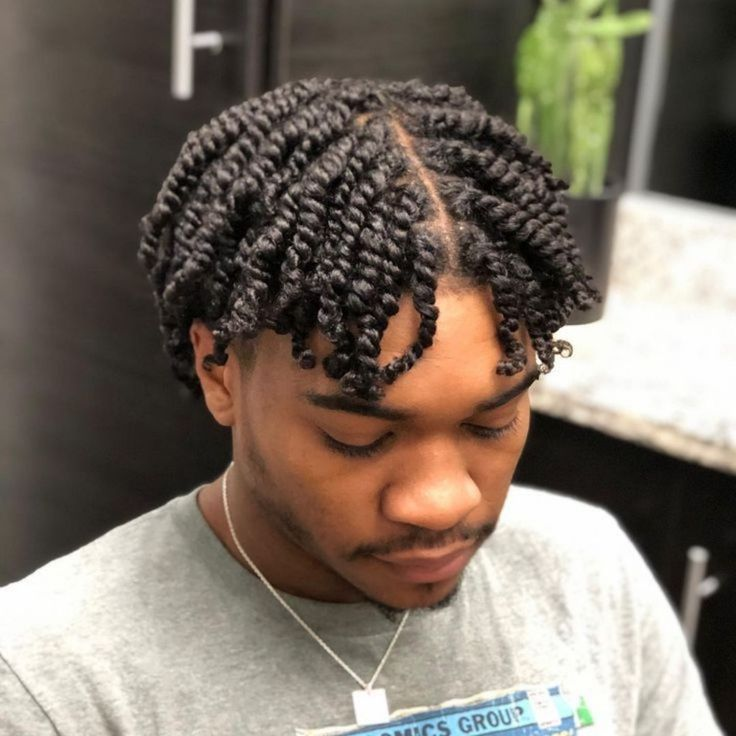
TRIANGLE TWISTS
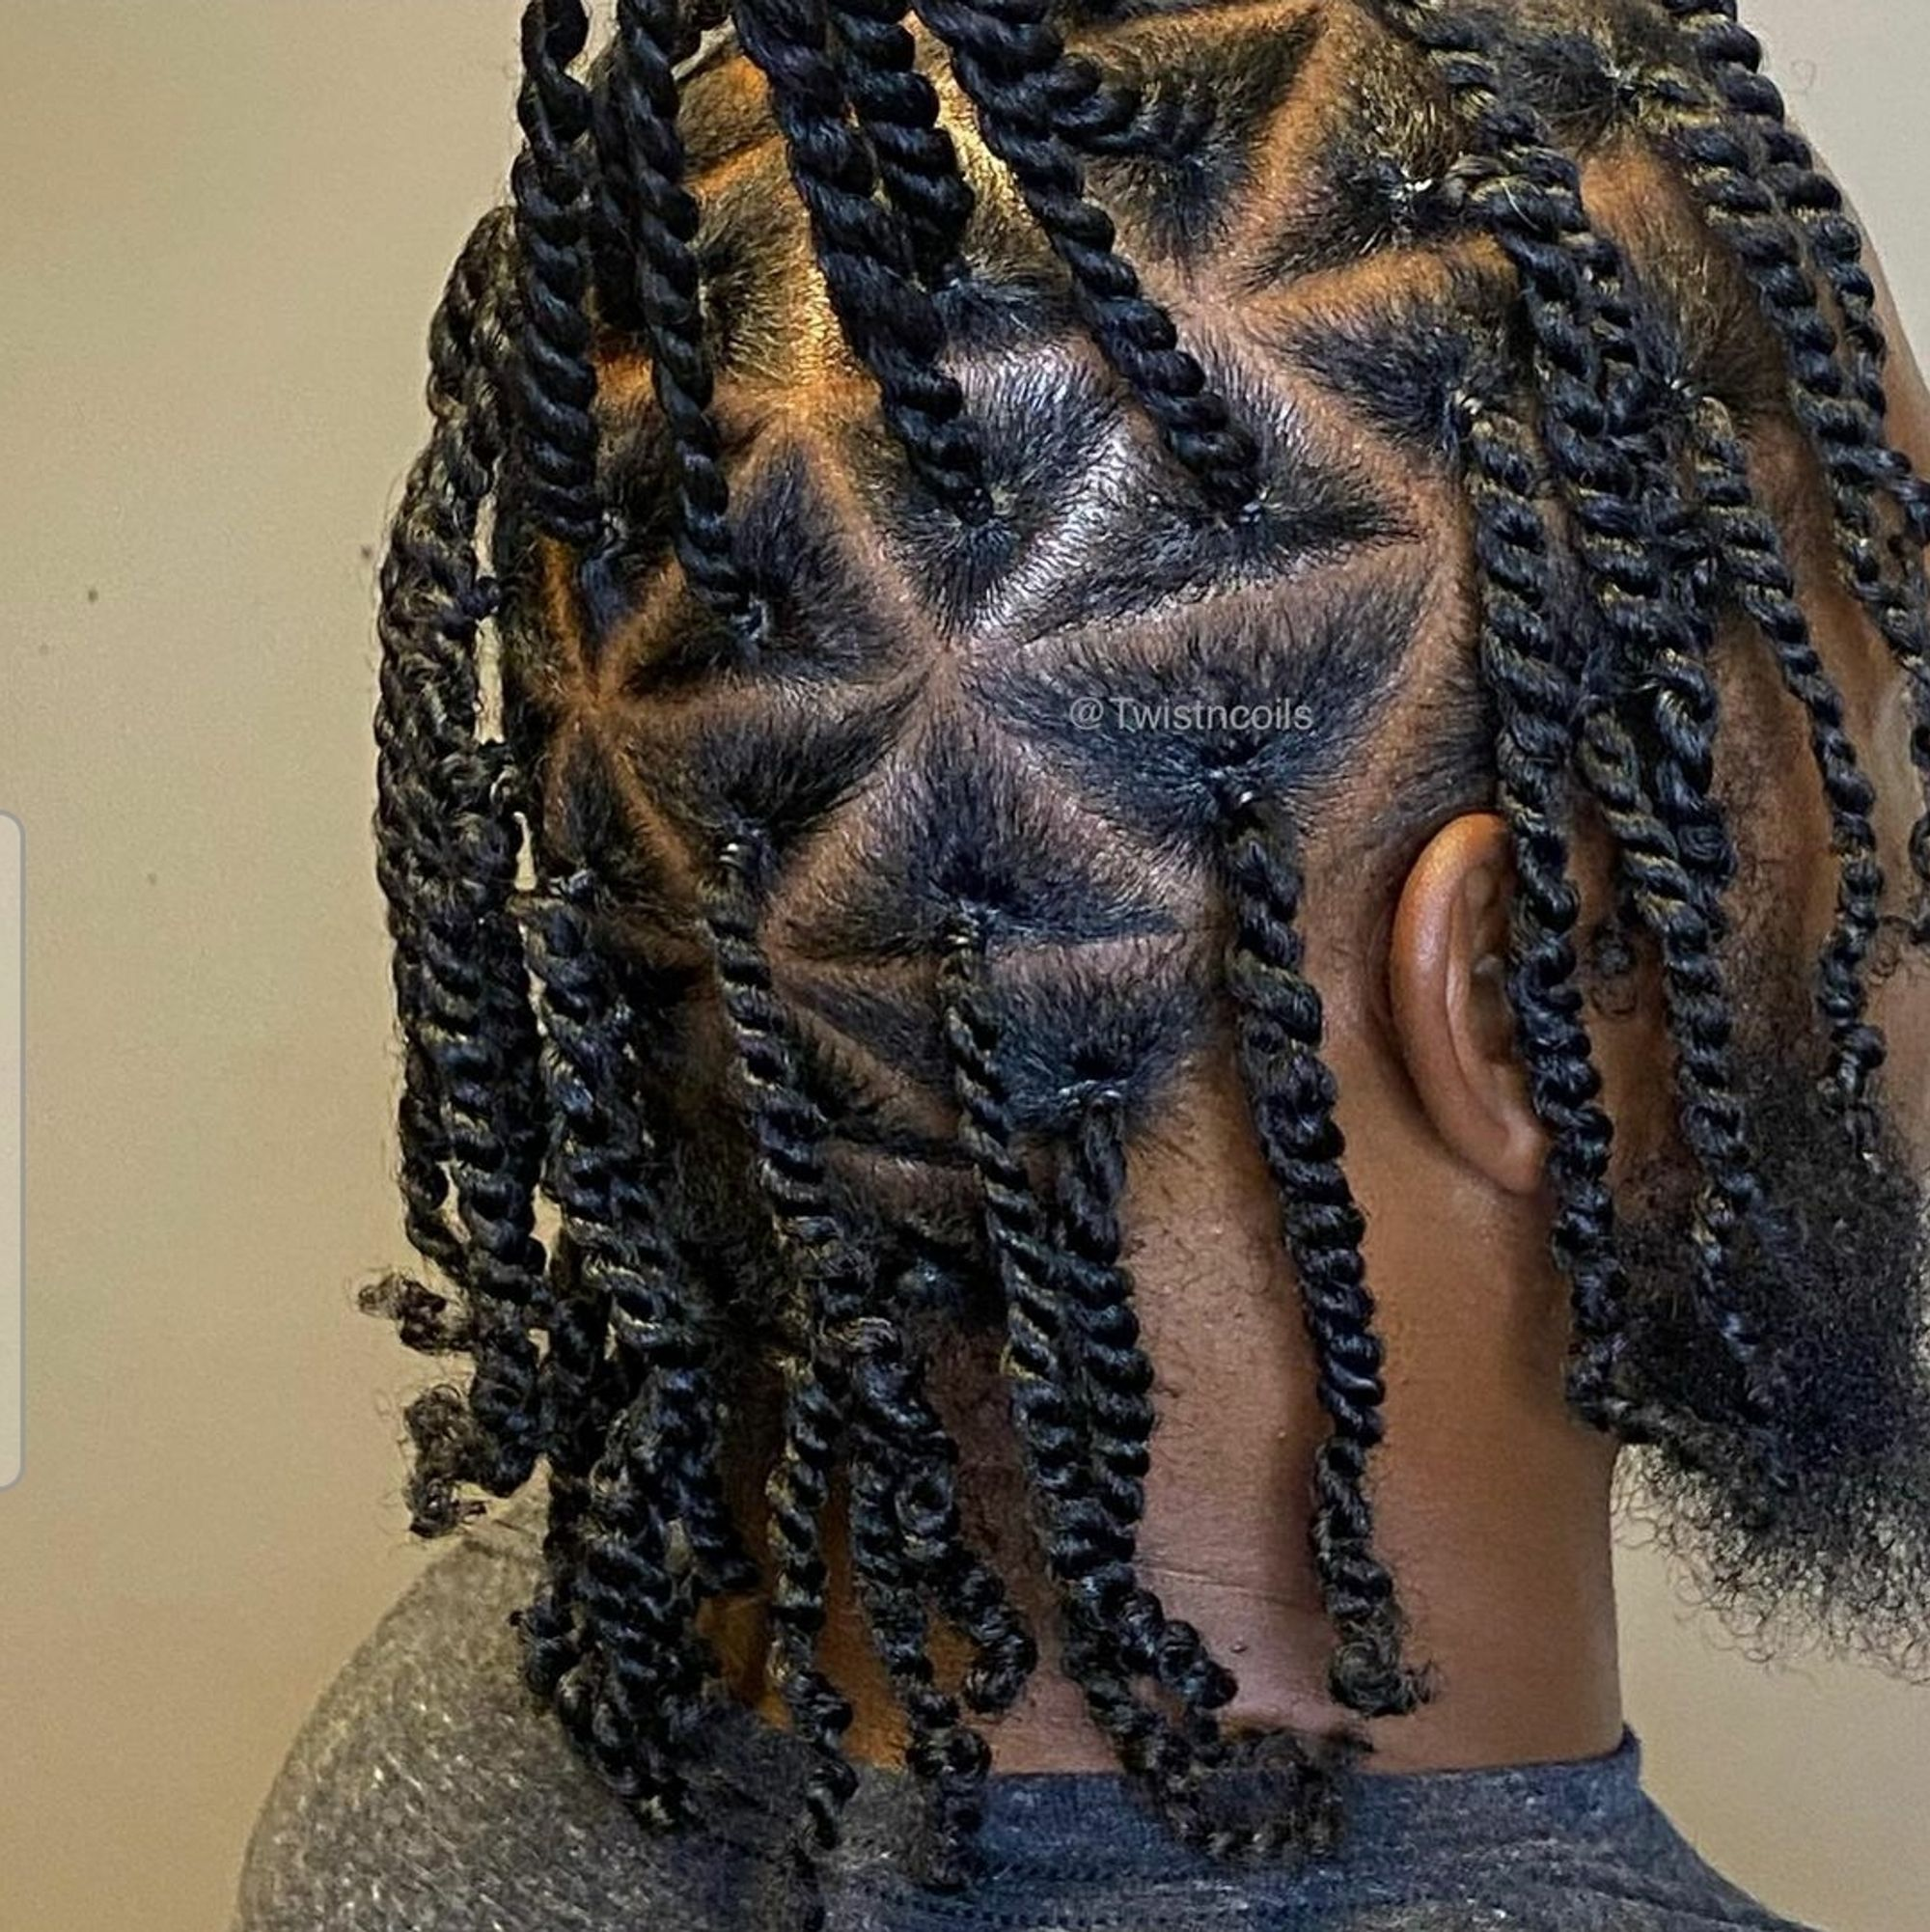
While boxes are the traditional parting system for twists and braids, triangle parts offer a distinctive and visually appealing alternative.
The twisting technique remains the same, with the key difference being in the placement of the roots.
Triangle parts create a unique and noticeable style that sets them apart from traditional box-part twists.
SPONGE TWISTS
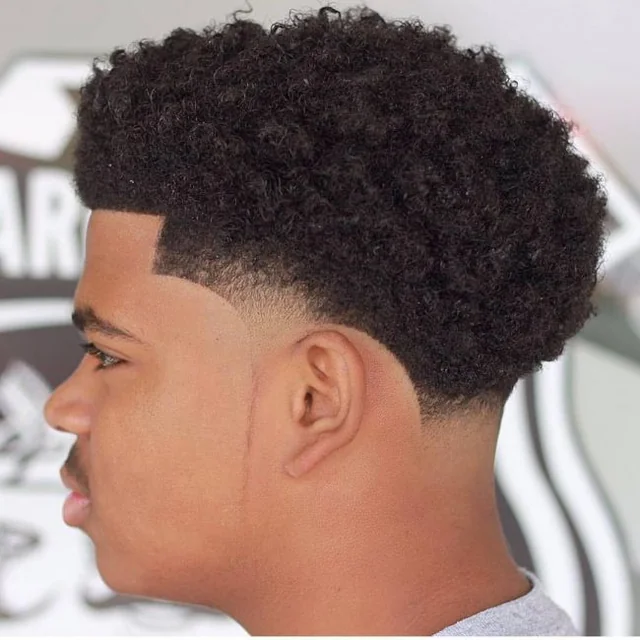
Twists aren’t just for those with long hair. Men with shorter hair can also achieve this stylish look using a sponge twisting technique.
The sponge, designed with multiple holes, is ideal for curling and twisting natural hair. For short hair, this is a great way to achieve a desired style. Remember to start with damp hair, apply a leave-in conditioner, and rotate the sponge throughout your hair.
Pairing short hair twists with a taper fade or shape-up can create a modern and sophisticated look.
BLEACHED TWISTS

For those seeking to make a statement, bleached twists offer a bold and attention-grabbing variation of this hairstyle.
There are several bleaching options to consider:
- Bleaching the Ends: A subtle yet stylish way to add a touch of color.
- Bleaching a Few Strands: A more textured look with strategically placed highlights.
- Bleaching the Whole Head: A dramatic and eye-catching transformation.
While bleaching can be done at home, it’s highly recommended to entrust this process to a professional hairstylist. This will help prevent damage to your hair and ensure optimal results.
THICK TWISTS
To create thick twists, simply use more hair than usual when starting the twisting process. This will result in a fuller and more voluminous look.
Thick twists are a versatile style that suits a wide range of hair types and textures. They are also relatively easy to achieve, making them accessible to most people with basic braiding skills.
One of the advantages of using more hair for twists is that the braiding process is often quicker than with thinner twists.
TWO STRAND TWISTS (ON DREADLOCKS)
Two strand twists have become a staple hairstyle for men with afro-textured hair, renowned for their simplicity, protective qualities, and distinctive rope-like appearance. This style offers the convenience of lasting up to six weeks, making it a popular choice for busy individuals.
Rappers like Lil Durk and Lil Wayne have played a significant role in popularizing two strand twists, incorporating them into their signature looks.
Often used as a post-wash styling technique for dreadlocks, two strand twists involve taking two locs and wrapping them around each other, securing the ends with rubber bands. It’s important to note that this style can cause hair shrinkage, so the final length may not accurately reflect the true length of your hair.
TWIST OUT (ON DREADLOCKS)

One of the many benefits of two strand twists is the stunning twist out that results when you unravel your dreadlocks. This style is achieved by tightly twisting your hair for several weeks and then allowing it to unravel, creating a voluminous and textured look. The video above showcases a beautiful twist out achieved after a six-week period.
The twist out typically lasts for four to five days before requiring restyling. This versatile style is a favorite among men with afro-textured hair.
If your hair is long enough, you have the flexibility to wear it up or down, allowing you to customize your look to your preference.
TWO STRAND TWISTS (ON LOOSE CURLY HAIR)
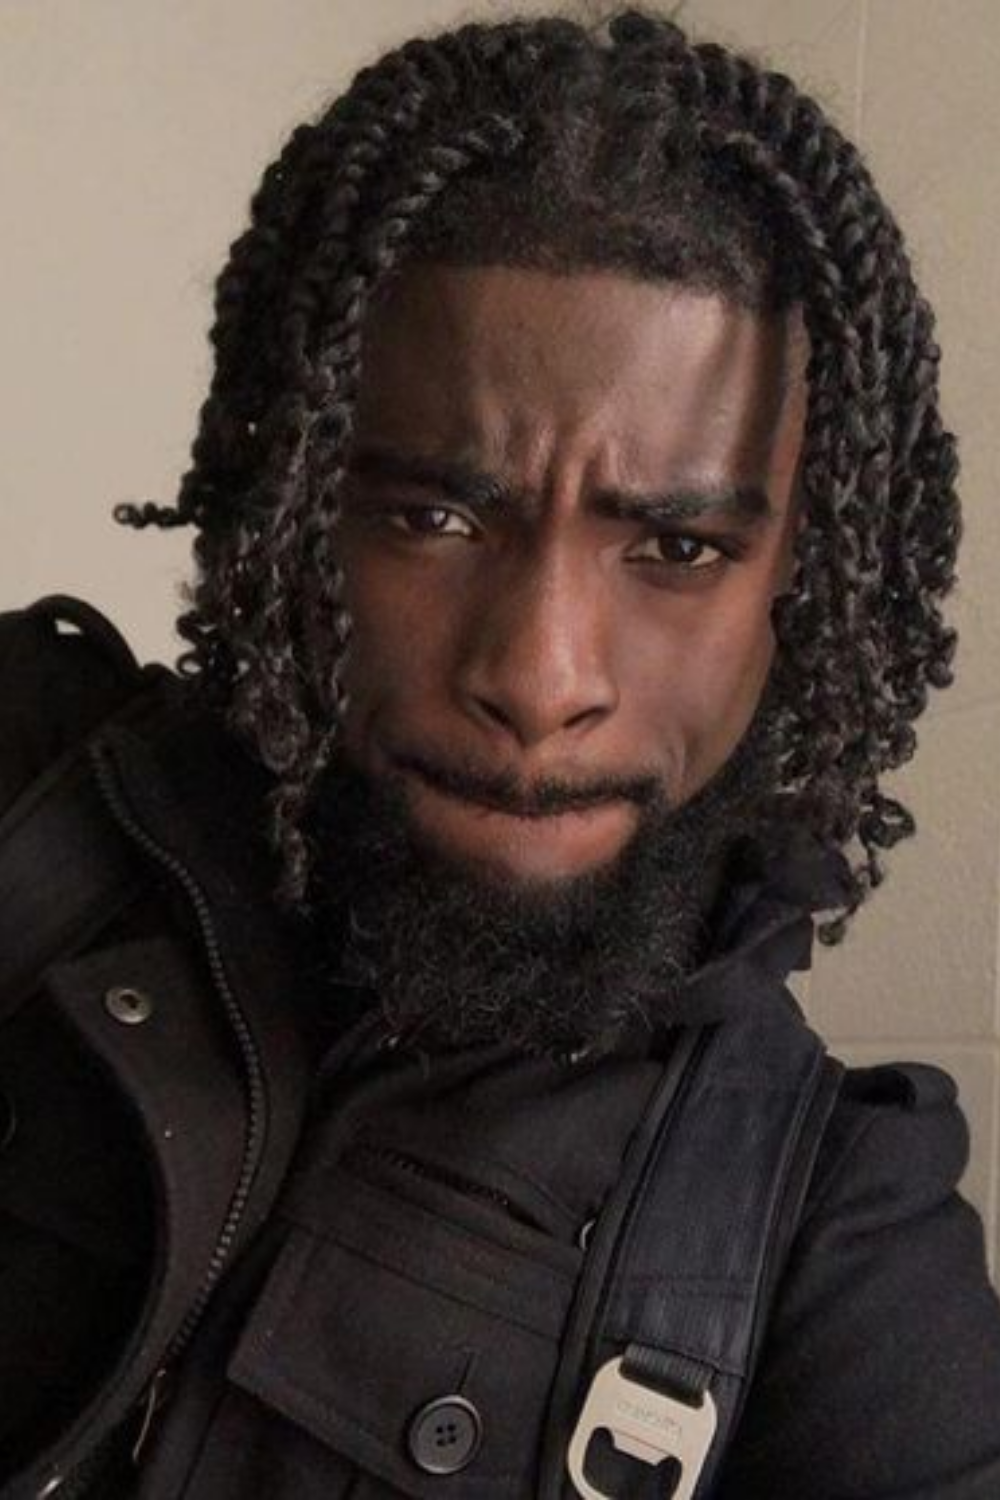
While two strand twists are commonly associated with dreadlocks, they can also be a stylish option for loose curly hair. The main difference is that the hair may not appear as long as it would on dreads. However, you have the flexibility to style these twists thick or thin to suit your preference.
For optimal results, it’s recommended to consult with a hairstylist who can provide personalized guidance and ensure proper technique.
If you’re looking for a quick tutorial, follow these steps:
- Prepare Your Hair: Wash and condition your hair thoroughly for a smooth process.
- Section Your Hair: Part your hair in the middle and divide it into four equal sections. Secure the unused sections with hair pins.
- Damp Hair is Essential: Ensure your hair is damp before starting the twisting process.
- Twist Two Strands: Take two strands of hair and twist them around each other.
- Continue Twisting: Continue twisting all the way to the ends of your hair and secure them with a rubber band.
- Set with Spray: Lightly spritz your hair with a setting spray to help the twists hold.
For more detailed instructions and visual demonstrations, we recommend watching tutorials on YouTube or consulting with a professional hairstylist.
TWIST OUT ON LOOSE CURLY HAIR
After keeping your two strand twists in your loose curly hair for a period of time, you’ll be rewarded with a beautiful twist out.
To begin, gently dampen your hair before carefully unraveling the twists, starting from the ends. As you work your way up, you’ll notice your hair forming a curly pattern. This is a direct result of the twisting process. For tighter curls, unravel each coil only slightly.
To expedite the process and add volume, you can use a comb to gently lift the roots. This will enhance the definition and fullness of your curls.
HIGH-TOP TWISTS

The high-top hairstyle, characterized by its shaved sides and long top, is instantly recognizable. Adding twists to this classic style creates a truly unique and eye-catching look.
To create high-top twists, slightly dampen your hair with hairspray and use a sponge to rotate it around your hair. The level of aggression you use will determine the thickness of your twists. This technique is often used as a starting point for dreadlocks.
THIN TWISTS
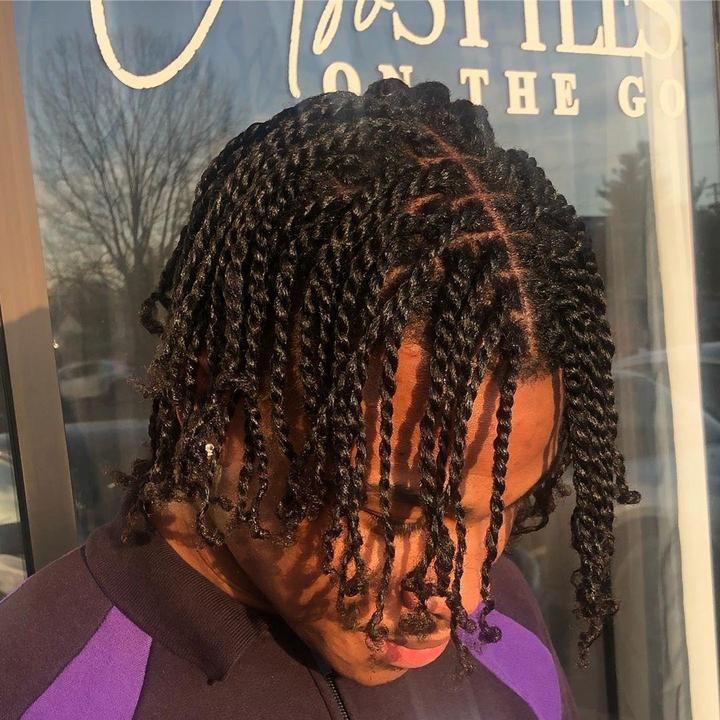
In contrast to thick twists, thin twists require significantly more patience and precision. The process is time-consuming but ultimately rewarding.
While thin twists may demand more maintenance than thicker styles, they offer a visually appealing alternative that can provide a refreshing break from the bulkier look.
FLAT TWISTS
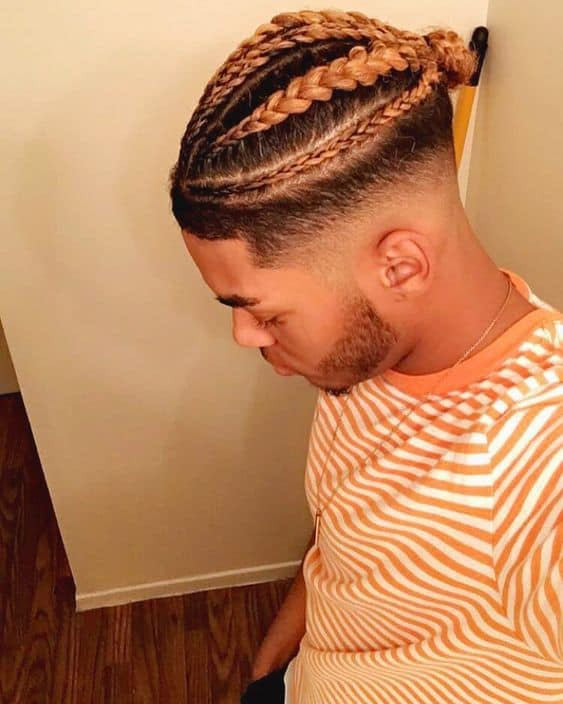
Flat twists combine the elements of two strand twists and cornrows into a single hairstyle. To achieve this look, two strands of hair are twisted together and then laid flat against the scalp, creating a rope-like braid.
Unlike traditional two strand twists, which are typically performed off the scalp, flat twists are installed directly on the scalp, hence the name. This style offers a refreshing alternative to traditional cornrows.
TWISTS WITH UNDERCUT
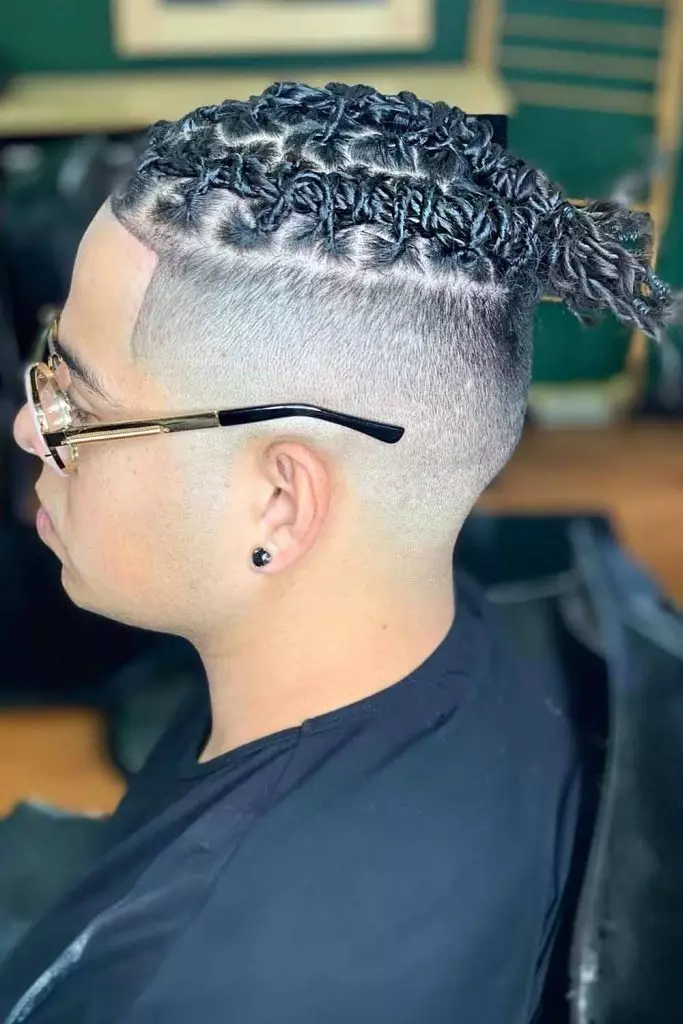
Similar to high-top twists, undercut twists feature a distinctive contrast between long hair on top and shorter hair on the sides and back. However, the undercut style involves a more dramatic cut, with the hair on the sides and back gradually tapering down to nothing around the ears and neck. This creates a noticeable difference between the top and sides.
The undercut haircut provides a foundation for natural, curly hair, adding length and volume. By incorporating twists into this style, you can create a completely unique and eye-catching look. Twists can be two-strand, three-strand, twist-outs, or sponge twists, allowing you to choose the style that best suits your preferences.
HOW TO TWIST HAIR
While visuals can be helpful, here’s a written guide to assist you in twisting medium or long hair:
- Part Your Hair: Divide your hair into four equal sections by parting it in the middle and across.
- Secure Sections: Secure the sections you’re not working on with hair pins.
- Dampen Your Hair: Lightly spritz your hair with a liquid spray to dampen it.
- Start Twisting: Begin twisting two strands of hair around each other in a hand-over-hand motion. Continue until each strand resembles a rope.
- Complete the Twists: Twist all the way down to the ends of your hair and secure them with rubber bands. Note that fine hair may unravel more easily due to its lack of grip.
- Set with Spray: Once you’ve completed all the twists, lightly spritz your hair with a setting spray to help them hold.
HOW TWISTS FOR MEN SHOULD BE MAINTAINED
Twists are a fantastic protective hairstyle that can last up to six weeks. To maximize their duration and ensure your hair remains healthy, it’s essential to follow a proper maintenance routine. Here are some simple tips to keep your twists looking great and minimize damage:
- Make sure Twists aren’t too tight
If you experience pain from tight twists, consider it a warning sign from your scalp. Tight twists can lead to damage, bumps, infected follicles, and even temporary or permanent hair loss. While it’s normal for twists to feel slightly tight initially, persistent or worsening tightness is a cause for concern. If you notice this, it’s important to loosen or redo your twists to avoid potential complications.
- Moisturize your scalp
Even with a protective hairstyle like twists, moisturizing your scalp remains essential. Proper scalp care helps maintain defined, healthy, and hydrated twists.
The market offers a wide range of natural hair products, so take the time to find one that best suits your hair’s needs. Regular moisturizing will contribute to the overall health and longevity of your twists.
- Oil your Scalp
Regular scalp oiling offers numerous benefits, including preventing breakage, reducing growth fatigue, restoring moisture, protecting strands, and improving blood circulation. These factors contribute to a healthy scalp, which is essential for optimal hair growth.
To reap these benefits, incorporate weekly scalp massages into your hair care routine. This simple practice can stimulate the scalp and promote healthy hair growth.
- Protect your twists while at Night
Sleeping with your hair unwrapped can expose it to friction from your pillowcase, leading to breakage and dryness. For those with afro-textured hair, using a head wrap or durag at night is a common and effective way to protect your twists and maintain their health.
- Ensure you take your Hair out every 6 Weeks
While twists offer a protective style, it’s essential to remember that your hair still needs to breathe. Washing your twists every six weeks is a recommended practice for maintaining good hygiene.
Over time, your twists will be exposed to dirt and environmental factors, making regular cleaning necessary. This can be done at home or by a professional hairstylist.