In recent years, the growing popularity of acrylic nails has piqued the interest of those looking for innovative nail designs that are resilient and visually appealing. Acrylic nails offer an elegant and long-lasting solution for those who desire an attractive and well-groomed appearance. However, it is important to recognize the importance of a safe and scientific removal process. Due to the hard nature of these nails, which are made of hard plastic, a cautious and patient approach is required during nail removal. Using safe removal methods becomes paramount to protecting the natural health of the nail, helping to minimize potential damage. This article will reveal a step-by-step guide on how to remove acrylic nails safely and effectively without damaging your natural nails.
When should acrylic nails be removed?
Acrylic nails should be removed when there is noticeable lifting or damage, or if you experience any signs of infection, such as redness, swelling, or pain. It’s also advisable to remove them if you want to give your natural nails a break or if they have grown out significantly, affecting the overall appearance. Professional removal is recommended to minimize the risk of damage to your natural nails.
Tools you’ll need to take off Acrylic Nails
Quality products are formulated with gentle and effective ingredients that dissolve acrylic without causing unnecessary damage or stress to your nails. Poor-quality products may contain harsh chemicals that can weaken and dehydrate your natural nails, leading to brittleness and breakage. By investing in quality nail removal products, you not only ensure a smoother and more comfortable nail removal process, but you also contribute to the long-term health and resilience of your nails, promoting a positive overall nail care experience.
To safely and effectively remove acrylic nails at home, you’ll need a few essential tools:
Pure acetone: Acetone is the primary solvent used to dissolve acrylic nails. It’s crucial to use pure acetone, as nail polish removers with lower acetone content may not be strong enough to remove the acrylic effectively.
Cotton balls or pads: Cotton balls or pads facilitate the application of acetone to acrylic nails. They provide a comfortable and absorbent surface for the acetone to work on.
Aluminum foil: Aluminum foil is used to wrap around the fingers after applying acetone to the acrylic nails. It helps trap the acetone heat, enhancing its dissolving power and accelerating removal.
Orangewood cuticle pusher: The Orangewood cuticle pusher removes acrylic nails gently and effectively from the natural nail. Its smooth and rounded surface prevents damage to the natural nail layer.
Nail file: A nail file is essential for smoothing out any rough edges or irregularities on the natural nails after the acrylics have been removed. It helps restore a natural and polished look to the nails.
Nail Clipper: A nail clipper will be useful for trimming the length of your natural nails before starting the acrylic nail removal process. It can help make the subsequent steps more manageable and efficient.
Buffer: A nail buffer is used to buff the natural nails after filing to restore their shine and remove any remaining acrylic residue. It promotes a healthy and well-cared-for appearance of the nails.
Moisturizer: Moisturizer is important for replenishing the moisture lost during the acrylic removal process. Acetone can be drying to the skin and nails, so applying moisturizer helps restore hydration and prevent dryness.
How to take off acrylic nails
Step 1: Shorten the tips of your acrylic nails
Trim off as much acrylic material as possible, as this will streamline the subsequent steps. If the thickness of the nails makes cutting challenging, consider using a coarse nail file to gradually file them down. Be cautious not to cut into your nail bed during this process.
Step 2: Eliminate the topcoat and nail polish from your nails
Smoothly file away the topcoat and nail polish from your nails. Employ a fine-grade buffer or a nail file to eliminate as much product as possible. Utilize long strokes that traverse the length of the nail, continuing to file until the product is completely removed or until the smooth, shiny layer transitions to a more matte surface.
Step 3: Immerse cotton balls in acetone
Ensure each cotton ball is fully saturated by dropping it into the acetone. So, you can soak off acrylic nails by immersing your fingertips in acetone until the acrylic material softens and becomes easier to gently lift away. It’s crucial to note that acetone is highly flammable and emits strong fumes. Guarantee proper ventilation in the room, and be cautious to keep the acetone away from heat or any open flames.
Step 4: Prepare tin foil
While the cotton balls are absorbing the acetone, prepare 10 squares of tin foil. Ensure that each square is sizable enough to fully encircle your finger. Precision is unnecessary; the squares don’t have to be perfectly neat.
Step 5: Apply petroleum jelly
Shield the skin around your nails by applying petroleum jelly. Since acetone can be harsh on the skin, it’s crucial to safeguard your fingers. Gently massage a generous quantity of petroleum jelly onto the tips of your fingers and the cuticles, extending it up to the first knuckle if you’re particularly cautious. Avoid applying petroleum jelly directly to the nails, as this could impede the removal process. For more precise application, consider using a cotton-tipped wooden applicator.
Step 6: Wrap in tin foil
Affix the cotton balls to your fingers using tin foil. Position a cotton ball in the middle of a tin foil square, and then place them together atop a nail, ensuring the cotton ball makes contact with the nail. Proceed to wrap the tin foil around your nail to secure the cotton ball. Repeat this process for each nail.
Step 7: Remove the foil bundles
Remove the foil bundles from your nails following a 30-minute duration. Unwrap the tin foil and pull the cotton ball and acrylic away from your natural nail with a gentle yet firm motion. The acetone’s action has loosened the acrylic from your nail, facilitating an easy removal without much difficulty.
If you opted for soaking your acrylic nails in the acetone bowl, delicately pry the nails off using an orange wood stick. In the event that the acrylic nails remain stubbornly attached, consider repeating the process. Allow your nails to soak for an additional 20 minutes before attempting to remove them again.
Step 8: Remove excess acrylic
Smooth away any remaining acrylic and shape your nails with the nail file. The acetone bath will have softened the acrylic, providing an ideal opportunity to gently buff away the residual material until your nails are free of any leftover residue. Employ nail clippers and a nail file to refine the edges and achieve a rounded nail shape. Subsequently, lightly buff your nails with a fine-grade nail buffer, moving from the base to the tip, to impart a polished and smooth sheen. To prevent nail damage, ensure that you file in one direction only, avoiding a back-and-forth sawing motion.
Step 9: Add moisturizer
After completing the acrylic nail removal process, cleanse your hands and replenish moisture with lotion. The drying effect of acetone can leave the skin extremely dry, so it’s essential to restore some hydration to your fingers. Wash your hands using warm water and a gentle hand soap, followed by thorough drying. Then, massage your hands with body oil or a moisturizing lotion. Ensure to rub the moisturizer into your nails, cuticles, and surrounding skin to keep them well-hydrated and aid in their recovery from the effects of acrylics.
How to remove acrylic nails without acetone
Step 1: Clip Your Nails
Start by selecting a good-quality nail clipper and ensure it’s clean and sharp. With careful precision, clip your nails straight across, avoiding the temptation to cut too close to the skin to prevent discomfort.
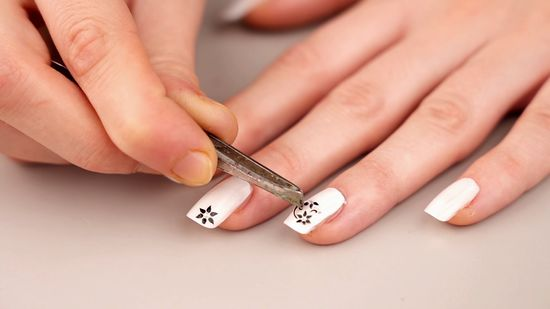
Step 2: File the Acrylic Surface
Delicately filing the surface of your acrylic nails is a crucial step in their removal. Use a fine-grit nail file, ensuring its cleanliness to prevent any debris from affecting the procedure. With a gentle touch, file the surface of each acrylic nail, moving from the outer edge towards the center. The objective is to break the top layer of the acrylic, allowing the removal agent to penetrate more effectively. Take your time and exercise patience during this step to avoid unnecessary pressure that could potentially damage your natural nails.
Step 3: Soak in Warm Water
Creating a soothing prelude to acrylic nail removal involves immersing your fingertips in a bowl filled with warm, soapy water. This preparatory step not only promotes relaxation but serves a practical purpose. Allow your nails to soak in the comforting warmth for approximately 15 to 20 minutes. The warm water works wonders by gently softening the acrylic, making it more pliable and easier to remove. This soaking technique not only contributes to the overall comfort of the removal process but also facilitates a smoother transition, minimizing the risk of any undue stress on your natural nails.
Step 4: Gently Pry Off Acrylic
Following the soaking process, it’s time to remove the softened acrylic using a cuticle pusher delicately. Choose a high-quality cuticle pusher with a gentle edge to avoid unnecessary pressure on your natural nails. Start by working patiently around the edges of each nail, where the acrylic has begun to lift. With a gradual and gentle motion, carefully pry off the softened acrylic from your natural nails. Pay close attention to avoid forcing or rushing the process, as this can lead to damage. The goal is to lift and separate the acrylic layer without causing undue stress to your natural nails. Take your time, and with each careful maneuver, observe the acrylic lifting away, revealing your natural nails underneath.
Step 5: Buff the Natural Nails
After successfully removing the acrylic, the next crucial step involves using a nail buffer to refine the surface of your natural nails. Opt for a fine-grit nail buffer to gently smooth out any rough edges or unevenness. With meticulous care, move the buffer across the surface of each natural nail, focusing on achieving a seamless and polished look. Take extra caution to avoid excessive buffing, ensuring that you only refine the surface without compromising the thickness of your natural nails. This step not only contributes to the aesthetic appeal but also helps restore the natural shine and smooth texture of your nails.
Step 6: Moisturize Your Nails and Hands
Choose a nourishing option like olive oil or a rich hand moisturizer. Dispense a small amount onto your fingertips and massage it generously into your nails and hands. Olive oil, known for its hydrating properties, can penetrate deeply, promoting nail and cuticle health.
What should I do to my nails after removing acrylics?
After removing acrylics, it’s essential to care for natural nails to promote health and strength. Start by regularly moisturizing your nails and the surrounding skin with cuticle oil or a nourishing cream. To prevent snagging or breakage, ensure that you keep your nails trimmed and shaped. Consider incorporating a strengthening nail treatment into your routine to support the natural nail’s recovery. Additionally, allow your nails to breathe and be cautious about excessive exposure to water, as it can contribute to brittleness. Finally, maintain a balanced diet rich in vitamins and minerals to support overall nail health.
Common Mistakes to Avoid
Common mistakes in the process of removing acrylic nails often result from impatience and a lack of proper care. Hastening the removal process is a common error since impatience can lead to taking shortcuts that may harm natural nails. Employing excessive force is another pitfall, as it can cause damage and weaken the nails. Equally crucial is avoiding neglect of post-removal nail care, as the failure to moisturize and nourish the nails afterward can result in dryness and vulnerability. To ensure a smooth transition from acrylics to natural nails, it’s essential to approach the removal method patiently, refrain from using excessive force, and prioritize post-removal care for optimal nail health.
FAQ
1. Is acetone bad for skin?
Excessive exposure of the skin to acetone can result in dryness, irritation, and cracking. Some studies on the prolonged effects of acetone exposure have primarily focused on animals, revealing potential harm such as kidney, liver, and nerve damage, as well as the occurrence of birth defects and male infertility.
2. Can hot water remove acrylics?
Absolutely! Taking off acrylic nails with warm water is a simple and chemical-free solution.
3. Do acrylic nails damage your nails?
Acrylic does not harm your nails. However, if acrylic paint or any nail polish method is applied or removed improperly, it can cause significant damage.
4. How long is it OK to wear acrylic nails?
Clients are advised to return every two to three weeks for a fill, allowing for the growth of their natural nails and maintaining a fresh-looking manicure. A full set typically lasts about four to six months, but after eight weeks, it’s recommended to remove them and opt for a new set.
5. Why are my nails so thin after acrylics?
Nails becoming thinner after using acrylic paint is a common issue, as acrylic can lead to moisture loss, making the nails brittle and prone to peeling.
Conclusion
Even though your short square acrylics are stunning, removal is inevitable. The good news is you can take them off safely and easily at home with a little patience and the right tools! Remember to prioritize patience and gentle techniques to avoid harming your natural nails and surrounding skin. Regular maintenance, proper tools, and a mindful approach will contribute to a successful acrylic nail removal experience. Embracing these tips not only preserves the health of your nails but also allows you to enjoy the flexibility of changing your nail style without compromising the integrity of your natural nails.