Asian hairstyles are known for their classy and fashion-forward appeal, often featuring short sides and back with extra length on top for a sleek, modern look. If you’re looking to refresh your style, these versatile and stylish Asian men’s haircuts can complement any hair type or length, ensuring a sharp and flattering finish.
For a clean and masculine short haircut, consider pairing a fade or undercut with a slick back, two-block cut, side part, brush-up, blowout, Ivy League, or messy fringe. If you prefer longer styles, adding texture, volume, and natural flow can enhance your overall look.
No matter your hair type—straight, thick, wavy, or curly—these trendy styles can take your appearance to the next level.
For inspiration, explore some of the best Asian men’s hairstyles, from the ever-popular two-block cut to the sophisticated comb-over fade, and discover the latest trends that define modern, stylish looks.
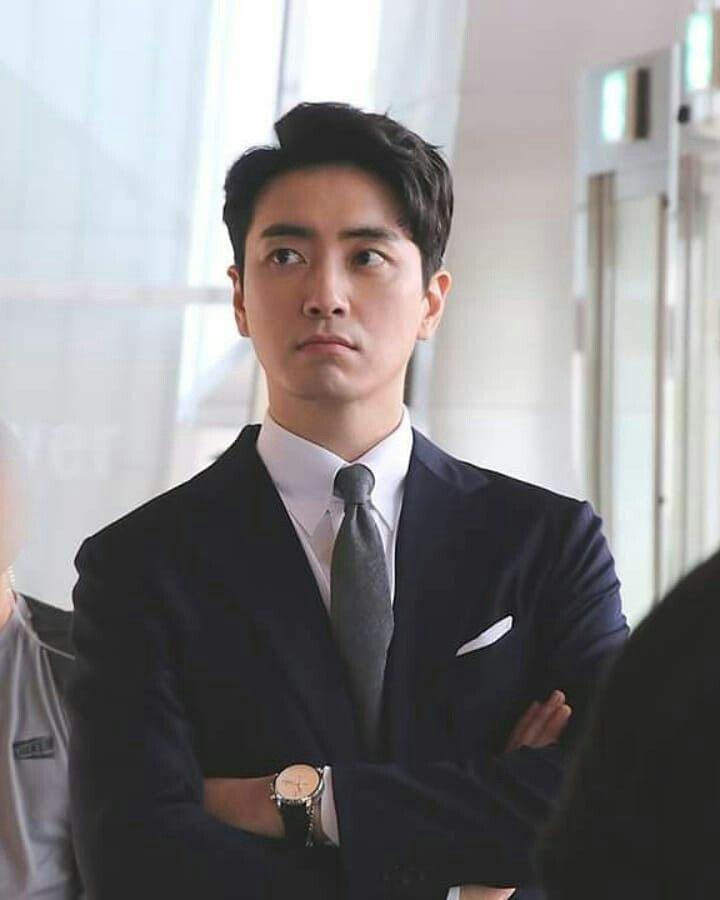
Permed Hair with Short Sides

A permed hairstyle with short sides offers a stylish and modern look, adding boyish charm with soft, voluminous curls. This cut features longer hair on top, typically a few inches in length, permed into loose, natural-looking curls. To enhance the texture and shine, a generous amount of high-shine gel is used, giving the hair a sleek, wet appearance. The contrast comes from the shorter, curl-free sides, creating a sharp and polished finish that balances structure with movement.
Textured Slick Back with Low Undercut Fade

The textured slick back with a low undercut fade is a bold yet effortlessly stylish look that exudes masculinity. Featuring several inches of length at the front, this haircut gradually tapers down the sides and back for a clean, polished finish. Styling is simple—use a wide-tooth comb and a bit of styling paste to brush the top section straight back, creating natural texture. The comb enhances definition, while the undercut fade provides sharp contrast, making this an eye-catching and modern choice.
Shaggy Medium Center Parted Style

This shaggy, medium-length center-parted style captures the essence of the classic bad boy look while giving it a modern twist. The hair on top and at the sides is kept several inches long, blending into shorter lengths just above the ears, around the back, and at the nape. To achieve this effortlessly cool style, simply part the hair in the center and tousle it with a touch of texturizing pomade for a relaxed, lived-in finish.
Brushed Forward Short Hair with Drop Fade

Brushed-forward short hair with a drop fade strikes the perfect balance between boyish charm and subtle boldness. The top is left slightly longer, gradually tapering down the sides and back for a clean, structured look. The drop fade ensures a seamless transition to very short hair around the ears and nape, enhancing the sharp contrast. The finishing touch is the playful “flip” at the front, mimicking a subdued quiff for added personality and style.
Long Ponytail

The long ponytail offers versatile styling options, from a simple low knot to a flowing half-up, half-down look. This style works best with medium-length layered hair, providing natural movement and texture. To achieve it, gather the hair from the ears upward and secure it into a ponytail at the back, leaving the rest to flow freely. For a relaxed, effortless touch, allow a few strands to fall naturally around the forehead and sideburns.
Textured Comb Over Fade

The textured comb-over fade turns thick, straight hair into a sleek, modern statement. The top and front are left slightly longer, while a high fade seamlessly tapers down to the skin just above the ear. To achieve the signature textured, piecey look, apply a texturizing paste for definition and movement. The thicker the hair, the more volume and dimension this style creates after styling.
Classic Side Part

The classic side part is a timeless, dapper cut with roots in the 1950s. The hair is kept slightly longer than the traditional gentleman’s cut, allowing it to flow smoothly from the side part in a stylish and flattering way. This handsome look is ideal for guys who prefer a low-maintenance style, as it requires minimal effort at home—just some gel and a comb or brush for quick styling.
Shaggy Hair

Shaggy hair is one of the hottest trends right now. This short, versatile style features hair on the top and sides that falls just to the top of the ears, gradually tapering to a shorter length. The hair is parted in the center, falling to the side, back, and front in a relaxed, tousled manner for a windswept effect. The cut works well with various hair lengths, but it’s especially perfect for those with a bit of natural texture or wave, giving it an effortless, lived-in vibe.
Classic Pompadour

The classic pompadour is an iconic hairstyle renowned for its impressive volume and bold, eye-catching appeal. The hair on top is significantly longer than the sides and back, with a smooth fade creating a seamless transition between lengths. While achieving the perfect pomp requires a skilled stylist and some effort, with the right products and a bit of patience, it results in a charming and effortlessly stylish look that exudes confidence and sexiness.
Short Bro Flow

The short bro flow is a casually cool hairstyle that’s both refreshing and elegant. With choppy layers and a middle part, this face-framing cut creates natural movement while drawing attention to the facial features. It’s a laid-back yet stylish choice that offers a relaxed vibe with just the right amount of sophistication.
Quiff

The quiff is a timeless men’s hairstyle that exudes a handsome, youthful, and sexy vibe. The modern version typically features textured spikes at the front, flowing upwards and back, complemented by a clean fade on the sides. This combination adds both styling flexibility and dimension, making the quiff a versatile and dynamic look.
Thick Messy Crop

A thick, messy crop is a youthful and effortlessly cool style. The longer hair on top blends into the shorter sides and back, but instead of layering the longer sections, they’re kept at one length. This creates volume in the fringe and at the crown of the head. To achieve the sought-after messy look, simply tousle the hair with your fingers for a relaxed, textured finish.
Textured Two Block with Classic Taper

The textured two-block with a classic taper is a trendy haircut for Asian men who prefer longer hair on top and shorter sides and back. Whether you opt for a fade, taper, or undercut, the contrast creates a disconnected, dimensional look that highlights stylish volume. You can finish it with a messy texture or incorporate curtain bangs for a more refined touch.
Medium Layered Style with Part

A medium layered style with a part offers great versatility for guys who enjoy experimenting with different looks. One option is to channel a K-Pop vibe by creating a side part, lifting the front of the hair, and letting the fringe curl down over one side of the forehead. Alternatively, pairing the layers with an undercut gives the style a more masculine edge, balancing softness with structure.
Modern Faux Hawk with Low Skin Fade

The modern faux hawk with a low skin fade is perfect for guys who want to maintain a youthful style without going too bold or edgy. The hair on top is significantly longer than the sides, swept upward into a series of spikes that flow from the fringe to the crown. The low skin fade on the sides creates a subtle transition, softening the overall look and giving it a more balanced, refined appearance.
Mullet with Undercut

The mullet with an undercut is a modern twist on the classic style, offering a more subdued take on the iconic look. This version features choppy layers on the top and back, while the undercut creates a peekaboo effect that adds both masculinity and flair. The slightly tousled finish is a popular styling choice, giving the cut a relaxed, effortless vibe with a touch of edge.
Modern Pompadour with Mid Fade

For guys looking to make a bold statement, the modern pompadour with a mid fade is the perfect choice. The hair on top gradually gets longer from the crown to the forehead, with the fringe styled straight upward and back to create the iconic “pomp.” The focus is on height, and the mid fade to skin not only emphasizes the volume on top but also creates the illusion of added height, making this cut both striking and dynamic.
Hard Side Part Fade

The hard side part fade is a versatile, semi-casual yet semi-formal look that works for any occasion. The hair on top is kept a few inches long and styled over from a deep side part. The high fade creates a smooth transition from the longer top to the much shorter sides and back. This cut pairs well with a clean-shaven face, but can also be styled with a beard or goatee for a more rugged, masculine vibe.
Long Side Part

The long side part is a timeless gentleman’s hairstyle that strikes the perfect balance between casual and classy. While it can be shoulder-length or longer, many opt for a shorter version with volume in the fringe and tapered sides. This versatile look works with any hair length or texture, but wavy hair especially adds a unique dimension, giving it a bit of extra flair and movement.
K-Pop Haircut

The K-pop haircut is a trendy and flattering style for Asian guys looking to add volume on top. The most popular K-pop look features a two-block cut with a thick fringe and disconnected sides, emphasizing the styling on top. Popularized by members of Korean boy bands, this layered cut offers a fresh, dynamic look that instantly elevates your style.
Long Side Swept Style with Low Taper

The long side-swept style with a low taper is a bold and fashionable cut that suits a variety of hair types and textures. The hair on top is left several inches long, sweeping over from a deep side part aligned with the corner of the forehead. The low taper creates a smooth transition from the very short hair around the ears to the longer hair on top, giving the style a polished yet dynamic look.
Long Spikes with Low Taper

Long spikes with a low taper is an edgy and bold style that requires growing the hair on top and sides a few inches longer. To style, use pomade or gel to create thick, textured spikes in all directions. The gradual taper to a shorter length around the ears and neck adds versatility, allowing for different styling options while maintaining a dynamic, sharp look.
Classy Comb Over

The classy comb over is a timeless haircut that’s effortlessly versatile. Whether dressed down with jeans and a tee or styled up with a tux, this look always makes a statement. Slightly longer than a traditional gentleman’s cut, it features a subtly off-center side part with the hair neatly combed over. Ideal for clean-cut men, this style exudes charm and sophistication with minimal effort.
Brushed Forward Hair with Side Fringe

Brushed forward hair with a side fringe is an excellent choice for men with fine, straight hair. The top is kept slightly longer and styled forward, with the fringe sweeping to one side for a sleek yet effortless look. When paired with a shaved or buzzed undercut, this cut feels modern, youthful, and undeniably stylish.
Messy Curly Hair

Messy curly hair is a stylish and low-maintenance way to embrace natural texture with a carefree finish. The top and fringe are kept long, while the sides and back are trimmed shorter for contrast. A touch of curl-defining mousse, gel, or texturizing pomade enhances definition, and a simple finger tousle adds the perfect amount of messiness for an effortlessly cool look.
Curtains

Curtains are a stylish choice for guys with longer hair who want a relaxed, effortlessly cool look. This hairstyle is defined by its middle-parted bangs that frame the face, creating a soft yet structured appearance. While the length can vary, the current trend favors eyebrow-grazing fringe that naturally falls from the part for a modern, laid-back vibe.
CONCLUSION
No matter what your hair type or personal style, there’s a hairstyle out there that will make you look and feel your best. So go ahead and experiment until you find the perfect one for you. Remember, the best hairstyle is the one that makes you feel confident and comfortable. So don’t be afraid to try something new and have fun with it.