Does Olive Oil Clog Pores?

In the realm of natural skincare, olive oil has gained popularity for its versatile uses and potential benefits. From culinary applications to beauty routines, this golden elixir has been praised for its moisturizing properties and rich nutrient content. However, as with any skincare product, concerns and questions arise, especially when it comes to its impact on our pores. The burning question remains: Does olive oil clog pores? . Don’t you worry. We’re here to give you all the answers on olive oil and its pore-clogging potential. Keep reading below to find out!

What is Olive Oil?

Olive oil is an oil extracted from the fruit of the olive tree. It is rich in healthy fats and antioxidants, making it a popular ingredient in many health and beauty products. Olive oil has been used for thousands of years in countries around the Mediterranean, where it is a staple part of the diet and a key ingredient in traditional remedies.

Olive oil has long been used as a natural remedy for various skin conditions and has been praised for its moisturizing properties. It is appropriate with people looking for a natural alternative to commercial skincare products or those with sensitive skin who want to avoid harsh chemicals.

Understanding Pore Clogging – How Does It Happen?

Imagine a delicate network of small openings scattered across the surface of your skin. When these tiny openings become obstructed by a buildup of dirt, dead cells, and surplus sebum, it leads to a troublesome pore-clogging situation.

The consequences of pore clogging can be troublesome, giving rise to various skin issues, including acne, blackheads, and whiteheads.

This condition is caused by several factors:

Excessive sebum production: Sebum, an oily substance produced by the sebaceous glands, serves to maintain the skin’s moisture levels. However, when the production of sebum goes into overdrive, it mixes with dead skin cells and impurities on the skin’s surface, leading to the obstruction of pores.

Accumulation of dead skin cells: As our bodies continuously shed old skin cells and produce new ones, proper cleansing and exfoliation are essential to ensure the removal of these dead cells from the skin’s surface. Failure to do so can cause dead cells to accumulate within the pores, leading to blockages.

Bacterial growth: The presence of bacteria on the skin is normal, but certain conditions, such as excess sebum or trapped debris inside pores, can create an ideal environment for bacterial growth, potentially resulting in infections and inflammation.

Use of comedogenic products: Some skincare products contain ingredients that have a higher likelihood of clogging pores (comedogenic). Therefore, incorporating these products into your routine can contribute to pore-clogging issues.

Does Olive Oil Clog Pores?

Olive oil is considered to have a moderate comedogenic rating, which means it has the potential to clog pores for some individuals but may be suitable for others, depending on their skin type and sensitivity. The comedogenic rating system ranges from 0 to 5, with 0 being non-comedogenic (unlikely to clog pores) and 5 being highly comedogenic (highly likely to clog pores).

The rating for olive oil usually falls between 2 and 3, indicating that it has a moderate likelihood of clogging pores. While this might be a concern for those with acne-prone or sensitive skin, it’s essential to understand that the effects of olive oil on the skin can vary from person to person.

Olive oil contains a mix of fatty acids, such as oleic acid and linoleic acid, along with antioxidants and vitamins, which can provide nourishment and hydration to the skin. It has been used historically for its moisturizing properties and to improve skin texture. Many individuals with dry or normal skin types find olive oil beneficial, as it can help retain moisture and promote a healthy glow without causing pore issues.

However, for people with oily or acne-prone skin, using olive oil as a facial moisturizer might lead to clogged pores and potentially exacerbate existing skin issues. The thick texture of olive oil could trap dirt, sebum, and dead skin cells, which may contribute to the formation of blackheads, whiteheads, or even acne breakouts.

If you have acne-prone or sensitive skin, it’s advisable to exercise caution when using olive oil on your face. You can perform a patch test on a small area of your skin to see how it reacts before applying it more extensively. Additionally, if you choose to use olive oil on your skin, it’s crucial to ensure you’re using extra virgin or cold-pressed olive oil, as it retains more of its natural beneficial compounds.

Ultimately, whether or not olive oil clogs your pores depends on your unique skin type and how your skin responds to the oil. If you’re unsure or concerned about using olive oil on your face, consult with a dermatologist or skin care professional to find the best products and regimen that suit your skin’s specific needs.

How to Incorporate Olive Oil into Your Skincare Routine

Patch Test First

Before using olive oil on your face or body, it is important to patch test the oil on a small area of skin first. This will help you determine if you have any allergies or sensitivities to the oil and whether it is safe for you to use. To patch test olive oil:

  • Cleanse the skin with a gentle cleanser and pat dry.
  • Apply a small amount of olive oil to a small area of skin, such as behind the ear or on the inner forearm.
  • Wait 24 to 48 hours and observe the area for any signs of irritation or allergic reaction, such as redness, itchiness, or swelling.

If you experience any of these symptoms, discontinue use of the oil immediately and seek medical advice if necessary.

Use a Small Amount

While olive oil can be beneficial for the skin, it is important to use it in moderation to avoid clogging pores. Using too much oil can also make the skin feel greasy or oily. Start by using a small amount of oil and gradually increase the amount if necessary.

Wash Thoroughly

After using olive oil on your face or body, be sure to wash your skin thoroughly to remove any residue. Leaving oil on the skin can trap dirt and bacteria, leading to clogged pores and acne. Use a gentle cleanser and lukewarm water to cleanse the skin, and be sure to rinse thoroughly.

Consider Your Skin Type

While olive oil can be beneficial for many skin types, it may not be suitable for everyone. If you have oily or acne-prone skin, you may want to avoid using olive oil on your face. Instead, consider using it as a hair mask or body moisturizer. If you have dry or sensitive skin, olive oil may be beneficial, but be sure to patch test it first and use it in moderation.

Alternatives to Olive Oil for Skincare

If you decide that olive oil is not right for your skin or if you are looking for alternative options, there are plenty of other natural oils and ingredients that you can use in your skincare routine. Here are some of the most popular alternatives to olive oil:

  • Jojoba oil: Similar in texture to sebum (the oil produced by our skin), jojoba oil is a great option for oily or acne-prone skin.
  • Coconut oil: Rich in medium-chain fatty acids, coconut oil is a popular ingredient in many natural skincare products.
  • Argan oil: Packed with antioxidants and fatty acids, argan oil is a great choice for dry or mature skin.
  • Rosehip oil: High in vitamin C and other antioxidants, rosehip oil can help brighten and even out the skin tone.

Tips for Using Olive Oil to Minimize Pore Clogging

If you decide to use olive oil in your skincare routine, here are some tips to help you get the most out of this natural ingredient:

  • Choose a high-quality, extra-virgin olive oil.
  • Always patch test the oil on a small area of skin before using it on your face or body.
  • Use a small amount of oil to avoid clogging pores.
  • If you have oily or acne-prone skin, consider using olive oil as a hair mask rather than on your skin.
  • Always wash your face thoroughly after using olive oil to avoid leaving any residue behind.

Conclusion

So, does olive oil clog pores? The answer is not a straightforward yes or no. While some people may find that olive oil clogs their pores or exacerbates their acne, others may benefit from its moisturizing properties. It is important to patch test any new skincare product, including olive oil, before using it on your face or body. If you do decide to use olive oil in your skincare routine, be sure to choose a high-quality, extra-virgin oil and use it in moderation to avoid clogging pores.

FAQs:

  1. Is olive oil good for dry skin? Yes, olive oil can be beneficial for dry skin due to its moisturizing properties.
  2. Can I use olive oil as a makeup remover? Yes, olive oil can be used to remove makeup, but it is important to thoroughly cleanse the skin afterward to avoid leaving any residue behind.
  3. Will olive oil cause acne? Olive oil may exacerbate acne in some individuals, particularly those with oily or acne-prone skin.
  4. Can I use olive oil on my hair? Yes, olive oil can be used as a hair mask to moisturize and condition the hair.
  5. How often should I use olive oil in my skincare routine? This will vary depending on your skin type and individual needs, but it is recommended to start by using olive oil once or twice a week and gradually increasing the frequency if your skin tolerates it well.

DIY HAIR GROWTH OIL FOR RAPIDLY ACHIEVING LONGER, THICKER, AND LUSCIOUS HAIR

Looking to quickly achieve longer, thicker hair? While there’s no miracle solution for instant growth, this homemade hair growth oil can help accelerate the process. Packed with herbs and essential oils, this all-natural recipe is the result of years spent experimenting with effective methods for fast hair growth. It’s simple to make and highly effective.

There are plenty of so-called “fast hair growth secrets” out there—some work, while others don’t, and I’ve likely tried most of them! My journey into natural beauty began with a desire for longer, thicker hair. Like all my DIY beauty recipes, this hair growth oil stems from my personal experiences.

As a teen, I would spend hours hunting for herbs and supplements in specialty stores, diligently reading Long Hair Care Community forums, and testing various tips and remedies to grow my hair to hip length. In retrospect, I wish I’d focused less on superficial goals, but this quest provided valuable insights into the beauty industry, helping me cultivate discernment.

Whether you’re looking to combat hair loss, encourage regrowth after stress, or simply boost your hair growth, I hope this hair oil recipe helps you reach your goals.

CAN OILS REALLY HELP GROW YOUR HAIR FASTER?

The hair growth industry is booming, with countless new, exotic “fast hair growth oils” and magic serums promising to deliver your dream of long, mermaid-like locks.

However, the reality is that most carrier oils lack any truly magical properties for hair growth. In fact, using excessive amounts of the wrong oil can lead to issues like yeast overgrowth, exacerbating hair loss and scalp problems.

Take argan oil, for example. It was once hailed as the miracle hair growth oil, but its fatty acid profile is quite ordinary, resembling that of sesame or sunflower oil—neither of which have been shown to promote hair growth. (And I say this as someone who once relied on argan oil!)

That said, a few oils do genuinely support hair growth and thickness. When combined with certain herbs and essential oils—like rosemary and peppermint—you can create a more effective homemade hair growth oil.

DIY HAIR GROWTH OIL BENEFITS + HOW IT WORKS

This homemade hair oil promotes natural hair growth in several effective ways:

  • Stimulates Scalp Blood Flow: Infused with powerful herbs and essential oils, this recipe enhances blood circulation to the scalp and hair follicles.
  • Modulates Hair Growth Phase: Castor oil activates prostaglandin pathways linked to the growth phase, accelerating hair growth.
  • Reduces Scalp Buildup: Massaging the oil into your scalp before washing helps loosen buildup that can clog hair follicles, similar to how cleansing oils keep facial pores clear.
  • Antioxidant Activity: The antioxidants in this DIY hair oil protect hair follicles and shafts from oxidative stress, supporting faster growth.
  • Antimicrobial Activity: Excess bacteria and yeast can cause issues like dandruff and scalp acne, hindering growth. The antibacterial herbs and essential oils in this recipe, such as rosemary oil, help maintain a balanced scalp environment.

Now that we’ve covered the essentials, let’s dive into how to make your own hair growth oil.

KEY HERBS FOR HAIR GROWTH

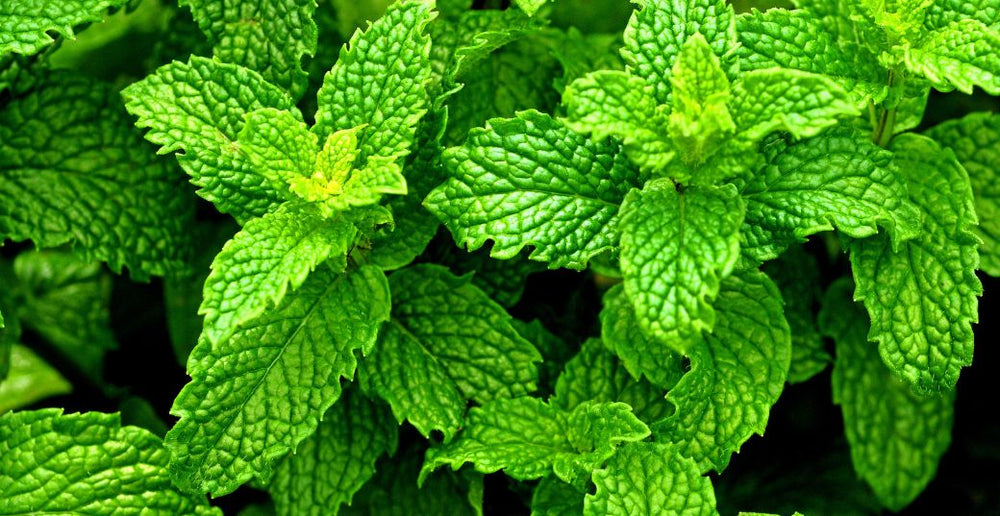
PEPPERMINT

Known for its cooling and soothing effects, peppermint oil is great for irritated scalps. Research suggests it may promote hair growth even more effectively than rosemary. Peppermint oil accelerates the hair growth phase and increases hair follicles, contributing to longer, thicker hair. Its anti-inflammatory and antimicrobial properties also support scalp health.

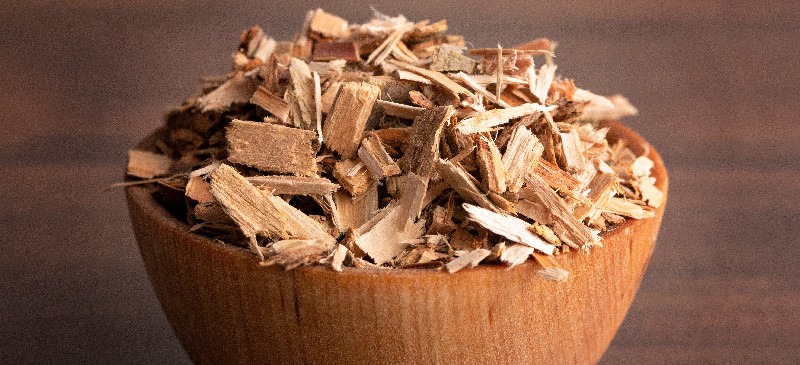
WHITE WILLOW BARK

If you face scalp issues like dandruff or acne, white willow bark can be beneficial. It contains salicin, a natural anti-inflammatory and gentle exfoliant. While it doesn’t directly stimulate hair growth, it promotes a healthy scalp by soothing irritation, unclogging pores, and reducing buildup.

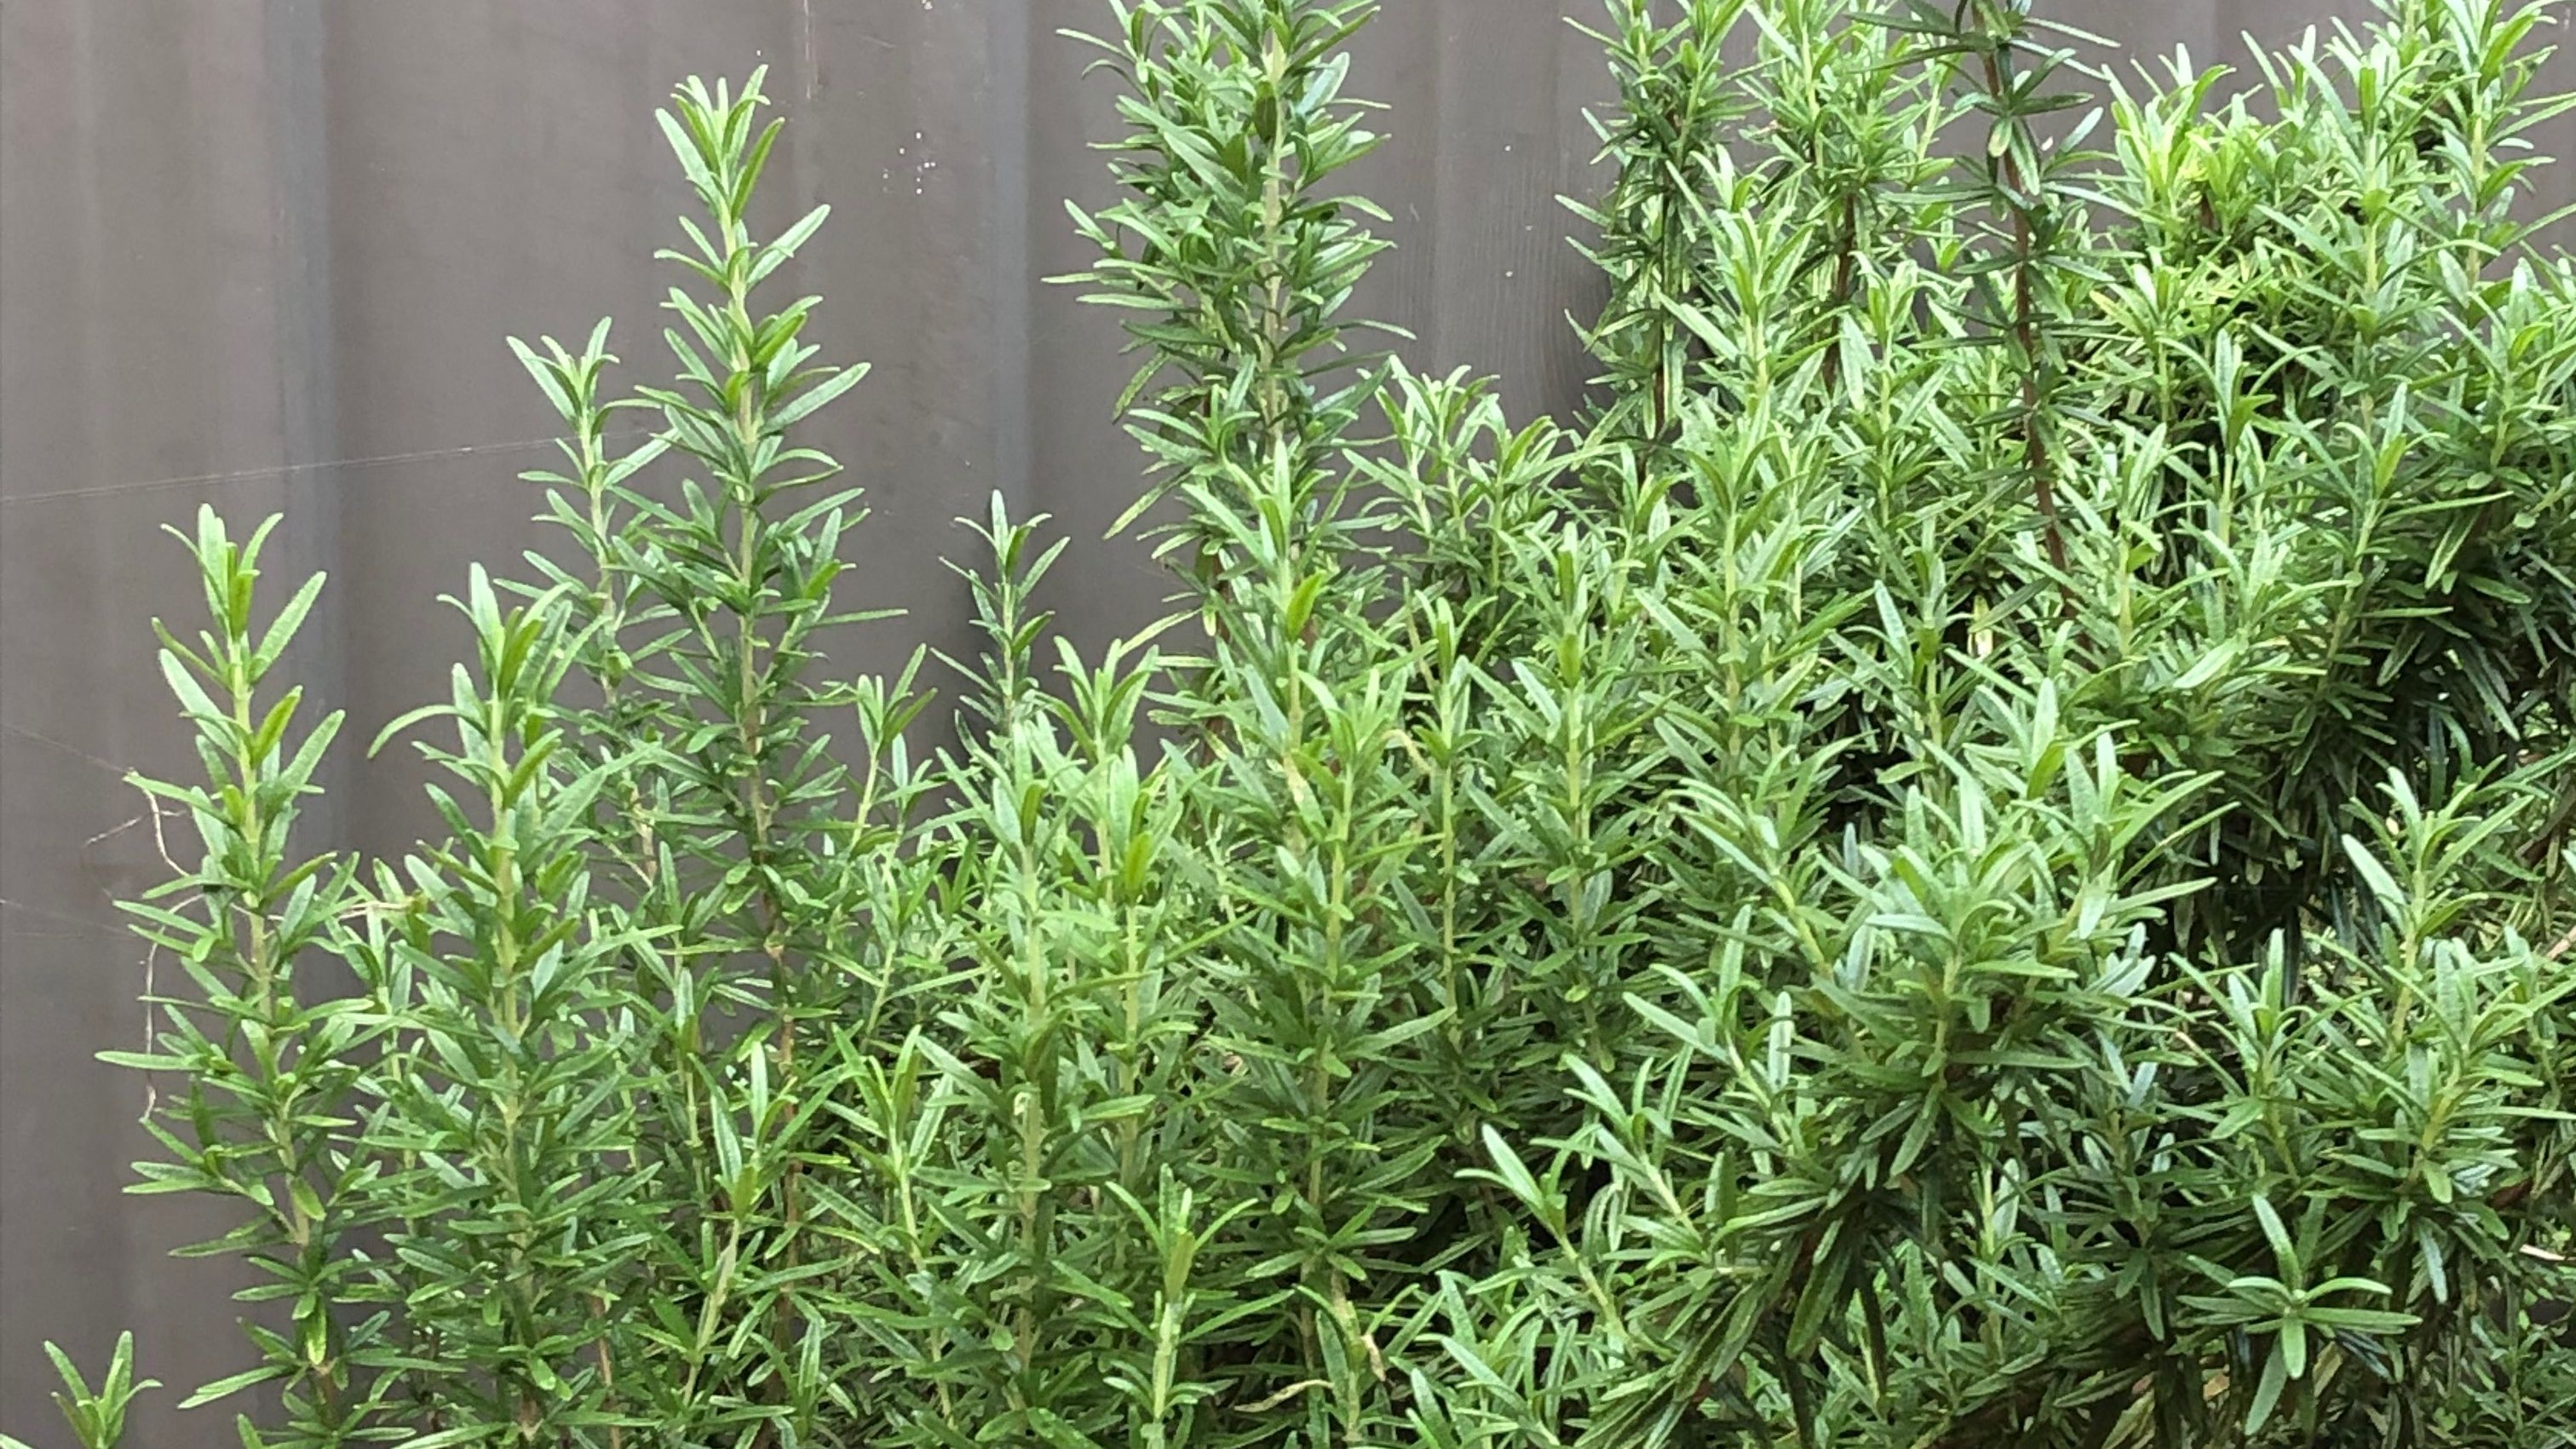
ROSEMARY

Rosemary-infused oil is a popular remedy for hair growth. Studies show it can be as effective as minoxidil without side effects. Rosemary stimulates blood flow to the scalp, nourishing hair follicles and encouraging both new and existing hair growth. Its antibacterial and antifungal properties help maintain a healthy scalp, while its antioxidants protect against oxidative stress, which can lead to hair loss.

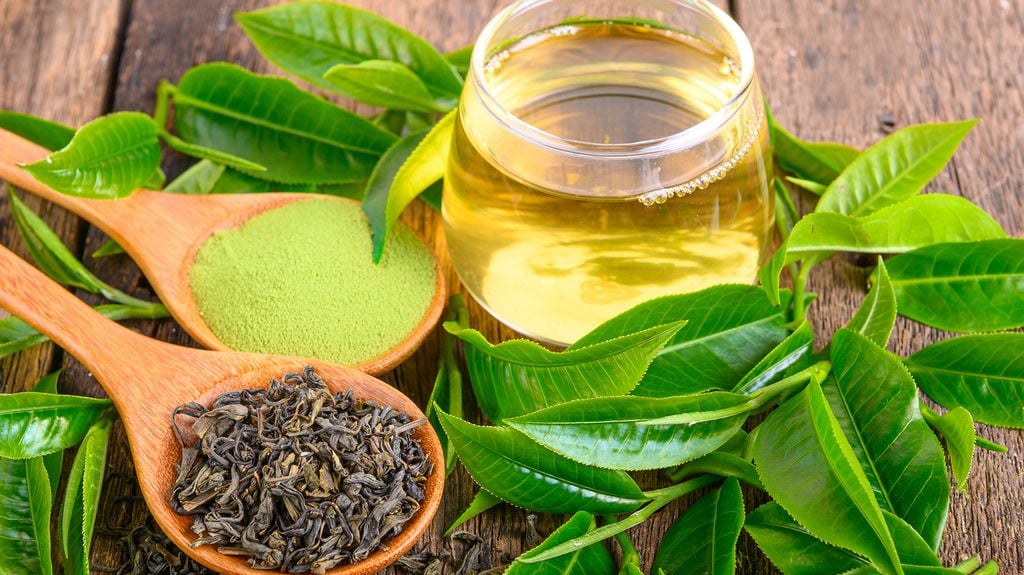
GREEN TEA

Adding green tea leaves to your hair oil infuses it with antioxidants that support hair follicle health. Although caffeine and ECEG—key components for hair growth—are water-soluble and won’t transfer to oil, the antioxidants in green tea still provide benefits. Note that it can impart a deep green color to the oil, but it generally doesn’t stain hair.

These herbs are effective allies in your quest for longer, thicker hair, and incorporating them into your hair oil can enhance its benefits.

ESSENTIAL OILS FOR HAIR GROWTH

To enhance your herbal hair growth oil, consider adding essential oils for concentrated benefits. 

Peppermint and rosemary essential oils are particularly effective for promoting hair growth, and using both can provide optimal results. You can also create a blend with cedarwood, lavender, thyme, frankincense, myrrh, palmarosa, and nettle, all known for supporting hair growth and scalp health. 

Additionally, incorporating an essential oil blend like Beauty Within can further boost scalp health with its antifungal properties, making it a great addition to your scalp treatments and hair masks.

FAST HAIR GROWTH OIL INGREDIENTS

You’ll need just a few ingredients for this DIY hair growth oil:

  • Heat-stable carrier oil for herbal infusion
  • Cold-pressed castor oil
  • Dried, organic hair growth herbs
  • Growth-boosting essential oils
  • Vitamin E oil

You can choose to make this oil with essential oils, herbal infusion, or both. I prefer using both to maximize the plant’s benefits. If you’re short on time, simply mix the carrier oils with the recommended essential oils.

INGREDIENTS

  • J MAC BOTANICALS Organic Cold-Pressed Castor Oil
  • Starwest Botanicals Organic Rosemary Leaf
  • Simply Earth Rosemary Essential Oil
  • Vitamin E Oil from Forefront Health

CARRIER OIL OPTIONS

  • MCT oil
  • Fractionated coconut oil
  • Avocado oil
  • Jojoba oil
  • Olive oil

Using a stable carrier oil is crucial. Many common oils, like sweet almond and sunflower oil, contain unstable polyunsaturated fatty acids (PUFAs) that break down with heat and light, losing their beneficial properties. Instead, opt for monounsaturated or saturated oils, which are more stable. I recommend MCT or fractionated coconut oil, especially if you have issues with yeast overgrowth, as MCT oil won’t feed Malassezia yeast.

Once you prepare the herbal-infused oil, dilute it with castor oil. Castor oil is well-regarded for hair growth due to its unique properties:

  • It mimics prostaglandins, extending the active hair growth phase and delaying the resting phase.
  • It conditions and prevents hair follicles from drying out.
  • It moisturizes and protects existing hair from breakage.
  • It has antibacterial and antifungal properties to maintain a healthy scalp.
  • It’s rich in antioxidants like vitamin E, which protect hair follicles from oxidative damage.

DIY HAIR GROWTH OIL RECIPE

INGREDIENTS

  • 47g herbal infused oil (see below for instructions)
  • 47g castor oil
  • 3.5ml peppermint essential oil
  • 3.5ml rosemary essential oil

HERBAL INFUSED OIL

  • 1 cup (200g) carrier oil (e.g., MCT, olive, or avocado oil)
  • ~3/4 cup dry herbs (e.g., rosemary, willow bark, peppermint, green tea)
  • 5ml (1 tsp) vitamin E oil

INSTRUCTIONS

  • Prepare Herbal Infused Oil:
    • Place dry herbs in a clean, heat-proof mason jar. Pour carrier oil over the herbs and add vitamin E oil. Stir gently to ensure herbs are fully submerged.
    • Seal the jar with a one-piece metal lid.
  • Infuse Oil:
    • In a slow cooker, place a hand towel at the bottom and fill with water to submerge the jar without leaking. Set to low and infuse for 8-12 hours, keeping water temperature between 50°C-71°C (120-160°F). Monitor closely to avoid overheating.
  • Strain Oil:
    • Once infused, let the oil cool. Strain out the herbs using cheesecloth or a sieve, pressing gently to extract all the oil. Be cautious of sharp herb pieces.
  • Combine Oils:
    • Mix equal parts of the herbal infused oil and castor oil. Add peppermint and rosemary essential oils, stirring well.
  • Store:
    • Transfer the final mixture to a glass dropper bottle for easy application.

Enjoy your homemade hair growth oil!

HOW TO MAKE HAIR OIL WITH ESSENTIAL OILS

Combine castor oil and a low-PUFA carrier oil (like fractionated coconut oil, jojoba oil, or olive oil) in equal parts. Add vitamin E and a hair growth essential oil blend to the mixture. Then, transfer it to a glass dropper bottle.

HOW TO USE HOMEMADE HAIR GROWTH OIL

To use the hair growth oil, apply it directly to your scalp using the dropper applicator, section by section, to ensure even coverage. After saturating your scalp, gently massage the oil in with your fingers or a jade gua sha comb to boost blood circulation to the follicles, promoting faster growth. If safe for you, you can also massage your scalp with your head upside down.

Leave the oil on for at least an hour or overnight, depending on your hair washing routine. When ready to wash it out, use conditioner first to help remove the castor oil, then follow with your regular shampoo. For added benefits, consider using a rosemary hair rinse or a pH-balancing vinegar rinse afterward.

CONCLUSION

DIY hair growth oil offers a natural and cost-effective solution for promoting hair growth and improving hair health. By combining essential oils known for their hair-nourishing properties with carrier oils that provide moisture and penetration, you can create a personalized hair treatment that addresses your specific needs. Remember to patch test the oil before applying it to your scalp to ensure you don’t have any adverse reactions. Consistent use and proper application are key to achieving optimal results.