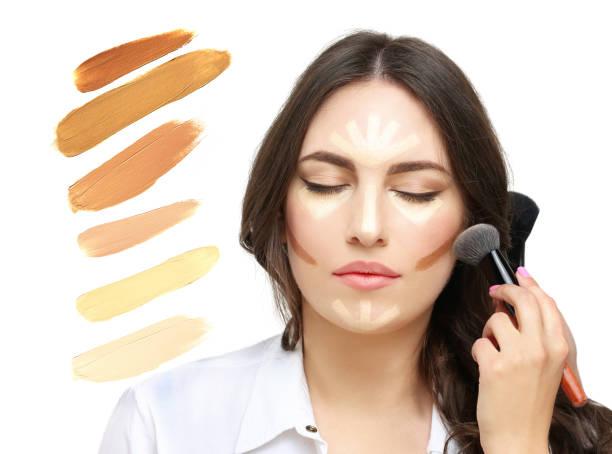
Your makeup brushes are the unsung heroes of your beauty routine. They help you apply foundation flawlessly, blend eyeshadow like a pro, and achieve that perfect winged eyeliner. But, just like any tool, they require regular cleaning to function at their best. Dirty makeup brushes are more than just gross—they can be a breeding ground for bacteria, potentially leading to breakouts, irritation, and even infection. That’s why it’s important to clean your brushes regularly, ideally once a week.

HOW OFTEN SHOULD YOU WASH YOUR MAKEUP BRUSHES
Regularly cleaning your makeup brushes is crucial for maintaining healthy skin and ensuring the best application of your cosmetics. Ideally, you should clean your brushes at least once a week to prevent the buildup of makeup residue, oils, and bacteria. Dirty brushes not only compromise the effectiveness of your makeup application but can also contribute to skin issues such as breakouts, irritation, and infections.
Establishing a consistent cleaning routine is particularly important if you use your brushes daily. The accumulation of product and impurities on the bristles can not only affect the performance of the brushes but may also lead to skin problems over time. By incorporating regular cleaning into your beauty regimen, you ensure that your makeup tools remain in optimal condition, providing you with a flawless application and promoting the overall health of your skin.
In addition to weekly cleaning, it’s essential to spot-clean your brushes between uses, especially if you switch between different products or colors. This quick maintenance routine helps remove excess product and maintains the integrity of your brushes, extending their lifespan. By adopting these habits, you’ll not only enhance your makeup application but also prioritize the health and hygiene of your skin.
STEPS TO CLEAN MAKEUP BRUSHES
Start by gathering all the necessary supplies. You’ll need lukewarm water, a bowl, and a gentle shampoo or clarifying shampoo. Avoid using plain soap and water, as it can dry out the bristles over time. Selecting the right shampoo is key to preserving the softness and quality of your brush bristles.
STEP 1: WASH THE BRUSH HEAD
Begin the cleaning process by rinsing the tips of your brushes under lukewarm, running water. This step is essential for removing residual makeup and ensuring the bristles are free from any product buildup. Focus on the tips while avoiding submerging the entire brush head. Submerging the whole head can compromise the glue that connects the brush head to the handle.
STEP 2: ADD A TABLESPOON OF SHAMPOO
Once the tips are thoroughly rinsed, fill a bowl with lukewarm water and add a tablespoon of the chosen shampoo. Swirl the brushes in the soapy water, ensuring that the bristles are fully immersed. Gently agitate the brushes to loosen any remaining makeup, oils, or impurities.
STEP 3: CLEAN THE BRUSH BRISTLES
After allowing the brushes to soak for a few minutes, use your fingers to gently lather the shampoo through the bristles. Pay attention to the base of the bristles near the ferrule, where makeup residue tends to accumulate. Be cautious not to press too hard, as this can damage the bristles.
STEP 4: RINSE THE BRUSHES
Rinse the brushes under running water again, ensuring that all soap and makeup residues are thoroughly washed away. Continue rinsing until the water runs clear, indicating that the brushes are clean.
STEP 5: SQUEEZE OUT THE WATER
Gently squeeze out excess water from the bristles using a clean towel or paper towel. Reshape the brush heads to their original form to maintain their structure. Avoid pulling on the bristles, as this can lead to shedding or misshaping.
STEP 6: ALLOW THE BRUSH TO DRY
Finally, lay the brushes flat on a clean towel to air dry. Ensure they are arranged in a way that allows air circulation around each brush head. Avoid leaving brushes upright while drying, as water can seep into the ferrule and compromise the glue.
WHAT SHOULD YOU USE TO CLEAN YOUR MAKEUP BRUSHES?
Parian Spirit Professional Makeup Brush Cleaner: Parian Spirit Professional Makeup Brush Cleaner is a renowned and widely trusted product in the beauty industry, specifically formulated for the efficient and effective cleaning of makeup brushes. This professional-grade cleaner is favored by makeup artists and beauty enthusiasts alike for its exceptional performance and quick-drying formula. Key features of Parian Spirit Professional Makeup Brush Cleaner include its fast-drying nature, making it a convenient choice for those who require a rapid turnaround between makeup applications. The cleaner is designed to thoroughly remove makeup residues, oils, and impurities from both natural and synthetic bristles, ensuring that brushes remain pristine and ready for flawless makeup application.

Philosophy Purity Made Simple One-Step Facial Cleanser: Philosophy Purity Made Simple One-Step Facial Cleanser is a beloved skincare product that has garnered a reputation for its simplicity and effectiveness. This gentle yet efficient cleanser is designed to remove makeup, cleanse the skin, and tone in a single step. The formula is mild and suitable for all skin types, leaving the skin feeling refreshed and balanced. Philosophy Purity Made Simple is known for its ability to dissolve dirt and impurities without stripping the skin of its natural oils. With a light and refreshing fragrance, this one-step facial cleanser has become a staple in many skincare routines, emphasizing the brand’s commitment to uncomplicated yet powerful skincare solutions.

Cinema Secrets Makeup Brush Cleanser: Cinema Secrets Makeup Brush Cleanser is a professional-grade solution that has become a go-to choice for makeup artists and beauty enthusiasts alike. This cleanser is specifically formulated to quickly and effectively clean makeup brushes, removing residual makeup, oils, and impurities. Known for its fast-drying formula, Cinema Secrets allows for swift and convenient brush cleaning, making it an ideal choice for busy professionals in the beauty industry. The cleanser is suitable for both natural and synthetic bristles, maintaining the integrity of the brushes while ensuring they stay hygienic and ready for flawless makeup application. With its efficient performance and ease of use, Cinema Secrets Makeup Brush Cleanser has earned a reputation for being a reliable and time-saving tool in the world of makeup artistry.

Mrs. Meyer’s Clean Day Dish Soap: Mrs. Meyer’s Clean Day Dish Soap is a popular household product known for its effective cleaning power and delightful scents. Formulated with plant-derived ingredients and essential oils, this dish soap cuts through grease and grime, leaving dishes sparkling clean. What sets Mrs. Meyer’s apart is its commitment to using biodegradable and environmentally friendly components, making it a conscious choice for eco-conscious consumers. The various scents, such as lavender, lemon verbena, and basil, add a refreshing touch to the dishwashing experience. Mrs. Meyer’s Clean Day Dish Soap not only delivers on cleaning performance but also brings a touch of aromatherapy to the kitchen, making it a favorite among those who appreciate both efficacy and a pleasant fragrance in their cleaning products.

Sigma Spa Express Brush Cleaning Mat: The Sigma Spa Express Brush Cleaning Mat is a game-changer for makeup enthusiasts seeking an efficient and thorough way to clean their brushes. This compact and innovative mat features a variety of textures and patterns designed to deep clean both eye and face brushes. The suction cups on the back secure the mat to your sink, providing a stable surface for brush cleaning. The different sections on the mat cater to various brush sizes and types, ensuring a comprehensive cleanse. The Sigma Spa Express Brush Cleaning Mat streamlines the cleaning process, making it a must-have tool for maintaining the hygiene and longevity of your favorite makeup brushes.

HOW TO STORE MAKEUP BRUSHES
Your cherished brushes are impeccably clean and completely dry! Now, ensuring their longevity involves proper storage practices. To maintain the optimal condition of your top-tier makeup brushes, it’s crucial to provide them with adequate space, reducing the risk of bacterial buildup. Reserve the makeup bag for travel purposes, and instead, favor a jar or drawer organizer for everyday storage. Storing brushes upright in a brush bouquet or neatly tucking them into a designated drawer compartment minimizes exposure to unwanted dust.
For those on the move, a brush roll is an excellent choice, offering seamless storage to keep both your brushes and, by extension, your skin and makeup, looking their absolute best.
CAN YOU USE RUBBING ALCOHOL TO CLEAN MY MAKEUP BRUSHES?
While some people may consider using rubbing alcohol to clean makeup brushes due to its disinfectant properties, it’s generally not recommended by beauty experts. Rubbing alcohol can be too harsh on the bristles of the brushes, especially those made of natural fibers or synthetic materials.
Rubbing alcohol has a drying effect, and continuous use may lead to bristle damage, making the brushes coarse and prone to shedding. Additionally, it may compromise the glue that holds the bristles together, causing the brush to lose its shape over time.
Beauty experts often suggest using gentler alternatives like mild shampoos, baby shampoo, or specially formulated brush cleansers. These products effectively remove makeup residues, oils, and bacteria without causing harm to the brush bristles.
It’s essential to prioritize the longevity and quality of your makeup brushes by choosing cleaning solutions that are gentle and suitable for the specific materials used in your brushes. Regular cleaning with the right products helps maintain the hygiene of your brushes and ensures optimal makeup application.
When should you throw away a makeup brush?”
Knowing when it’s time to part ways with a makeup brush is crucial for maintaining both effective application and the health of your skin. Signs that indicate it’s time to replace a makeup brush include frayed or splayed bristles that no longer maintain their original shape. If the bristles start shedding excessively or if the brush no longer feels soft and smooth against the skin, it’s a clear indication that its performance is compromised.
Additionally, if the brush has become discolored despite regular cleaning or if there is an unpleasant odor, it may be harboring bacteria that could lead to skin issues. When any of these signs become apparent, it’s advisable to invest in a new brush to ensure a hygienic and flawless makeup application.
Regularly inspecting your brushes and being attentive to changes in their condition will contribute to a more effective and enjoyable makeup routine.
FAQ
1. What kind of soap do you use to clean makeup brushes?
To clean makeup brushes, it’s recommended to use a mild and gentle soap such as baby shampoo, a sulfate-free shampoo, or a specialized brush cleanser.
2. Can I use my cleanser to wash my makeup brushes?
It’s generally not advisable to use your facial cleanser for makeup brushes, as facial cleansers may not effectively break down makeup residues.
3. Can I use micellar water to clean brushes?
While micellar water can remove some makeup from brushes, it may not be as effective at breaking down oily residues, and continuous use might not thoroughly clean the brushes.
CONCLUSION
Maintaining clean makeup brushes is an essential aspect of a healthy skincare and beauty routine. By incorporating this practice into your beauty regimen, ideally on a weekly basis, you ensure that your makeup application remains flawless, hygienic, and a positive contribution to the overall health of your skin. Regular attention to your brushes underscores a commitment to both effective cosmetics use and the well-being of your skin, allowing you to confidently express your unique style.