Get to know the various types of jeans to help you pick the perfect pair that complements your style, body type, or size. Jeans are incredibly versatile, making them a go-to choice for both men and women. Whether paired with a casual t-shirt, a chic blouse, a cozy hoodie, or any top, jeans can be styled with a variety of footwear, including sneakers, heels, boots, or sandals, giving you endless outfit options for any occasion.
TYPES OF JEANS BASED ON LEG CUT OR FIT
Some of these styles only have subtle differences in the cut, and it’s not uncommon for jeans manufacturers to use the terms interchangeably. The most common types of jeans and fits you’ll come across include
REGULAR CUT
Regular fit jeans are designed to follow your natural body shape, fitting straight from the hips to the thighs. They offer a closer fit compared to straight-cut jeans, with a slightly narrower opening at the ankles for a more streamlined look.
RELAXED TYPES OF JEANS
Relaxed-cut jeans are similar to regular fit jeans but offer a much looser fit throughout. While not overly baggy, they provide extra room in the seat and thigh areas, making them exceptionally comfortable. Due to their laid-back fit, relaxed-cut jeans are often seen as a more casual option compared to other styles.
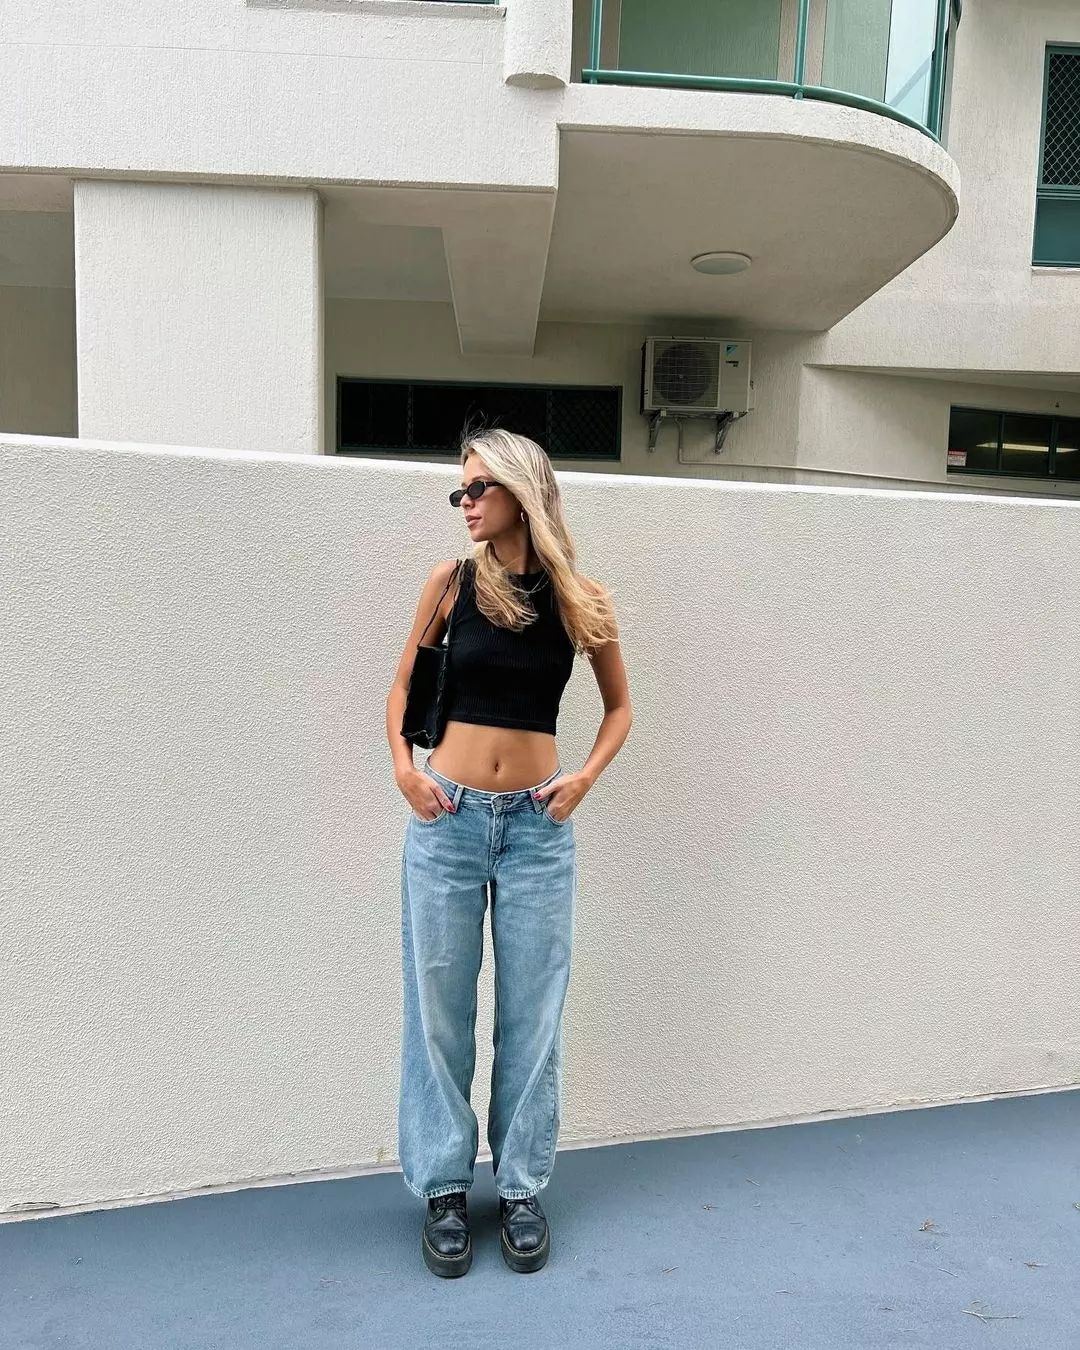
LOOSE FIT JEANS
Loose-fit jeans offer a roomy fit throughout the bottom, thighs, hips, and calves, providing maximum comfort and unrestricted movement. Their loose design extends to the ankles, making them ideal for wearing over boots or shoes. These jeans are perfect for a relaxed, casual look.
BOYFRIEND
Boyfriend jeans fit snugly around the hips and waist before gradually widening toward the ankles. This stylish and relaxed design makes them comfortable for lounging, traveling, or any casual activities. Boyfriend jeans come in various lengths, including both regular and cropped styles, allowing for versatile outfit options.
SKINNY (PENCIL, SLIM FIT JEANS)
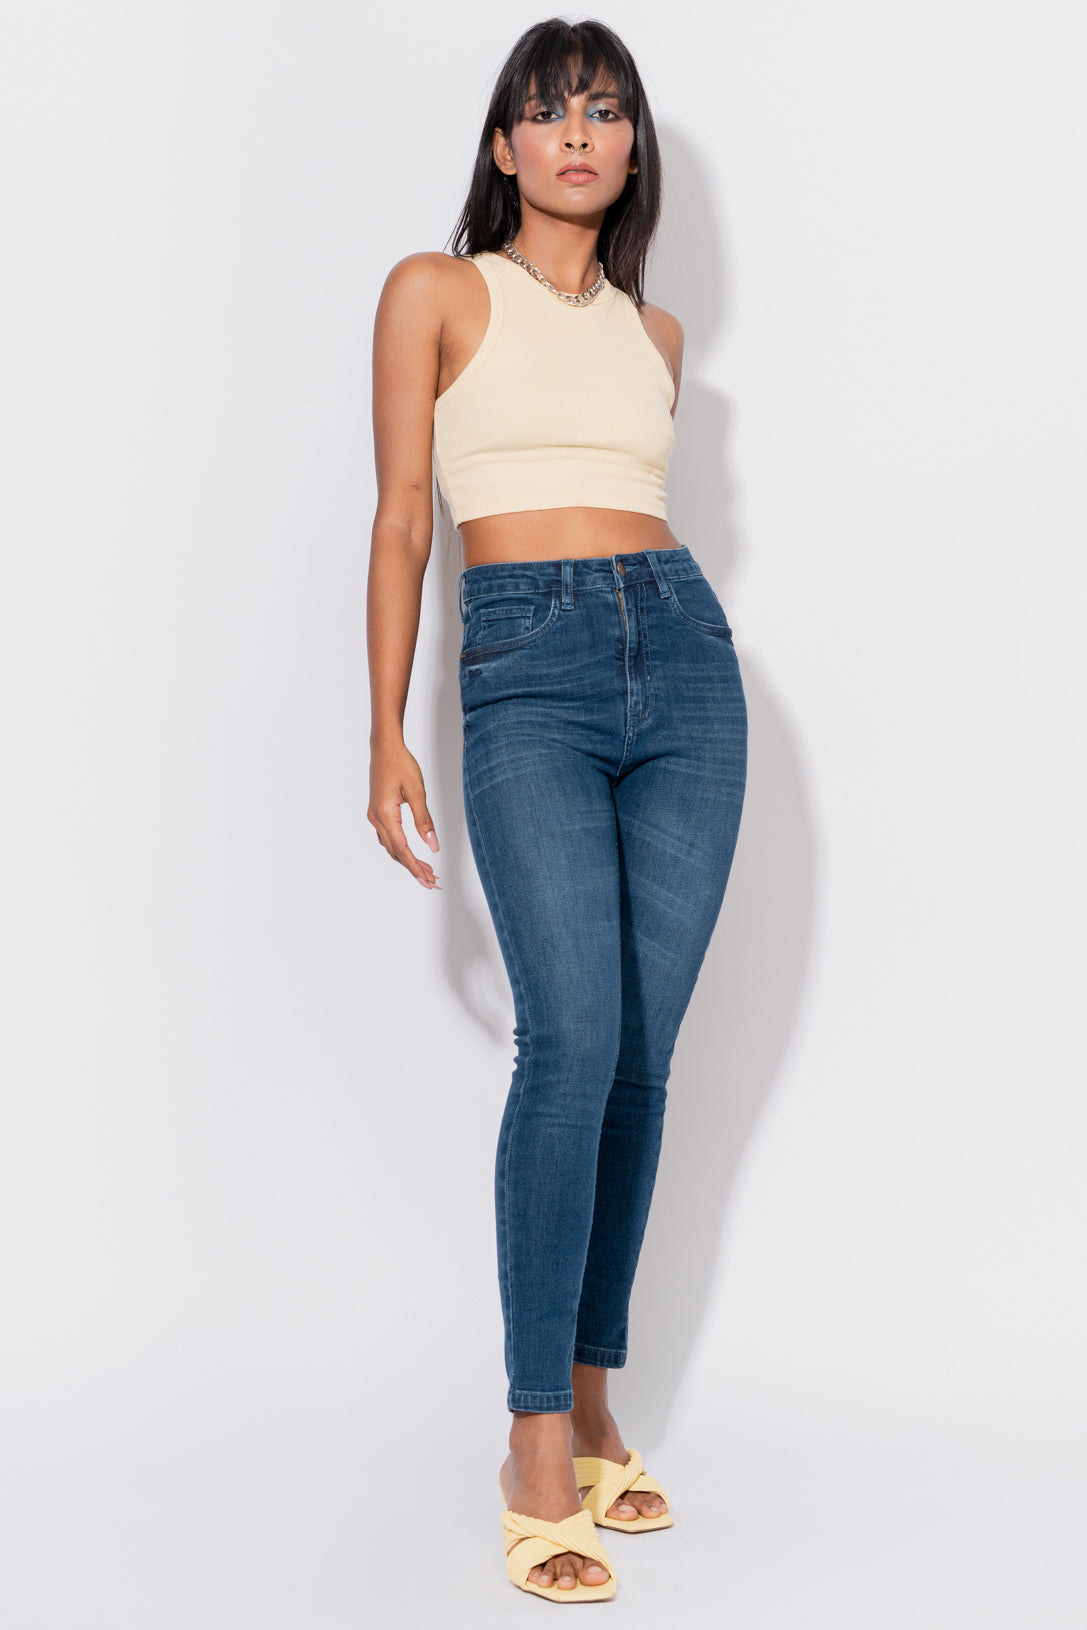
Stretchable and form-fitting, skinny jeans contour to the shape of your thighs, legs, and backside. They offer a sleek, streamlined look that many find appealing. A sub-type of skinny jeans is the skinny crop, which ends before the shins rather than at the ankle. These cropped versions are sometimes folded at the hem for added style.
Pencil jeans are particularly well-suited for individuals with hourglass figures, athletic or muscular builds, and those with slim, toned legs. They also flatter petite women, helping them appear taller due to the elongated silhouette.
BOOTCUT (MOM JEANS)

Once referred to as “mommy jeans,” bootcut jeans are designed to fit snugly on the thighs and backside while offering more room below the knee. They are tighter than flared jeans, with a subtle flare that begins at the calf and extends to the ankle, but not as wide as the bottoms of flared jeans.
Bootcut jeans have become trendy for all ages, with newer styles featuring more tapered designs compared to the original versions. Cropped bootcut jeans flare just above the shins, providing a stylish option for warmer weather. These jeans are flattering for all body types, particularly curvy figures, as they balance proportions beautifully.
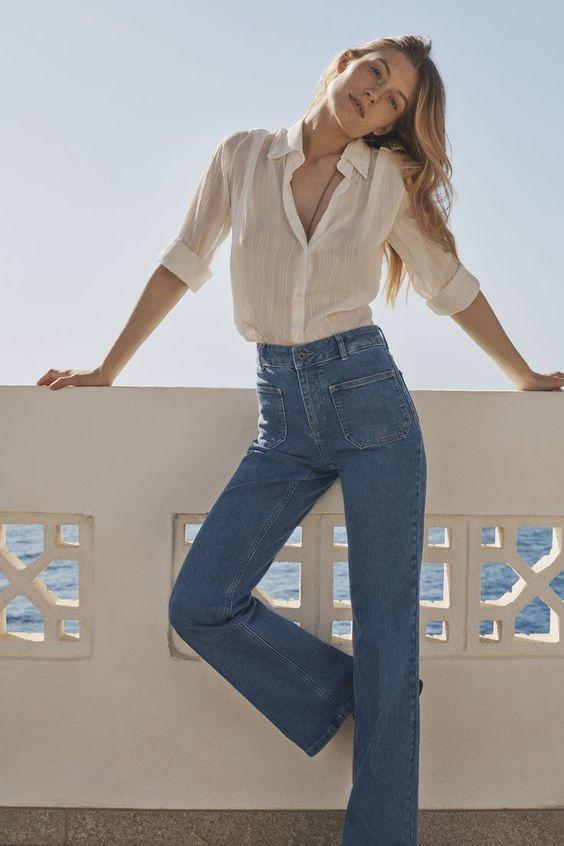
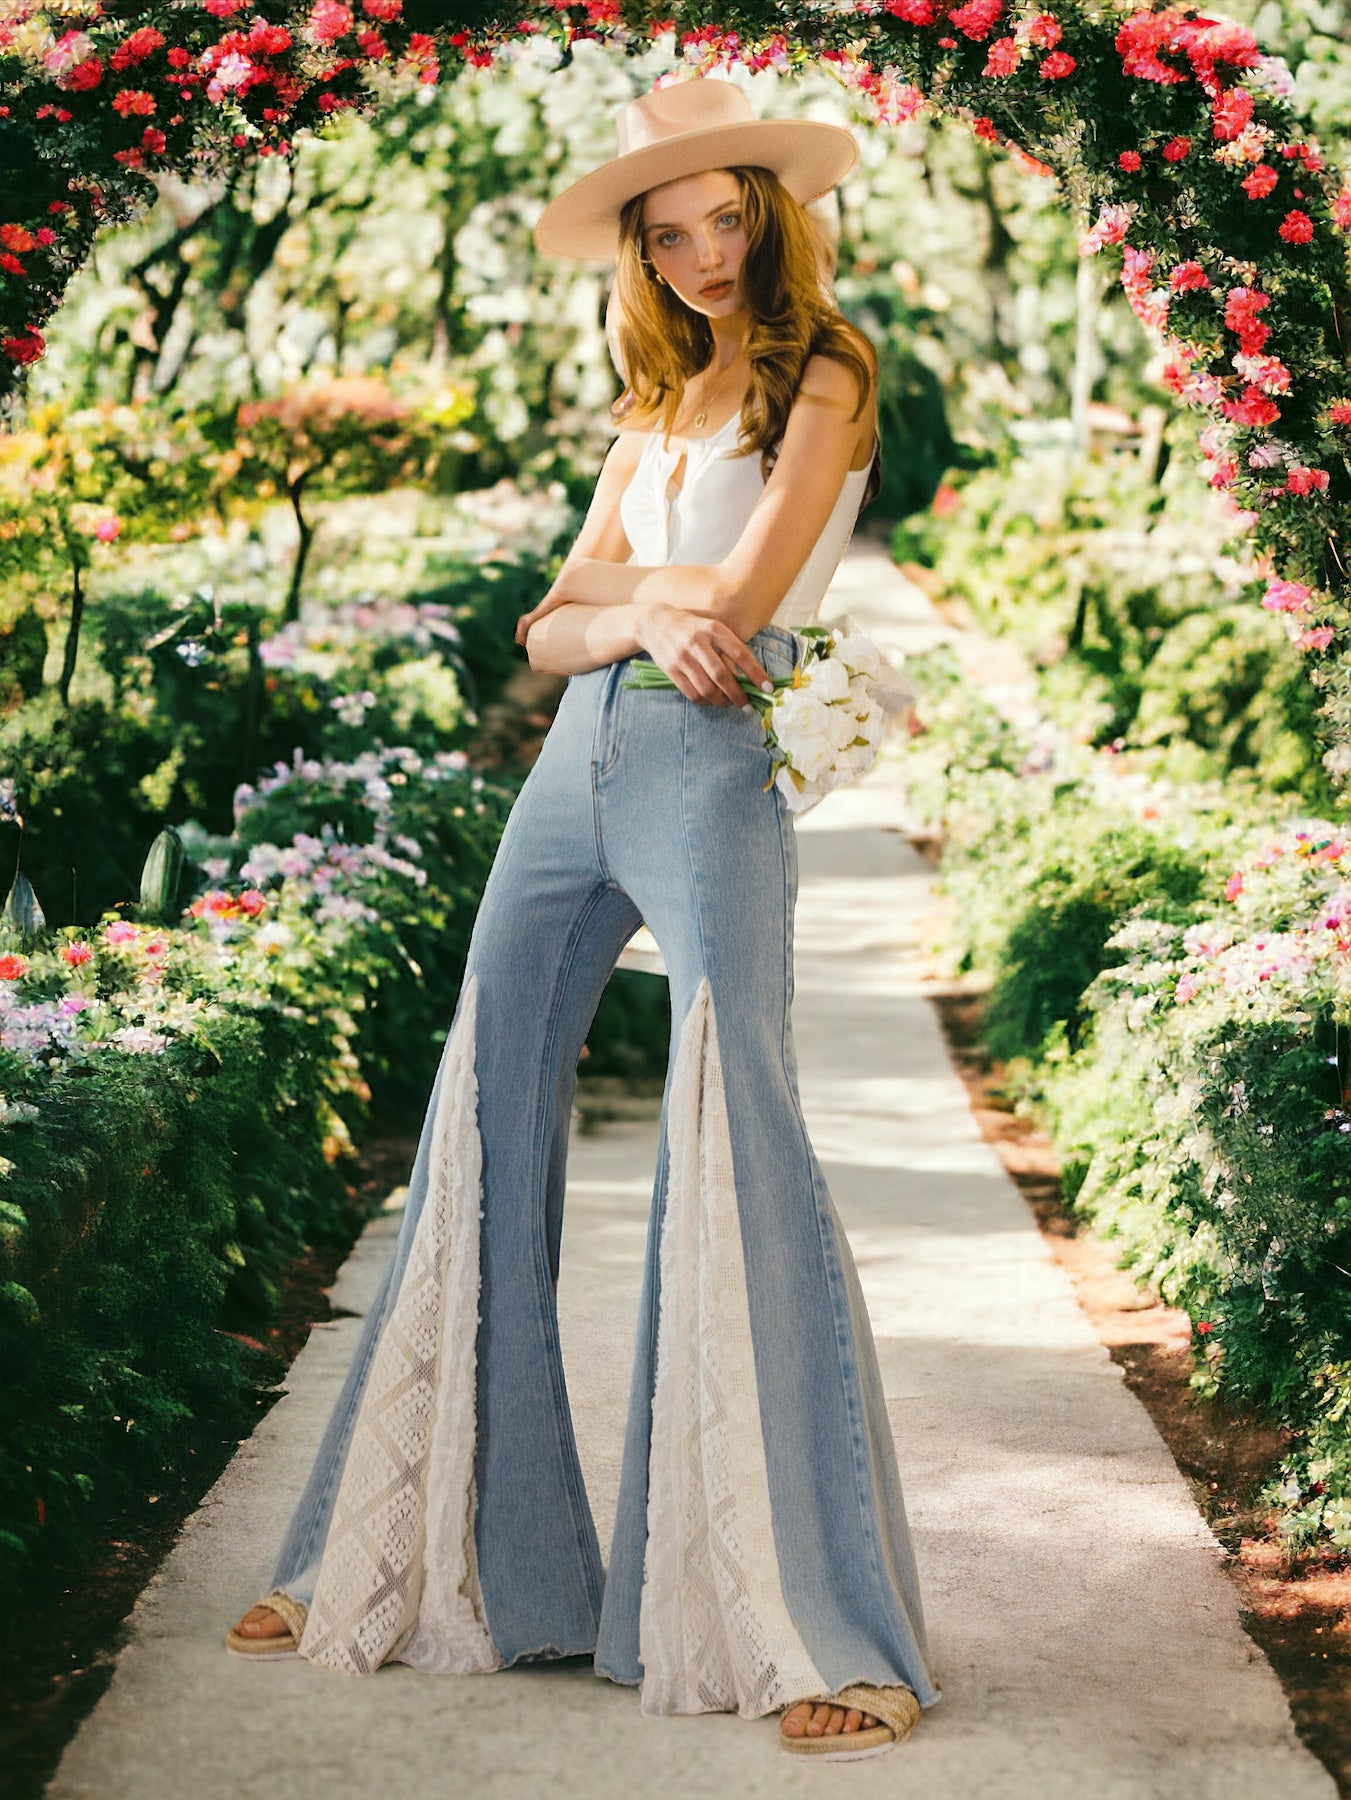
FLARED JEANS
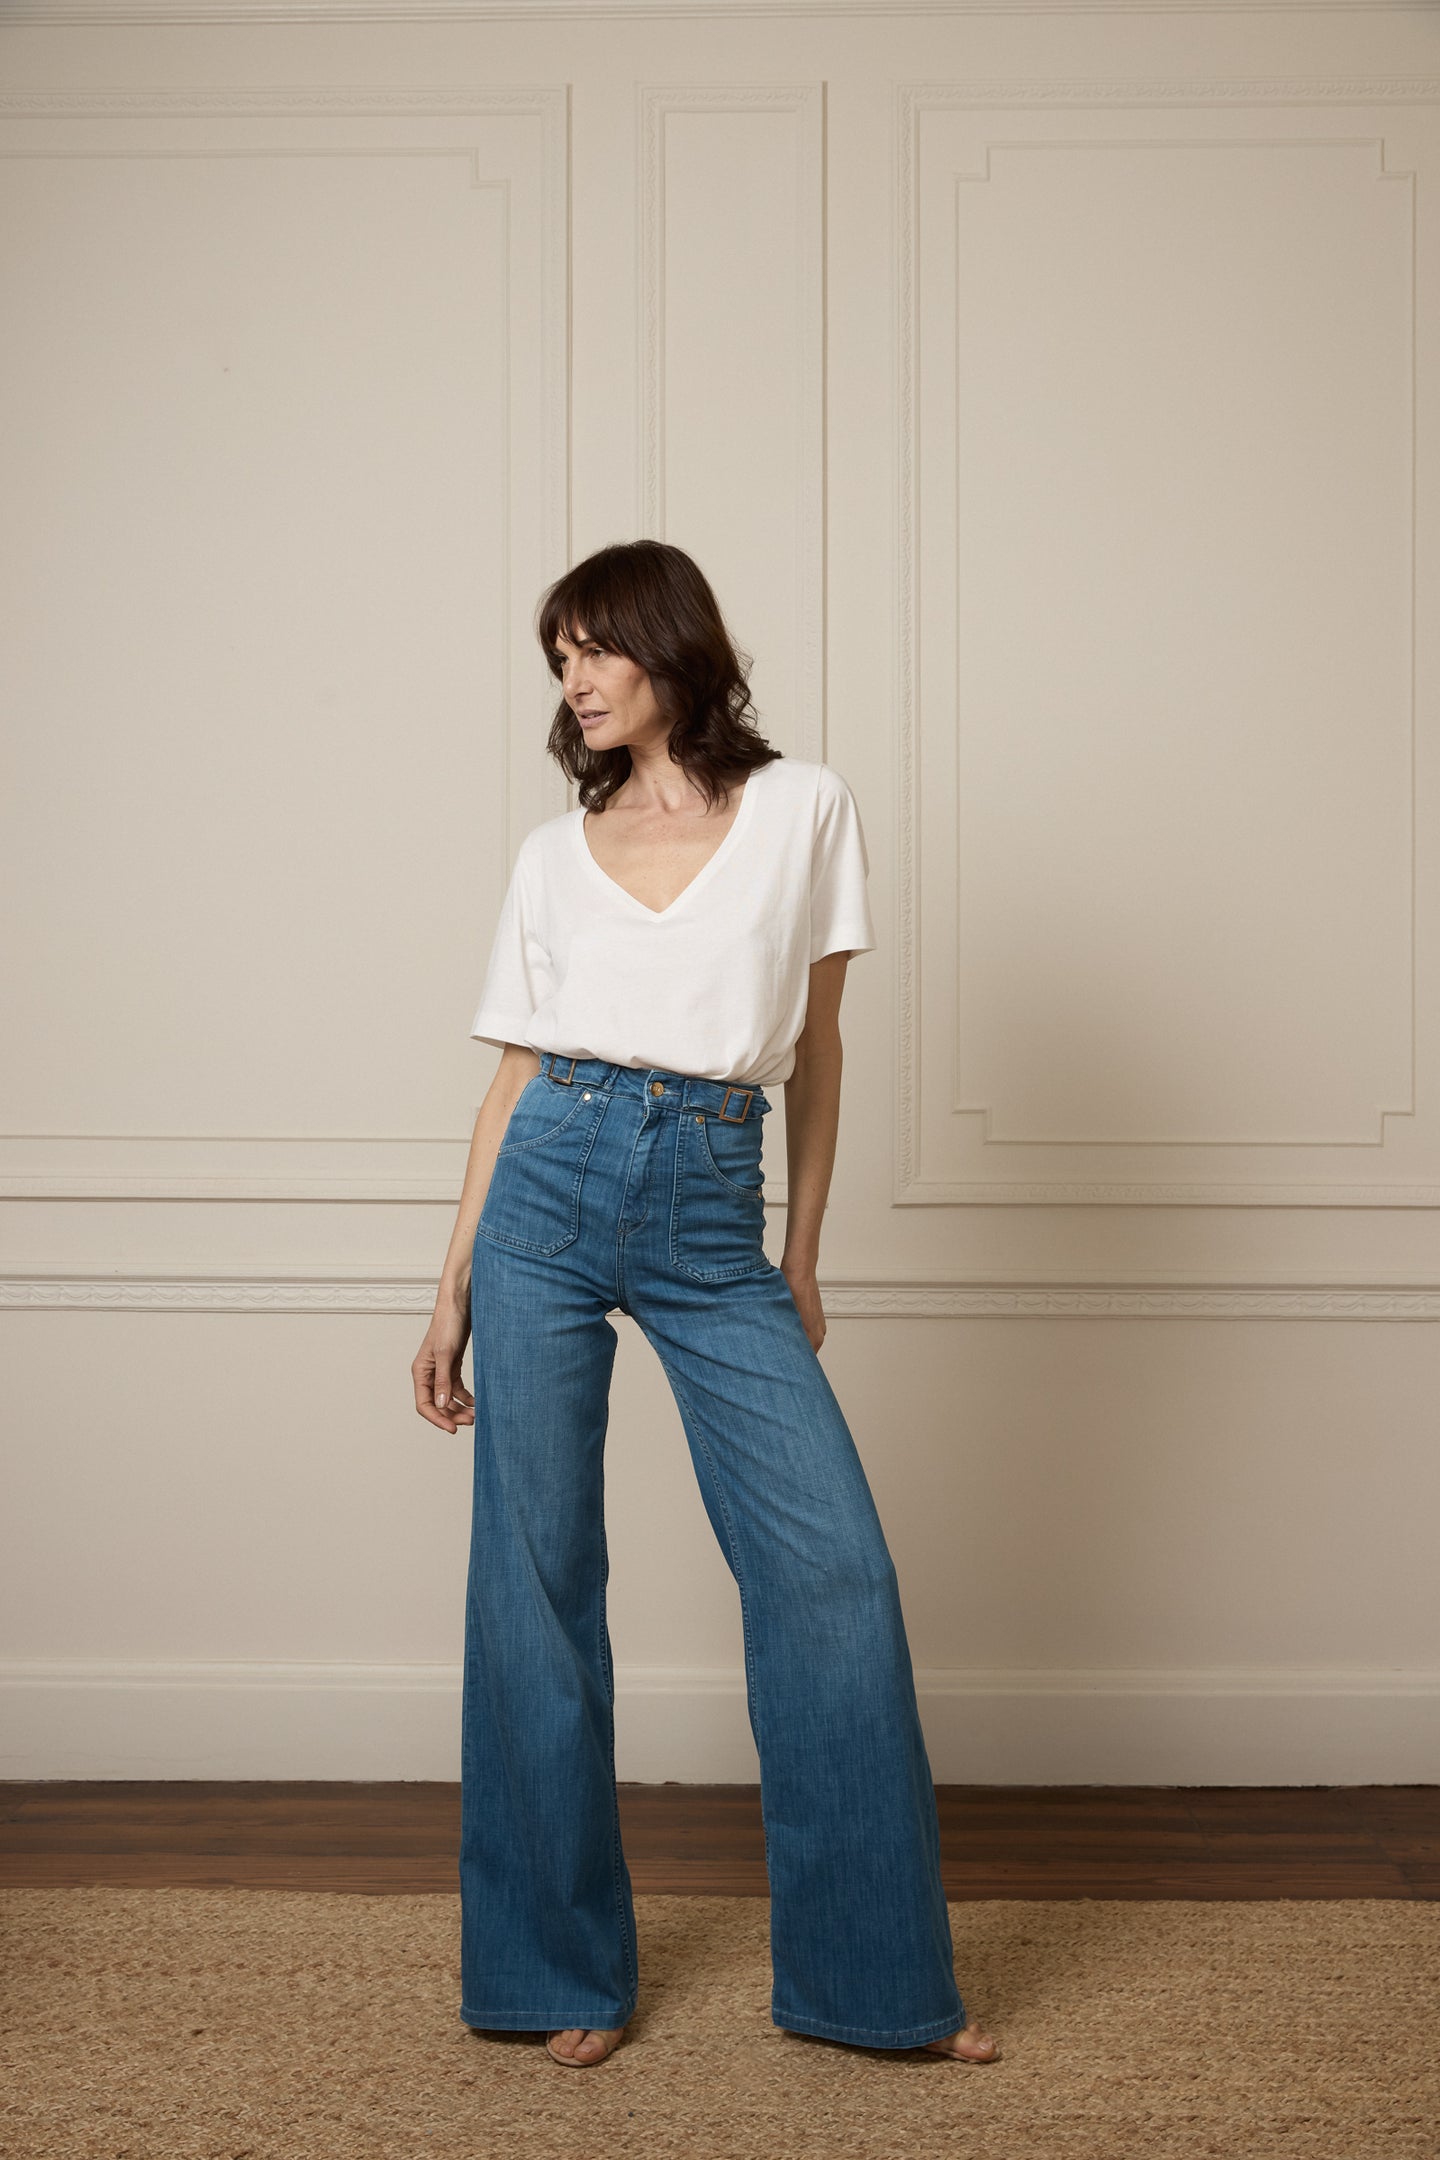
Flared jeans, most popular in the ‘70s and making a comeback today, feature a snug fit through the thighs and buttocks, flaring out significantly at the bottom. This style is particularly flattering for tall, curvy women, as well as those with round or pear-shaped bodies, as it helps balance proportions and creates a stylish silhouette.
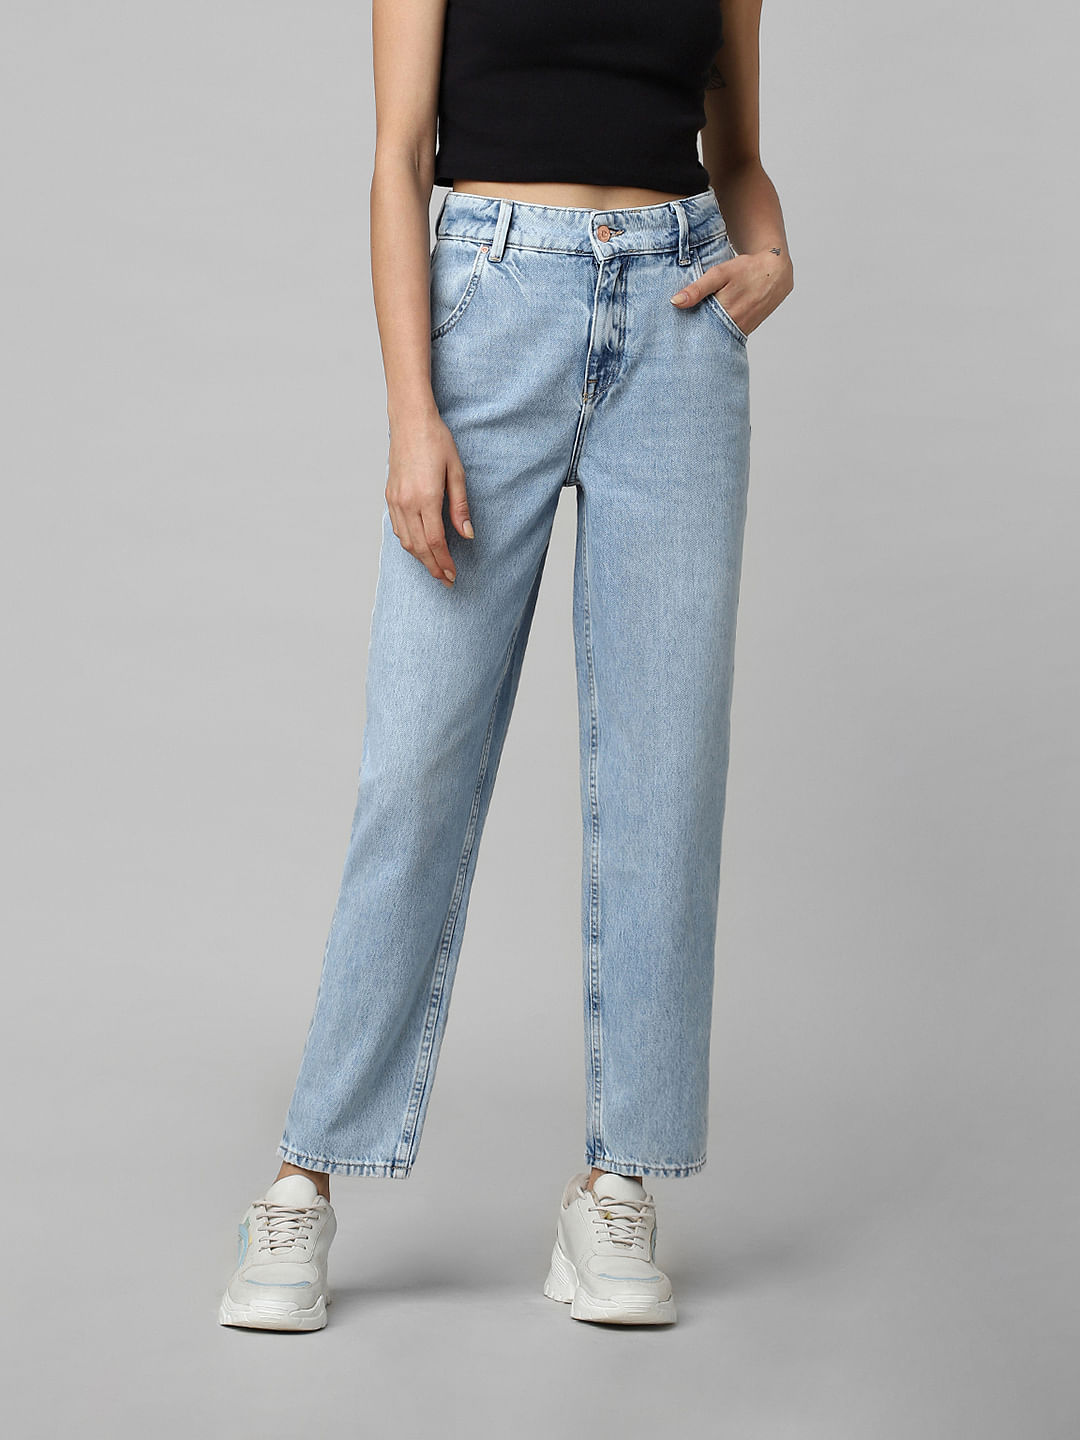
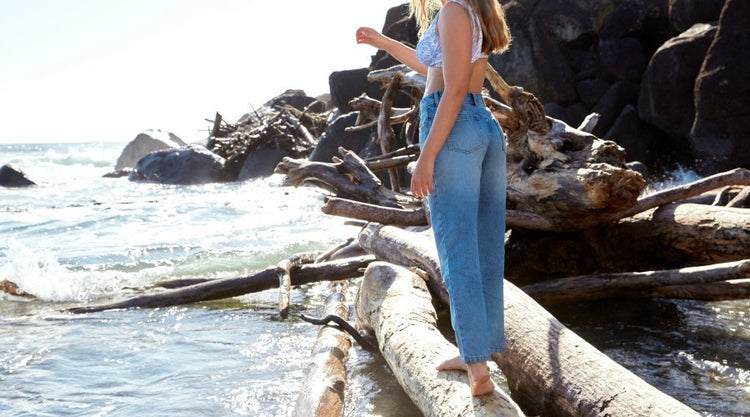
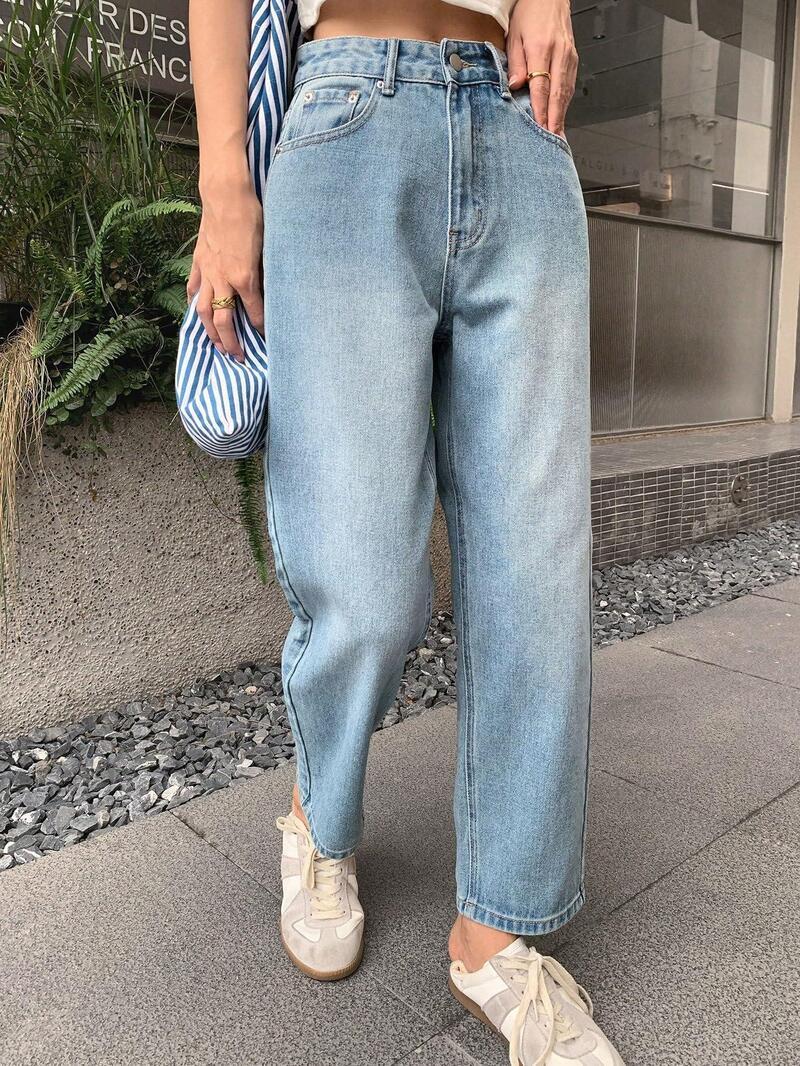
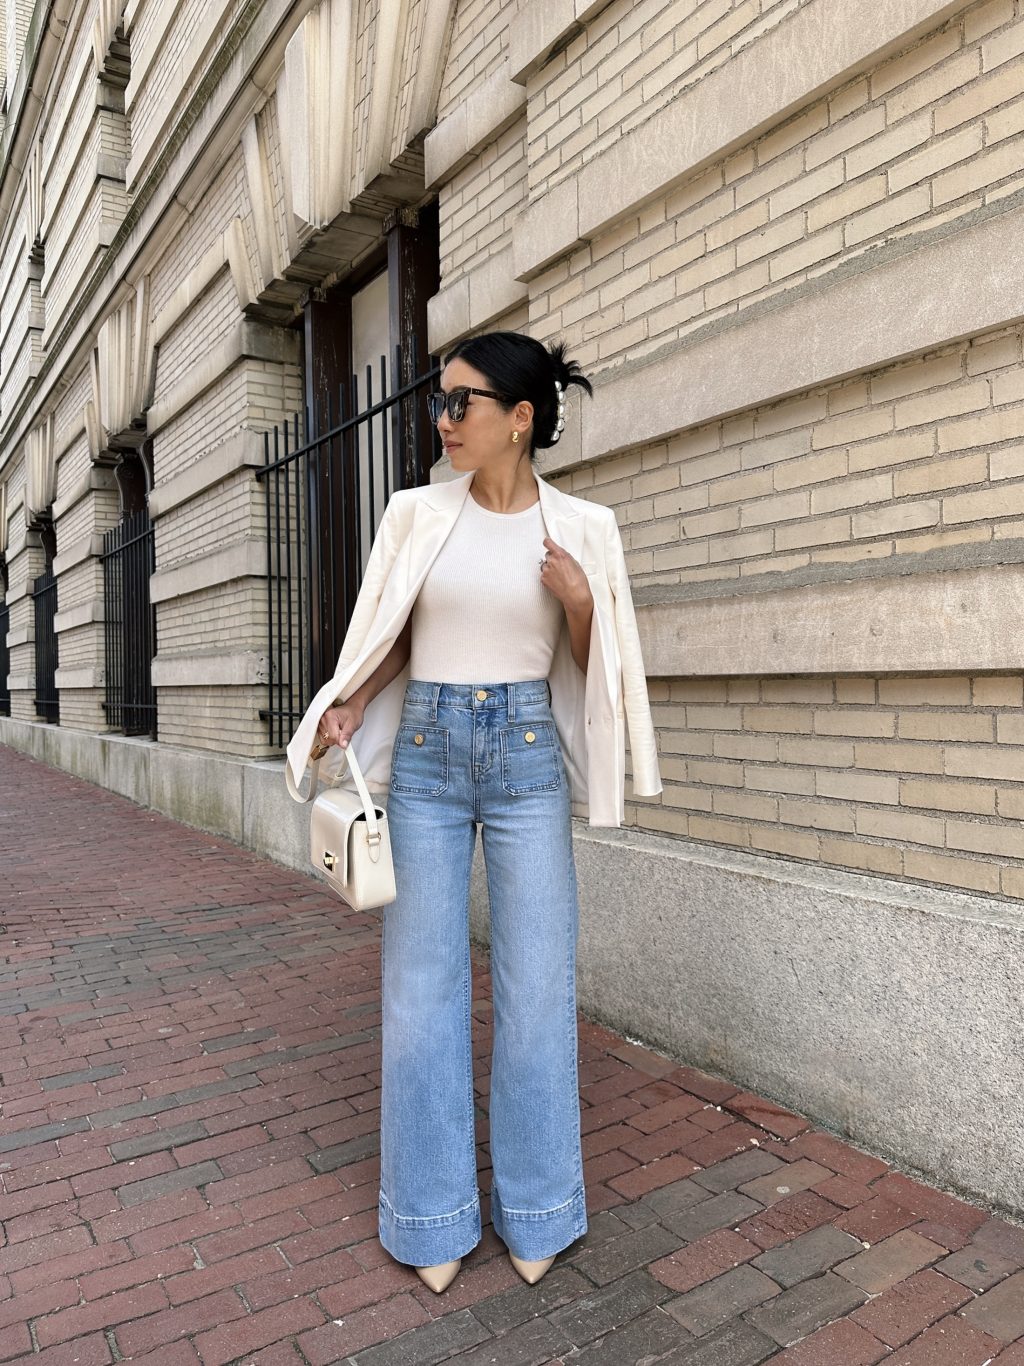
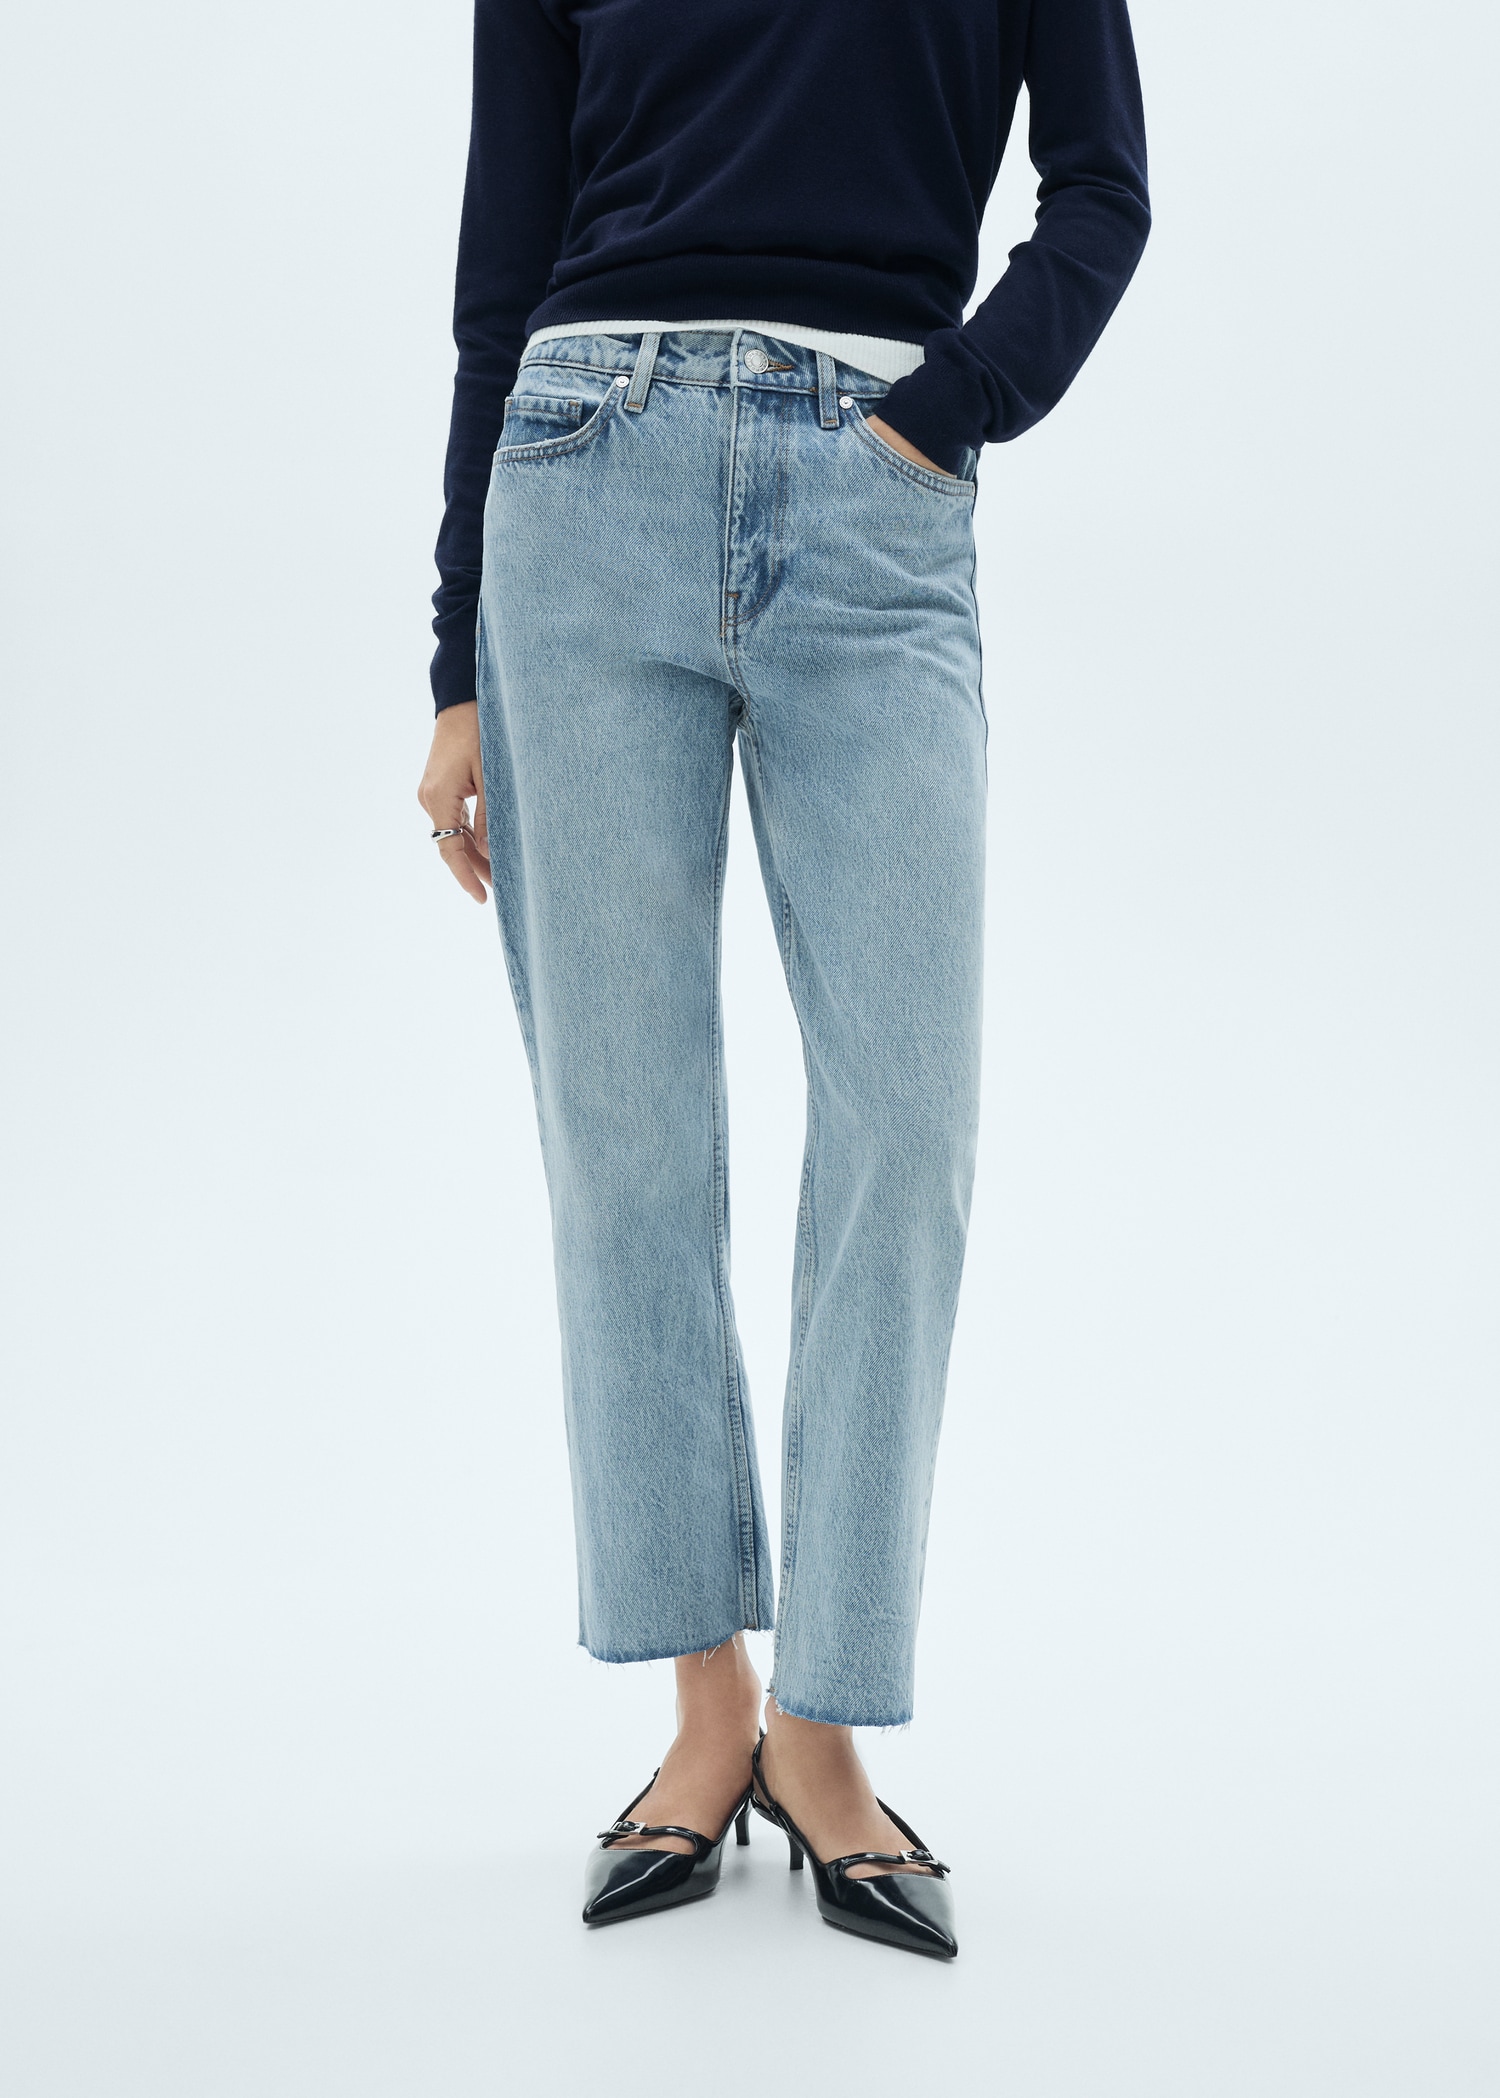
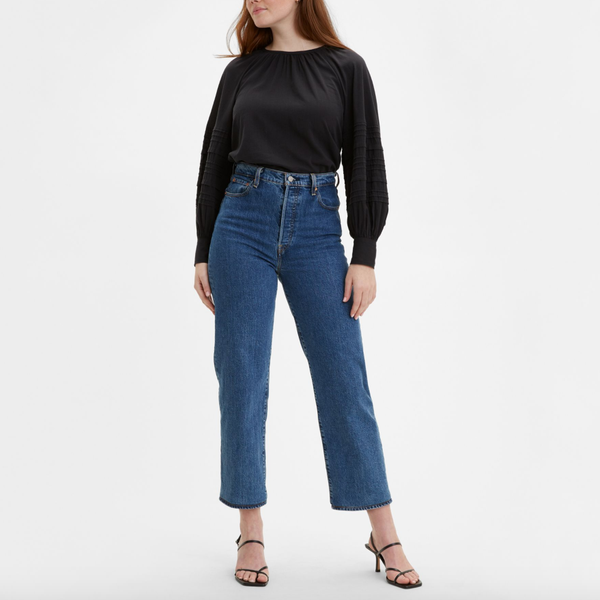
STRAIGHT CUT (STRAIGHT FIT JEANS)

Classic and conservative, straight-leg jeans feature a consistent width that sits between boyfriend or flared styles and skinny jeans. They fit snugly through the thighs while offering a slightly looser fit at the ankles and calves. This design hugs the lower limbs, creating the illusion of longer legs. Straight-leg jeans are versatile and suitable for most body types, making them a staple in any wardrobe.
TAPERED TYPES OF JEANS
As the name suggests, tapered-fit jeans feature a relaxed fit from the waist to the hips, gradually narrowing down toward the ankle area. This style is typically available in mid-rise or low-waisted options, offering a contemporary silhouette that combines comfort with a tailored appearance. Tapered jeans can be paired with a variety of tops and shoes, making them a versatile addition to any wardrobe.
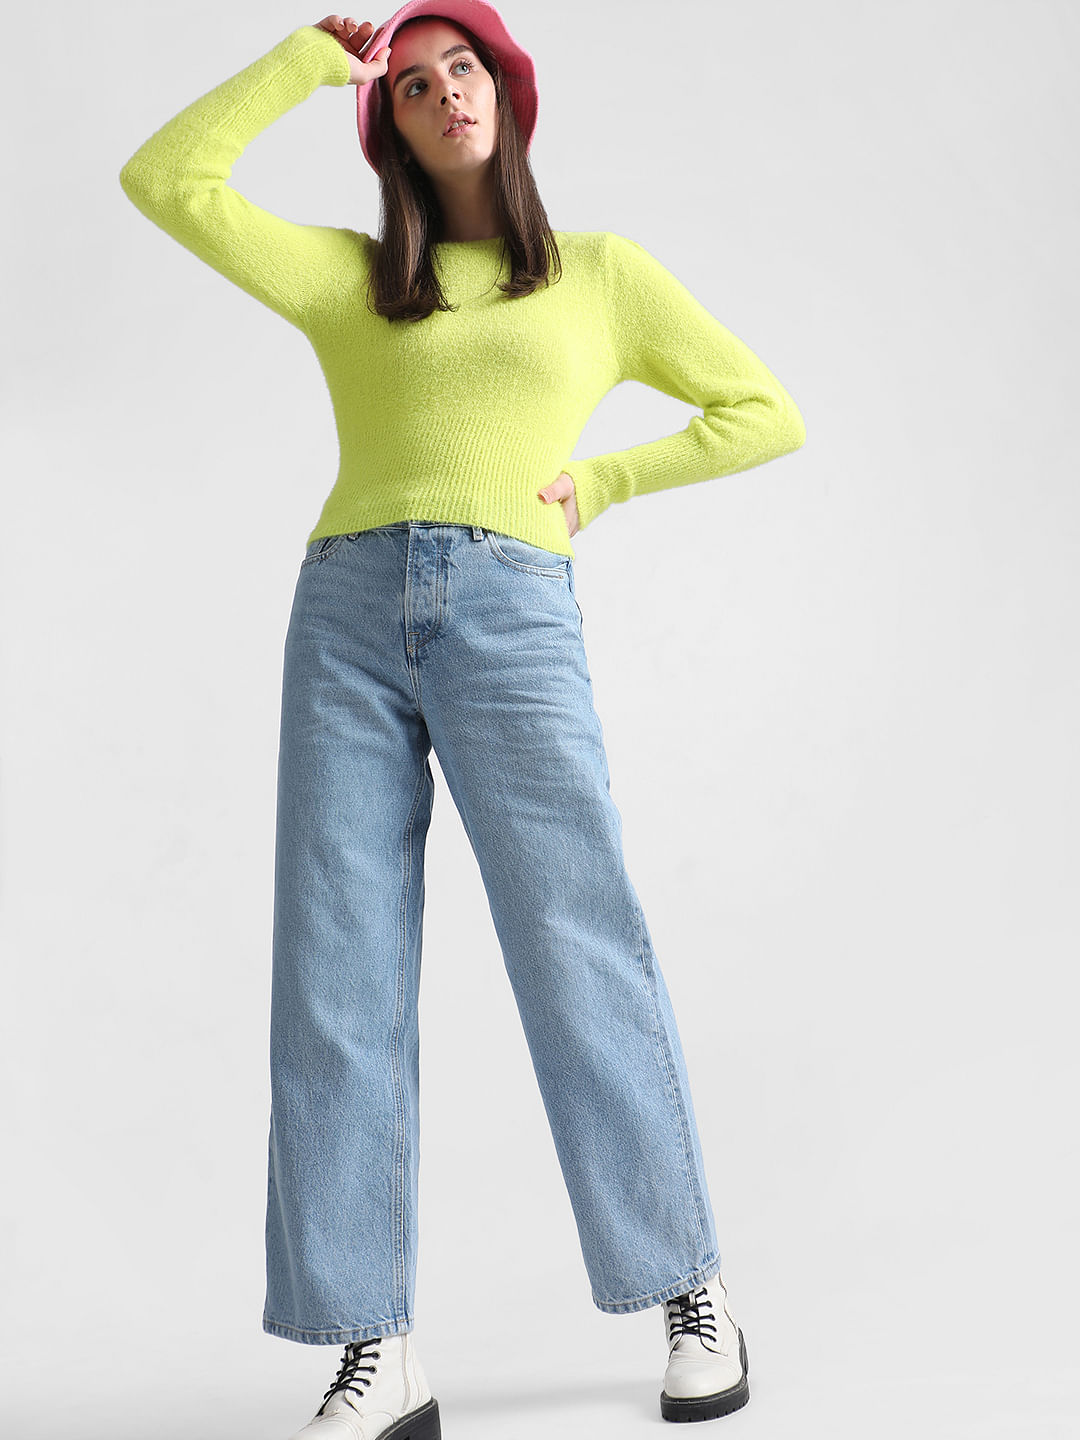
TROUSER
Trouser jeans come in two hem sizes: narrow and medium-width, and they can also fall into the wide-leg category while offering a more polished, dressy style. Unlike standard wide-leg jeans, trouser jeans often lack the typical flat-fell seam and five-pocket design, featuring instead slash pockets and finer detailing. They can flatter most body types by creating a lengthening effect, making them particularly ideal for petite individuals looking to enhance their silhouette.
JOGGER
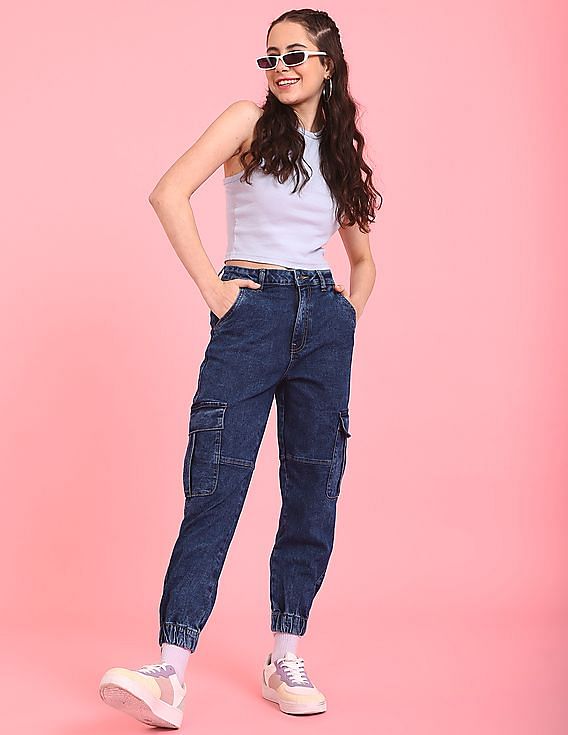
Jogger pants are among the most comfortable types of jeans, designed to provide a relaxed fit that doesn’t cling to your thighs or legs. They feature gathers at the bottom, allowing you to adjust their length and prevent a baggy appearance. Similar to lounge pants, joggers are made from denim or jean fabric and can come in both plain and mixed styles, making them a versatile option for casual wear.
SAILOR

Sailor jeans draw inspiration from traditional sailor uniforms, featuring a nautical design characterized by decorative buttons. These buttons are typically placed along each side, adorning the entire length of the pocket opening, although pocketless versions are also available. The number of buttons can vary, adding a unique touch to each pair. Sailor jeans are a stylish option that combines a playful maritime aesthetic with modern fashion sensibilities.
SIDE-SLIT
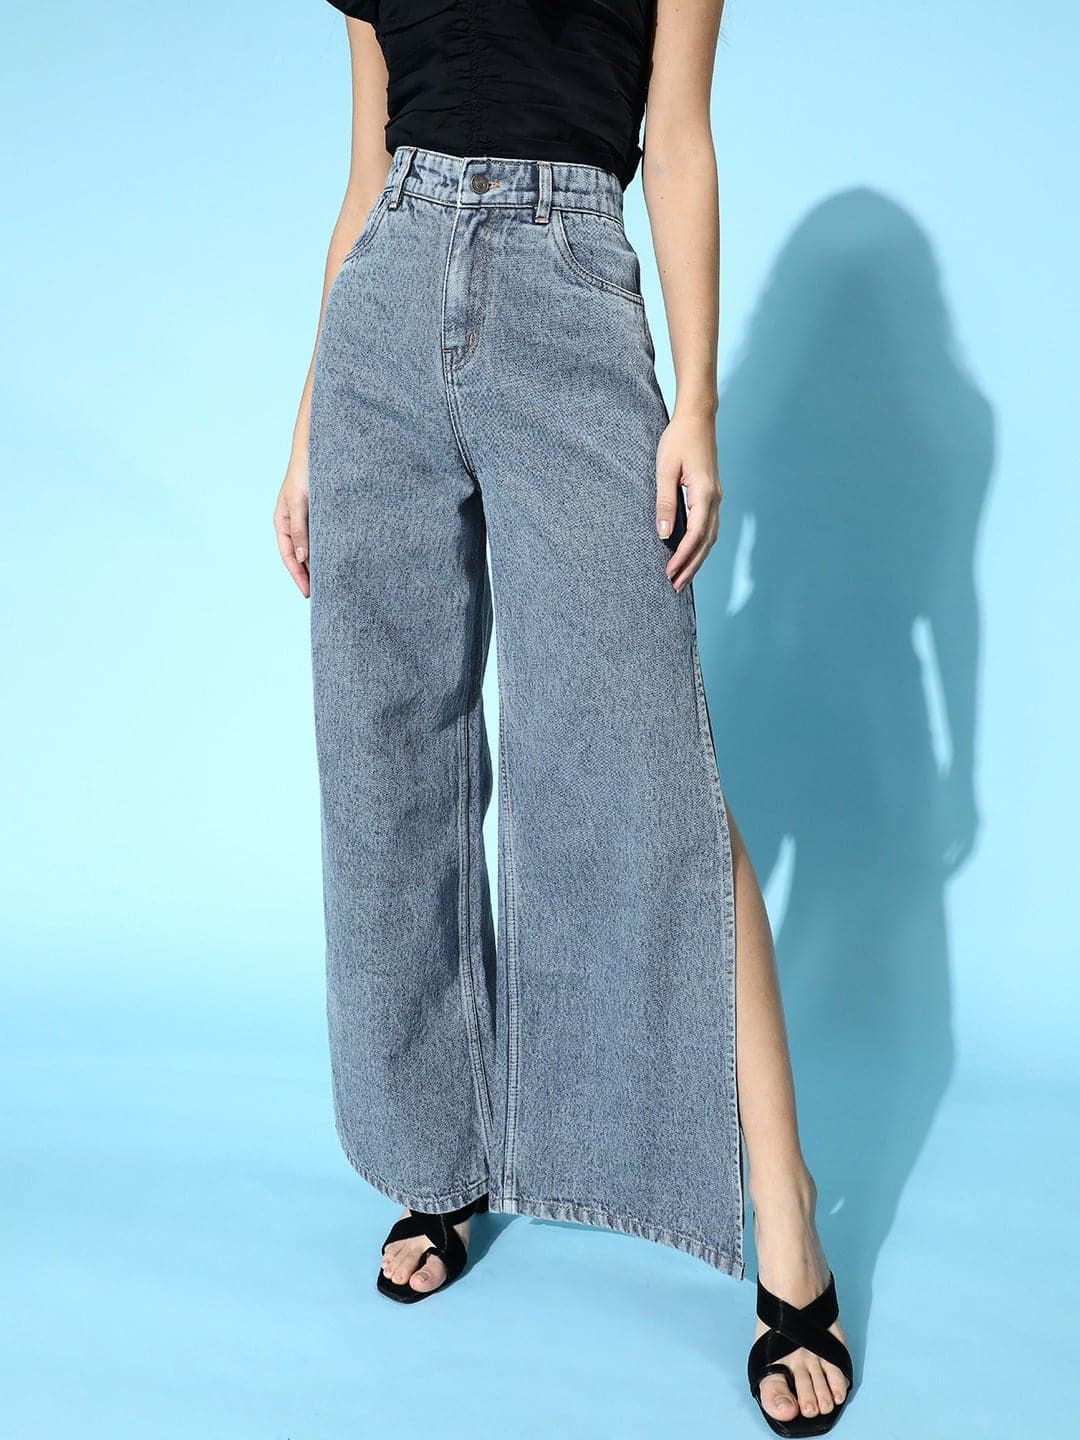
These jeans feature side slits that provide extra room for movement and enhance breathability. Gaining popularity around 2018, they strike a balance between fashion and casual wear. Some styles come equipped with zippers or buttons, allowing you to adjust them for a more traditional look when desired. These jeans are a trendy choice for those looking to add a unique twist to their wardrobe while staying comfortable.
JEAN TYPES BY WASH AND COLOR
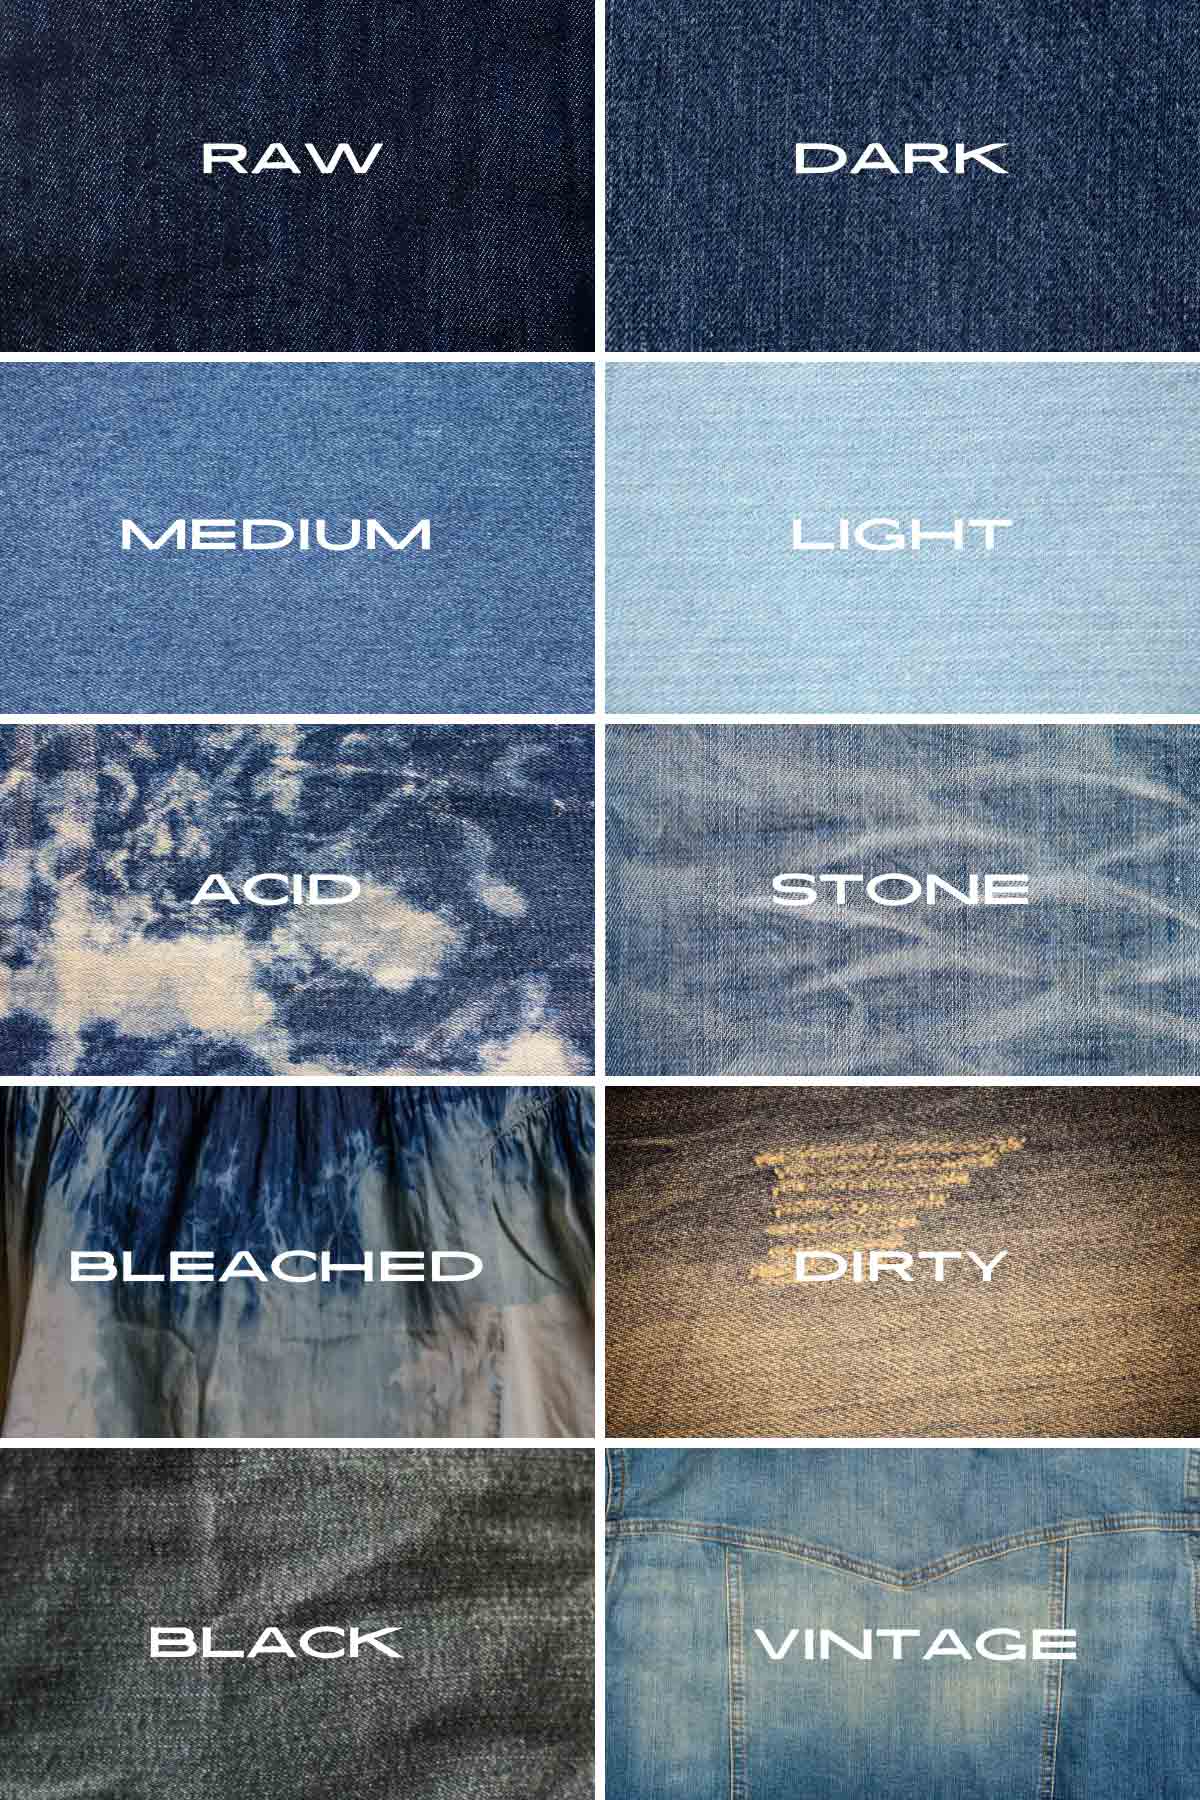
RAW OR DRY DENIM
Raw denim is the fabric in its purest form, remaining unwashed and untreated after dyeing. Initially, raw denim jeans can feel stiff, but they gradually mold to the wearer’s body with use. This creates a personalized fit, and the fabric develops unique fades that reflect the wearer’s body shape and movements over time, resulting in a one-of-a-kind pair of jeans that tells a story.
DARK WASH OR INDIGO
Dark wash jeans, often labeled as indigo in stores, have a more formal appearance and can be suitable for dressier occasions. These darker styles tend to elevate outfits, making them versatile for various settings. It’s advisable to wash dark wash jeans a few times before wearing them, as the dye may transfer onto bags or other clothing items, potentially causing stains.
MEDIUM WASH
Medium wash jeans feature a mid-blue color that makes them ideal for casual wear. Although they are less formal than dark wash jeans, they offer greater versatility and embody the classic denim look. This shade can easily be paired with a variety of tops and footwear, making it a staple in any wardrobe.
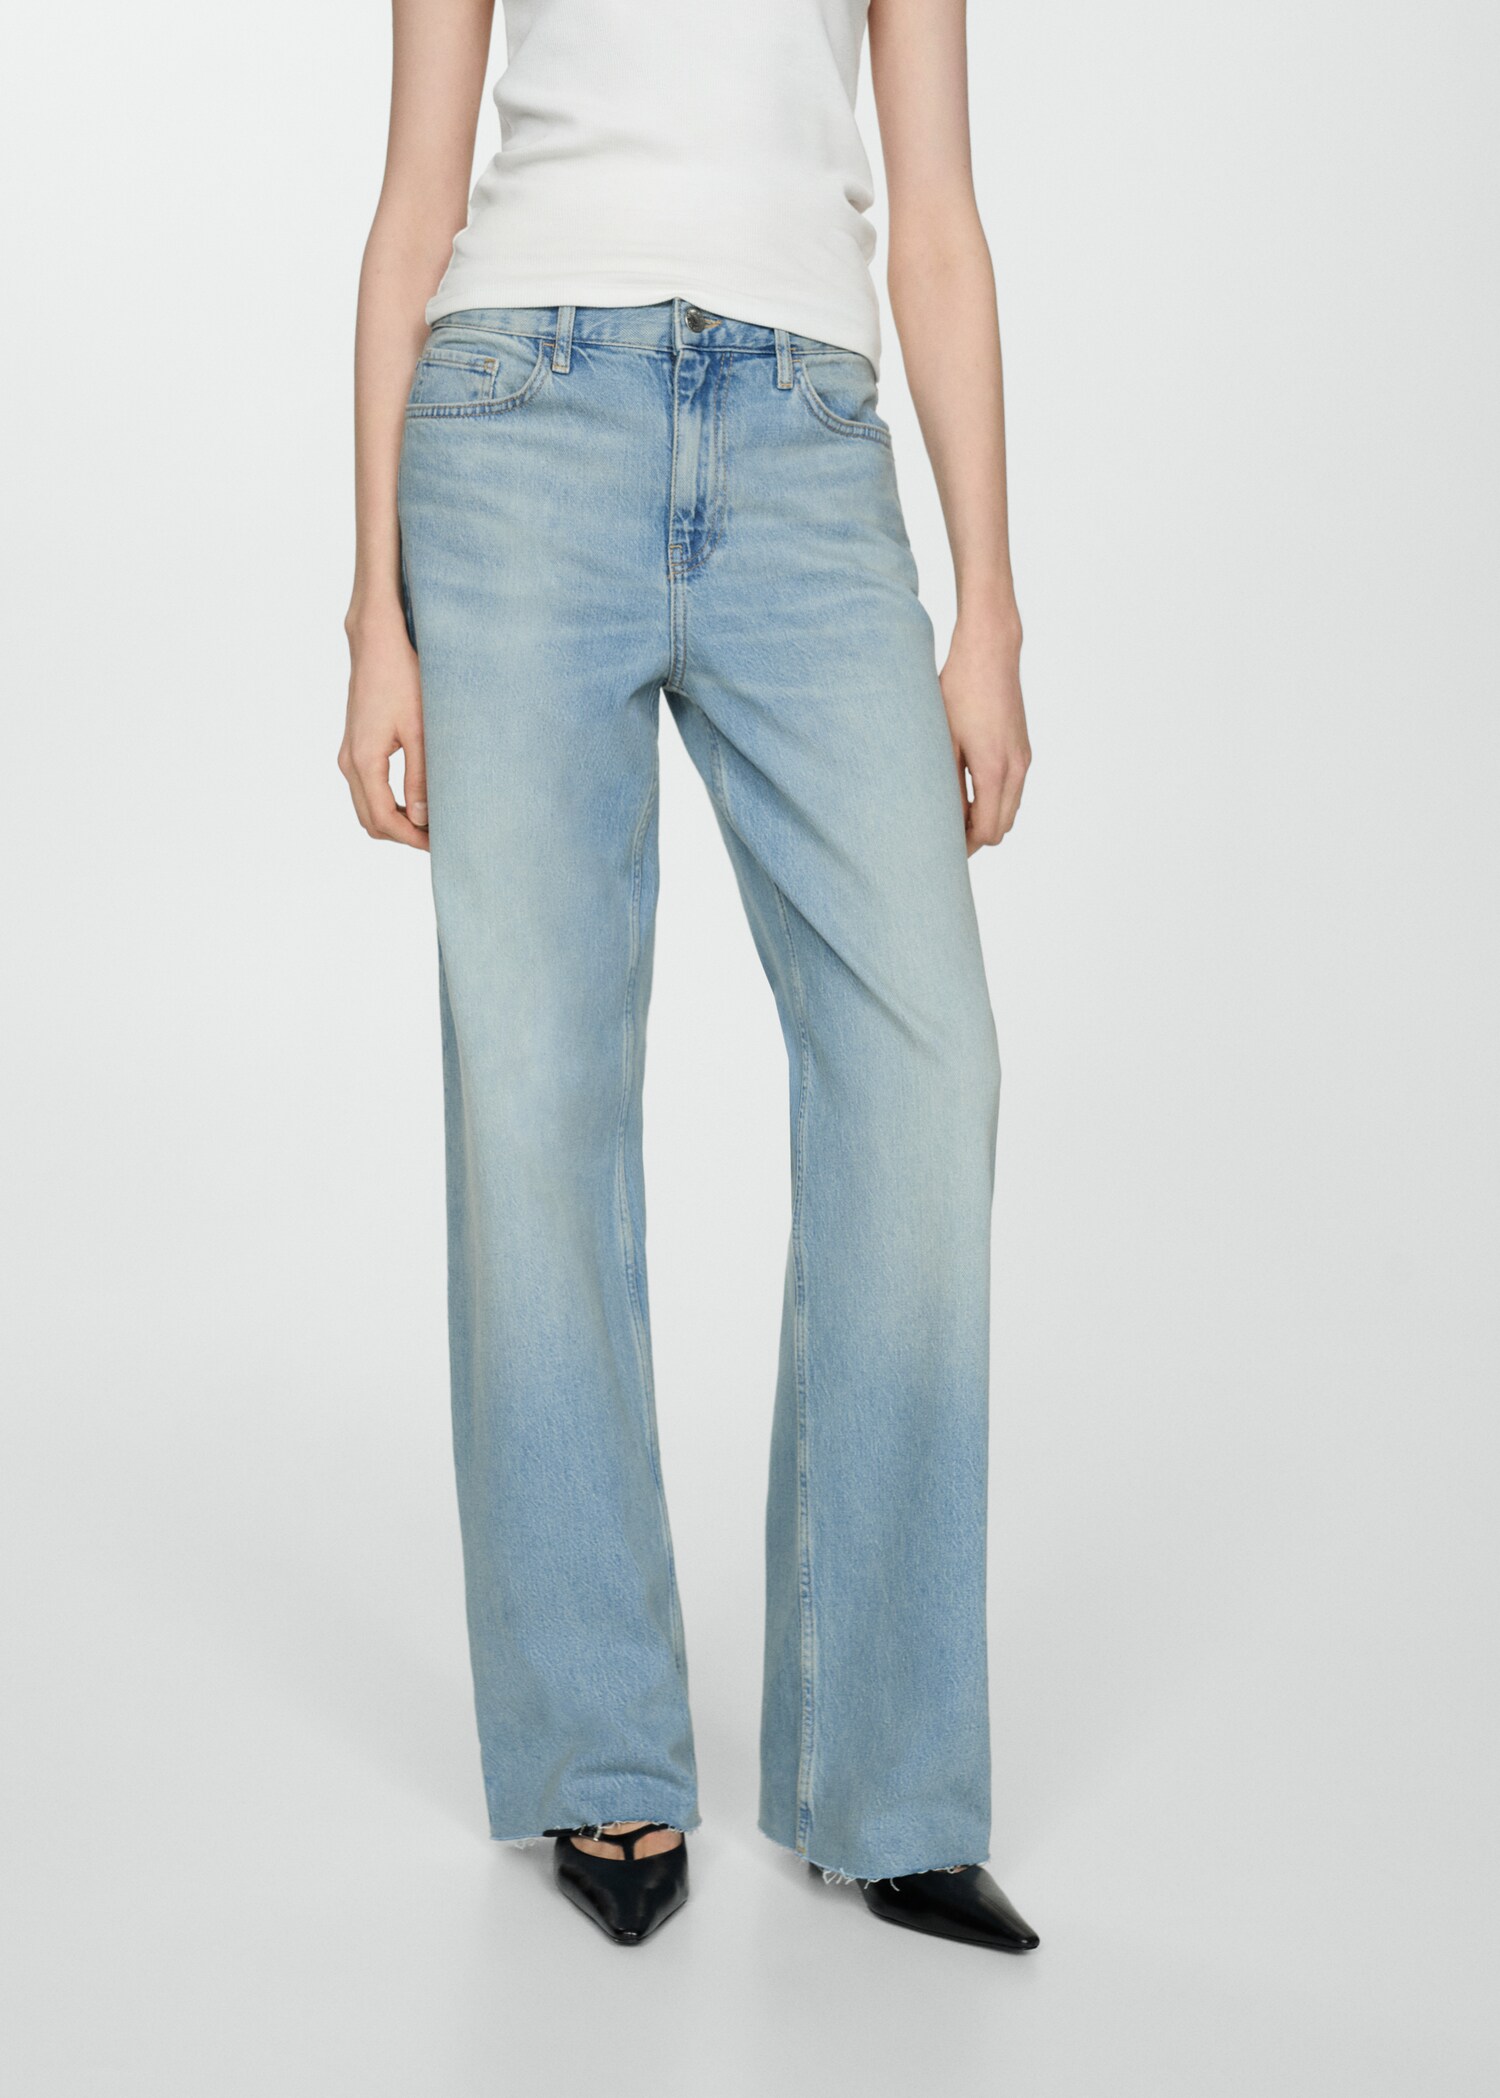
LIGHT WASH
Light wash jeans showcase a pale blue color and a more worn-in appearance, giving them a laid-back, relaxed vibe. They are perfect for casual outfits and are great for achieving a comfortable look. However, because of their lighter color, they tend to show marks and stains more easily. Additionally, light wash jeans are often softer than their darker counterparts, as they undergo less processing during manufacturing, making them comfortable for all-day wear.
ACID WASH
Acid wash jeans are characterized by a marbled or speckled appearance, achieved through a chemical process that removes some of the dye, resulting in a high-contrast, patterned effect. This distinctive style was especially popular in the 1980s, evoking a retro vibe that can add a bold statement to modern outfits.
STONEWASHED
Stonewashed jeans feature a faded, worn appearance created through a washing process that involves pumice stones. This technique not only gives the jeans a soft feel but also enhances their vintage look. Similar to acid wash jeans, stonewashed styles gained popularity in the 1980s, making them a classic choice for a casual and effortlessly cool aesthetic.
BLEACHED JEANS
Bleached jeans are treated with bleach to significantly lighten their original color. The intensity of the bleaching process can vary, resulting in different patterns and levels of lightness. This technique allows for a range of styles, including unique, trendy looks like tie-dye bleached jeans, where sections are bleached in a pattern for added visual interest and flair.
DIRTY WASH
Dirty wash jeans are designed to give the illusion of dirt or grime, typically achieved through a specialized dye process. This style creates a rugged, worn appearance without any actual dirt. For a stylish contrast, dirty wash jeans tend to look best when paired with a more formal shirt, striking a balance between casual and polished aesthetics.
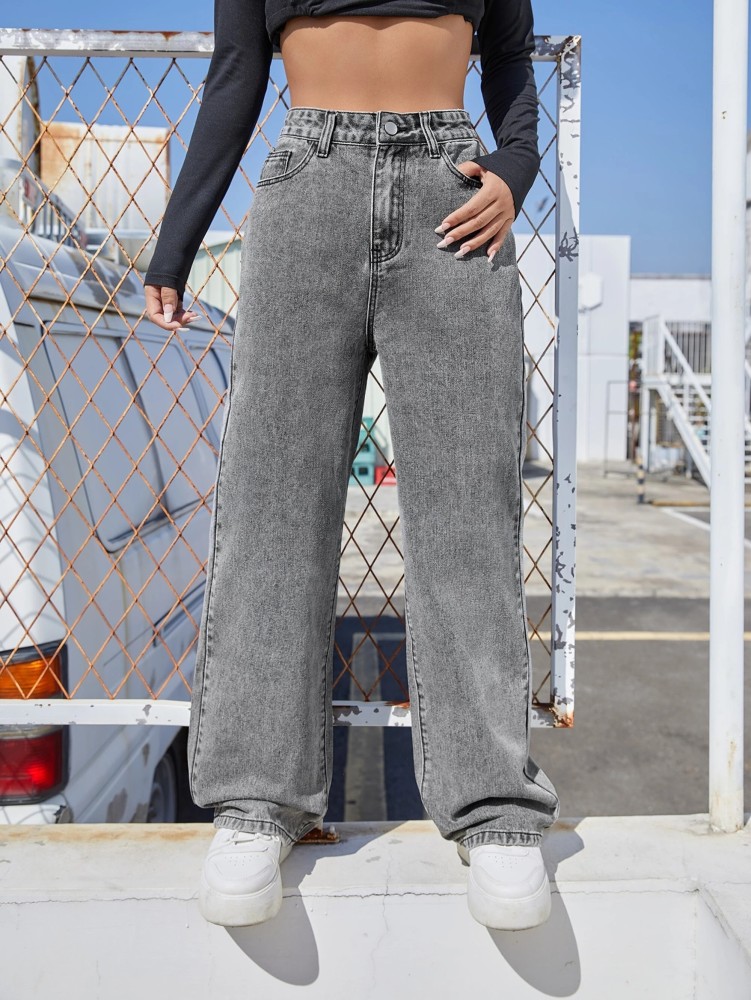
BLACK AND GREY WASH
These jeans are dyed in various shades of black and grey, moving away from the classic blue denim. The color palette can range from light grey to deep black, offering a sleek and modern alternative to traditional denim. This versatile style can easily be dressed up or down, making it a staple in any wardrobe.
VINTAGE WASH
These jeans are crafted to achieve a well-worn look, featuring washes that include fading and distressing to replicate the appearance of long-term wear. The main areas of distress, typically found on the thighs and knees, are designed to mimic how jeans naturally discolor and soften over time. This style adds a vintage charm to your wardrobe, making them a popular choice for those seeking a relaxed and casual aesthetic.
COLORED DENIM
Colored denim, while not a traditional wash, provides jeans in a spectrum of hues beyond the typical blue, including shades like red, green, pink, and yellow. Available in various cuts and lengths, these jeans are considered a high-fashion item that can be trendy one season and less so the next. Their bold colors allow for creative outfit combinations, making them a fun addition to any wardrobe.
TYPES OF JEANS BASED ON STYLE
To unleash your inner fashionista, jeans now come in a variety of styles beyond just the classic designs. Here are some of the most popular options
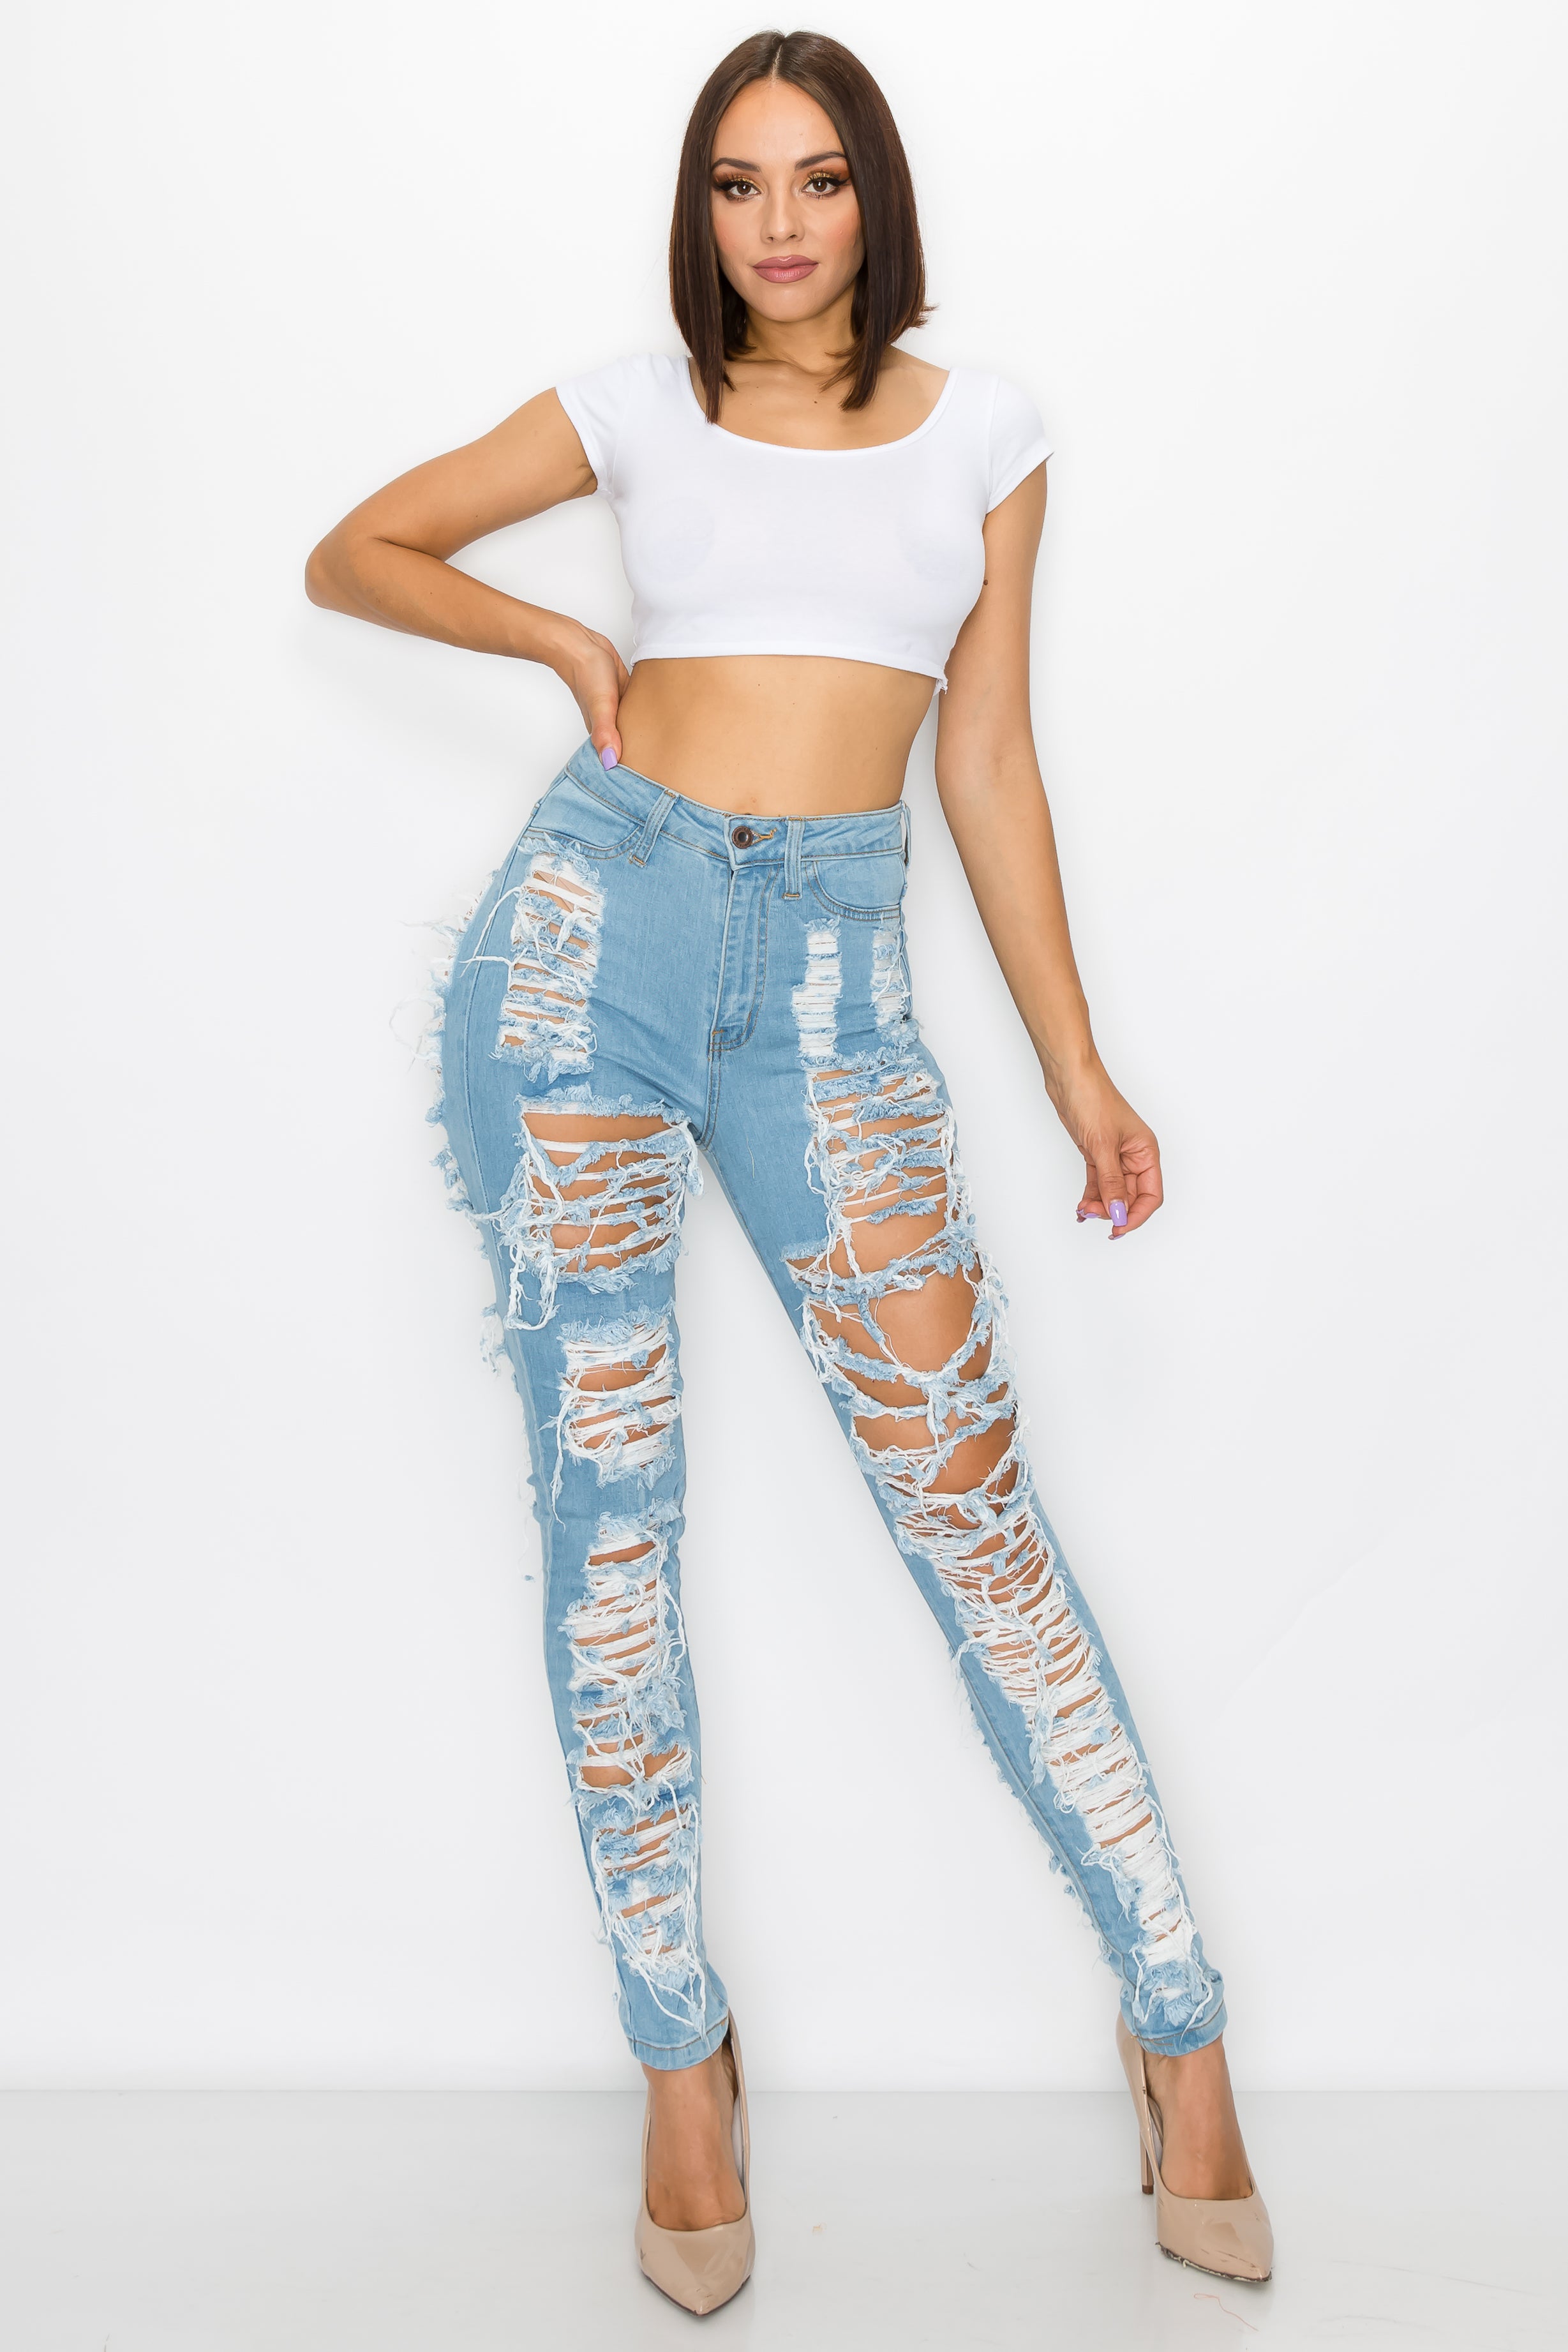
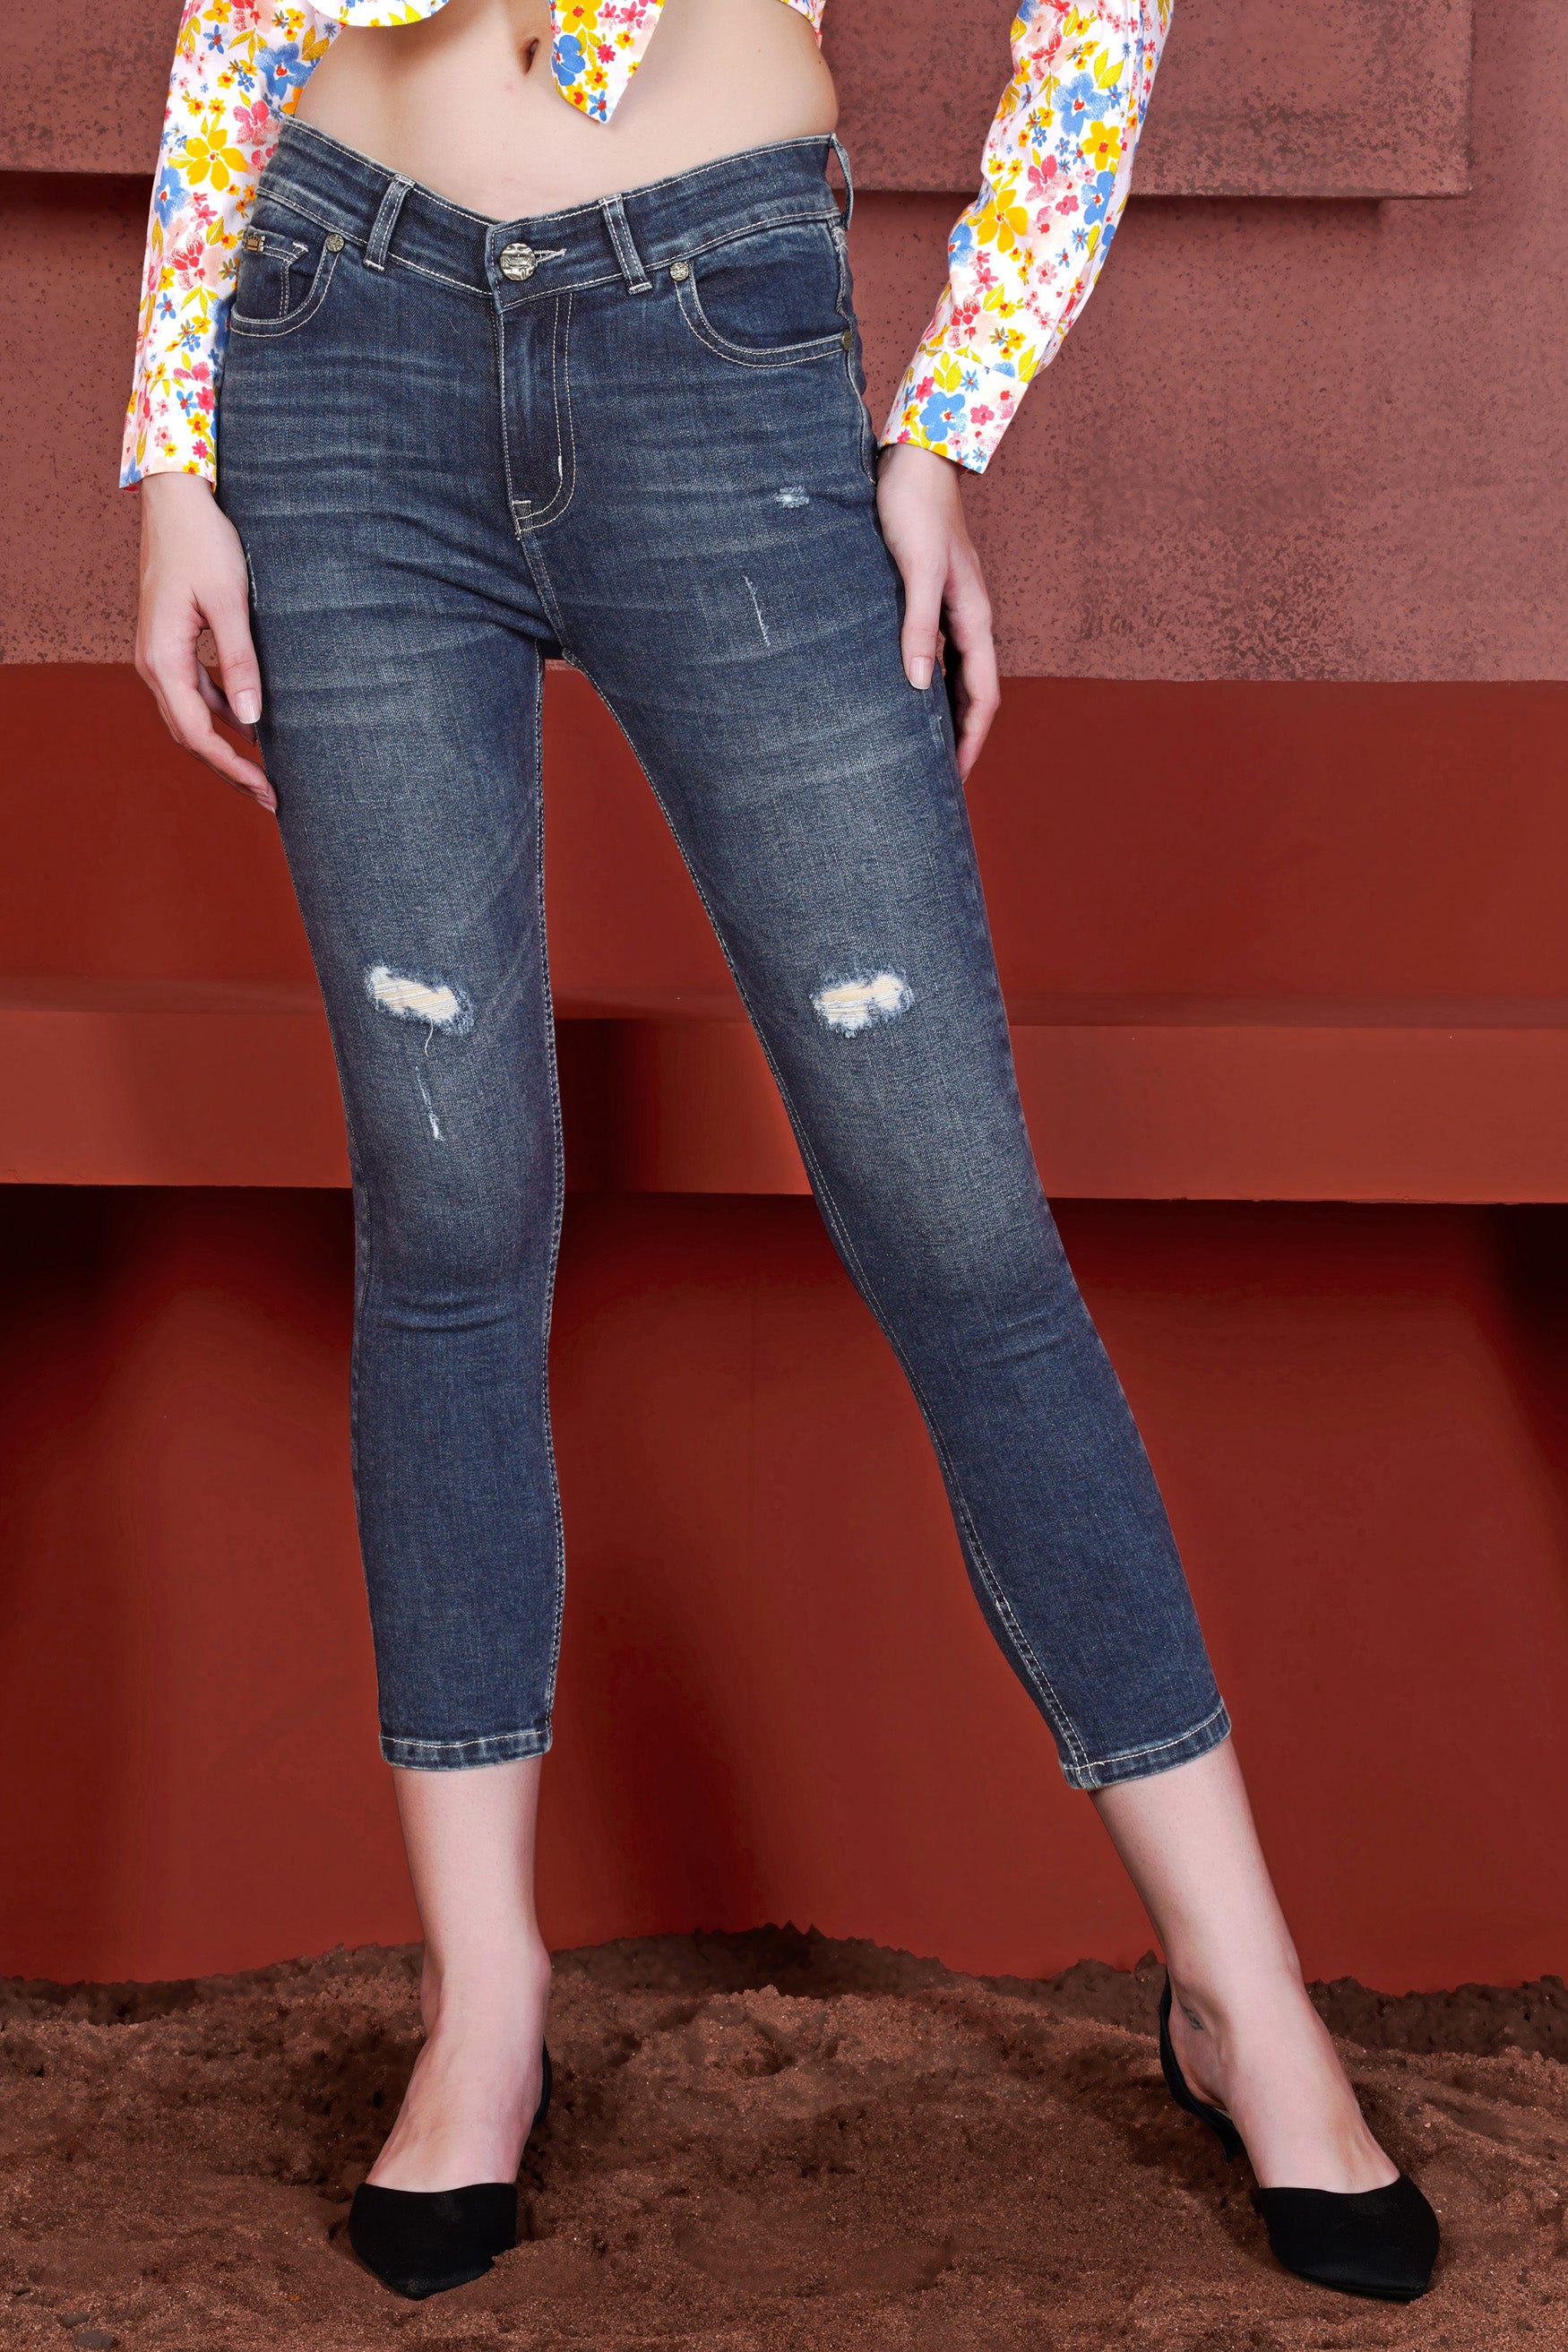
RIPPED

As the name suggests, distressed jeans feature rips or tears in various areas, typically around the legs and thighs. Since their rise in popularity, many people have taken to intentionally distressing their old jeans using tools like sandpaper, cutters, or blades, or simply cutting areas with scissors for a customized look. This trend adds a unique, edgy flair to outfits, making distressed jeans a fashionable choice for casual wear.
DISTRESSED
In contrast to ripped jeans, distressed jeans have a worn-out appearance without significant tears. They may feature subtle fading, whiskering, or fraying that gives them a relaxed, vintage vibe. While many distressed jeans remain intact, some may include small rips for added texture and character, blending style with comfort.
CROCHETED OR LACED
For a more feminine and stylish touch, some manufacturers design jeans featuring crocheted or laced areas. These styles resemble ripped jeans, but the distressed sections are elegantly covered with lace fabric or crochet designs. If you have sewing or crocheting skills, you can even create your own unique versions, adding a personalized flair to your denim collection.
PATCHED
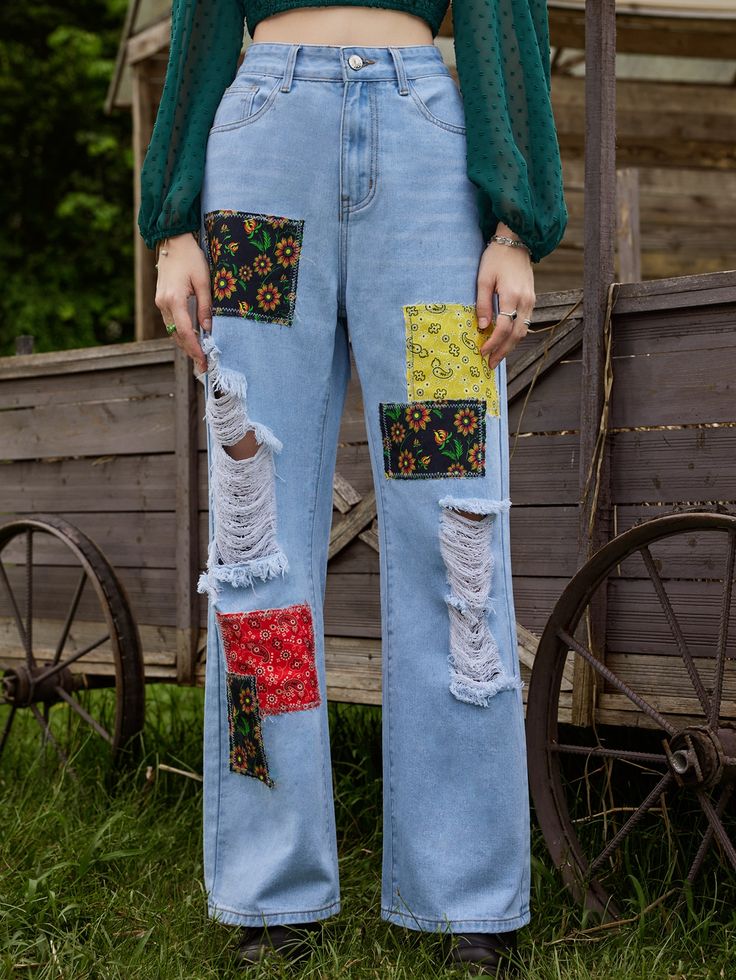
Also known as patchwork jeans, these trendy pants feature patches sewn onto some or most areas, creating a distinctive and stylish look. Like crocheted or laced jeans, patchwork styles can be purchased commercially or made at home by covering holes and rips with patches of your choice. For a quick and easy option, you can also use iron-on patches to customize your jeans temporarily, allowing for versatile styling without a permanent commitment.
STUDS AND METAL
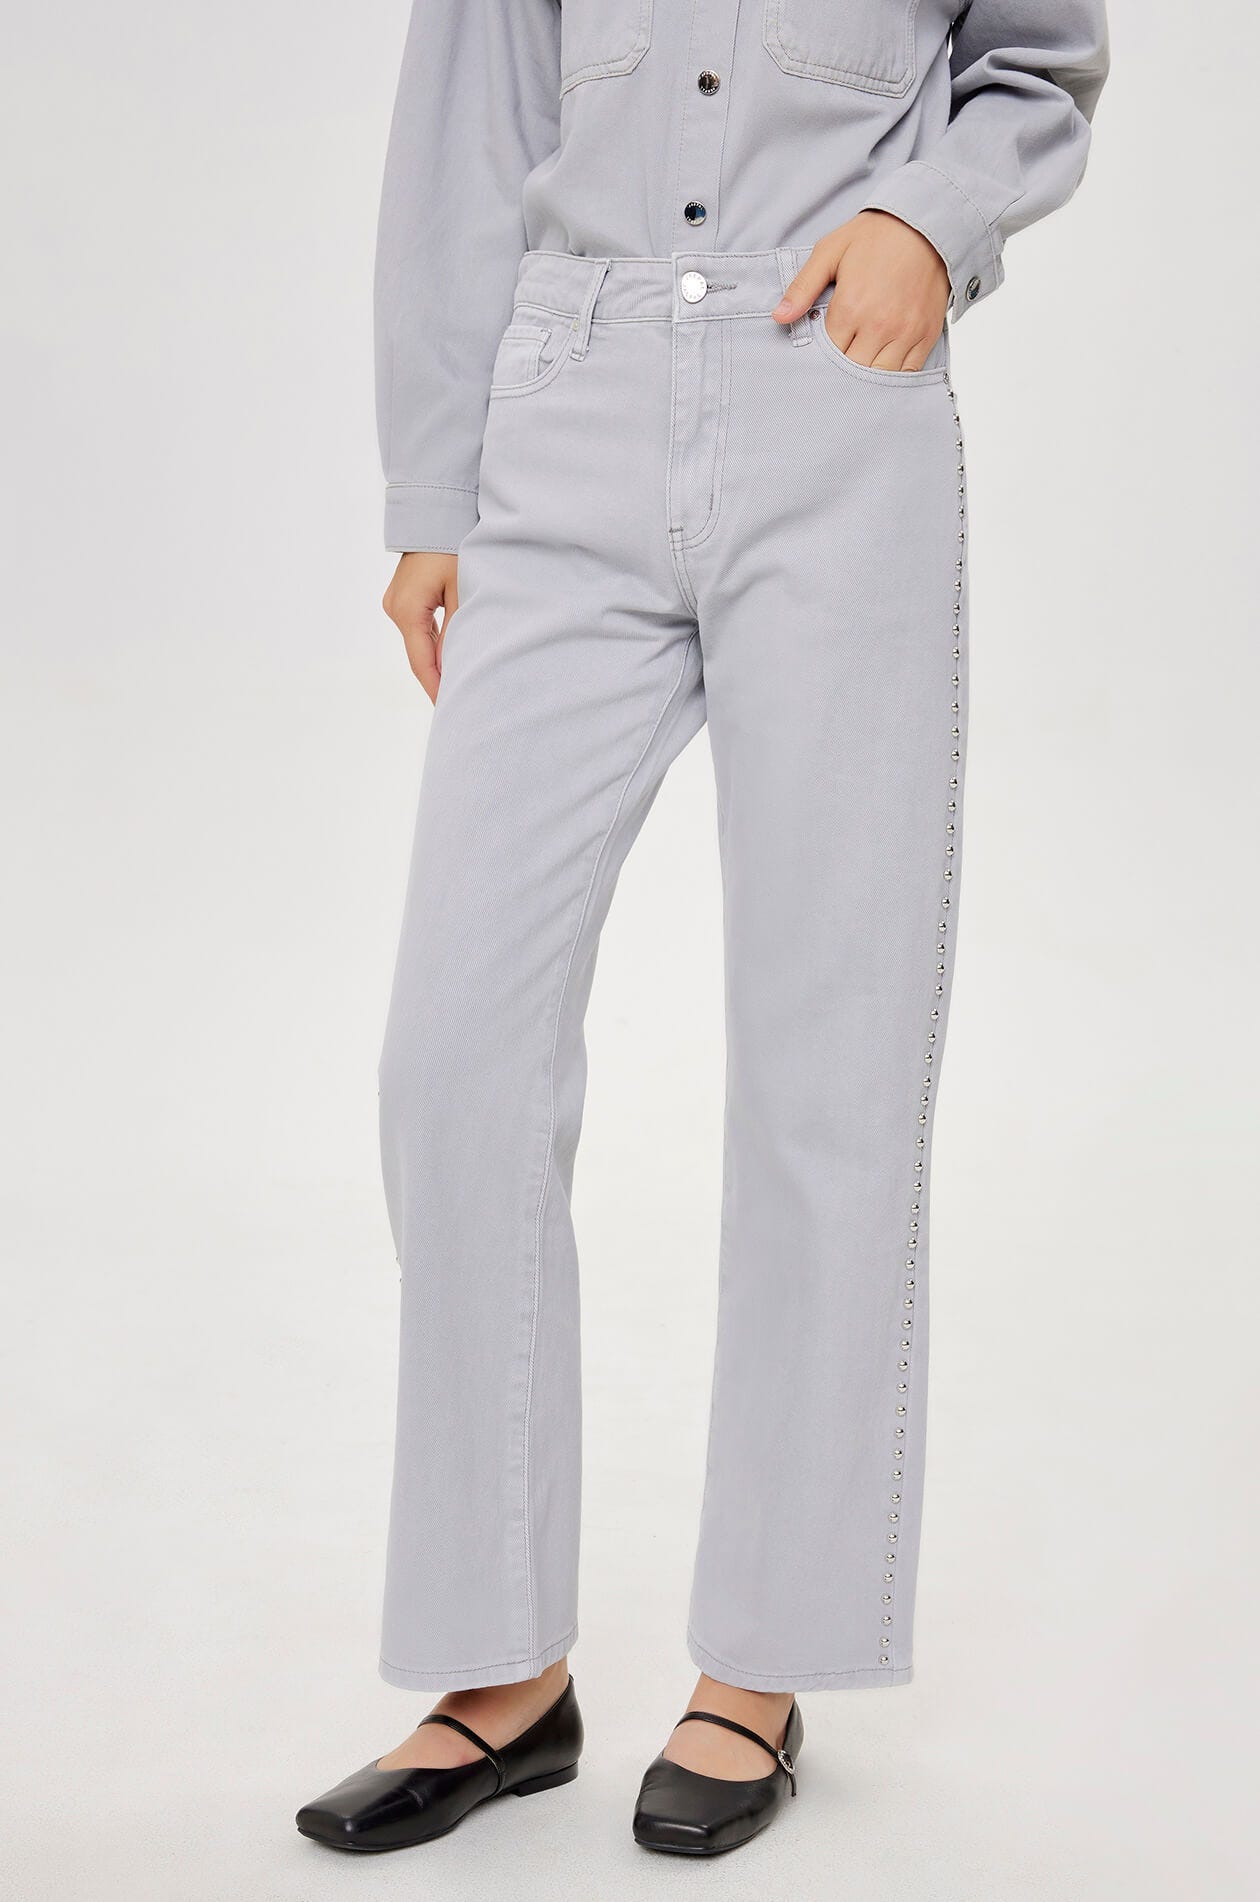
Jeans adorned with metal grommets, studs, and eyelets exude an edgy and cool vibe, especially when styled with the right tops. These embellishments can be strategically placed on hems, pockets, or seams, adding a touch of flair and personality to your denim. This stylish detail enhances the overall look, making the jeans a standout piece in any outfit.
PAINT AND PRINTS
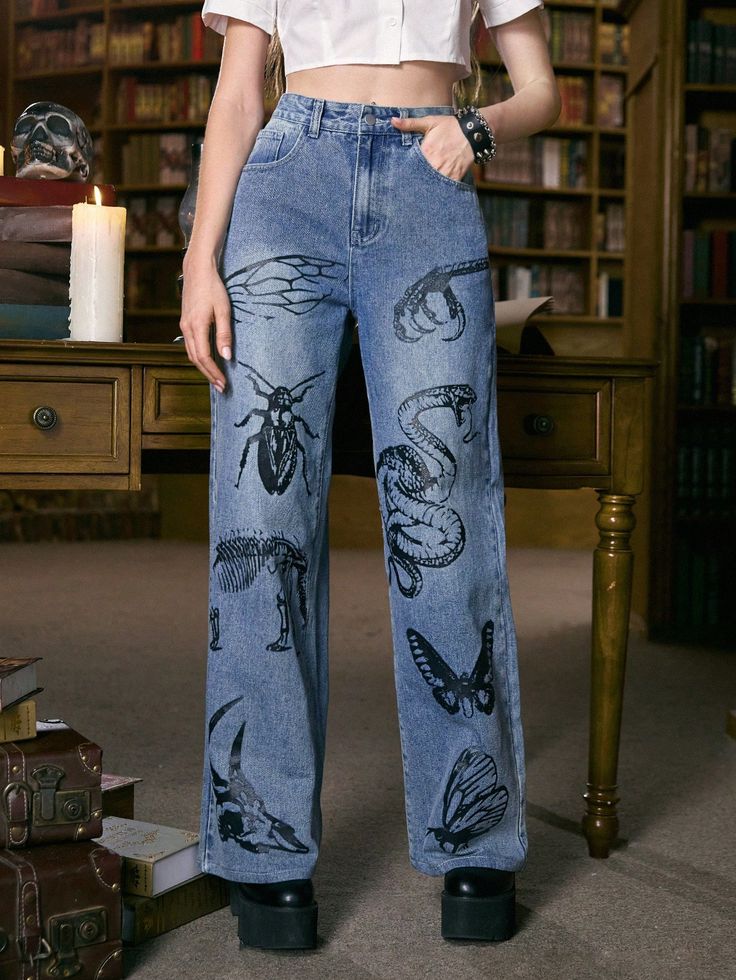
You can discover unique jeans featuring hand-painted designs that vary from subtle accents to bold, vibrant images. This creative approach allows for personal expression and a one-of-a-kind style. If you’re feeling artistic, you can also try painting your own jeans, transforming them into a canvas that reflects your personality and fashion sense.
TYPES OF JEANS BASED ON LEG LENGTH
Jeans typically extend below the ankles or can be longer, depending on leg length, but they are also available in shorter lengths. The various types of jeans by length include
CAPRI
These jeans are slightly shorter than cropped jeans, ending higher than the mid-calf. This style provides a breezy, relaxed look that pairs well with various footwear options, making them a great choice for warmer weather or casual outings.
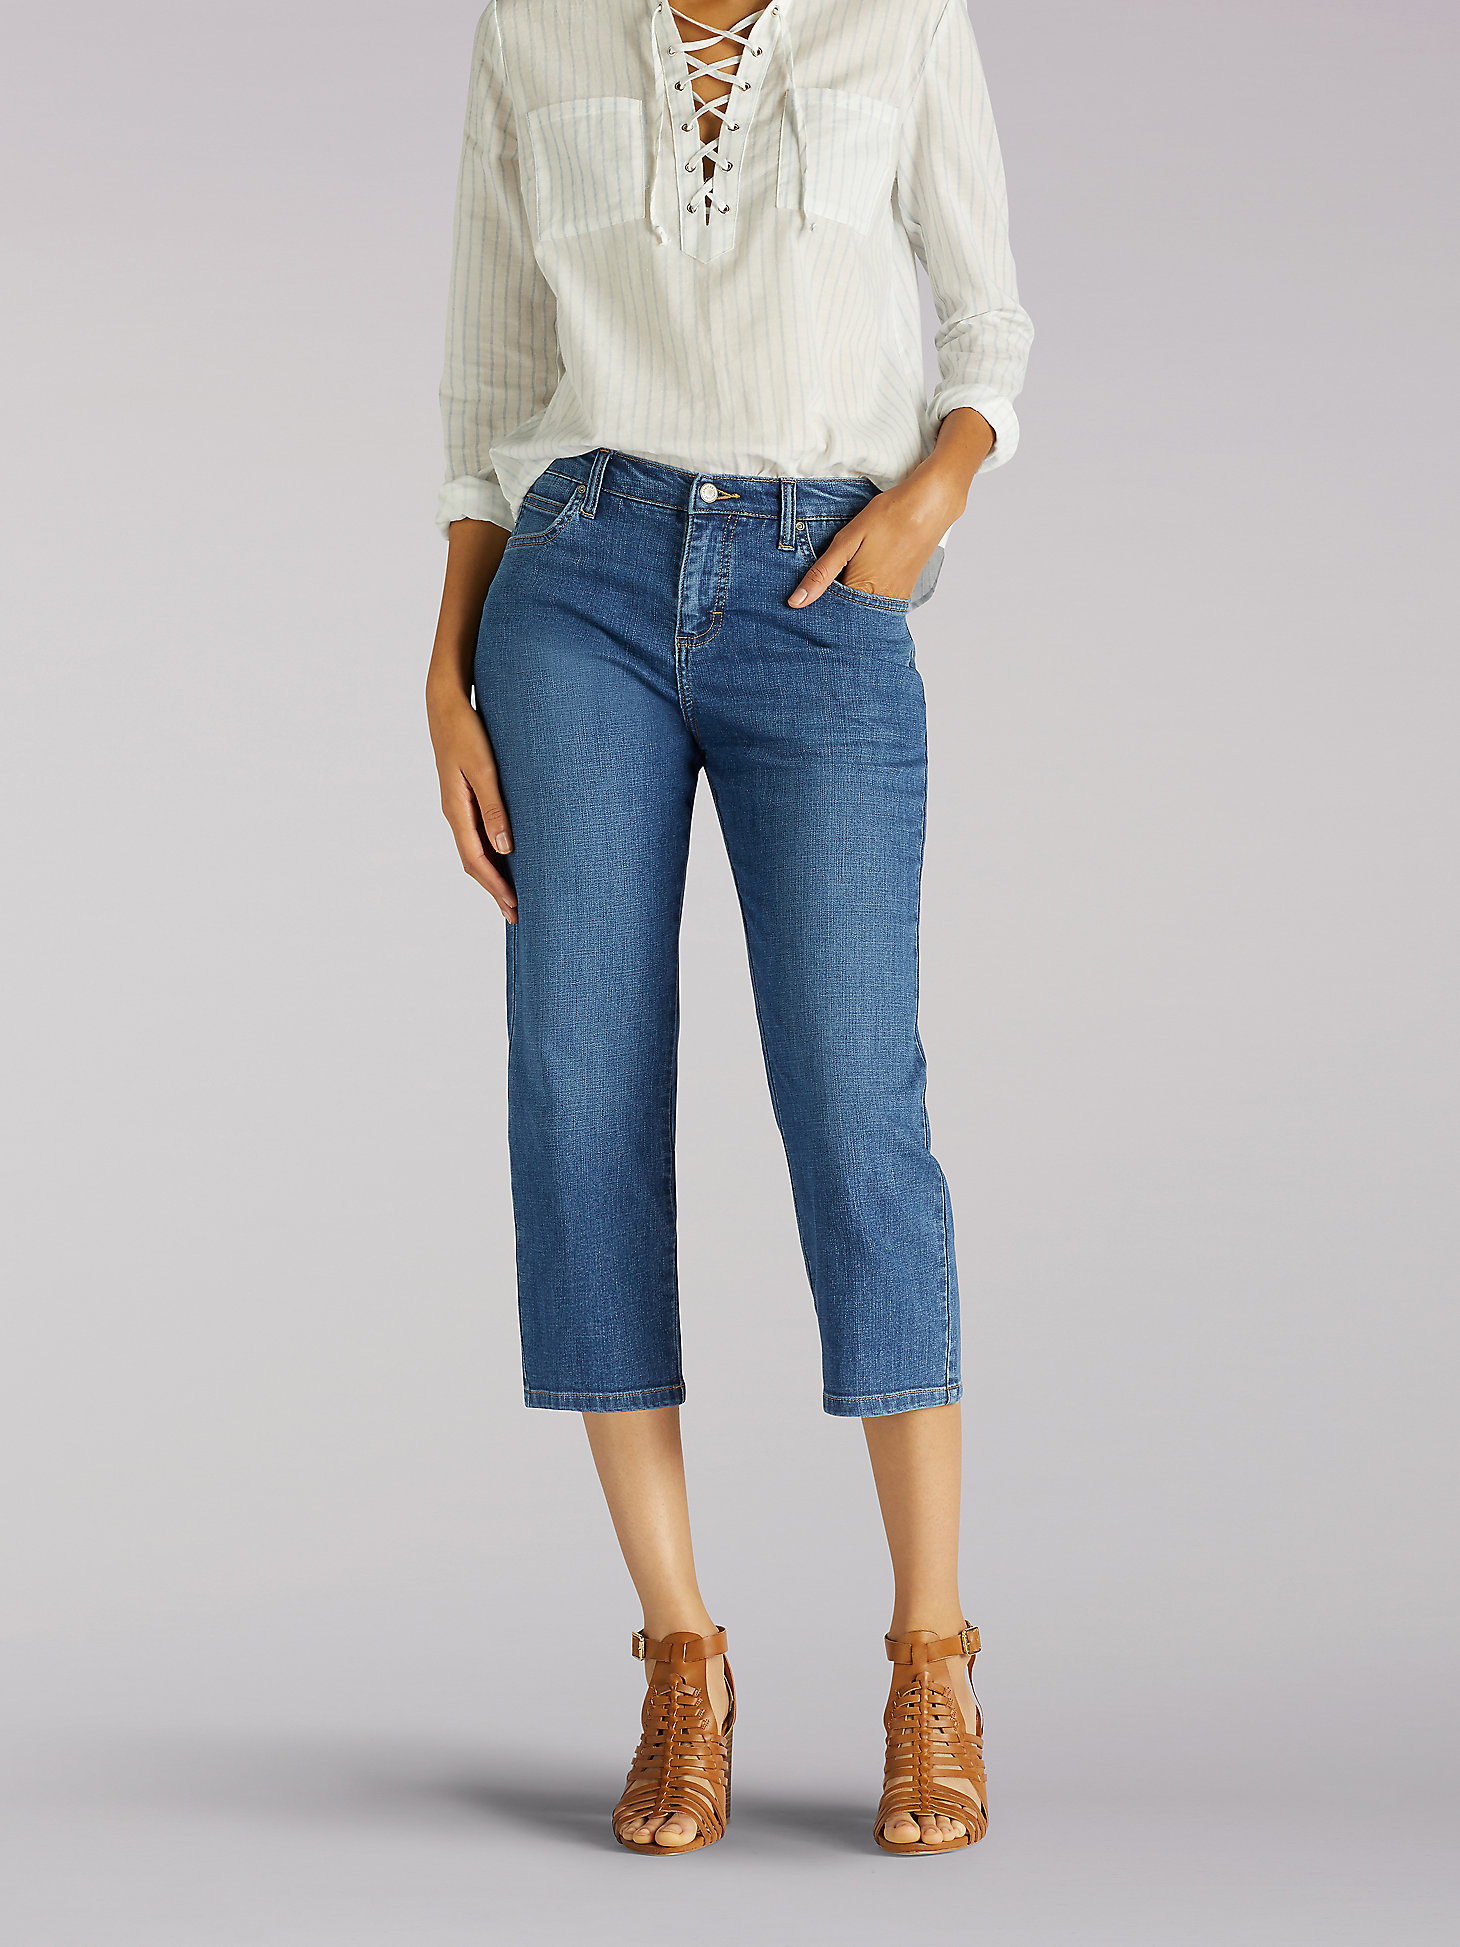
CROPPED
These jeans typically end just below the mid-calf or at the ankles, which is why they are often referred to as ankle jeans. This length offers a chic, tailored appearance, making them a versatile option that can be styled with both casual and dressier outfits.
ANKLE LENGTH
Ankle-length jeans are specifically designed to end right at or just above the ankle. This style is especially popular among skinny and straight-leg jeans, as it provides a sleek, polished look that pairs well with various types of footwear, from heels to sneakers.
FULL LENGTH (REGULAR LENGTH)

This is the standard length for jeans, typically fitting most people without the need for alterations. While exact measurements can vary slightly by brand, this length generally accommodates individuals of average height. Within this category, you can find regular lengths tailored for tall or petite women. For men, regular lengths often include additional measurements in inches, such as a 32-inch length, providing a better fit for various body types.
CUFFED, ROLLED OR FOLDED
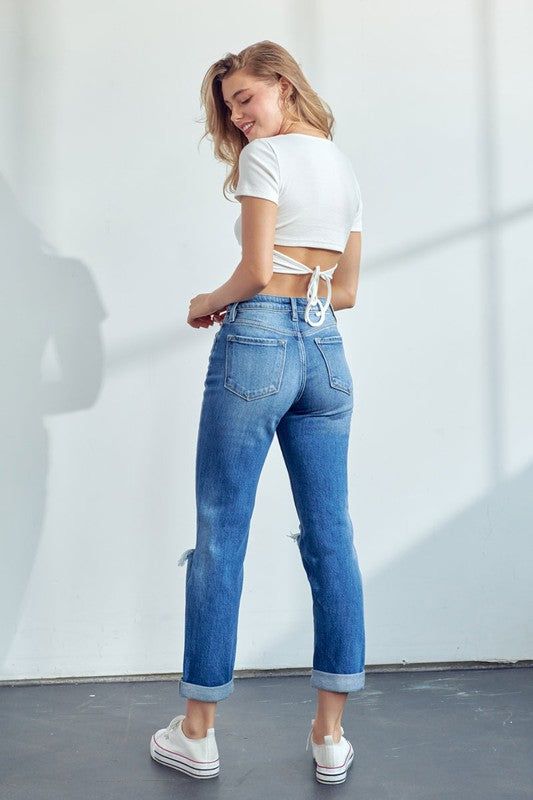
In contrast to cropped and Capri jeans, the shorter length of this style isn’t due to being cut shorter; instead, it features cuffed, folded, or rolled hems. This design exposes the denim undersides at the bottom of the jeans, adding a casual and stylish flair to the overall look. This versatile option can be dressed up or down, making it a great addition to any wardrobe.
TYPES OF JEANS BY RISE
When discussing jeans styles, the rise refers to the position of the waistband and how far up the stomach it sits. Different rise options can significantly impact both fit and style, ranging from low-rise to mid-rise and high-rise, allowing you to choose the best option for your body shape and personal preference.
HIGH-RISE (HIGH WAISTED) JEANS
These jeans have a rise that sits above the natural waistline, typically around the height of the belly button. They are favored for their ability to create a defined waistline and offer a vintage feel, making them a stylish choice that pairs well with various tops and adds a flattering silhouette to any outfit.
REGULAR RISE (ORIGINAL RISE)

Regular rise jeans provide a comfortable fit that sits at the natural waist. This classic style is more traditional and relaxed, making it a versatile option that works well for various body types and can be easily paired with different tops for both casual and formal looks.
MID-RISE JEANS (MEDIUM RISE)
The mid-rise jean style sits between the hip and the belly button, making it one of the most popular rise options. This style offers a comfortable fit and flatters a wide range of body types, making it a versatile choice for everyday wear. Mid-rise jeans pair well with various tops, from casual tees to dressier blouses.
LOW-RISE JEANS
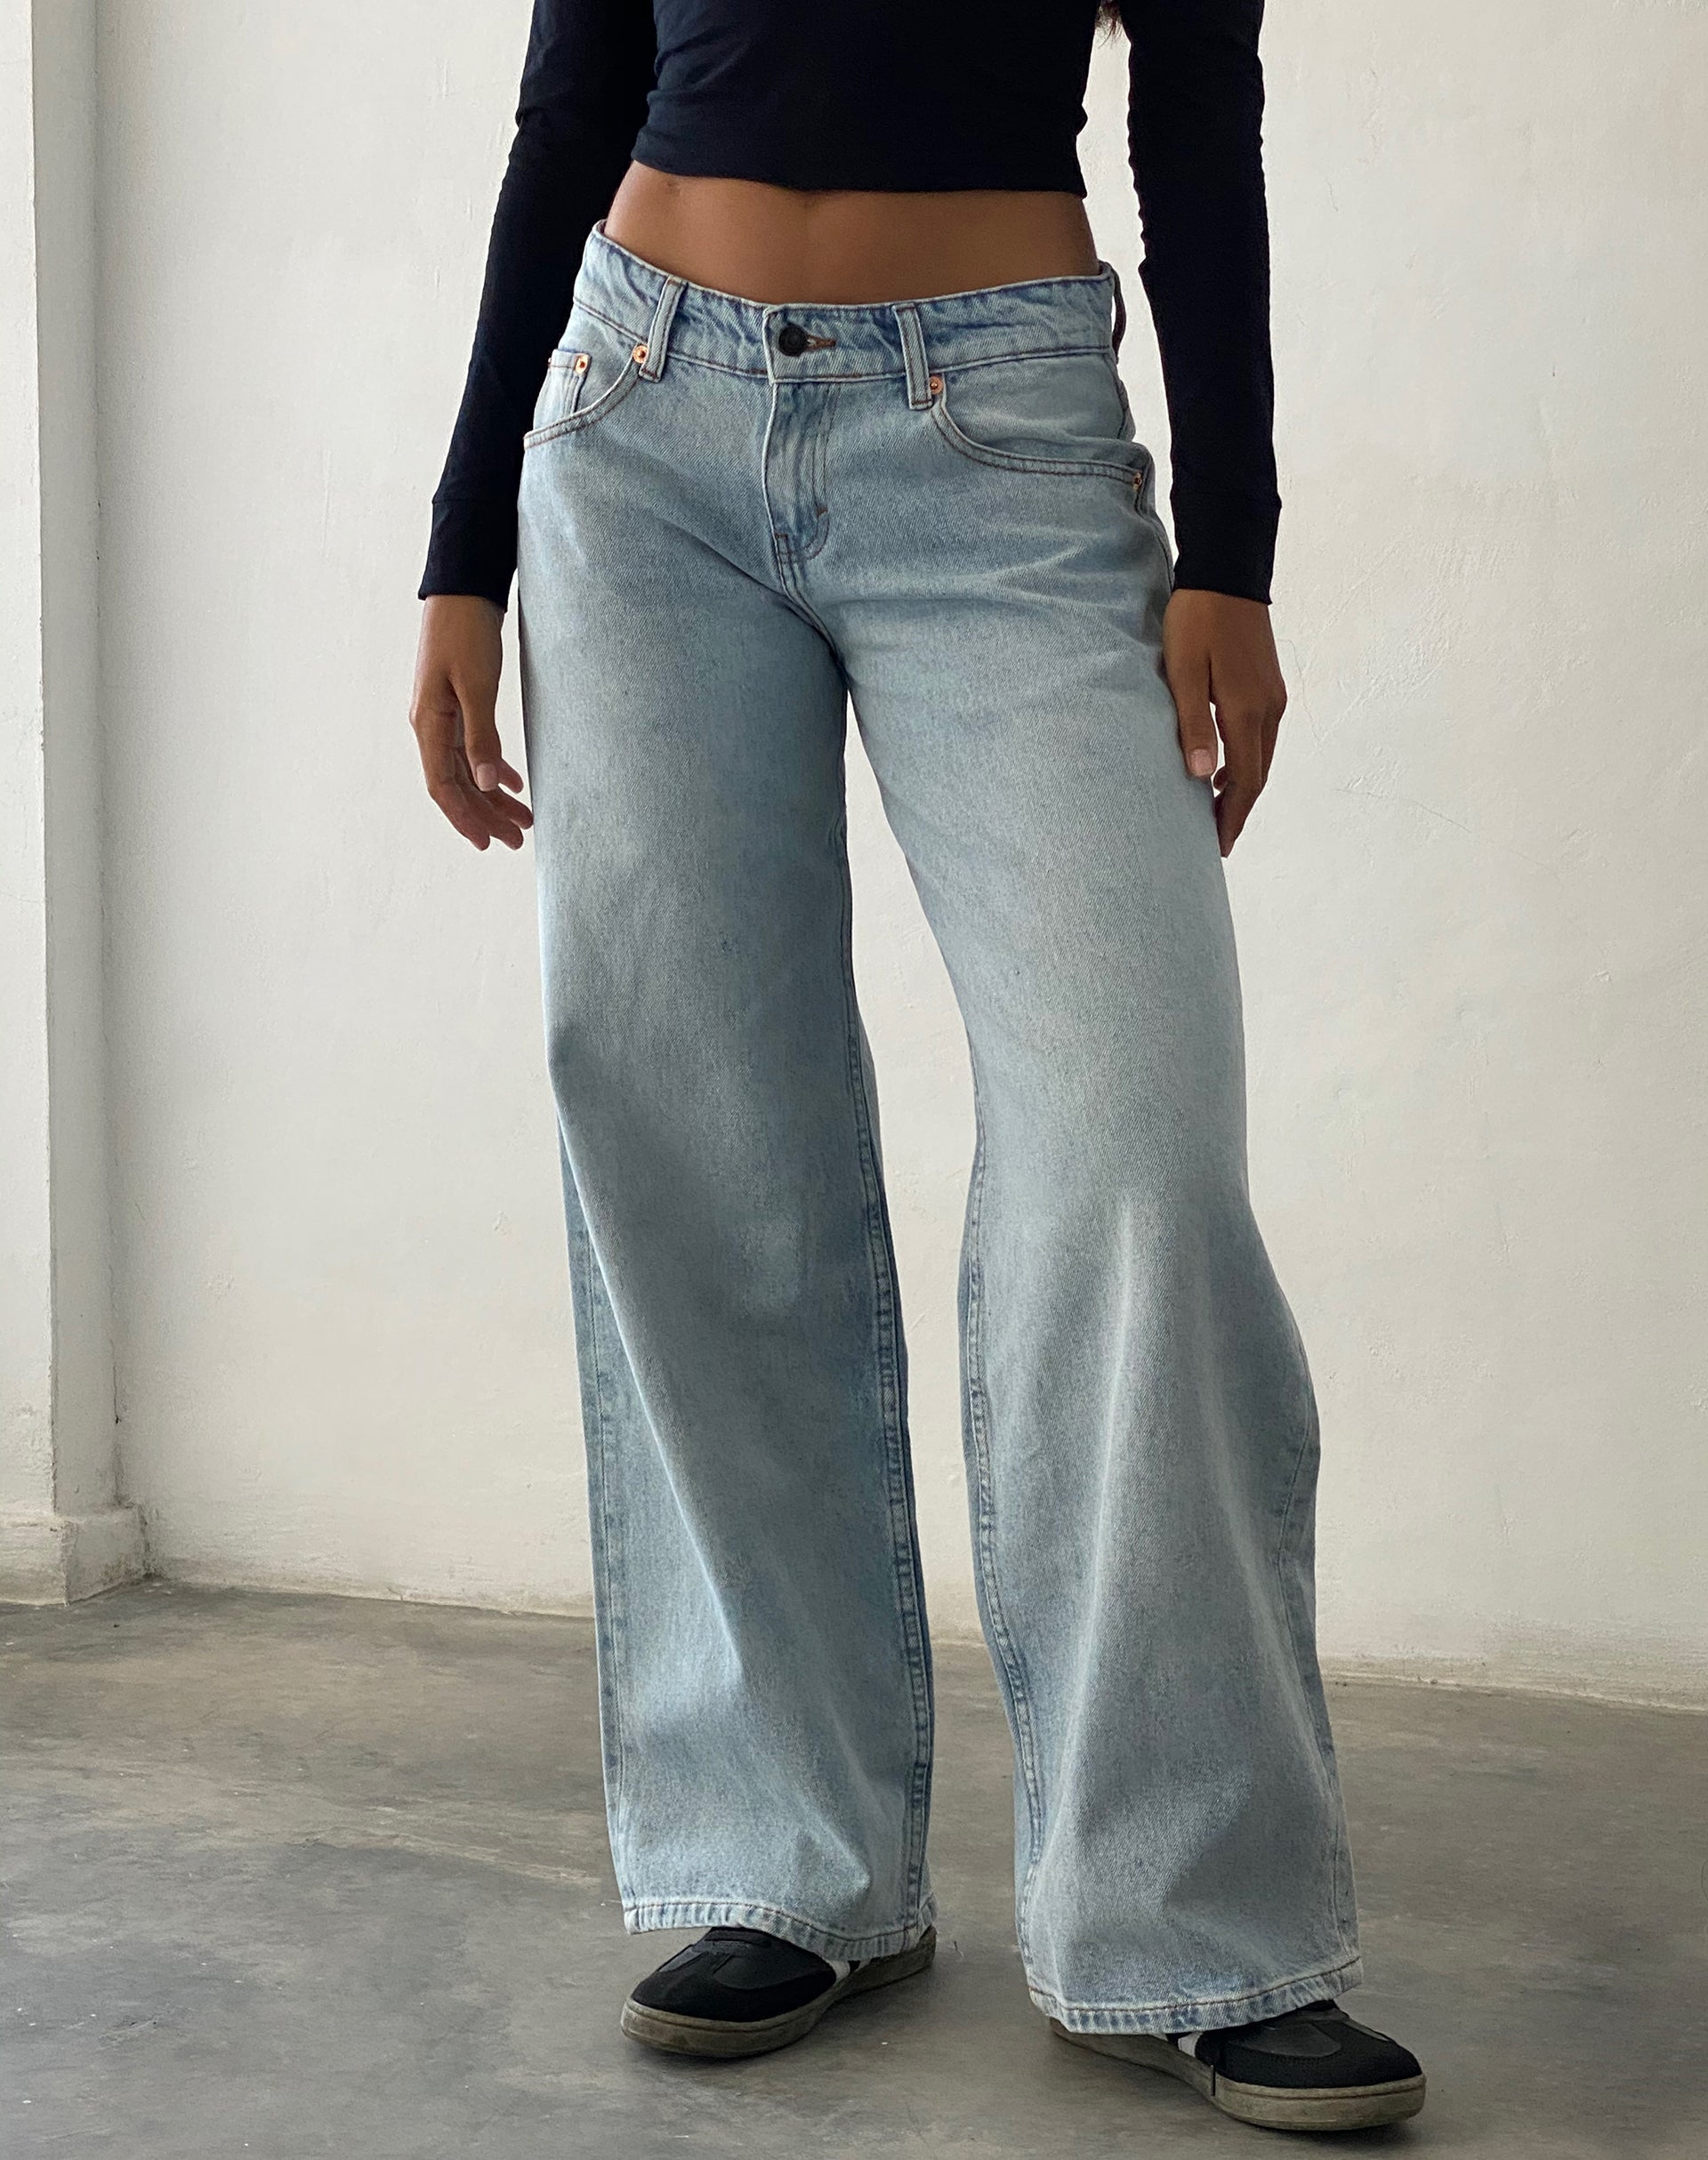
Low-rise jeans sit several inches below the belly button, typically at hip level. While they can create the illusion of an elongated torso, they offer less coverage than mid-rise jeans. This style is popular for its trendy, casual look and is often paired with crop tops or fitted shirts for a stylish ensemble.
ULTRA-LOW RISE
These are an even more extreme version of low-rise jeans, sitting well below the hips. This style was particularly popular in the late ’90s and early 2000s, often associated with a bold, carefree fashion aesthetic. They can be styled with crop tops or fitted shirts for a nostalgic look that brings back that era’s iconic vibe.
CONCLUSION
By exploring the 40 types of jeans discussed in this article, you can discover versatile pieces that complement your personal style and enhance your overall look. Remember, the key to finding the right jeans is to consider your body shape, desired aesthetic, and comfort level. Experiment with different styles and washes to find the ones that make you feel confident and stylish. With so many options available, there’s no excuse not to embrace the timeless appeal of denim and elevate your wardrobe game.