2023 Tutorial on Acrylic Nails – Guide to Achieve Beautiful and Long-Lasting Nails

Acrylic nails have long been a popular option for those wanting to add length and strength to their natural nails. Whether you are looking to achieve a classic French manicure or experiment with bold and colorful designs, acrylics can offer endless possibilities. The process of applying acrylic nails may seem daunting at first, but with the right tools and techniques, it can be done easily at home. Check out these steps to achieve long-lasting acrylic nails.

What Are Acrylic Nails?

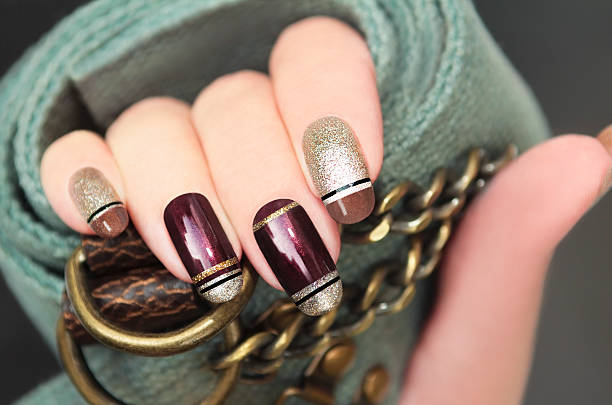
Acrylic nails are a type of artificial nail that is made by applying a mixture of liquid and powder to your natural nails. This mixture forms a hard, durable layer that is then shaped and polished to create the desired look. Acrylic nails can be applied in a variety of shapes and lengths, and can be customized with different colors, patterns, and embellishments.

Materials Needed

Before you begin the process of applying acrylic nails, it is important to make sure you have all the necessary materials on hand. Here is a list of items you will need:

  • Acrylic nail kit (includes acrylic liquid, acrylic powder, and a brush)
  • Nail file
  • Cuticle pusher
  • Nail buffer
  • Nail polish remover
  • Cotton balls or pads
  • Paper towels
  • Nail clippers
  • Nail glue
  • Optional: nail tips, nail primer, and top coat

Step-by-Step Guide

Now that you have gathered all your materials, it’s time to start the process of applying acrylic nails. Follow these steps carefully to achieve the best results:

Step 1: Prepare Your Nails

Before you begin, make sure your nails are clean and dry. Remove any old nail polish with acetone-based nail polish remover and cotton balls or pads. Use nail clippers to trim your nails to the desired length, and file them into the desired shape. Be sure to file in one direction to avoid damaging the nails.

Step 2: Push Back Your Cuticles

Use a cuticle pusher to gently push back your cuticles. This will create more space on your nails for the acrylic to adhere to. Be careful not to push too hard or damage the delicate skin around your nails.

Step 3: Apply Nail Tips (Optional)

If you want to add extra length to your nails, you can apply nail tips before applying the acrylic mixture. Choose tips that match the shape and size of your natural nails, and use nail glue to attach them to the tips of your nails. Trim the tips to the desired length using nail clippers, and file them into shape.

Step 4: Apply Nail Primer (Optional)

If you are using nail tips, it is recommended to apply a nail primer to help the acrylic adhere better. Apply a small amount of primer to each nail tip, and let it dry completely before moving on to the next step.

Step 5: Mix the Acrylic

Now it’s time to mix the acrylic liquid and powder. Follow the instructions on the kit carefully, as the ratio of liquid to powder may vary depending on the brand. Use the brush included in the kit to mix the two components together until they form a smooth, creamy consistency.

Step 6: Apply the Acrylic

Using the brush, apply a small amount of acrylic mixture to the back of the nail tip (if you are using tips) or directly onto your natural nails. Be sure to apply the mixture evenly and smoothly, starting at the base of the nail and working your way towards the tip. Repeat this process on each nail, but work quickly to avoid the mixture drying out.

Step 7: Shape and Buff the Acrylic

Once the acrylic mixture has dried, use a nail file to shape and smooth out any rough edges or bumps. Be careful not to file too much, as this can weaken the nails. Next, use a nail buffer to gently buff the surface of the nails until they are smooth and shiny.

Step 8: Apply Top Coat (Optional)

For added protection and shine, you can apply a top coat of clear nail polish over the acrylic nails. Be sure to let it dry completely before using your hands to avoid smudging or chipping.

And that’s it! You have successfully applied acrylic nails at home. With proper care and maintenance, your new nails should last for several weeks before needing to be filled in or removed.

Tips for Maintaining Your Acrylic Nails

To keep your acrylic nails looking their best, here are some tips for maintaining them:

  • Avoid exposing your nails to harsh chemicals or excessive water, as this can cause the acrylic to lift or chip.
  • Wear gloves when doing household chores or working with your hands to protect your nails.
  • Moisturize your cuticles and nails regularly to prevent dryness and cracking.
  • Avoid biting or picking at your nails, as this can cause damage to both the acrylic and your natural nails.
  • Get your nails filled every two to three weeks to maintain their strength and appearance.

FAQs

  1. How long do acrylic nails last? Acrylic nails can last for several weeks if properly maintained, but it is recommended to have them filled in every two to three weeks to keep them looking their best.
  2. Can I remove acrylic nails myself? While it is possible to remove acrylic nails yourself at home, it is recommended to have them removed by a professional nail technician to avoid damaging your natural nails.
  3. Will acrylic nails damage my natural nails? If applied and maintained properly, acrylic nails should not cause damage to your natural nails. However, if they are removed improperly or left on for too long without being filled in, they can weaken and damage your natural nails.
  4. Can I paint my acrylic nails? Yes, you can paint your acrylic nails with regular nail polish. Just be sure to let the polish dry completely before using your hands to avoid smudging or chipping.

Get Trendy with These 14 Must-Try Nail Designs for the Perfect Manicure

Your nails are the perfect canvas for expressing your creativity and style. Whether you prefer an edgy, grunge or daring or elegant and chic look, there are countless nail designs to choose from that can take your manicure to the next level. If you’re struggling with finding the perfect design for you, we’ve you covered because here are the top 14 nail designs you should try out

Almond Shape Acrylic Nails

Almond shape acrylic nails are a popular and stylish choice for those looking to upgrade their nail game. The almond shape is elegant, feminine and can make your hands look slimmer and more elongated. 

They can also be customized with a variety of colors and designs, from bold and bright to understated and elegant. Experiment with different nail polishes, glitters, and nail art to make your almond-shaped acrylic nails truly unique.

Ombre Nails With Glitter

For those who like sparkling nails with a subtle change of colors, this nail design is what you ever need.

Ombre nails are a design that every girl should at least try once as they never go out of style. If you’re wanting to jazz up these classic nails, adding glitter is really a game changer.

Sparkle Glitter French Tip Nails

The French manicure is the classic of the classic nails, you can find them at every nail salon. Even French tips are the classic, vintage kind of nails but that doesn’t mean they can’t get a remix.

One of our recommended remixes to this design is adding holographic tips or glitter.

Neon Bright Summer Nails

Neon bright summer nails are the perfect way to add some bold and vibrant color to your manicure during the summer months. This trend has been popular for years, and it’s not going away any time soon! 

This design can be spiced up with details like French tips, glitter and some cute, vibrant charms.

Black and Purple Nails

Dark purple is a color that is often associated with royalty, luxury, power, and ambition. In other beliefs, it is mostly linked to the highest chakra. Black and purple nails are always giving off a very witchy, dark vibe. That’s why sparkles, glitter and constellations are always seen on these nails.

Rose Gold Burgundy Nails

If you are tired of all the bright and pastel shades separately or even combined together, burgundy is a perfect choice. And if a full set of burgundy matte nails is way too dull for you, adding rose gold to it is not a bad idea at all as the rose gold color can really bring out your nails.

Coffin White Tip Nails

Coffin white tip nails are a classic and sophisticated choice for those who love a clean and polished look. The coffin shape is sleek and modern, and the white tip adds a touch of elegance to this timeless design.

You can also spice up coffin white tip nails with glitter, rhinestones or charms, anything can go well with this basic design.

Classy Red Tip Nails

When it comes to choosing a nail’s color, red is the first color that comes up in everyone’s mind. Just like red lipstick, people assume that red is a little bit too much for a casual look but in fact, there’s nothing wrong about looking “Too much” sometimes. This design is perfect for those who want a simple yet elegant look that will complement any outfit.

Orange and Pink Nails

Orange and pink nails are a bright and cheerful nail design that is perfect for summer or any time you want to add a pop of color to your look. This design combines two bold and vibrant colors that complement each other beautifully. If you like bright, hot colors in the summer, this is the set for you.

Nude and White Nails

If you’re deciding what to do with your next manicure, why don’t you add nude and white nails to your list. Nude clothing has been a thing with minimalists in these recent years as they’re simple yet flattering. Nude nails can also elongate your fingers, giving your hand a more elegant look. Adding white details to this design will jazz up your nails a lot.

Summer Neon Green Nails

Neon-color nails might not be everyone’s first choice when it comes to nails but that doesn’t mean they can’t look good. Summer neon green nails are a bold and intense choice for those who want to make a statement with their nails. This design is perfect for summer when bright and bold colors are all the rage.

Brown French Tip Nails

Are you struggling with finding nails that can pull off every outfit of you, we have the answer you need. Brown French tip nails are what you need. Brown French tip nails are the best friends of all indecisive ladies out there. Since this design has a very minimalistic, elegant vibe yet sexy and luxurious, they’re many women’s “Go-to” nail set.

Classy Short French Nails

If you’re not a fan of long nails or nail extensions but you also want to look fabulous and chic like those long-nail girls, then we are very sure that you should go for a set of classy short french nails. They are short which makes chores, working out or any other tasks you have, done easy. And don’t worry about having dirt under those nails since the minimal size of them makes sanitizing your hands much better.

Cute Cow Print Nails

To those who love animal prints and cute, trendy stuff, this is the nail set for you. This design is so versatile and popular that you can easily find a set that suits your taste, from plain black-and-white details to colorful and pastel patterns.

If you’re on a budget but still want fabulous-looking nails, you might want to know more about Olive and June press on nails. Olive and June press on nails are a popular and convenient way to achieve a salon-quality manicure at home. This is a brand that offers a wide range of press on nails in various styles and designs, allowing you to choose the perfect set for your preferences.

To apply Olive and June press on nails, start by prepping your natural nails. Buff them gently and push back your cuticles, then clean them with rubbing alcohol to remove any oils or residue.

Next, choose the right size of press on nails for each of your natural nails. Olive and June offers a variety of sizes to ensure a perfect fit.

Apply a small amount of nail glue or adhesive to the back of the nail, then press it onto your natural nail. Hold it in place for a few seconds to ensure a secure bond.

Repeat this process for each of your nails, making sure to adjust the size and shape of the press on the nail as needed.

Once all of the press on nails are in place, you can choose to add some extra embellishments or designs, such as rhinestones or glitter.

Olive and June press on nails are designed to last up to two weeks, depending on how well you care for them. To remove them, simply soak your nails in warm water for a few minutes to loosen the adhesive, then gently peel them off. With a wide range of styles and designs to choose from, you can switch up your look whenever you want without any commitment.

Nails are a versatile and fun way to express your personal style and add some extra flair to your look. From the timeless elegance of French tip nails to the playful whimsy of cow print nails, the options are endless. So go ahead and experiment with different colors, shapes, and styles, and don’t be afraid to make it your own. With these top 14 nail designs as inspiration, you’re sure to find something that suits your taste and personality.