WHAT IS QUIFF HAIRSTYLE?

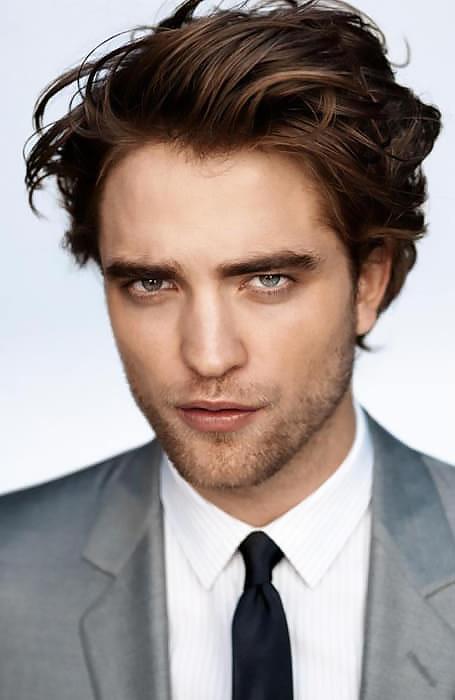
One of the most legendary men’s haircuts, the quiff has been making waves since the 1950s, securing its spot among timeless styles like the French crop, buzz cut, and short back and sides.

Blending elements of the pompadour, flat top, and even the mohawk, this bold, voluminous style commands attention while complementing a variety of face shapes, ages, and personal aesthetics.

Research also suggests it’s one of the most attractive hairstyles to women. In a survey conducted by styling brand Fudge, 28 percent of 2,000 women said they would be most likely to swipe right on a man sporting a quiff.

WHAT IS THE QUIFF?

The quiff is a classic men’s hairstyle that you’ve likely seen before. It’s defined by shorter hair on the sides and back, with a longer, voluminous top. While this description applies to several styles, what makes the quiff unique is how it’s styled.

The hair on top is lifted to create volume and then combed back, achieving a sleek yet textured look with a strong vertical focus at the front. The sharp contrast between the different lengths adds an edgy, modern appeal that shares similarities with the timeless pompadour.

Blending elements of the pompadour, flat top, and even the mohawk, the quiff makes a bold statement. Its versatility allows it to complement various face shapes, ages, and personal styles.

Research also suggests it’s one of the most attractive men’s hairstyles. In a survey by styling brand Fudge, 28 percent of 2,000 women said they were most likely to swipe right on a man sporting a quiff.

THE HISTORY OF THE QUIFF

Although the quiff had been around for years, it truly gained popularity after World War II as a rebellious response to the military buzz cuts and strict wartime styles. However, it became a cultural icon with the rise of rock ‘n’ roll, symbolizing youthful defiance.

“As a style, it has always represented rebellion, and it screams confidence,” says ReeRee Rockette, owner of Rockalily Cuts. “It’s a hairstyle that literally takes up more space, so it makes you stand out and gets you noticed.”

The quiff’s signature height often meant it would fall forward throughout the day, requiring regular upkeep. This maintenance became part of its charm, with Elvis Presley famously turning the act of fixing his hair into an effortlessly cool and flirtatious gesture—just as iconic as his hip shakes or microphone caresses.

Beyond fashion, the quiff also played a role in shifting male grooming culture. It encouraged men to take greater pride in their appearance, paving the way for the grooming revolution we see today. In short, the quiff didn’t just influence hairstyles—it helped change the way men approached personal style.

THE QUIFF VS. THE POMPADOUR

There’s often debate about how the quiff differs from the pompadour, another classic cut. In general, the quiff is a more understated version of the dramatic, top-heavy pomp worn by rock ‘n’ roll icons like Little Richard and later, Bruno Mars.

“In truth, there’s no black and white answer,” says Devon-based barber Tom Chapman, founder of The Lions Barber Collective. “A typical quiff features short back and sides, and longer hair on top that’s swept upwards and backwards at the front. But this can be messy, straightened, or brushed, making it a generally more versatile style. Pompadours are similar in that they take the hair off, up, and away from the face, but are usually glossier and very precise.”

While pompadours lift all the hair for a dramatic effect, quiffs primarily emphasize the forelock—the section just above the forehead—while the rest of the hair can remain relatively flat.

“Ask your barber for a tapered cut with plenty of length on top, and you can’t really go wrong,” Chapman advises.

BEST QUIFF HAIRSTYLES FOR MEN

Looking to update your hairstyle? Here are some of the best quiff hairstyles for men to inspire your next visit to the barber.

THE CLASSIC QUIFF

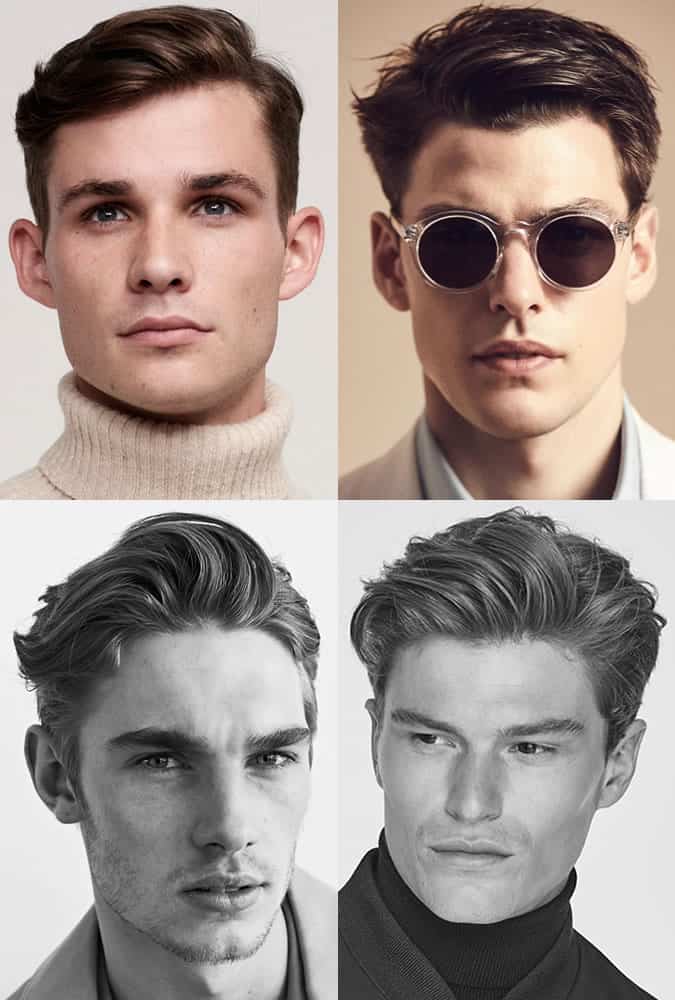
Timeless and effortlessly stylish, the classic quiff has remained a favorite for decades. Unlike modern variations, this version features a softer contrast between the longer top and shorter sides, creating a balanced look.

When getting this cut, ask your barber for around four to five inches of length on top, with slightly more at the fringe. The sides should be trimmed short but not disconnected, and a fade isn’t necessary.

For styling, go easy on the products to avoid weighing down your hair. After washing, towel dry and apply a matte paste as a pre-styler. Then, use a comb or your fingers while blow-drying to create volume. Finish with a light pomade for definition and shine—just rub a small amount between your palms and work it through your hair from front to back.

THE ROCKABILLY QUIFF

While the pompadour has been getting a lot of attention, the rockabilly quiff is a more relaxed and versatile choice. Worn by icons like James Dean and Elvis Presley, this vintage-inspired style remains effortlessly cool.

A classic rockabilly quiff typically features a side part, which can be either shaved in or combed. It’s lower in height compared to a pompadour, and the top is usually faded into the sides. Some variations also include a ducktail, where the side sections are curled inward at the back.

For styling, pomade is your best friend. Warm it up between your hands, smooth it through your hair, and comb everything into place. A hairdryer can help set the style, and a comb is essential for achieving a polished finish.

THE UNDERCUT QUIFF

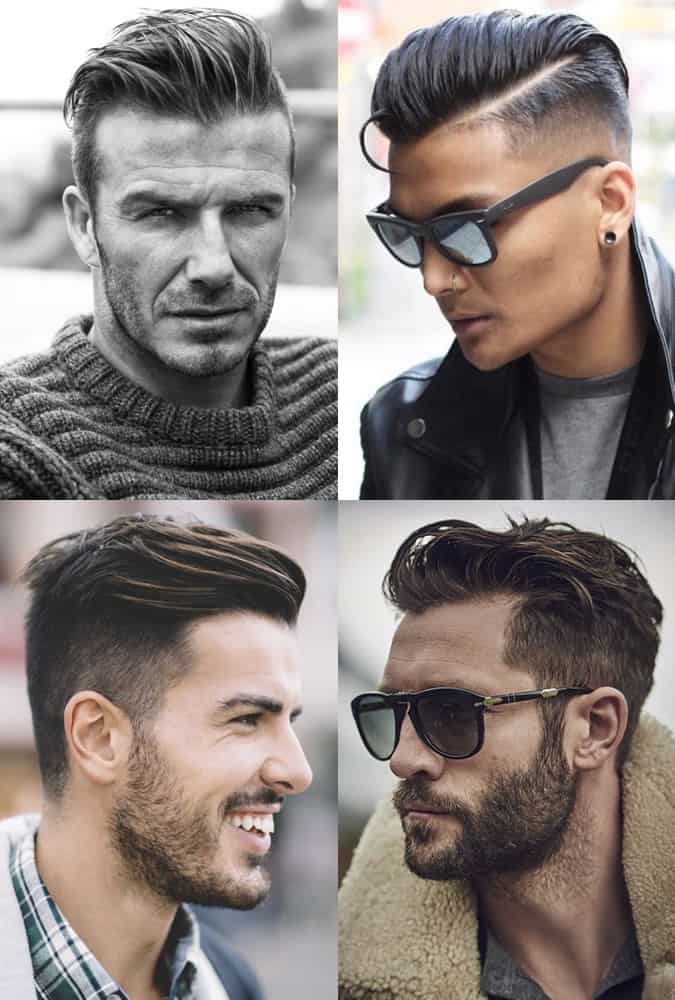
For a modern and edgy twist, the undercut quiff blends vintage appeal with contemporary sharpness. This style relies on the contrast between the long top and short, disconnected sides, creating a bold, statement look.

To achieve this cut, ask your barber to disconnect the sides from the top at your recession point, extending to the back of your ear. You can choose either a soft taper or a sharp fade for the undercut, depending on how dramatic you want the contrast to be. The top should be textured and left long enough for a voluminous quiff.

For styling, start with a salt spray on damp hair and use a round brush while blow-drying to build volume. Finish with a matte clay for a textured, separated look.

THE PSYCHOBILLY QUIFF

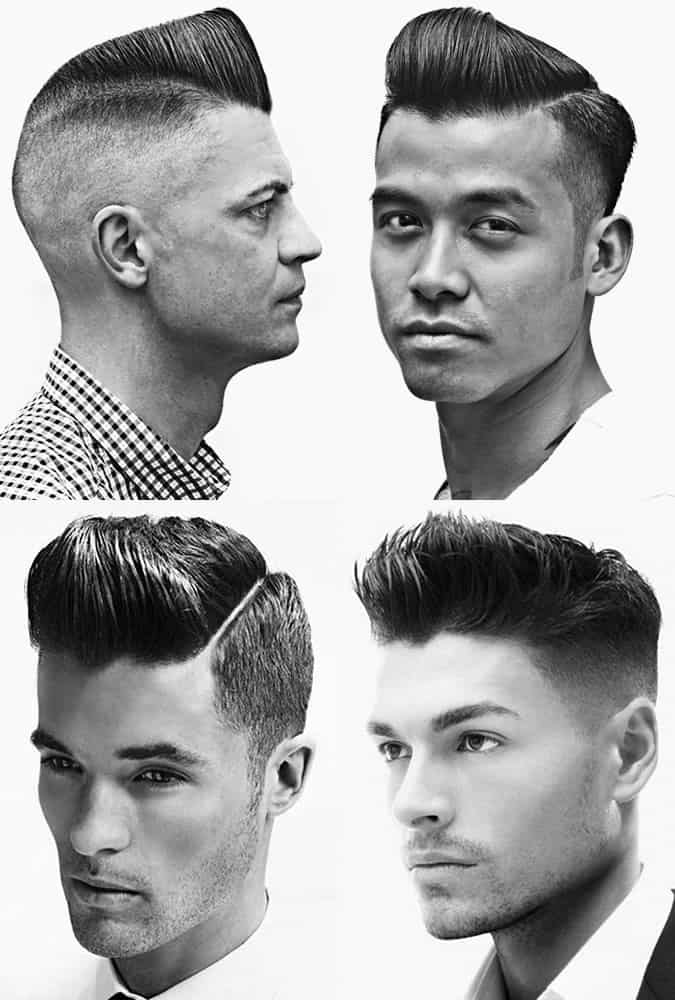
The psychobilly quiff, also known as the wedge quiff, is a bold, punk-inspired take on the style. With its sharp, sculpted shape and shaved sides, this look is a fusion of rockabilly and mohawk aesthetics.

This extreme style involves shaving the back and sides down to a zero, leaving only a high, gravity-defying quiff at the top. It’s a high-maintenance choice that may not suit all workplaces, but a looser, less structured version can make it more wearable.

To style, you’ll need strong-hold pomade, a hairdryer, and a comb. Every strand should be coated with product to help maintain height, and a finishing spray can provide extra hold against gravity.

THE TEXTURED QUIFF

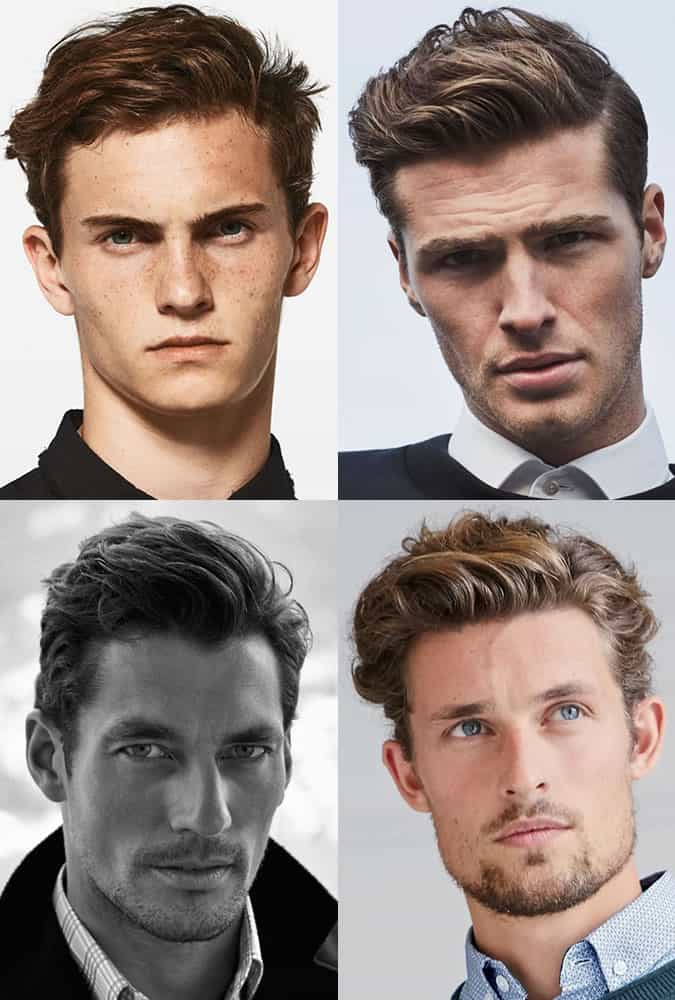
If you prefer a more relaxed, effortless look, the textured quiff is a great option. Worn by style icons like David Gandy, this version is less polished and more natural, making it perfect for men with wavy or unruly hair.

For this cut, ask your barber to clipper the sides short with a fade, while the top is point-cut with scissors for an uneven, textured finish.

Styling starts with a texture powder or volumizing spray at the roots to add depth. Then, warm a small amount of styling paste or soft clay between your hands, twist sections of the hair at the sides, and push the quiff upward until you achieve your desired look.

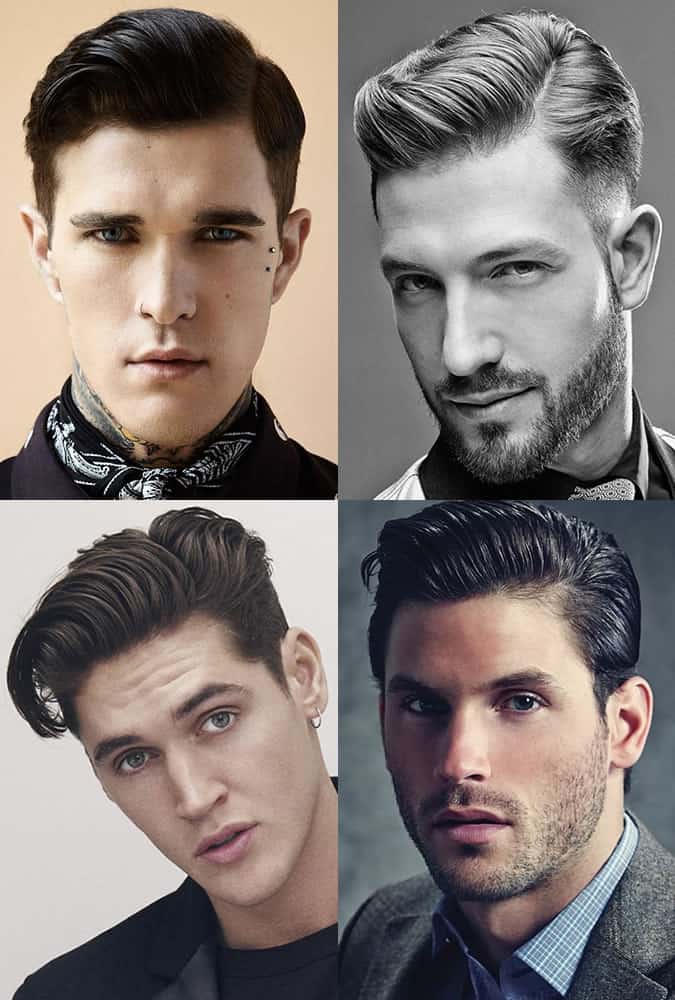
THE SIDE-PARTED QUIFF

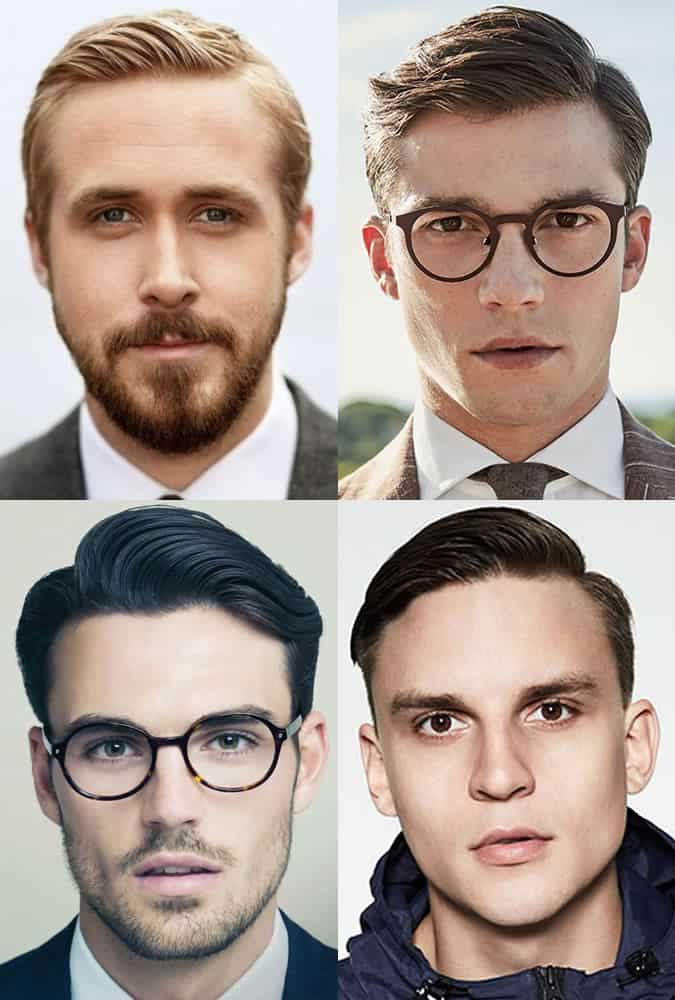
A simple way to give a quiff a more polished and refined look is by incorporating a side part. While this can be done with most types of quiffs, if you’re aiming for a consistently sharp style, it’s best to mention it to your barber.

To achieve this look, celebrity hairstylist Asgar Saboo recommends using your palms to smooth styling product into the sides of your hair. Then, comb the top section away from the part to create a clean divide, lifting and shaping the fringe as desired.

For a sleek, structured finish, use a comb to perfect the shape. If you prefer a more relaxed, rugged effect, simply tousle it with your hands. You can also customize the overall vibe by selecting the right styling product—high-shine options give off a classic Ivy League feel, while matte products create a more casual and contemporary look.

THE SLICKED-BACK QUIFF

Channel a sleek, 1960s-inspired look with a slicked-back quiff—so polished, you could practically check your reflection in it.

This retro take on the modern quiff adds a sophisticated edge and works well for both everyday and formal occasions. Achieving the perfect shine, however, requires a generous amount of styling product and careful application. Once your hair is evenly coated, use a comb to sculpt the ideal shape.

For an extra touch of drama, consider adding a side part to this already eye-catching style. While it’s best suited for thick, wavy hair, even those with finer hair can pull off a slicked-back quiff with the right products and technique.

THE FADED QUIFF

For a modern twist, pair your quiff with a classic taper or fade. Unlike the dramatic contrast of an undercut quiff, the fade here is more subtle and gradual, creating a clean, professional look with a hint of sophistication.

This style is particularly popular among the preppy crowd and makes an excellent choice for daily wear, as it requires minimal styling. A quick application of product, a simple run-through with your fingers, and you’re good to go.

The faded quiff works well for a variety of hair types, including fine or thin hair. Whether worn slicked back or slightly tousled, this cut is a versatile option for those seeking a polished yet effortless look.

THE LONG HAIR QUIFF

Not ready to sacrifice your length for a quiff? The good news is, you don’t have to. Men with longer hair can still rock a quiff by keeping the sides and back shorter while allowing the top to grow out.

Styling a long-hair quiff requires extra effort, but with a strong-hold product and a blow dryer, you can achieve impressive volume. When properly slicked back, this style appears sharp and refined.

To highlight the contrast between the longer top and shorter sides, tuck your hair behind your ears. On days when you prefer a more relaxed look, let your hair hang naturally for a curtain-inspired or eBoy aesthetic.

THE CURLY QUIFF

Curly-haired guys can absolutely pull off a quiff—it just takes a slightly different approach. A curly quiff tends to have a more tousled, effortless appeal and pairs exceptionally well with facial hair. The same applies to wavy-haired men looking for a stylish, textured cut.

For a more rugged, laid-back vibe, let your curls grow out for a messy quiff. If you prefer a sharper, neater style, opt for tapered sides to create a refined contrast. Either way, texture is the key feature, so embrace your natural curls.

When styling, follow the same basic steps as any quiff, but go easy on the blow dryer to maintain volume and definition. Use minimal product to keep your curls from looking weighed down or flattened.

This version keeps all the key details while making the text smoother and more engaging! Let me know if you’d like any further tweaks. 

CONCLUSION

In essence, the quiff is more than just a hairstyle; it’s a statement. Its enduring popularity stems from its adaptability, allowing individuals to express their personal style while maintaining a classic and sophisticated look.

PERSONLIZED FALL WREATHS FOR FRONT DOOR

As autumn arrives, bringing with it the rich colors of orange, red, and yellow, it’s the perfect time to embrace the beauty of the season. A wonderful way to usher in fall is by crafting your own DIY fall wreath. This charming decoration adds a personal touch to your home and sets a warm, welcoming tone for visitors. In this step-by-step guide, we’ll show you how to create customized fall wreaths that reflect your unique style while boosting your home’s curb appeal.

Selecting Foliage and Accents

The foliage you choose plays a key role in shaping the overall aesthetic of your wreath. Here are some popular options for fall foliage:

  • Autumn Leaves: Faux leaves in rich shades of orange, red, and yellow are perfect for capturing that classic fall feel. Look for varieties with different textures to create depth and visual interest.
  • Evergreens: Sprigs of pine or cedar add a refreshing contrast to the warm autumn hues. They also bring a lovely, natural fragrance, enhancing the sensory experience of your wreath.
  • Dried Flowers: Flowers like lavender, wheat, and grasses add an earthy, rustic element to your wreath, bringing texture and visual interest to the design.
  • Seasonal Fruits: Small fruits like apples, berries, or even dried citrus slices can introduce vibrant pops of color and a playful, whimsical touch to your wreath.

Why a Fall Wreath Matters

A fall wreath is more than just a decoration; it’s a symbol of warmth, hospitality, and the beauty of nature’s changing seasons. It sets the tone for your home, making a welcoming statement as guests arrive. A thoughtfully crafted wreath can evoke feelings of comfort and nostalgia, reminding us of cozy gatherings, family traditions, and the harvest season. By adorning your front door with a fall wreath, you not only elevate your home’s aesthetic but also offer a heartfelt invitation to friends and family.

Unique Ideas for Customized Fall Wreaths

Personalization is key! Here are some unique ideas for customizing your fall wreath:

  • Monogrammed Wreaths: Add a personal touch by incorporating your family’s initials or last name. Wooden letters or wire-crafted initials can create a distinctive, custom look that makes your wreath truly one-of-a-kind.
  • Pumpkin-Themed Wreaths: Center your design around pumpkins in various sizes and colors. This creates a whimsical, eye-catching focal point that brings a playful and festive vibe to your front door.
  • Rustic Natural Elements: Incorporate twigs, dried flowers, and feathers for an earthy, natural feel. These elements add texture and a touch of nature to your wreath, making it feel grounded and organic.
  • Seasonal Color Palettes: Choose a color palette that reflects the fall season, such as deep burgundies, burnt oranges, and muted yellows. For a modern twist, you could also experiment with metallic accents like gold or copper to add a touch of sophistication to your design.

Choosing Your Wreath Base

Your choice of wreath base is essential, as it provides the foundation for your design. Here’s a closer look at the different types of wreath bases:

  • Grapevine Base: This rustic option offers a natural, organic feel, perfect for creating a relaxed, earthy wreath. It’s flexible and can easily accommodate a variety of decorations, making it a popular choice for fall wreaths.
  • Foam Base: Ideal for a more structured wreath, foam bases provide stability and allow for intricate designs. They’re excellent for securely attaching floral arrangements and other accents, offering a cleaner, more polished look.
  • Wire Base: A lightweight and flexible option, wire bases are perfect for minimalist designs. They allow for easy attachment of various decorations while maintaining a clean and streamlined look.
  • Straw Base: Offering a vintage, rustic charm, straw bases are ideal for traditional fall wreaths. They can be easily adorned with a wide range of materials, adding warmth and texture to your creation.

Exploring Different Styles of Fall Wreaths

When crafting your fall wreath, consider different styles to complement your home decor. Here are some styles to inspire your creativity:

  • Traditional Wreaths: These often feature classic autumn colors and elements, such as vibrant oranges, rich reds, and earthy textures. This timeless style evokes the warmth and coziness of the fall season.
  • Modern Wreaths: For a sleek, contemporary look, consider a minimalist design with monochromatic colors and geometric shapes. This style pairs beautifully with modern home decor, offering a fresh, clean aesthetic.
  • Nature-Inspired Wreaths: These wreaths highlight organic materials such as twigs, dried leaves, and pinecones, showcasing the natural beauty of the season while adding an earthy, rustic touch to your decor.
  • Farmhouse Style Wreaths: Incorporate elements like burlap, galvanized metal, and rustic finishes for a cozy, farmhouse-inspired wreath. This style evokes a warm, inviting atmosphere with a charming, down-to-earth appeal.

How to Make Your Wreath Last Longer

If you want to extend the life of your wreath, consider these additional tips:

  • Use UV-Resistant Materials: If you’re displaying your wreath outdoors, choose materials that are UV-resistant. This will help prevent fading and maintain the vibrant colors of your wreath throughout the season.
  • Spray with Protectant: Use a clear acrylic spray to provide an extra layer of protection against moisture and UV rays. This will help preserve the integrity and color of your wreath, especially if it’s displayed outdoors.
  • Rotate Your Wreath: If your wreath is hung outside, rotate it periodically to ensure even exposure to sunlight and weather. This will help prevent certain areas from fading or becoming damaged more quickly than others.

Materials You’ll Need

Before you start crafting, it’s essential to gather all the materials needed for your project. Here’s a comprehensive checklist to help ensure you have everything required for a successful wreath-making experience:

  • Wreath Base: Choose from grapevine, foam, wire, or straw bases depending on your design preference. Each base offers a unique texture and style.
  • Foliage: Faux or dried leaves are perfect for adding a seasonal touch. Mix and match various shapes and colors to create depth and dimension.
  • Seasonal Accents: Mini pumpkins, gourds, and vibrant flowers like sunflowers or chrysanthemums will bring charm and personality to your wreath.
  • Floral Wire and Hot Glue Gun: These are essential tools for securely attaching elements to your wreath.
  • Ribbons and Scissors: Ribbons can enhance your wreath’s aesthetic and provide a beautiful finishing touch.
  • Wire Cutters: Perfect for trimming stems and adjusting the size of your materials.
  • Optional Decorations: Consider adding elements like feathers, acorns, or pinecones to bring extra texture and dimension to your wreath.

Involving the Family: A Crafting Experience

Making a fall wreath can be a wonderful family activity! Here’s how to involve everyone:

  • Assign Roles: Let each family member take on different tasks, such as gathering materials, arranging foliage, or tying ribbons. This ensures everyone is involved in the process and helps the wreath come together smoothly.
  • Share Ideas: Encourage creativity by allowing everyone to suggest colors and materials they want to include. This makes the wreath a true family creation, with each member’s personal touch reflected in the final design.

Celebrate the Results: After completing the wreath, take a moment to admire everyone’s hard work. Celebrate the beautiful creation with a seasonal treat or a cozy family gathering. This makes the crafting experience even more memorable and enjoyable for everyone involved!

Caring for Your Fall Wreath

To ensure your wreath remains vibrant throughout the season, follow these care tips:

  • Display Indoors or in a Protected Area: If you use real foliage or flowers, it’s best to hang your wreath indoors or in a sheltered spot to protect it from fading and damage due to the elements.
  • Regular Dusting: Gently dust your wreath with a soft cloth to remove any dust or debris that may accumulate. This will help maintain its fresh appearance and keep the colors vivid.
  • Avoid Excessive Moisture: Keep the wreath away from moisture to prevent mold or decay, especially if you’ve used natural materials. Humidity can cause damage and shorten its lifespan.
  • Store Properly: At the end of the season, store your wreath in a cool, dry place. Avoid placing heavy items on top of it to maintain its shape and preserve its structure for next year’s fall season.

The Benefits of Crafting Your Own Wreath

Creating your own fall wreath comes with a plethora of benefits that go beyond just decoration:

  • Cost-Effective: DIY wreaths can save you money compared to buying pre-made ones from stores. You can also use materials you already have at home or repurpose old decorations, making it an affordable and sustainable option.
  • Express Your Style: A DIY project gives you the freedom to express your creativity and personal style. You can choose colors, textures, and themes that resonate with you, ensuring your wreath is a unique reflection of your taste and the fall season.
  • Therapeutic Experience: Crafting can be a relaxing and rewarding activity. It offers a chance to unwind, tap into your artistic side, and de-stress while enjoying the present moment.
  • Perfect for Gifting: A handmade wreath makes for a thoughtful and personalized gift for friends and family. Consider creating custom wreaths for loved ones to spread the joy of the season.

Creating your own DIY fall wreath is a rewarding and enjoyable way to celebrate the season while showcasing your creativity. With a few materials and a bit of imagination, you can craft a stunning wreath that welcomes guests and adds warmth to your home.

So gather your supplies, unleash your creativity, and enjoy the process of welcoming fall in style! Your customized fall wreath will not only enhance your home’s curb appeal but also serve as a cherished reminder of the beautiful moments shared with family and friends during this magical season.

Crafting Your Wreath: Step-by-Step Guide

PREPARE THE BASE

Start by preparing your chosen wreath base. For foam or straw bases, make sure they are stable and sturdy enough to hold the weight of your decorations. If you’re using a grapevine base, you can gently reshape it to ensure it has the desired form before you begin adding decorations.

5ADD FOLIAGE

Begin by attaching your chosen foliage, starting at the top of the wreath base and working your way around. Use hot glue or floral wire to secure the leaves in place. Layer different types of foliage to create depth and visual interest. Overlap some leaves to mimic the natural, organic look of autumn, ensuring a fuller, more textured appearance.

INCORPORATE SEASONAL ACCENTS

This is where your creativity can really shine! Add mini pumpkins, gourds, pinecones, or other seasonal accents to your wreath. Arrange them in a balanced way, ensuring each piece is securely attached. For added visual interest, consider creating clusters of accents in different areas of the wreath to give it a more dynamic and cohesive look.

FINISHING TOUCHES

To complete your wreath, add ribbons or burlap for a final decorative flourish. Create a beautiful bow with your chosen ribbon and attach it to the top or side of the wreath. This finishing touch not only ties the entire design together but also adds an extra layer of charm and personality to your creation.

Seasonal Inspiration: Gather Ideas

If you’re looking for inspiration, browse platforms like Pinterest or visit local craft stores to explore the latest trends in fall wreath designs. Collect images that resonate with you and can serve as a starting point for your creativity. This process will help you visualize the colors, textures, and materials you want to incorporate, ensuring your wreath reflects your unique style and the essence of the season.

conclusion

In conclusion, crafting your own fall wreath is not only a fun and creative way to embrace the season, but it also offers an opportunity to personalize your home decor. Whether you’re looking to create a welcoming entrance or make a meaningful gift, a DIY wreath can be tailored to suit your unique style. From choosing materials to adding the finishing touches, the process is both therapeutic and rewarding. So, gather your supplies, let your creativity flow, and enjoy the beauty of fall with a custom wreath that reflects the warmth and charm of the season.