10 BEST MASCARAS FOR STRAIGHT LASHES

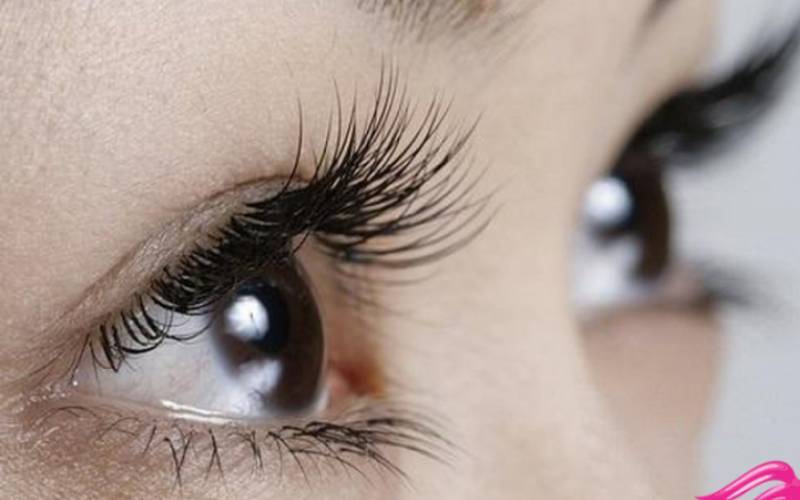
Long, thick, and curled eyelashes can make your eyes appear more soulful. While not everyone is blessed with naturally curly lashes, the world of makeup offers effective solutions. Mascaras with specially designed brushes can help shape and curl straight lashes, creating a dramatic and eye-catching look. Explore our list of the 10 best eyelash curlers.

HOW TO FIND THE BEST MASCARAS FOR STRAIGHT LASHES

Firstly, look for mascaras that are specifically designed to provide curl and lift. These formulas often contain ingredients that help to hold the curl and provide a lasting effect. Curling mascaras typically have a curved brush that follows the natural shape of your lashes and helps to lift them from the base. These brushes are designed to grab and coat each lash, creating a more defined and curled appearance.

Another important factor to consider is the formula of the mascara. Opt for a mascara with a lightweight, buildable formula. Heavy and clumpy formulas can weigh down straight lashes, making them appear even straighter. Look for a mascara that is labeled as lengthening or curling, as these formulations are often lighter and provide better results for straight lashes. Additionally, choosing a waterproof formula can also help maintain the curl throughout the day, as it is less likely to smudge or lose its hold.

Before applying mascara, it’s a good idea to use an eyelash curler to give your lashes an extra lift. Start by curling the lashes at the base, then move the curler gently towards the tips. This will help create a more pronounced curl and open up your eyes. Once your lashes are curled, apply the mascara starting at the base of the lashes and wiggle the wand back and forth as you move upward. This technique helps to separate and coat each lash, providing volume and curl. Apply multiple coats if desired, but make sure to let each coat dry before applying the next to avoid clumping.

If you find that your straight lashes tend to lose their curl throughout the day, you can try using a lash primer before applying mascara. Lash primers are designed to condition and prep the lashes for mascara application, helping to enhance the curl and hold. They create a base that allows the mascara to adhere better and provide longer-lasting results.

Lastly, don’t be afraid to experiment with different mascara brands and types to find the one that works best for your straight lashes. What works for someone else may not work for you, so it’s important to try different options and see which gives you the desired lift and curl. Consider reading reviews or seeking recommendations from others with straight lashes to get an idea of what might work well.

THE BEST MASCARA FOR STRAIGHT LASHES

L’OREAL PARIS PRO XXL LIFT MASCARA

My amazing lashes mascara, the L’Oreal Paris Pro XXL Lift Mascara, is like an adult version of a lash-transforming product. It offers a unique two-in-one experience to address the needs of straight lashes. The first end features a straight brush and a primer formula that effectively lengthens the lashes without any clumping issues. However, the real magic happens with the second end. It boasts a curved brush that allows for precise application at the roots, lifting the lashes upward. This end is also infused with microfibers that work wonders in increasing both the thickness and length of the lashes. With this mascara, you can achieve a dramatic and long-lasting eyelash lift without the need for an eyelash curler.

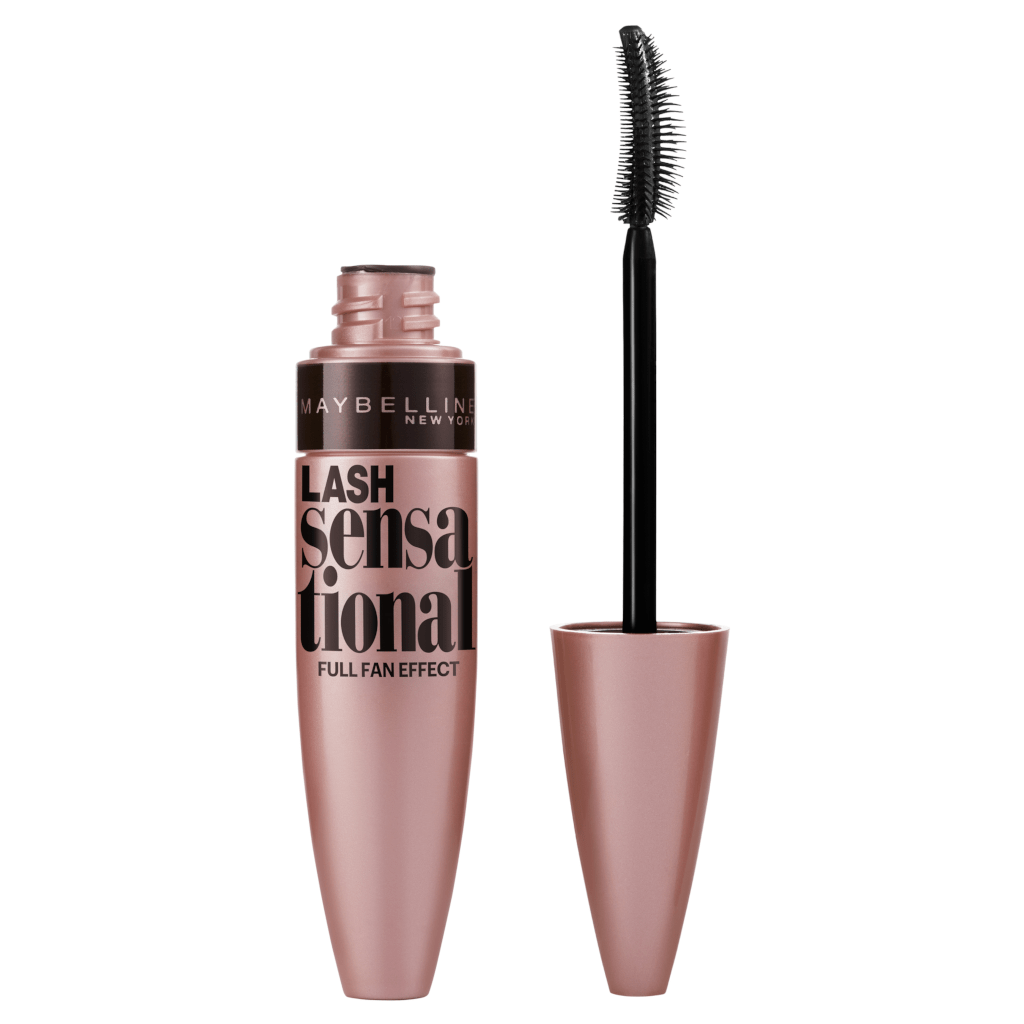
MAYBELLINE LASH SENSATIONAL LENGTHENING MASCARA

Maybelline Lash Sensational Lengthening Mascara is a fantastic choice when you want longer lashes. This mascara from Maybelline works wonders in extending the length of your lashes, giving them a more noticeable and defined look. With its easy-to-use wand and special formula, it coats each lash evenly, providing a lengthening effect that enhances your natural beauty. You’ll love how this mascara effortlessly adds length to your lashes, making your eyes stand out in a simple and beautiful way.

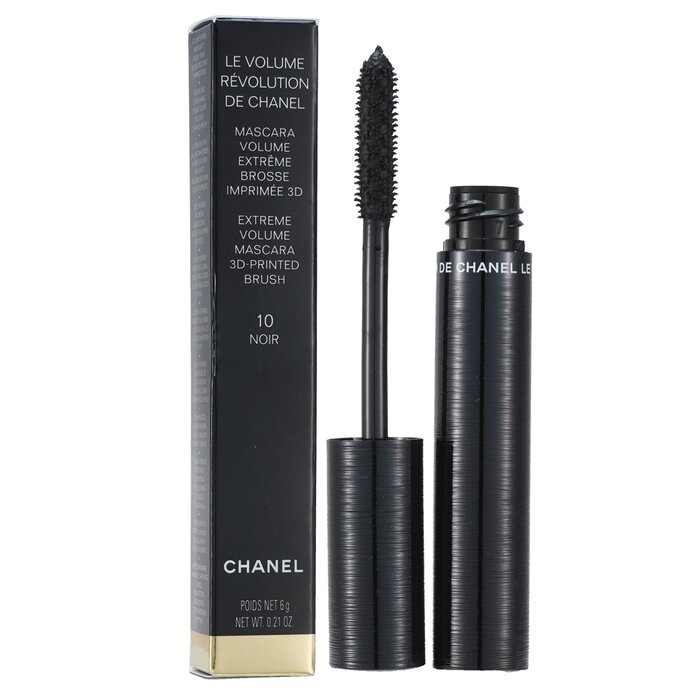
CHANEL LE VOLUME DE CHANEL

The Chanel Le Volume De Chanel mascara lives up to its name by providing the desired volume for your lashes. One of the reasons for this is the inclusion of acacia gum in its formula, which helps to quickly set, lift, and hold a curl. This makes it an ideal choice for individuals with short or straight lashes. Additionally, the mascara’s bristles of mixed lengths ensure that the product is distributed evenly without clumping. The end result is beautifully separated eyelashes that create an eye-opening effect.

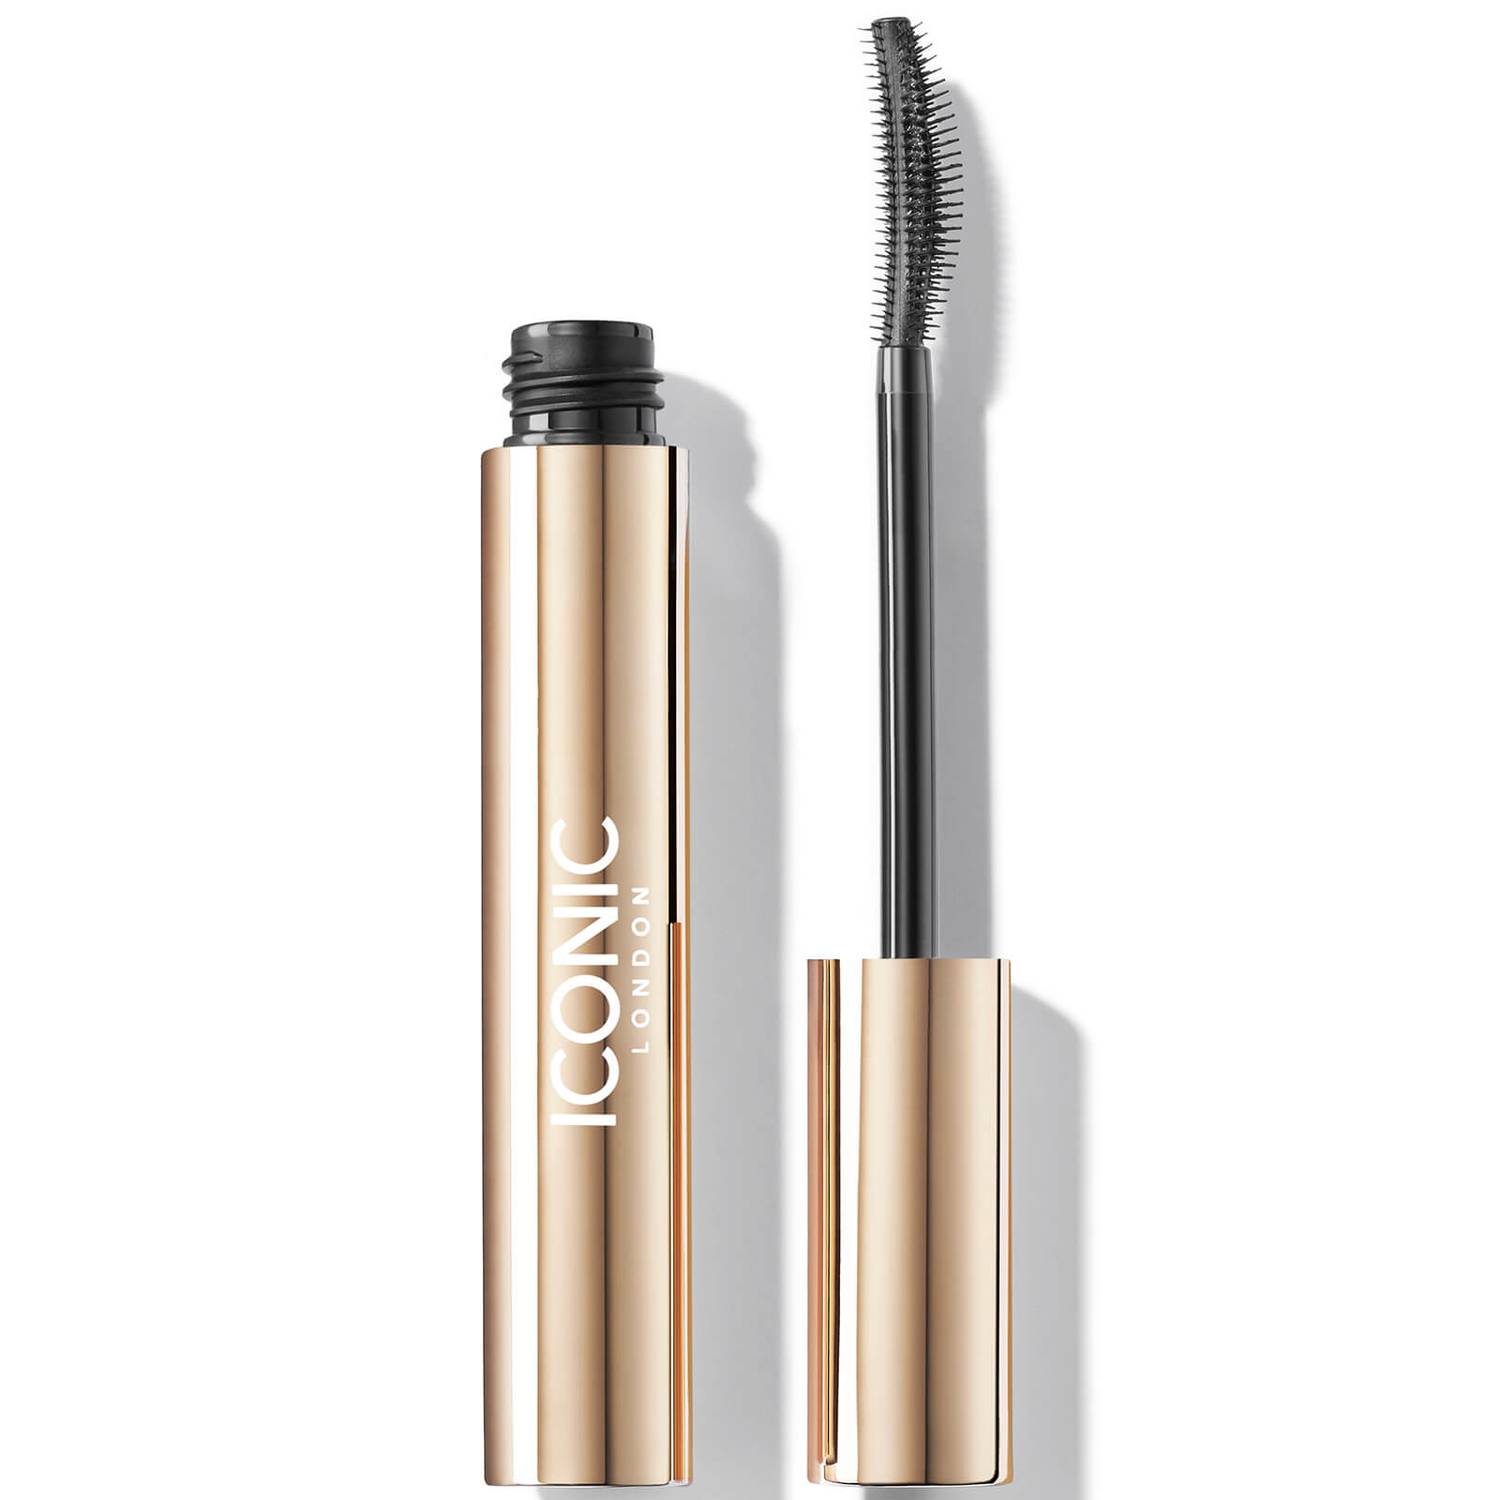
ICONIC ENRICH & ELEVATE MASCARA

Iconic Enrich & Elevate Mascara not only avoids disadvantages such as dry eyelashes and difficulty removing makeup, but also provides extra care for your lashes. It contains Symlash, a patented eyelash growth agent that strengthens and lengthens your lashes. The mascara has a curved plastic brush tip that is slightly curved and narrow, making it easier to reach the shorter lashes in the inner corner of the eye. When comparing brown mascara and black mascara, brown mascara often gives a more subtle and natural look, while black mascara gives a more bold and dramatic effect.

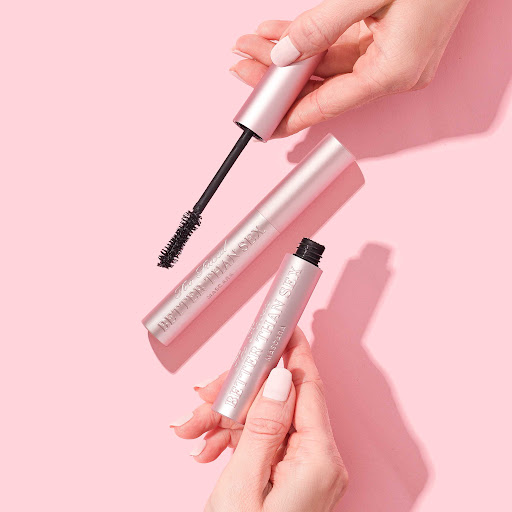
TOO FACED BETTER THAN SEX

Too Faced’s Better Than Sex Mascara is a go-to choice when you want to enhance your lashes with definition, volume, and length. This mascara effortlessly transforms even the most uncooperative lashes with just one application. Its intensely black formula has been a beloved favorite among editors and beauty professionals for years. The mascara’s hourglass-shaped wand is a key feature, as it expertly hugs each lash, providing a boost of volume with every swipe. To top it off, the pretty pink packaging and playful name add an extra touch of fun to this mascara.

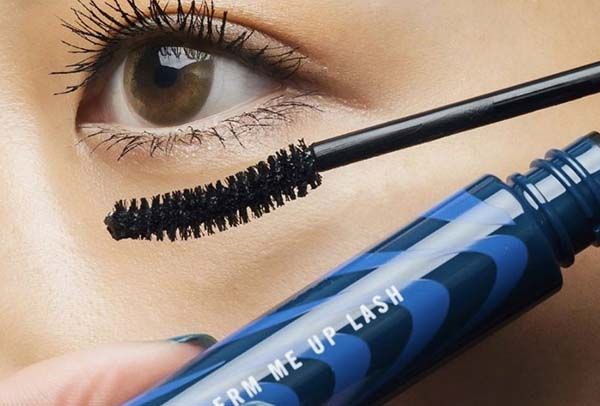
M.A.C COSMETICS EXTENDED PLAY PERM ME UP LASH

M.A.C Cosmetics Extended Play Perm Me Up Lash is widely regarded as the best non-clumping mascara. This mascara boasts a lightweight formula that coats each lash evenly, providing a natural and fluttery look without any clumps. The specially designed brush separates and defines each lash, ensuring a clean and flawless application. With its long-wearing formula, this mascara stays put throughout the day without smudging or flaking. If you’re looking for a mascara that delivers impeccable results without the hassle of clumping, M.A.C Cosmetics Extended Play Perm Me Up Lash is the perfect choice.

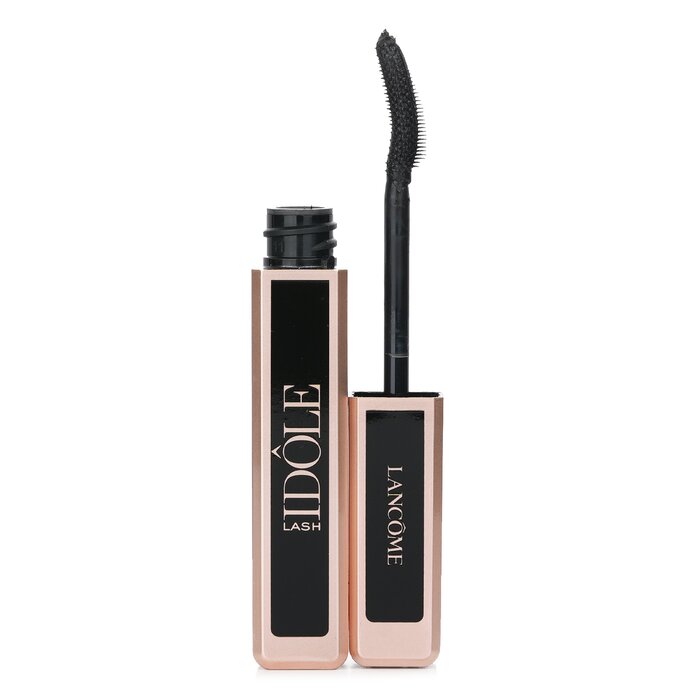
LANCOME LASH IDOLE LIFTING LASH VOLUMIZING MASCARA

The Lancôme Lash Idôle Lifting Lash Volumizing Mascara is a must-have for achieving stunning lashes. This mascara is designed to provide exceptional lift and volume, making your lashes appear fuller and more defined. Its innovative formula coats each lash from root to tip, creating a lengthening and volumizing effect. The mascara’s brush is specifically engineered to separate and fan out the lashes for a wide-eyed look. With the Lancôme Lash Idôle Mascara, you can effortlessly elevate your lashes and achieve a captivating, eye-catching appearance.

DIOR DIORSHOW 24H BUILDABLE VOLUME MASCARA

This mascara is specifically formulated to give your lashes a beautifully curved appearance. Its buildable formula allows you to layer the mascara to achieve your desired level of volume, without compromising on the natural bend of your lashes. The mascara’s innovative brush effortlessly lifts and separates each lash, creating a stunning curved effect that opens up your eyes. With the Dior Diorshow 24H Buildable Volume Mascara, you can effortlessly elevate your lash game and enjoy long-lasting, curved lashes that make a bold statement.

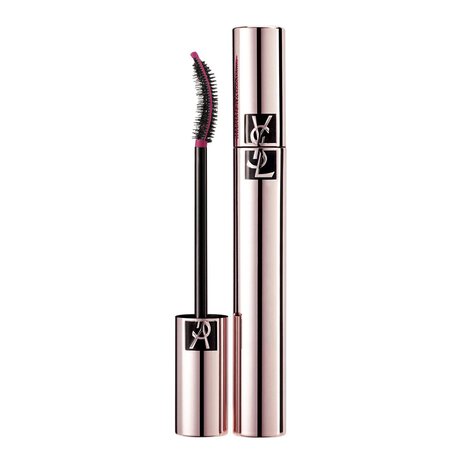
YSL BEAUTY THE CURLER MASCARA

YSL Beauty’s The Curler Mascara is a highly recommended choice, thanks to its enriching ingredients like fatty acid-rich coconut oil and antioxidant-loaded bamboo oil. This mascara is praised for its smudge-proof and long-lasting qualities. The mascara brush is designed to provide precise definition, while the fiber bristles add dimension and curl, resulting in a beautifully fanned-out effect. Additionally, the rounded shape of its curve makes it particularly ideal for enhancing larger, rounder eyes, as confirmed by makeup artists. With YSL Beauty’s The Curler Mascara, you can enjoy the benefits of nourishing ingredients, impeccable definition, and eye-enhancing effects.

EYEKO LASH ALERT CURL & LIFT MASCARA

Eyeko stands out among the best mascaras for straight lashes by prioritizing both ingredients and performance. This mascara’s formula is enriched with caffeine, biotin, castor oil, and arginine, offering conditioning and nourishing benefits. The combination of these ingredients ensures that your lashes receive the care they deserve. In terms of performance, the initial application may seem somewhat underwhelming, as it primarily lengthens lashes without providing much lift. However, by allowing the first coat to become tacky and then applying a second coat, you can achieve a more pronounced curl that lasts throughout the day. Notably, the mascara does not clump, resulting in a convincing and flawless finish. Eyeko’s focus on both ingredient quality and performance makes it a standout choice for those with straight lashes.

CONCLUSION

In short, when looking for the best mascara for straight lashes, there are a few standout options. Each mascara on this list has unique features and benefits to enhance and transform straight lashes, providing curl, length, and volume, along with nourishing and conditioning properties. If you have short eyelashes, please refer to the 14 best mascaras for short lashes. Hopefully, after reading this article, you will find the perfect choice for your eyelashes

HOW TO DO MAKEUP FOR BRIDE: A STEP-BY-STEP GUIDE TO DIY WEDDING MAKEUP

A wedding day is a moment people daydream about and meticulously plan well in advance before meeting the person they will eventually marry. When the moment finally arrives, numerous aspects need careful consideration and execution, including selecting the ideal make up for bride. This process involves various steps, such as preparing the skin for a radiant appearance, deciding on the makeup artist, and scheduling time for a trial-run application (or two). It also entails mastering the art of applying makeup that complements the desired look for the bride on her wedding day.

DO A RESEARCH

The internet is brimming with beauty inspiration for your wedding day. If you’re uncertain about the kind of look you want, initiate some research. Explore your favorite celebrity’s latest red carpet appearances through a search engine or visit a professional makeup artist’s Instagram page to peruse photos of their clients.

You can also turn to TikTok or YouTube for comprehensive tutorials that you can recreate. Kim suggests identifying someone with similar facial features for a more personalized guide. Following makeup trends that don’t compliment your face may result in an awkward appearance. Don’t replicate a look just because it’s trending online. Instead, ensure that you genuinely like the chosen style.

CONSIDER YOUR THEME

Your final appearance will be significantly shaped by your overall aesthetic. Prior to applying your makeup, it’s crucial to decide whether a natural, sun-kissed glow, or a blend of both aligns better with you and your event. Taking into account your color scheme, floral decorations, venue, and ambiance. Aligning your makeup with the overarching theme enhances the harmonious and elegant atmosphere of your wedding day.

DETERMINE THE RIGHT SHADES

To achieve a smoother end result, it’s essential to determine which color will best complement your skin tone, whether it’s a warm bronze tone or a cool blue tone. Attention should be paid to the importance of finding the right shade for your skin, suggesting the possibility of mixing different shades to create the perfect combination. Instead of relying on guesswork, consider seeking advice from a professional who can determine the color that best suits your skin tone.

STAY OUT OF THE SUN

In the countdown to your wedding day, one crucial piece of beauty advice is to stay out of the sun. Prolonged exposure to sunlight can lead to skin damage, including sunburn, premature aging, and uneven skin tones, all of which might affect your desired wedding day look. To maintain a radiant and flawless complexion, it’s advisable to minimize sun exposure in the weeks leading up to the big day. Consider using sunscreen with a high SPF, wearing protective clothing, and seeking shade whenever possible. By taking these precautions, you can help ensure that your skin looks its best and remains picture-perfect for your wedding, allowing you to confidently showcase your natural beauty on this special occasion.

PRACTICE MAKEUP FREQUENTLY

In the buildup to your wedding, one valuable beauty tip is to practice your makeup frequently. Regularly experimenting with different looks allows you to refine and perfect the ideal style that enhances your features and complements your wedding theme. Schedule trial runs to familiarize yourself with the application process, ensuring that your chosen makeup look not only suits your preferences but also stands up to the demands of the long-awaited day.

Frequent practice not only builds your confidence in achieving the desired outcome but also enables you to identify any potential challenges and address them well in advance. With each practice session, you’ll gain valuable insights into the products and techniques that work best for you, ensuring that you step into your wedding day with the expertise to create a stunning and long-lasting makeup look.

BOOK A VIRTUAL APPOINTMENT

In the modern landscape of wedding preparations, booking a virtual appointment has become an invaluable step, especially in the era of convenience and technology. Prior to your wedding, consider scheduling virtual appointments with key vendors, such as your wedding planner, photographer, or even beauty professionals. These virtual consultations provide a convenient and efficient way to discuss details, share ideas, and make crucial decisions without the need for in-person meetings. 

Whether it’s finalizing the event timeline, reviewing photography preferences, or discussing your desired bridal look, virtual appointments allow for seamless communication from the comfort of your own space. Embracing this digital approach not only streamlines the planning process but also accommodates busy schedules, ensuring that every detail is meticulously addressed, and your vision for the perfect wedding day is brought to life.

PREP YOUR SKIN

On your wedding day, stick with your tried-and-true skincare routine! A clean, familiar canvas is key to achieving natural, beautiful makeup. Skip experimenting with new products and simply cleanse, moisturize (lightly!), and gently exfoliate (if you normally do). Leave any blemishes alone unless you have a trusted spot treatment, and you’re all set for a picture-perfect complexion.

CHOOSE FAMILIAR PRODUCT

When it comes to your wedding day, selecting familiar makeup products is key. The familiarity of these products offers a sense of comfort and confidence since you already know how they perform on your skin. Opting for tried-and-true makeup items ensures that you avoid any potential surprises or adverse reactions that could occur from experimenting with new products. By sticking with the cosmetics you are familiar with, you can trust that they will provide the desired results and enhance your natural beauty. It’s essential to feel at ease and radiate confidence on your special day, and relying on familiar makeup products plays a significant role in achieving that peace of mind.

HOW TO DIY YOUR OWN BRIDAL MAKEUP

STEP 1: PREP YOUR SKIN

Whether you’re applying your makeup on your own or relying on a professional, on your wedding day, start by washing your face and applying a light moisturizer. Stick to your regular skincare routine; now is not the moment for drastic changes. If you usually exfoliate, choose a gentle exfoliating cleanser instead of a harsh scrub. Address any blemishes by lightly dabbing on an appropriate product like Visine, but avoid unnecessary interventions. The goal is to have a clean and soft canvas, providing the perfect base for achieving naturally beautiful skin with your makeup.

Consider your skin’s undertones, whether they lean towards cool or warm, when selecting colors that both match and complement. To identify your undertone, try a simple trick. Place a piece of silver and a piece of gold jewelry on the back of your hand. If the gold appears to blend seamlessly, you likely have warm undertones. Conversely, if the silver seems to harmonize better, you probably have cool undertones.

STEP 2: KNOW THAT PRIMER IS REQUIRED

From the moment you start applying your makeup until you bid farewell to your guests, a multitude of events will unfold. To make sure your makeup withstands the ceremony, dancing, tears, and toasts, consider incorporating a primer into your routine. While occasional touch-ups may still be necessary, they will be significantly reduced. Moreover, a primer serves to even out fine lines, and wrinkles, and conceal open pores. Apply a small amount after moisturizing, but before your foundation, ensuring even coverage across your face and eyelids. This sets the stage for a flawless base for all that follows.

STEP 3: APPLY FOUNDATION

For those with a cool undertone, seek out foundations with a rosier, redder, or blue base. If your undertone leans warm, opt for a foundation with a yellow or golden base. To verify if the shade is suitable, apply a small amount on the center of your lower jawline using a Q-tip. If it seamlessly blends in, you’ve found the right match.

Apply your foundation in thin layers, starting from the center of your face and blending outward with a foundation brush. Ensure a seamless finish, paying particular attention to blending beneath your jaw and along your neck to avoid visible lines. Avoid caking on the foundation, as it can give an overdone appearance and may lead to smearing or streaking.

STEP 4: ADD CONCEALER 

Applying concealer before the foundation can lead to much of it rubbing away during the foundation blending process. To address red areas or dark circles, use a concealer brush to apply a liquid concealer, matching your skin tone or going one shade lighter, to problematic areas. Dot the concealer and gently pat the brush against your skin to spread it. If needed, use a makeup sponge dampened with water to blend the concealer further.

For concealing blemishes, start by applying foundation, followed by concealer, and set it with powder. If the blemish is still visible, add more concealer and powder. Ensure you pat the concealer onto the blemish rather than rubbing to achieve a seamless finish.

STEP 5: APPLY HIGHLIGHTER

Highlighter might not be a staple in everyone’s makeup collection, but its purpose is to enhance specific facial features, making eyes appear larger and adding a radiant, youthful dewy look. However, using too much or a formulation with sparkle or glitter can lead to photo disasters, so apply it with a light touch. Highlighters are available in both liquid and powder forms.

When using a liquid highlighter, apply it with a brush after your foundation, forming a check mark shape. Begin near your inner eye, angle down toward your nostril, and then move up your cheekbone, blending toward your temple. Repeat the process above your brows, down the center of your nose, on the center of your forehead, and on your chin.

For powder highlighter, apply it after powdering and brush it under your brows, lightly in the corner of your eyes, and on the tops of your cheekbones. Avoid using powder highlighter under your eyes or over your mouth to prevent a sweaty appearance in photos.

STEP 6: SET YOUR BASE

Now, you face a decision. You can either opt for a cream blush instead of a powder blush or set your base with powder. If you choose the latter, begin by using a translucent powder to set your base and manage any shine. When it comes to powder, remember that less is more; aim for a luminous look rather than a heavy one. With a medium-sized brush, lightly dust over your forehead, the sides of your nose, and on your chin.

Following this, apply a powder bronzer that’s a shade or two darker than your foundation. Brush it in the shape of a 3 on both sides of your face. Begin at your hairline, move down the side of your face, then under your cheekbone, back to the side of your face, and finally below your jaw.

Keep pressed powder handy for those moments when certain areas shine and need a quick dab before a photo or while in the restroom.

STEP 7: BRING COLOR TO YOUR EYES

Wedding experts typically advise against a heavily dramatic eye, suggesting instead the use of eyeliners in shades other than black, along with paler or muted eye shadows that complement your eye color. Highlighters can also be applied to create the illusion of larger eyes. Experiment with brown, grey, and green eyeliners, applying them to both your upper and lower eyelids to enhance your eyes. For a longer-lasting effect, use a cream eye shadow on your eyelids, reserving powder for the crease of your eye. Apply a powder highlighter in the corners of your eyes and under your brow.

Consider the following color recommendations based on your eye color: bronze shades for green eyes, mocha for hazel eyes, navy and dark brown for blue eyes, and purples and grays for brown eyes. If you want to line your eyes with eye shadow, dampen an eyeliner brush with water and brush it into the eye shadow for a defined look.

STEP 8: ADD MASCARA

Given that tears are likely, it’s essential to use waterproof mascara for your wedding day. If you’re not accustomed to wearing false eyelashes regularly, your wedding day is not the ideal time to start. Instead, ensure you have a reliable eyelash curler, a volumizing mascara, and a lengthening mascara. Prior to applying mascara, curl your lashes for added lift. When applying mascara, begin at the root of your eyelashes and wiggle the wand from side to side as you move up to the top. Opt for black mascara, as it complements everyone.

Complete your eye makeup by framing your face with a brow powder slightly darker than your natural color. Brush it along the natural line of your eyebrows, working outward toward the end of your eyes. This final touch will enhance your overall look on your special day.

STEP 9: CREAT LIPS

Much like your facial skin, well-moisturized lips are crucial before applying makeup to prevent dryness or cracks that may emphasize lines once color is added. To achieve this, use a lip hydrator, allowing it to absorb for a couple of minutes before applying color. Select a shade that complements your blush and consider the following tips. While many lipsticks claim lasting hours, opting for a lip stain is a more reliable choice on your wedding day.

For fair skin with cool undertones, consider nude, light mocha, and light mauve. If you have warm undertones, explore sand, nude peach, or shell, steering clear of bright pinks, dark bronzes, and deep mochas. If your skin tone is medium with cool undertones, opt for rosy pink, pomegranate, or cranberry; for warm undertones, go with bronze, copper, and cinnamon, avoiding nudes. Deep skin with cool undertones can experiment with raisin, wine, or ruby red, while warm undertones may prefer honey, ginger, or a coppery bronze, avoiding shades close to orange.

CONCLUSION

In conclusion, mastering the art of bridal makeup involves careful consideration and skill. These 8 tips provide valuable insights to help you become the most beautiful bride on your special day. Remember, when it comes to achieving a flawless finish, exploring techniques like air brush make up can elevate your bridal look to new heights. With attention to detail and a touch of creativity, you’re sure to radiate confidence and beauty as you walk down the aisle on your unforgettable day.