Making my own homemade lotion bars means a lot to me because I know exactly where every ingredient comes from. The best part is blending the beautiful scents of natural herbs and flowers into my lotion bars. It allows me to get creative and craft different magical scents that not only smell amazing but also soothe the skin.
If you’ve never made your own lotion bars before, let me guide you through the process! With this recipe, you’ll create a lovely lotion bar to treat yourself or gift to a friend or loved one, no matter the season. This particular recipe features flowers that bloom in spring, but if you’re looking for a winter-inspired option, check out my Homemade Winter Forest Lotion Bars.
BEAUTIFUL FLOWER LOTION BARS
Wildflower season in Southern California is in full swing! This time of year is hands down my favorite time of year here on the west coast. The flowers are popping up everywhere. You can find Calendula, Lavender, Roses, Poppies and all sorts of beauty everywhere you go. I always daydream of going to lay safely in a bed of flowers, yet I don’t because I don’t want to disrupt their beauty.
Ever since I made my Winter Forest Lotion Bars, I’ve been dreaming of making a version inspired by all of the magical flowers. Since I can’t quite go lay in a bed of flowers without disturbing the blooms, the next best thing is to make a lotion bar infused with their scent that magically transports me to this daydream. Every piece of this recipe’s aroma is extracted naturally so you get the full benefit of the flowers.
HOW TO MAKE THE FLOWER-INFUSED OIL BASE
The base of this lotion bar recipe is olive oil, and you have two options: you can use plain olive oil, or you can take it a step further and make your own flower-infused olive oil! I personally love using the flower-infused oil because it brings additional skin-nourishing benefits and a subtle, magical scent.
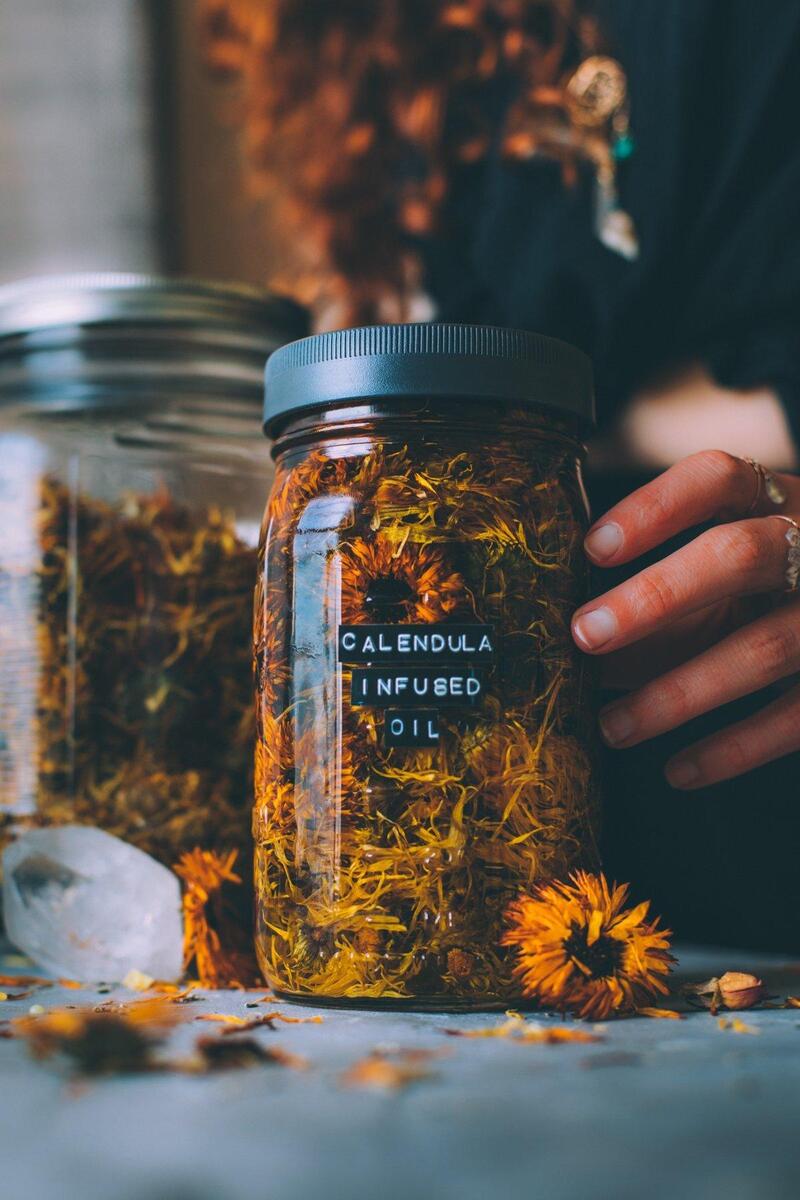
For this recipe, I’ve created a calendula-infused oil, but you can get creative and use any skin-safe flower to infuse. I’ve made oils with calendula, rose, and lavender, and each one has an incredible fragrance! I believe in using what you already have, so there are plenty of options.
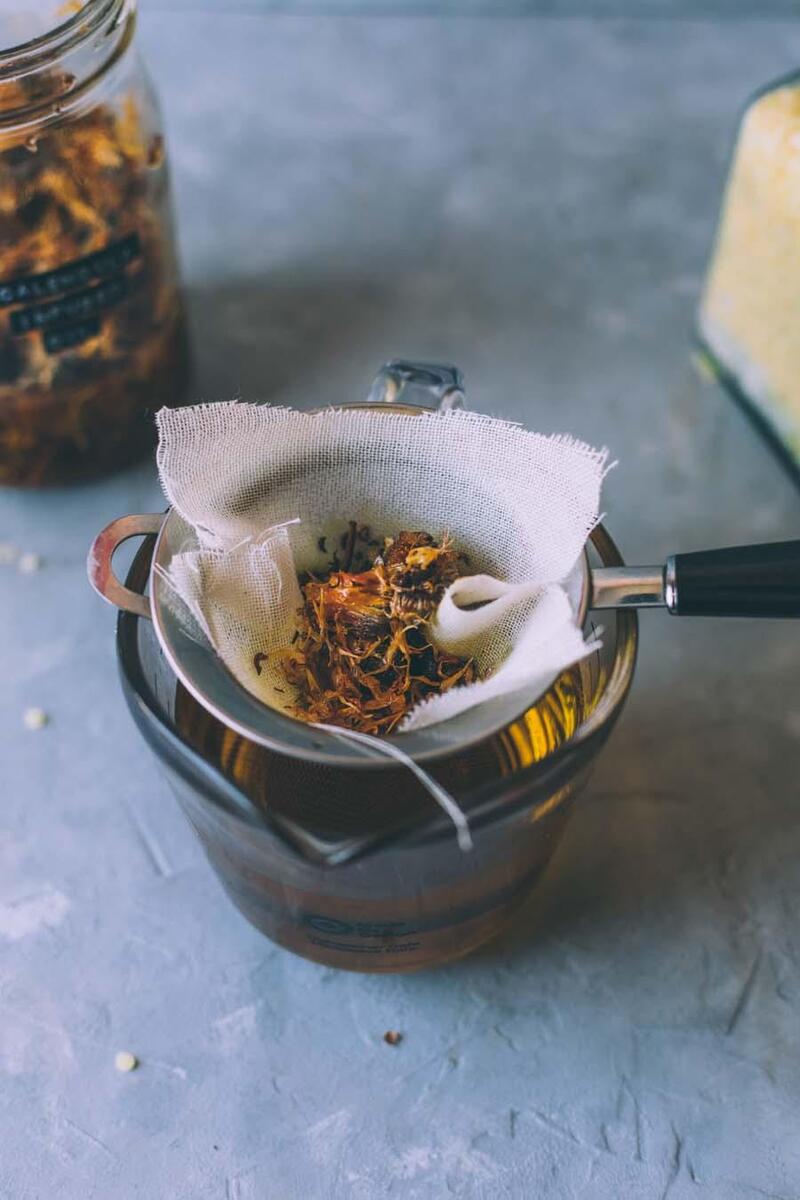
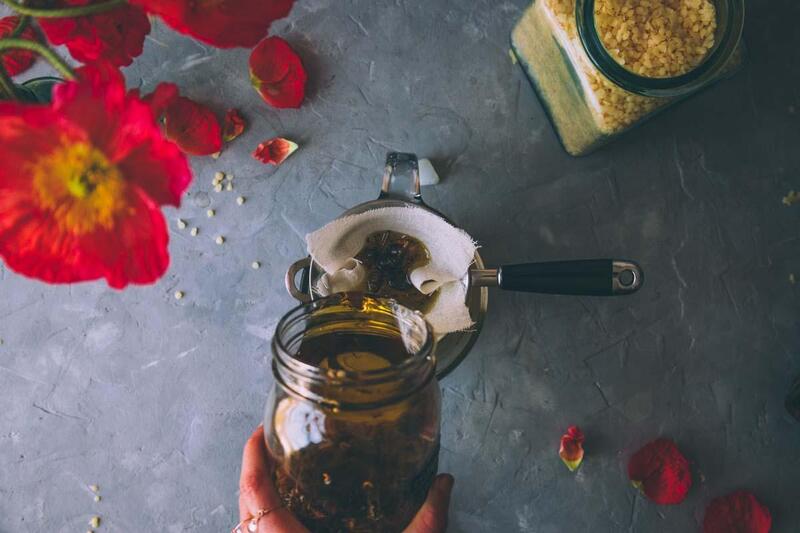
Making your own flower-infused oil is super simple. For this example, I’ll guide you through creating a calendula-infused oil. If you prefer a different flower, simply swap out the calendula for your chosen blooms. Start by placing dried or fresh calendula flowers into a jar, then pour olive oil over the flowers, ensuring they are fully covered. Let the flowers infuse in a dark place for 4-6 weeks, though you can leave them longer if you’d like. A pantry or apothecary works perfectly for this process! Once your infusion is ready, strain out the flowers using a strainer or cheesecloth.
If you’re in a hurry and don’t have the time for infusing, you can always skip the step and just add a few drops of essential oils for your desired aroma. While I believe infusing the whole flower is truly magical, this quick method works too.
For more tips and tricks, check out my instructions on how to make Flower-Infused Body Olive Oil. The secret to consistently making homemade lotion bars or skincare products is to always have a flower-infused oil ready in your apothecary. That way, when inspiration strikes, you’ll be all set!
CREATING YOUR HOMEMADE LOTION BAR
Once your flower-infused oil is steeped and ready, it’s time to create your homemade lotion bars! The best part is that they’re super easy to make, and you can get really creative with the process. Let your imagination run wild and have fun!
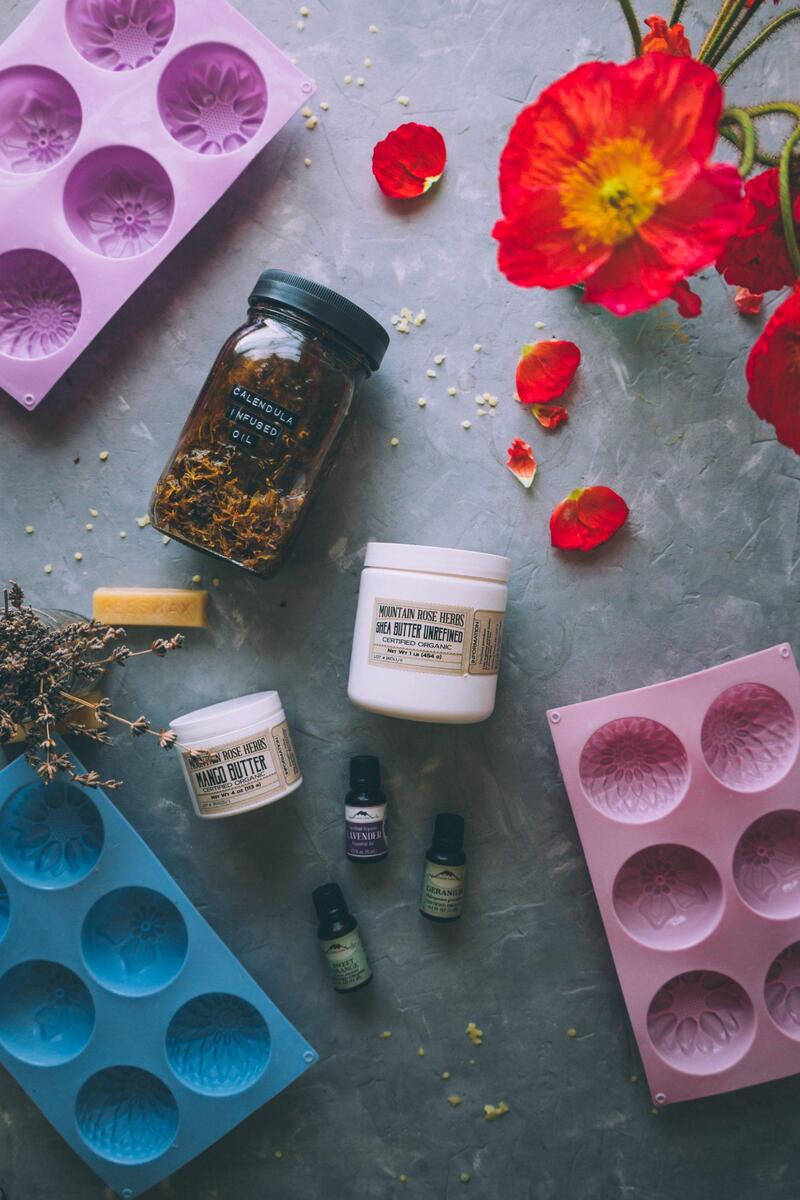
Start by melting the beeswax into your infused flower oil. This forms the base of your lotion bar. Once the beeswax is fully melted, turn off the heat and add in the shea butter, mango butter, and essential oils. You don’t want to overheat the butter, so turning off the heat once the beeswax is melted is key. The oil and beeswax will retain enough heat to melt and blend the butters evenly. If it’s taking a little longer to melt, just turn your stove to the lowest setting and stir often.
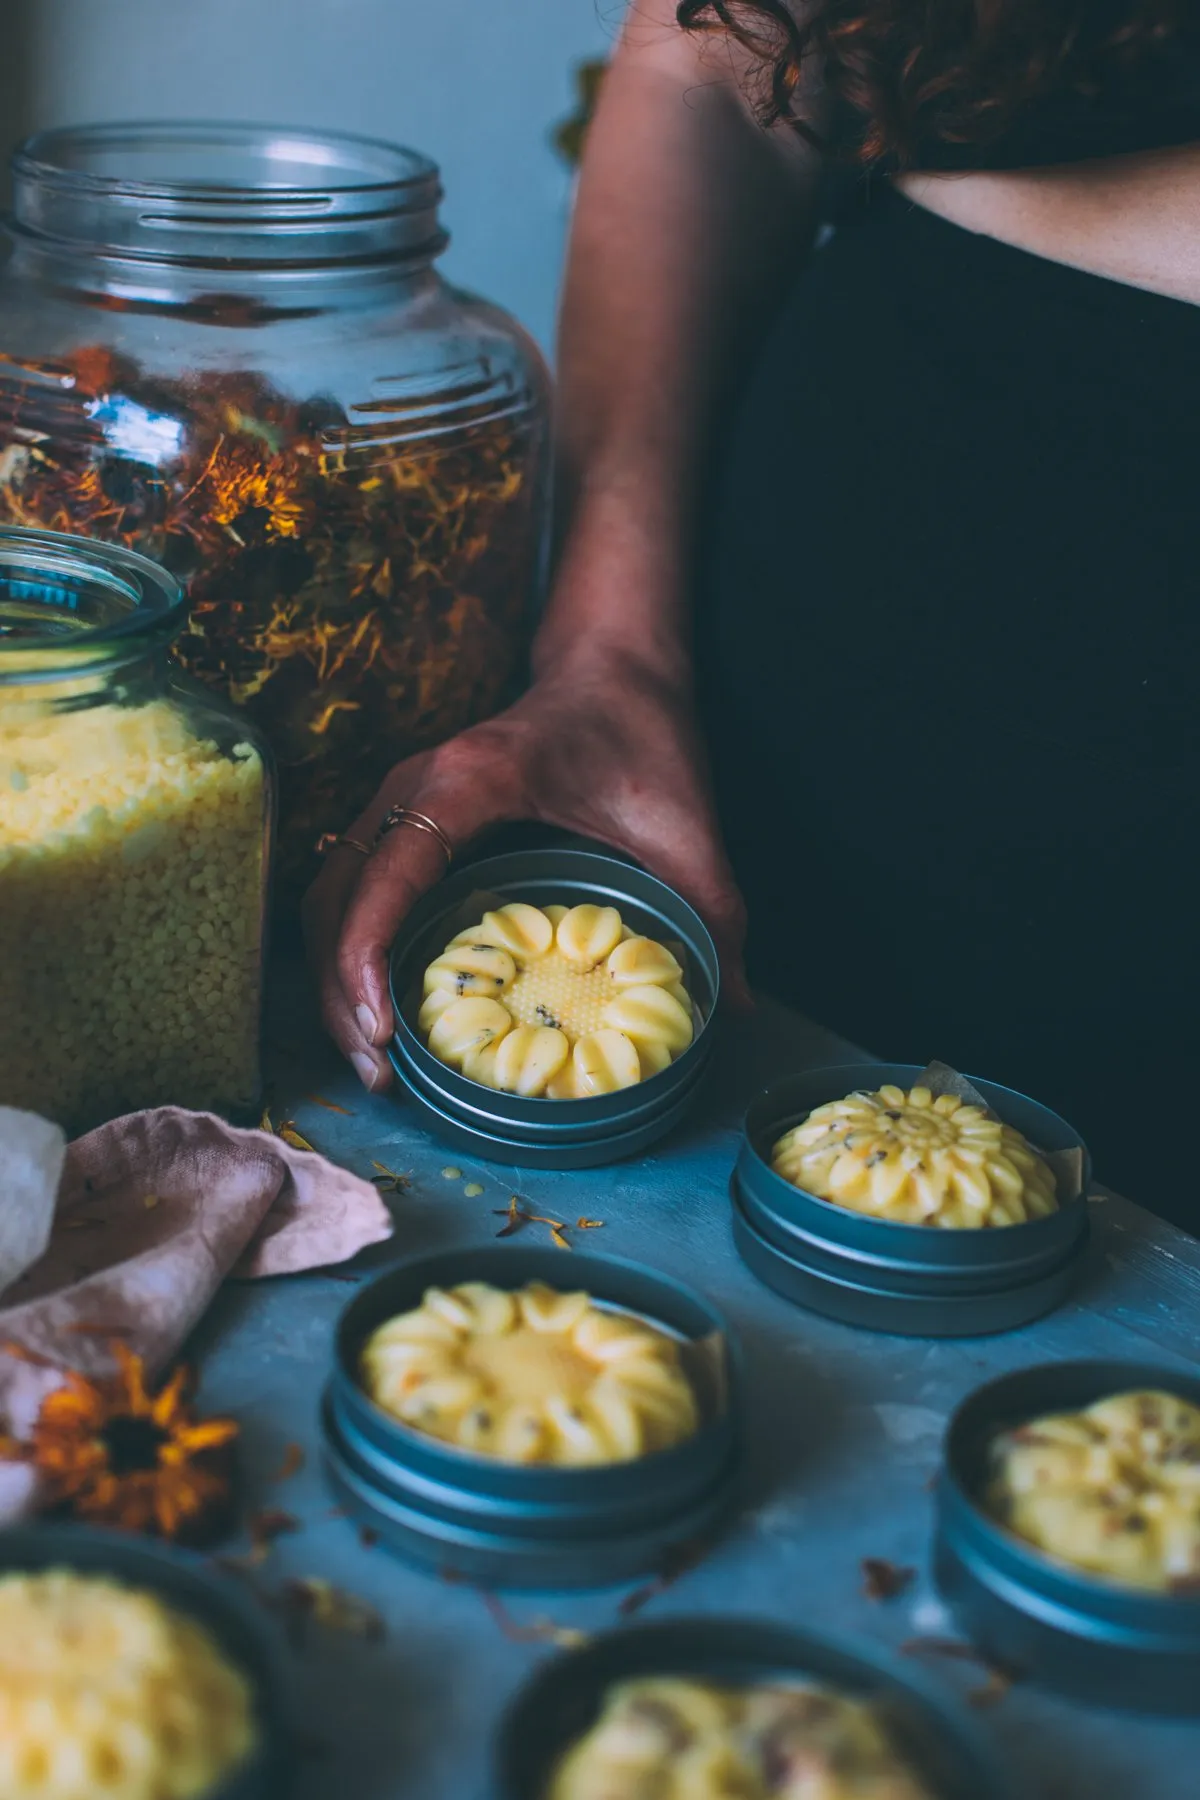
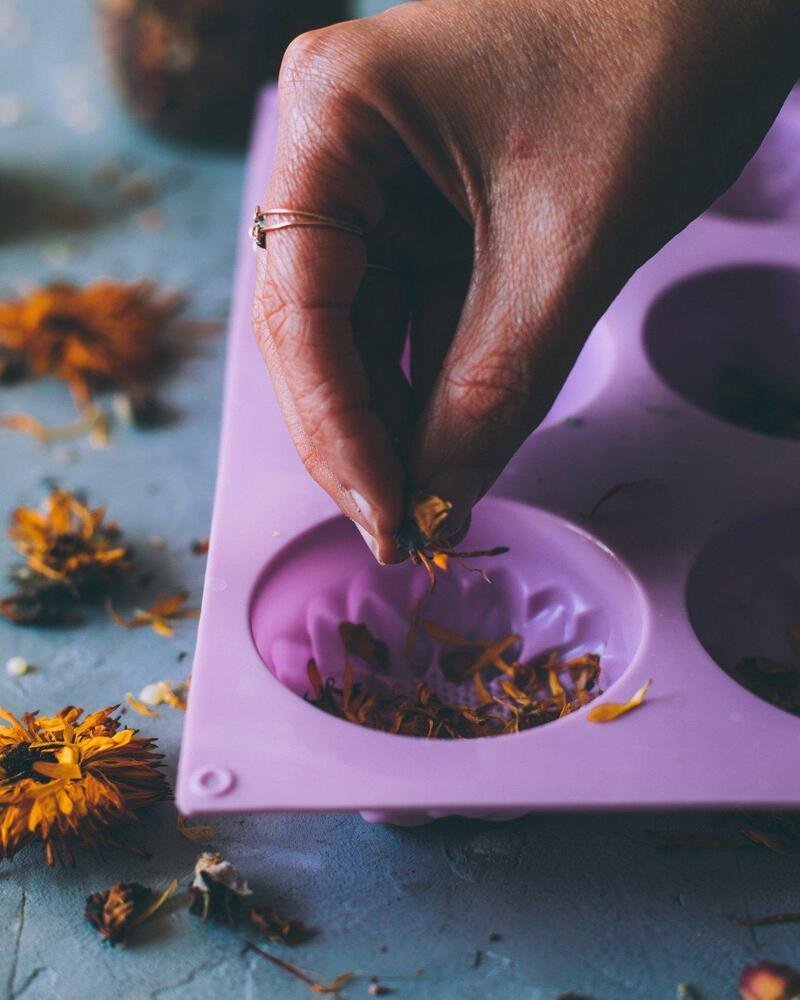
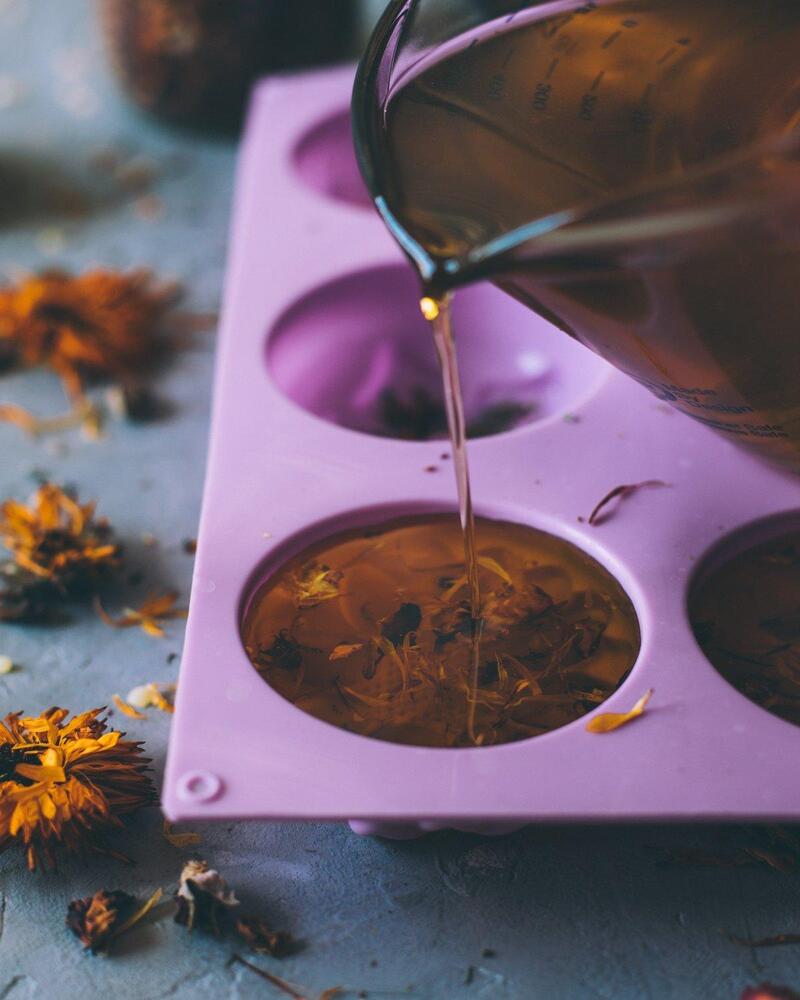
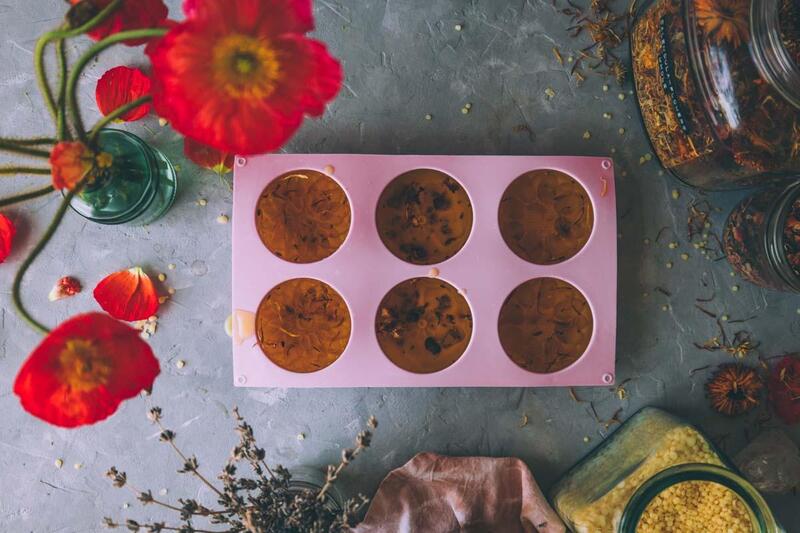
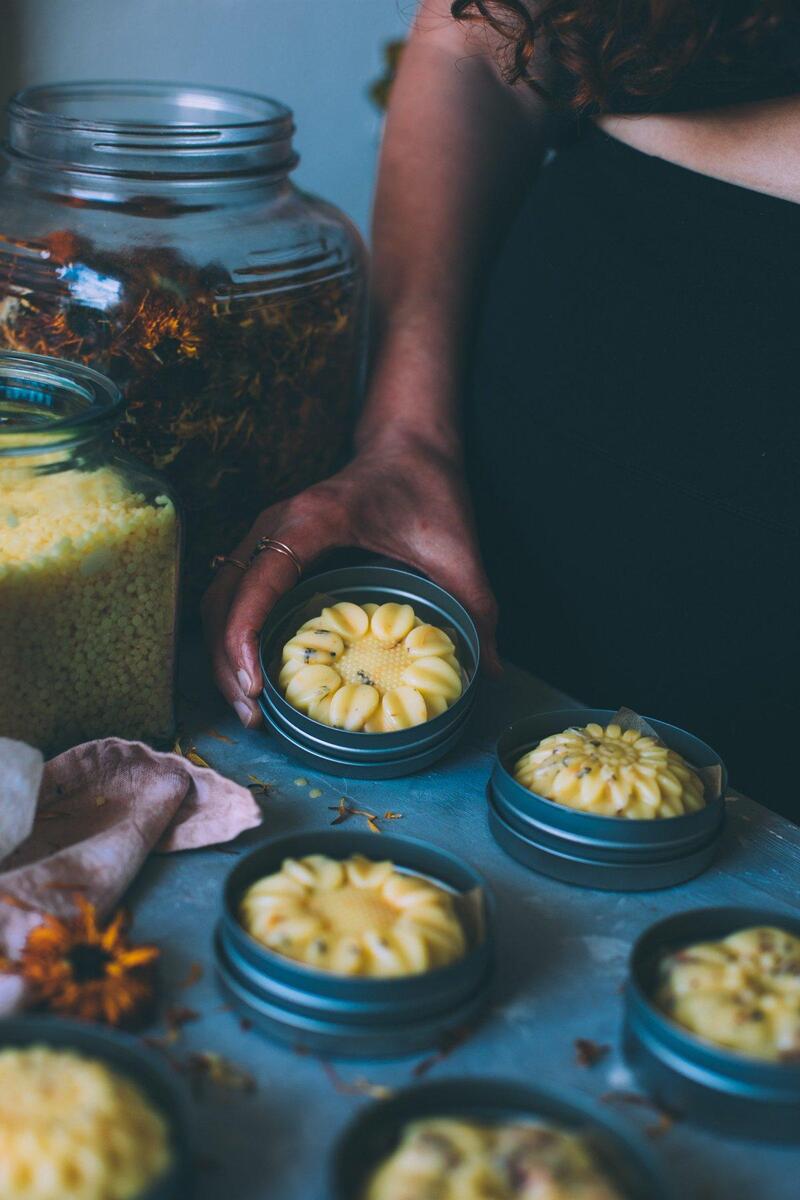
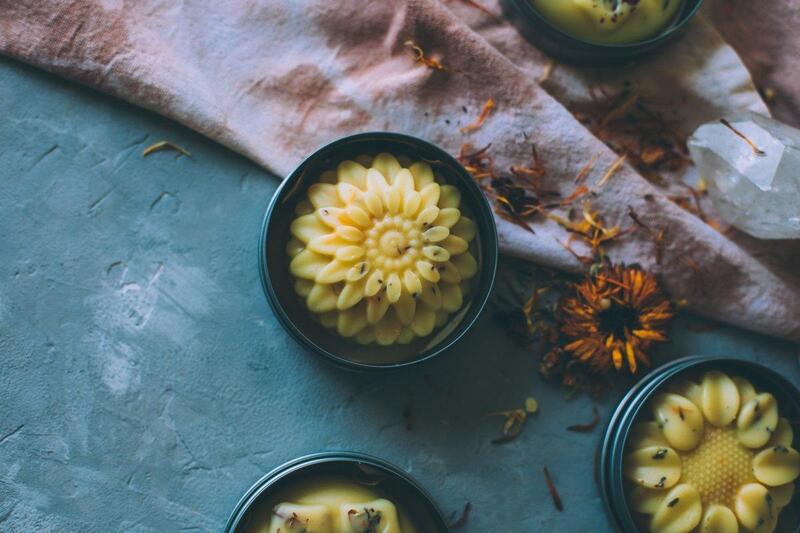
After the infused oil, shea butter, mango butter, and essential oils have blended with the beeswax, pour the mixture into silicone molds. This is where you can really get creative! I love adding dried flowers to the molds for an extra touch of beauty. The lotion bars will take on the shape of the mold, and the dried flowers will make them even more stunning. Make sure to use silicone molds—this ensures the bars will pop out easily once they’re set.
Let the lotion bars cool and cure completely before using them. In my experience, they take about 20-30 minutes to fully cool and set. Once they’re ready, pop them out of the molds and place them in small containers, like 4 oz push-top tins or wide jars, lined with parchment paper. I recommend storing them in small metal containers or jars. Keep them in a cool, dry place away from direct sunlight.
Now comes the best part—enjoying your beautiful, homemade lotion bars!
BENEFITS FOR YOUR SKIN
There are so many wonderful benefits to using these homemade lotion bars! The natural olive oil and beeswax work together to moisturize and soften the skin, leaving it feeling incredibly nourished and smooth. But that’s not all—the aromatherapy from the flowers helps to ground you and bring a sense of peace and relaxation. Plus, the flowers and essential oils in this recipe provide additional skin benefits.
In this lotion bar, I used Patchouli, Geranium, Ylang Ylang, and Lavender essential oils. When applied to the skin, these oils offer several advantages:
Nourish the skin with essential nutrients
Energetically grounding, helping you feel centered and balanced
Support the lymphatic system, aiding in detoxification
Promote healing for wounds and skin irritations
Hydrate all skin types, leaving your skin soft and moisturized
These lotion bars not only nurture your skin but also offer a soothing, holistic experience with every use!
HOW TO USE LOTION BARS
Now that we’ve made these beautiful lotion bars and discussed their amazing benefits, you might be wondering how to use them. Fortunately, they’re super easy to apply! All you need to do is take the lotion bar and warm it slightly with the heat of your hand. Once it softens a bit, gently massage the bar into your skin. As you rub it in, the lotion bar will start to melt and absorb, just like any other lotion. Once softened, continue to massage it over your body and feel the moisturizing effects. Let the calming scent and soothing properties transport you to that wildflower field as you pamper yourself!
Here are a few personal tips for using your lotion bar:
I recommend applying it right after you shower when your skin is warm and more receptive to absorbing the benefits. Whether it’s a morning or evening shower, your skin is in the perfect state to soak in the nourishment.
Make using your lotion bar part of your self-care or self-love ritual. The process of massaging it into your skin is incredibly relaxing and grounding, adding an extra touch of peace to your routine.
conclusion
In conclusion, making and using homemade lotion bars is not only a creative and enjoyable process but also a wonderful way to nourish and pamper your skin naturally. By infusing your own flower oils and choosing the right essential oils, you can customize your lotion bars to suit your needs, whether it’s for hydration, relaxation, or a touch of aromatherapy. The benefits of these lotion bars go beyond just moisturization—they offer grounding, soothing effects while supporting your skin’s health.
So, take time to enjoy this self-care ritual, incorporating it into your daily routine for the ultimate indulgence. Whether you’re gifting them to loved ones or treating yourself, these lotion bars are a beautiful, natural way to feel pampered and connected to the magic of nature.
57+ REALISTIC SIMS 4 CLUTTER AND DECOR CC TO ENRICH YOUR COLLECTION
Is your Sims 4 world feeling a little…lifeless? Are your builds brimming with potential but lacking that special touch of realism? Well, get ready to toss those bare shelves and sterile spaces out the window! This guide dives into a treasure trove of over 50 incredible clutter and decor items that will transform your Sims’ homes from generic to genuinely lived-in. From cozy bedroom clutter to kitchen essentials, we’ll cover everything you need to bring your creations to life. So, get ready to unleash your inner interior decorator!
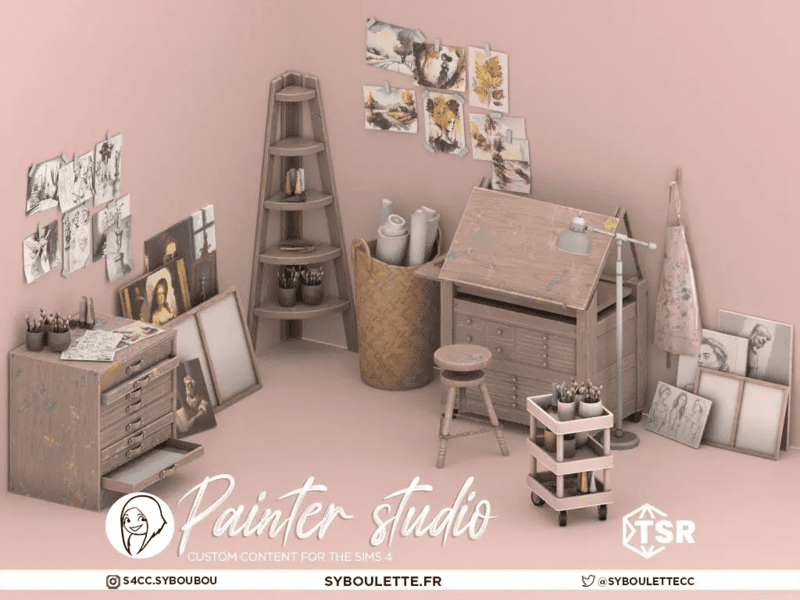
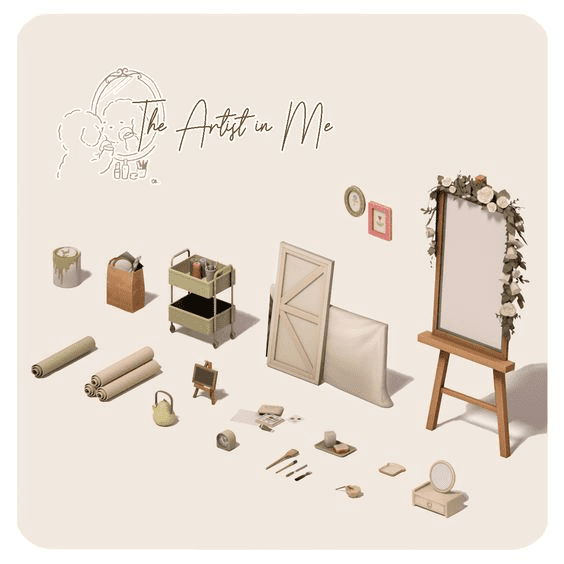
SIMS 4 PAINTER STUDIO CLUTTER CC – SYBOULETTE
If you’re looking to create a truly immersive painter’s studio in The Sims 4, Syboulette’s Painter Studio Clutter CC might be just what you need. This set by a talented creator offers a collection of clutter specifically designed for artistic spaces. Expect to find items like paint brushes, palettes, and easels in realistic styles. It injects that extra dose of detail to make your Sim’s artistic endeavors feel genuine and lived-in. While searching for Syboulette’s creations, be mindful that some content creators use platforms like Patreon, so you might need to explore those avenues to find the download.
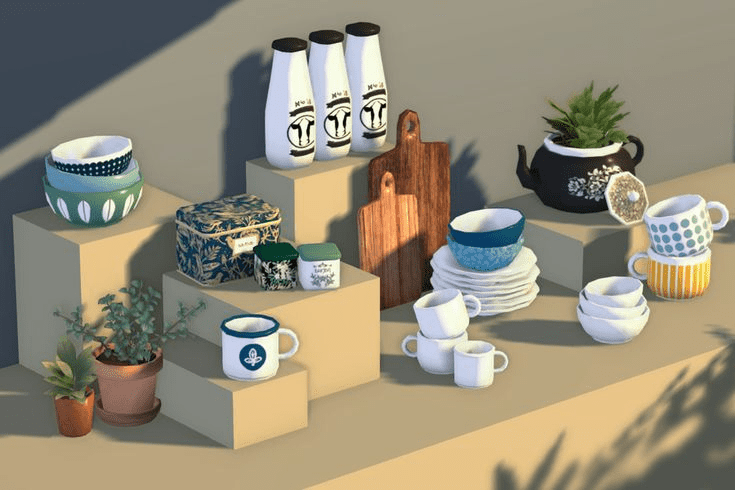
SIMS 4 TABLEWARE CC – LEAF-MOTIF
Spruce up your Sims’ dining experience with some nature-inspired elegance! Look for leaf-motif tableware CC for The Sims 4. This decorative style adds a touch of whimsy and sophistication to any kitchen or dining room. Imagine plates adorned with delicate leaf patterns or cups featuring charming leaf shapes. These sets are perfect for creating a botanical theme or simply adding a touch of organic beauty to your Sims’ home. With various creators offering leaf-motif CC, you’re sure to find a set that complements your existing décor. So, ditch the plain dishes and let your Sims dine in style!
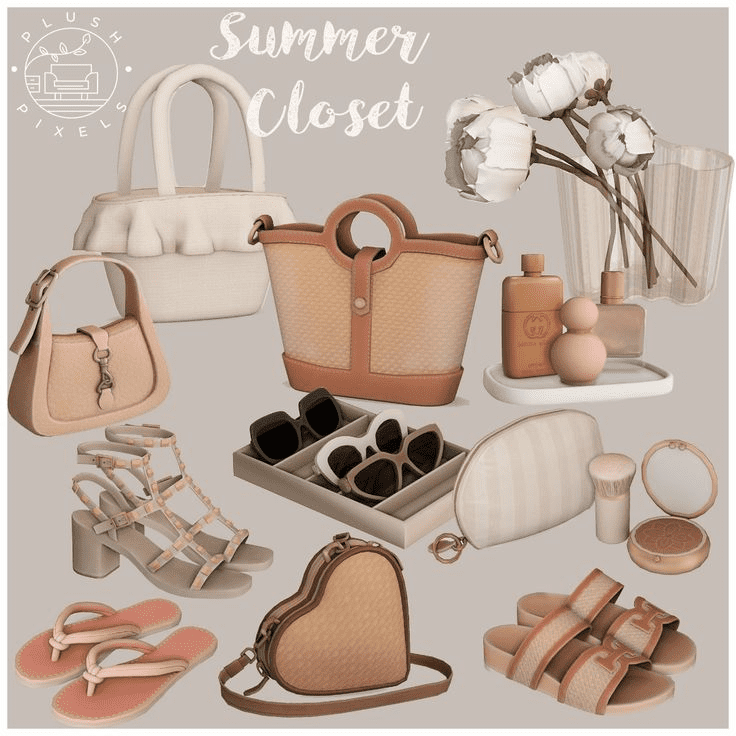
SIMS 4 SUMMER CLOSET CC – PLUSH PIXELS
Dive into summer vibes with Plush Pixels’ Sims 4 summer closet CC! This collection by a popular creator caters to the warm-weather wardrobe needs of your Sims. Expect to find a range of stylish and breezy clothing options, perfect for those long summer days. Think flowy dresses, cute swimwear, and essential summer accessories. Whether your Sim prefers a casual beach look or a flirty poolside outfit, Plush Pixels’ CC has something for everyone. Breathe life into your Sims’ summer wardrobe and let them embrace the sunshine in style! Be sure to explore Plush Pixels’ other creations for even more outfit inspiration.
SIMS 4 MUSIC CLUTTER CC – MYSHUNOSUN
Want to create a music lover’s paradise in The Sims 4? Look no further than Myshunosun’s Music Clutter CC! This talented creator offers a collection of decorative items specifically designed to bring your Sim’s musical passion to life. Expect to find instruments like guitars and microphones alongside smaller music-related clutter like sheet music and headphones. These CC pieces add a realistic touch, allowing you to craft a dedicated music room, a cozy musician’s corner, or simply sprinkle musical details throughout your Sim’s home. So, crank up the creativity and let Myshunosun’s CC help your Sims express their musical side!
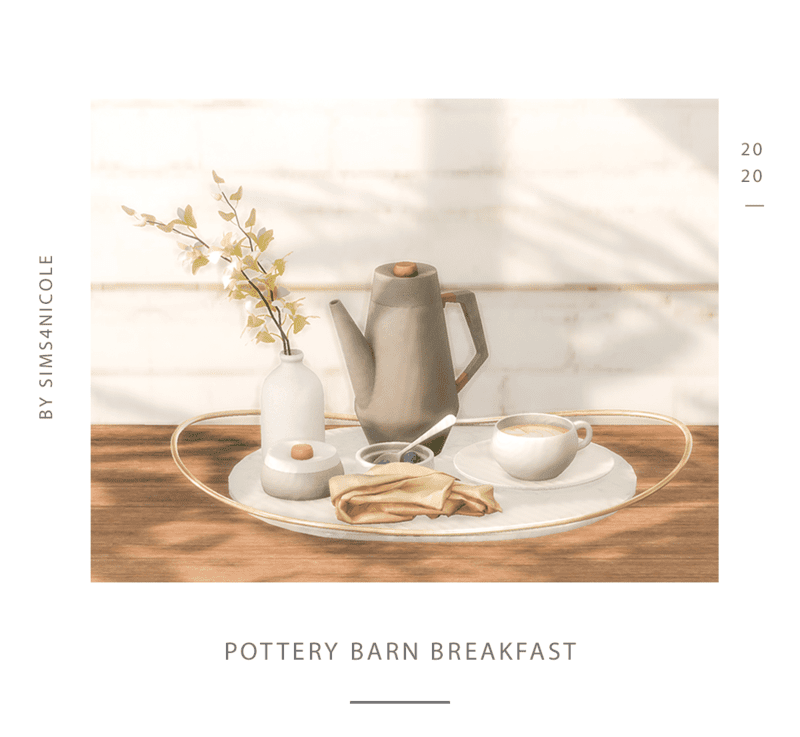
SIMS 4 BREAKFAST CLUTTER CC – SIMS4NICOLE
Breakfast is the most important meal of the day, and it deserves a stylish setting in your Sims’ home! Look for Sims4Nicole’s Breakfast Clutter CC for The Sims 4. This creator specializes in crafting delightfully realistic clutter specifically for kitchens and dining areas. Expect to find a charming array of breakfast-themed items like cereal boxes, toasters left out, and maybe even a half-eaten bowl of pancakes. These CC pieces add a touch of personality and lived-in charm to your Sims’ mornings. So, ditch the sterile kitchen and let Sims4Nicole’s CC help you create a breakfast nook that feels warm and inviting!
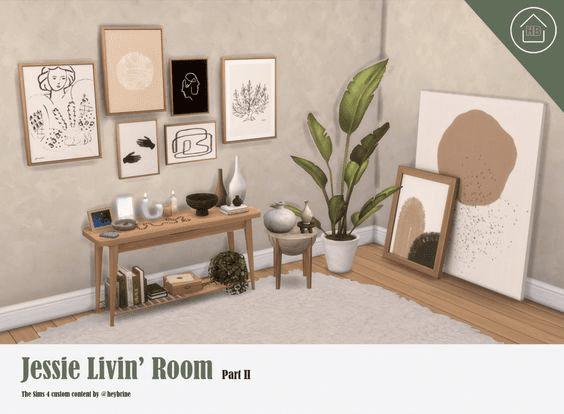
SIMS 4 LIVING ROOM CLUTTER CC – HEYBRINE
Breathe life into your Sims’ living spaces with Heybrine’s Living Room Clutter CC for The Sims 4! This creator is known for crafting beautiful and realistic clutter that elevates the atmosphere of any room. Expect to find a diverse collection of items perfect for living rooms, from cozy throw pillows and decorative bowls to interesting books and figurines. Heybrine’s CC allows you to personalize your Sims’ living spaces, reflecting their hobbies and interests. So, ditch the generic living room and let Heybrine’s clutter help you create a space that feels truly lived-in and reflects your Sims’ unique personalities.
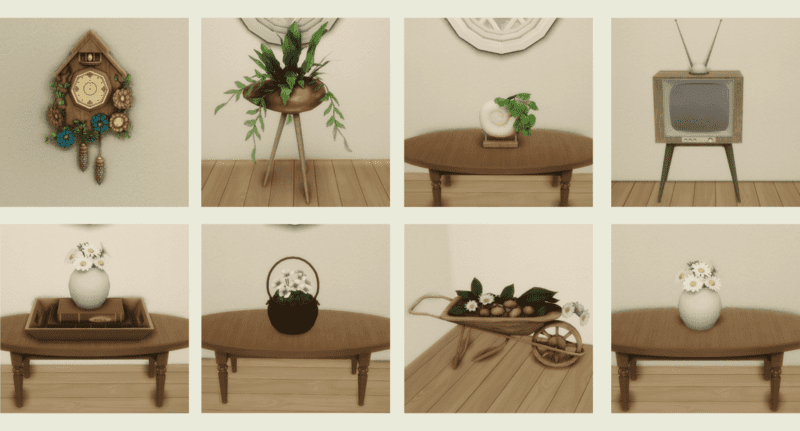
SIMS 4 VINTAGE CLUTTER CC – LUSTROUSIMS
Steep your Sims’ home in nostalgia with Lustrousims’ Vintage Clutter CC for The Sims 4! This creator specializes in crafting exquisite clutter that evokes a bygone era. Imagine adorning shelves with antique cameras and dusty gramophones, or adding a touch of whimsy with vintage teacups and floral doilies. Lustrousims’ CC is perfect for creating a charmingly retro atmosphere, allowing you to build anything from a cozy grandma’s cottage to a sophisticated mid-century modern masterpiece. So, dust off your design sensibilities and let Lustrousims’ CC transport your Sims’ world to a different time period!
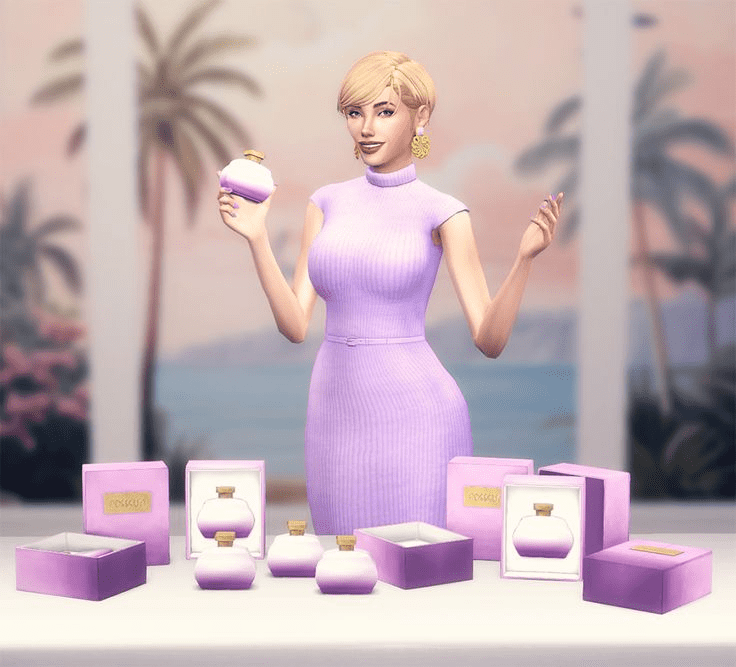
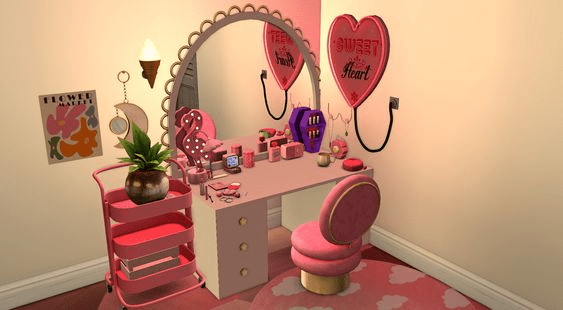
PASSION SIMS 4 PERFUME DECOR CC AND POSES – SOMEONE-ELSA
This creative duo offers a unique combination of decorative items and expressive poses centered around the world of perfume. Imagine chic perfume bottles gracing your Sims’ vanities or bathroom shelves, adding a touch of sophistication to their daily routine. But Someone-Else doesn’t stop there! The included poses allow you to capture your Sims spritzing on their favorite scent, admiring a new fragrance, or even lost in a luxurious bubble bath. So, elevate your Sims’ bathroom experience and express their love for perfume with Someone-Else’s CC!
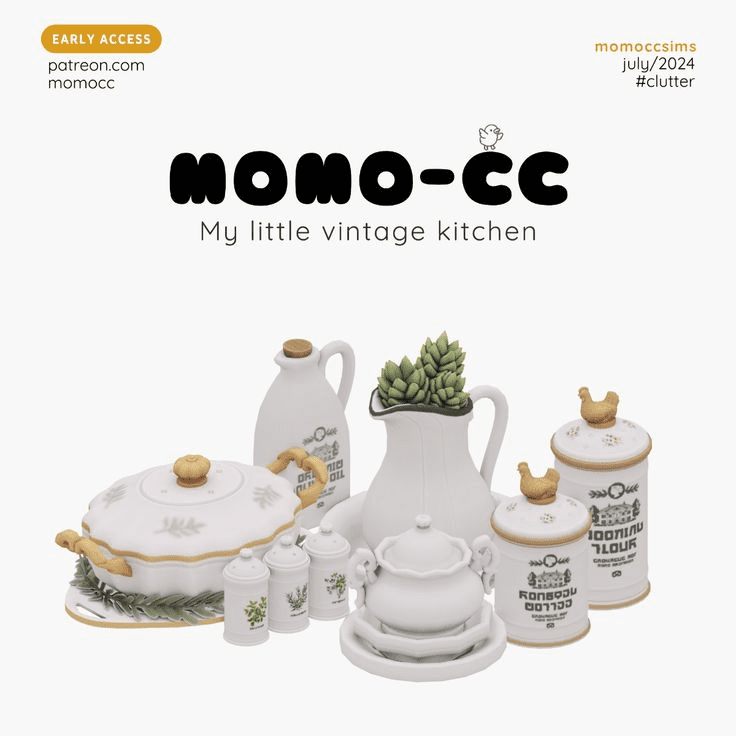
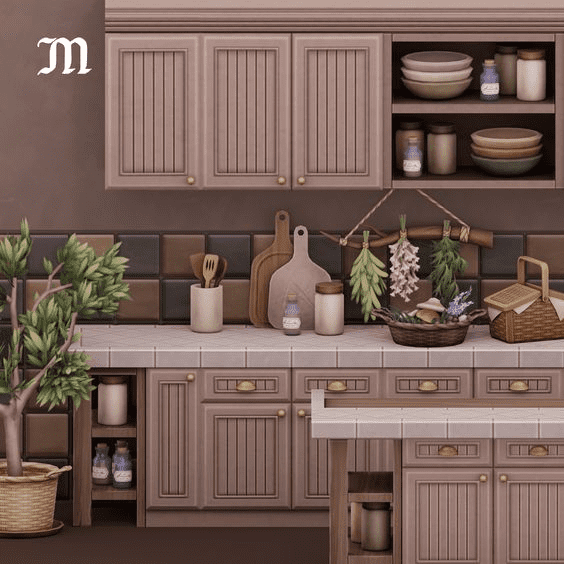
MY LITTLE VINTAGE KITCHEN CLUTTER CC – MOMO-CC
Whisk your Sims back to a simpler time with Momo-CC’s My Little Vintage Kitchen Clutter CC for The Sims 4! This creator brings a delightful touch of nostalgia to your Sims’ culinary space. Imagine adorning shelves with antique tins filled with colorful cookies or displaying charming mismatched teacups. Momo-CC’s collection isn’t just about aesthetics; expect functional clutter like vintage rolling pins and enamelware pots, allowing you to create a kitchen that feels both beautiful and timeworn. So, ditch the sterile modern look and embrace the warmth of yesteryear with Momo-CC’s My Little Vintage Kitchen Clutter CC!
IN MY BACKPACK SIMS 4 CLUTTER CC – MEL-BENNETT
“In My Backpack” is a delightful Sims 4 clutter custom content (CC) pack created by the talented Mel-Bennett. This pack features an array of detailed and realistic items that you might find in a typical backpack, adding a touch of everyday life to your Sims’ environment. From notebooks and pens to water bottles and snacks, each piece is meticulously crafted to enhance the immersive experience of the game. The clutter items are perfect for creating more personalized and lived-in spaces, whether you’re decorating a student’s room, a cozy study area, or a traveler’s corner. Mel-Bennett’s attention to detail and creativity shine through in this CC pack, making it a must-have for players looking to add a bit of charm and realism to their Sims 4 gameplay.
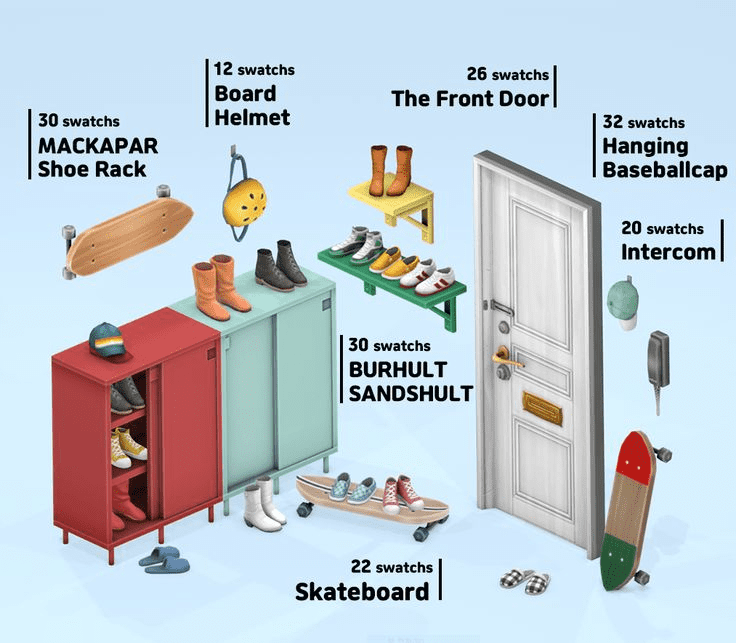
MY HEIMISH SIMS 4 FRONT DOOR DECOR CC – KKB
The “My Heimish” front door decor custom content (CC) for Sims 4, created by KKB, brings a cozy and welcoming touch to your Sims’ homes. This CC pack includes a variety of charming decor items such as wreaths, doormats, and potted plants, perfect for enhancing the curb appeal of any house. Each piece is designed with intricate details and a homey aesthetic, making your Sims’ front entrances look inviting and warm. Ideal for players who love to personalize their virtual spaces, the “My Heimish” front door decor adds a delightful and realistic touch to the game’s environment. KKB’s creativity and attention to detail ensure that these decor items blend seamlessly with the game’s visuals, providing a beautiful and cohesive look to your Sims’ homes.
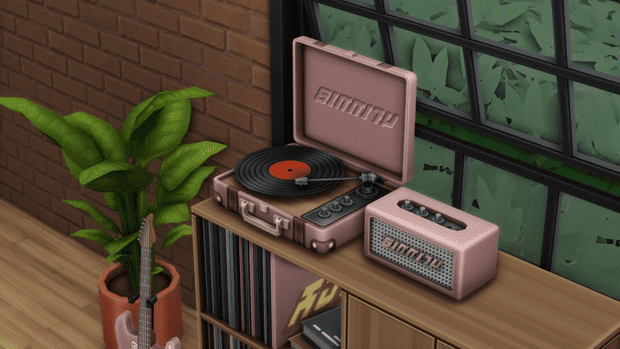
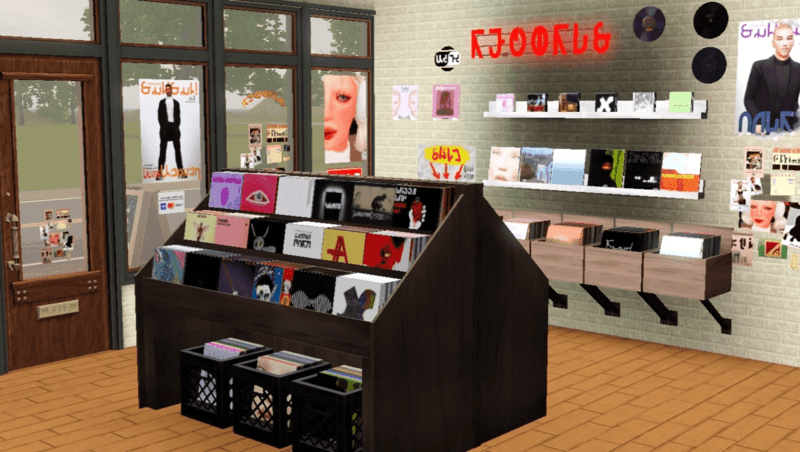
SIMS 4 THE RECORD STORE CLUTTER CC – SIMMILA
“The Record Store” clutter custom content (CC) for Sims 4 by Simmila is a fantastic addition for music lovers looking to bring a touch of vintage charm to their Sims’ spaces. This CC pack features an array of meticulously designed items that you would find in a classic record store, including vinyl records, turntables, posters, and record crates. Each piece is crafted with incredible detail, capturing the essence of a nostalgic music shop and adding a unique, lived-in feel to your Sims’ homes or community lots. Perfect for creating a dedicated music room or a retro-themed hangout spot, these clutter items allow players to infuse their builds with personality and a love for music. Simmila’s “The Record Store” clutter CC not only enhances the visual appeal of your game but also offers a fun and creative way to celebrate the timeless joy of vinyl records and vintage music culture.
SKINCARE SIMS 4 MAKEUP CLUTTER CC – SIMKOOS
The “Skincare” makeup clutter custom content (CC) for Sims 4 by Simkoos is a delightful addition for players who want to add a touch of beauty and self-care to their Sims’ routines. This CC pack includes a variety of detailed items such as skincare bottles, makeup brushes, creams, and serums, perfectly capturing the essence of a well-stocked vanity or bathroom counter. Each item is designed with meticulous attention to detail, making the clutter look realistic and enhancing the everyday life aspect of the game. Ideal for creating personalized beauty corners, dressing tables, or spa-themed rooms, this clutter set adds a layer of authenticity and charm to your Sims’ living spaces. Simkoos’ “Skincare” makeup clutter CC not only beautifies your game environment but also allows you to reflect the importance of self-care and pampering in your Sims’ lives.
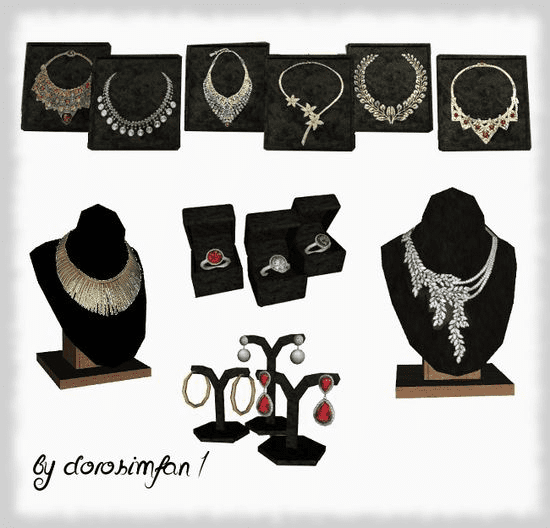
SIMS 4 JEWELRY CLUTTER CC – AROUND THE SIMS 4
The “Jewelry Clutter” custom content (CC) for Sims 4 by Around the Sims 4 is a beautiful and intricate addition for players looking to add a touch of elegance and luxury to their Sims’ homes. This CC pack features a stunning array of jewelry pieces, including necklaces, earrings, bracelets, and rings, all designed with exceptional detail. Each piece can be displayed in various ways, such as on trays, in open jewelry boxes, or elegantly draped on dressers, adding a sophisticated and realistic touch to your Sims’ dressing areas. Perfect for creating a glamorous vanity, a chic boutique, or a personal treasure trove, the jewelry clutter items bring a sense of style and refinement to any room. Around the Sims 4 has crafted these items with such care and precision that they seamlessly blend into the game’s environment, enhancing the visual appeal and personalizing your Sims’ spaces with a touch of sparkle.
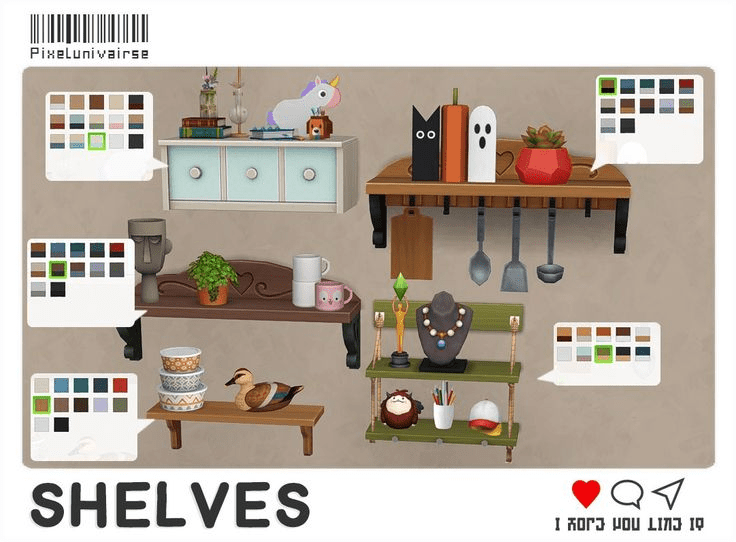
SIMS 4 SHELVES DECOR CC – PIXELUNIVAIRSE
The “Shelves Decor” custom content (CC) for Sims 4 by Pixelunivairse is a fantastic collection for players who love to decorate their Sims’ homes with stylish and functional items. This CC pack includes a variety of shelves and decor pieces that can be mixed and matched to create personalized and aesthetically pleasing spaces. From books and plants to decorative trinkets and storage boxes, each item is crafted with great attention to detail, making the shelves look both realistic and inviting. Perfect for any room in the house, these decor items allow players to add character and organization to living rooms, bedrooms, kitchens, and more. Pixelunivairse’s “Shelves Decor” CC not only enhances the visual appeal of your game but also offers endless possibilities for creative interior design, making your Sims’ homes feel more lived-in and uniquely theirs.
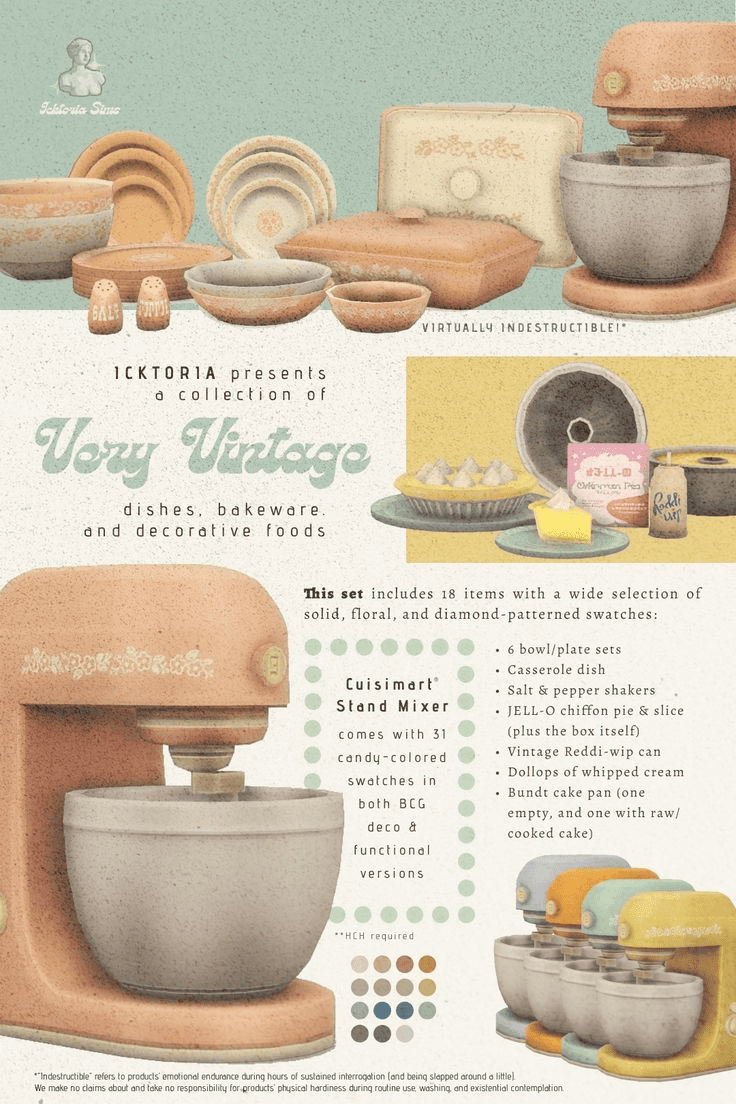
VERY VINTAGE SIMS 4 CLUTTER CC PACK – ICKTORIA SIMS
The “Very Vintage” clutter custom content (CC) pack for Sims 4 by Icktoria Sims is a delightful collection for those who adore retro and nostalgic aesthetics. This CC pack features an array of vintage-inspired items like old-fashioned telephones, typewriters, antique clocks, and vintage decor pieces that bring a charming, bygone era feel to your Sims’ homes. Each item is meticulously designed with authentic detail, capturing the essence of different decades and adding a touch of history and character to any room. Ideal for creating retro-themed living spaces, cozy reading nooks, or a stylish vintage office, these clutter pieces allow players to immerse their Sims in a world of timeless elegance. Icktoria Sims’ “Very Vintage” CC pack not only enhances the game’s visual appeal but also provides a fun and creative way to explore historical design trends and personalize your Sims’ environments with a nostalgic flair.
SCHOOL SUPPLIES SIMS 4 CLUTTER CC – SIXAMCC
The “School Supplies” clutter custom content (CC) pack for Sims 4 by SixamCC is a fantastic addition for players looking to create realistic and detailed educational environments. This CC pack includes an assortment of school-related items such as notebooks, pencils, rulers, backpacks, and textbooks, all designed with a high level of detail and authenticity. Perfect for decorating children’s rooms, study areas, or classrooms, these clutter pieces add a functional and lived-in feel to any space. Each item can be strategically placed to create a messy desk, an organized study corner, or a bustling classroom, enhancing the storytelling possibilities in your game.
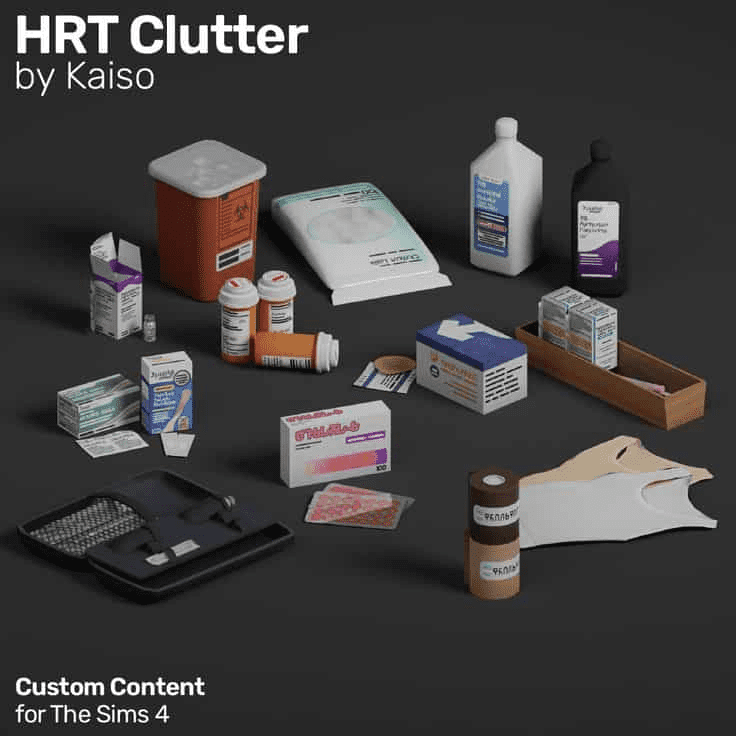
HRT SIMS 4 CLUTTER CUSTOM CONTENT – KAISO
The “HRT” (Hormone Replacement Therapy) clutter custom content (CC) pack for Sims 4 by Kaiso is a thoughtful and inclusive addition designed to represent the experiences of transgender Sims. This CC pack includes a variety of HRT-related items such as medication bottles, hormone patches, syringes, and informational pamphlets, all crafted with careful attention to detail and sensitivity. These items can be placed in bedrooms, bathrooms, or personal spaces, adding a realistic touch to the lives of Sims undergoing hormone therapy. By incorporating such specific and meaningful clutter, Kaiso’s pack provides players with the tools to create more diverse and representative stories within their Sims’ communities. The “HRT” clutter CC pack not only enhances the authenticity of the game but also fosters a greater understanding and visibility of transgender experiences in the virtual world.
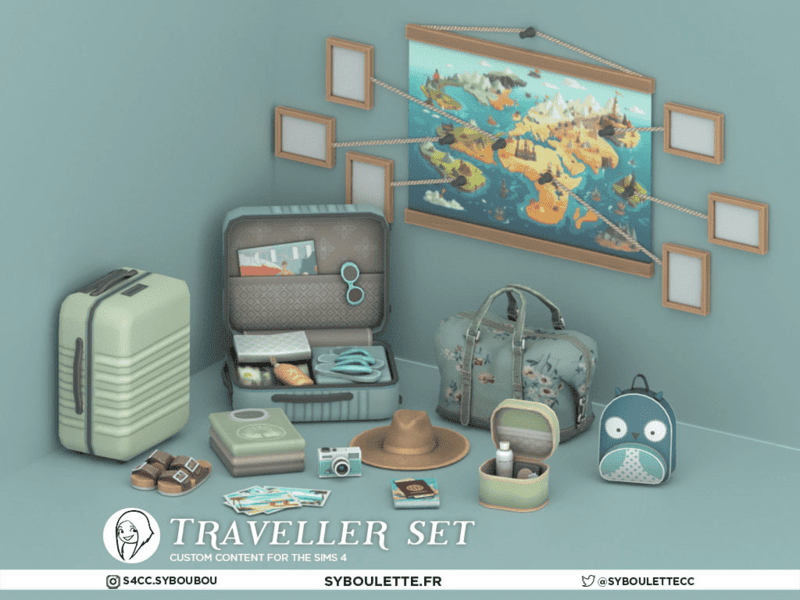
TRAVELLER SIMS 4 CLUTTER CC SET – SYBOULETTE
Embark on a decorative journey with Syboulette’s Traveller Sims 4 Clutter CC Set! This collection by a talented creator caters specifically to wanderlust-stricken Sims. Expect to find a treasure trove of travel-themed clutter, like miniature suitcases, postcards from exotic locations, and well-worn travel journals. These decorative items allow you to create a living space that reflects your Sim’s adventurous spirit. Imagine a bookshelf adorned with travel mementos or a desk scattered with maps and travel brochures. Syboulette’s CC helps transform any room into a haven for the globetrotting Sim!
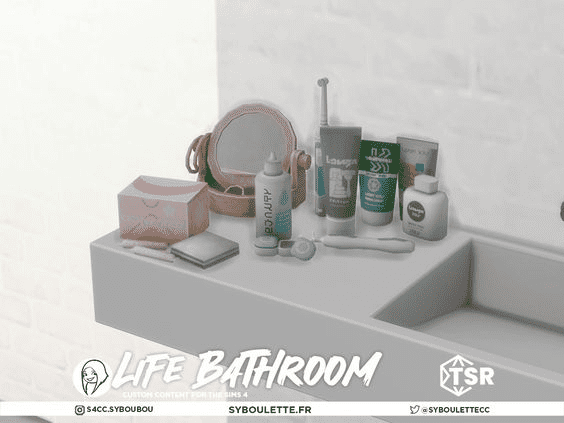
SIMS 4 BATHROOM CLUTTER CC PACK – SYBOULETTE
Spruce up your Sims’ hygiene haven with Syboulette’s Bathroom Clutter CC Pack for The Sims 4! This collection from a renowned creator focuses on adding those finishing touches that make a bathroom feel lived-in and functional. Imagine shelves overflowing with fluffy towels and colorful toiletries, or a vanity adorned with decorative soaps and bath bombs. Syboulette’s CC goes beyond aesthetics; expect clutter like bath mats and toothbrush holders, allowing you to create a bathroom that’s both stylish and practical. So, banish the sterile look and infuse your Sims’ bathroom with personality and everyday essentials!
SIMS 4 GROCERY CLUTTER CC – DESTRUAM
Breathe life into your Sims’ kitchens with Destruam’s Grocery Clutter CC for The Sims 4! This collection by a creative designer offers a delightful assortment of clutter specifically designed to stock your virtual shelves and fridges. Expect to find a wide variety of realistic food items like milk cartons, colorful cereal boxes, and fresh fruit. Destruam’s CC goes beyond basic groceries; you might find condiment bottles, cookbooks propped open, or even leftover takeout containers. These details help create a kitchen that feels real and used, allowing you to tell stories through the clutter and let your Sims’ personalities shine. So, ditch the empty shelves and fill your Sims’ kitchens with the delicious bounty of Destruam’s Grocery Clutter CC!
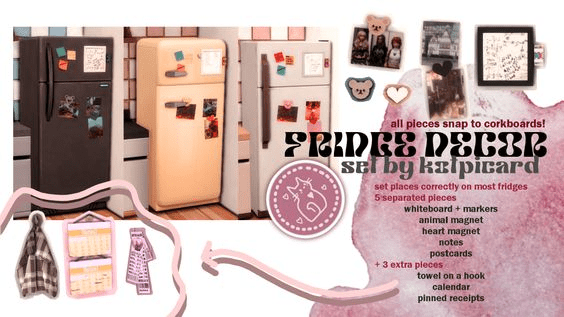
SIMS 4 FRIDGE DECOR SET – PICARDSIMS
Spice up your Sims’ kitchens with PicardSims’ Fridge Decor Set for The Sims 4! This creative collection lets you personalize those often-bare fridge doors. Imagine adding cute magnets, grocery lists scrawled on notepads, or even colorful artwork. PicardSims’ set caters to a range of styles, so you can find whimsical magnets for a playful kitchen or sleek framed photos for a more modern look. These decorative touches add a layer of personality and make your Sims’ fridges feel truly lived-in. So, say goodbye to boring fridges and let PicardSims’ CC help you create a kitchen that reflects your Sims’ unique style!
RANDOM SIMS 4 CLUTTER CC PACK – AIRA
Breathe new life into your Sims’ world with Aira’s Random Sims 4 Clutter CC Pack! This collection by a creative designer offers a delightful surprise bag of decorative items. While the exact contents remain a mystery, you can expect a diverse mix of clutter to add personality and detail to any room. Imagine finding anything from cozy throw pillows and trinkets to quirky figurines and decorative bowls. Aira’s CC lets you embrace the unexpected and create unique spaces that reflect your Sims’ individual tastes. So, ditch the predictable and dive into Aira’s Random Clutter Pack for a delightful surprise and endless creative possibilities!
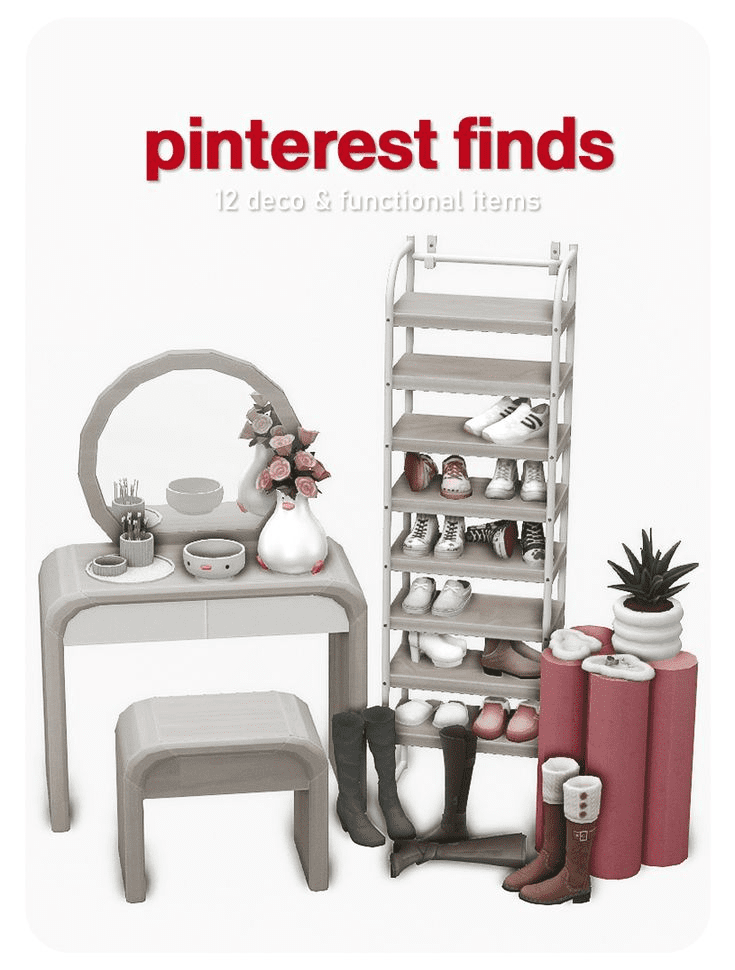
PINTEREST FINDS SIMS 4 DECOR AND FUNCTIONAL CC FINDS – SIMKOOS
Explore a treasure trove of decorative and functional CC for The Sims 4 on Simkoo’s Pinterest boards! Simkoo, a talented creator, curates inspiring collections showcasing a variety of custom content. Expect to find a delightful mix of decorative items – think stylish furniture, beautiful wall art, and even realistic clutter. But Simkoo doesn’t stop there! You might also discover functional CC, like unique light fixtures, custom windows, or innovative appliances. By browsing Simkoo’s Pinterest finds, you’ll uncover a world of possibilities to enhance your Sims’ homes and bring your design visions to life!
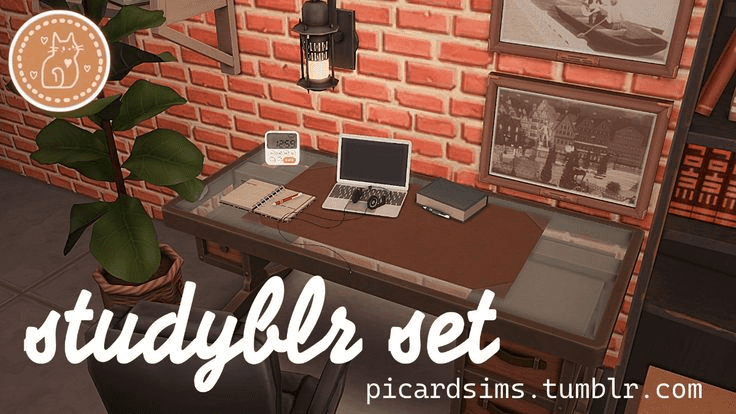
SIMS 4 STUDYBLR CLUTTER CC PACK – PICARDSIMS
Inspired by the popular “studyblr” aesthetic on social media, this collection offers a curated selection of clutter to create the perfect academic haven. Imagine desks adorned with motivational quotes, stacks of colorful textbooks, and charming potted succulents. PicardSims’ CC goes beyond aesthetics – expect functional clutter like planners, highlighters, and even a trusty cup of coffee (essential for those late-night study sessions!). This pack allows you to personalize your Sim’s study space to reflect their academic pursuits. Whether they’re a budding scientist or a future novelist, the Studyblr Clutter CC Pack provides the perfect finishing touches for a truly inspiring environment. So ditch the sterile desks and let PicardSims’ CC help your Sims conquer their studies in style!
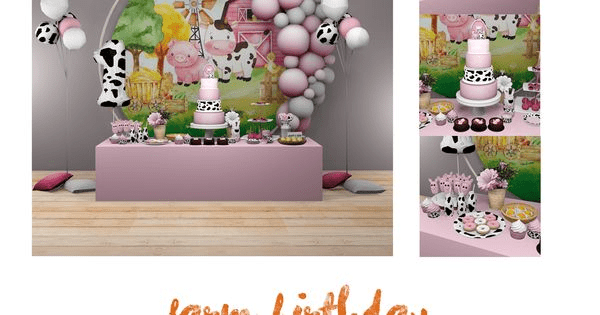
SIMS 4 FARM BIRTHDAY CLUTTER CC – MELBENNETTS
The “Farm Birthday” clutter custom content (CC) pack for Sims 4 by MelBennetts is an adorable and festive addition for players planning charming, rustic birthday celebrations. This CC pack features a delightful array of farm-themed birthday decorations, including animal-shaped balloons, barnyard banners, themed party hats, and table settings adorned with cute farm animals. Ideal for both children’s birthday parties and fun-loving adult gatherings, these items bring a touch of countryside whimsy and joy to any celebration. Each piece is meticulously designed to create a cohesive and visually appealing party atmosphere, making it easy to transform any space into a lively farmyard festivity. MelBennetts’ “Farm Birthday” CC pack not only enhances the festive feel of your Sims’ parties but also adds a unique and playful theme that can make birthdays truly memorable in the game.
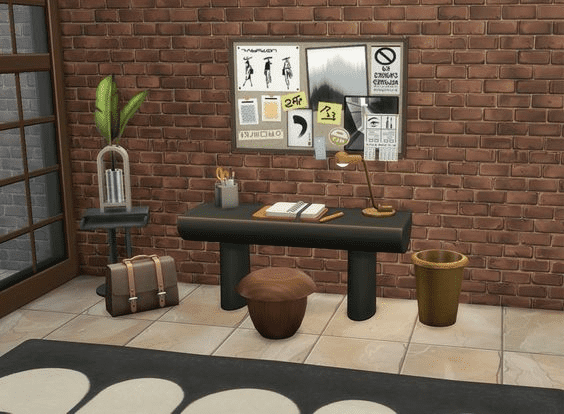
BUSYBEE SIMS 4 OFFICE CLUTTER CC – THE CLUTTER CAT
BusyBee Sims 4 Office Clutter CC is a fantastic addition for players looking to enhance their in-game office spaces. This collection, created by The Clutter Cat, offers a wide variety of realistic office items that add depth and detail to any Sims 4 environment. From stationery and desk organizers to coffee mugs and file folders, the clutter set brings a lived-in feel to your Sims’ workspaces. These meticulously crafted items not only improve the aesthetic of your Sims’ offices but also help in creating more immersive storytelling opportunities. Whether you’re designing a bustling corporate office or a cozy home workspace, BusyBee Sims 4 Office Clutter CC is a must-have for any dedicated player.
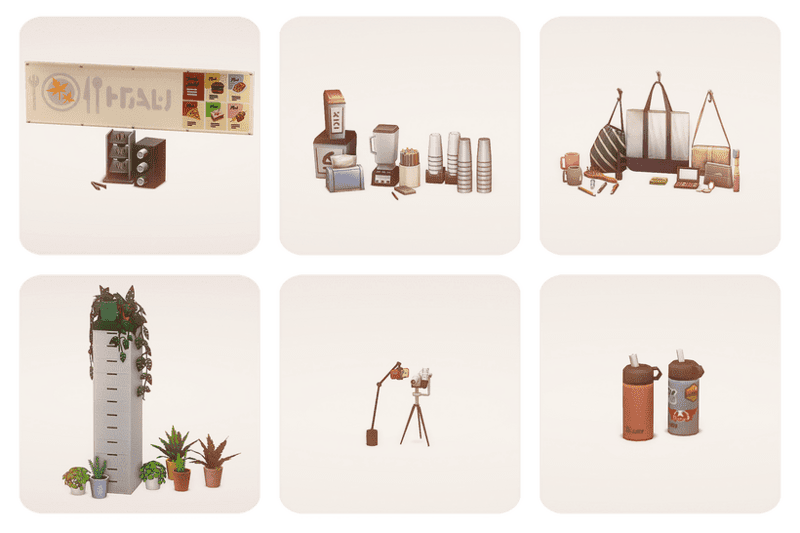
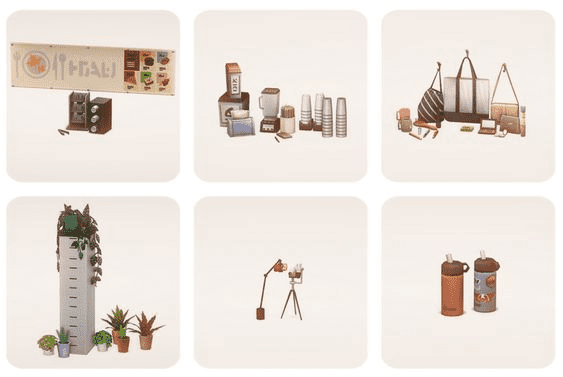
SIMS 4 DECO AND FUNCTIONAL CLUTTER ITEMS – SIMKOOS
Sims 4 Deco and Functional Clutter Items by Simkoos are perfect for players looking to enhance both the aesthetics and functionality of their Sims’ homes. This collection includes a wide range of items, from decorative plants and picture frames to functional objects like kitchen utensils and office supplies. Each item is thoughtfully designed to blend seamlessly with the game’s existing decor, adding a touch of realism and charm. These clutter items not only beautify your Sims’ living spaces but also provide practical uses, making daily Sim life more engaging and immersive. With Simkoos’ attention to detail and quality, this clutter pack is an excellent addition for any Sims 4 player aiming to create more vibrant and dynamic environments.
SIMS 4 HEALTH AND FITNESS CLUTTER CC – SIMMERKATE
The “Health and Fitness” clutter custom content (CC) pack for Sims 4 by SimmerKate is perfect for players who want to create realistic and motivating fitness spaces for their Sims. This CC pack includes a variety of health and fitness-related items like water bottles, yoga mats, dumbbells, protein shakes, and gym bags, all crafted with high attention to detail. These items can be strategically placed in home gyms, fitness studios, or even in Sims’ living rooms, adding a touch of authenticity and functionality to the environment. By incorporating such detailed fitness clutter, players can enhance their Sims’ workout routines and create inspiring, health-focused spaces. SimmerKate’s “Health and Fitness” CC pack not only boosts the visual appeal of your Sims’ homes but also promotes a healthy lifestyle and encourages your Sims to stay active and fit.
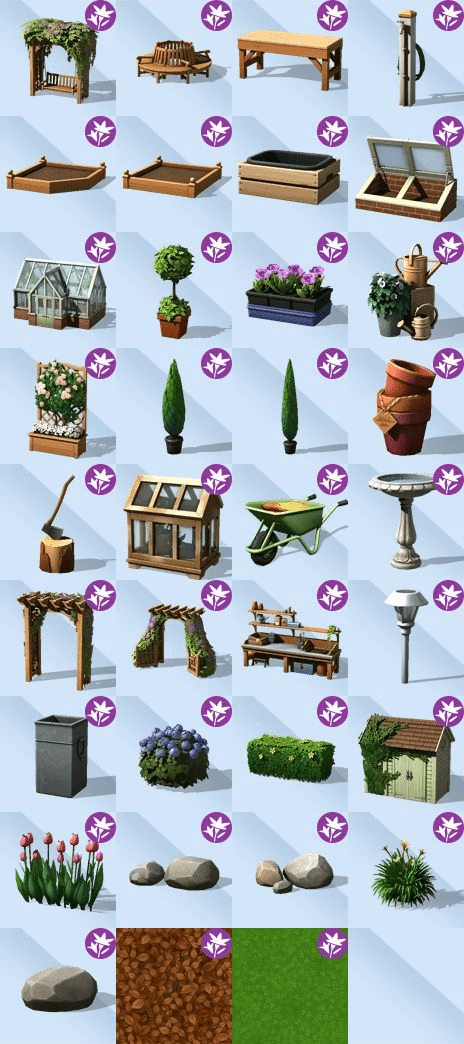
SIMS 4 GARDEN AND CLEANING CLUTTER CC
The “Garden and Cleaning” clutter custom content (CC) pack for Sims 4 is an excellent choice for players aiming to add practical and detailed touches to their Sims’ outdoor and indoor spaces. This CC pack includes a variety of items like gardening tools, potted plants, watering cans, cleaning supplies, brooms, and detergent bottles, all meticulously designed to enhance realism. These clutter pieces can be placed in gardens, greenhouses, kitchens, or utility rooms, creating a lived-in and functional atmosphere. With this pack, players can design beautiful and organized gardening areas or spotless, well-maintained homes, adding depth to their Sims’ daily routines. The “Garden and Cleaning” CC pack not only enriches the visual detail of your Sims’ environments but also brings a sense of everyday life and domestic care into your game.
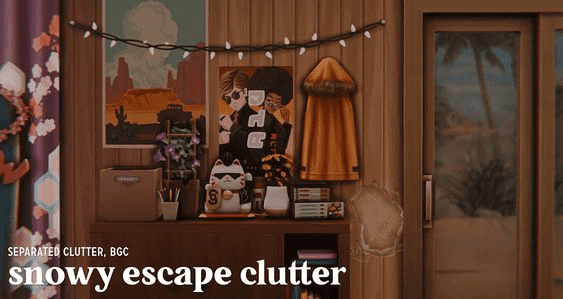
SIMS 4 SNOWY ESCAPE CLUTTER CC – SFORZCC
Sims 4 Snowy Escape Clutter CC by SforzCC is great for adding winter-themed items to your game. This set includes cozy decorations like snow boots, skis, and winter coats that make your Sims’ homes feel warm and inviting. The clutter items match the Snowy Escape expansion, blending perfectly with its style and theme. These decorations help create a realistic and immersive winter environment for your Sims. If you love the Snowy Escape expansion, this clutter set by SforzCC is a perfect addition to your game.
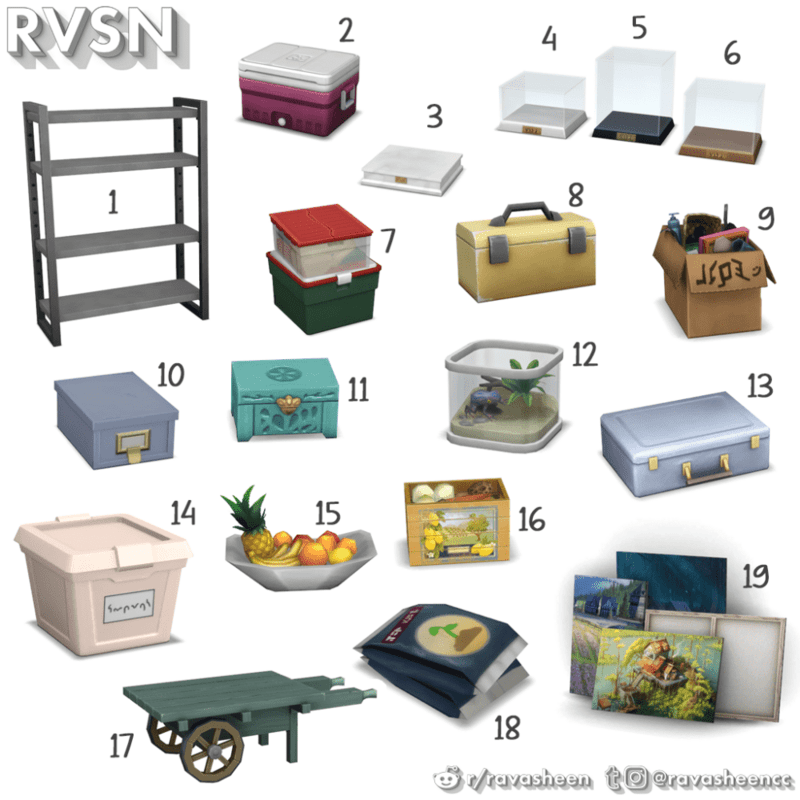
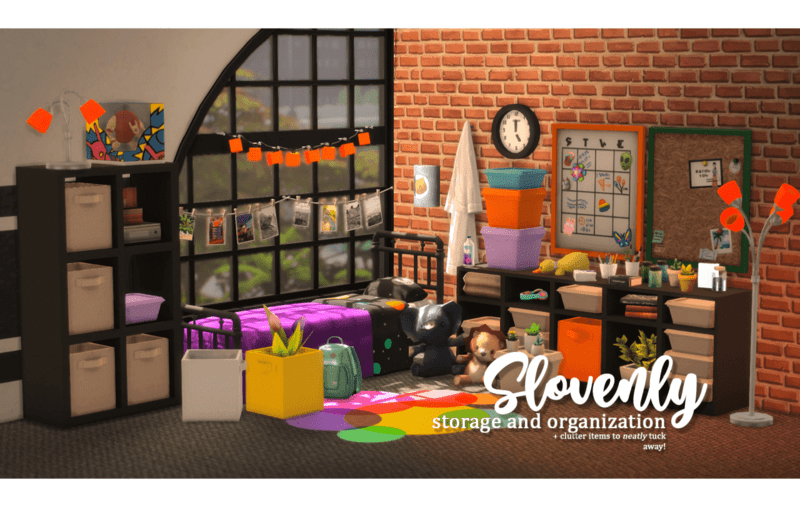
SIMS 4 STORAGE AND ORGANIZATION CLUTTER CC – SIMKOOS
Sims 4 Storage and Organization Clutter CC by Simkoos is perfect for making your Sims’ homes neat and tidy. This collection includes items like shelves, boxes, and bins that help organize different rooms. The clutter pieces are designed to look realistic, making your Sims’ spaces feel more lived-in. With these storage items, you can create well-organized kitchens, bedrooms, and offices. Simkoos’ clutter set is great for adding both style and function to your Sims’ homes.
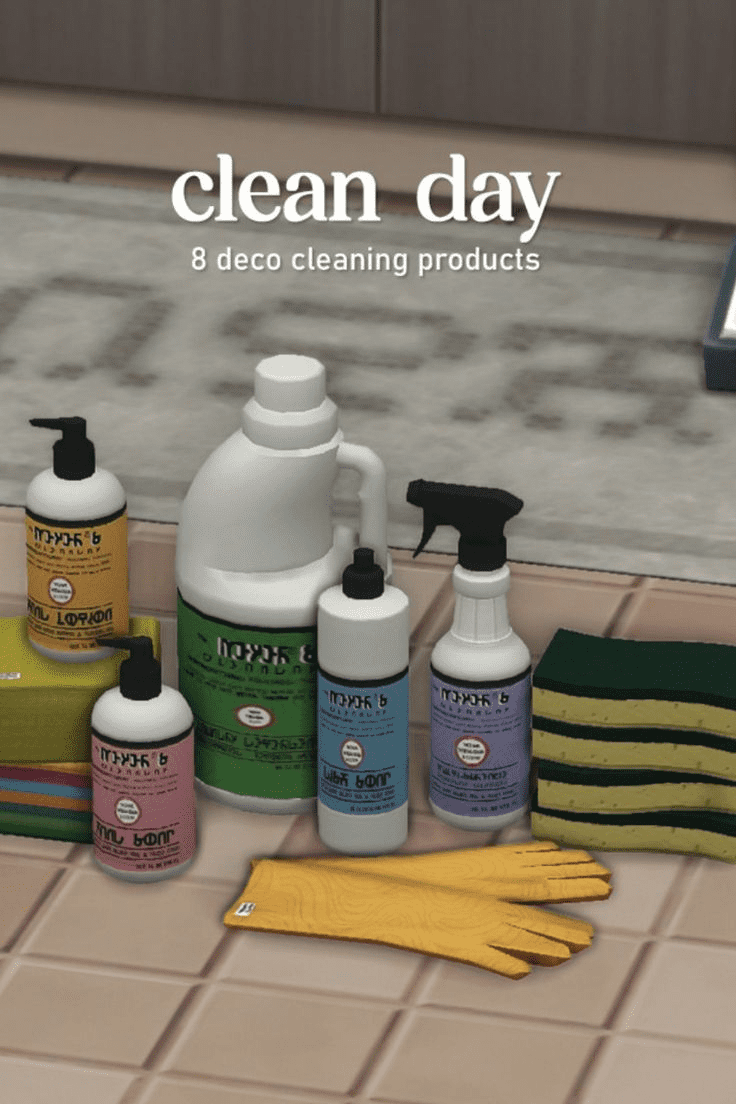
SIMS 4 CLEAN DAY CLUTTER CC – SIMKOOS
Sims 4 Clean Day Clutter CC by Simkoos is perfect for adding cleaning items to your Sims’ homes. This set includes things like mops, brooms, cleaning bottles, and sponges. These items make your Sims’ houses look more realistic and lived-in. With Clean Day Clutter CC, you can create scenes where your Sims are tidying up their spaces. Simkoos’ clutter set is a great way to add a touch of everyday life to your Sims’ game.
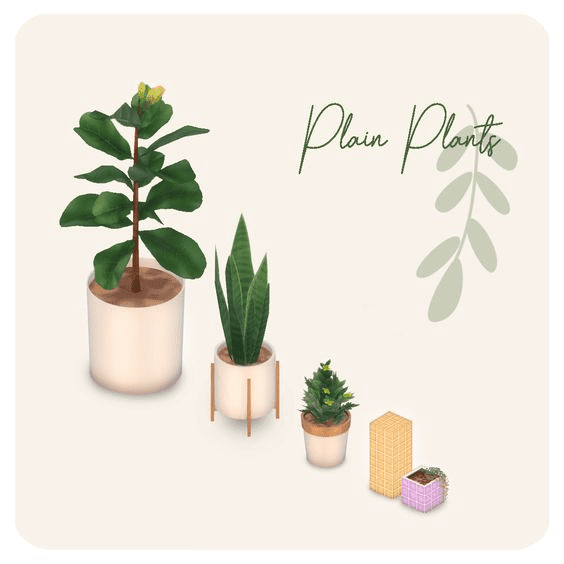
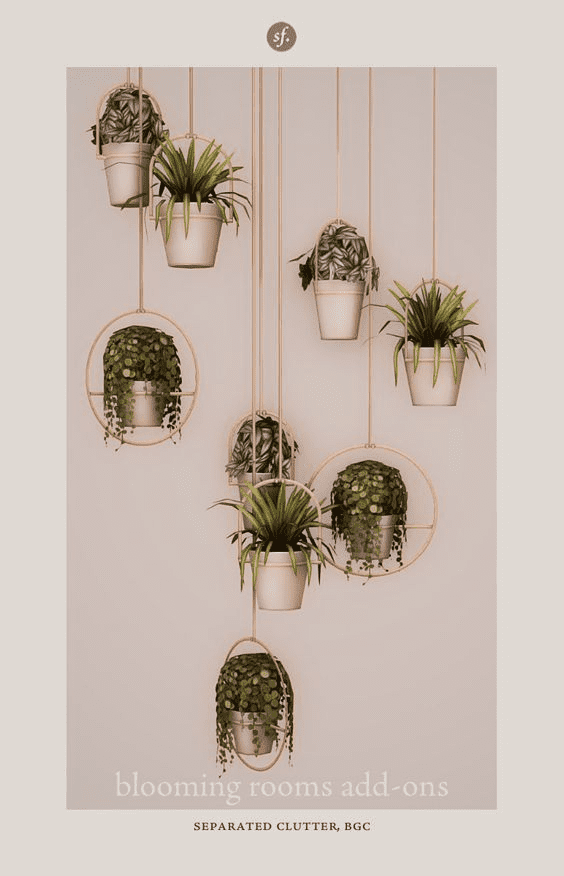
SIMS 4 PLANT CLUTTER CC
The “Plant Clutter” custom content (CC) pack for Sims 4 is a delightful addition for players who love to adorn their Sims’ spaces with greenery and natural elements. This CC pack includes a variety of plant-related items such as small potted plants, hanging planters, succulent arrangements, and decorative vases, all designed with intricate detail and care. Perfect for enhancing any room, these plant clutter pieces can be strategically placed on shelves, tables, windowsills, or even in outdoor patios and gardens, adding a fresh and vibrant touch to the environment. By incorporating these lush and diverse plant items, players can create serene and aesthetically pleasing spaces that reflect their Sims’ love for nature. The “Plant Clutter” CC pack not only beautifies your Sims’ homes but also brings a sense of tranquility and life to their surroundings, making every space feel more inviting and refreshing.
SIMS 4 BATTLESTATION CLUTTER CC – SIMKOOS
Sims 4 Battlestation Clutter CC by Simkoos is great for gamers who want to build cool gaming setups for their Sims. This set includes items like gaming keyboards, monitors, headphones, and action figures. These clutter pieces make your Sims’ gaming rooms look more realistic and exciting. With Battlestation Clutter CC, you can create the ultimate gaming space for your Sims. Simkoos’ set is perfect for adding fun and detail to your Sims’ gaming lives.
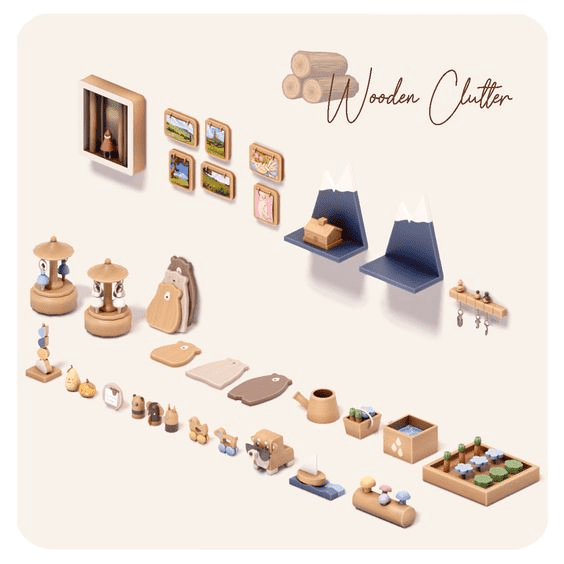
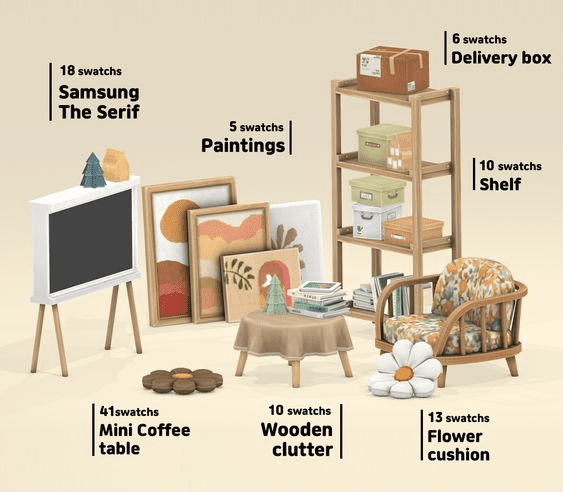
THE SIMS 4 WOODEN CLUTTER SET – AIRA
The “Wooden Clutter Set” for Sims 4 by Aira is a beautiful addition for players who love rustic and natural decorations. This set includes items like wooden bowls, trays, picture frames, and small furniture pieces, all made with a charming wooden texture. These items can be placed in various rooms such as the living room, kitchen, or bedroom, adding a warm and cozy feel to the space. Aira’s wooden clutter helps create a homey and inviting atmosphere, perfect for Sims who appreciate natural materials. The “Wooden Clutter Set” not only enhances the visual appeal of your Sims’ homes but also adds a touch of nature and warmth to their living spaces.
SIMS 4 REALISTIC CLUTTER CC – SIMKOOS
Sims 4 Realistic Clutter CC adds lifelike details to your Sims’ homes. This collection includes everyday items like books, plants, and kitchen utensils. These clutter pieces make your Sims’ living spaces feel more cozy and realistic. With Realistic Clutter CC, you can personalize rooms to match different lifestyles and preferences. Players enjoy using this CC to enhance the atmosphere and storytelling in their Sims’ lives.
SIMS 4 FOOD CLUTTER CC – PINK BADDIE
The “Food Clutter” custom content (CC) pack for Sims 4 by Pink Baddie is perfect for players who love detailed kitchen and dining decorations. This pack includes items like realistic food dishes, snacks, drinks, and kitchen utensils, all designed with great care. These food items can be placed on counters, tables, and shelves, making your Sims’ kitchens look busy and lived-in. Pink Baddie’s food clutter adds a fun and tasty touch to any home, making meals and gatherings feel more real. The “Food Clutter” CC pack not only makes your Sims’ spaces look more lively but also adds a delicious and cozy vibe to their daily life.
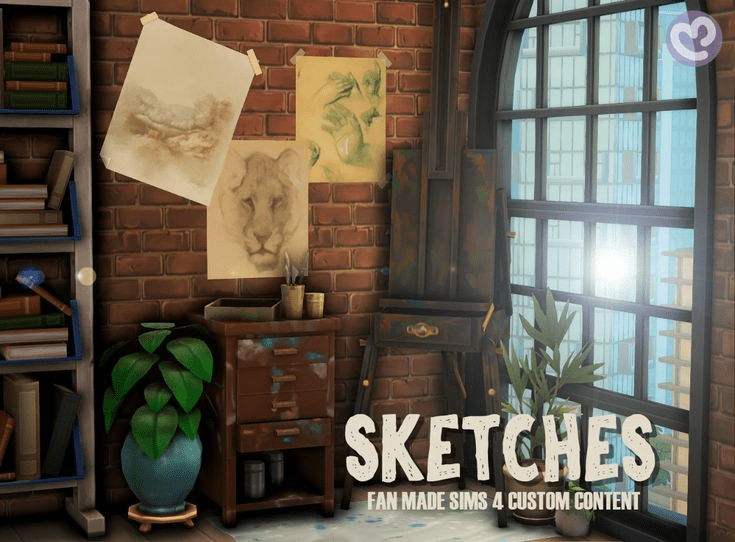
SIMS 4 SKETCHES DECOR CC – SIMLICY
The “Sketches Decor” custom content (CC) pack for Sims 4 by SimLicy is great for adding artistic touches to your Sims’ homes. This pack includes various sketches, drawings, and framed art pieces, all beautifully crafted. You can place these artworks on walls, shelves, or desks to create a creative and stylish atmosphere. SimLicy’s sketches decor helps make your Sims’ spaces feel more personalized and unique. The “Sketches Decor” CC pack not only adds visual interest but also brings a touch of creativity and charm to any room.
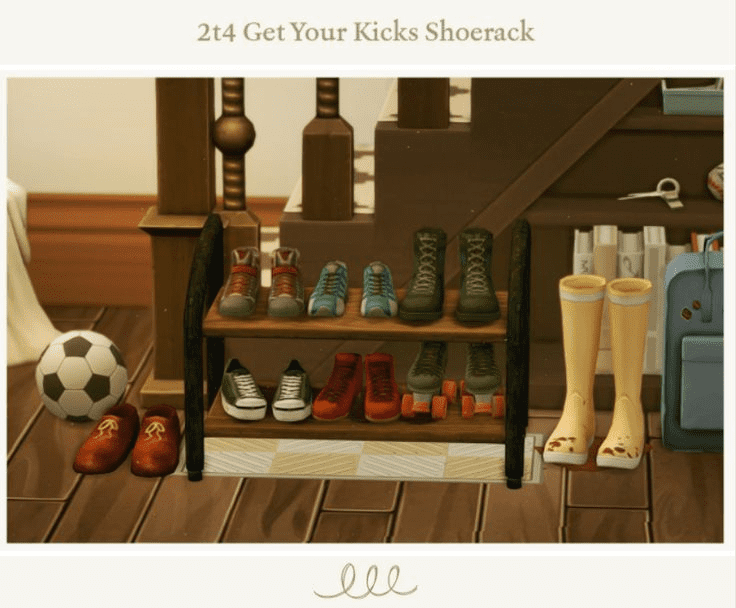
2T4 GET YOUR KICKS SHOERACK CC – ATTICWINDOWATDAWN
The “Get Your Kicks Shoerack” custom content (CC) for Sims 4 by AtticWindowAtDawn is a must-have for organizing your Sims’ shoes. This pack features stylish and realistic shoeracks that can hold multiple pairs of shoes. You can place these shoeracks in entryways, bedrooms, or closets to keep things tidy and neat. AtticWindowAtDawn’s shoerack decor adds a practical and chic touch to your Sims’ homes. The “Get Your Kicks Shoerack” CC not only helps with organization but also enhances the look of any room with its detailed design.
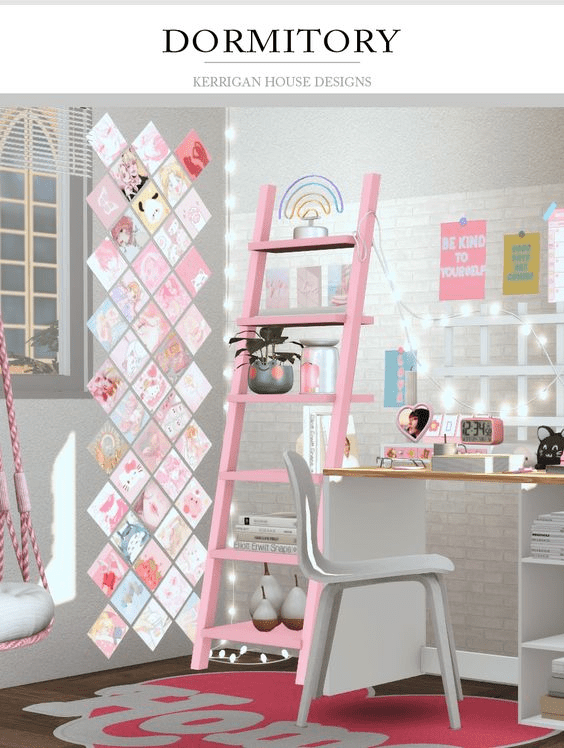
SIMS 4 DORM CLUTTER CC – MECHTASIMS X KERRIGAN HOUSE DESIGNS
Sims 4 Dorm Clutter CC by Mechtasims and Kerrigan House Designs is perfect for decorating dormitory rooms in the game. This CC collection includes items like posters, study desks, bedding, and storage solutions tailored for dorm life. These clutter items add personality and functionality to Sims’ dorm rooms, making them feel more realistic and lived-in. Players can create unique and cozy living spaces for their Sims using this CC set. It’s a popular choice among players aiming to enhance the dormitory experience in Sims 4.
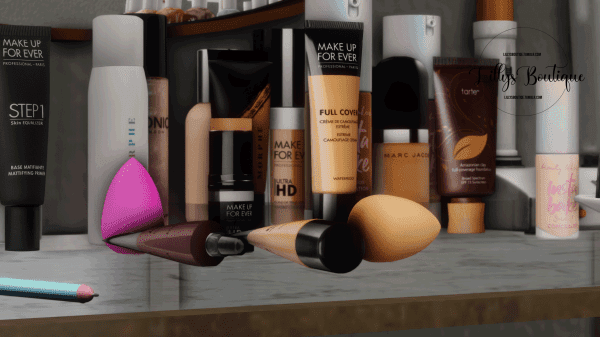
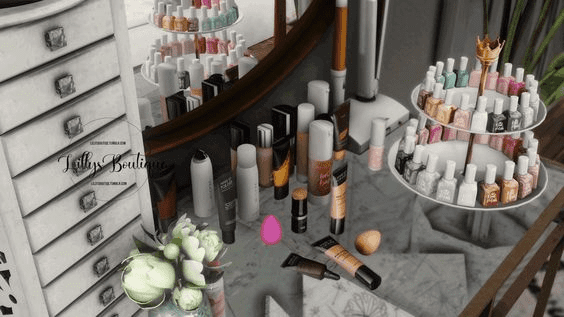
THE SIMS 4 MAKEUP CLUTTER CC – LILLYS BOUTIQUE
The “Makeup Clutter” custom content (CC) for Sims 4 by Lillys Boutique is perfect for adding beauty essentials to your Sims’ homes. This pack includes items like makeup brushes, palettes, lipsticks, and skincare bottles, all designed with great detail. You can place these makeup items on bathroom counters, vanity tables, or dressers to create a realistic and stylish look. Lillys Boutique’s makeup clutter makes any room feel more glamorous and lived-in. The “Makeup Clutter” CC pack not only adds a touch of elegance but also brings a sense of everyday life to your Sims’ spaces.
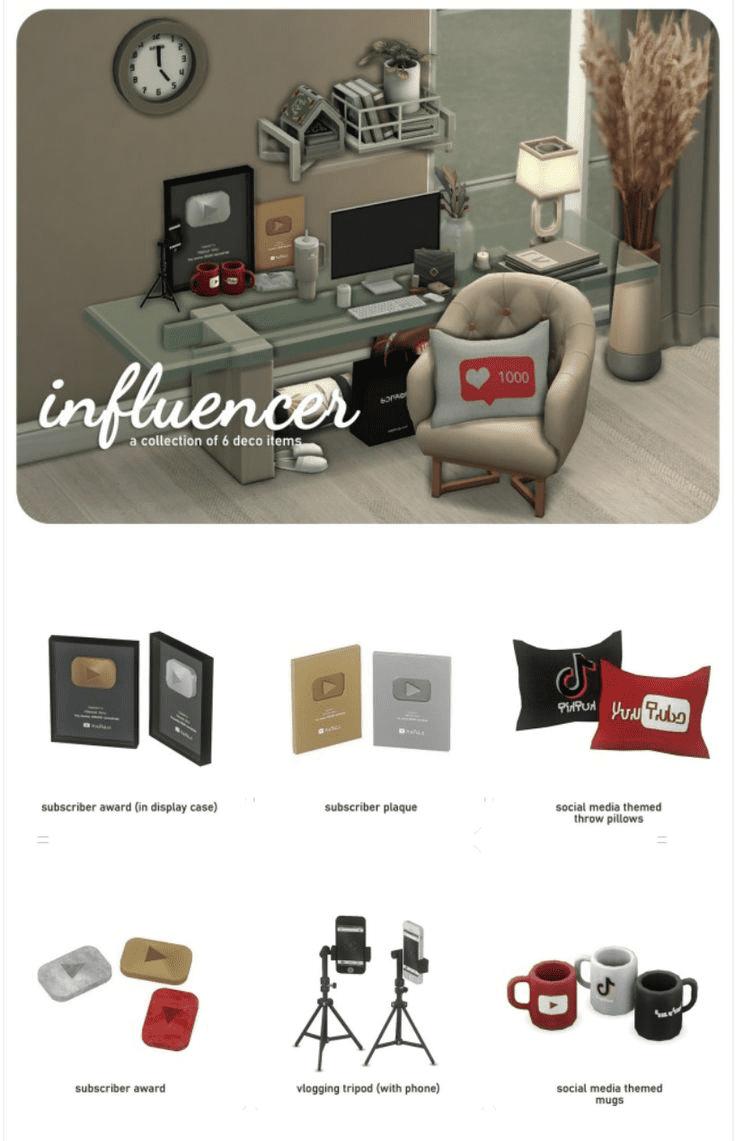
INFLUENCER SIMS 4 CLUTTER CC – SIMKOOS
The “Influencer Clutter” custom content (CC) for Sims 4 by SimKoos is ideal for Sims who love social media and fashion. This pack includes items like cameras, laptops, beauty products, and trendy accessories, all designed with a modern touch. You can place these items in your Sims’ bedrooms, offices, or living rooms to create a stylish and influencer-like vibe. SimKoos’s influencer clutter helps make your Sims’ homes look trendy and up-to-date. The “Influencer Clutter” CC pack not only adds cool decorations but also brings a touch of the influencer lifestyle to your Sims’ daily routines.
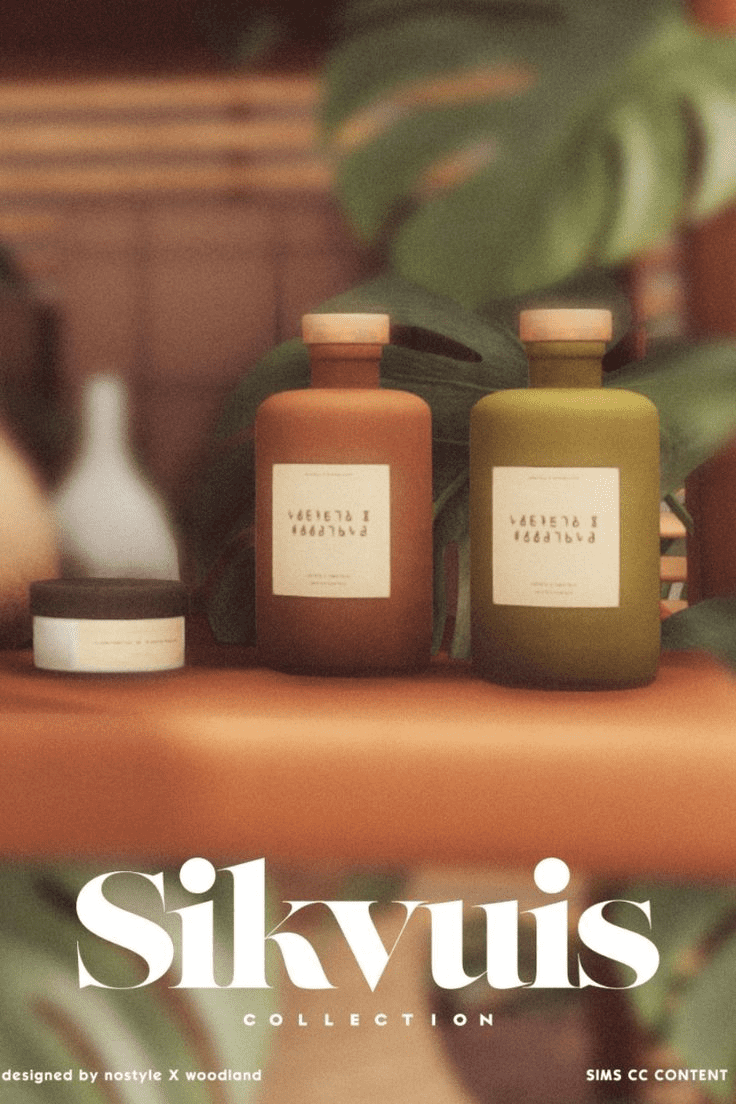
SIKVUIS SIMS 4 CLUTTER CC PACK – NOSTYLESIMSSTUDIO
The “Sikvuis Clutter” custom content (CC) pack for Sims 4 by NoStyleSimsStudio is perfect for adding quirky and fun items to your Sims’ homes. This pack features unique decorations like colorful jars, cute figurines, and interesting knick-knacks, all designed with a playful touch. You can place these items on shelves, tables, or counters to make your Sims’ spaces feel more lively and personalized. NoStyleSimsStudio’s clutter pack adds a whimsical and creative vibe to any room. The “Sikvuis Clutter” CC not only enhances the look of your Sims’ homes but also brings a sense of fun and charm to their daily life.
SIMS 4 CYBER GIRL CLUTTER SET – MECHTASIMS
Explore the fantastic Sims 4 Cyber Girl Clutter CC! Enhance your Sim’s home decor with these amazing and distinctive pieces. From the Alien House to the Bed, Couch, Deck, and more, transform your Sim’s home into a true masterpiece. It’s ideal for giving your space a vibrant touch! And don’t miss the barbed wire heart rug, available in nine swatches. Each item has minimal polygons and ample slots for easy customization to match your unique style.
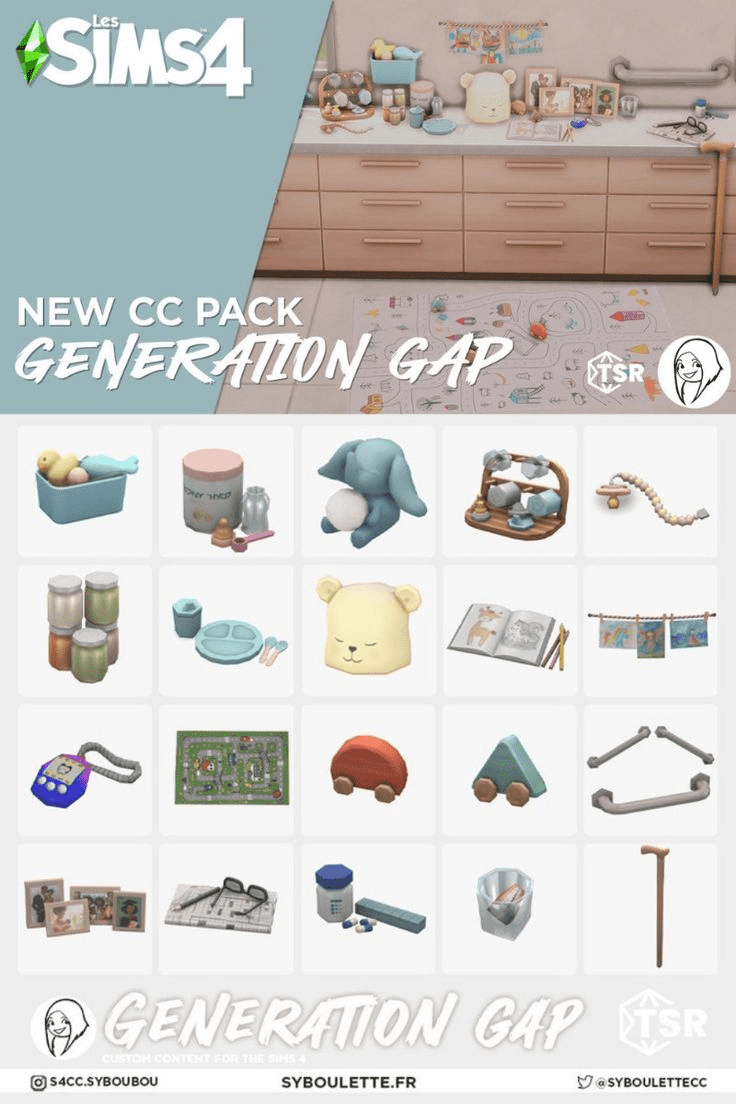
GENERATION GAP SIMS 4 CLUTTER CC PACK – SYBOUBOU
The “Generation Gap Clutter” custom content (CC) pack for Sims 4 by Syboubou is great for adding items from different eras to your Sims’ homes. This pack includes a mix of vintage and modern decorations like old radios, classic books, and trendy gadgets. You can place these items in your Sims’ living rooms, bedrooms, or offices to create a unique and diverse look. Syboubou’s generation gap clutter helps blend the old with the new, making any space feel rich and interesting. The “Generation Gap Clutter” CC not only adds variety but also brings a sense of history and modernity to your Sims’ everyday life.
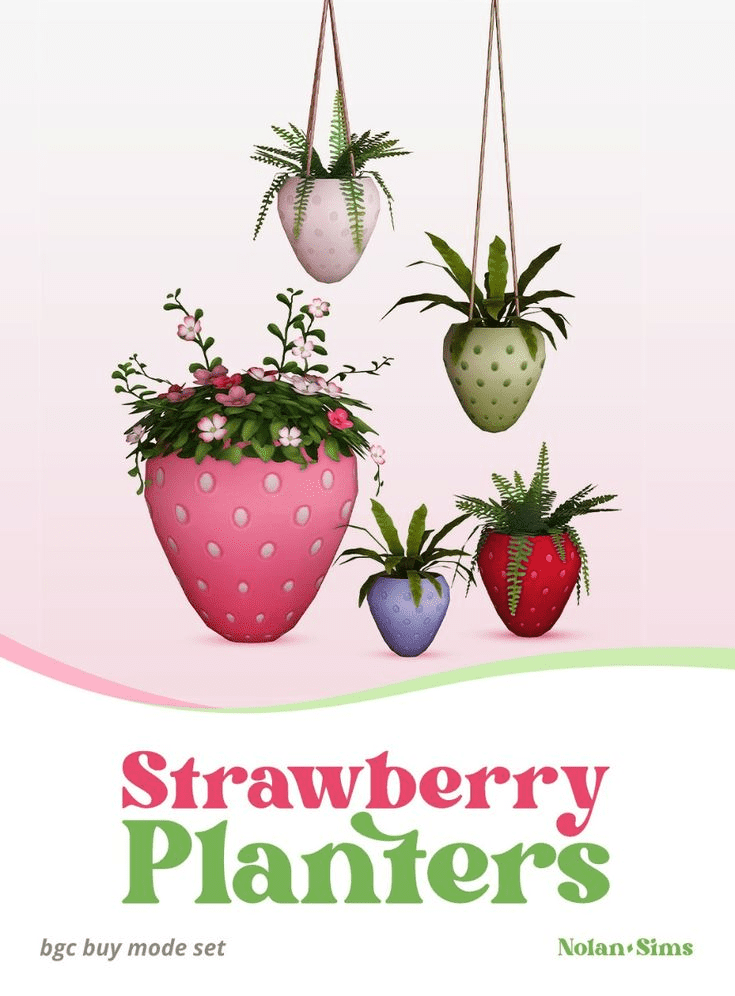
SIMS 4 STRAWBERRY PLANTERS V2 – NOLAN SIMS
The “Strawberry Planters V2” custom content (CC) for Sims 4 by Nolan Sims is perfect for Sims who love gardening. This pack includes cute and stylish planters specially designed for growing strawberries. You can place these planters in your Sims’ gardens, patios, or even indoors to add a touch of nature. Nolan Sims’ strawberry planters not only look beautiful but also make gardening more fun and easy for your Sims. The “Strawberry Planters V2” CC adds a charming and fresh element to your Sims’ homes, making them feel closer to nature.
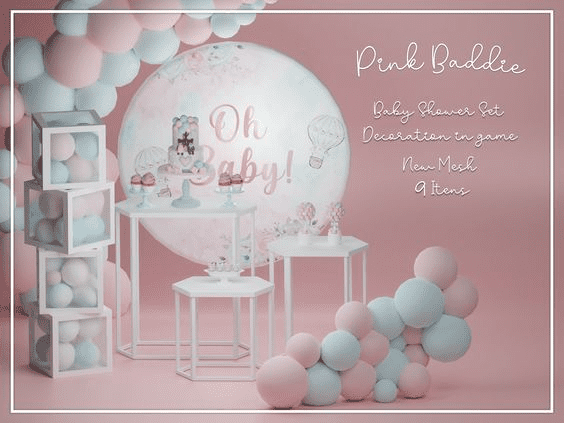
SIMS 4 BABY SHOWER CLUTTER CC – PINK BADDIE
The “Baby Shower Clutter” custom content (CC) for Sims 4 by Pink Baddie is perfect for celebrating new arrivals. This pack includes adorable decorations like baby bottles, gift boxes, balloons, and party banners. You can place these items in your Sims’ living rooms or party spaces to create a festive atmosphere for a baby shower. Pink Baddie’s baby shower clutter makes the event feel special and joyful. The “Baby Shower Clutter” CC adds a touch of celebration and happiness to your Sims’ homes, making the baby shower an unforgettable occasion.
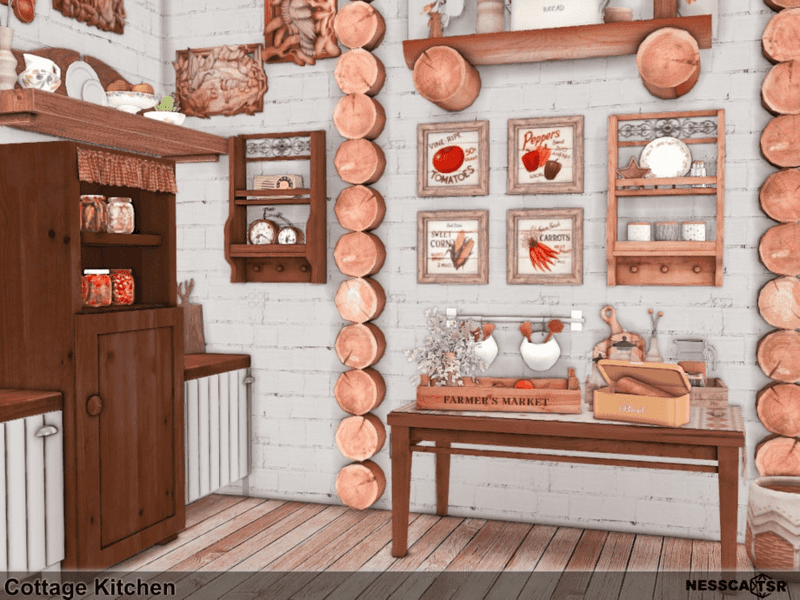
SIMS 4 COTTAGE KITCHEN CLUTTER CC
The “Cottage Kitchen Clutter” custom content (CC) for Sims 4 is perfect for giving your Sims’ kitchens a cozy, rustic feel. This pack includes items like old-fashioned jars, wooden utensils, vintage cookbooks, and charming dish racks. You can place these decorations on counters, shelves, and tables to make the kitchen look warm and inviting. The cottage kitchen clutter adds a homely and traditional touch to any Sim’s house. This CC pack is perfect for making your Sims’ cooking spaces feel like a true countryside kitchen.
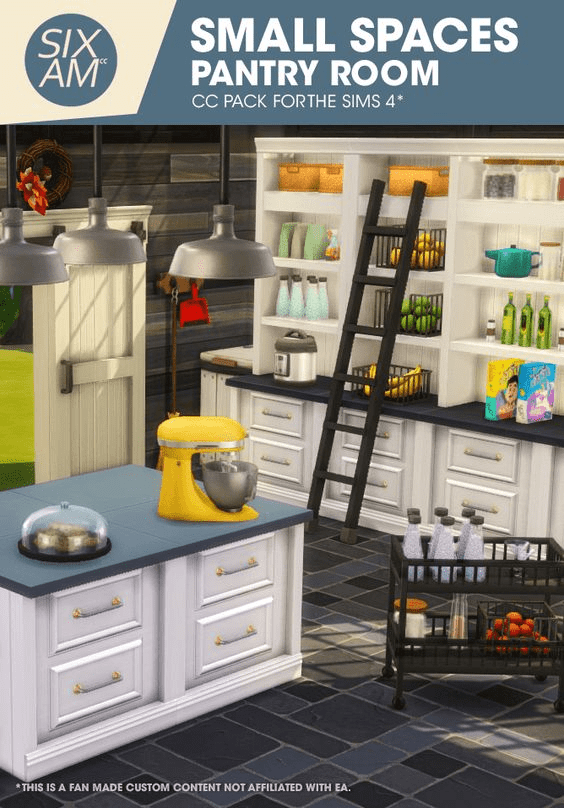
SIMS 4 PANTRY CLUTTER CC – SIXAM CC
The “Pantry Clutter” custom content (CC) for Sims 4 by Sixam CC is great for organizing your Sims’ kitchens. This pack includes items like food jars, spice containers, canned goods, and storage baskets. You can place these items on pantry shelves, countertops, or inside cabinets to make the kitchen look neat and stocked. Sixam CC’s pantry clutter adds a realistic and functional touch to your Sims’ homes. This CC pack helps create a well-organized and visually appealing kitchen space for your Sims.
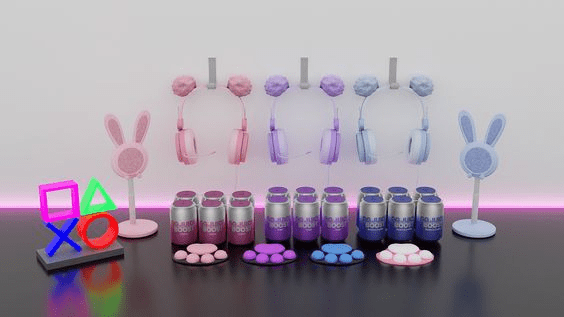
SIMS 4 GAMING ACCESSORY CLUTTER CC – SIMMERKATE
The “Gaming Accessory Clutter” custom content (CC) for Sims 4 by SimmerKate is perfect for Sims who love gaming. This pack includes cool items like gaming consoles, controllers, headsets, and game discs. You can place these accessories in your Sims’ bedrooms, living rooms, or gaming setups to make the space feel tech-savvy. SimmerKate’s gaming accessory clutter adds a fun and modern touch to any room. This CC pack makes your Sims’ homes look like a true gamer’s paradise.
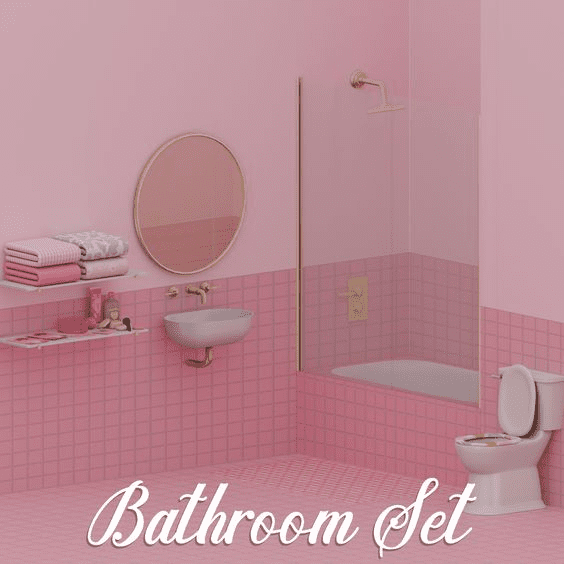
SIMS 4 BATHROOM CLUTTER CC – MECHTASIMS
The “Bathroom Clutter” custom content (CC) for Sims 4 by Mechtasims is perfect for making your Sims’ bathrooms feel realistic and lived-in. This pack includes items like soap dispensers, toothbrushes, towels, and bathroom mats. You can place these items on counters, shelves, and around the sink to add detail and charm. Mechtasims’ bathroom clutter makes the bathroom look cozy and functional. This CC pack helps create a more genuine and homely bathroom space for your Sims.
SIMS 4 ARTIST CLUTTER CC – AIRA
The “Artist Clutter” custom content (CC) for Sims 4 by Aira is great for Sims who love to create art. This pack includes items like paintbrushes, sketchbooks, easels, and paint tubes. You can place these art supplies in your Sims’ studios, bedrooms, or living rooms to make the space feel creative. Aira’s artist clutter adds an artistic and inspiring touch to any room. This CC pack helps make your Sims’ homes look like a true artist’s workspace.
SIMS 4 ECO BATH CLUTTER CC – SIMBISHY
Want to give your Sims’ bathroom a makeover but keep it eco-friendly? Look for Sims 4 Eco Bath Clutter CC! This set has cool decorations made with recycled or natural materials, perfect for a bathroom that’s both stylish and green. Imagine shelves with pretty soap dispensers made from bamboo or colorful washcloths made from recycled materials. Simbישy’s CC lets you create a bathroom that looks great and shows your Sim cares about the environment!
SIMS 4 MAKEUP CLUTTER CC – MECHTASIMS
Bring your Sims’ bathroom to life with MechtaSims’ Sims 4 Makeup Clutter CC! This collection is all about the little details that make a bathroom feel real. Imagine counters scattered with colorful makeup brushes, lipsticks, and cute makeup bags. It’s like adding mini versions of your own makeup to the game! MechtaSims’ CC lets you show off your Sims’ unique style and make their bathroom feel more used and personal.
SIMS 4 KITCHEN DECOR CC – MYSHUNOSUN
Spruce up your Sims’ kitchens with MyShunosun’s Sims 4 Kitchen Decor CC! This set lets you add fun decorations that make your kitchen look more interesting. Imagine shelves with pretty bowls and plates, or spice racks filled with colorful jars. MyShunosun’s CC isn’t just for looks! You might find cool things to hang on the walls like kitchen towels or even cutting boards. So, ditch the boring kitchen and add some personality with MyShunosun’s CC!
SIMS 4 FARMHOUSE DECOR CC – SFORZCC
The “Farmhouse Decor” custom content (CC) for Sims 4 by SforzCC is perfect for giving your Sims’ homes a rustic, country feel. This pack includes items like wooden furniture, cozy rugs, vintage lamps, and charming wall art. You can place these decorations in the living room, kitchen, or bedroom to create a warm and inviting atmosphere. SforzCC’s farmhouse decor adds a homely and traditional touch to any space. This CC pack helps make your Sims’ homes feel like a cozy farmhouse retreat.
SIMS 4 LIVING ROOM DECOR CC – KKB
The “Living Room Decor” custom content (CC) for Sims 4 by KKB is great for making your Sims’ living rooms stylish and comfortable. This pack includes items like modern sofas, coffee tables, decorative pillows, and stylish lamps. You can place these pieces in your Sims’ living room to create a cozy and fashionable space. KKB’s living room decor adds a contemporary and chic touch to any home. This CC pack helps make your Sims’ living rooms look elegant and inviting.
ESSENTIAL SIMS 4 CLUTTER CC – MECHTASIMS
Level up your Sims’ home with MechtaSims’ essential clutter CC for The Sims 4! This collection offers a mix of small decorative items that make a big difference. Think of things you’d see in a real home, like cozy throw pillows, books stacked on shelves, or even figurines. MechtaSims’ CC helps bring your Sims’ spaces to life and tell a story about their personalities. It’s like adding tiny details that make your Sims’ home feel lived-in and loved.
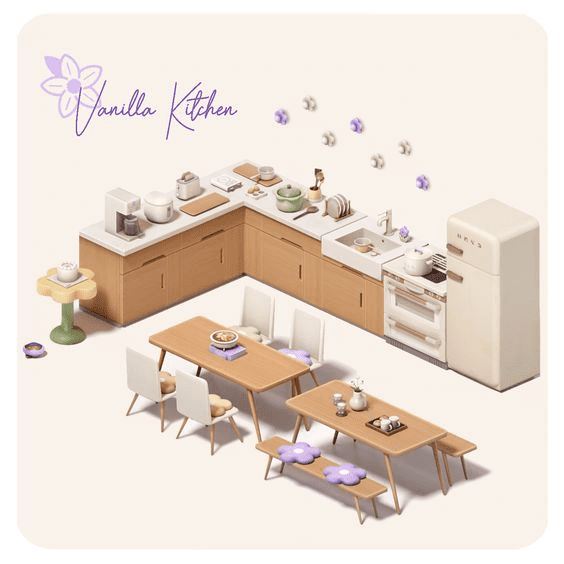
SIMS 4 VANILLA KITCHEN CLUTTER CC – AIRA
The “Vanilla Kitchen Clutter” custom content (CC) for Sims 4 by Aira is perfect for making your Sims’ kitchens look real and lived-in. This pack includes items like spice jars, cutting boards, dish racks, and cooking utensils. You can place these items on counters, shelves, and tables to add detail and charm. Aira’s vanilla kitchen clutter adds a cozy and homely touch to any kitchen. This CC pack helps make your Sims’ kitchens feel warm and inviting.
SIMS 4 CLUTTER CC PACK – LUSTROUSIMS
The “Clutter CC Pack” for Sims 4 by Lustrousims is great for adding small, detailed items to your Sims’ homes. This pack includes things like books, candles, plants, and decorative trinkets. You can place these items on shelves, tables, and desks to make rooms feel more lived-in and personalized. Lustrousims’ clutter pack adds charm and character to any space. This CC pack helps make your Sims’ homes look more realistic and cozy.
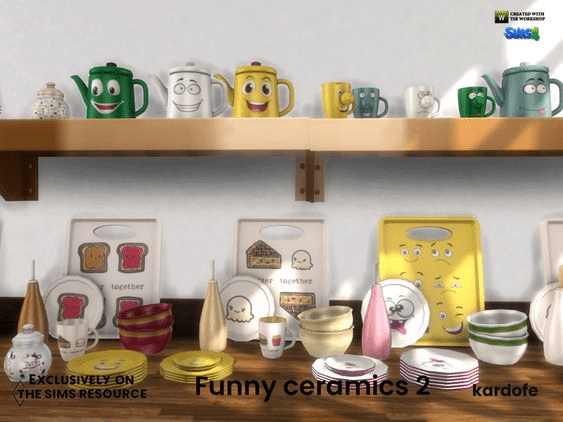
SIMS 4 KITCHEN CLUTTER CC – KARDOFE
The “Kitchen Clutter” custom content (CC) for Sims 4 by Kardofe is perfect for making your Sims’ kitchens look busy and realistic. This pack includes items like jars, plates, mugs, and cooking tools. You can place these items on counters, shelves, and tables to add a lived-in feel. Kardofe’s kitchen clutter adds warmth and detail to any kitchen. This CC pack helps make your Sims’ kitchens feel cozy and well-used.
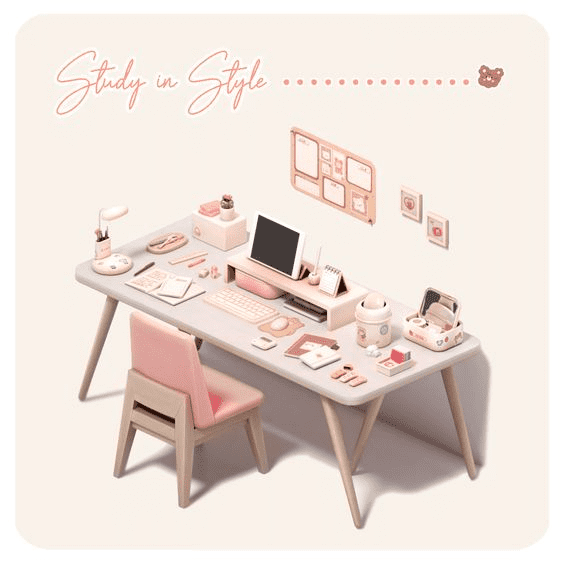
SIMS 4 STUDY CC CLUTTER – AIRA
Give your Sims the perfect study space with Aira’s Study Clutter CC for The Sims 4! This collection is full of neat items that make studying more fun. Imagine desks with colorful pens and pencils, notebooks with cool covers, or even fun plants to keep your Sim company. Aira’s CC lets you create a study space that looks organized and helps your Sims ace those exams!
CONCLUSION
So there you have it! With over 57 fantastic options for clutter and decor CC, you’re well on your way to transforming your Sims’ world from generic to genuinely stunning. From bedrooms overflowing with personality to kitchens brimming with life, these creative collections offer everything you need to tell stories through the power of detail. So, unleash your inner designer, explore these amazing CC options, and get ready to create truly unique and lived-in homes for your Sims!