How long does lip filler last? What You Need to Know

Having plump lips has always been popular, but now more and more folks prefer getting lip fillers instead of using lipstick or gloss for that plumping effect. This article has all the info you need about making your lips plumper. Whether you’re curious about how long lip fillers stay, how much they cost, or just want to know what happens before your first treatment, we’ve got you covered. Keep reading to find out everything you need to know about lip fillers. 

What are lip fillers

Lip fillers are injections that add volume to your lips and belong to the category of dermal fillers. They consist of synthetic hyaluronic acid (HA), which is a natural substance found in your body. Various brands of lip fillers are available, such as Juvederm®, Restylane®, and Perlane®. The effects are temporary, with the duration varying depending on the type of filler used.

Types of Lip Fillers

There are different types of lip fillers, each with its own set of characteristics. The most common types include

Hyaluronic Acid Fillers (HA Fillers)

Juvederm: This brand offers various formulations, such as Juvederm Ultra, Juvederm Ultra Plus, and Juvederm Volbella, designed for different areas of the face, including the lips.

Restylane: Another popular brand, Restylane has products like Restylane Silk specifically formulated for lip enhancement.

Collagen Fillers

CosmoPlast and CosmoDerm: These are bovine collagen-based fillers. However, collagen fillers are less commonly used today compared to hyaluronic acid fillers due to the risk of allergic reactions.

Poly-L-Lactic Acid (PLLA) Fillers

Sculptra: While Sculptra is mainly used for facial volume restoration, it can also be used for subtle lip augmentation. It stimulates the production of collagen over time.

Calcium Hydroxylapatite (CaHA) Fillers

Radiesse: This filler contains calcium hydroxylapatite microspheres in a gel. It’s often used for deeper wrinkles and can also be used for lip augmentation.

Fat Injections

Autologous Fat Transfer: This involves harvesting fat from one part of your body (usually abdomen or thighs), purifying it, and injecting it into the lips. It’s a more natural option as it uses the patient’s own tissue.

Polymethyl Methacrylate (PMMA) Fillers

ArteFill (Bellafill): This is a semi-permanent filler containing PMMA microspheres. It provides long-lasting results but is less commonly used for lip augmentation.

What are the benefits and risks of lip filler

Benefits of Lip Fillers 

Enhanced Lip Volume: Lip fillers can add volume to the lips, providing a fuller and plumper appearance.

Improved Lip Shape: Fillers can be used to enhance lip contours and shape, addressing asymmetry or adding definition.

Reduced Fine Lines: Some fillers, particularly those containing hyaluronic acid, can help smooth out fine lines and wrinkles around the lips.

Quick Procedure: Lip filler injections are typically quick, often taking less than an hour, and require minimal downtime.

Temporary Results: For individuals who are unsure about permanent changes, many lip fillers offer temporary results, allowing for adjustments over time.

Risks and Considerations

Bruising and Swelling: Common side effects include temporary bruising and swelling at the injection site. These usually subside within a few days.

Allergic Reactions: While rare, allergic reactions to the filler material can occur. It’s important to discuss any allergies with the healthcare provider before the procedure.

Infection: Any injection procedure carries a risk of infection, although it is relatively low. Strict adherence to hygiene and proper aftercare can minimize this risk.

Lumps or Irregularities: In some cases, uneven distribution of the filler or the formation of lumps may occur. This can often be corrected with additional treatment.

Temporary Results: The temporary nature of some fillers means that repeat treatments are necessary to maintain the desired appearance.

Migration or Shifting: Rarely, filler material may shift from the intended injection site, causing an uneven result. This can sometimes be corrected with massage or additional injections.

Overfilling or Underfilling: Achieving the desired outcome requires skill and experience. Overfilling can lead to an unnatural appearance, while underfilling may not produce the desired results.

How long do lip injections last ?

Lip fillers don’t last forever – their effects typically stick around for about six months to a year. After that, the filler breaks down and the body absorbs it. How long your plump lips stay that way depends on a few things, like the kind of filler used, where it’s injected, and how fast your body works (which is influenced by age and metabolism).

Usually, people enjoy their fuller lips for several months before they might need a little touch-up. There are some newer fillers that hang around even longer, up to 18 months, and lots of folks are liking this option more and more. So, while it’s not a forever change, you can count on enjoying your enhanced look for a good while before thinking about another visit to the cosmetic pro.

How to Prepare for Lip Fillers

Before getting lip fillers, start with a talk with the doctor. They’ll discuss how you want your lips to look, making sure it fits your face. Your face shape matters more than just having full lips. Show some pictures to help the doctor understand what you want.

Also, check your doctor’s work on Instagram to see if it matches what you want. Before the appointment, avoid certain things like aspirin and alcohol because they can make swelling and bruising worse. It’s good to skip them before getting the injections.

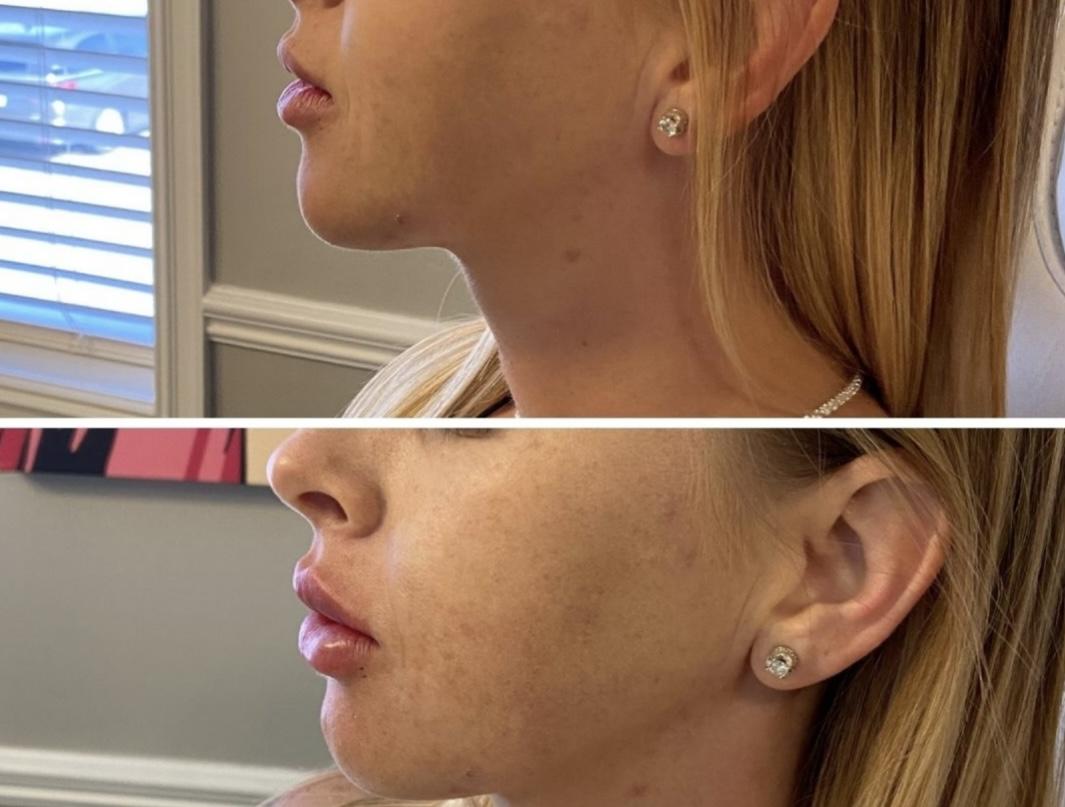
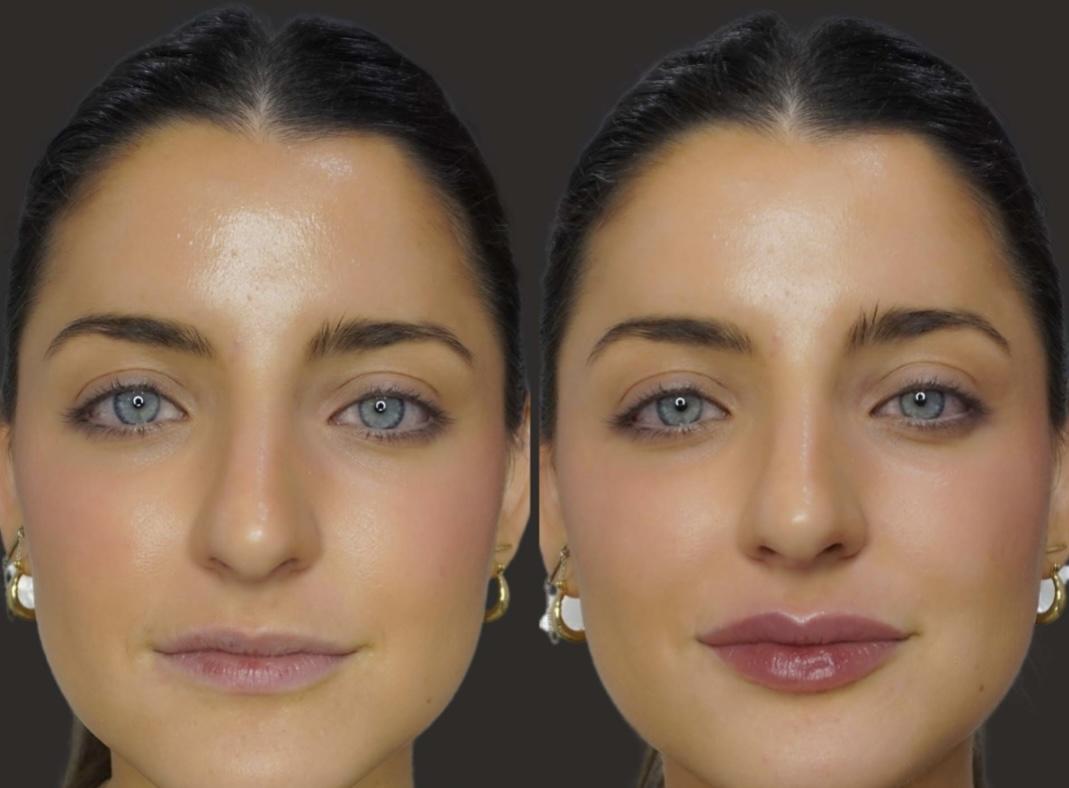
Lip fillers before and after 1ml: What to expect

What happens before a lip filler proceduce?

Before the lip filler procedure, it’s common for lips to appear thin or flat, lacking a well-defined Cupid’s bow or line. Additionally, fine lines or wrinkles around the mouth may be noticeable. These features contribute to an overall look that may be less plump and sculpted than desired.

What happens during a lip filler procedure?

In a lip filler procedure, your healthcare provider will put numbing cream on your lips. This cream, often containing benzocaine, lidocaine, and tetracaine (BLT), makes your lips numb within 15 to 30 minutes, ensuring a pain-free and comfortable process. If you’re allergic to BLT, they might use a nerve block injection to numb your lips, taking about 15 to 30 minutes.

Using a thin needle, your provider will inject about 1 milliliter (mL) of filler into different parts of your lips. It won’t go deeper than 2.5 millimeters (mm). You might feel a pinch but not pain. They may use an ice pack to reduce swelling and bruising. The whole thing can take 30 minutes to two hours.

What happens after a lip filler procedure?

After the procedure, the doctor might gently rub your lips and put some ice on them to help the filler soak in. They will keep an eye out for any issues like feeling dizzy or sick for about 15 minutes. Once everything is okay, you can go home. Your lips might be a bit puffy and have some bruises, but that usually gets better in a day or two, though sometimes it takes up to a week.

After about a week, your lips will look fuller and plumper, making your pout stand out more. The shape of your Cupid’s bow and lips will become clearer, giving you a more sculpted appearance. Plus, any lines around your mouth will look softer or less noticeable.

You can refer to some pictures before and after lip injections.

Lip Fillers Aftercare

To ensure your lip plumping process goes well, follow these steps. First, apply ice to reduce swelling or pain, and be gentle with your lips for the first 24-48 hours – don’t touch them much as they are very sensitive. Try not to move your lips too much, drink water, and avoid using lipstick or lip balm for at least a day. Also, when brushing your teeth, be gentle to avoid discomfort. During this time, do not do heavy exercise for a day and follow exactly what your doctor says after treatment. Keep all your follow-up appointments to make sure everything goes well and get any changes if needed. These measures collectively contribute to a smooth and effective recovery process after lip augmentation surgery.

Average cost of lip fillers

The price of lip fillers can be different depending on where you are, the skills of the person doing it, and the kind of filler they use. On average, getting your lips done can cost a few hundred to over a thousand dollars. The cost often shows how experienced the person doing it is and the quality of the filler they use. Some places might also charge based on how much filler they use, usually per syringe. It’s a good idea to talk to a qualified person to get the exact cost and make sure your lip filler experience is safe and good.

How Do I Choose the Right Cosmetic Clinic?

Choosing the right doctor is super important for making your lip filler procedure work well. Look for a clinic with lots of experience and good reviews from other people. It’s also great if the clinic has a friendly team that can help answer your questions. A good clinic usually gives you a free first meeting before any treatment. This lets you meet the doctor, ask questions, and get advice that fits your needs. Doing these things helps you make a smart choice and increases the chance of getting the results you want.

FAQ

1. When should I see my healthcare provider after a lip filler?

Plan to meet with your healthcare provider again two weeks after getting your lip fillers. They will check your lips, and you can talk about the final results. If you want more fullness, you can discuss using more filler.

2. When can I eat or drink after a lip injection?

Wait until the numbness wears off before eating to avoid accidentally biting your lips and affecting the filler. Also, avoid messy foods for at least a day. Don’t use straws, smoke, or pucker your lips for 24 hours. Skip alcohol during this time to reduce the risk of bruising.

3. Can you get lip fillers while pregnant?

No studies have shown if getting lip fillers during pregnancy is safe. Because of this, the FDA has not approved the use of lip fillers while pregnant.

4. Are lip fillers permanent?

Lip fillers are not permanent. They gradually fade away, typically within 12 to 18 months after the procedure, depending on your metabolism. To keep the volume you want, you might need regular touch-up treatments.

5. Will lip fillers ruin your lips?

If you don’t get lip fillers from someone who knows what they’re doing, your lips might get messed up. They could stretch too much, the skin around them might die, the filler might get hard, or the places where they put the filler might get infected.

Conclusion

Before you start changing your appearance with lip fillers, it’s important to think carefully and make smart choices. Talking to a qualified healthcare professional is really important. They can help you understand what you want, check if you’re a good fit for the procedure, and suggest the right kind of filler and treatment plan for you. Keep in mind, getting lip fillers isn’t a one-time fix. The choice to get them is all about what you personally want and hope to achieve.

30 BEST NAILS WITH FLOWER DESIGNS 

Summer is here (or just around the corner depending on the hemisphere you’re in), and what better way to celebrate than with blooming beautiful nails? Get ready to ditch the winter blues and embrace the vibrant colors and delicate details of floral nail art. Whether you’re a nail art enthusiast or just looking for a touch of summertime chic, we’ve got you covered. Dive into our list of 30 flower nail designs, from minimalist buds to full-blown garden masterpieces. Find the perfect flowery flair to complement your style!

PETALS AND METALS

Looking for a way to add some extra edge to your floral nails? Then look no further than the petal and metals trend. This captivating style combines the delicate beauty of flowers with the coolness of metallic accents. Think chrome or rose gold petals, 3D metallic flower embellishments, or even nail art that mimics the texture of hammered metal.  This fusion of soft and strong creates a truly unique and eye-catching look, perfect for those who want to embrace their feminine side with a touch of rock and roll.

FRENCH FLORALS

Channel springtime elegance with French floral nails! This delightful trend takes the classic French manicure and injects it with a touch of blooming beauty. Here’s how it works: imagine the crisp white tips of a French mani, but instead of a straight line, the tips are adorned with delicate floral designs. These flowers can be simple little buds or more intricate works of art, featuring soft pastels or vibrant pops of color.  This is a perfect way to add a touch of whimsy to a timeless look, ideal for a special occasion or a touch of everyday romance.

GOLD LEAF

The gold leaf backdrop adds a touch of luxury to this manicure, creating a captivating contrast with the subtle and intricate floral motifs adorning each corner. When it comes to intricate flower nail art like this, Goldstein recommends beginning with delicately drawn stems and leaves using a fine liner brush. Then, blending together shades of white, blush pink, and deep rose, you can craft the perfect peony – a timeless favorite for springtime designs.

TRIPPY TULIPS

This nail art trend isn’t for the faint of heart. It throws out traditional flower depictions and dives headfirst into a world of vibrant colors, swirling patterns, and optical illusions. Imagine tulips with distorted shapes, melted colors that bleed into each other, or flowers with hypnotic patterns that seem to move when you look at them.  This is a bold statement for those who want to turn heads and showcase their love for all things unconventional.  Think neon colors, holographic finishes, and plenty of creative freedom to achieve a truly trippy tulip masterpiece.

BLACK AND WHITE FLORAL

The stark contrast between the two colors creates a graphic and chic look that transcends seasons.  This doesn’t have to be a boring option though! You can play with the balance of black and white, using one as the base color and the other for detailed floral designs.  Think delicate white daisies or bold black roses blooming across your nails.  For a modern twist, incorporate geometric shapes or negative space alongside the floral elements.  Black and white floral nails are perfect for those who love a touch of elegance with a hint of edge, and their versatility allows them to complement a variety of styles.

PRESSED PETALS

This enchanting trend takes nail art to a whole new level by incorporating real, dried and pressed flowers into the design. Imagine delicate petals in a breathtaking array of colors, meticulously arranged on your nails. The result is a stunningly natural and three-dimensional floral effect that’s impossible to achieve with paint alone. Pressed petal nails are perfect for those who appreciate a touch of whimsy and a connection to nature.

GARDEN GLAM

Think beyond blooms and incorporate elements like delicate vines, shimmering butterflies, and even tiny ladybugs. You can use a mix of techniques like nail art stamping, intricate hand-painting, or even tiny 3D embellishments to create a miniature garden scene on your fingertips. The color palette for garden glam nails is vast, allowing you to capture the soft hues of spring flowers or the bold jewel tones of summer blooms. This trend is perfect for those who want a manicure that’s bursting with life and personality. It’s a great way to show off your love for nature and embrace the feeling of springtime magic.

TROPICAL VACAY

Think sunshine yellows, ocean blues, and pops of coral and flamingo pink. Palm trees swaying gently in the breeze, playful pineapples, and cheeky little flamingos can all be incorporated into your tropical nail art.  You can even add a touch of shimmer with glittery accents that mimic the sunlight dancing on the waves.

This trend is perfect for anyone who wants to embrace the summer vibes and add a touch of fun to their fingertips. It’s a great way to get yourself in the vacation mindset, even if you’re nowhere near the beach! Opt for bold colors and playful designs, or go for a more subtle approach with pastel shades and delicate palm tree silhouettes. 

FLOWER POWER

Drawing inspiration from ’70s aesthetics, this manicure exudes a funky vibe with its bold shapes and vibrant colors. By featuring florals on just two nails per hand, the design achieves a balance of simplicity and impact. The uncomplicated shape of the flowers allows for easy replication using only a dotting tool, making it accessible for anyone to recreate.

PINK PETALS

Pink petal nails are incredibly versatile. They can be as simple as a single perfectly-placed pink petal on a nude base, ideal for a minimalist look. Or, you can create a more elaborate design with clusters of soft pink petals cascading across your nails. This trend is perfect for anyone who wants to add a touch of femininity and springtime charm to their fingertips. It complements a variety of styles, from a breezy sundress to a crisp white blouse, making it a great choice for any occasion.

ROMANTIC MILK BATH

Imagine a base coat of soft, milky white polish that creates a translucent, almost hazy effect. This delicate base becomes the canvas for subtle romantic elements. Think tiny dried flowers or shimmering gold flakes gently scattered across the nail, like delicate whispers against a backdrop of soft light.  You can even add a touch of lace nail art for a vintage, romantic feel. Romantic milk bath nails are perfect for a date night, a special occasion, or simply for anyone who wants to add a touch of ethereal elegance to their everyday look. They exude a soft, romantic vibe that’s both timeless and feminine.

FINE CHINA

Drawing inspiration from fine china dishes, this exquisite design showcases the timeless elegance of blue and white hues. Whether you opt for intricate patterns reminiscent of traditional chinaware or prefer a more minimalist approach, the result is sure to evoke a sense of classic sophistication.

BUTTER BLOSSOMS

Butter blossom nails are perfect for those who appreciate a touch of elegance without being overly flashy. They exude a warmth and sweetness that’s perfect for spring and summer,  complementing both casual and dressy outfits.  This trend is ideal for anyone who wants to add a touch of sunshine and springtime cheer to their fingertips.

OMBRÉ EFFECT

Achieve a touch of effortless cool with ombré effect nails! This versatile technique creates a seamless gradient of color, transitioning from one shade to another. For an ethereal look, imagine soft pinks or lavenders that gently fade to white at the tips. Craving something bolder? Opt for a vibrant coral that deepens to a fiery orange at the tips. The beauty of ombré nails lies in its customizability. You can choose any color combination that suits your style, from classic nudes to playful neons. 

EARTH TONES

For a minimalist approach, opt for a single earth tone shade across all your nails. This creates a clean and sophisticated look that complements any outfit. If you’re feeling more adventurous, incorporate different earth tones for an ombre effect or create geometric patterns. You can even add a touch of shimmer with metallic accents that mimic glistening rocks or moonlight on a calm lake.  Earth tones nails are perfect for those who appreciate a natural aesthetic and want a manicure that feels both timeless and effortlessly stylish.

CORAL CUTIES

The beauty of coral cuties nails lies in their versatility. Keep it simple with a clean coat of coral polish for a pop of summery color.  For a touch of whimsy, add tiny white polka dots or playful nail art designs like seashells or pineapples in contrasting colors. Feeling fancy?  Dress up your coral base with a touch of gold glitter or metallic accents for a manicure that’s both fun and chic.

FLOWER VINE

If the thought of drawing intricate petals feels daunting, you’re not alone – we understand that sentiment. But fear not, as these floral-inspired designs offer a refreshing alternative. Simply apply a few strokes of a vibrant color in an inverted triangle shape to emulate blooming flowers, offering an abstract and straightforward take on the traditional spring design. What adds to the charm is the vine used to connect the flowers, imparting a vintage touch that we particularly adore.

MUTED MINI FLORALS

Muted mini florals nails offer a perfect balance of femininity and understated cool. They’re ideal for those who love the floral nail art trend but prefer a more subtle and sophisticated approach. This look is incredibly versatile, complementing both casual and dressy outfits. It’s a great choice for anyone who wants to add a touch of springtime charm to their fingertips without overwhelming the eye with bold colors.

TOTALLY TROPICAL

Palm trees swaying gently in the breeze, playful pineapples dancing across your nails, and cheeky little flamingos can all be incorporated into your design. Don’t be afraid to mix and match patterns and colors – the key is to embrace the exuberant energy of the tropics! You can even add a touch of shimmer with glittery accents that mimic sunlight sparkling on turquoise waters.

DAISY HALF MOONS

These daisies can be simple little outlines or feature pops of bright yellow for the center and white petals. You can even add a touch of whimsy with french tips in different pastel colors to complement the daisy theme. Daisy half-moon nails are perfect for those who want a manicure that’s both cute and classy. They’re ideal for spring and summer, adding a touch of sunshine and floral charm to your fingertips. This delightful trend is perfect for anyone who wants a fresh take on the classic French manicure with a touch of blooming personality.

FRUITS AND FLOWERS

Tiny strawberries, glistening cherries, or wedges of watermelon can be incorporated alongside blooming sunflowers, playful daisies, or even delicate roses.  The key is to create a balanced and colorful composition.  Don’t be afraid to mix and match different fruits and flowers – the goal is to celebrate the joyful essence of summer! You can even add a touch of glitter or metallic accents for an extra dose of summer sparkle.

PASTEL POPS 

For a minimalist approach, paint each nail a different pastel shade for a charming color block effect. Feeling more artistic? Play with negative space designs, geometric patterns, or even add a touch of metallic glitter for a touch of glam.  The beauty of pastel pops nails lies in their versatility. They’re perfect for anyone who wants to add a touch of whimsy and springtime cheer to their fingertips, without overwhelming the eye with overly bold colors. This trend is ideal for both short and long nails, making it a great choice for everyone.

SUNNY D

Feeling bold? For a truly unique look, incorporate Sunny D logos or their mascot, the bright orange sun character, into your nail art design.  Capture the vibrant energy of Sunny D with a base coat in a sunshine yellow or juicy orange. Add playful details like tiny orange slices or even 3D nail art droplets resembling bursting fruit bubbles.  For extra pizzazz, incorporate a subtle glitter gradient that mimics the carbonation of the drink.

MONOCHROMATIC BLUES

The beauty of monochromatic blue nails lies in its versatility.  For a minimalist look, opt for a single shade of blue across all your nails. This creates a clean and polished look that complements any outfit. Feeling more adventurous? Play with different shades of blue within a manicure, creating an ombre effect or geometric patterns.  You can even incorporate different finishes, like a glossy base coat with matte blue tips, to add depth and dimension.

MOODY MONOCHROME

Embrace the depths of mystery with moody monochrome nails! This trend transcends the usual black and white color scheme, delving into a world of richer, more complex hues. Imagine a palette of deep, smoky purples, inky blacks, and charcoal grays, all playing together on your fingertips. The result is a manicure that’s both sophisticated and enigmatic, perfect for those who love to express their individuality.

3d floral

These flowers can be created in various ways, whether meticulously hand-painted for ultimate customization, utilizing pre-made floral decals for convenience, or incorporating 3D embellishments like sculpted flowers or pearl accents for added luxury. Whichever technique you choose, encapsulated blooms nails are sure to spark conversations and infuse your look with whimsy and romance, making them perfect for those seeking an ethereal and utterly charming manicure.

DARK AND MOODY

For a classic and sophisticated approach, opt for a single, dark shade across all your nails. This creates a clean and polished look that’s perfect for any occasion. Feeling more adventurous? Play with different finishes within your chosen color palette. Combine a glossy black base with a matte charcoal grey accent nail for added depth and intrigue. You can even explore nail art techniques like negative space designs or subtle metallic accents to create a truly unique and eye-catching manicure.

BROWN BLOSSOMS

Step into autumn with the earthy elegance of brown blossom nails! This trend celebrates the beauty of fall foliage and delicate blooms in unexpected color combinations. Imagine a base coat in a rich, earthy brown, like chocolate brown or a warm terracotta shade. This grounding base becomes the canvas for a surprising pop of color: delicate flowers in soft pinks, creams, or even blush oranges.

TINY DETAILS

In the world of nail art, sometimes it’s the little things that make the biggest impact. Tiny details nails are all about incorporating subtle yet eye-catching elements to elevate your manicure from ordinary to extraordinary.  Imagine a clean, classic base coat in a neutral shade like beige, soft pink, or even a clear gloss. This creates a blank canvas for the tiny details to take center stage.

SUNFLOWERS AND MUMS

Sunflowers and mums together on your nails can create a delightful celebration of late summer and early autumn! This cheerful combination allows you to play with contrasting elements: the bright, bold sunshine of sunflowers alongside the softer, delicate blooms of mums. Here are some ways to bring this trend to life.

CONCLUSION 

From the delicate beauty of pressed petals to the bold energy of tropical blooms, the world of floral nail art offers endless possibilities for expressing your unique style. With 30 inspiring ideas in this list, you’ve got all the ammunition you need to transform your fingertips into tiny works of floral art.  So unleash your creativity, embrace your favorite colors and flowers, and get ready to blossom into the new season with stunning floral nails!