
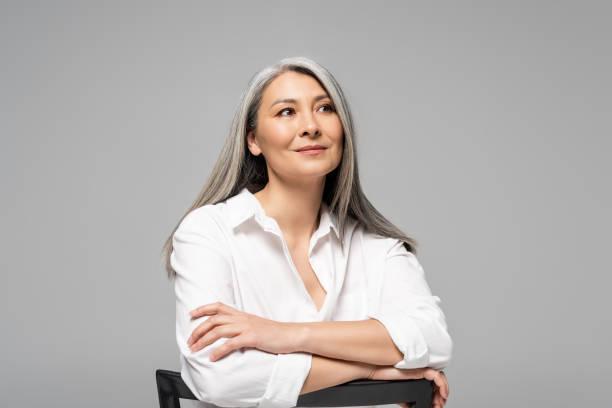
Choosing to embark on the journey of transitioning to gray hair is a significant decision. It signifies a moment of self-acceptance and the readiness to reflect that change on the outside as well.
However, before you fully commit to this transformation, it’s crucial to contemplate the approach you want to take to transition to gray hair. Embracing your natural hair color and incorporating lowlights can be a stunning way to infuse depth and character into your look..
If you’re not sure how to make your grays blend into the rest of your hair as they grow in, don’t fear. Here, we’re sharing a step-by-step guide on transition to gray hair with lowlights, and sharing the tips to give yourself the perfect hair color.

What are Lowlights?
Lowlights are sections of hair that are dyed a darker shade than the base color. This technique can be used to add depth, dimension, and richness to any hair color.
Transitioning to gray hair with lowlights is a process of gradually blending your natural gray hair color with darker shades to create a more natural and flattering look. This can be done by adding lowlights to your entire head of hair, or by focusing on specific areas, such as your roots or the sides of your face.
Lowlights are a great way to transition to gray hair because they are less damaging than highlights and can be used to create a variety of looks. For example, you can choose subtle lowlights that are close to your natural hair color, or you can go for a more dramatic look with darker, contrasting shades.
Why Choose Lowlights for Transitioning to Gray Hair?
Natural Look – Lowlights help create a natural look by blending your gray hair with your natural hair color. This helps eliminate the harsh line of demarcation between your colored hair and gray roots.
Low Maintenance – Since lowlights don’t require as much upkeep as highlights, they’re an excellent choice for those who want to embrace their natural gray hair but don’t have the time or energy to spend on frequent salon visits.
Soften Features – As we age, our skin tone changes, and lowlights can help soften the features of our face, providing a more youthful appearance.
Versatility – Lowlights can be customized to meet the individual needs of each client. They can be done in a variety of shades and intensities, depending on the desired effect.
How to Choose the Right Lowlights for Your Hair
Gray hair comes in various shades, much like the spectrum from black to white. What might catch you off guard, though, is that finding the right shade of gray is crucial to complement your hair and skin tone. An ill-suited gray can create an unflattering contrast, but don’t worry, we’re here to guide you away from that fashion faux pas. It’s not simply about going from dark to light, although that’s an essential consideration.
Skin Tone – Consider your skin tone when choosing lowlights. If you have warm undertones, opt for lowlights with warmer tones such as golden brown or caramel. For cool undertones, choose cooler lowlights like ash brown or platinum.
Natural Hair Color – Take into account your natural hair color when choosing lowlights. If you’ve been coloring your hair for an extended period, it’s possible that you’re uncertain about the extent of your natural gray hair. This can significantly impact the timeline for your lowlights transition before achieving a full, natural gray look. Fortunately, determining your natural gray level is usually straightforward. Simply wait until your roots begin to show, and you’ll get a clear indication of the extent of your gray hair.
Lifestyle – Consider your lifestyle when choosing lowlights. In case you’re someone who spends a lot of time outdoors, opt for lowlights that won’t fade quickly, such as auburn or deep red.
Maintenance – Choose lowlights that are easy to maintain. Opt for shades that don’t require frequent touch-ups and fit in with your everyday routine.
How to transition to gray hair with lowlights
Consultation with a Professional
Transitioning to gray hair with lowlights is a gradual process, and it may take several appointments to achieve the desired look. During the initial appointment, your stylist will assess your current hair color and determine the best approach for adding lowlights.
Color Selection
Your stylist will select a shade that’s one or two shades darker than your natural hair color and apply it to your hair using a technique called foiling. This involves sectioning off small sections of hair and applying the lowlight color only to those sections.
Gradual Application
Start the transition gradually. Instead of applying lowlights to your entire head at once, opt for a partial application. This allows you to ease into the change and ensures a subtle, natural look as your gray hair grows in.
Maintenance Schedule
Plan regular maintenance appointments with your colorist, typically every 6-8 weeks. During these visits, the colorist will touch up the lowlights and adjust the color as your gray hair continues to grow in. Over time, the amount of lowlighting can be reduced to create a more natural look.
Consider Highlights
To add dimension and contrast to your hair, consider incorporating highlights along with lowlights. Highlights can create a harmonious blend between your natural gray and the lowlighted sections
Tips for Maintaining Gray Hair with Lowlights
Once you’ve achieved your desired look, it’s essential to maintain your gray hair with lowlights. Here are some tips for maintaining your new look:
- Use Color-Safe Shampoo – Using a color-safe shampoo specifically formulated for gray hair can help prevent fading and keep your lowlights looking their best.
- Limit Heat Styling – Excessive heat styling can cause damage to your hair and fade your lowlights more quickly. Try limiting heat styling as much as possible or use heat protectant products.
- Protect from Sun Damage – UV rays from the sun can cause your lowlights to fade more quickly. Protect your hair by wearing a hat or using a protective hair product with SPF.
- Schedule Regular Touch-Ups – Regular touch-ups with your stylist can help maintain the color of your lowlights and keep them looking fresh.
FAQs
- Will lowlights damage my hair? Lowlights typically do not cause damage to your hair when done correctly.
- How long does it take to transition to gray hair with lowlights? Transitioning to gray hair with lowlights is a gradual process that can take several appointments to achieve the desired look. The timeline for transitioning to gray hair with lowlights can vary depending on the starting color of your hair and the level of contrast you want to achieve.
- Will my lowlights need to be touched up frequently? The frequency of touch-ups needed for lowlights can depend on several factors, including how quickly your hair grows and how well you maintain them. However, lowlights typically don’t require as much maintenance as highlights and can last for several months before needing a touch-up.
- Can I still have highlights if I’m transitioning to gray hair with lowlights? Yes, it’s possible to have both lowlights and highlights. Your stylist can work with you to create a custom look that blends your gray hair with your natural hair color while also incorporating subtle highlights.
- Is transitioning to gray hair with lowlights suitable for all hair types? Yes, lowlights can be used on all hair types and textures to help blend gray hair with your natural hair color.
- Can I transition to gray hair with lowlights at home? While it’s possible to add lowlights to your hair at home, we recommend seeking the services of a professional stylist to ensure the best results and minimize the risk of damage to your hair.
Final Takeaway
Transitioning to gray hair with lowlights is a fantastic option for those looking to embrace their natural gray hair while still maintaining a youthful appearance. With the right lowlights and maintenance routine, you can achieve a stunning and seamless blend between your gray hair and natural hair color.
If you’re considering transitioning to gray hair with lowlights, we recommend consulting with a professional stylist who can help guide you through the process and create a custom look that suits your individual needs and preferences.
Remember, embracing your natural beauty is a journey, and it’s essential to enjoy every step of the way. So, go ahead and make the leap to gray hair with confidence and grace – you won’t regret it!


