BOHEMIAN BRAIDS WITH CURLS: 27 STUNNING IDEAS FOR YOUR NEW HAIR
Braids are a versatile and stylish hairstyle on their own. But what if you could elevate them even further by incorporating curls? Adding curls to your braids can create a truly captivating and unique look, transforming your hairstyle from ordinary to extraordinary.
Curls bring a playful and fun vibe to any hairstyle, and when combined with braids, they can create a jaw-dropping effect. Whether you’re looking for a minimalist or a more dramatic look, this article features a curated collection of stunning braids with curls to inspire you.
Before we dive into the hairstyles, let’s explore how to achieve these beautiful curls and braids.
HOW TO ACHIEVE BRAIDS WITH CURLS
Braided curls offer a versatile and visually appealing hairstyle. They can be created by curling sections of the braids, such as the ends, middle, or top. Alternatively, you can add pre-curled strands to the braids for a dramatic effect.
Experiment with different techniques and curl sizes to find the perfect braided curls for your style. And they’re achieved through different methods which are:
WITH HAIR ROLLERS AND HOT WATER
Hair rollers are versatile tools used to create a variety of curls. To use them on braids, simply wrap individual braids around the roller and dip it in hot water for a few seconds. Repeat for all braids. Once cooled, gently remove the braids from the rollers using a towel.
Remember, hair rollers come in different sizes and types, each producing unique curl patterns. Smaller rollers create tighter curls, while larger ones result in looser waves. Choose the roller size that best suits your desired hairstyle.
WITH A CURLING IRON
To achieve loose, bouncy waves in human hair extensions, gently wrap the desired sections of your braids around a curling iron. Avoid using a curling iron on synthetic hair, as it can melt or burn the material. After a few seconds, carefully release the curled sections for a natural, wavy look.
WITH THREAD, STRING, OR YARN
For a quick and easy alternative to hair rollers, use thread, yarn, or string to create temporary curls. Tie the desired sections of your braids with the string, then gently push the braids up from the ends to the tied section. Secure the string with a knot at the ends of the braids.
Dip the tied braids in hot water for a few seconds, then remove and cut away the straight ends that weren’t tied. Once the curls have set, carefully untie or cut off the string.
CURL BY BRAIDING YOUR BRAIDS
For a unique approach to curly braids, weave several individual braids together into a larger braid, starting from the desired location for the curls. Dip the large braid in hot water for a few seconds, then remove and pat dry with a towel.
When you loosen the large braid, you’ll reveal loose, wavy curls.
USE PRE-CURLED HAIR EXTENSIONS
For a goddess or boho braid hairstyle, incorporate pre-curled braids into the braiding process to create a stunning, glamorous look.
TYPES OF CURLS WITH BRAIDS
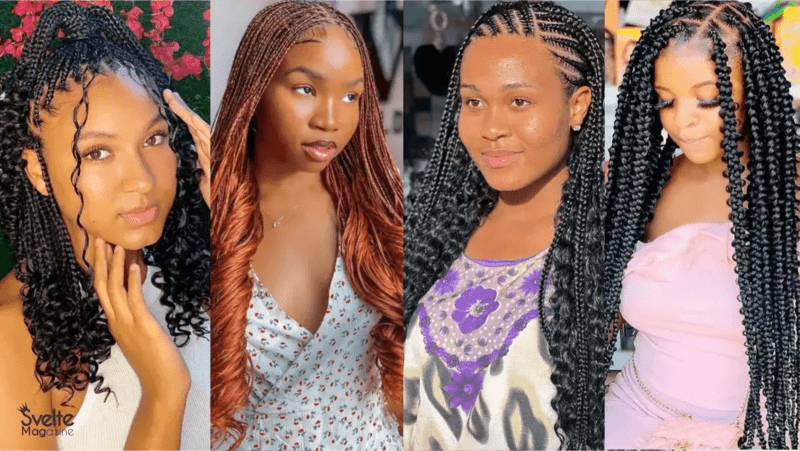
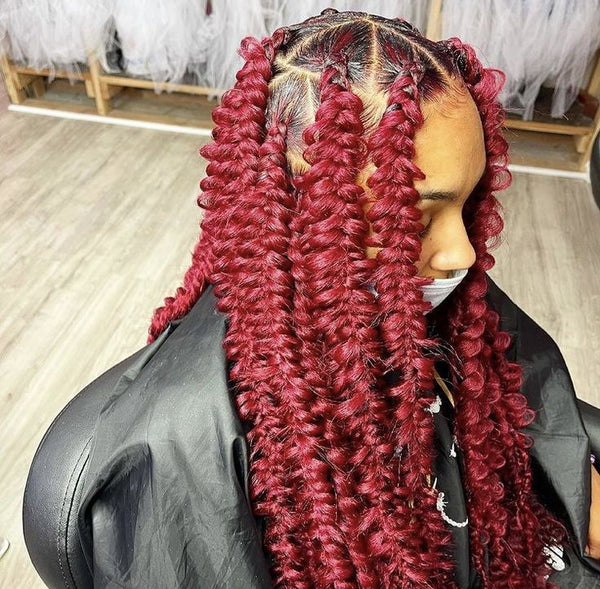
COI LERAY BRAIDS
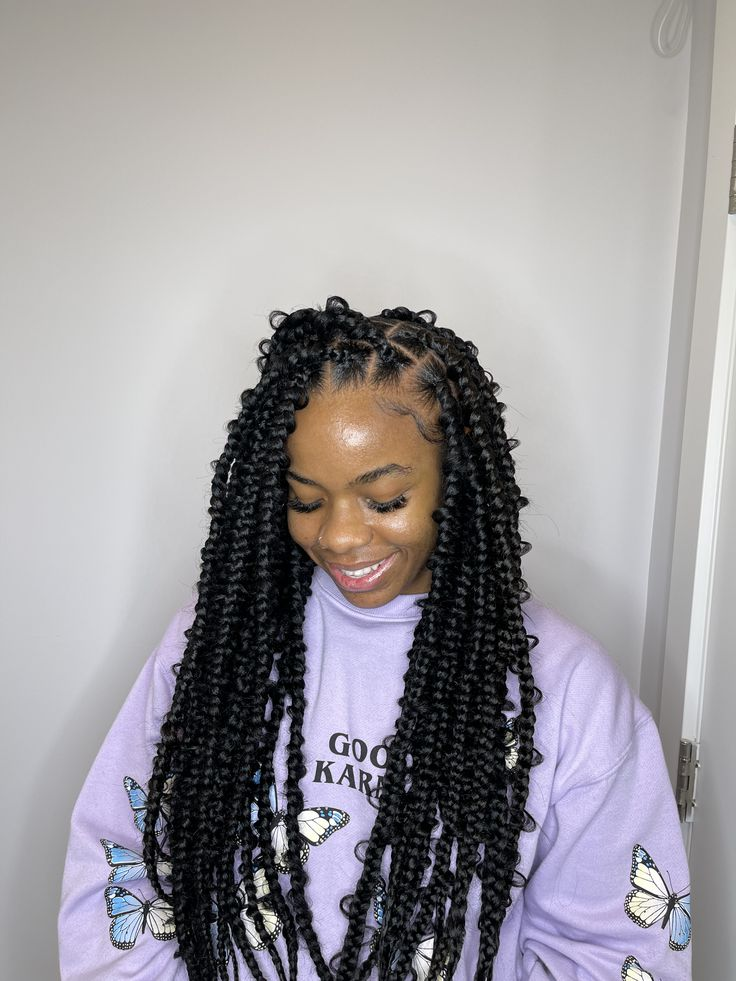
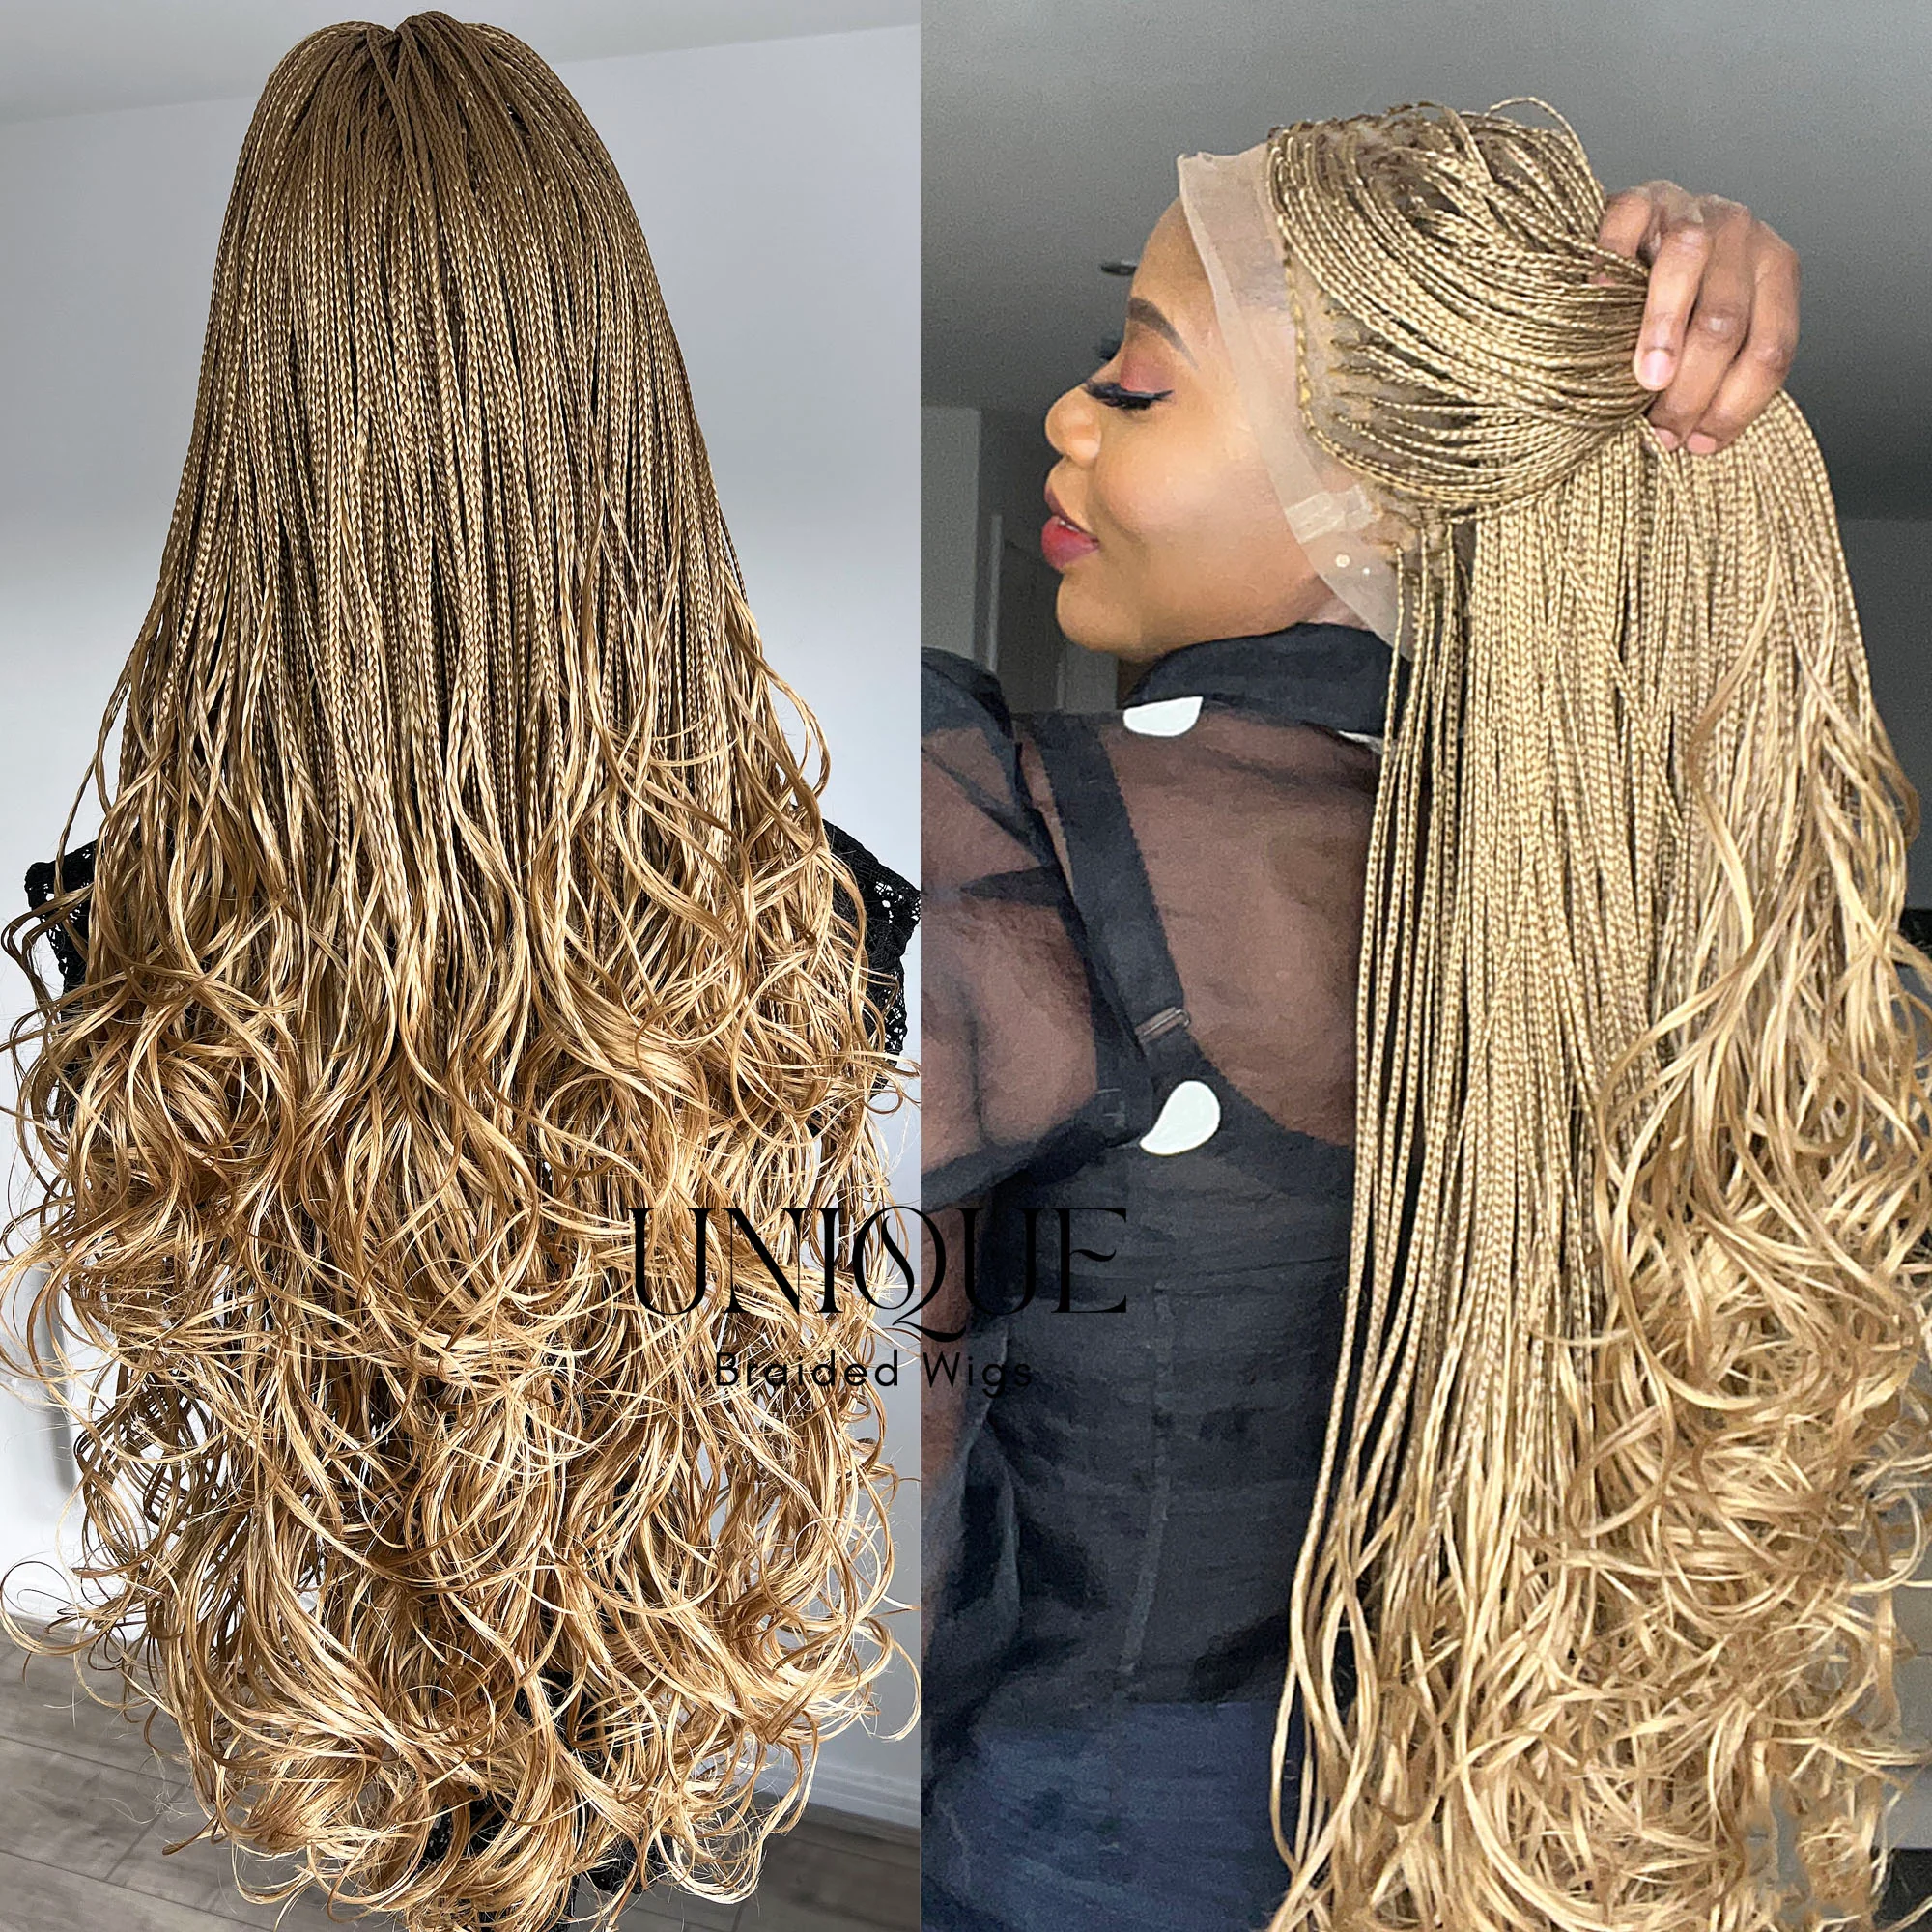
Jumbo braids with curly ends are also known as goddess braids. They typically feature 16 medium-length knotless box braids with bouncy curls and laid edges. However, you can customize this style by changing the number of braids or experimenting with different curl patterns.
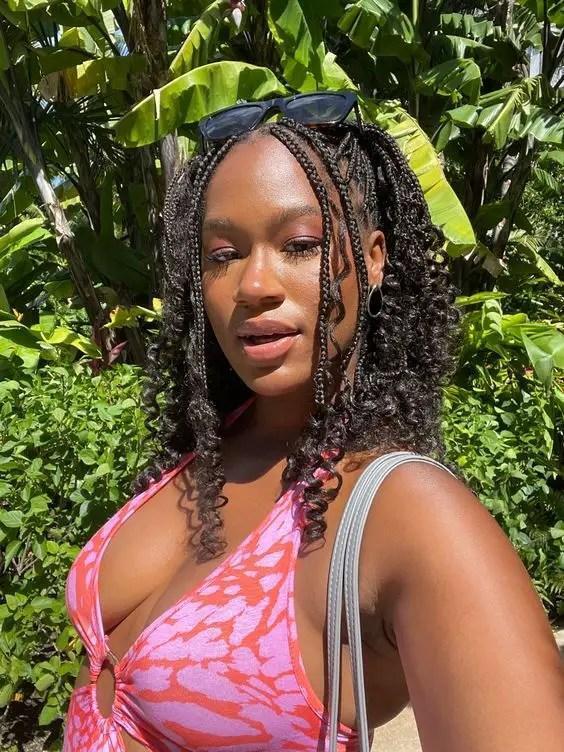
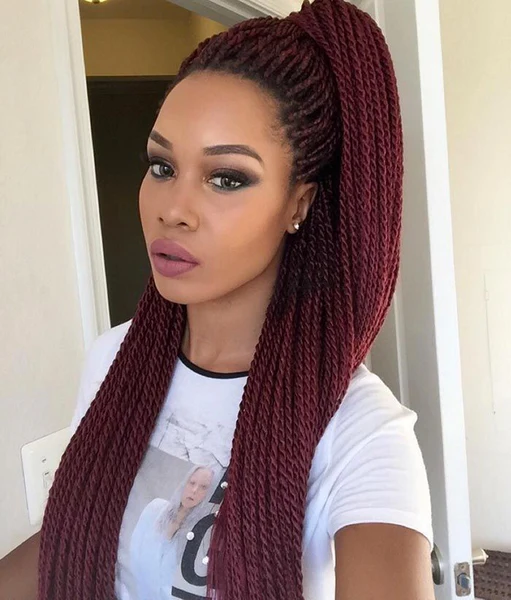
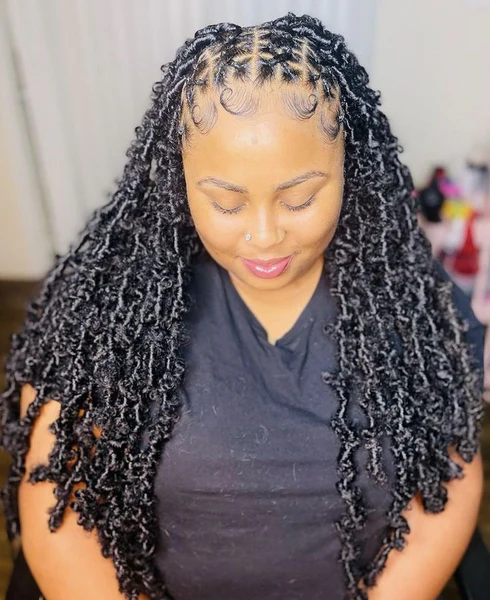
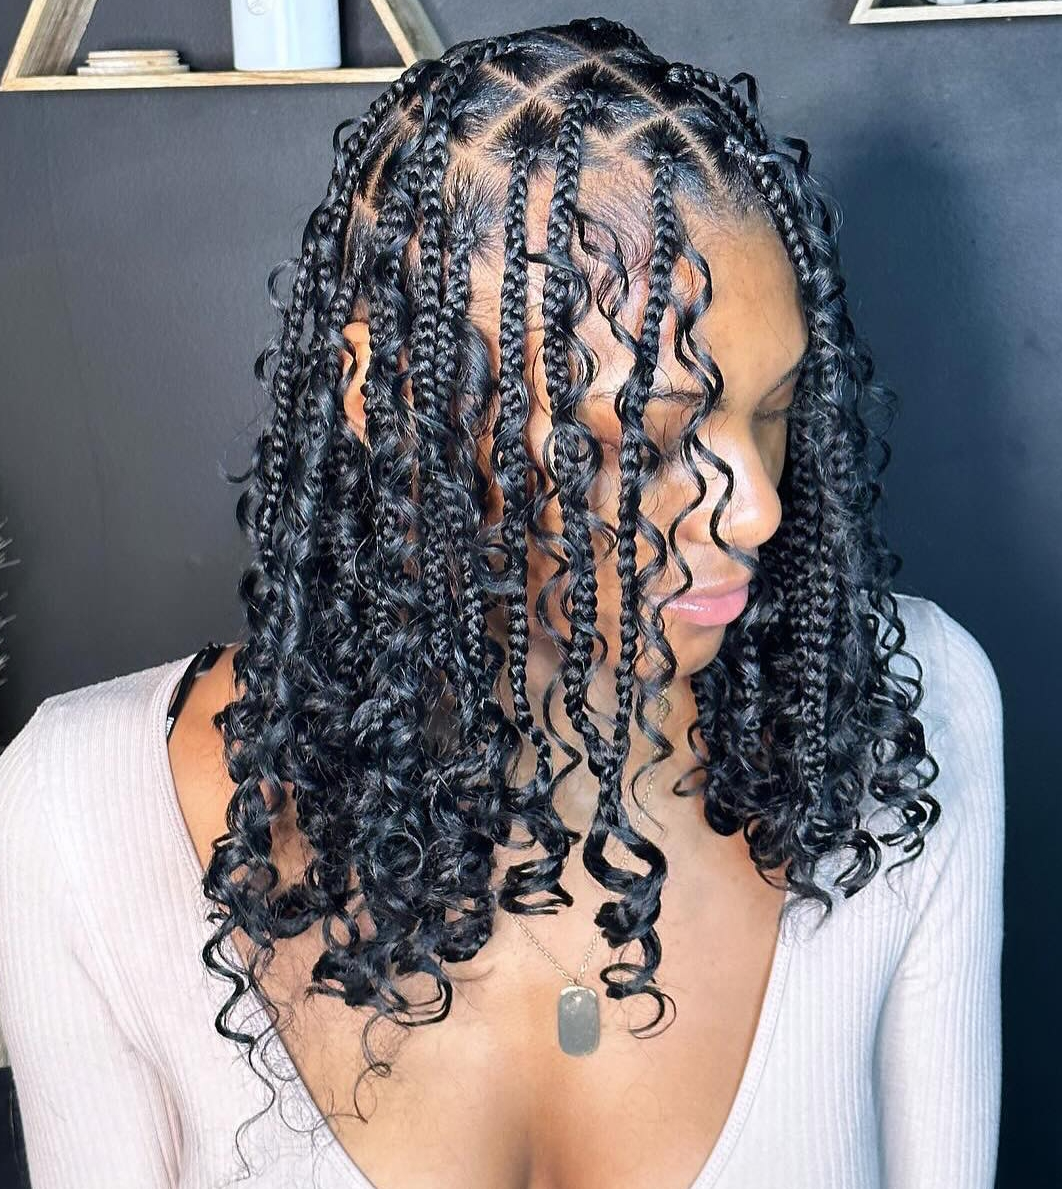
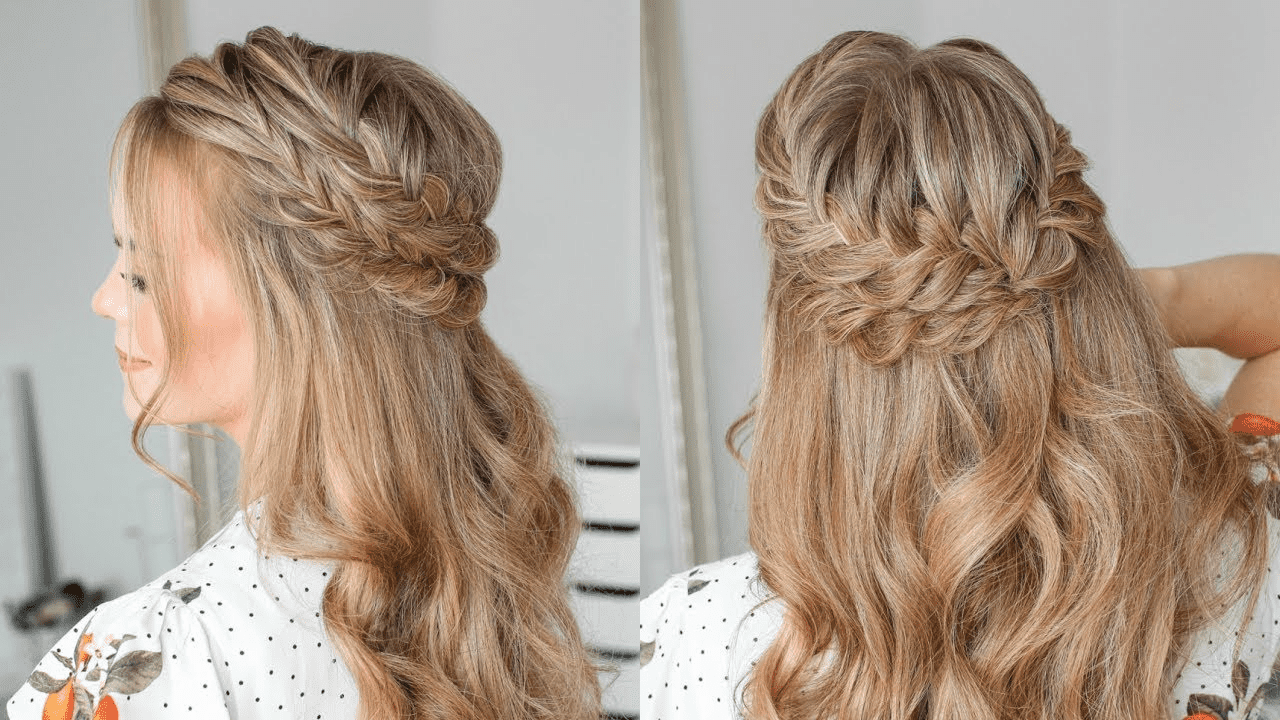
BOHEMIAN BRAIDS
Goddess braids are characterized by curly ends or loose, wavy strands incorporated into the braids, creating a soft, voluminous look. The curls are often left unfinished, with the hairstylist braiding only the initial inches and leaving the remaining length curly.
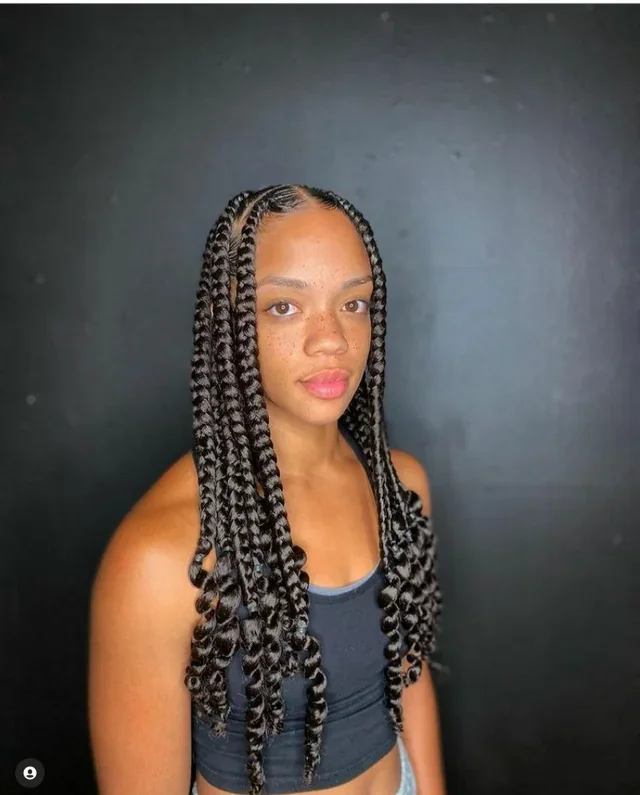
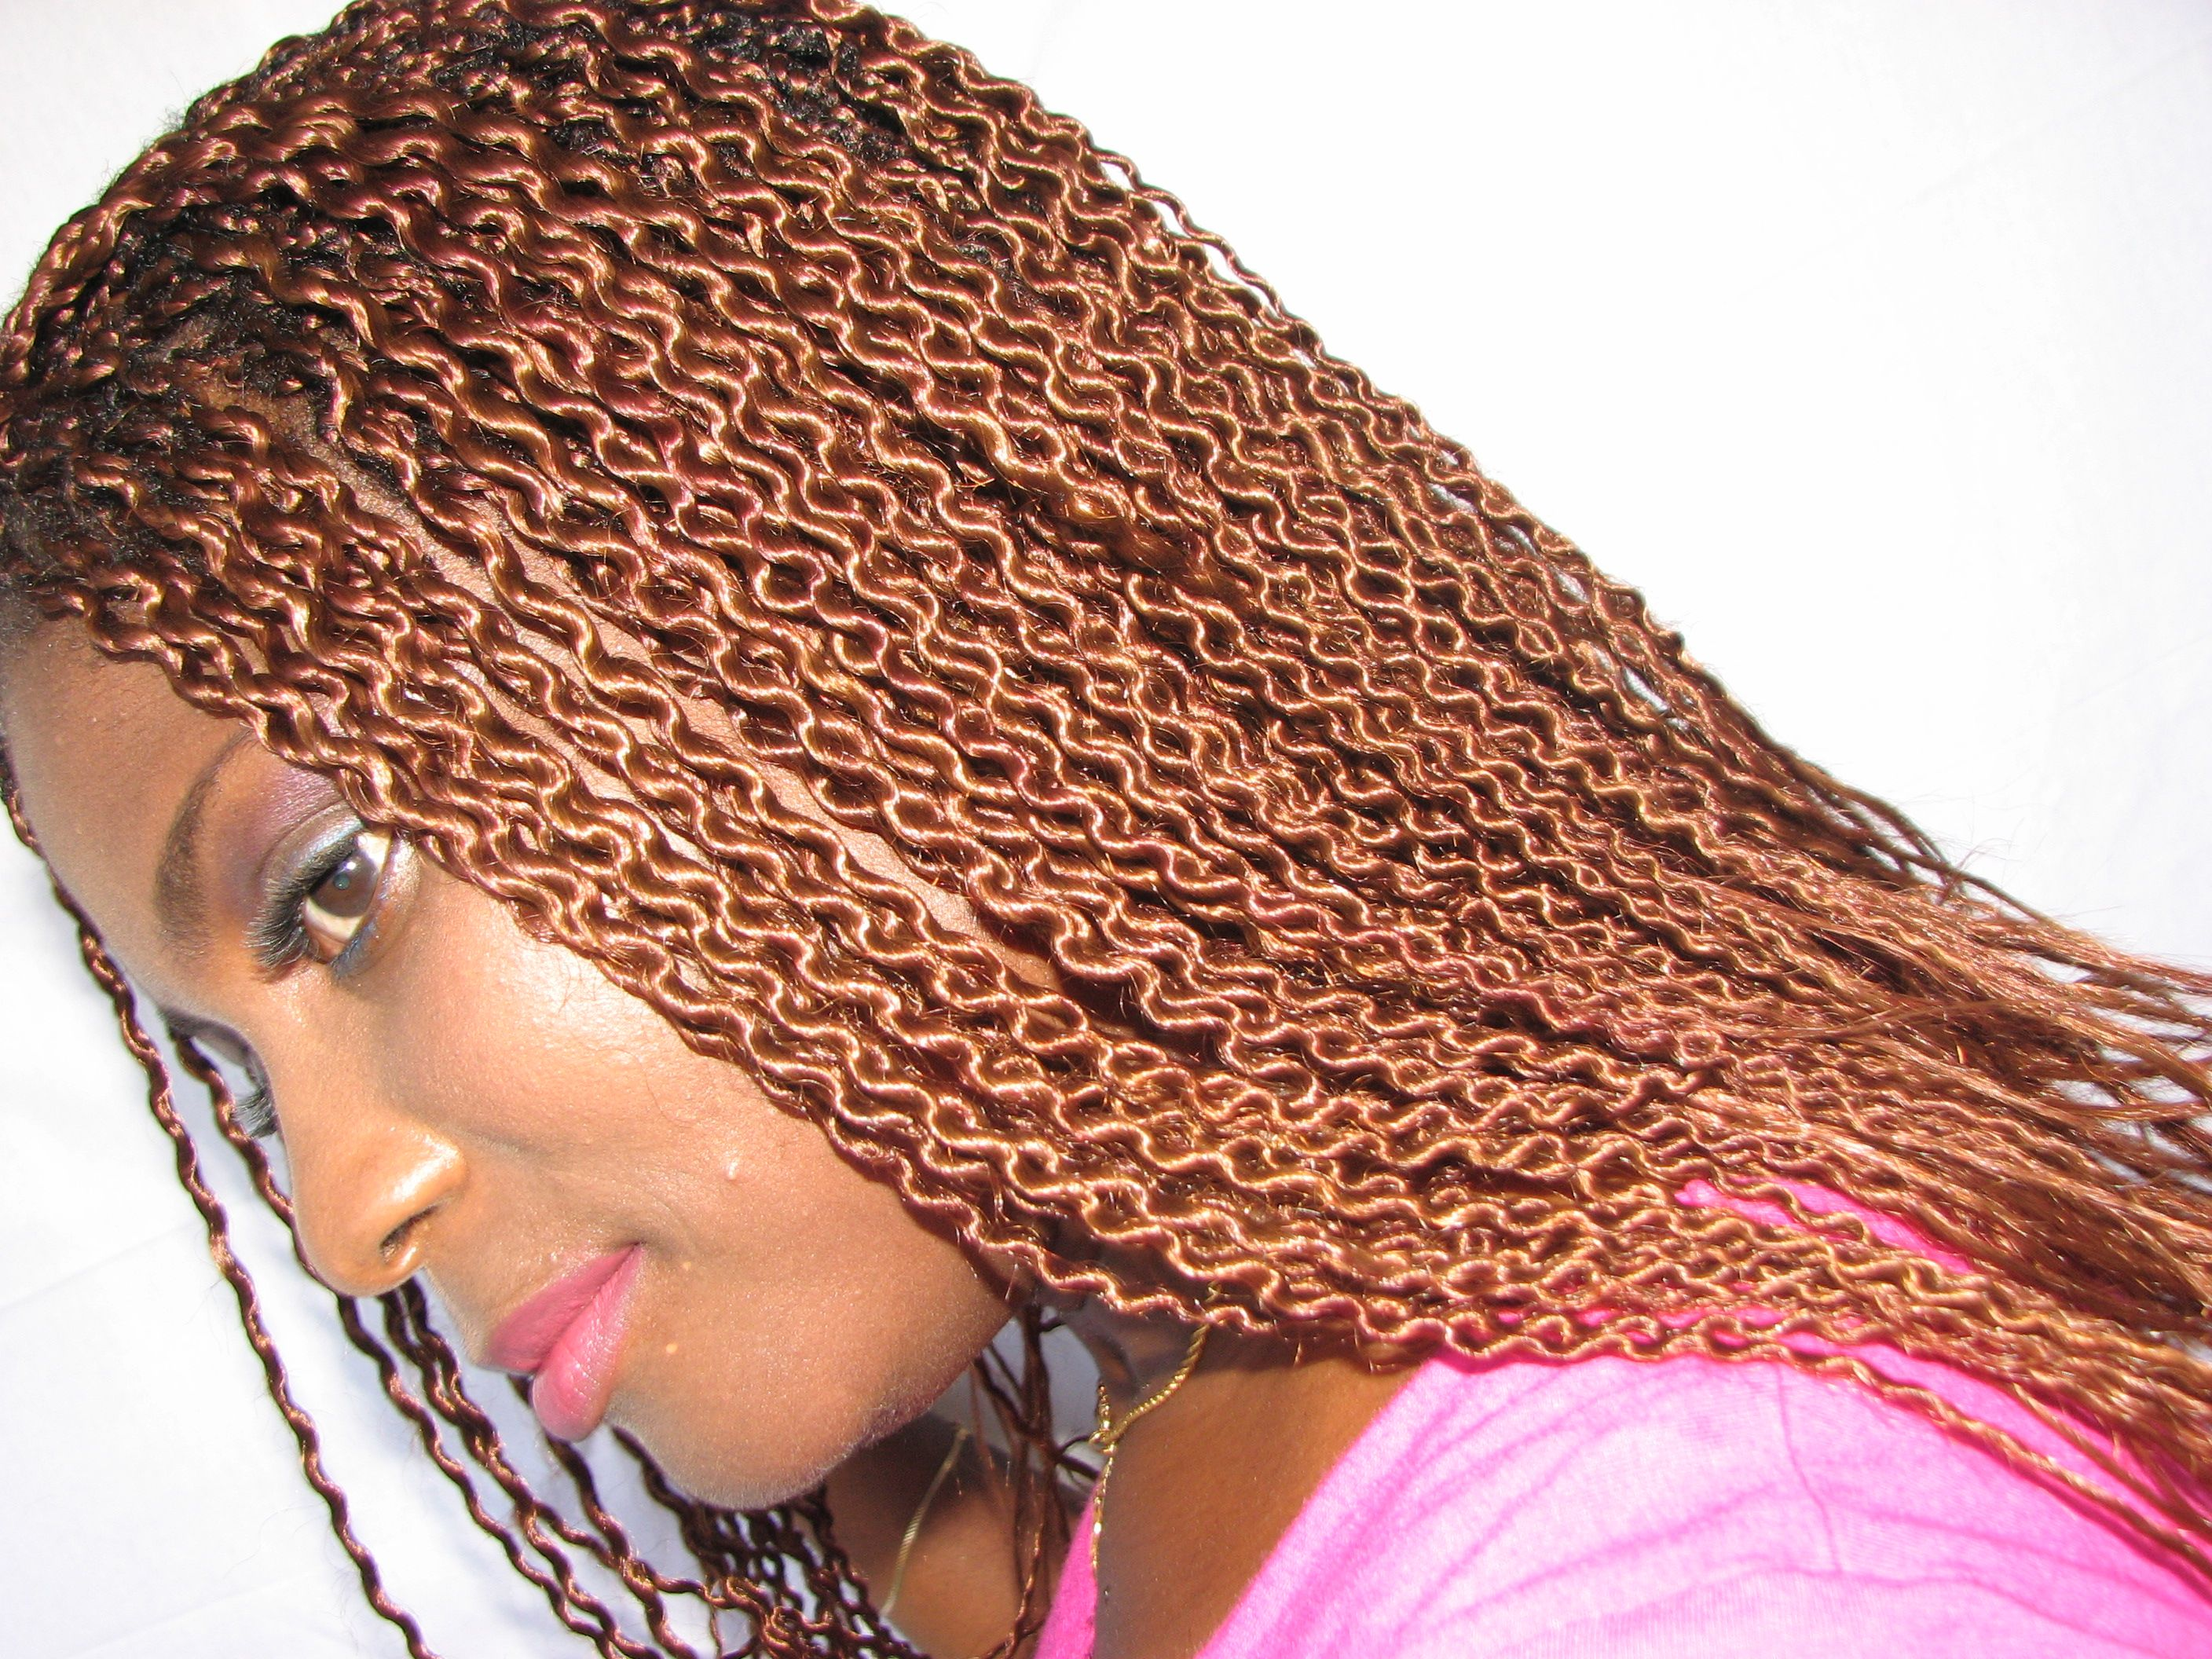
SMALL BRAIDS WITH CURLS
For a stylish twist on thin braids, add definition by curling the tips. This simple touch can elevate your hairstyle.
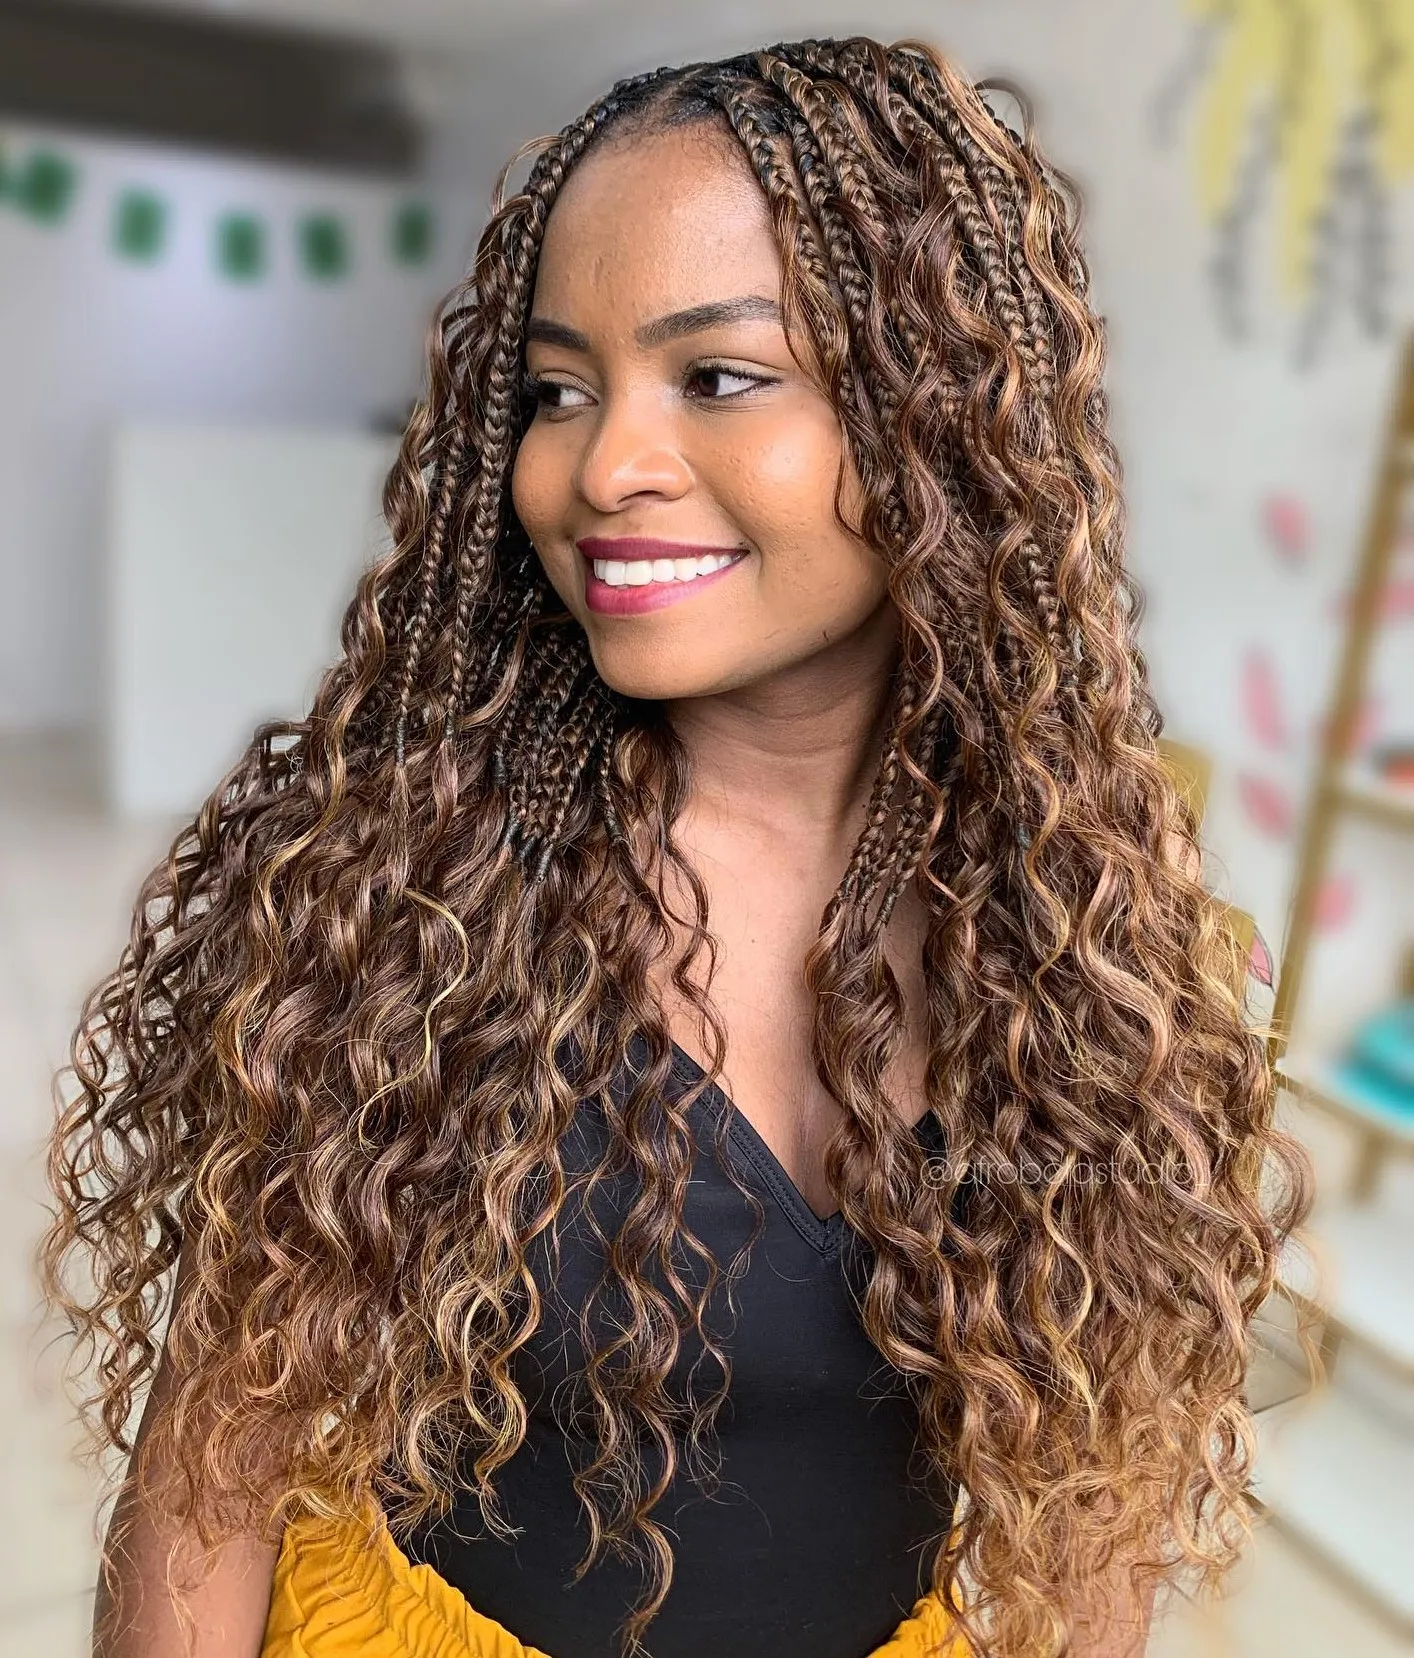
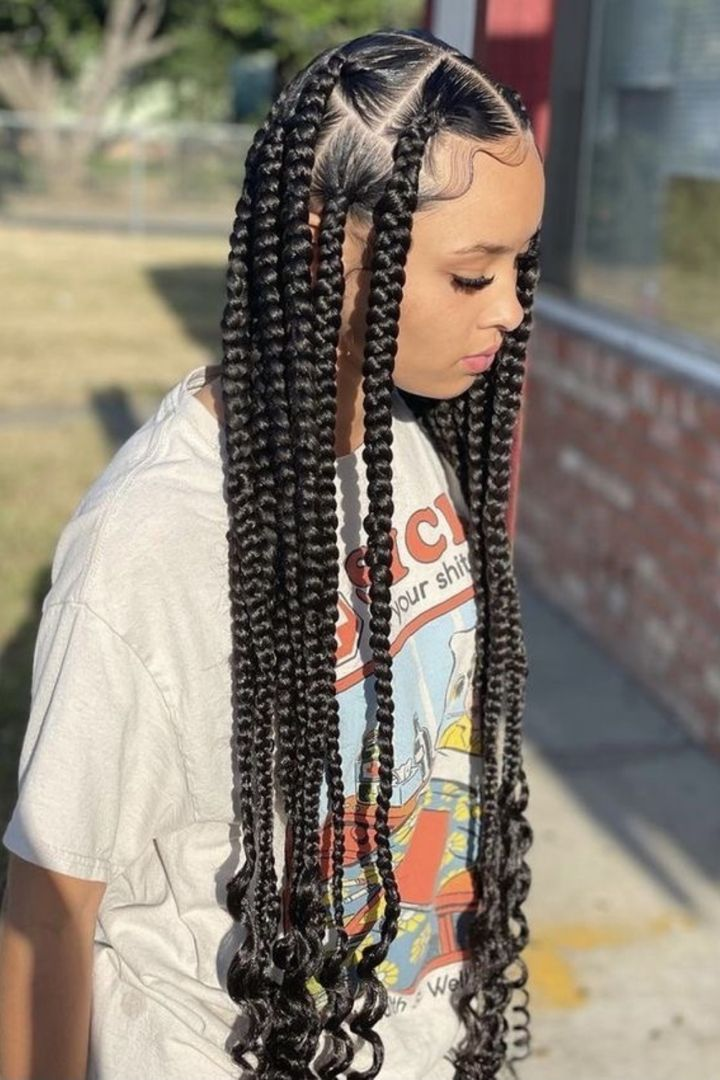
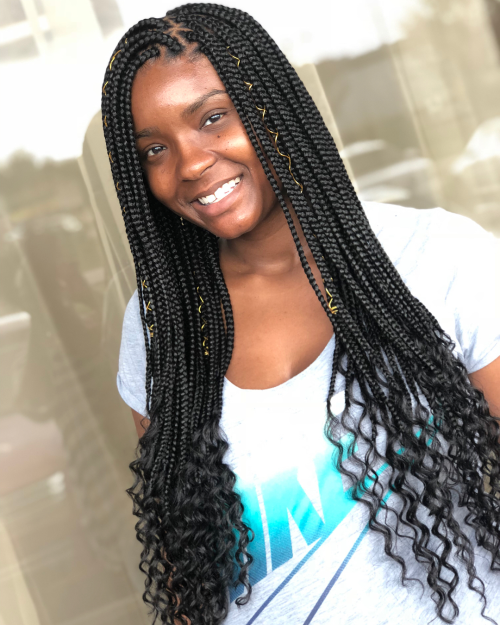
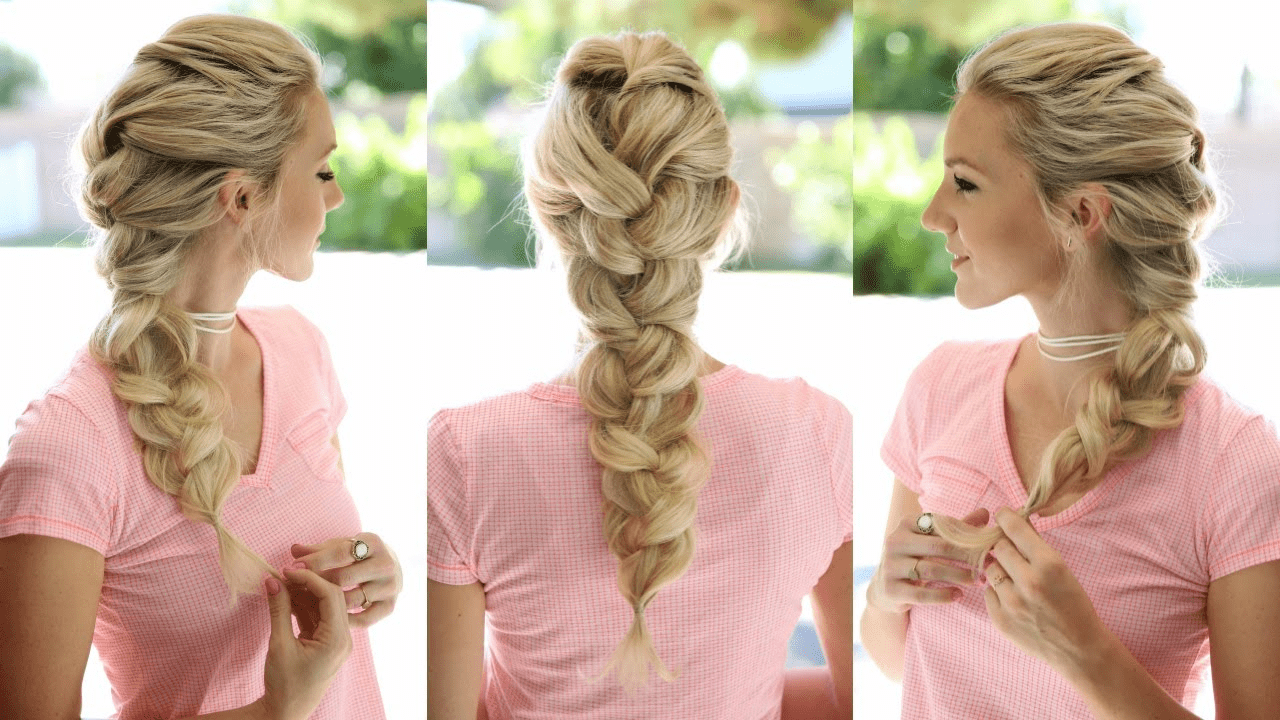
JUMBO BRAIDS WITH CURLS
Whether you prefer knotless or traditional box braids, adding curls to thick braids can create a stunning and eye-catching look. The combination of large braids and curls is a bold and beautiful choice.
WATERMELON BRAIDS
This style involves braiding your hair with extensions into loose braids, then twisting two individual braids together. Dip the twisted braids in hot water to create wavy curls.
PASSION TWISTS
This hairstyle features curly twists created using synthetic hair extensions. The use of wavy or curly extensions adds a textured and voluminous look, making these twists particularly eye-catching.
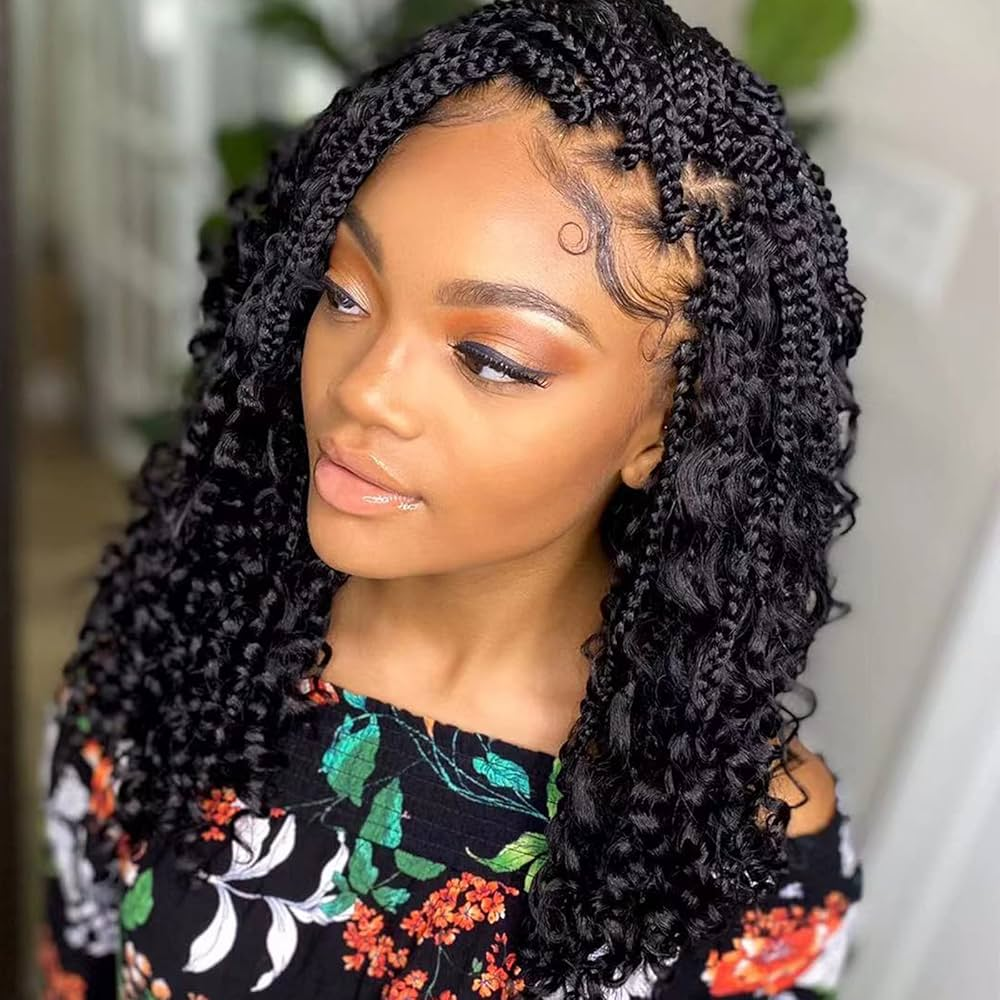
STITCH BRAIDS WITH CURLS
This hairstyle features cornrows with deliberate spaces and sectioned lines, allowing you to incorporate extensions into each braid. For an added touch, attach curls to the tips or inside the braids to enhance their appearance.
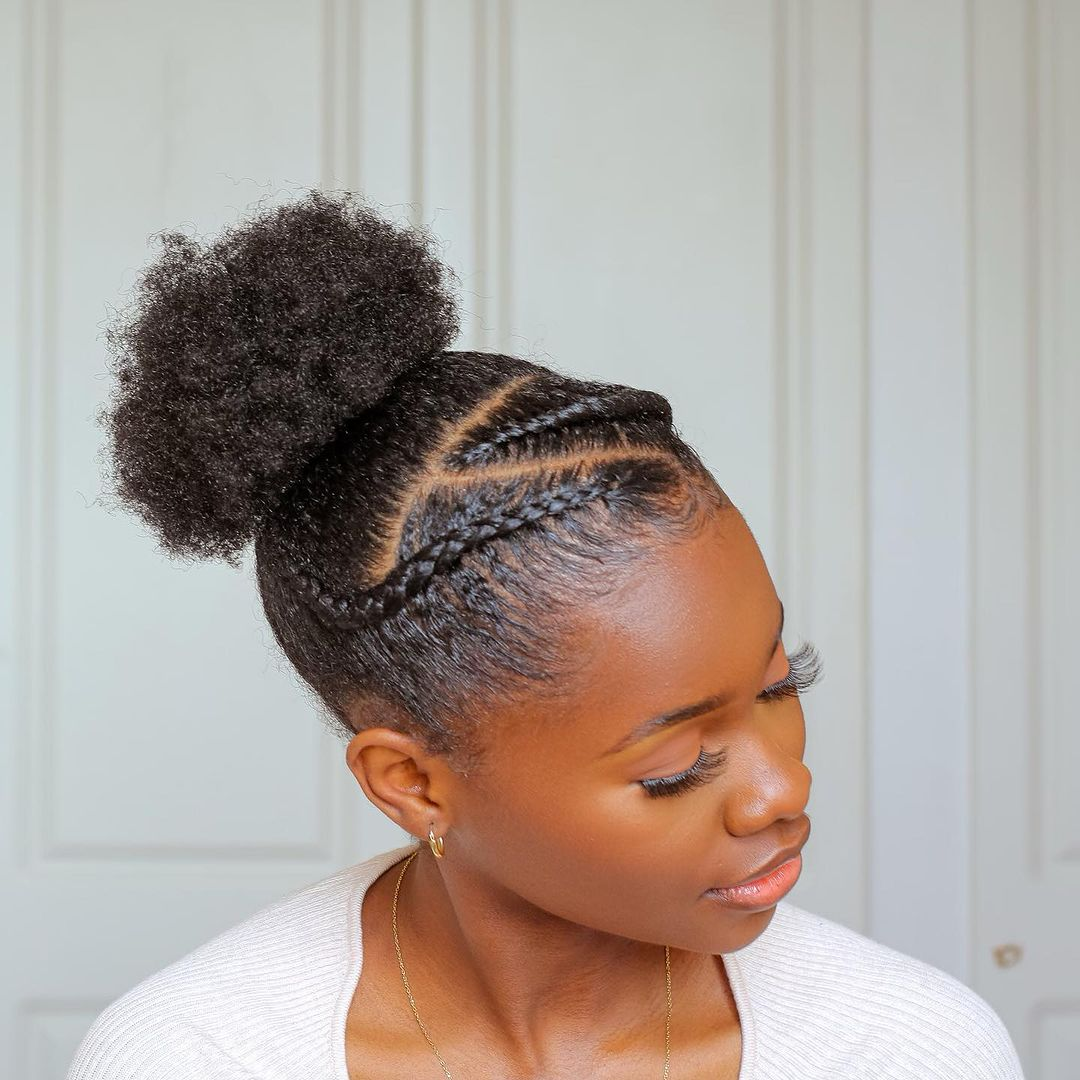
UPDO WITH CURLS
Shuku hairstyles, created using the Ghana weaving or stitch technique, look stunning with curls. This style is perfect for showcasing your forehead while pulling your hair back.
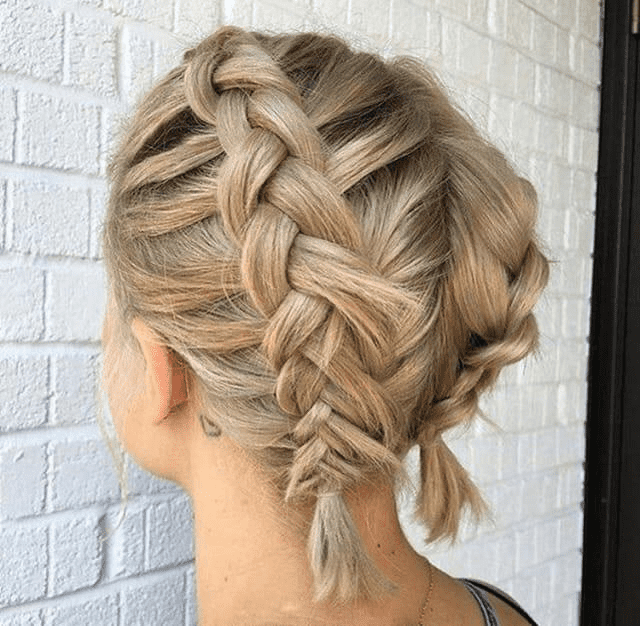
CORNROWS WITH CURLS
All-back cornrows are a versatile style that looks fantastic with curls. Whether you prefer long or short cornrows, this combination offers a stylish and eye-catching look.
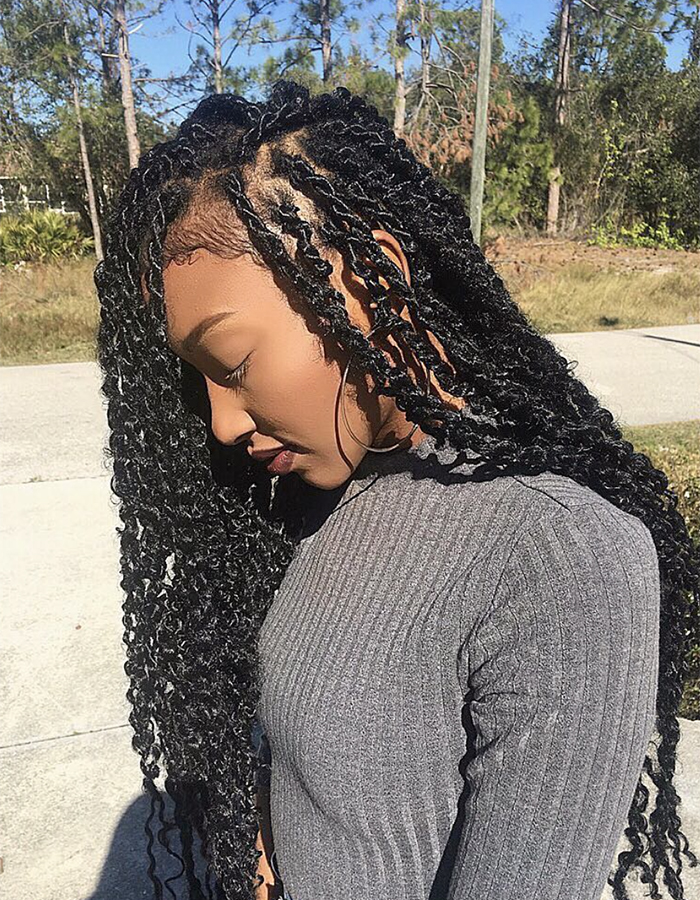
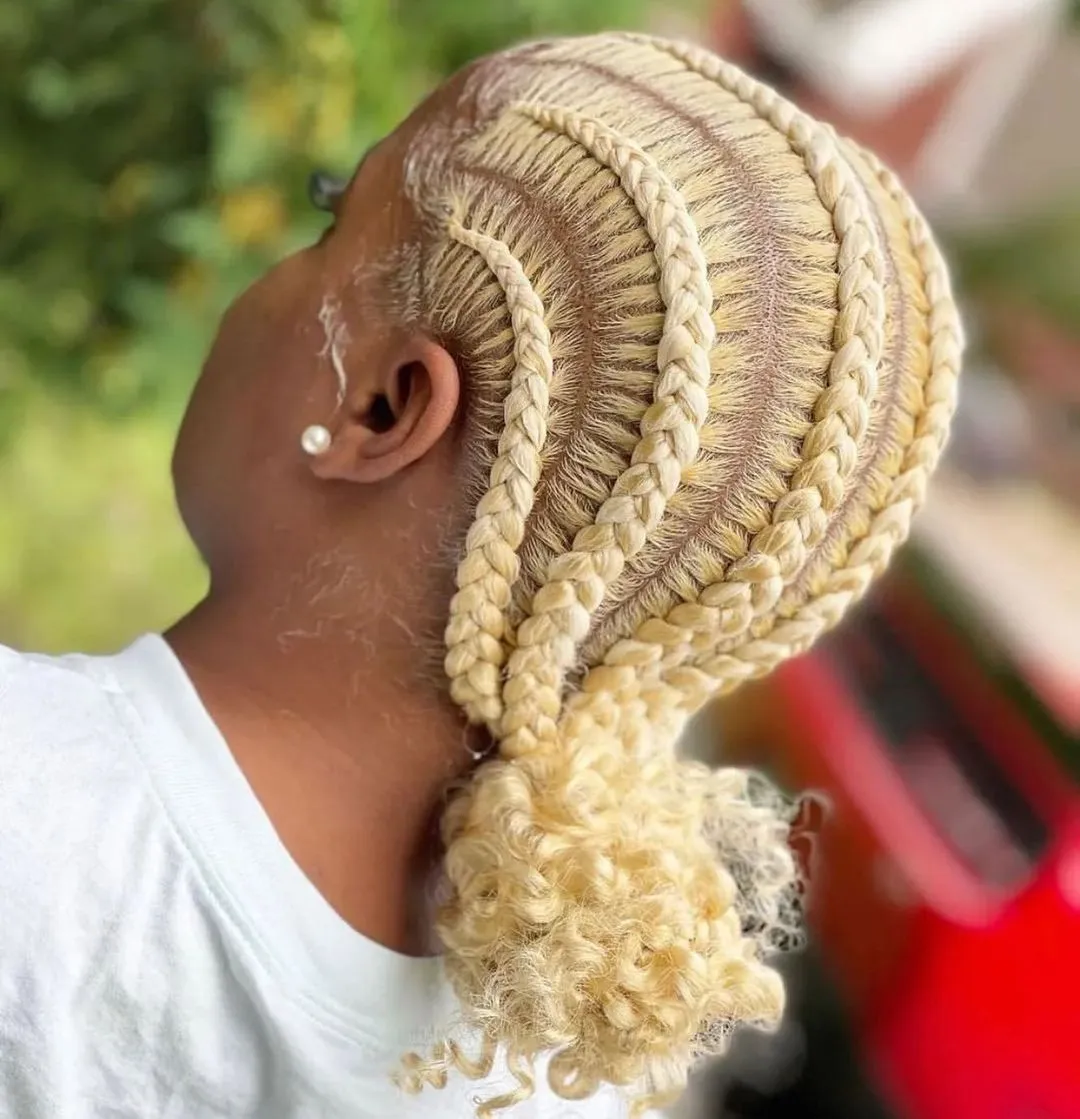
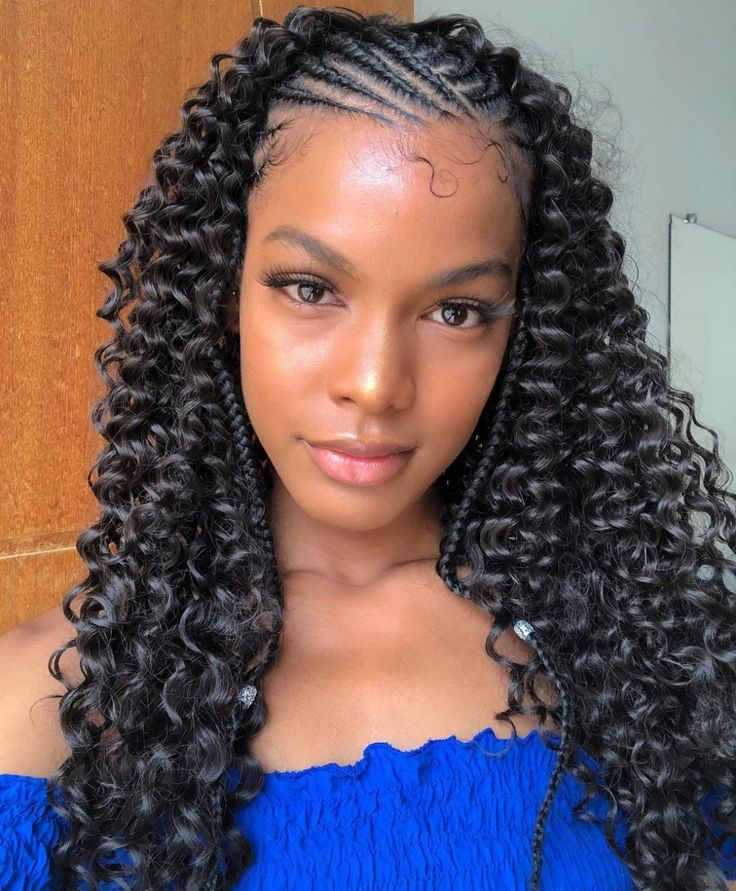
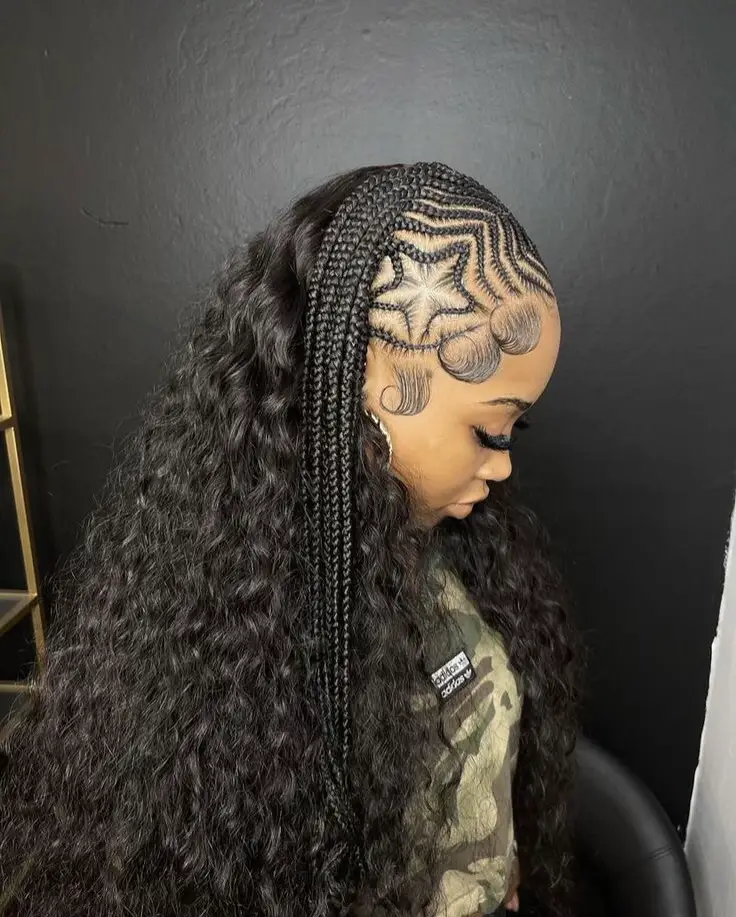
FULANI BRAIDS WITH CURLS
Fulani braids are a unique hairstyle featuring updo or all-back cornrows that are intricately carved into curved patterns on the scalp. Box braids drape down the sides of the head, completing the distinctive look.
BUTTERFLY BRAIDS
These braids feature natural curls achieved by incorporating free water wave braiding hair into the strands. This creates a fluffy, voluminous look. They are essentially African braids with small curls or waves around each individual braid.
BRAIDS WITH CURLS ARE WORTH THE HYPE
These braids are all the rage for a reason! They’re versatile and customizable, allowing you to wear them long or short with any hair extension color. For a quick and easy option, try a pre-made wig.
Need more inspiration? Here are some popular styles to try:
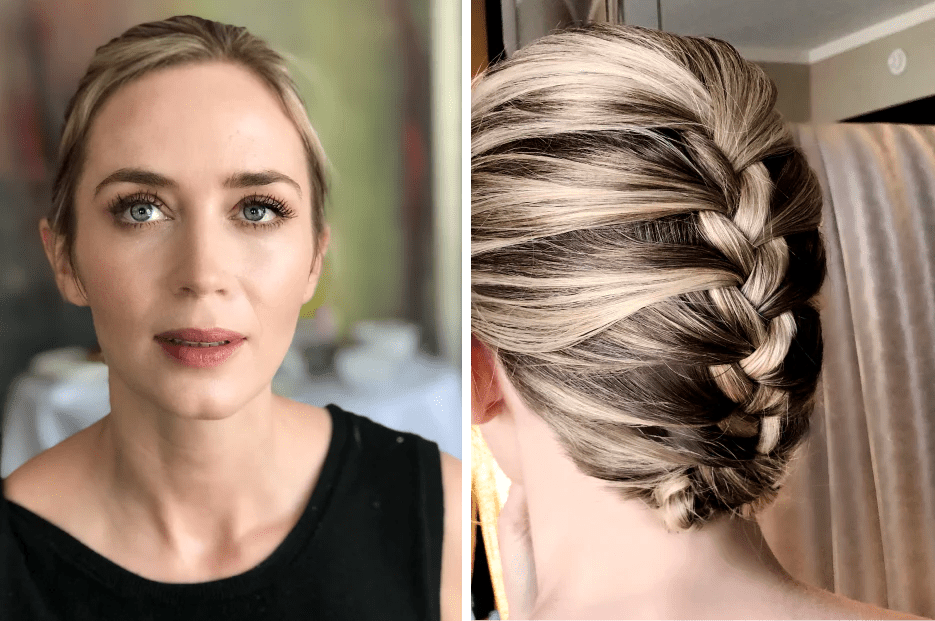
How To French Braid Step By Step For Beginners
Braiding hair, especially mastering the art of a French braid, can be a delightful and rewarding skill to acquire. Whether you’re preparing for a special occasion, looking for a stylish everyday look, or simply seeking a creative outlet, learning how to French braid your hair opens up a world of possibilities. This elegant and timeless technique adds a touch of sophistication to your hairstyle and is surprisingly versatile.
In this guide, we’ll walk you through the step-by-step process of creating a French braid, unraveling the mystery behind those intricately interwoven strands. Get ready to elevate your hairstyling game and enjoy the journey of discovering the beauty and artistry of French braiding.
How To French Braid On Yourself
Tools You’ll Need
A hair elastic
A comb
Texturizing spray
Hairspray
Bobby pins
Step 1: Prep your hair
Begin by thoroughly brushing your hair to eliminate any tangles, ensuring it becomes soft, smooth, and ready for braiding. If opting for a single braid down the back, brush your hair backward, away from your forehead. Should you prefer a braid down the side or multiple braids, part your hair accordingly and brush it into sections based on your desired braiding style. Whether your hair is dry or wet, note that braiding wet hair can result in soft, attractive waves once undone.
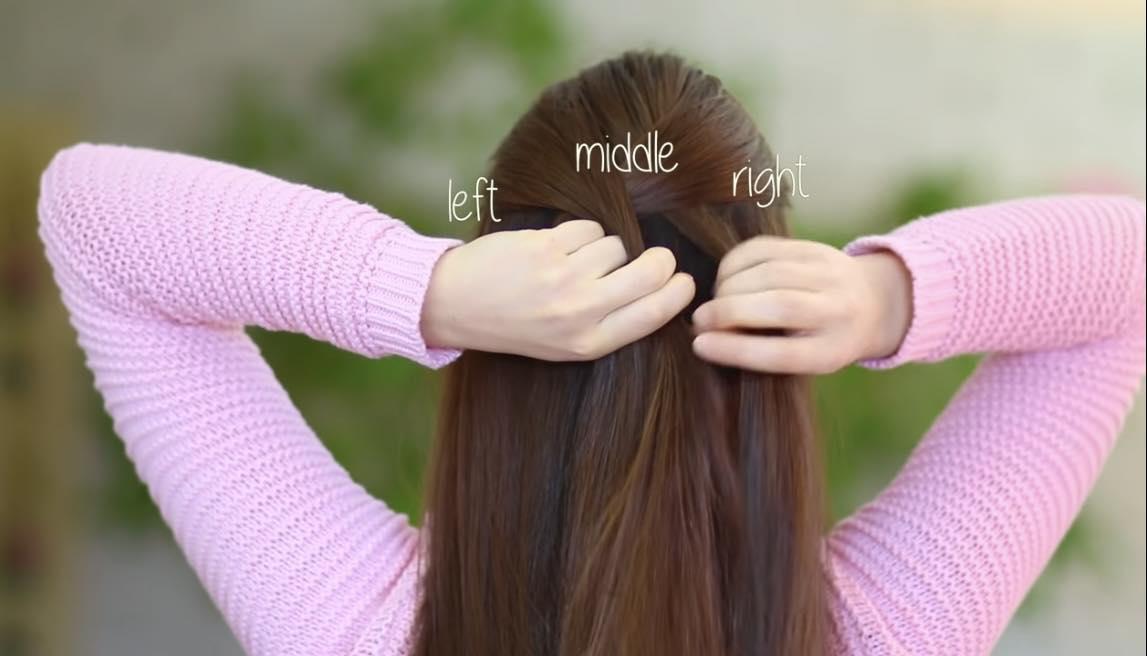
Step 2: Begin sectioning your hair
Initiate the process by gathering a substantial chunk, approximately 3-4 inches wide, from the top-center of your head. Ensure that all the hair in this section is derived from the same “hair row,” avoiding strands from higher or lower areas. If you have bangs, you have the option to incorporate them into the braid at this stage or leave them flowing freely—choose the option that enhances your desired look. To include bangs, gather hair from the very top-center of your head, just above your forehead.
It’s important to note that the initial section you start with doesn’t determine the final size of your braid. Although you begin with a small section, the braid naturally thickens as you progressively add more hair.
Step 3: Separate into three pieces
Divide this initial “section” into three segments. Similar to conventional braids, French braids employ three strands of hair to form their design. Use your fingers to separate them by running through the section you’re holding, ensuring that you create three uniform pieces. Ensure that none of the segments are larger or smaller than the other two.
Step 4: Start with a traditional braid
To start, ensure correct hand positioning: hold two strands in one hand and the third strand in the other. Initiate the process with a traditional braid by crossing the “right” strand over to the center, followed by crossing the “left” strand over to the center. Repeat this pattern until you’ve formed several rows of a traditional braid.
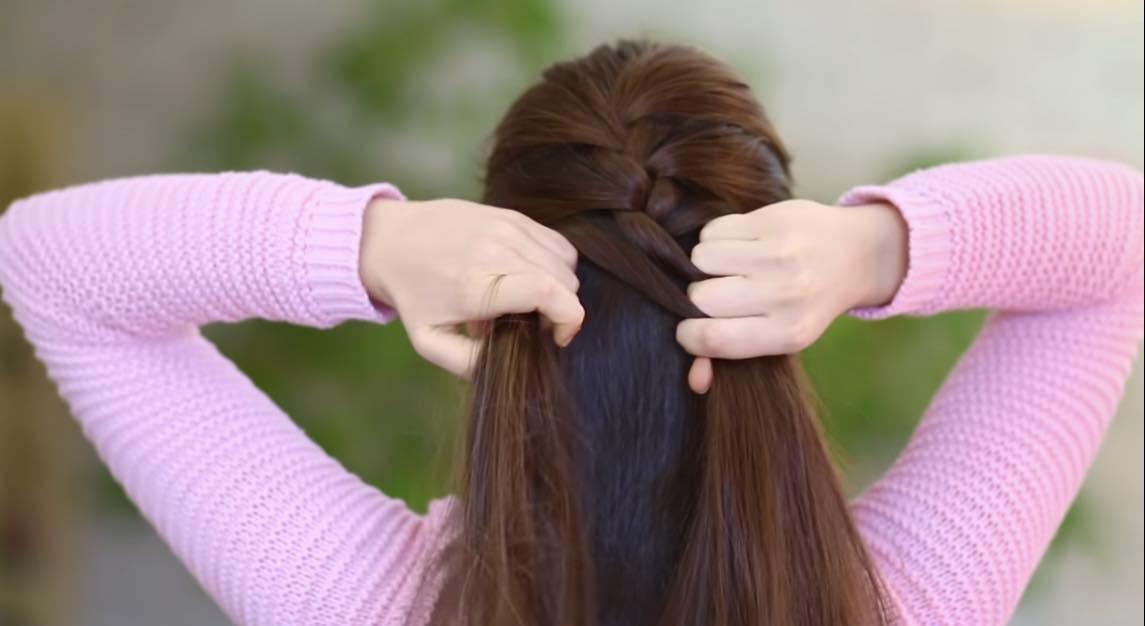
Step 5: Work on new hair
Continue following the traditional braid pattern, but now introduce additional strands of hair. Before crossing a section over to the center, gather some hair from that side of your head and incorporate it into the cross-over. Each time you perform a crossover, integrate another small piece of hair. The amount of new hair you grab each time is flexible, but for a more intricate appearance, consider grabbing smaller sections.
For the most aesthetically pleasing French braid, focus on picking up hair near your face and neck. Avoid solely selecting pieces from the center, as they may get concealed later by strands from the outside.
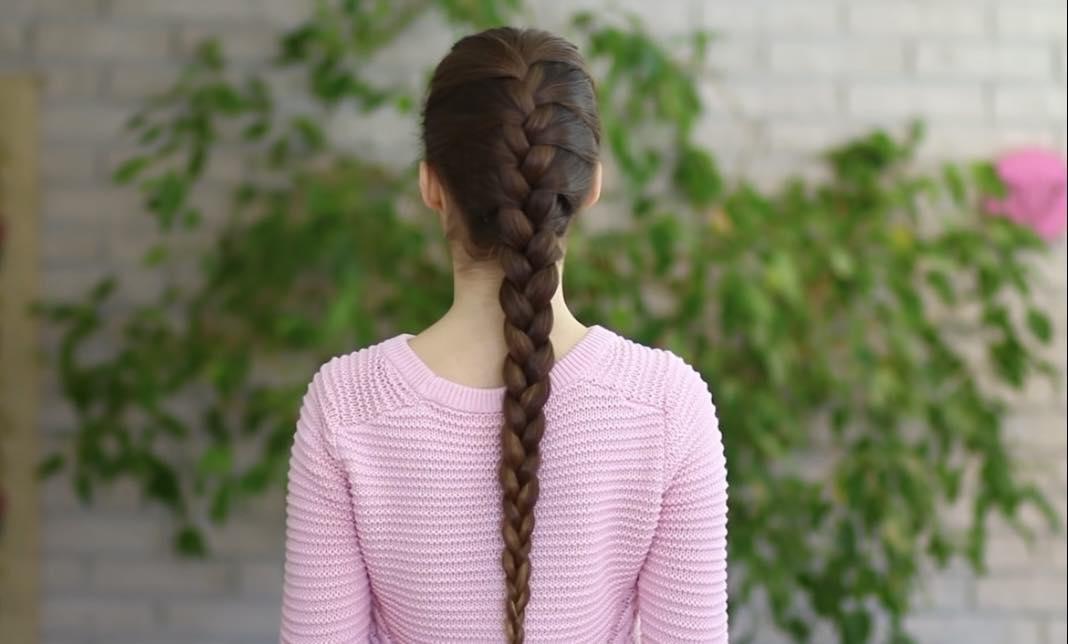
Step 6: Finish your braid
Continue employing this braiding method until all the hair from both sides of the braid has been incorporated. Complete the working braid by continuing in the fashion of a traditional braid until you reach the end of your strands. Finally, use a ponytail holder to secure the braid. It is advisable to refrain from using rubber bands, as they can cause damage to your hair when being removed.
9 BEST FRENCH BRAID HAIRSTYLES
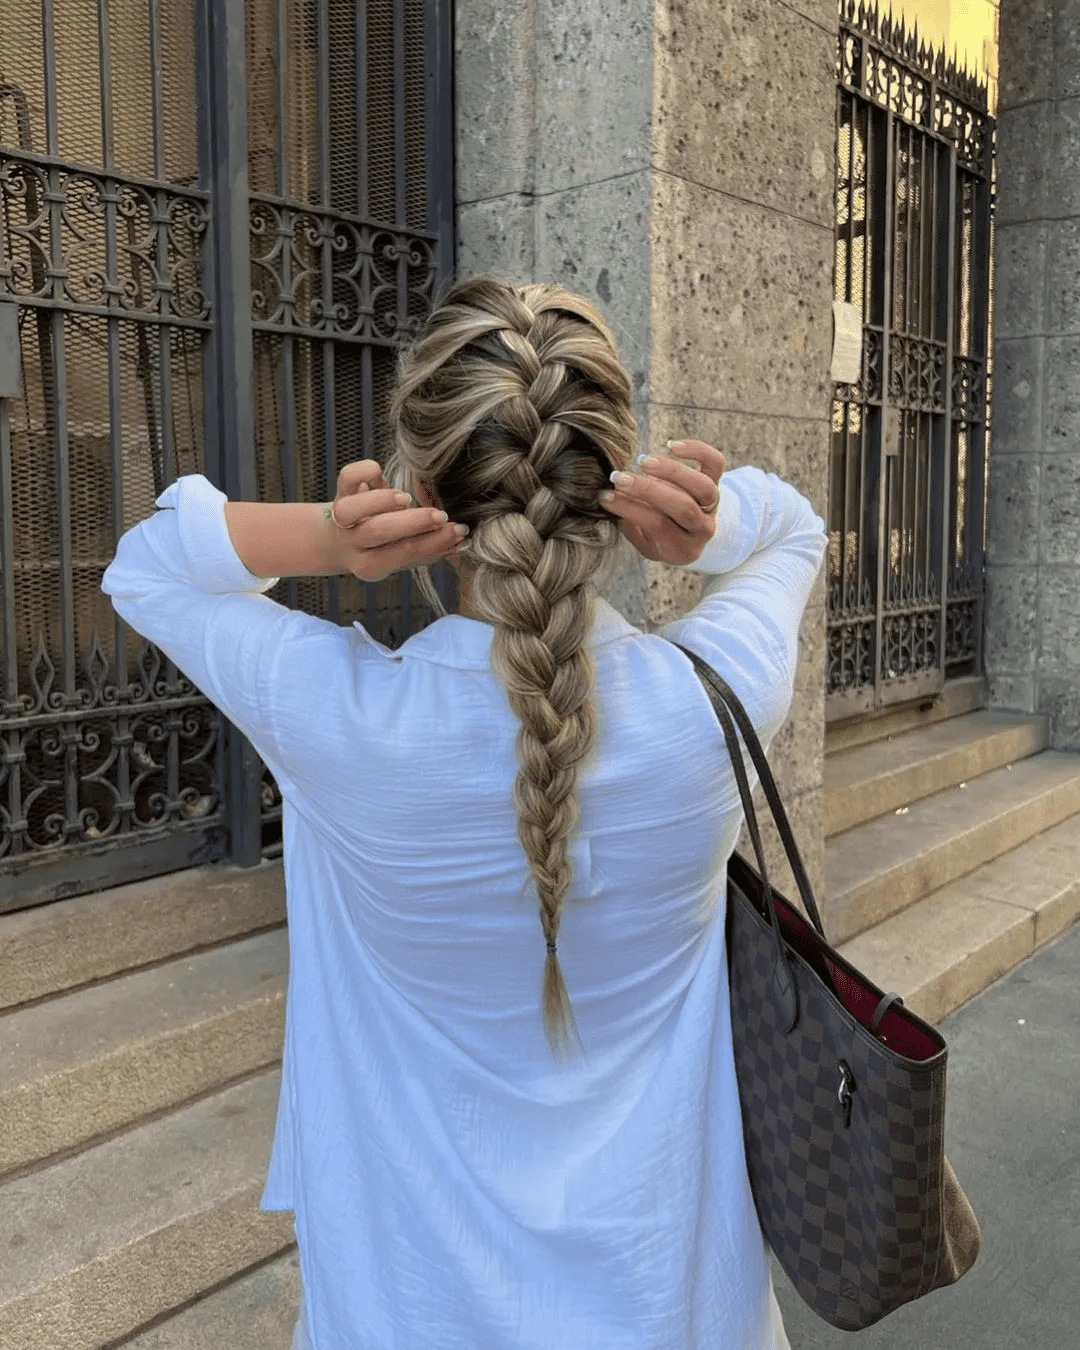
Single French Braid
A classic French braid is not only a timeless masterpiece but also versatile enough to complement various occasions. It’s easy to execute and can be adapted to reflect your personal style. Whether you prefer to wear it up or down based on your individual preferences. Utilizing a rat-tail comb aids in effortlessly sectioning and maintaining the firmness of the hairstyle. Remember to secure the braid tightly as you weave it to prevent any undesired slipping. Experiment with incorporating additional strands into the braid to create a unique focal point. If you encounter difficulties, don’t hesitate to seek assistance from friends or family for a perfect result.
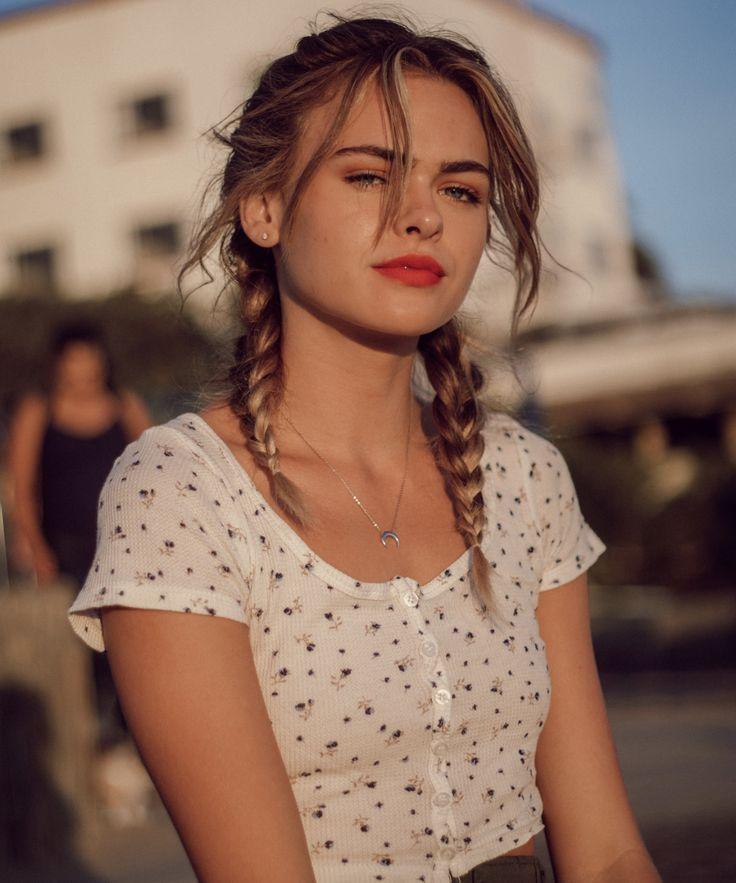
French Braid Pigtails
Consider embracing a playful and youthful vibe with French braid pigtails, a charming twist on the classic French braid hairstyle. Begin by parting your hair down the middle, the craft French braids on each side, guiding them back towards the nape of your neck. Instead of continuing the braid, secure your hair into two cute pigtails. These results in a stylish and fun appearance, ideal for weekend escapades, concerts, and more. The versatility of this style accommodates various hair lengths, whether you flaunt a lob or luxurious, flowing locks, making it effortlessly chic.
French Braid Bun
For those moments when you’re heading to a special event or just in the mood for some elevated styling, a French braid bun can be a truly stunning hairstyle. The fusion of a bun and a braid adds intricate detail and sophistication to your look. The possibilities for combining these two classic hairstyles are endless. Experiment with a contemporary twist by crafting a French braid that ascends along the back of your head, culminating in a stylish topknot. Alternatively, for a more romantic vibe, consider pairing a French crown braid with a low chignon.
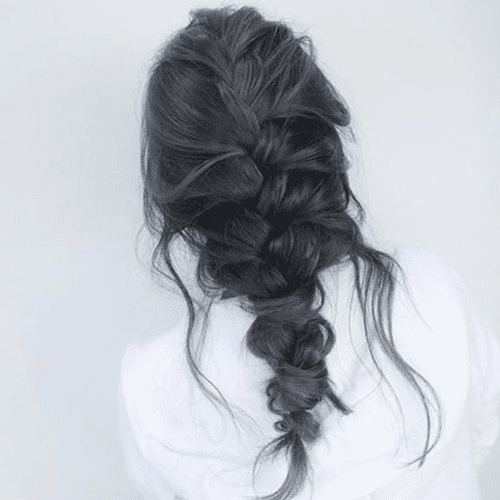
Loose French Braid
The French braid exudes a chic and refined charm, making it an excellent choice for formal gatherings and special occasions. Crafted with three strands and the overhand braiding technique, this style offers versatility in terms of thickness and tightness. For a deliberately undone and effortlessly messy look, consider creating the French braid with a looser touch. This not only adds volume to the hairstyle but also imparts a romantic and relaxed feel. Particularly well-suited for those with curly hair, you can enhance the aesthetic by leaving a few strands loose around the face, framing your features with a touch of elegance.
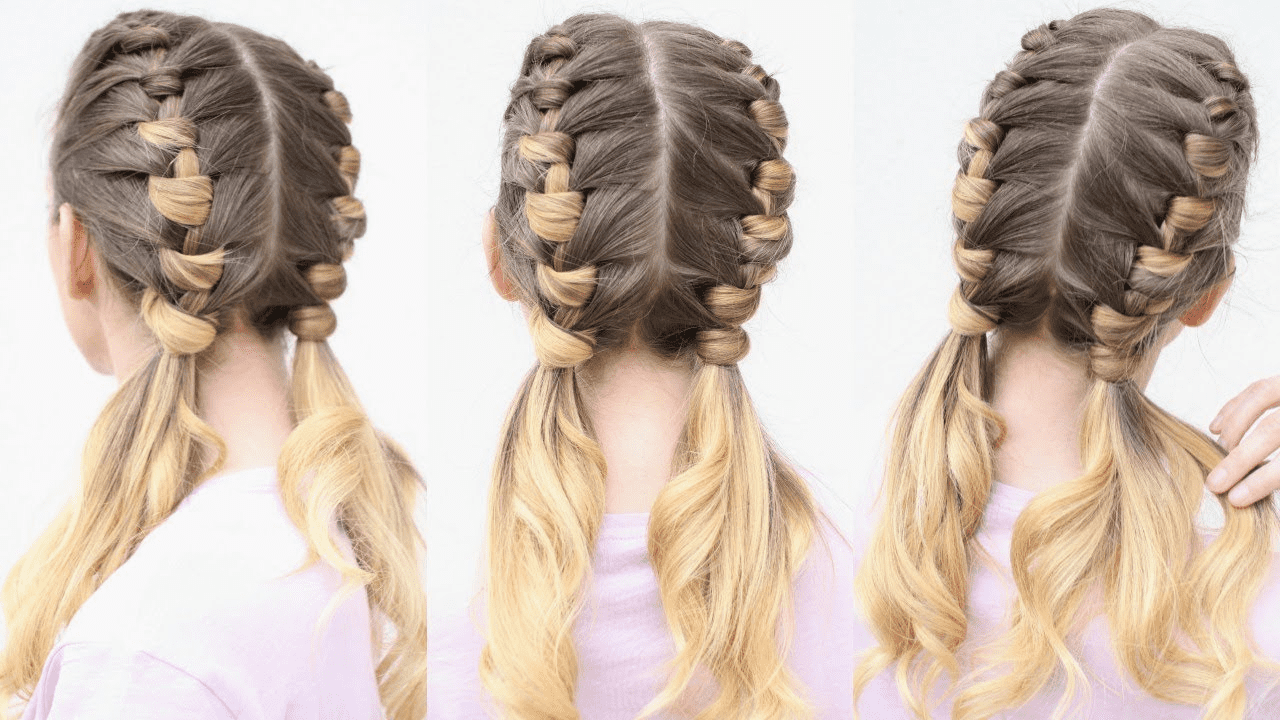
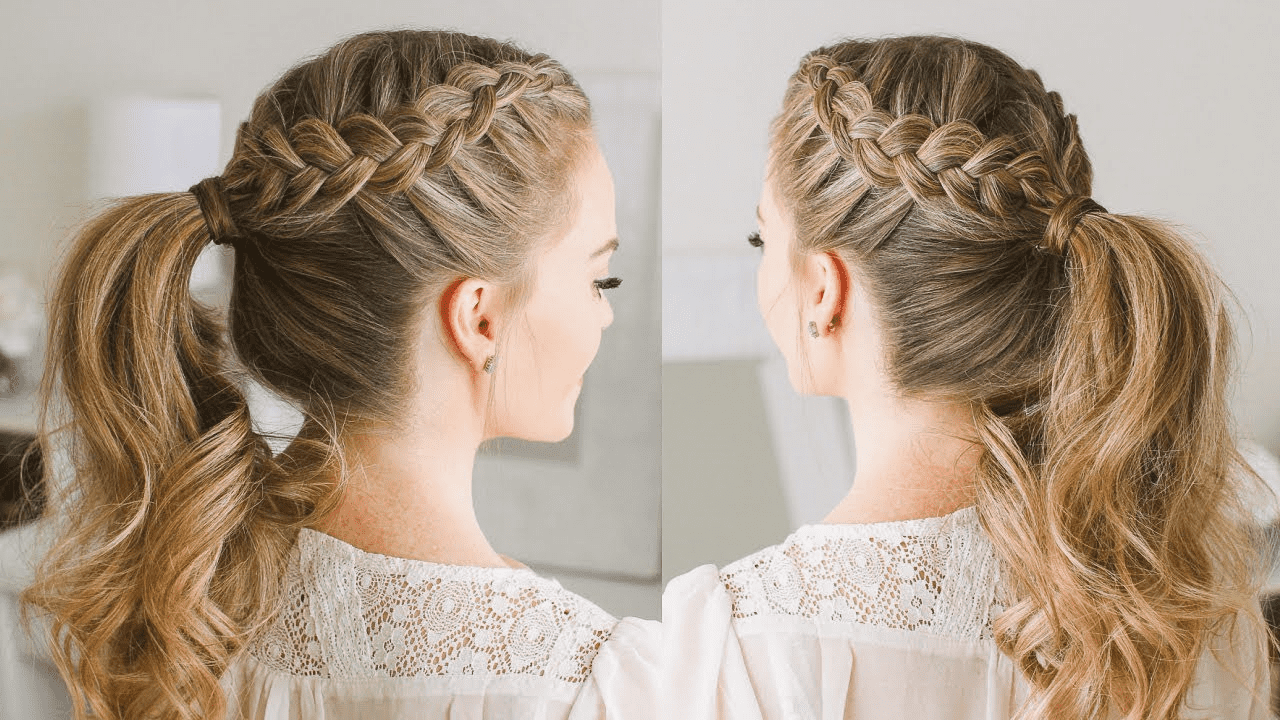
Double French Braid Ponytail
The Double French Braid Ponytail is a straightforward yet sophisticated hairstyle that suits any occasion and can be effortlessly tailored to individual preferences. Achieving this look involves simply French braiding the hair into two distinct braids and securing them into a ponytail at the end. This hairstyle radiates a youthful and dynamic vibe, making it an ideal choice for those who value both comfort and convenience.
Half-Up French Braid
Embrace both the charm of braids and the trendy appeal of half up half down hairstyles by blending them into a delightful and stylish fusion. To achieve this look, begin by sectioning off a portion of hair at the top of your head. Commence French braiding from your forehead towards the back, transitioning into a regular plait as you reach the crown. Alternatively, you can secure the braid into a ponytail and wrap it around the base, using bobby pins to create an adorable topknot. This combination results in a fabulous and versatile hairstyle that’s bound to capture your admiration.
Jumbo French Braid
The Jumbo French braid is a French braiding hairstyle with large strands of hair. This hairstyle is typically braided from the base of the hair to the tips, creating a voluminous, thick, and prominent braid. To achieve this hairstyle, you will need a substantial amount of thick hair. You can create this braid on straight or curly hair. If you have straight hair, you can use a curling iron to add some waves before braiding. Afterward, use a wide-tooth comb to detangle the hair before braiding, as this will make the braiding process smoother. Use a small amount of gel or mousse to maintain the hair’s texture. If you have thin hair, you can consider using hair extensions to add thickness to your hair.
French Braid on Short Hair
You don’t have to forgo the allure of this beautiful hair trend simply because you have shorter locks. French braids are adaptable and can complement most hair lengths, including those above the shoulders. However, the key is to choose a French braid style that suits shorter hair. While intricate braids might be challenging to achieve, opting for a short side or crown braid can be a great choice. To ensure the longevity of your braid and prevent it from unraveling, consider using hair products like a defining hair lotion. This not only adds smoothness but also provides the necessary grip for a secure and lasting style.
Two French Braids With Bangs
Two French braids with bangs is a simple yet beautiful hairstyle… To create two French braids, start by dividing the hair into three equal strands. Then, cross the strands diagonally over each other in a repeated pattern. Continue crossing the strands until you reach the end of the hair. The bangs can be left straight, curled, or swept to one side. This classic hairstyle not only keeps your hair neat and in place but also adds a touch of elegance to your look. Whether for casual or more formal occasions, two French braids with bangs can be a chic and practical choice.
Conclusion
Mastering the art of the French braid hair not only adds a touch of elegance to your look but also offers a versatile and stylish option for various occasions. Whether you opt for a classic single French braid or venture into the charm of two French braids, this timeless technique allows for creativity and personal flair. So, embrace the beauty of French braids and let your hair tell a story of sophistication and individuality.
FAQs?
Should I French braid my hair wet or dry?
You can French braid your hair when it’s either wet or dry, but braiding wet hair may result in a tighter and smoother finish.
Is French braiding on yourself hard?
Yes, French braiding your own hair can be challenging because of the coordination needed to handle three strands while working with a mirror. However, with practice and patience, it becomes easier over time. Starting with simpler variations and gradually progressing helps build confidence and skills.
Can you French braid with extensions?
Yes, you can French braid with extensions. When using extensions, ensure they are securely attached to your natural hair. Begin the French braid as usual, incorporating the extension strands along with your natural hair. The key is to maintain an even tension to prevent slipping. Practice and experimentation will help you achieve a seamless and blended look with French braids using extensions.
Does French braiding work for all hair types?
French braiding is a versatile styling technique that complements various hair types. Whether your hair is straight, wavy, or curly, you can achieve a beautiful result. Straight hair gives a sleek appearance, while wavy hair adds a relaxed touch. Curly hair allows for intricate styles, and coarse or thick hair may appear more voluminous. Even fine or thin hair can achieve an elegant look, possibly with extensions for added fullness. In essence, French braiding adapts to different hair types, providing a stylish option for everyone.
Can you provide any advice on practicing and improving my French braiding skills?
To improve your French braiding, practice consistently with damp hair, use a mirror, and be patient. Watch online tutorials, try different hair textures, and seek feedback for improvement. Use hair elastics to secure sections, learn from mistakes, and explore various styles as you master the basics. Keep a positive mindset and prioritize regular practice for skill development.