DIY HOLIDAY ROOM SPRAY RECIPES WITH FREE PRINTABLE LABELS

Looking for the perfect homemade Christmas gift? Try these holiday room sprays made with essential oils! Plus, download free printable bottle labels to add a festive touch to your gift.

How Do You Make Christmas Room Spray

The holiday season is just around the corner—can you believe it? To help us all get into the festive spirit, I’ve created some amazing holiday room spray recipes using essential oils.

If you’re like me and aren’t a fan of candles or store-bought air fresheners, these sprays are a game-changer. Not only do traditional air fresheners often cause headaches, but they’re also loaded with harmful chemicals, including endocrine disruptors, carcinogens, and allergens, which can impact the health of your family and pets.

Synthetic fragrances from air fresheners can trigger allergies and asthma, and some even contain formaldehyde, a known carcinogen. Long before I learned about these dangers, I had already ditched air fresheners because they always gave me pounding headaches.

Instead, I freshen my home naturally with essential oils. Whether it’s through my diffuser or these easy-to-make room sprays, essential oils are a safer, healthier way to enjoy a fresh and festive-smelling home.

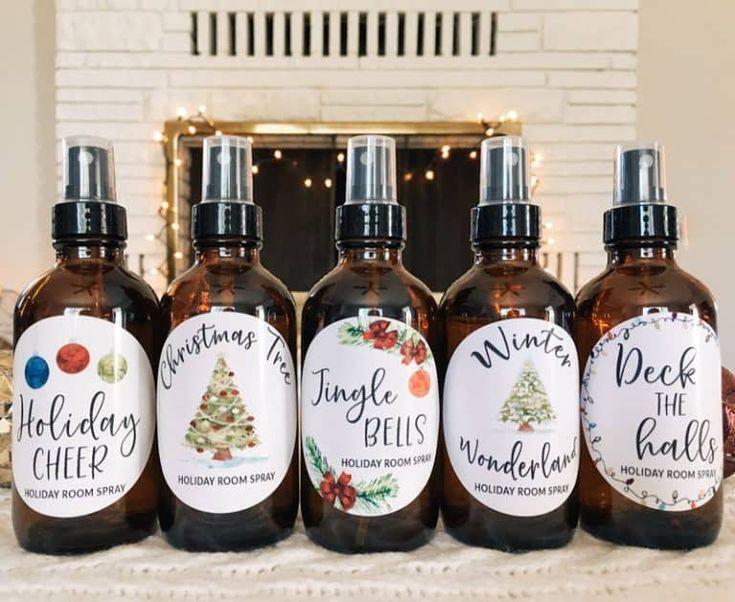
These homemade holiday room sprays are free of toxic chemicals, smell amazing, and can even be used to freshen up linens. They also make fantastic Christmas gifts—especially when paired with the adorable printable labels I’ve made just for you!

DIY Holiday Room Spray Ingredients

Making these holiday room sprays is incredibly simple! With just a few ingredients, you’ll have a festive and natural way to freshen up your space. Here’s everything you’ll need:

SPRAY BOTTLES

The size and number of spray bottles you’ll need depend entirely on your preference! I like using 4-ounce bottles (like these), but you can choose any size you like. Just keep in mind that the recipes below are designed for 4-ounce bottles, so you’ll need to adjust the quantities if using larger or smaller bottles.

There are nine different holiday scents to choose from. If you’re making just one, you’ll only need one bottle. But if you want to try them all, be sure to have at least nine bottles on hand.

A few important tips:

  • Use dark glass bottles: Essential oils are highly concentrated and can degrade or react with plastic, so it’s best to stick with glass.
  • Protect from light: Dark glass bottles help shield the oils from ultraviolet rays, which can cause them to spoil.

WATER

Water serves as the base for these homemade holiday room sprays, and it’s best to use distilled water whenever possible.

Using distilled water helps prevent mineral buildup that can clog your spray nozzle or leave unwanted residue on your home’s surfaces. It ensures a clean and smooth spray every time!

ESSENTIAL OILS

Essential oils are the key ingredient that gives these holiday room sprays their delightful scents. To create the various holiday blends listed below, you’ll need a selection of essential oils.

For the best results, I strongly recommend using only 100% pure essential oils. Some of my favorite trusted brands include Plant Therapy, Simply Earth, and Far & Wild.

Be cautious of fake essential oils—they can be just as harmful as synthetic air fresheners and candles. Always ensure the oils you use are pure and high-quality.

If you’re unsure how to spot fake essential oils, check out this helpful guide: Fake Essential Oil Brands You Should Avoid.

WITCH HAZEL

Witch hazel acts as an emulsifier, helping to blend the essential oils with water. It also helps the scent linger longer, making your holiday room sprays even more effective and fragrant!

How Do You Make Holiday Room Spray With Essential Oils?

To make your own holiday room spray with essential oils, here’s what you’ll need:

  • 4-ounce glass spray bottles (like these ones)
  • Witch hazel
  • Essential oils (recipes below)
  • Distilled water

STEP-BY-STEP DIRECTIONS:

  1. Add 20-40 drops of your chosen essential oils to the bottle (use the recipes below for inspiration).
  2. Pour in 2 ounces of witch hazel.
  3. Shake well to mix the oils and witch hazel.
  4. Fill the rest of the bottle with distilled water.
  5. Shake again to combine everything.

And that’s it! Your homemade holiday room spray is ready to use. Below, you’ll find a few of my favorite holiday room spray recipes to try out!

Essential Oil Room Spray Recipes for the Holidays
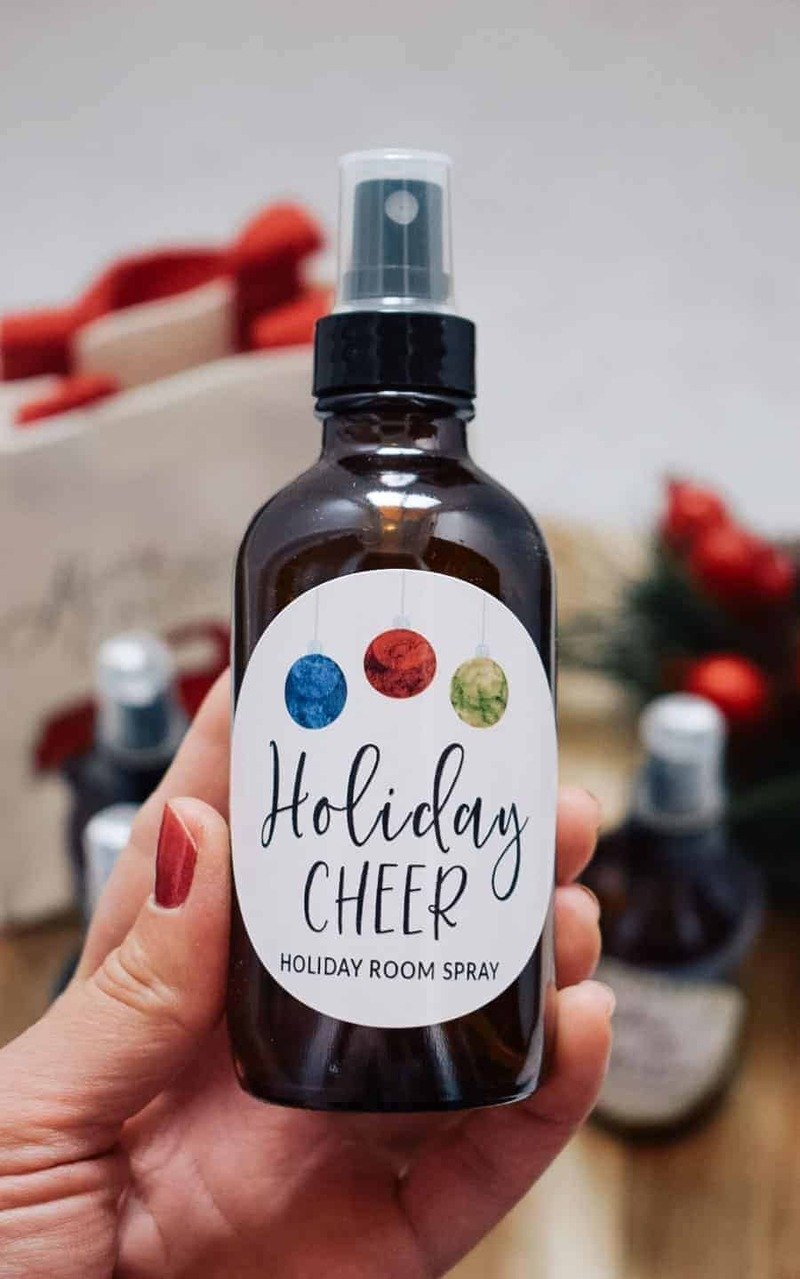
HOLIDAY CHEER

10 drops Peppermint, 10 Ylang Ylang, 15 drops Orange

CANDY CANE

15 drops Peppermint, 15 drops Spearmint

CHRISTMAS SPIRIT

10 drops Cinnamon, 10 drops Clove, 10 drops Orange, 5 drops Peppermint

DECK THE HALLS

10 drops Frankincense, 10 drops Cedarwood, 15 Drops Peppermint

CHRISTMAS COOKIES

10 drops Cinnamon, 10 drops Nutmeg, 10 drops Ginger, 5 drops Lemon

WINTER WONDERLAND

10 drops Wintergreen, 10 drops Cinnamon, 10 drops Cedarwood

JINGLE BELLS

10 drops Orange, 10 drops Peppermint, 10 drops Cypress

UNDER THE MISTLETOE

10 drops Palmaraso, 10 drops Peppermint, 10 drops Blue Tansy
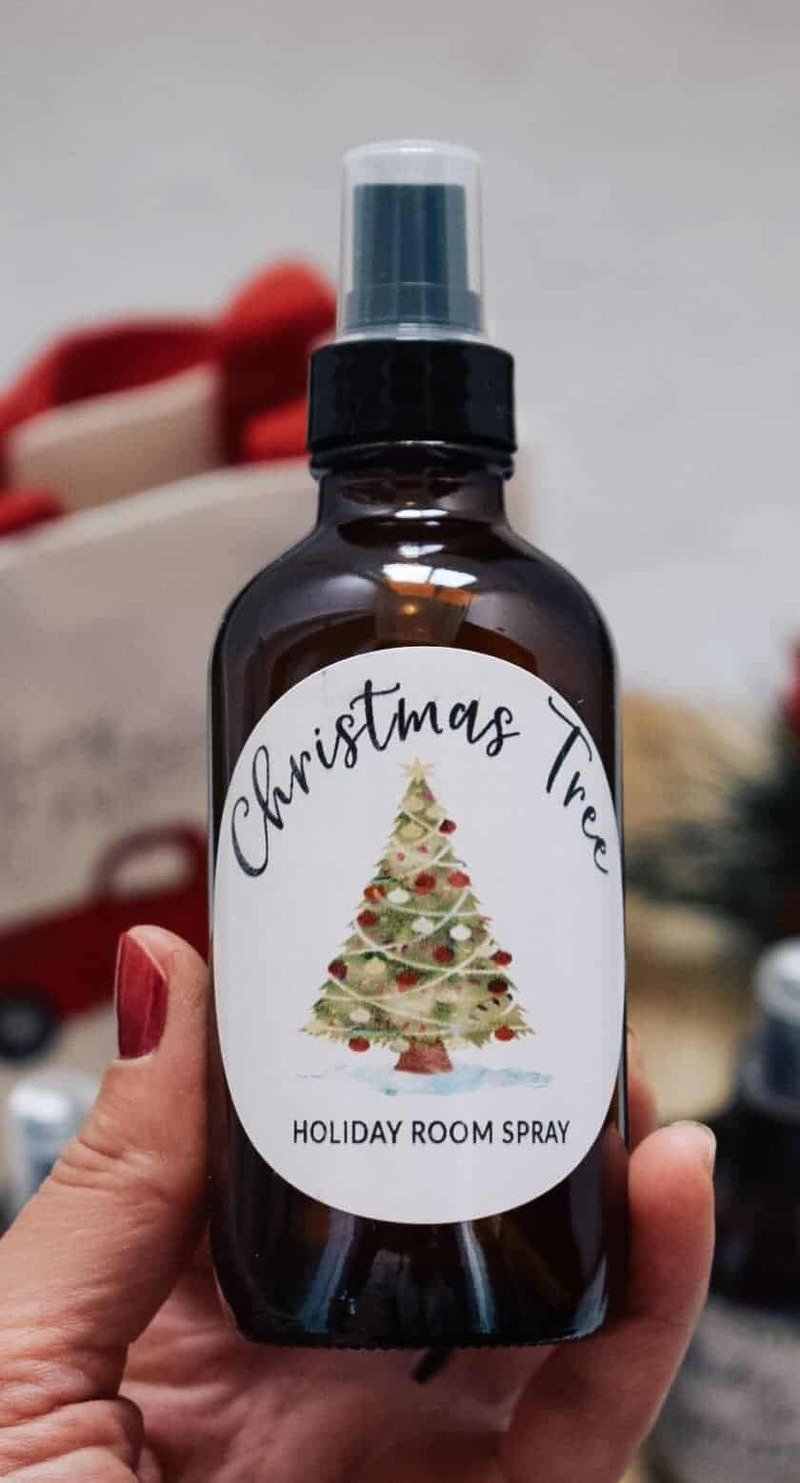
Christmas Tree

10 drops Cedarwood, 10 drops Balsam fir, 10 drops Cypress, 5 drops Nutmeg

How Do You Use Holiday Room Spray?

To use your holiday room spray, simply shake well before each use. Then, spritz it around the room for an instant burst of holiday fragrance. You can also spray it directly onto pillows, curtains, blankets, or couches to freshen up your linens and furniture!

Why Do You Need Witch Hazel in Room Spray?

Witch hazel is a key ingredient in homemade room sprays. It helps to blend the essential oils with water, ensuring the oils mix well and the scent lasts longer. This makes it an essential component for a longer-lasting, fragrant experience!

What Can I Use Instead of Witch Hazel in Room Spray?

If you don’t have witch hazel on hand, you can substitute it with drinkable grain alcohol (ethanol) or vodka. However, I chose to use witch hazel in this recipe because it’s something many people already have on hand, and it’s easily found at most local drugstores.

Personally, I prefer witch hazel because I’m not entirely comfortable using room sprays made with high-proof alcohol around my family. Alcohol can be an irritant to the upper respiratory system, and the strong alcohol scent can be difficult to mask. Witch hazel provides a gentler, more natural option for your room spray!

Is Witch Hazel or Vodka Better for Room Spray?

Some people claim that using vodka instead of witch hazel will make the scent last longer, but in my experience, I didn’t notice much of a difference between the two.

In my opinion, both witch hazel and vodka serve the same purpose in DIY room sprays. They both work well for creating a fragrant room spray. The only real difference is that not everyone feels comfortable using a room spray made with vodka around their family, due to its high alcohol content. If that’s a concern, witch hazel is a great alternative that still does the job beautifully!

Can You Use Rubbing Alcohol Instead of Witch Hazel for Room Spray?

While rubbing alcohol (isopropyl alcohol) can be used as an alternative to witch hazel in room sprays, I personally prefer not to use it. While it’s not currently classified as a carcinogen, I have concerns about its potential hazards.

Isopropyl alcohol can irritate the skin, eyes, nose, and throat. Prolonged or repeated exposure to high levels can cause dizziness, headaches, and even confusion. Because of these risks, I feel more comfortable sticking with witch hazel or vodka, as they are gentler and generally safer options for creating DIY room sprays.

Tips For Using DIY Christmas Room Sprays

Always be sure to shake well before using your room spray to ensure the oils are properly mixed. If you find that the scent isn’t strong enough, simply add more drops of your chosen essential oil until it reaches your desired fragrance level.

Need Essential Oils?

There are many companies that offer high-quality essential oils at affordable prices. I used to use Young Living oils exclusively, but they became too expensive for my budget. I was thrilled to discover other brands that offer excellent oils at much more affordable prices.

A few of my favorite essential oil brands include Plant Therapy, Florihana, and Simply Earth.

If you decide to purchase from Simply Earth, you can use the code HAPPYHEARTFREE to get a big bonus box and a $45 Simply Earth gift card when you buy an essential oil recipe box!

Final Thoughts About Holiday Room Spray

I hope you enjoy making these holiday room spray recipes as much as I do! They make wonderful gifts for friends, coworkers, teachers, or anyone who loves making their home smell amazing.

I personally like to gift these sprays in sets of 3 or 5, but you can package them however you like—or keep them all for yourself!

If you’re looking for more homemade holiday gift ideas, be sure to check out the following posts for even more inspiration!

CONCLUSION

In conclusion, these homemade holiday room sprays are a simple, natural, and thoughtful way to fill your home with festive scents—without the harmful chemicals found in store-bought air fresheners. With just a few basic ingredients like essential oils, witch hazel, and distilled water, you can create beautiful, personalized gifts that will brighten anyone’s holiday season. Whether you choose to gift them in sets or keep them for yourself, these sprays are a fun and easy way to spread holiday cheer. Happy crafting, and enjoy the festive aromas!

EASY DIY INTERIOR DOOR MAKEOVER PROJECT FOR YOUR HOME

Transform Your Interior Door with an Easy DIY Makeover

Sometimes, doors can feel flat and plain with little to no character. But don’t worry—there’s an easy way to upgrade your door using wood strips! In this post, we’ll guide you through the materials and steps for a simple interior door makeover.

Accent walls with geometric and linear patterns are all the rage right now, but a full wall might not suit everyone’s aesthetic or budget. A door makeover is a great alternative! It allows you to add stylish details to your space on a smaller, more affordable scale.

A DIY door makeover is a perfect low-budget project that can significantly enhance a room with minimal effort. Let’s face it—sometimes, doors just feel boring! By adding a few simple upgrades, you can make your door a statement piece without spending a fortune.

For example, our master bedroom door is visible from both the dining and kitchen areas, and it needed a little more life—but in a subtle way. We didn’t want to add a pop of color (though you definitely can!), just something to elevate its look.

This DIY project is quick and easy, and we’ll show you everything you need to get started—materials, inspiration, and step-by-step instructions for your door transformation.

Let’s dive into our interior door makeover!

Door Makeover Materials

  • Paint of Choice – Ours was Behr “White” with Eggshell finish
  • 3/4” wide by 3/16″ thick pine strips
    • Option 1: Purchase 1/4” x 3/4″ pine trim pieces
    • Option 2: Purchase 1×4 8ft. pine board and cut into 3/16″ thin strips
    • Option 3: Use leftover scrap wood pieces like we did. Yay reuse!
  • 1/2″ nap Paint Roller or Paint Sprayer
  • Sandpaper or Handheld Sander
  • Wood Glue
  • Painter’s Tape
  • Speed Square
  • Tape Measure
  • Miter Saw OR Jigsaw OR Handsaw
  • Table Saw (optional if splitting boards)

DIY Interior Door Makeover Steps

STEP 1: FIND INSPIRATION & CREATE A PLAN

As I mentioned, there are endless accent wall ideas out there, and Pinterest is a fantastic source for design inspiration! Simply search for keywords like “geometric patterns,” “linear designs,” or whatever style you’re drawn to, and you’ll definitely find something that sparks your creativity. Whether you’re looking for bold shapes or subtle lines, Pinterest is a goldmine for ideas that can be adapted to your interior door makeover!

As a highly visual person, I knew I needed to create a quick mockup of my accent door design before diving in. Since I’m using wood scraps for the makeover, I took a few cut pieces and used painter’s tape to experiment with different design ideas. I only had five pieces of varying lengths, so I couldn’t always create my full vision. But it worked perfectly for a quick visioning session and gave me a sense of how the design would look before committing to it. It’s a great way to test out ideas without making any permanent changes!

After that, I took it a step further as I’m a planner and want a detailed idea of what I’m doing. Additionally, I’m a heavy user of Photoshop with my design background. It’s great for quick visualizations on top of a photo you took. So even with the quick mockups, I had to take it further and fully realize what this DIY door makeover might look like when painted. Below are a couple final options.

We were looking for a subtle accent that was more about the shadow lines. However, you could totally paint it a fun color like many of the accent wall examples.

If you don’t have Photoshop or any editing software, don’t worry! You can always sketch your design out with pen and paper, or use the draw function in your phone’s editing app. Having a plan in place before starting the DIY project will make a huge difference. It acts as a guide and helps you stay on track, ensuring you don’t waste time or materials. After all, nothing’s worse than finishing a project only to realize you don’t love the final result!

STEP 2: PREP THE DOOR

Depending on the condition of your door, some prep work will usually be needed before attaching your accent pieces. You might need to fill any holes and sand the surface to ensure a smooth finish.

While some people prefer to remove the door and handle the prep and painting in a garage or workshop, we decided against taking our bedroom door off the hinges since we didn’t want to be without it. Ultimately, it’s up to you—do whatever works best for your space and convenience!

Fill Holes & Sand
If your door has any dents, scratches, or holes, now is the time to fill them. For wood doors, wood filler works great for patching up imperfections. Once it’s dried, sand the area smooth.

Additionally, be sure to lightly sand the spots where the wood strips from your design will be attached. This creates a slightly rougher surface, which helps the wood glue adhere better.

Don’t Mix Paints
A quick tip: latex and oil-based paints don’t mix well and can peel apart over time. If you’re unsure what kind of paint was previously on your door, it’s best to sand it down first to prevent any peeling issues later.

Most basic doors are usually painted with latex paint, but it’s worth checking—especially if you’re reusing an old door. To be safe, do a small test paint spot before you start the full project. That’s exactly what we did when patching up our door, as you can see in the photos!

STEP 3: MEASURE & CUT THE ACCENT WOOD STRIPS

Now that you have your design mockup or sketch plan, it’s time to measure and cut your accent wood strips.

For our design, which featured linear pieces with straight ends, I simply measured a distance and drew a straight line across the wood. If your design involves angles, be sure to use an angle guide to ensure that each strip is cut consistently.

It’s important to mark which side of each piece is the “correct” one. This helps avoid confusion when cutting and ensures you won’t mix up pieces later on. Since there were several strips of varying lengths, I also labeled each one with its length, making it easier to match them up with my design plan as I went along.

Once all your pieces are marked and labeled, it’s time to cut them to the desired length. We used a miter saw for quick and precise cuts, but don’t worry if you don’t have one—you can also use a jigsaw or handsaw. Just be sure to practice safety when cutting the wood!

As you cut, create two piles: one for your finished pieces and one for the leftovers. It’s a good idea to save the leftover pieces for future projects, as this is both eco-friendly and budget-friendly. Even the smallest scraps that can’t be used later make great kindling for a fire!

STEP 4: LAYOUT THE ACCENT WOOD STRIPS

Execute The Plan
Now that all the cutting is done, it’s time to lay out the wood pieces on the door!

Having a dimensioned layout plan makes this part much easier. Use a measuring tape, pencil, and speed square to lay out your pieces and mark where they need to go. Mark the top and bottom sides to ensure everything aligns when gluing.

It’s crucial to make sure the pieces are straight. I highly recommend measuring along the full length of each piece in several spots. Wood can warp or bow, which can cause what should be a straight line to appear wavy.

For example, the 45” long piece was supposed to be 2 inches from the edge of the door and the next piece. While the top and bottom were spot on, the middle section bowed, so the distance varied between 1 ¾” and 2 ¼” on either side. To correct this, I measured 2 inches from the edge in the middle as well and drew a straight line. This gave me a clear guide for aligning the pieces when gluing.

Make sure to measure in multiple spots on all your longer pieces to ensure they are straight. Also, check that the pieces along the edge won’t interfere with the door frame when you close the door.

STEP 5: GLUE ALL THE PIECES

After marking the door, it’s time to glue your wood strips in place. There are many types of glues available, but for this project, simple wood glue works best. It doesn’t harden immediately, giving you time to adjust the pieces if needed to ensure your design stays straight. Plus, it doesn’t add moisture or cause the wood strips to warp, which is important for achieving a smooth, even finish

DIY Tip – Avoid using liquid nails or construction glue! While these glues harden quickly, they can add moisture to the wood, causing it to warp. We’ve learned from experience that this can lead to pieces falling off after all your hard work, so stick with wood glue for a more reliable result.

Use Painter’s Tape to Hold in Place
Since the door is still hanging upright, painter’s tape is a great tool to help secure the wood strips while the glue dries.

Here’s how to do it:

  • Apply glue along the back of each wood strip.
  • Place the strip onto the door, adjusting it to align with your marks.
  • Use painter’s tape to secure the strip in place in multiple spots.
  • If the wood is bowed, use tape in the middle to gently pull it back into alignment with your marks.
  • Repeat this process until all the pieces are attached.

    DIY Tip – Be mindful of the door frame and flooring around your door. You may need to adjust your wood strips slightly to ensure they don’t interfere with the door’s function, such as opening and closing smoothly.

    To ensure everything stayed secure, I went back and added a little extra glue and tape at the ends of the wood strips. Gravity was pulling them away, and I didn’t want them popping off while drying. If your door has been removed and is laying flat, this extra step may not be necessary, but it was a helpful precaution since mine was still hanging upright.

    Now, just let all the glue dry! We allowed ours to dry overnight since wood glue typically requires about 24 hours to fully cure. However, drying times can vary depending on the product, so be sure to check the label on your specific glue to ensure you’re allowing enough time for it to set properly.

    STEP 6: PAINT IT

    Before you start painting, make sure to check for any touch-ups that might be needed. There could be some excess glue around the edges of the wood that will need to be sanded or scraped off. This ensures that the surface is smooth and ready for paint, giving you a clean, professional finish when you’re done.

    We own a paint sprayer, but in this case, it was easier to just roll the paint on. I laid down a drop cloth and used a heavier ½” nap roller to apply the paint. It covered most of the wood edges, though I did have to go back and touch up a few spots that the roller missed.

    If you decide to spray the paint, I highly recommend removing the door and spraying in a well-ventilated garage or workshop. Make sure to set up a tarped area to catch any overspray, and you’ll be able to skip taping off the door frame and walls for protection.

    For our door, we chose basic Behr white paint to match the rest of our doors and trim. We wanted the wood accents to blend in subtly but still complement the existing decor. However, you could opt for an accent color instead to make the door stand out and add contrast—choose what works best for your space!

    Depending on your paint, a second coat might be needed to achieve full coverage.

    STEP 7: FINISHING TOUCHES

    If you’re planning to add new handles or hinges, now is the time to do so. We decided to stick with the existing ones since they still worked well and looked nice. If you removed the door for painting or other steps, now’s the time to rehang it and enjoy your refreshed door!

    Once everything is done, you’ve successfully completed your DIY door makeover! Step back, admire your work, and enjoy the transformation. It’s amazing how such a simple project can make such a big impact on your space!

    DIY Door Makeover Tips & Methods

    Here are a few additional notes and tips for your DIY door makeover:

    • Detailed Plan vs. Random: We’re detail-oriented, so we prefer creating a detailed plan and layout. But you can also use what pieces you have and lay them out until it looks just right, then attach them. If you’re someone who likes to wing it and eyeball the design, that works too!
    • Removing the Door: You can absolutely remove the door for this project to avoid fighting gravity. However, keep in mind that you’ll be without a door for a while while the glue and paint dry, so make sure you’re okay with that.
    • Spraying Paint vs. Rolling Paint: This comes down to personal preference. Using a sprayer will give you a smoother finish but requires some experience and isn’t always ideal for the typical DIY setup. Rolling the paint may give you a slightly different texture but is easier for most DIYers to manage.

    No matter which method you choose, the key is to enjoy the process and get creative with your design!

    CONCLUSION

    In conclusion, a DIY door makeover is an easy, budget-friendly project that can make a big impact on the look and feel of your space. Whether you prefer a detailed plan or a more spontaneous approach, you can create a unique design that reflects your style. By following the simple steps of prepping the door, measuring and cutting the wood, gluing and securing the pieces, and finally painting, you’ll achieve a refreshed, personalized look for your door. With a little creativity and effort, you’ll have a beautiful accent door that enhances your home’s decor!