
Ditch the clutch and embrace practicality (and pockets!) on your wedding day. This list explores 32 of the most stunning wedding dresses that incorporate pockets seamlessly into their designs. Whether you’re a bride who craves a touch of modern flair or simply appreciates having somewhere to stash a lipstick or tissue, you’re sure to find a dress that speaks to your sense of style and keeps you comfortable throughout the celebration. From classic A-line silhouettes to whimsical ball gowns, get ready to discover pockets that are as beautiful as they are functional!
WHY CHOOSE A WEDDING DRESS WITH POCKETS?
Still considering whether to opt for a pocketed wedding dress? Here are a few compelling reasons that might tip the scales in favor of this trendy style:
Convenience: Pockets offer a stress-free solution for keeping your wedding day essentials within reach. Whether it’s your go-to lipstick, a sample of your chosen wedding day fragrance, oil-absorbing sheets for those summer ceremonies, or any other touch-up items you might need throughout the day.
Sentimentality: Pockets provide a secure place to carry your ‘something blue’, a treasured family heirloom, or a letter from a dearly departed loved one as you walk down the aisle.
Practicality: If you’d rather not hold your vows in your hand but need them accessible at the altar, tuck them in the pocket of your dress for seamless retrieval. Knowing they’re securely stowed away can also help alleviate any anxieties about misplacing them. A sweet idea? Jot down fleeting thoughts or impressions on the back of your vows throughout the day as a keepsake for you and your partner.
Style: Pockets lend an effortlessly chic and relaxed feel to your wedding attire. If your style ethos revolves around comfort, functionality, and simplicity, wedding dresses with pockets are a perfect match for your vibe.
OUR TOP PICKS
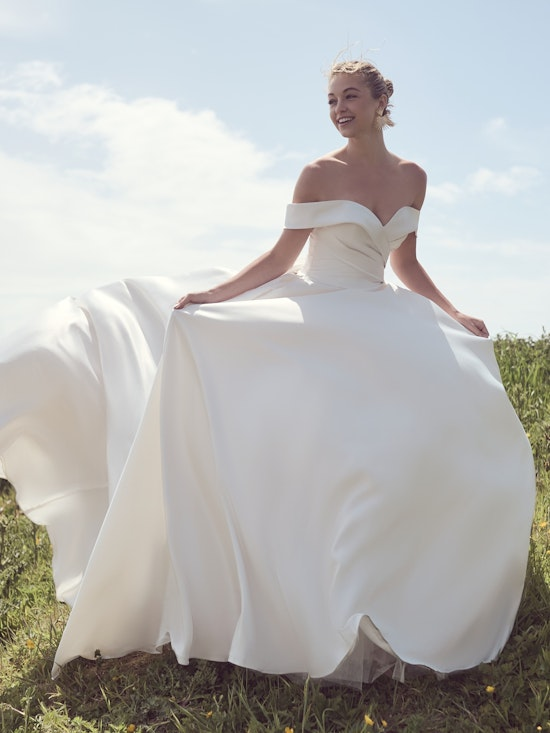
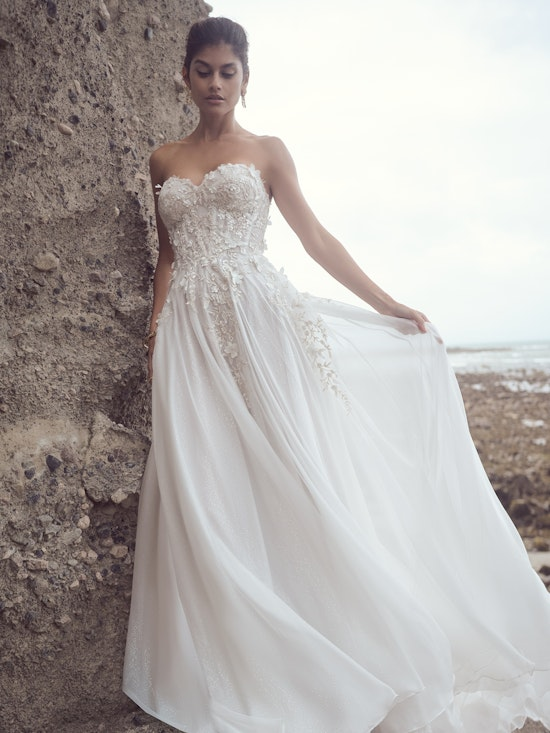
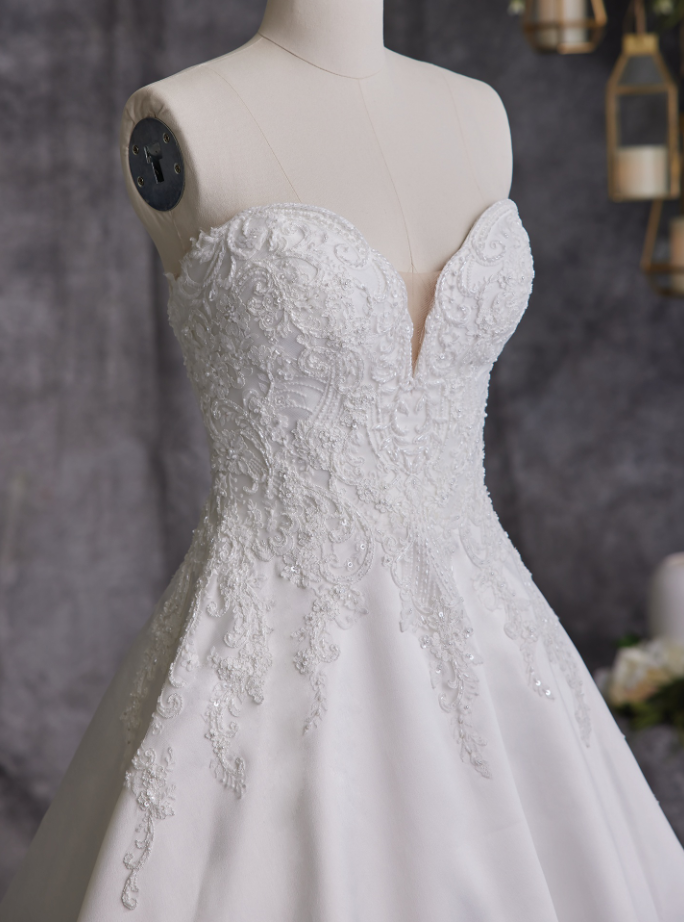
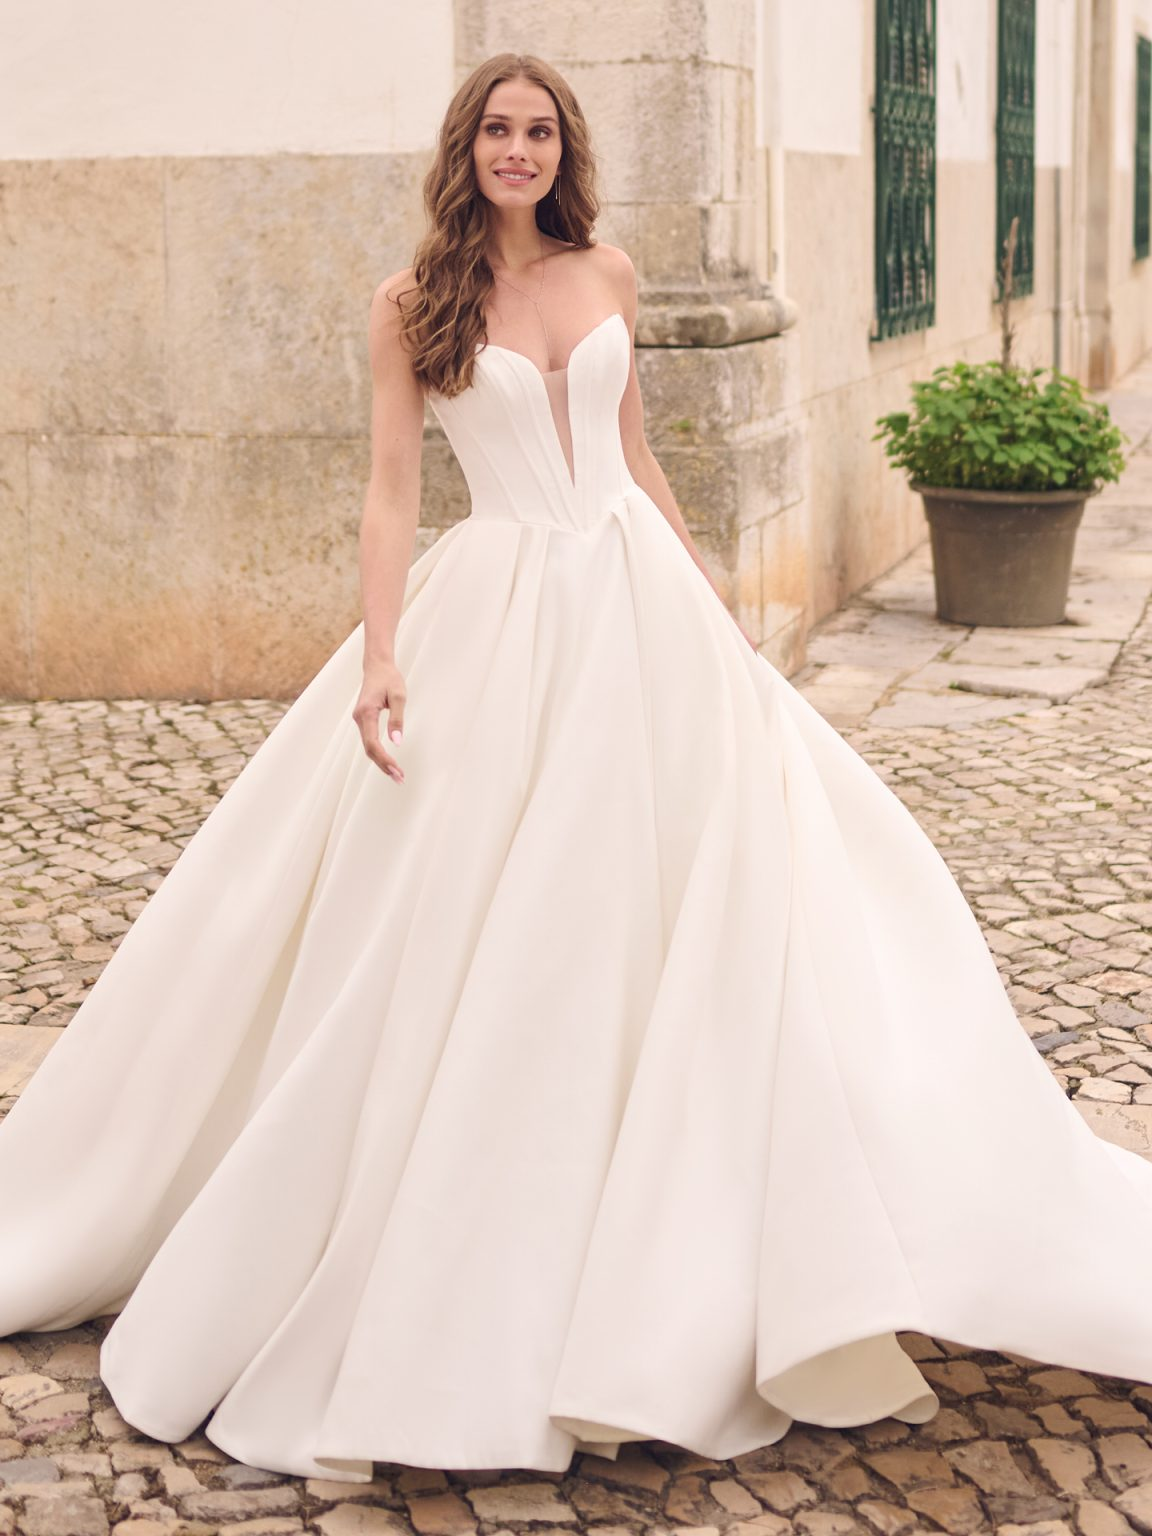
SOPHIE BY REBECCA INGRAM
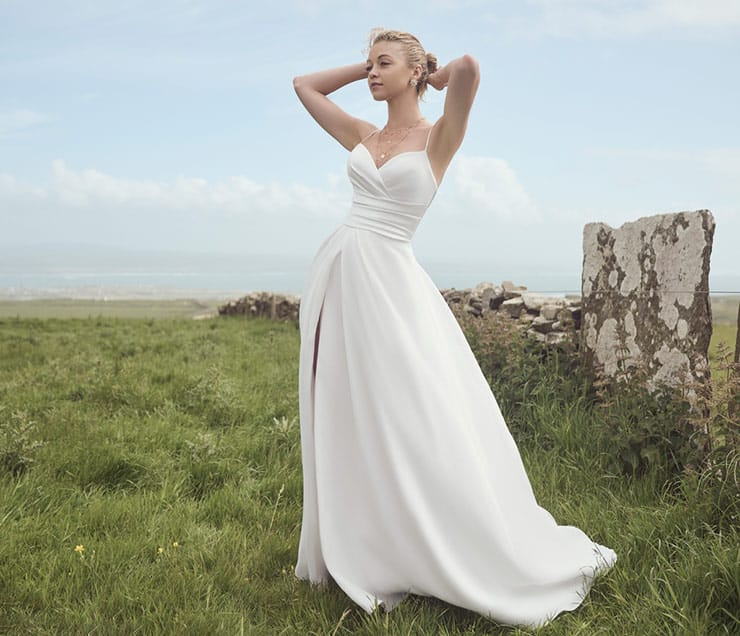
If understated elegance is your vibe, the Sophie by Rebecca Ingram might be your perfect match. This classic Hollywood-inspired gown features a flattering sweetheart neckline and delicate spaghetti straps. But the real surprise? Hidden pockets to stash tissues or a lipstick for effortless touch-ups throughout your wedding day.
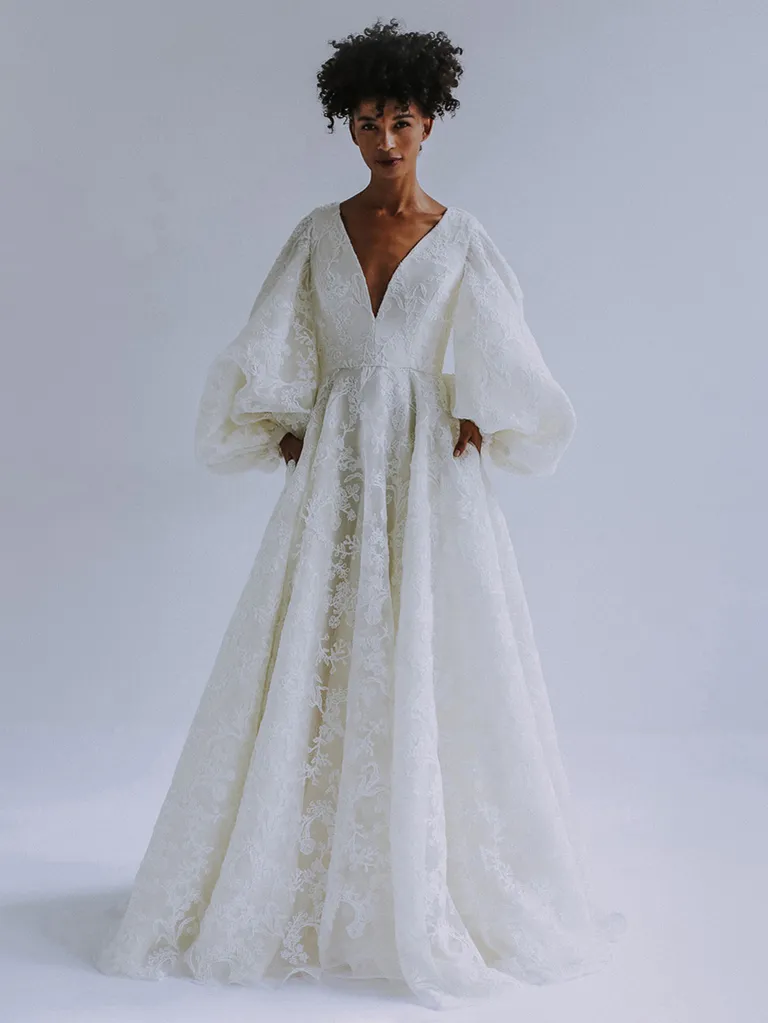
MORILEE BY MADELINE GARDNER CHASTITY
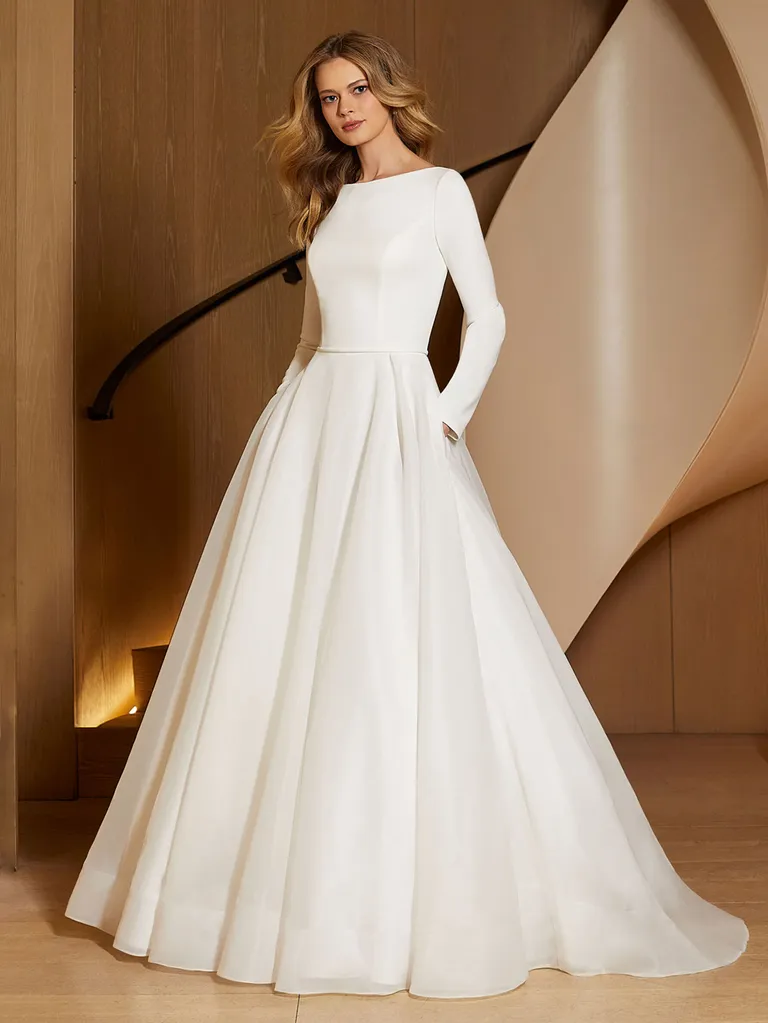
For a touch of modern sophistication, the Morilee by Madeline Gardner “Chastity” is a beautiful option. This A-line gown features a sleek stretch crepe bodice with a bateau neckline and long sleeves, offering a clean and polished look. The surprise? The full organza skirt with hidden pockets adds a touch of whimsy and functionality, perfect for stashing those wedding-day essentials.
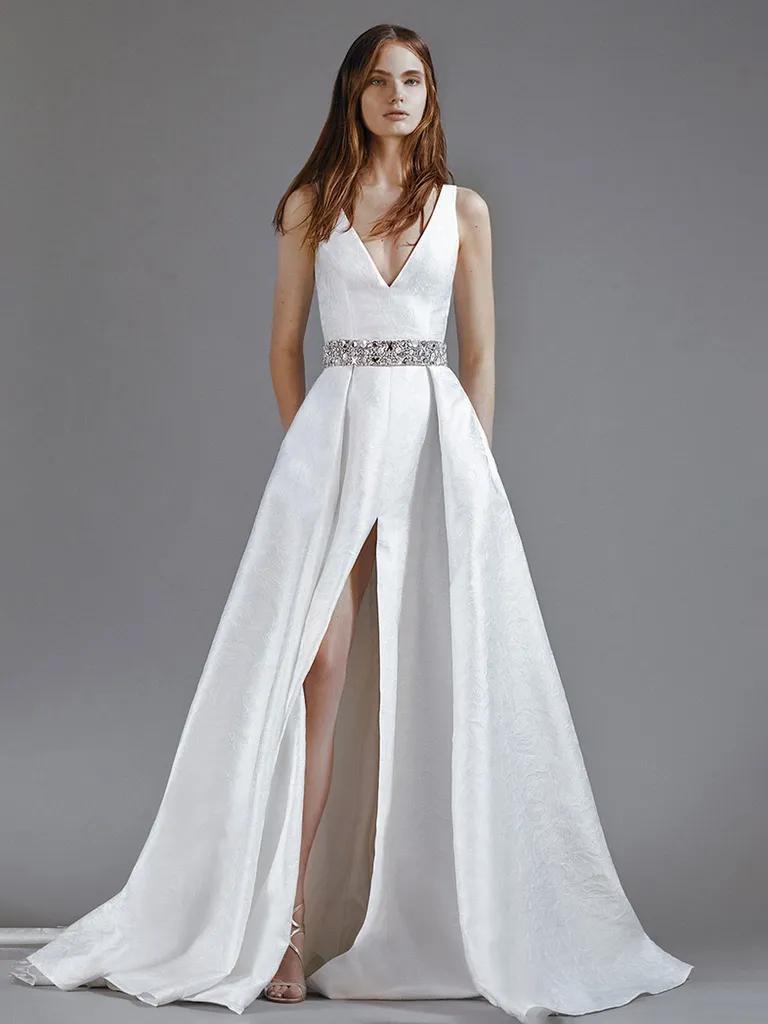
PAXTON BY MAGGIE SOTTERO
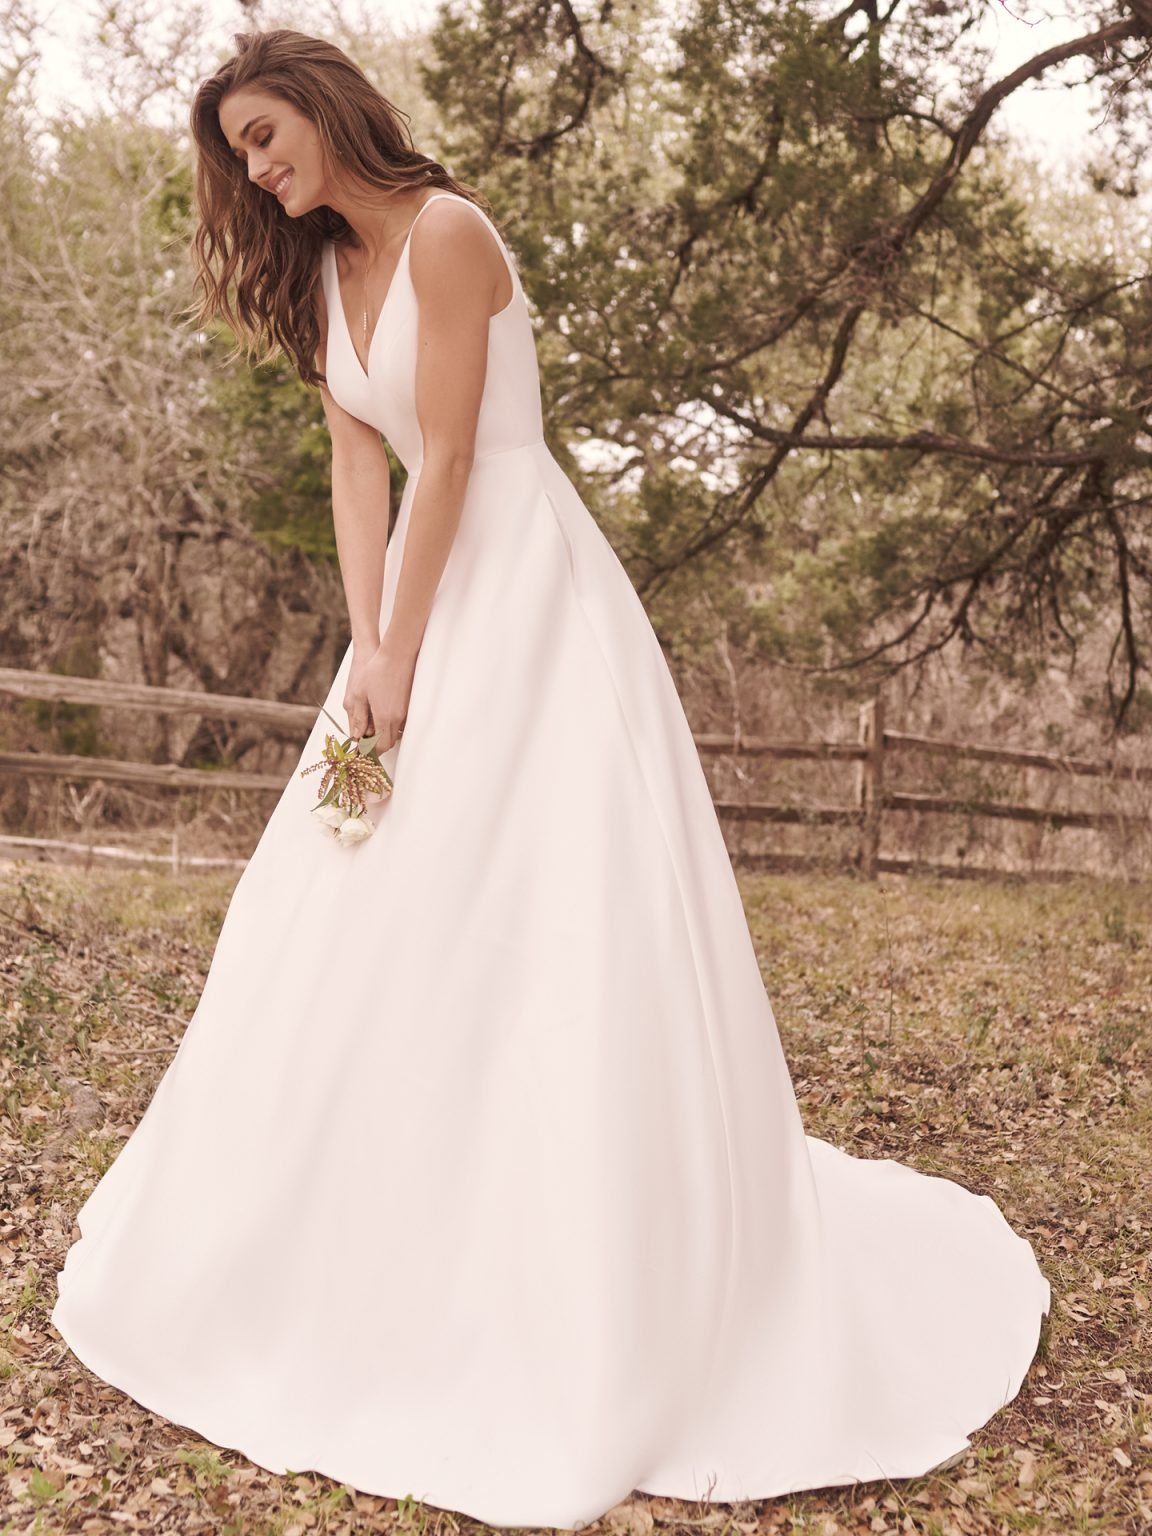
The Maggie Sottero Paxton strikes a perfect balance between classic romance and modern chic. This A-line gown features a flattering V-neckline and a flowing skirt crafted from luxurious Mago satin. Delicate beaded lace appliqués adorn the bodice, adding a touch of texture and elegance. And for the modern bride, there’s the surprise of hidden pockets, a detail that’s both practical and delightful.
WTOO BY WATTERS BOADY IN IVORY
The WTOO by Watters Boady in ivory is a minimalist’s dream wedding dress with a touch of surprise. This A-line gown features a clean and elegant silhouette with a plunging V-neckline and a soft crepe bodice. The skirt, crafted from luxurious ivory crepe, flows beautifully and adds a touch of sophistication. But the dress’s secret weapon? Hidden pockets, a detail that ensures both practicality and a touch of surprise on your wedding day.
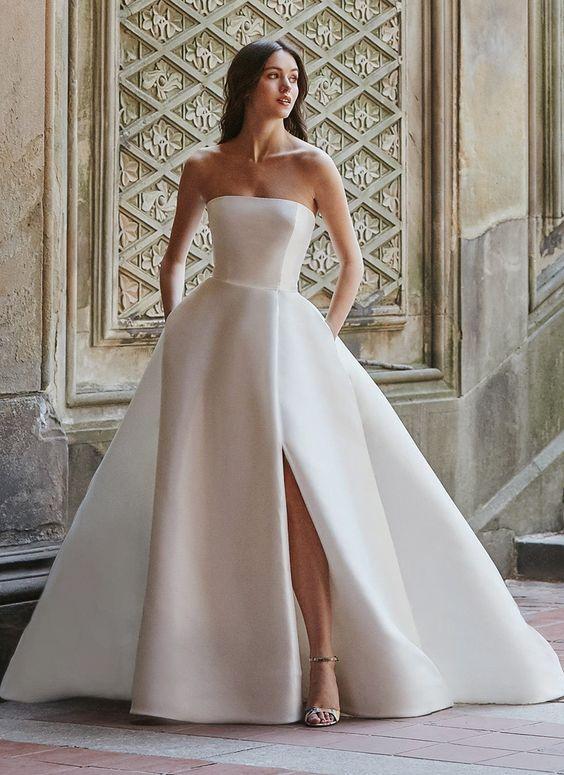
KYRIE BY MAGGIE SOTTERO
The Maggie Sottero Kyrie is a stunning ball gown designed for the bride who wants a touch of royalty on her wedding day. This strapless dress features a classic sweetheart neckline and a bodice with clean lines. The voluminous skirt, crafted from Stavanger satin, boasts a beautiful drape and a touch of elegance. For a surprising touch of practicality, the Kyrie also features pockets hidden within the skirt.
DAVID’S BRIDAL COLLECTION CUMMERBUND SATIN PLUS SIZE WEDDING DRESS IN IVORY
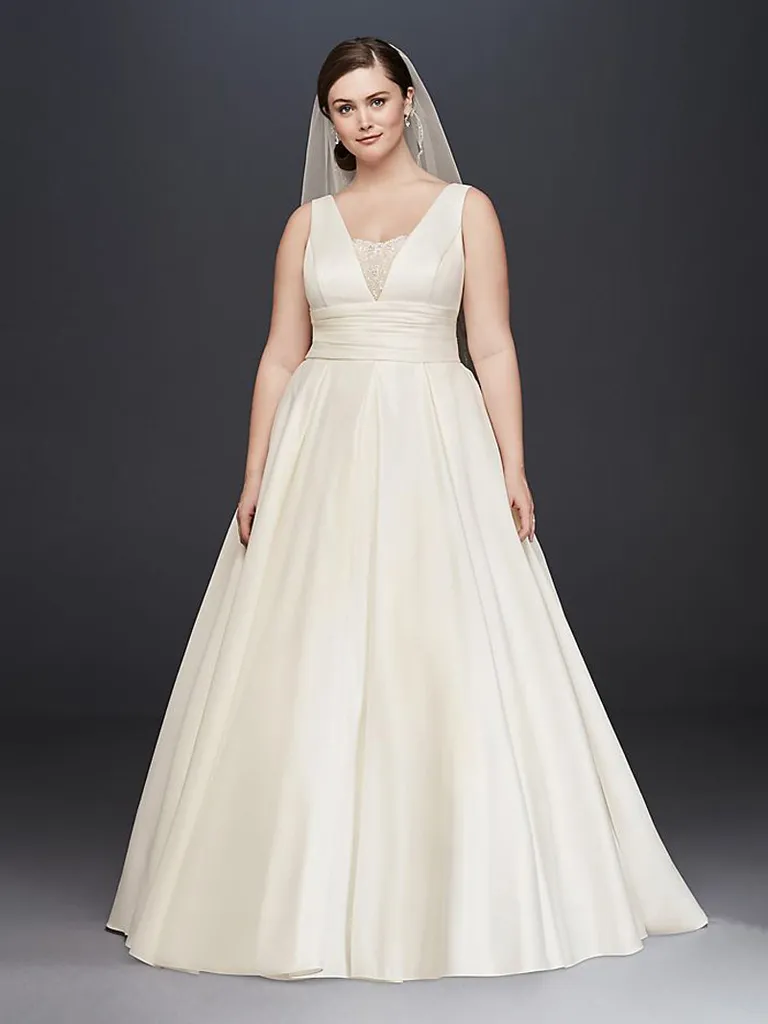
The David’s Bridal Collection Cumberbund Satin Plus Size Wedding Dress in Ivory offers a touch of classic elegance with a flattering silhouette for curvy brides. This ball gown features a plunging V-neckline and a wide-set strap design. The key detail is the pleated cummerbund waistband that cinches the waist and creates a beautiful hourglass shape. The dress is made from luxurious satin that drapes beautifully and boasts hidden side pockets for a touch of whimsy and practicality.
ANNISTON MARIE BY MAGGIE SOTTERO
The Maggie Sottero Aniston Marie is a luxurious ballgown crafted from soft Soma Stretch Satin, designed to flatter your figure and move with you throughout your special day. The asymmetrical ruched bodice with a sweetheart neckline adds a touch of romance, while hidden pockets offer a surprising detail that’s both functional and delightful. The dress flows into a chapel train, creating a dramatic and elegant silhouette for your walk down the aisle.
ANNE BARGE TAKE A BOW IN SILK WHITE
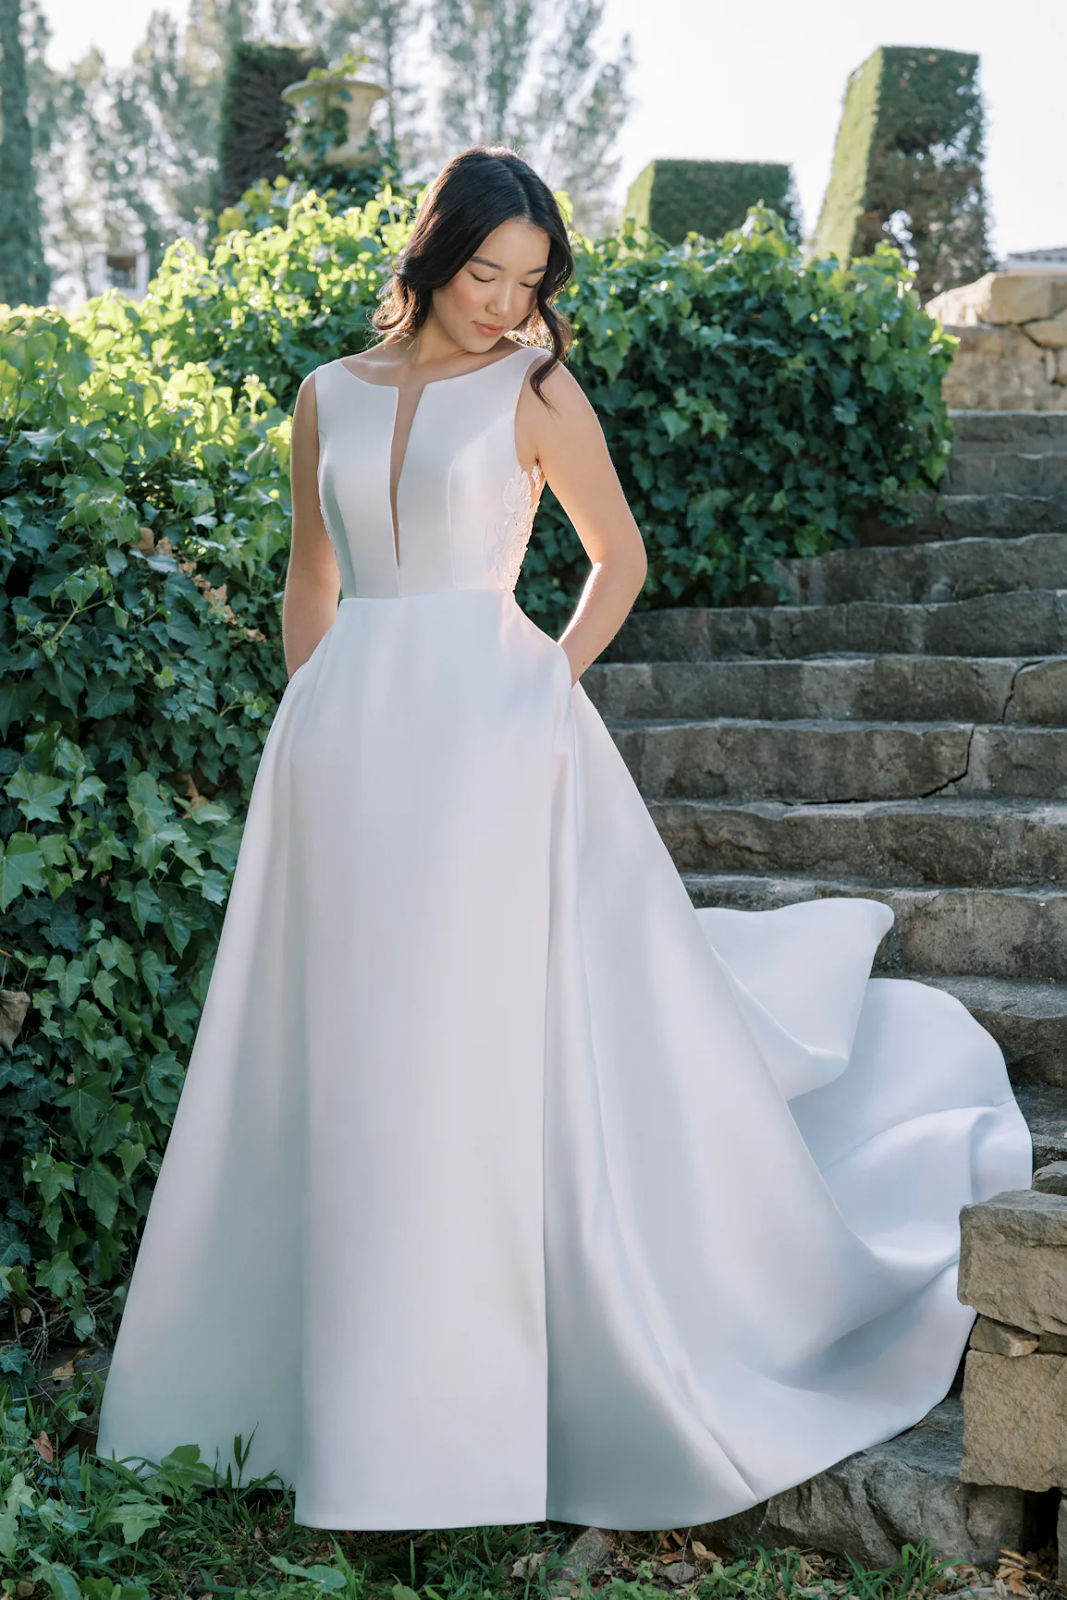
The Anne Barge “Take a Bow” in Silk White is a classic A-line wedding dress with a modern twist. The bateau neckline and clean lines offer a touch of sophistication, while the deep V-notch at the front adds a hint of unexpected sexiness. The dress is made from luxurious silk white mikado fabric that drapes beautifully and adds a touch of drama. And for the modern bride, there’s a surprising detail: hidden pockets, perfect for stashing those wedding-day essentials.
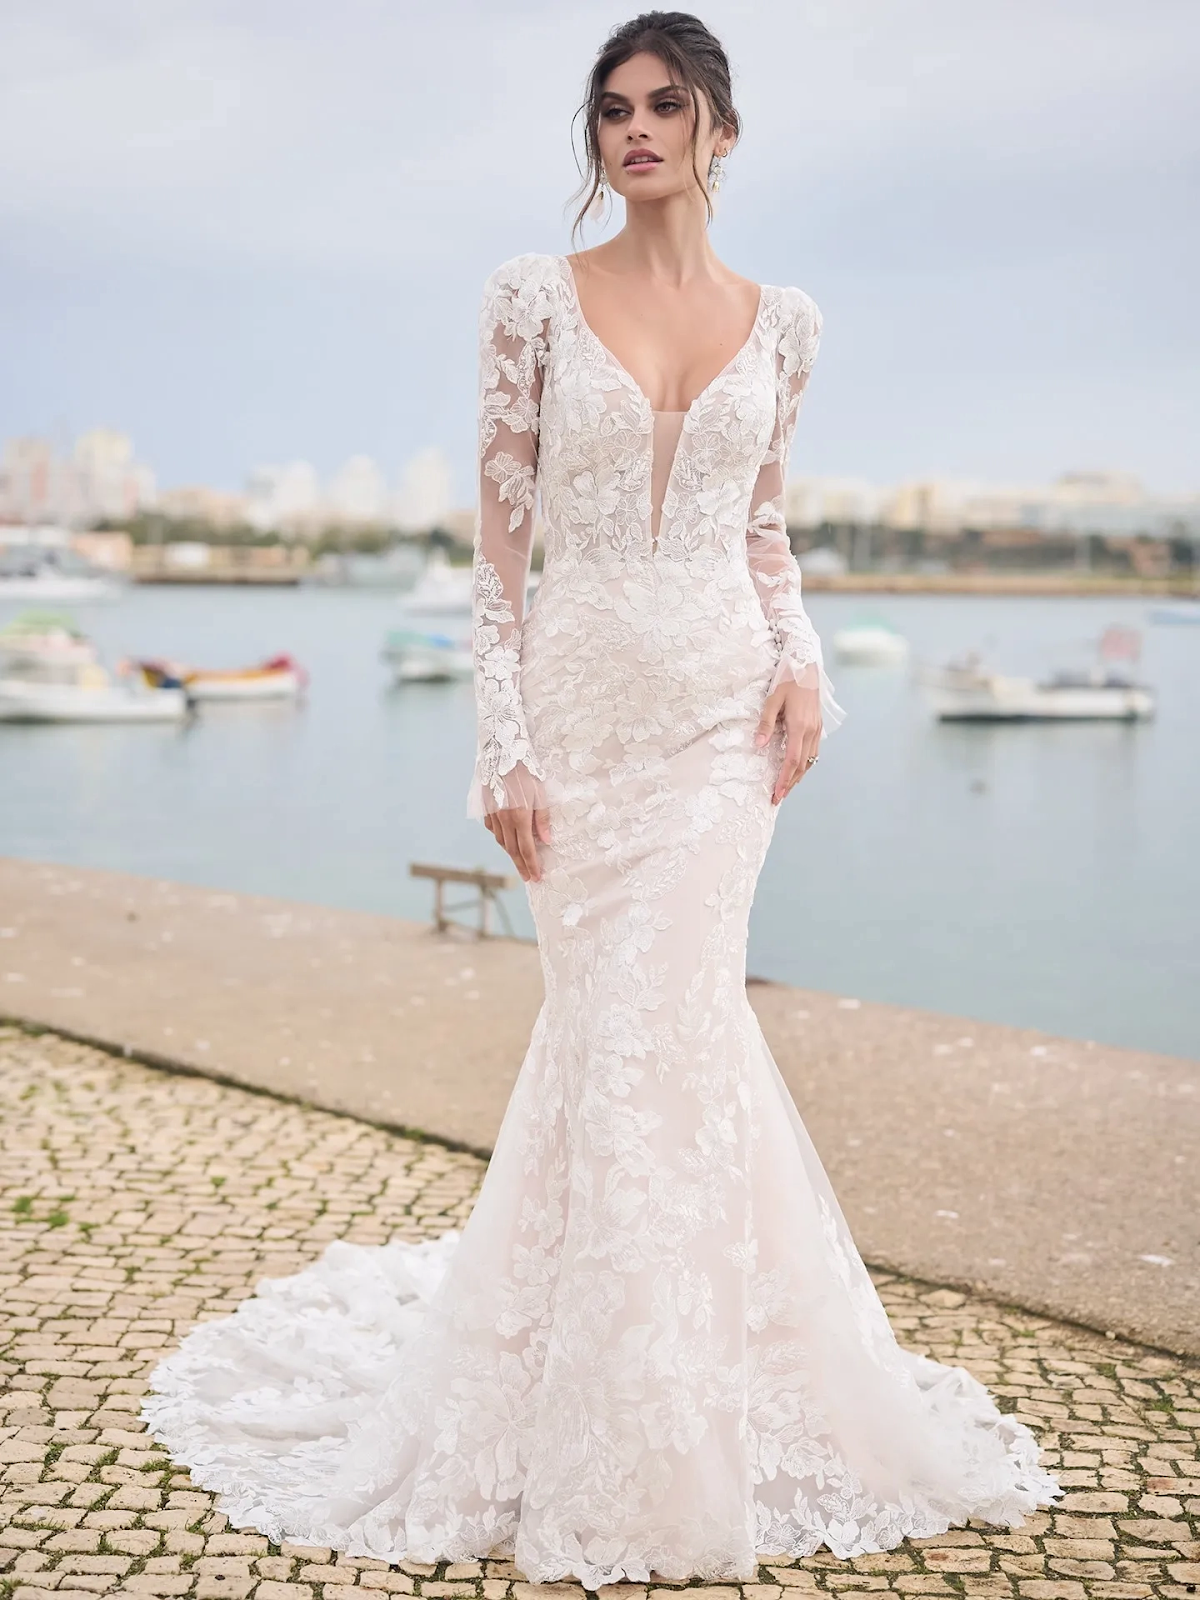
AMBER MARIE BY MAGGIE SOTTERO
The Amber Marie by Maggie Sottero is a wedding dress that combines timeless beauty with modern details. The unembellished diamond Jacquard fabric offers a touch of texture and sophistication, while the pleated front bodice creates a flattering silhouette. A plunging illusion V-neckline adds a touch of romance, and hidden pockets provide a surprising touch of functionality for the modern bride.
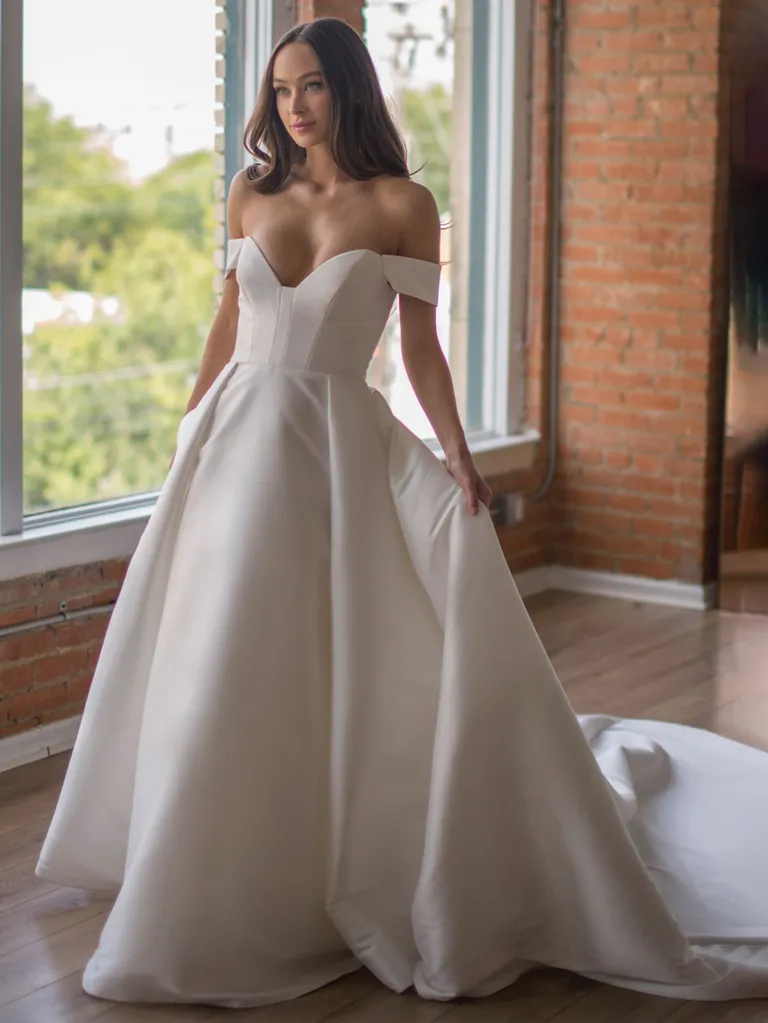
CHRISTIAN SIRIANO SILK FAILLE OFF THE SHOULDER DRAPED BODICE GOWN
The Christian Siriano Silk Faille Off-the-Shoulder Draped Bodice Gown is a luxurious and modern wedding dress designed to turn heads. The off-the-shoulder neckline and draped bodice are made from beautiful silk faille fabric, creating a timeless silhouette. The skirt flows gracefully from the waist, and the dress is finished with a train for added drama. But for the modern bride, there’s a surprising detail: hidden pockets, a perfect touch for stashing those wedding-day essentials.
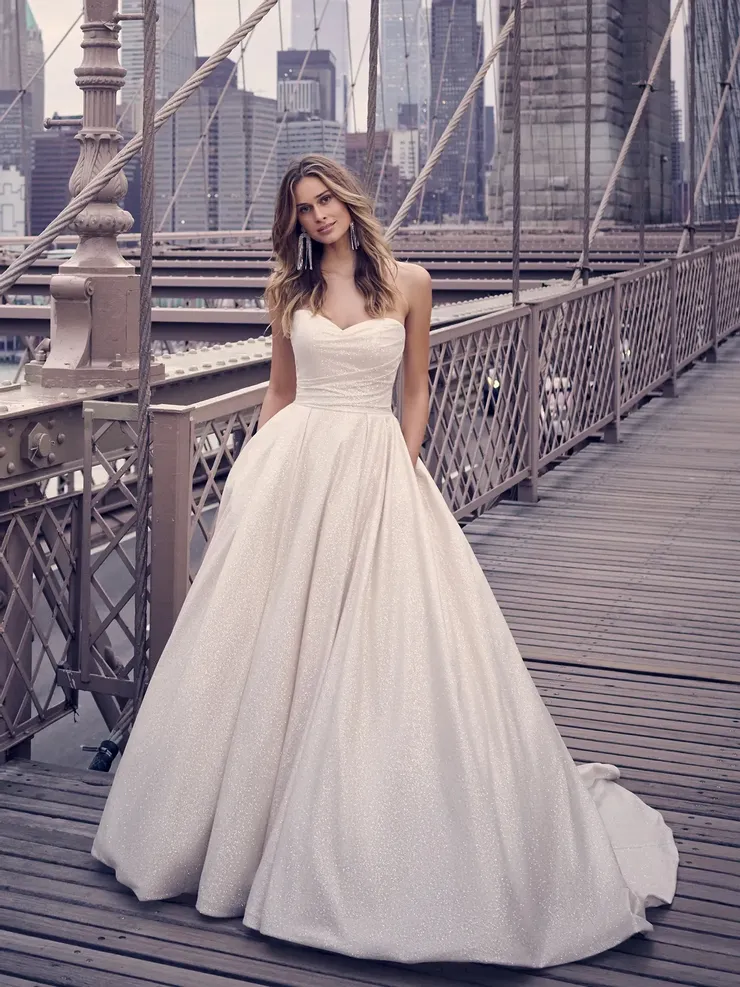
CYPRUS BY SOTTERO AND MIDGLEY
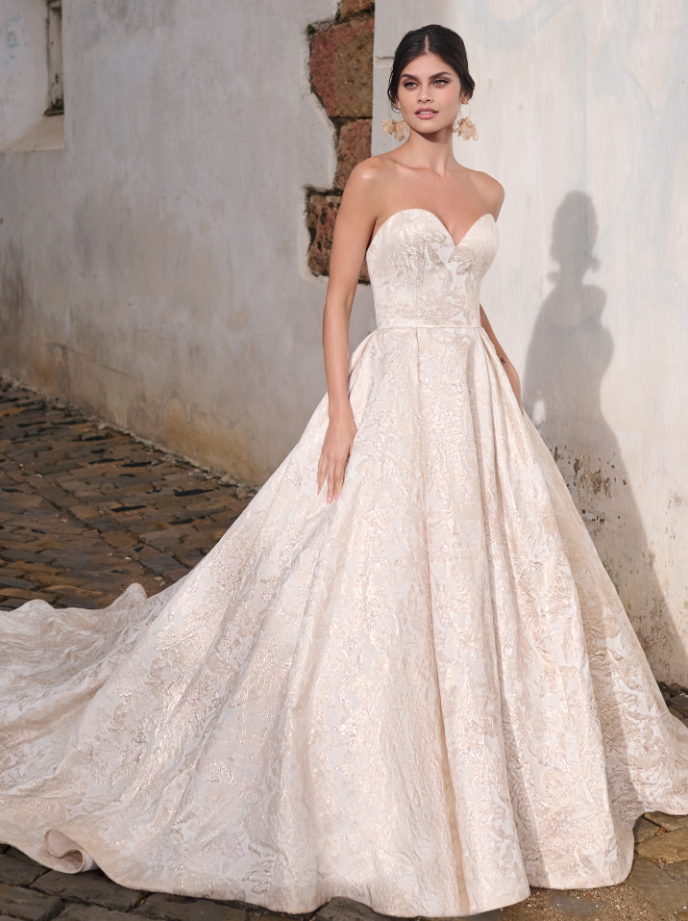
The Cyprus by Sottero and Midgley is a stunning wedding dress that combines classic elegance with a touch of modern whimsy. The strapless sweetheart neckline and timeless ball gown silhouette flatter many figures. The dress is crafted from a unique unembellished floral Jacquard fabric, adding a touch of texture and dimension. And for the modern bride, there’s a surprising detail: hidden pockets, perfect for stashing those wedding-day essentials.
GALIA LAHAV MAI
There isn’t a lot of information available online about the specific details of the Galia Lahav Mai wedding dress. Galia Lahav is known for their couture and ready-to-wear wedding dresses that exude a romantic and glamorous vibe. They use luxurious fabrics and often incorporate intricate beading and embellishments. Without knowing more about the Mai dress, it’s difficult to say for sure, but it’s likely a beautiful and well-crafted gown that would be perfect for a bride who wants to feel like a star on her wedding day.
KIKI BY REBECCA INGRAM
The Kiki by Rebecca Ingram is a vintage-inspired ball gown crafted from luxurious Tavira satin [Maggie Sottero Designs]. It features a flattering sweetheart neckline and off-the-shoulder sleeves for a touch of romance. The whimsical detail of a detachable satin bow adds a touch of personality, while hidden pockets provide a surprising touch of functionality for the modern bride.
KELLY FAETANINI MILANIA IN IVORY
The Kelly Faetanini Milania in ivory is a beautiful wedding dress that combines elegance and modern style. Made with luxurious fabrics, it has delicate lace details and a flattering shape. The classic ivory color fits many wedding themes, adding a timeless touch. This dress is perfect for brides who want both traditional and contemporary elements on their special day.
AMBROSE BY MAGGIE SOTTERO

The Ambrose by Maggie Sottero is a stunning wedding dress known for its elegance and charm. It features intricate lace details and a flattering silhouette that suits many body types. The dress is perfect for brides who want to feel graceful and beautiful on their special day. Its timeless design makes it a great choice for any wedding style.
LEANNE MARSHALL DARCY
Leanne Marshall is a renowned designer known for her unconventional and romantic wedding dresses. The “Darcy” is likely a specific dress design from her collection. There’s not much information publicly available about the exact design details, but based on Leanne Marshall’s style, the Darcy could be a whimsical and beautiful gown, possibly made with repurposed or sustainable materials.
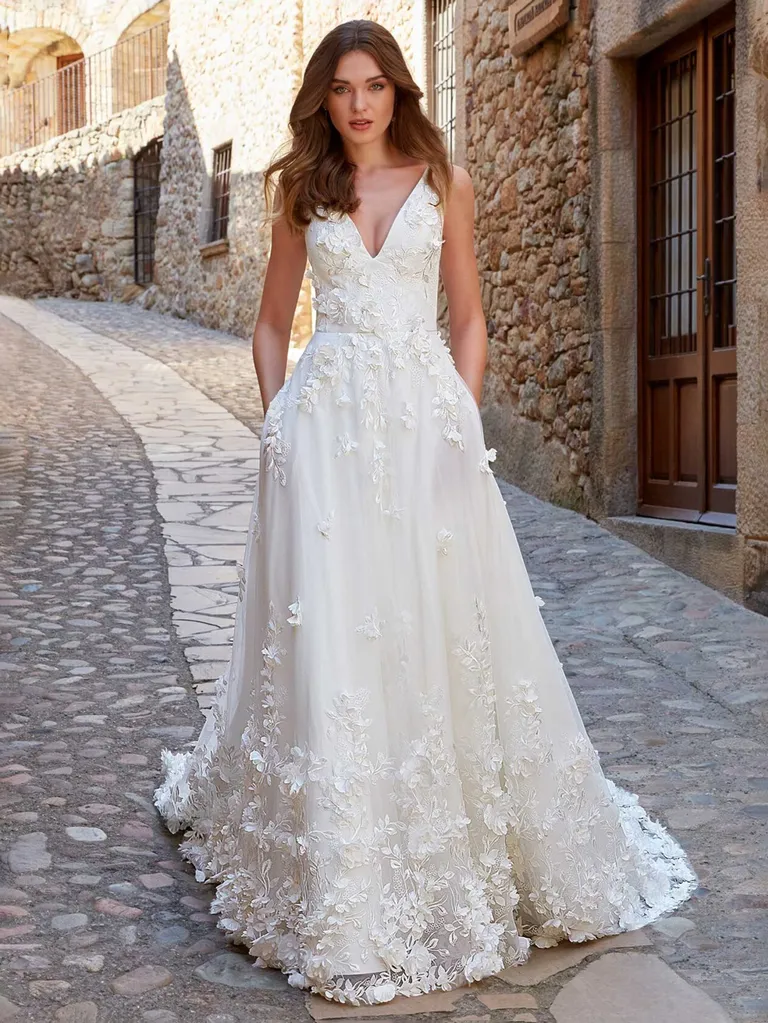
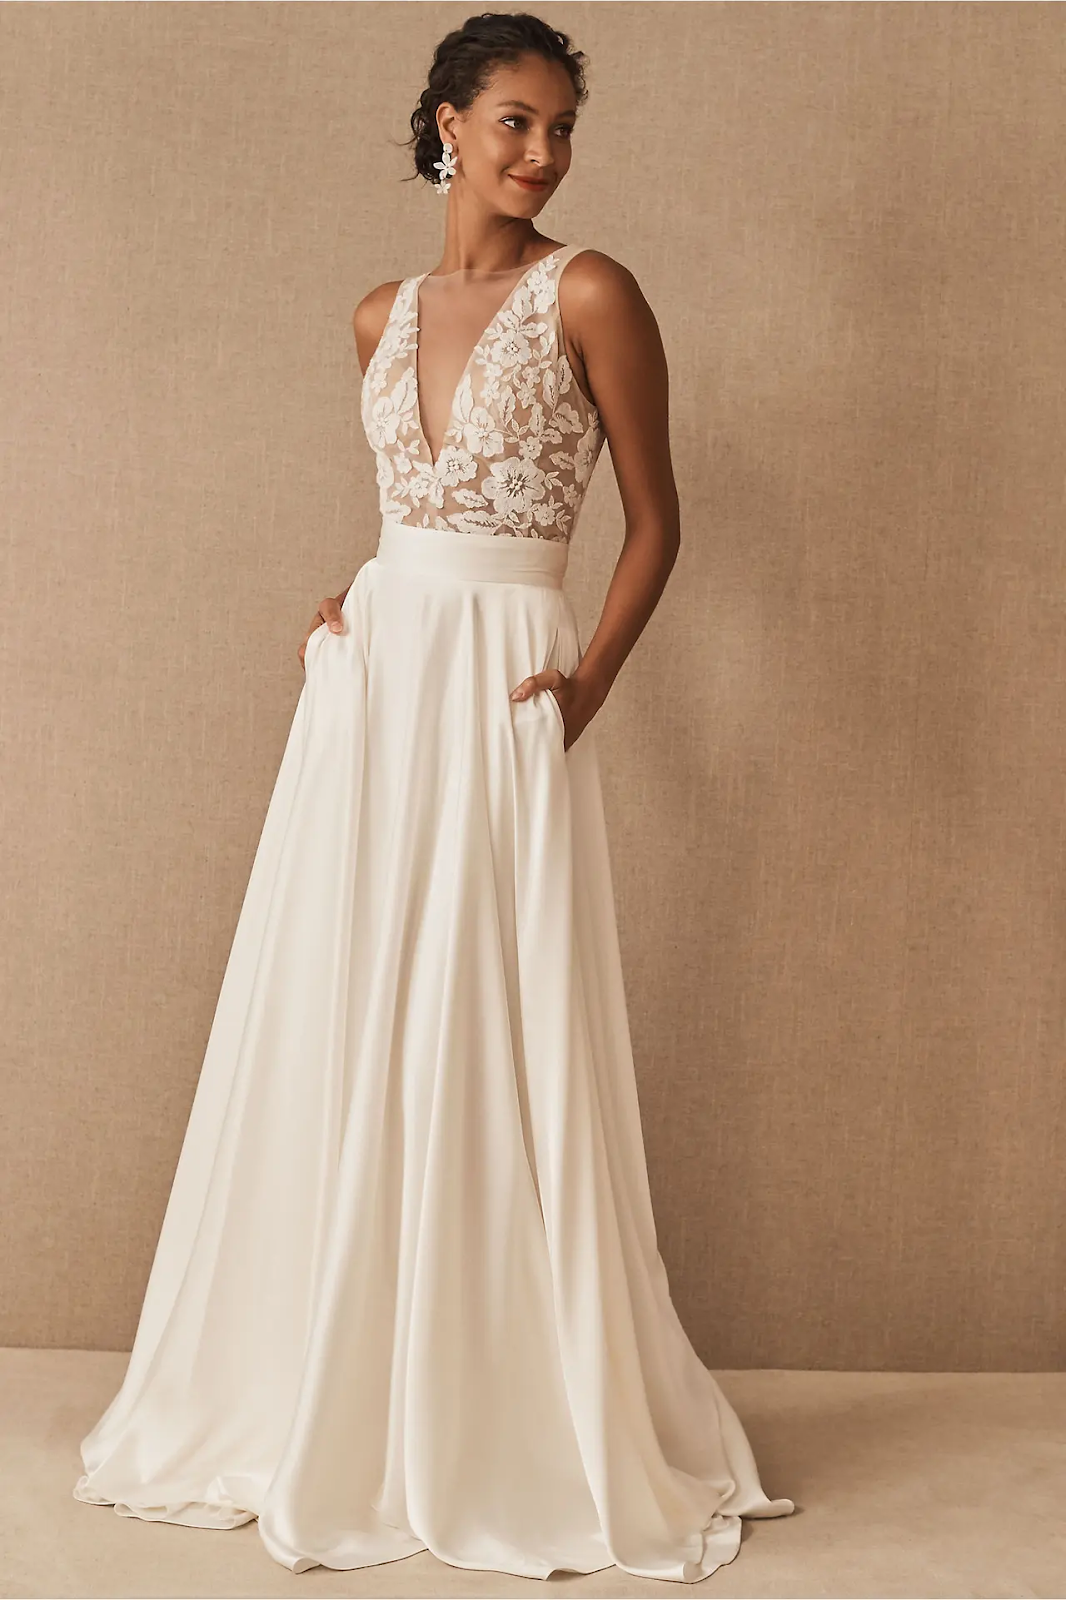
DOLLY BY REBECCA INGRAM
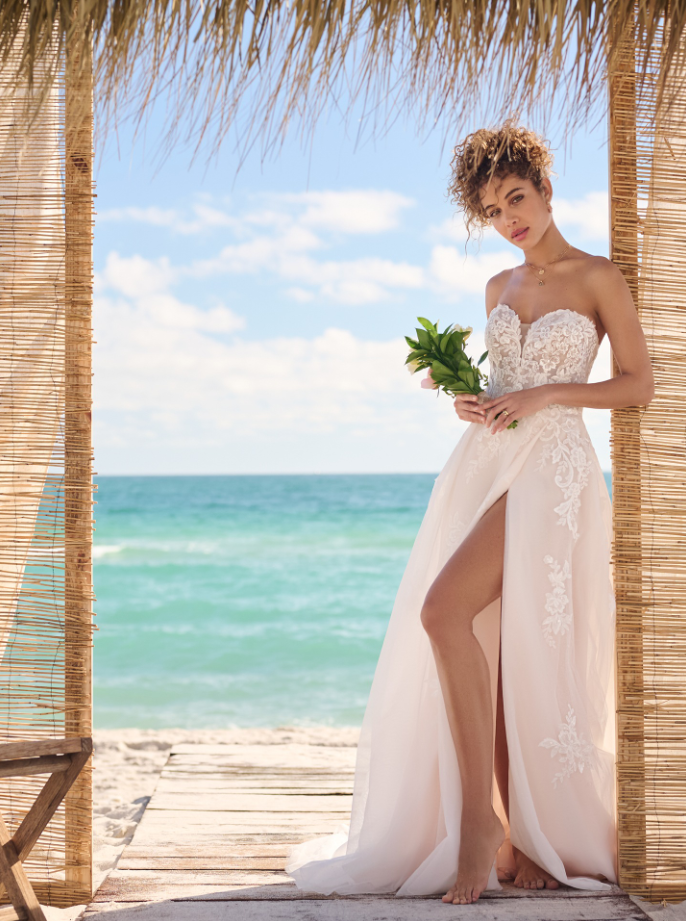
The “Dolly” by Rebecca Ingram is a beach-inspired A-line wedding dress . It features romantic details like a deep V-neckline, sequin lace motifs, and a flowing skirt with a side slit. Pockets add a touch of fun and functionality, making it a great choice for a bride who wants a relaxed and glamorous look on her wedding day.
SOTTERO AND MIDGLEY BURTON DAWN IN IVORY (GOWN WITH NUDE ILLUSION)
Sottero and Midgley’s Burton Dawn wedding dress in ivory is a romantic gown with a nude illusion effect. This likely means the dress has panels of sheer fabric that create the appearance of bare skin, adding a touch of elegance and sophistication. The ivory color adds to the overall romantic feel of the dress.
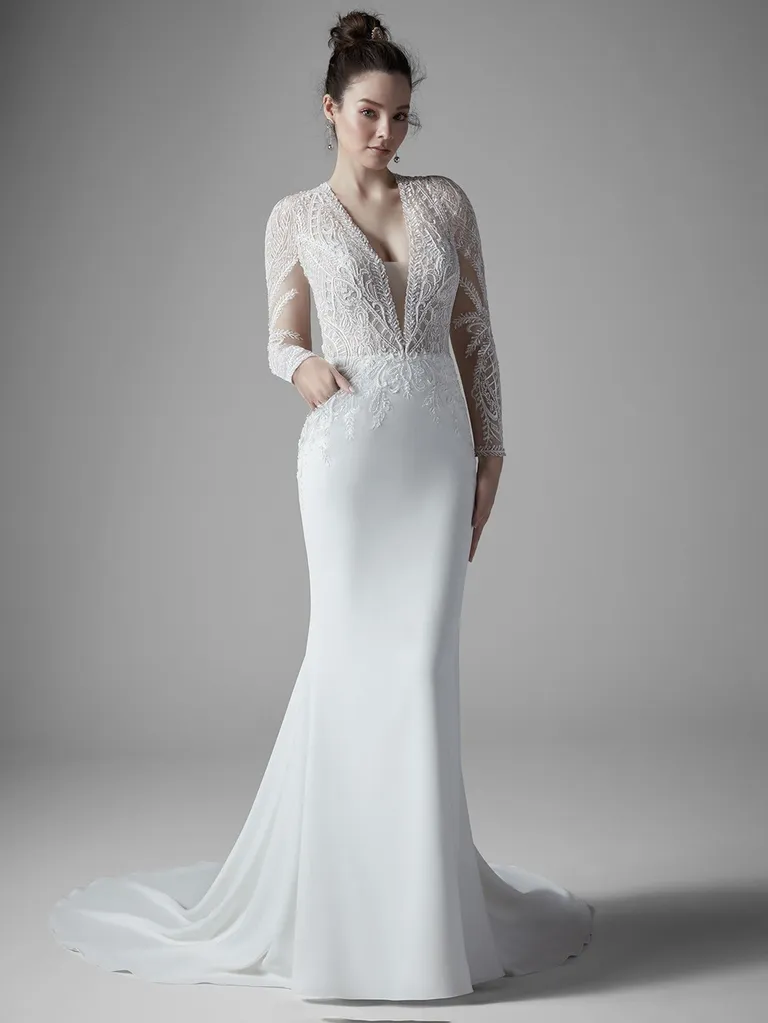
KNOX LANE BY SOTTERO AND MIDGLEY
Knox Lane is a specific wedding dress by Sottero and Midgley, not a collection. It’s known for its unique and whimsical look. The dress features a layered skirt made of Mariota organza over glitter tulle, creating a luxurious and textured look. Beaded lace and 3D flowers add a touch of romanticism, while the plunging sweetheart neckline with a detachable modesty panel offers a touch of modern sensuality.
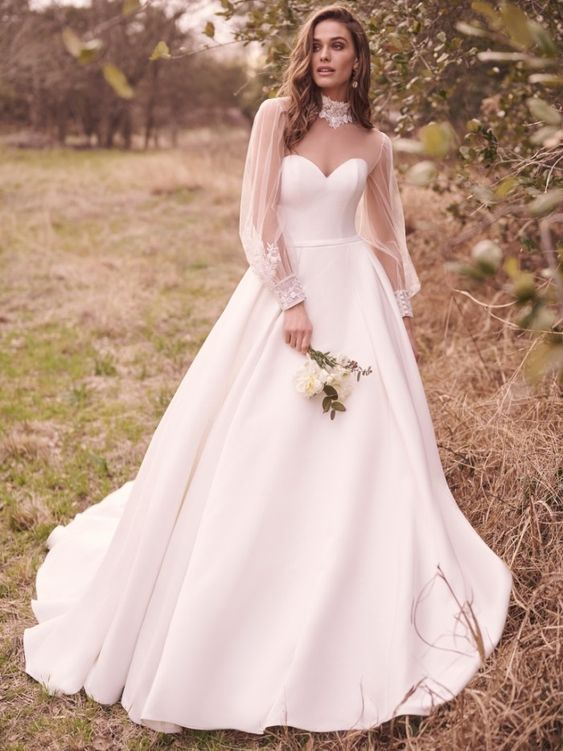
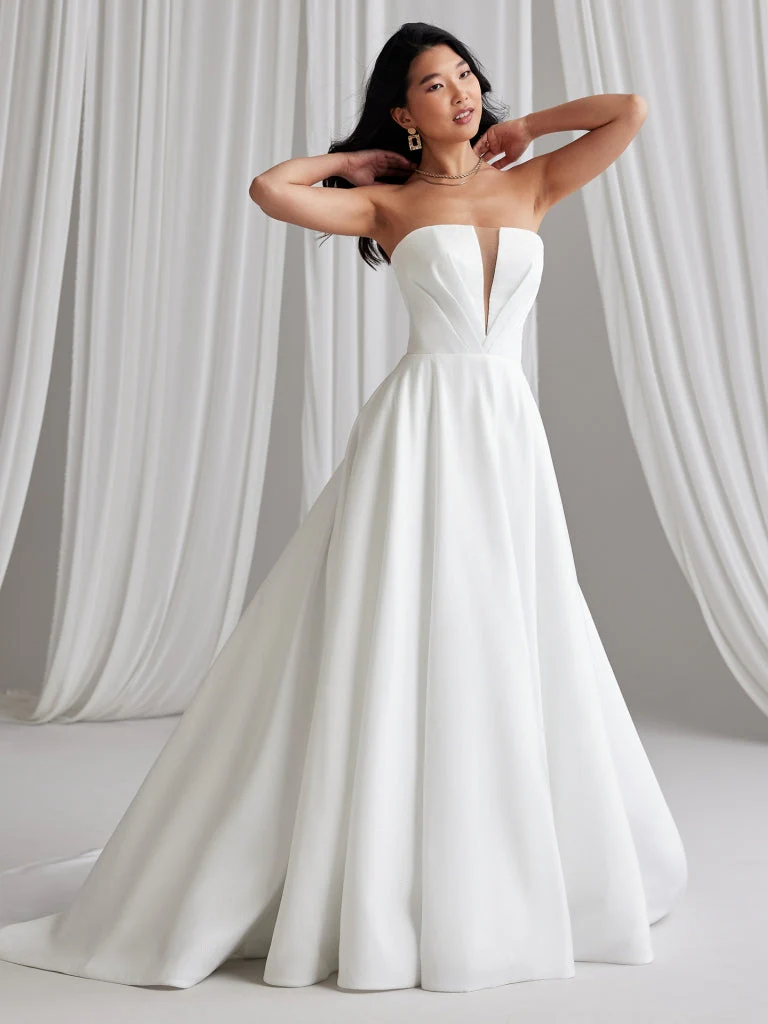
JUSTIN ALEXANDER GAINESVILLE CLEAN LONG SLEEVE BALL GOWN WITH ILLUSION BACK IN IVORY/NUDE
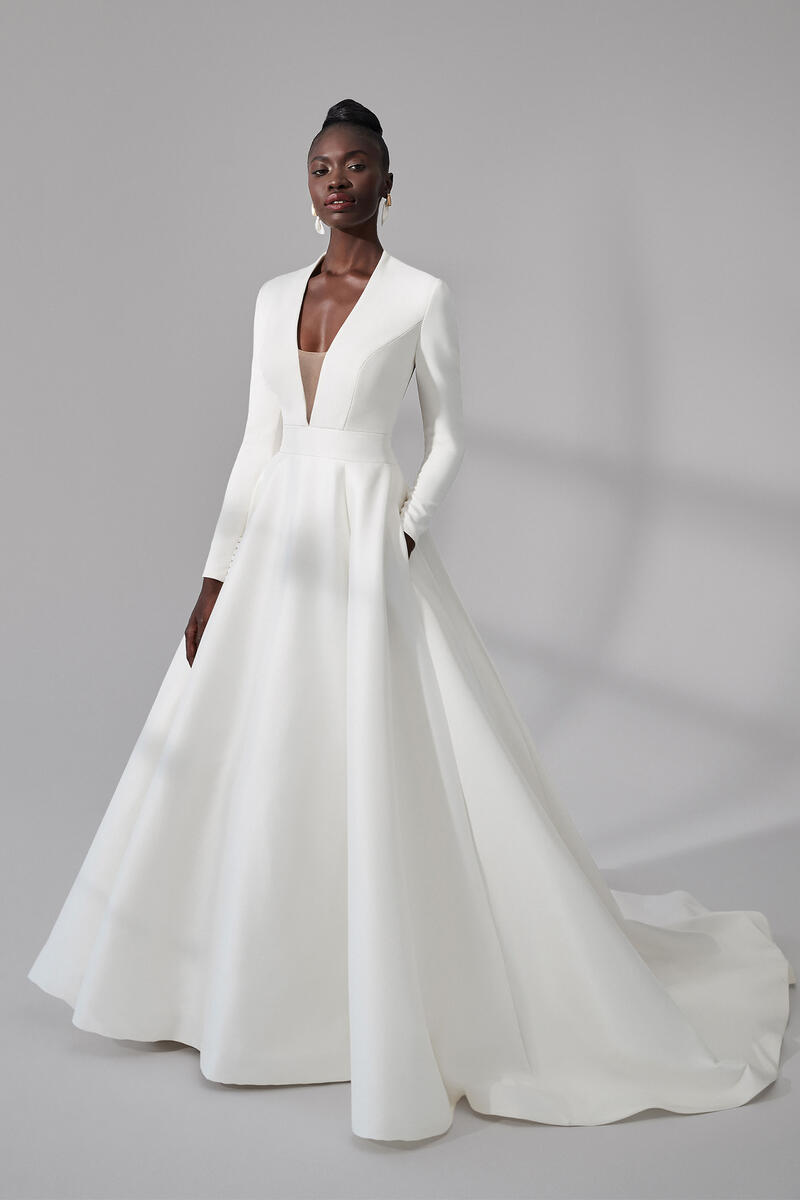
The Justin Alexander Gainesville Clean Long Sleeve Ball Gown with Illusion Back in Ivory/Nude is a stunning choice for any bride. The gown features a sleek ball gown silhouette, with a stretch crepe bodice that creates a plunging V-neckline, complemented by long sleeves. The sides of the dress are designed with an illusion detail, continuing to an elegant illusion back adorned with covered buttons. The flattering inset waistband leads to a full stretch Mikado skirt, combining to create a dress that is both modern and timeless.
SYMPHONY BY MAGGIE SOTTERO

The Maggie Sottero Symphony is a modern ball gown wedding dress designed to evoke a sense of elegance and romance. It features a full skirt, possibly made of luxurious fabrics like taffeta or tulle. The bodice may be fitted and strapless or have a square neckline for a more contemporary look. Special details like ruching, embroidery, or embellishments could add a touch of individuality.
PRONOVIAS ULURU
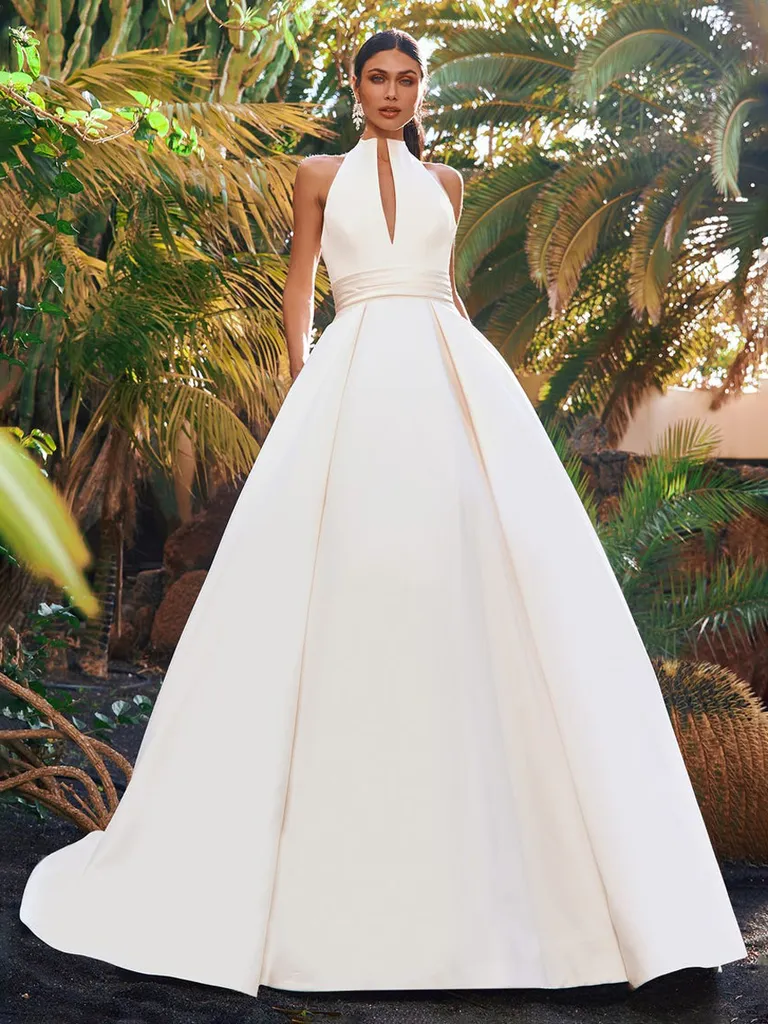
The Pronovias Uluru is a dramatic ball gown wedding dress crafted from luxurious satin. It features a structured high halter neck with a flattering pleated waistband detail. The back is sensually low cut, and the skirt flows out in voluminous folds with hidden pockets for a touch of surprise. Overall, it’s a classic and elegant design with a touch of modern flair.
RAMIRA BY MAGGIE SOTTERO
The Ramira is a wedding dress by Maggie Sottero, but without a more detailed description, it’s difficult to say exactly what it looks like. Maggie Sottero is known for her romantic and glamorous designs, so the Ramira could feature elements like a fitted bodice, a flowing skirt, and delicate lace or beadwork. These elements are commonly found in Sottero’s wedding dresses and could be part of the Ramira’s design as well.
KELLY FAETANINI ASHBY
Kelly Faetanini’s Ashby wedding dress is a stunning option for brides looking for a blend of modern and classic elements. Known for her uniquely feminine and romantic designs, Kelly Faetanini puts a modern twist on classic styles. The Ashby design, like all of her creations, is thoughtfully designed with the bride in mind. The dress is available at The Bridal Room in McLean, VA, among other locations, showcasing the accessibility and widespread appeal of the Kelly Faetanini brand.
COHEN BY SOTTERO AND MIDGLEY
The Cohen by Sottero and Midgley is a gorgeous wedding dress that combines modern style with classic elegance. It has beautiful lace details and a flattering fit that enhances the bride’s shape. Perfect for those who want to make a statement, this dress is ideal for a glamorous wedding. Its timeless design ensures that the bride will look stunning on her special day.
THEIA BRYONY IN IVORY
The Theia Bryony in ivory is a lovely wedding dress with a simple, elegant design. It features clean lines and a flattering shape that suits many brides. The soft ivory color adds a classic touch, perfect for any wedding setting. This dress is ideal for brides who want a timeless and graceful look on their special day.
DERRICK BY MAGGIE SOTTERO
The Derrick by Maggie Sottero is a dreamy bridal gown that caters to the most dramatic sensibilities. It features an elegant satin V-neckline with exposed boning details, and detachable cap-sleeves, offering versatility to brides. This gown is perfect for those who are thespians at heart or ballerinas in real life. The design encapsulates sophistication and romance, making it a standout choice for any bride seeking a gown that marries modern design elements with classic bridal aesthetics.
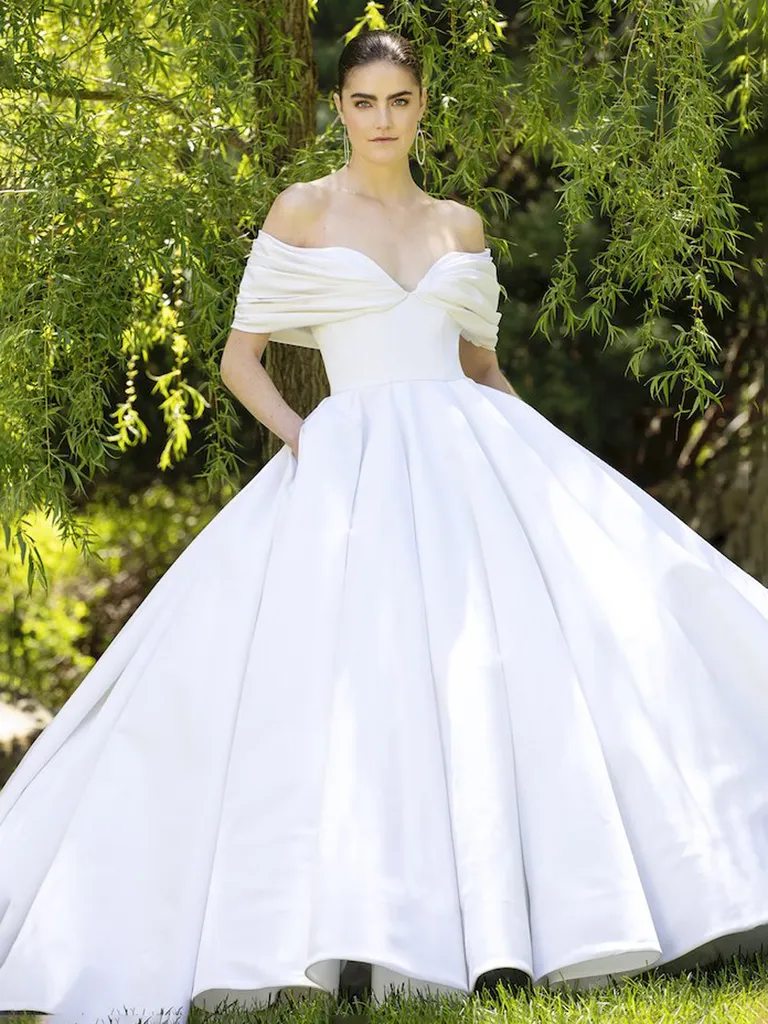
ESSENSE OF AUSTRALIA CLASSIC SATIN BALLGOWN WITH POCKETS AND OFF-THE-SHOULDER SLEEVES
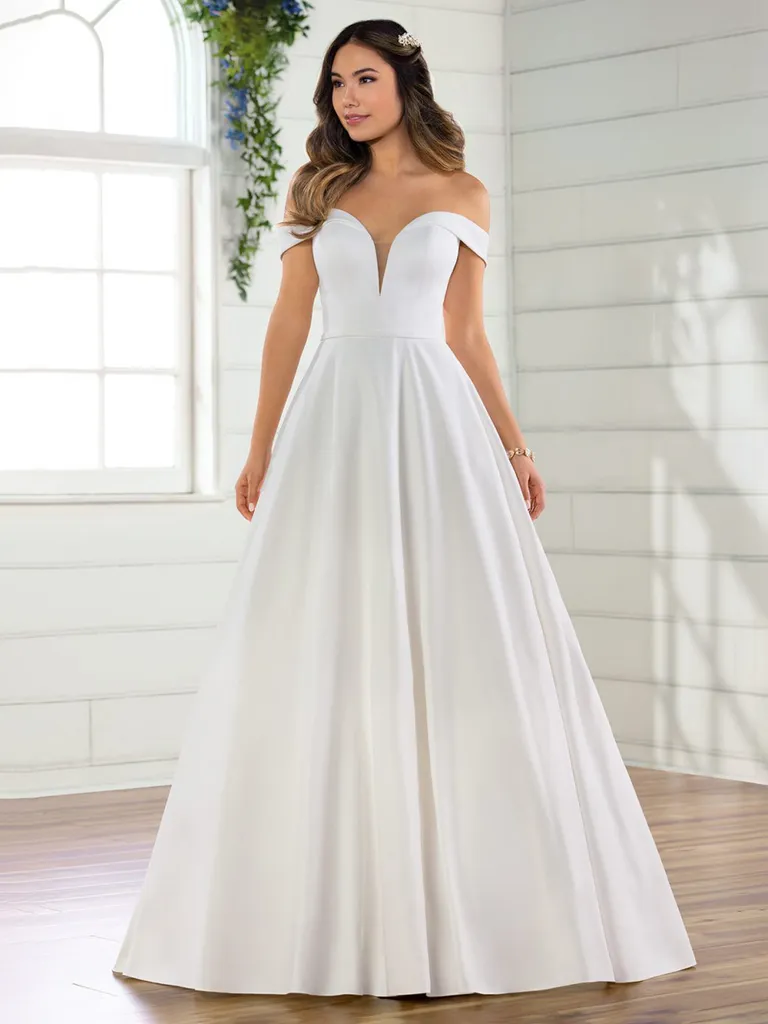
The Essense of Australia Classic Satin Ballgown with Pockets and Off-the-Shoulder Sleeves is an embodiment of classic elegance and modern design. This stunning silhouette features a plunging sweetheart neckline that seamlessly transitions into banded off-the-shoulder straps, beautifully accentuating the neck and shoulders. The gown’s simple seaming highlights the wearer’s frame, and the grand silhouette effortlessly floats beneath an attached fabric waistband for a light, ethereal finish. Perfect for the classic bride, this gown is a glamorous nod to old-Hollywood style with a fresh, contemporary twist.
LELA ROSE THE GRAMERCY IN SOFT WHITE
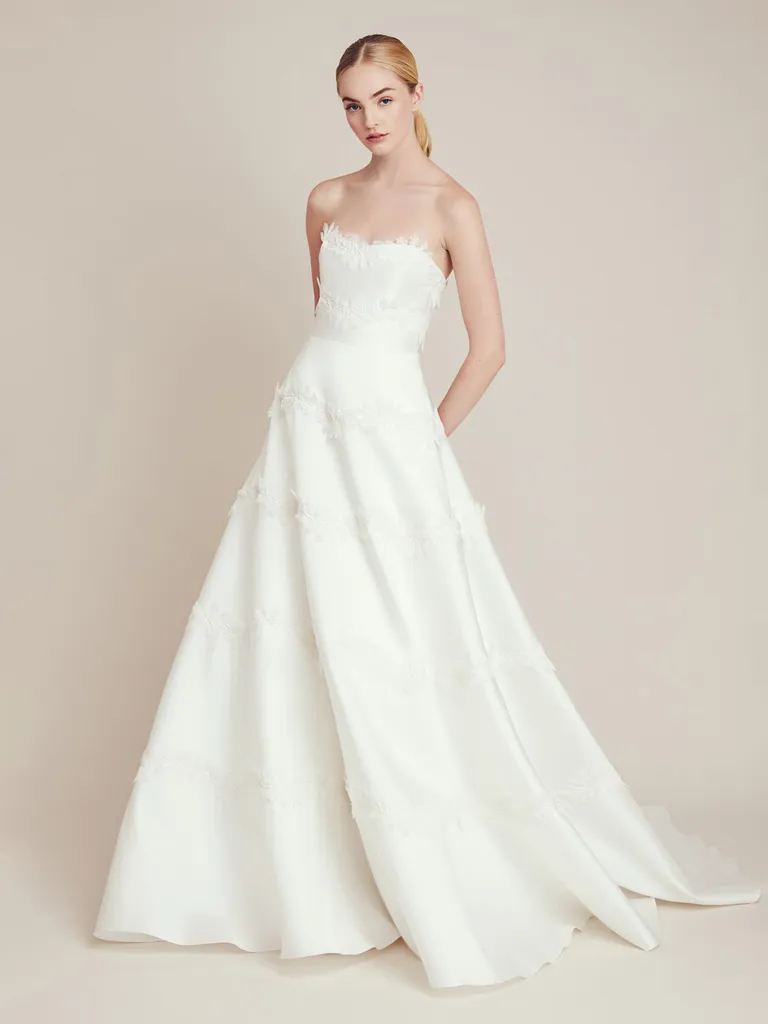
Lela Rose’s ‘The Gramercy’ in Soft White is a glamorous choice for brides looking for a blend of traditional and modern elements. This classic, romantic wedding dress offers a unique touch with stripe-like lace trims that elegantly wrap around the silhouette. The strapless design is flattering, and the soft white color makes it a timeless choice. Perfect for a garden wedding, this dress combines classic romanticism with modern style, making it a standout piece in the Lela Rose Fall 2020 Collection. Consider a few designs with small details, like rose gold chrome nails, to make your look more outstanding.
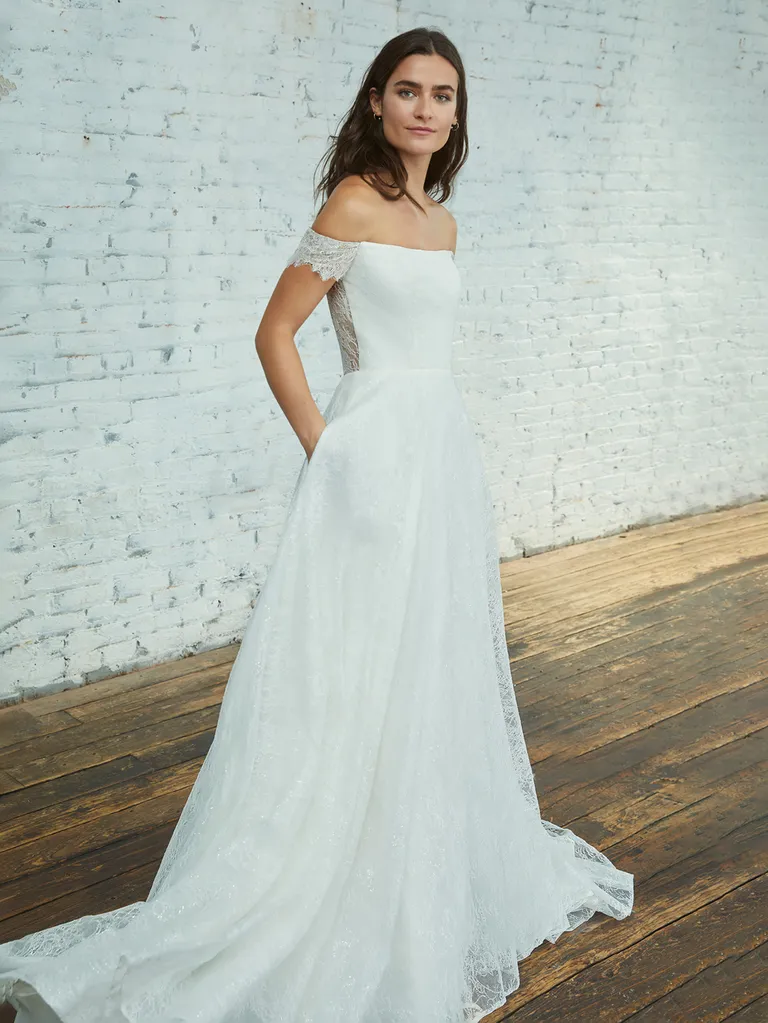
AMSALE LW165 – BOW BACK SHIFT DRESS IN IVORY
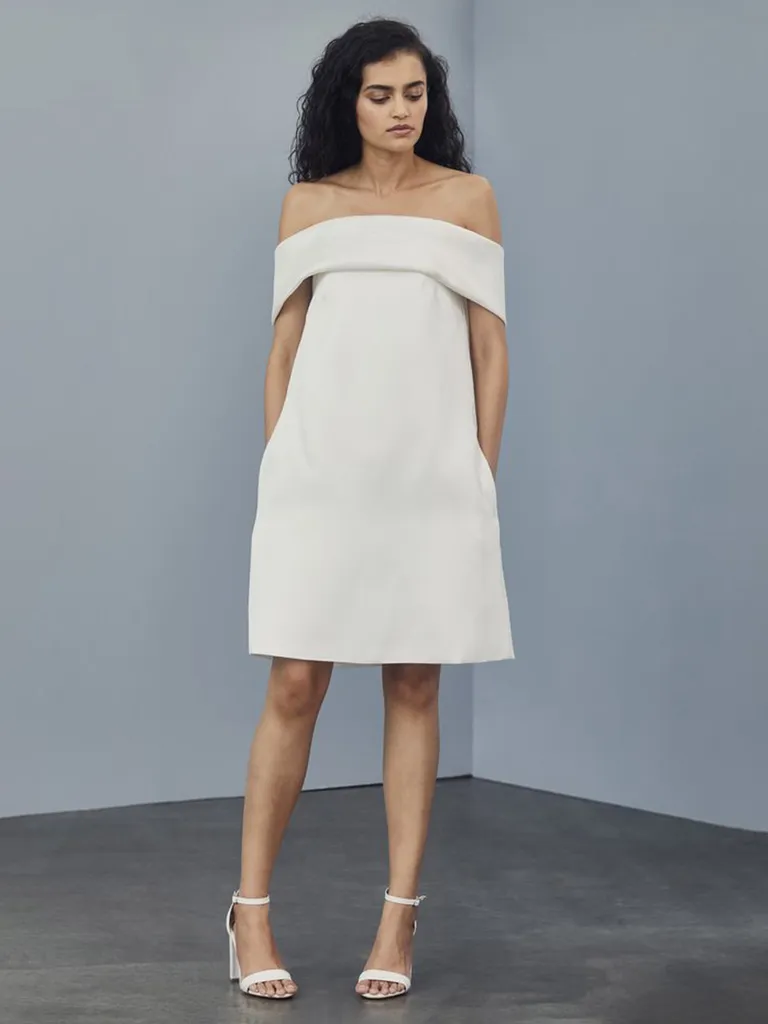
The Amsale LW165 – Bow Back Shift Dress in Ivory is a chic and elegant choice for any bride or wedding guest. It features an off-the-shoulder design with folded cuffs that wrap around the body, hugging the arms and coming together at the back in a delightful bow. The dress is made of weighted mikado in stunning ivory, which lends structure and holds its shape beautifully. As a bonus, the dress also features side pockets, adding a practical and modern touch to this timeless design.
ALEX PERRY ISOBEL CRÊPE GOWN
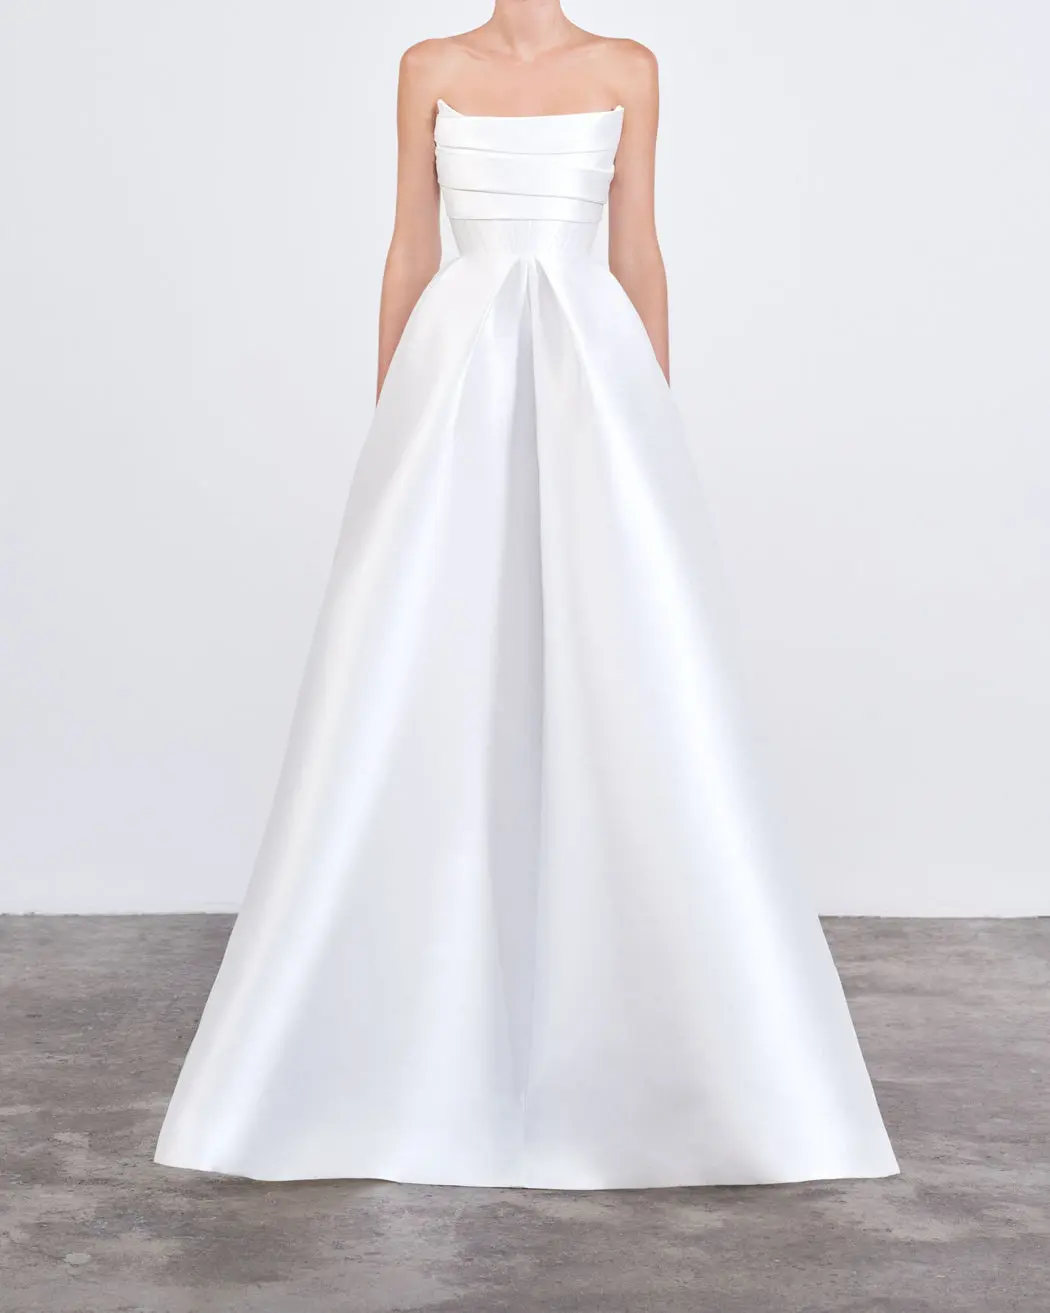
The Alex Perry Isobel Crêpe Gown is a beautiful piece that captures the essence of simplicity and elegance. This bridal gown features a corset-style bodice with meticulous pleating and boning to ensure a flawless fit. Its strapless design and draped detailing across the corset bodice create a stunning silhouette, while the full skirt falls to the floor, adding volume and grace to the overall look. The gown, constructed from lightweight silk faille, even features side pockets, adding a touch of modern functionality to this timeless design.
JENNY YOO TOP AND CATHERINE DEANE SKIRT
The Jenny Yoo Top and Catherine Deane Skirt combination is a beautiful choice for brides seeking a unique and sophisticated look. The Jenny Yoo top is crafted with layers of sparkling pearl beads over translucent silk chiffon, adding a touch of Gatsby-inspired glitz to the ensemble. The Catherine Deane skirt, on the other hand, complements the top perfectly with its elegant design. This combination not only offers a chic alternative to traditional bridal gowns but also provides the flexibility of mix-and-match for brides to create their unique style.
CONCLUSION
So ditch the clutch and embrace the practicality (and let’s be honest, coolness) of a wedding dress with pockets! With a variety of styles to flatter any bride, you’ll be sure to find a dress that lets you dance the night away, hold onto those must-have items, and look absolutely radiant on your special day. Happy shopping!


