Looking to make your nails stand out with some vibrant colors but struggling to find the perfect shade for your dark skin tone? Here’s a little secret: your rich, deep complexion is perfect for showcasing bold, high-impact nail polishes. Don’t let misconceptions about shimmery or subtle shades hold you back. In this post, we’ve curated the 15 best nail polish colors for dark skin tones that will enhance the look of your hands and complement your beautiful complexion. Keep scrolling to discover your new favorite shades!
15 TOP NAIL POLISHES FOR DARK SKIN TONES
SWISS BEAUTY SUPER SHINE NAIL POLISH – SHADE 04
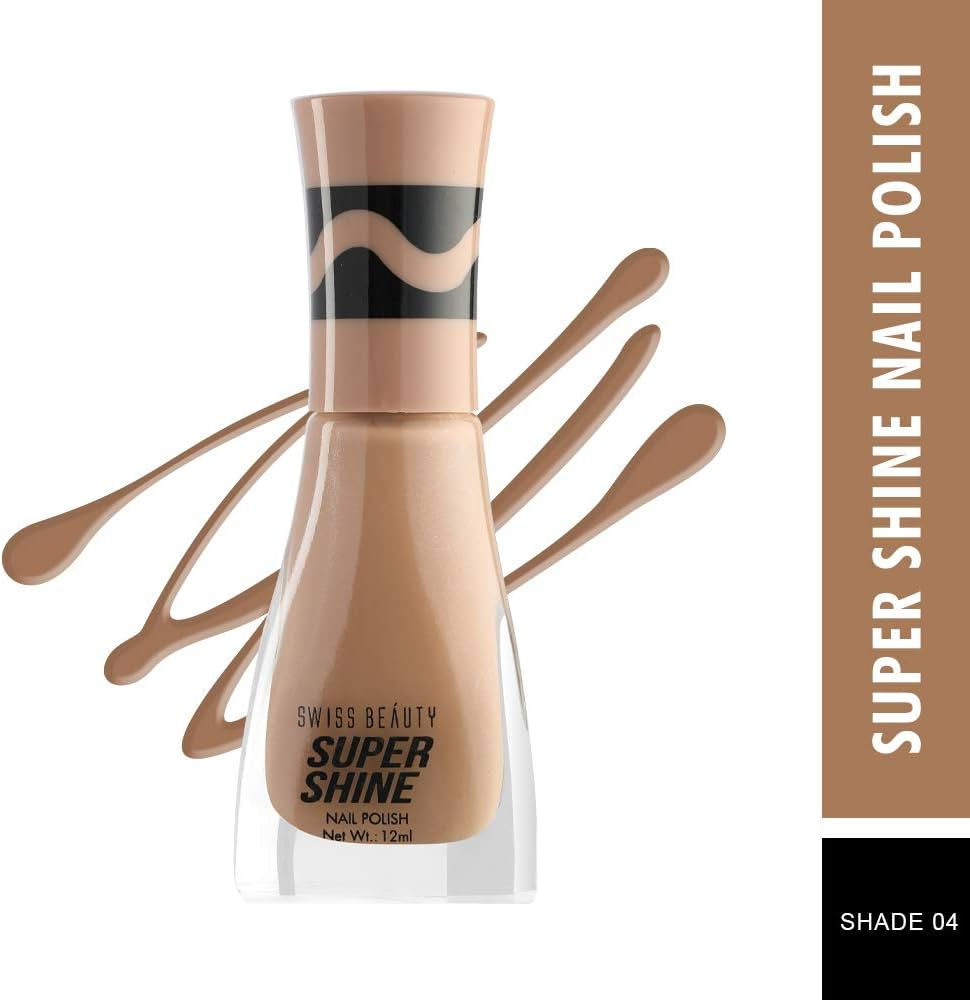
Swiss Beauty’s Super Shine Nail Polish offers a long-lasting, elegant finish with its advanced formula. Enriched with resins and Color Lock technology, this polish delivers vibrant, intense color and strengthens nails. Its patented flex brush ensures precise and smooth application.
Pros:
- Long-lasting
- Easy to apply
- Full coverage
- Chip-resistant
- Fast-drying
Cons:
- Strong chemical odor
FACES CANADA HI-SHINE GLOSSY NAIL ENAMEL – LAVENDER

Faces Canada’s Hi-Shine Glossy Nail Enamel is crafted with rich pigments to deliver vibrant color and a high-gloss finish with just one coat. It ensures excellent hardness and adhesion, providing long-lasting wear without chipping.
Pros:
- Long-lasting
- Chip-resistant
- Full coverage
- Free from harmful plasticizers
Cons:
- None
COLORBAR NAIL LACQUER – BERRY NICE
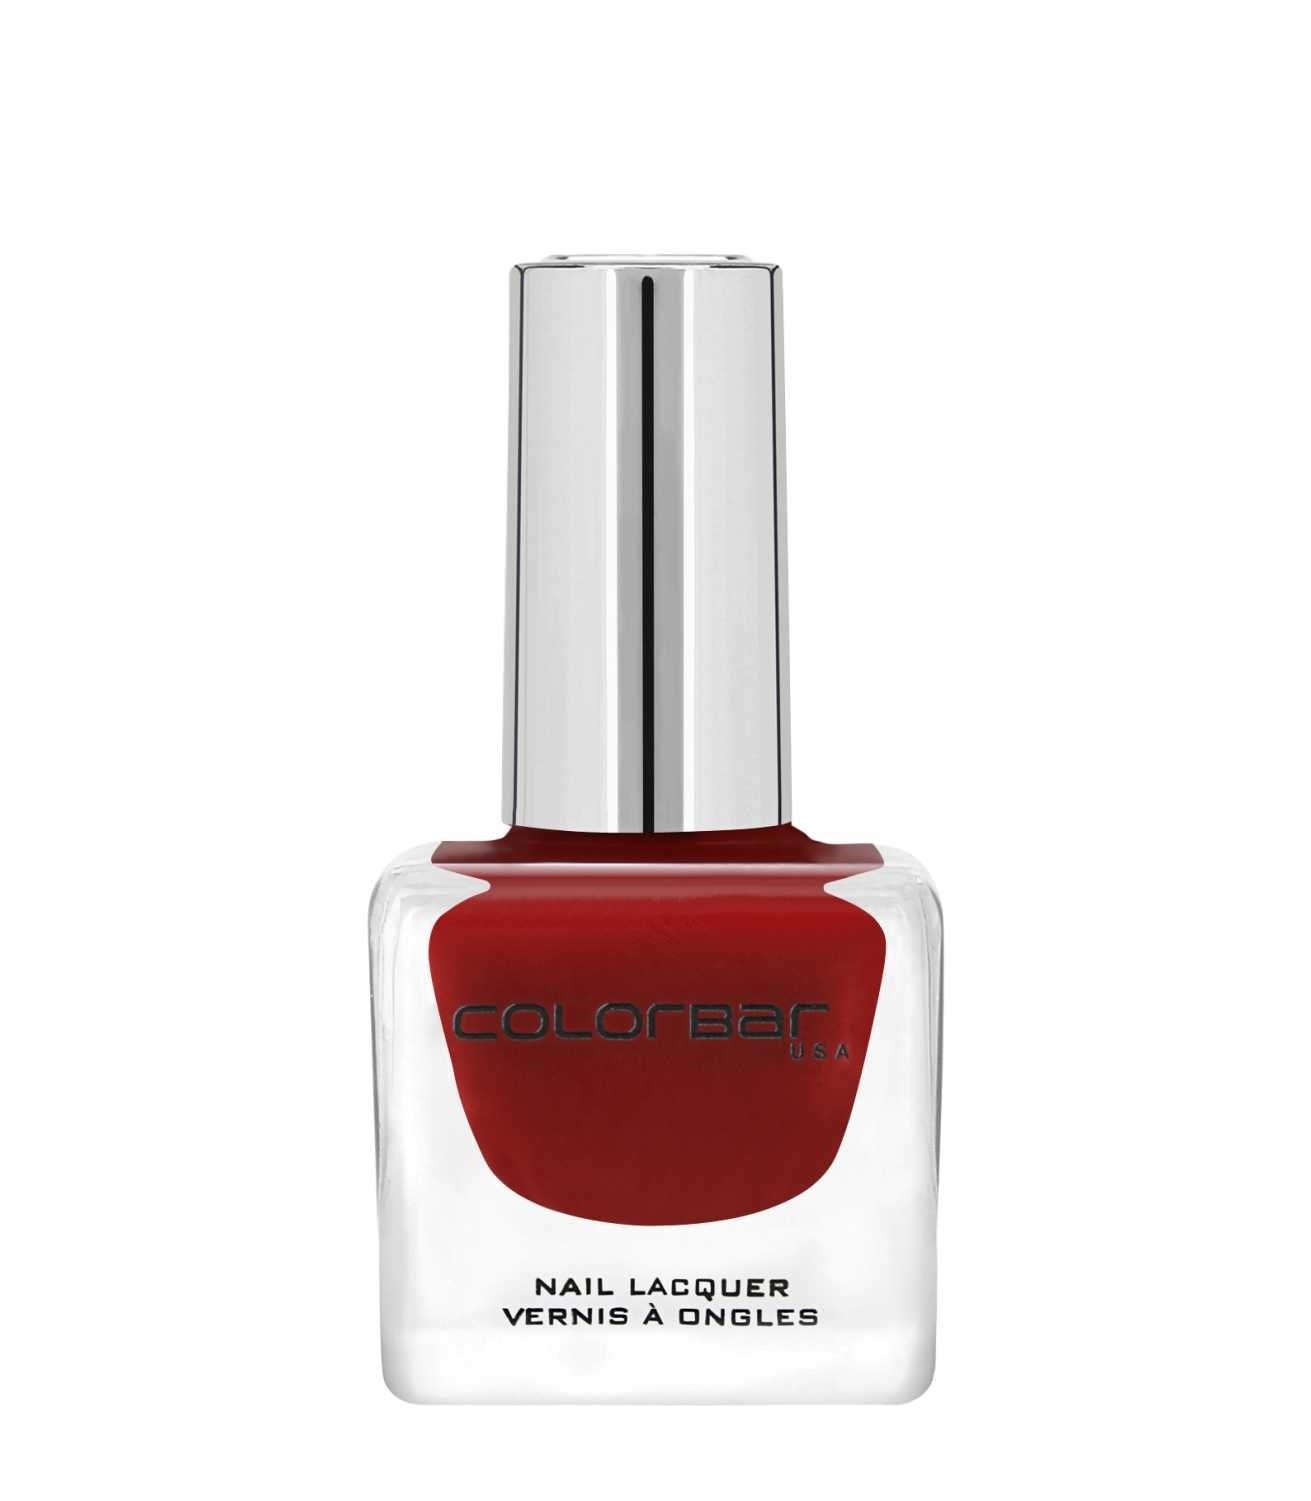
Colorbar’s Nail Lacquer boasts a luxurious formula that provides complete, opaque coverage with nail-loving ingredients to prevent yellowing. This chip-resistant, non-transferring polish stays intact for up to five days and comes with a round, fan-shaped brush for smooth, effortless application.
Pros:
- Full coverage
- Prevents yellowing
- Non-carcinogenic
- Long-lasting
- Chip-resistant
- Non-transferring
- Cruelty-free
Cons:
- None
HOUSE OF MAKEUP MATTE NAIL POLISH – CHOCOLATE BROWN
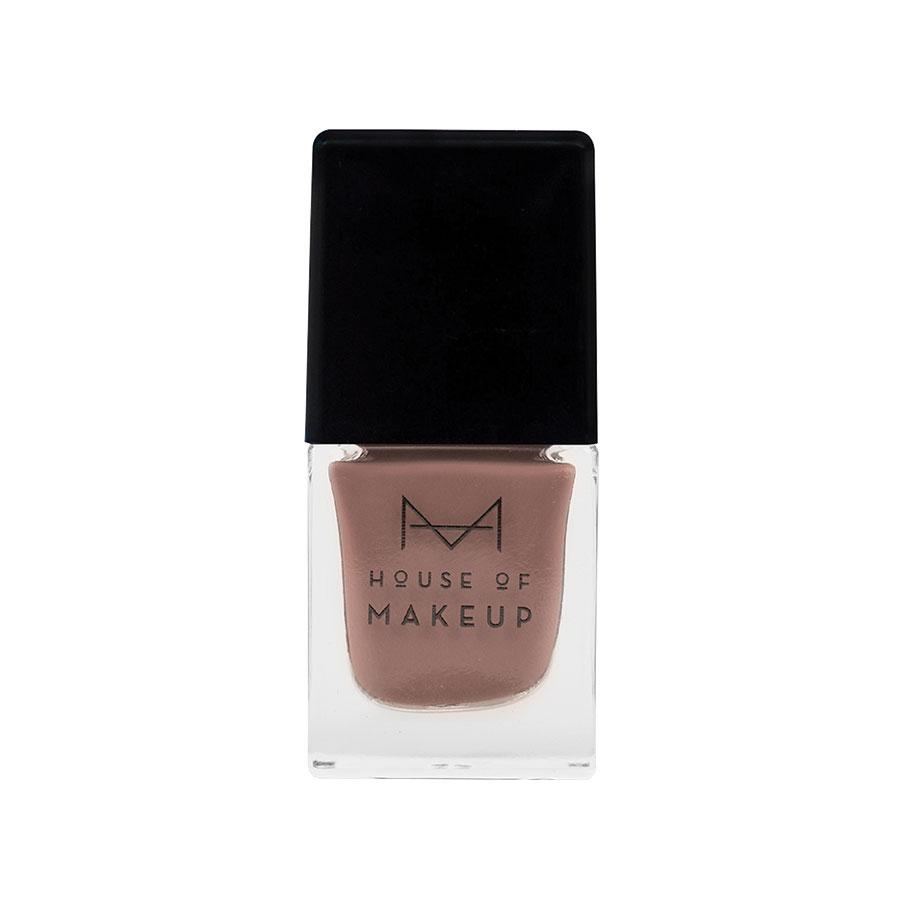
HOUSE OF MAKEUP’s matte nail polish delivers a professional finish with impressive results, all without the need for UV or LED lamps. This quick-drying, long-lasting formula is enriched with nourishing vitamin E, ensuring it doesn’t smudge or chip. Its opaque, ultra-durable pigments offer intense color payoff with just one stroke, and the 480 U-cut bristle brush ensures a smooth, seamless application.
Pros:
- Vegan
- Smudge-free
- Non-fading
- Long-lasting
- Easy to apply
- Crack-resistant
- Paraben-free
- Chemical-free
- Cruelty-free
Cons:
- May cause nail yellowing
COAT ME BONJOUR PARIS ONE STROKE NAIL LACQUER – PACK OF 3
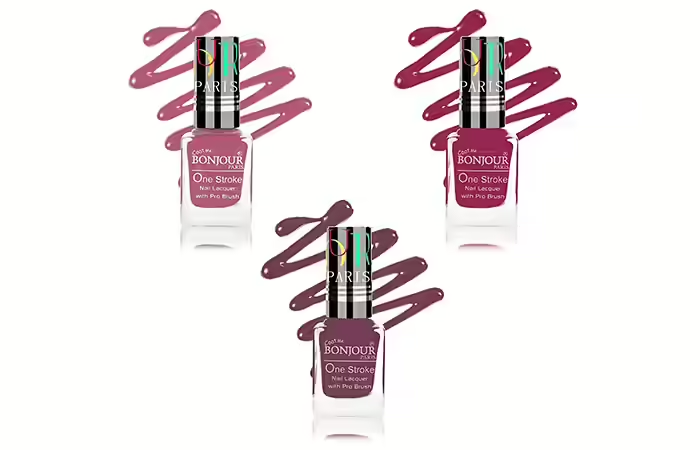
Coat Me Bonjour Paris nail polishes are infused with a nail hardener for enduring wear. With a creamy base, they provide a smooth, professional finish. The super-flat applicator brush makes for easy and precise application.
Pros:
- Long-lasting
- Chip-resistant
- Full coverage
- Highly pigmented
- Quick-drying
Cons:
- None
JUICE LONG STAY NAIL POLISH – PACK OF 3 (SUN KISSED / DUSTY CORAL / CAMEL NUDE)
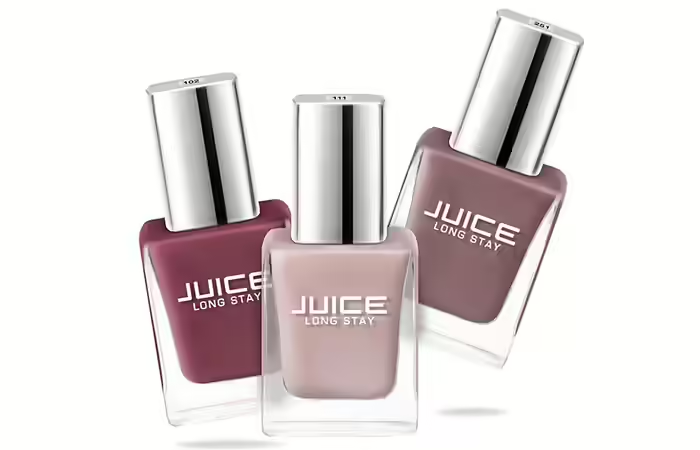
This JUICE combo pack features stunning nail polish shades designed to complement dark skin tones, offering classic, rich, and nude finishes. The iconic colors provide intense shine and last up to seven days. Each lacquer comes with a flexible brush for easy, precise, and smooth application.
Pros:
- Long-lasting
- Chip-resistant
- Highly pigmented
- Easy to apply
Cons:
- May fade over time
L’OREAL PARIS COLOR RICHE LE VERNIS À L’HUILE GEL NAIL POLISH – 440 CHERIE MACARON
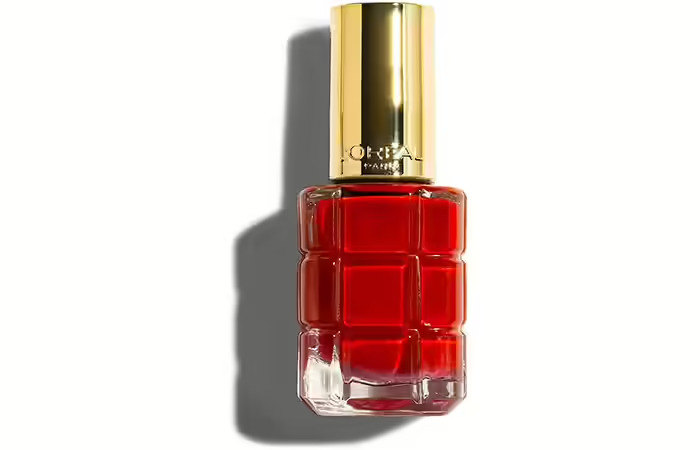
This L’Oréal Paris nail polish is enriched with a blend of micro-oils, including argan, rose, camellia, and lotus flower, to deliver a glossy, mirror-like shine and rich color payoff. Its vibrant pigments enhance the elegance of your hands, while the flexible, wide-stroke brush with over 400 bristles ensures quick and precise application. The drip-resistant formula guarantees a flawless finish.
Pros:
- Pleasant scent
- Quick-drying
- 5-free
- Paraben-free
Cons:
- Difficult to remove
LAKMÉ ABSOLUTE GEL STYLIST NAIL COLOR – BEIGE NUDE
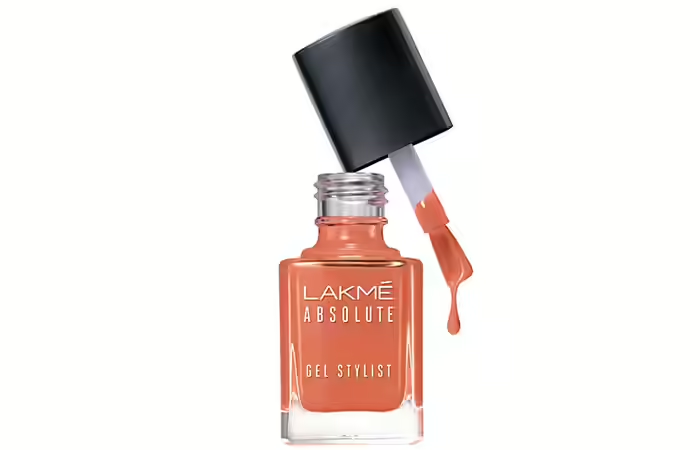
Lakmé Absolute Gel Stylist Nail Color delivers a high-shine, gel-like glossy finish. This stunning polish is designed for dark skin tones and provides a smooth, intense finish with just one swipe. Ideal for both party and casual looks, it features a stylish applicator brush for a smooth and seamless application.
Pros:
- Smooth texture
- Gel-based formula
- Easy to apply
- Full coverage
Cons:
- Runny consistency
REVLON SUPER LUSTROUS NAIL ENAMEL – BEWITCHING
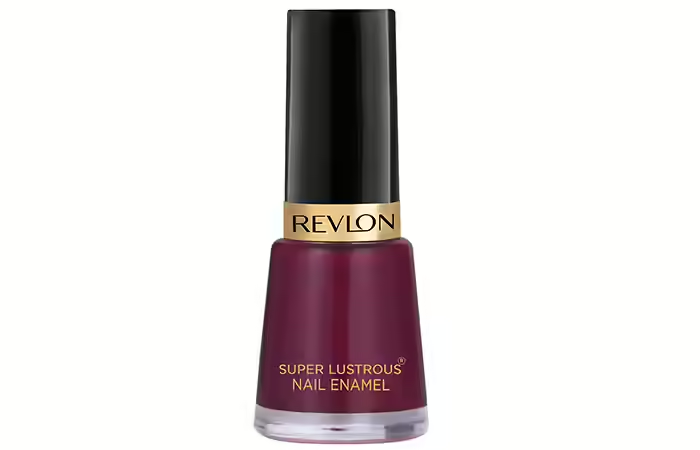
Revlon’s nail enamel features a chip-resistant formula that keeps color vibrant for up to nine days. Its quick-drying formula includes panthenol and vitamins A and E to condition and protect your nails. The broad applicator brush ensures full coverage and a smooth matte finish. This nail polish is free from DBP, toluene, formaldehyde, formaldehyde resin, and camphor.
Pros:
- Quick-drying
- Long-lasting
- Fade-resistant
- No bubbles or streaks
- 5-free
Cons:
- None
LAKMÉ 9TO5 PRIMER+GLOSS NAIL COLOR – CARAMEL CASE

Lakmé’s 9To5 Primer+Gloss Nail Color delivers vibrant color payoff with a glossy shine. Infused with a primer, it ensures an intense finish. This long-lasting polish dries quickly and applies smoothly.
Pros:
- Highly pigmented
- Quick-drying
- Long-lasting
- Chip-resistant
Cons:
- Thick texture
DEBELLE GEL NAIL LACQUER – GLAMOROUS GARNET

DeBelle Gel Nail Lacquer features a gel-based formula that delivers a metallic finish with long-lasting wear. Infused with seaweed extract and healthy minerals, it strengthens nails and provides a natural shine. The Glamorous Garnet shade, a dark maroon, adds sophistication to any outfit. This highly pigmented polish offers salon-quality results and comes with a flat, broad brush for easy application. It’s also suitable for stamping and nail art.
Pros:
- Quick-drying
- Highly pigmented
- 5-free
- Cruelty-free
Cons:
- Not chip-resistant
MINISO PITTURA NAIL POLISH – 26 DARK RED
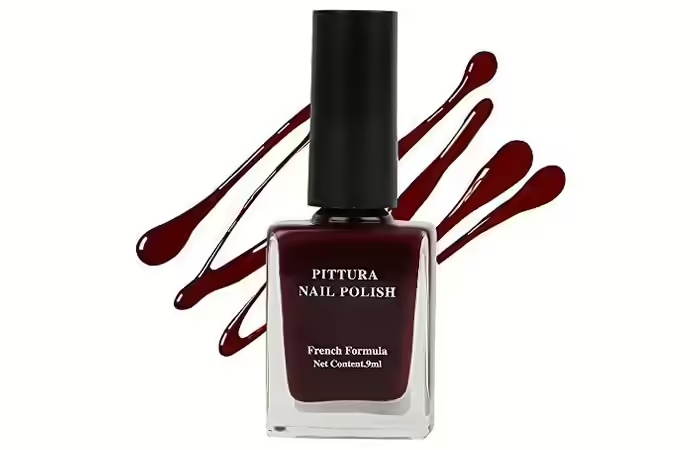
MINISO Pittura Nail Polish offers a long-lasting, chip-resistant formula. Free from harmful chemicals, it strengthens nails and dries quickly. The vibrant shade is perfect for various occasions and comes with a flat applicator brush for a smooth, intense matte finish.
Pros:
- Long-lasting
- Chip-resistant
- Quick-drying
- Smooth application
- Intense matte finish
- Free from harmful chemicals
Cons:
- Requires multiple coats
LAKMÉ COLOR CRUSH NAIL ART – G9
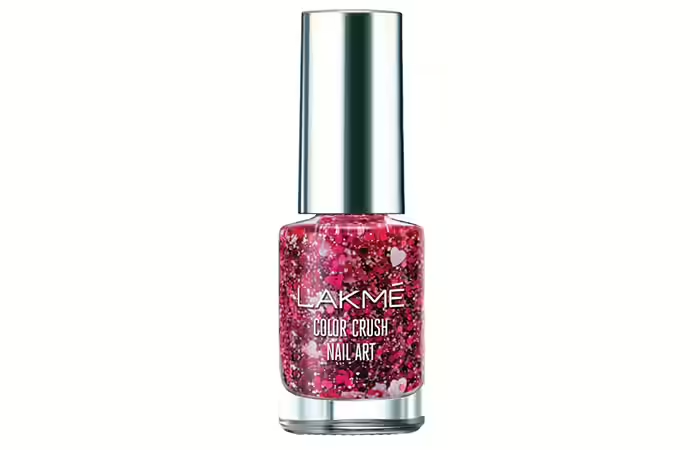
Lakmé’s Color Crush glittery nail polish adds a vibrant, shimmery finish to your nails with its unicorn chrome effect. Infused with glitter particles in various shapes, it creates a dazzling look. Ideal for mixing and matching with other shades to craft trendy nail art designs.
Pros:
- Long-lasting
- Holographic glitters
- Smooth application
- Chip-resistant
Cons:
- Not quick-drying
- Requires 2-3 coats
FACES CANADA GLOSSY SPLASH NAIL ENAMEL – PURPLE RAIN 19
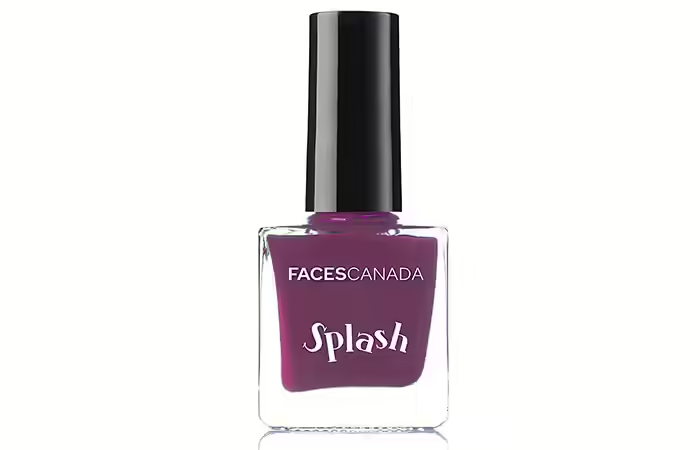
Faces Canada’s high-performance nail enamel is free from harmful plasticizers and delivers rich color payoff with smooth application. The chip-resistant formula ensures a flawless finish and dries quickly. Designed for dark skin tones, it features a round-cut, fan-shaped brush for full coverage and effortless application.
Pros:
- Quick-drying
- Long-lasting
- Chip-resistant
- Full coverage
- DBP-free
- Camphor-free
- Toluene-free
- Formaldehyde-free
Cons:
- Requires at least two coats for true color opacity
LAKMÉ TRUE WEAR COLOR CRUSH NAIL COLOR – SHADE 43
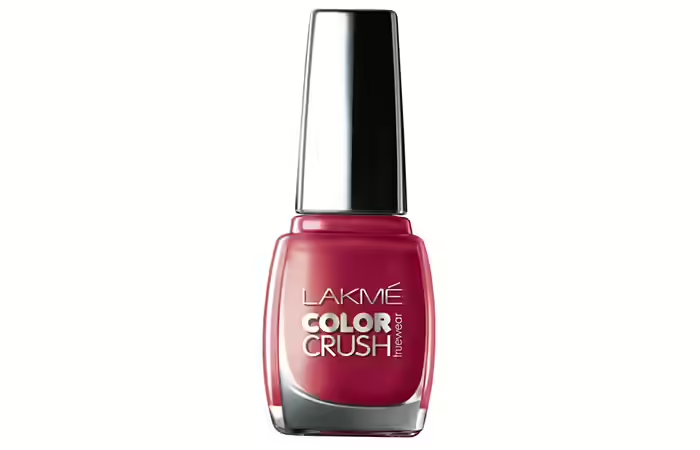
Lakmé True Wear Color Crush Nail Color features a chip-resistant formula with resins and Color Lock technology for enduring wear. Shade 43 is a vibrant dark pink with a shimmery finish that adds a lively touch to your nails. It applies smoothly and helps strengthen your nails.
Pros:
- Long-lasting
- Chip-resistant
- Non-fading
- Smooth application
- Quick-drying
Cons:
- None
WHAT TO LOOK FOR WHEN CHOOSING NAIL POLISH FOR DARK SKIN TONES
FINISH
Nail polishes come in two main finishes: glossy and matte. Glossy polishes add shine and luster to your nails, while matte polishes offer a flat, non-reflective look. Choose the finish that best suits your personal style and preference.
COLOR
Choose shades such as deep reds, pinks, and vibrant neons, which complement dark skin tones beautifully and deliver a striking finish.
BRAND
Opt for reputable brands known for their quality to avoid compromising on your nail health. Low-quality polishes can damage your nails, causing discoloration or weakening.
QUALITY
Select a nail polish based on its performance rather than brand or price. Look for key qualities like quick drying time, smooth and glossy finish, strong pigmentation, and durability. A high-quality polish should dry quickly, provide a smooth application, and resist chipping.
PRICE
While nail polishes are generally affordable, avoid extremely cheap options that may sacrifice quality. Investing in a good-quality polish ensures better results and nail care.
Nail experts suggest that with darker skin tones, you have a wider range of colors to explore. From bold hues to classic nudes and striking metallics, you can express your unique style. However, avoid very light shades, as they can create a washed-out effect.
These recommended nail polish shades for dark-skinned beauties provide long-lasting wear, intense color payoff, and a luxurious finish without fading or chipping. Choose your favorite shade and elevate your nail game today!
FREQUENTLY ASKED QUESTIONS
1. How do gel nail polishes differ from regular nail polishes in terms of application and longevity?
Gel nail polish is applied with a UV or LED lamp and can last up to two weeks without chipping. In contrast, regular polish dries on its own and usually lasts only a few days before it starts to show wear. Gel polish stays on longer and is less likely to chip or peel than regular polish.
2. How often should nail polishes be replaced or discarded for hygienic purposes?
It’s important to check the PAO (Period After Opening) on nail polishes, which is shown by a number and a letter. Usually, it will be 12M or 24M, meaning the polish should be thrown away 12 or 24 months after opening. Keep track of when you open it and throw it out when it reaches that time.
3. How does using a nail polish thinner help restore older or thickened nail polishes?
To fix old or thick nail polish, use a professional nail lacquer thinner. Add 2-3 drops of thinner to the polish and mix by rolling the bottle between your hands. Test the polish by applying it to a nail. If it spreads smoothly, it’s ready to use. If not, add a few more drops of thinner and test again until you get the right consistency.
4. What are the best practices for applying nail polish to achieve a smooth and even finish?
For a smooth and even nail polish application, follow these steps:
- Clip and file your nails.
- Clean them with nail polish remover.
- Apply a thin layer of base coat.
- Brush the polish smoothly from the base to the tip of each nail.
- Repeat this for every nail.
- Let the first coat dry before adding another layer.
- Apply a thin layer of top coat.
- Clean up any mistakes with nail polish remover.
5. How do earthy or warm-toned nail polish colors appear on darker skin tones?
Earthy or warm-toned nail polish colors can highlight the beauty of darker skin tones by providing rich, vibrant shades that complement the natural warmth of the skin.
CONCLUSION
Choosing the perfect nail polish for dark skin tones can be an exciting journey of self-expression. From bold and vibrant hues to sophisticated neutrals, there’s a shade to complement every style and occasion. The 15 stunning nail polishes highlighted in this guide offer a diverse range of options to inspire your next manicure. Remember, confidence is the ultimate accessory, and the right nail color can elevate your look and boost your self-esteem. So, experiment, have fun, and let your nails shine!