If you’re looking for a way to add texture and volume to your hair while reducing bulk and weight, then thinning scissors might be the tool you need! Thinning scissors, also known as texturizing shears or blending scissors, are a type of haircutting tool with teeth on one or both blades that remove hair as they cut. In this guide, we’ll explore everything you need to know about cutting hair with thinning scissors, from choosing the right pair to techniques and tips for achieving different styles.
What Are Thinning Scissors?
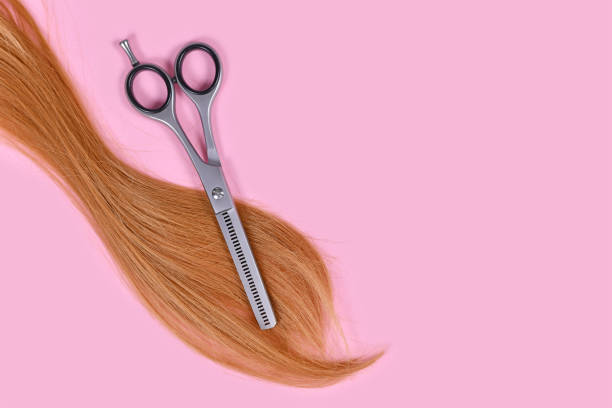
Thinning scissors are specialty hair cutting tools designed to create textured, layered looks by removing some of the hair’s bulk and weight. They have teeth or notches on one or both blades that grab and remove sections of hair as they cut, creating a softer edge than traditional straight edge shears. They can be used to blend layers, soften hard lines and edges, and thin out thick or coarse hair without chopping off too much length.
There are two types of thinning scissors: single-sided and double-sided. Single-sided thinning scissors have teeth on only one blade, while double-sided thinning scissors have them on both. The number of teeth per inch (TPI) can vary, ranging from around 10-40 TPI, with higher numbers indicating finer teeth and a more subtle effect.
Why Use Thinning Scissors?
Thinning scissors offer several benefits over traditional haircutting tools for certain styles and hair types:
- Texture: Thinning scissors can create soft, natural-looking texture and movement in the hair, especially when used to blend layers or create tapering at the ends.
- Volume: By removing some of the hair’s bulk, thinning scissors can add lift and volume to flat or limp hair.
- Control: Thinning scissors allow for precise, controlled hair removal, making them ideal for creating subtle gradations or removing weight from specific areas without sacrificing overall length.
- Versatility: Thinning scissors can be used on a wide range of hair types and styles, from fine to thick, curly to straight, short to long.
How to Choose the Right Pair of Thinning Scissors
- Quality: Look for thinning scissors made from high-quality materials, such as Japanese 440C stainless steel, which is durable, corrosion-resistant, and holds a sharp edge well.
- TPI: The number of teeth per inch determines how much hair is removed with each cut. Finer teeth are better suited for creating subtle texture and blending, while coarser teeth are more suitable for removing bulk quickly.
- Blade Length: Longer blades are better for larger sections of hair, while shorter blades offer more precision for detailed work.
- Comfort: Make sure the handles of the thinning scissors fit comfortably in your hand and don’t cause fatigue or strain over extended use.
Techniques for Cutting Hair with Thinning Scissors
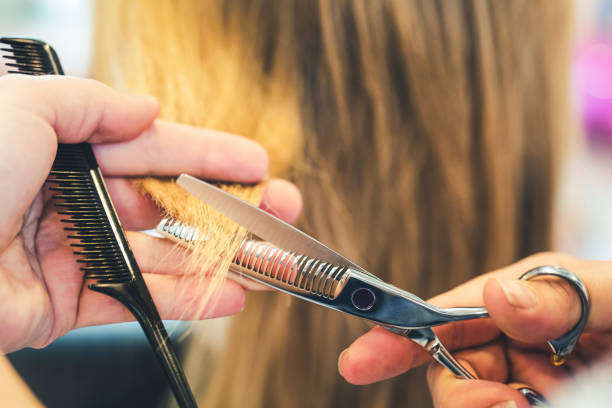
Cutting hair with thinning scissors requires a different technique than traditional haircutting with straight edge shears. Here are some techniques to help you get started:
Point Cutting
Point cutting involves using the tips of the scissors to create small, irregular cuts that remove some of the bulk and create texture. This technique is ideal for creating wispy, layered looks in longer hair.
- Take a section of hair and hold it out from the head at a 45-degree angle.
- Hold the thinning scissors perpendicular to the hair shaft.
- Use the tips of the scissors to make small, upward snips along the length of the hair.
- Release the hair and repeat on other sections as desired.
Slithering
Slithering is a technique that involves moving the thinning scissors through the hair, rather than making clean cuts. This creates soft, feathery texture and removes some of the bulk without sacrificing length.
- Take a section of hair and hold it out from the head at a 45-degree angle.
- Open the thinning scissors and slide them along the length of the hair, using a slicing motion.
- Release the hair and repeat on other sections as desired.
Blending
Blending involves using thinning scissors to soften the transition between different lengths or layers in the hair. This technique is ideal for creating natural-looking, seamless blends.
- Take a section of hair where two lengths or layers meet.
- Hold the thinning scissors perpendicular to the hair shaft.
- Make small, overlapping cuts along the line where the two sections meet, gradually blending them together.
- Repeat on other sections as desired.
Tips and Tricks for Using Thinning Scissors
- Use a light touch: Thinning scissors are designed to remove relatively small amounts of hair with each cut. Avoid trying to remove too much hair at once, which canresult in choppy, uneven results.
- Start conservatively: It’s always easier to remove more hair later than to add it back after you’ve cut too much. Start with a small amount of hair and work your way up gradually.
- Use the right sectioning: Proper sectioning is key to achieving even, balanced results. Section off only the hair you want to thin out, and avoid cutting through too many layers at once.
- Keep the scissors clean: Regularly clean and oil your thinning scissors to keep them functioning properly and prevent rust or damage to the blades.
- Practice makes perfect: As with any new technique, practice on mannequin heads or willing volunteers before attempting on clients.
FAQs
- Can I use thinning scissors on all hair types? Thinning scissors can be used on a wide range of hair types, from fine to thick, curly to straight.
- Do thinning scissors create visible lines in the hair? Thinning scissors are designed to create a softer, more natural-looking edge than straight edge shears. However, improper technique or overuse can result in visible lines or uneven texture.
- How often should I clean my thinning scissors? It’s recommended to clean and oil your thinning scissors after each use to prevent build-up and ensure optimal performance.
- Can I use thinning scissors on wet or dry hair? Thinning scissors can be used on both wet and dry hair, depending on the desired effect and personal preference.
- How do I maintain the sharpness of my thinning scissors? Regularly sharpening or honing your thinning scissors is important to maintain their effectiveness and prevent damage to the blades. It’s recommended to have them professionally sharpened once or twice a year.
Conclusion
Thinning scissors can be a valuable tool in any hairstylist or DIY-er’s arsenal, offering versatility, control, and texture that traditional straight edge shears can’t match. By following proper techniques, choosing the right pair, and practicing regularly, you can master the art of cutting hair with thinning scissors and achieve a wide range of styles and looks. Whether you’re adding volume to limp locks or creating wispy layers in longer hair, thinning scissors can help you achieve the perfect result.