There are plenty of all-natural toothpaste options available, but they can be expensive! My Homemade Toothpaste Recipe with Essential Oils provides a toxin-free way to freshen your breath. Our family loves using this tooth powder to maintain a healthy, clean mouth.
This recipe includes bentonite clay, known for its detoxifying properties. With a touch of stevia for sweetness and essential oils for flavor, this toothpaste tastes amazing!
THE IMPORTANCE OF ORAL HEALTH
Oral health plays a vital role in overall wellness, and problems in the mouth can affect the entire body. Oral issues go far beyond cavities and bad breath—over 80% of disease symptoms stem from mouth problems. Gum disease, for example, increases the risk of heart disease (1), and there is even a connection between mouth bacteria and thickened arteries (2).
Unfortunately, many people face disease-promoting dental procedures because they don’t prioritize oral health. By focusing on preventative care, many of these interventions can be avoided. While there are plenty of advanced techniques, it’s crucial to stick to the basics:
- Brush your teeth – Make sure to brush after every meal. Take your time to remove all food particles thoroughly.
- Floss regularly – Flossing removes stubborn food bits from between your teeth and stimulates your gums, reducing your risk of gum disease. I recommend flossing at night after eating.
- Oil pulling – Have you tried oil pulling? It’s an incredibly effective oral health practice to add to your routine. Learn how to get started with oil pulling today.
- Visit the dentist – Did you know there are holistic dentists? They blend traditional treatments with natural options and often provide alternatives to harmful procedures like mercury fillings. Never skip your dental checkups!
- Use essential oils for oral health – Certain essential oils are proven to support oral hygiene. These oils are great for homemade oral products like toothpaste or mouthwash.
By incorporating these basic practices into your daily routine, you can help maintain optimal oral health and reduce the need for costly or harmful interventions.

3 HARMFUL INGREDIENTS IN TOOTHPASTE
In my opinion, we should be extra cautious with the oral health products we use since we end up ingesting them. Unfortunately, many store-bought products are filled with toxins. Here are just a few of the harmful chemicals commonly found in most tubes of toothpaste:
FLUORIDE
Fluoride is a harmful ingredient commonly found in most oral care products. For years, oral health specialists believed fluoride was essential for healthy teeth, but we now know that’s not true. Fluoride is classified as a neurotoxic chemical, and consuming too much of it can lead to fluoride toxicity (3). This can affect tooth coloring, kidney function, and more. If you have young children at home, this is especially concerning! Many store-bought toothpaste brands have kid-friendly flavors that encourage little ones to use more than necessary, increasing the risk of fluoride toxicity.
ASPARTAME
You wouldn’t brush your teeth with sugar, so many companies add a sugar substitute called aspartame to improve the taste of toothpaste. Aspartame is often marketed as a low-calorie alternative to sugar, but studies show it can lead to increased food consumption (4). It can also trigger headaches, spiked blood sugar levels, and other side effects (5). In this recipe, we use stevia as a sweetener instead. It tastes better than aspartame, and best of all, it has no harmful side effects!
SODIUM LAURYL SULFATE
This toxin is responsible for the foamy texture in most toothpastes. Sodium lauryl sulfate (SLS) is an environmental toxin that can wreak havoc on your body (6). Interestingly, researchers use SLS to intentionally create skin and eye irritations during product testing. SLS can also cause canker sores (7), which is the complete opposite of promoting oral health! It’s one of the worst toxins for your body and should be avoided at all costs.
NATURAL ORAL HEALTH INGREDIENTS

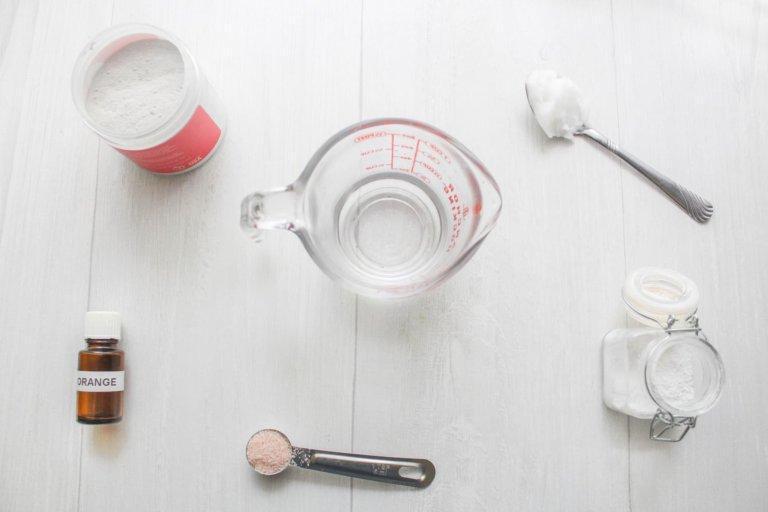
There’s a better way to take care of your teeth, and it starts with using natural, non-toxic ingredients. Here’s what you’ll need to make this recipe:
- Essential Oils: Many essential oils have antimicrobial properties, making them ideal for toothpaste. They can freshen your breath, fight plaque, and even help with canker sores. Plus, they add a nice scent! Here are some of my favorite combinations:
- Peppermint: Fights bad breath, smells fresh, and gives you a burst of energy in the morning!
- Clove and Orange: A soothing blend for sensitive teeth.
- Eucalyptus, Rosemary, and Orange: Helps with whitening your teeth.
- Lime, Lemon, and Grapefruit: Great for boosting your mood!
- Wintergreen: Offers a minty freshness, perfect for tackling stubborn bad breath.
- Distilled Water: Tap water often contains fluoride, which we want to avoid. It can also have other toxins that contribute to health issues like obesity, diabetes, and birth defects. I recommend using distilled or purified water for the cleanest, safest option.
- Bentonite Clay: This clay, derived from volcanic ash, helps absorb toxins in the mouth while providing essential minerals that can strengthen your teeth. Bonus: It can also aid in whitening your teeth.
- Stevia Powder: Stevia is a natural sweetener that helps balance out the taste of bentonite clay. A little goes a long way!
- Himalayan Pink Salt: Saltwater is often recommended after dental surgery to reduce bacteria (8), and salt is highly effective for combating bad breath. Plus, if you have sensitive teeth, Himalayan salt can help reduce discomfort.
This simple, natural recipe is all you need to promote healthy, toxin-free oral care!
HOMEMADE TOOTHPASTE RECIPE
This DIY is super easy to make! In just a few minutes, you’ll have everything you need to detox your mouth naturally.
To turn the tooth powder into toothpaste, simply add ¼ cup of hot purified or distilled water and 1 tablespoon of extra-virgin, unrefined coconut oil. You can add more coconut oil as needed to achieve your desired consistency.
For added teeth-whitening benefits, open capsules of activated charcoal and mix them into the tooth powder. After using this toothpaste, follow up with mouthwash, and be sure to brush your teeth again after rinsing.
Since bentonite clay can react with metal, it’s important to make and store this recipe in a glass or ceramic container to preserve its effectiveness.
STEP ONE: MIX THE ESSENTIAL OILS

Mix your chosen essential oils in a small glass container or glass measuring cup, then set aside for later use.
STEP TWO: ADD DRY INGREDIENTS

Place the bentonite clay, stevia, and sea salt in a food processor and blend until well combined.
STEP THREE: ADD ESSENTIAL OILS
With the machine running, slowly add the mixed essential oils to the food processor and process for a few more seconds. The mixture should be granular and slightly damp.

STEP FOUR: BRUSH YOUR TEETH

Store the mixture in a glass jar with a lid. To use, apply just enough of the homemade tooth powder or toothpaste to cover your toothbrush. Wet the brush with water and brush as usual.
CONCLUSION
In conclusion, this all-natural homemade toothpaste and tooth powder is a simple, effective, and toxin-free way to maintain optimal oral health. By using ingredients like bentonite clay, essential oils, and natural sweeteners, you can avoid harmful chemicals found in store-bought products while reaping the benefits of a cleaner, healthier mouth. With just a few easy steps, you can create a product that not only freshens your breath but also supports long-term oral wellness. Enjoy the peace of mind that comes with knowing exactly what’s in your toothpaste, and feel good about giving your family a safer, more natural option for oral care.