How Long After A Tattoo Can You Swim?

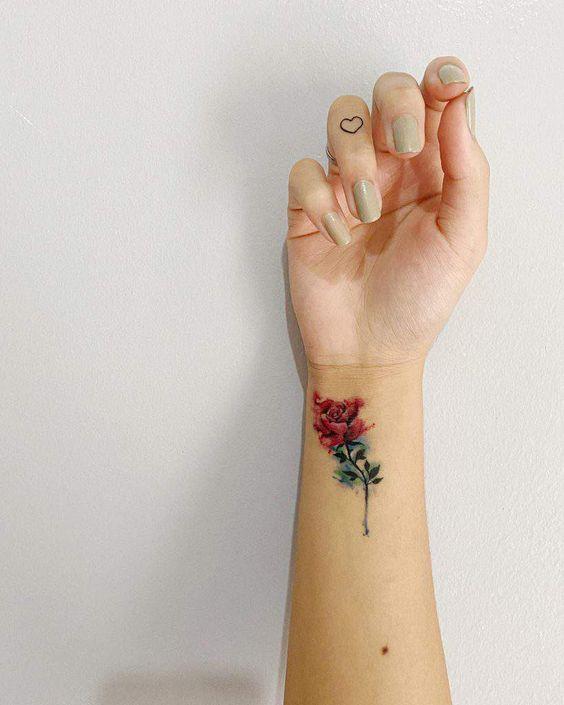
If you’re someone who loves tattoos, then it’s likely that you’ve wondered how long after a tattoo can you swim. 

After all, you don’t want to risk ruining your brand new ink by jumping in the pool or ocean too soon! In this article, we’ll answer this question and provide you with everything you need to know about swimming after getting a tattoo.

Why you need to wait to swim after getting a new tattoo

Infection Risk

During the initial healing period, the tattooed area is essentially an open wound. Swimming in pools, hot tubs, or natural bodies of water exposes the tattoo to bacteria, germs, and other pathogens that can increase the risk of infection. Infections can lead to complications, scarring, and a less satisfactory healing outcome.

Chemicals

Pools and hot tubs often contain chlorine and other chemicals that can be harsh on a healing tattoo. These chemicals can irritate the skin, cause itching, and potentially affect the tattoo’s appearance and longevity.

Moisture

Tattoos need to breathe and go through a natural healing process that involves scabbing and peeling. Prolonged exposure to moisture from swimming can disrupt this process, potentially leading to color fading, patchiness, or an uneven healing pattern.

Compromised Immune System

While your tattoo is healing, your body’s immune system is working to repair the damaged skin. Engaging in activities like swimming can divert your immune system’s resources away from the healing process, potentially slowing down recovery.

Color Preservation

Immersion in water, especially in natural bodies of water, can wash away some of the tattoo’s pigment and affect its vibrancy. To preserve the tattoo’s color and appearance, it’s best to avoid swimming until it has fully healed.

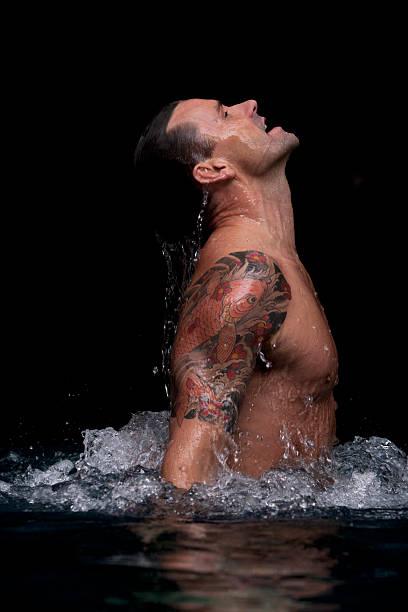
When Can You Swim After Getting A Tattoo?

The answer is that you should wait at least 2-3 weeks before swimming after getting a tattoo, during which the tattooed area goes through various stages of recovery, including scabbing, peeling, and settling into the skin. Swimming, especially in pools, hot tubs, or natural bodies of water, can expose the tattoo to bacteria, chemicals, and prolonged moisture, increasing the risk of infection, color fading, and other complications. To protect your new tattoo, it’s essential to follow your tattoo artist’s aftercare instructions diligently and avoid swimming until you receive their clearance that the tattoo is fully healed and sealed.

How To Take Care Of Your Tattoo Before and after Swimming

If you do decide to go for a swim after your tattoo has fully healed, make sure you follow these tips to properly care for your tattoo:

Before

  • Gently clean the tattooed area with mild, fragrance-free, and non-alcoholic soap.
  • Apply a thin layer of ointment or moisturizer to your tattoo as directed by your tattoo artist.
  • Avoid exposing your tattoo to direct sunlight or tanning beds.
  • Consider using a waterproof, transparent, and breathable bandage specifically designed for covering tattoos before swimming.
  • Try to minimize the duration of your swim, as prolonged exposure to water can still pose risks to the healing tattoo.

After

  • Rinse your tattoo with clean, cool water to remove any chlorine or salt.
  • Gently pat your tattoo dry with a clean towel.
  • Apply a moisturizer or ointment to your tattoo to keep it hydrated.
  • Avoid exposing your tattoo to direct sunlight or tanning beds for at least 24 hours after swimming.

What should you do if you Already got a Tattoo Wet?

While it’s not ideal, minor exposure to water is unlikely to cause significant harm if you take the appropriate steps to minimize potential damage. Begin by gently patting the tattoo dry with a clean, disposable paper towel or tissue, avoiding any rubbing or friction. This will help remove excess moisture and contaminants without disrupting the healing process.

After drying the tattoo, ensure you clean it gently with lukewarm water if available and then pat it dry again. Following this, reapply the recommended tattoo-specific ointment or moisturizer as outlined in your aftercare instructions. Keep a close watch on the tattoo for any signs of infection or irritation, such as increased redness or swelling. By promptly addressing the situation and maintaining your regular aftercare routine, you can help ensure that the healing process continues as smoothly as possible, even after an accidental exposure to water.

FAQs 

  1. Can I go in a hot tub or sauna after getting a tattoo? No, it’s recommended to avoid hot tubs and saunas for at least 2-3 weeks after getting a tattoo as the heat and moisture can increase the risk of infection.
  2. What should I do if my tattoo gets wet before it’s fully healed? If your tattoo gets wet before it’s fully healed, gently pat it dry with a clean towel and apply a thin layer of ointment or moisturizer to keep it hydrated.
  3. Can I swim with a waterproof bandage covering my tattoo? Yes, using a waterproof adhesive bandage can be a good way to protect your tattoo while swimming, but make sure to change the bandage frequently and follow proper care instructions.
  4. Is it safe to swim in a pool or ocean after getting a tattoo if I have sensitive skin? If you have sensitive skin, you may need to take extra precautions when swimming after getting a tattoo. Talk to your tattoo artist and dermatologist for personalized recommendations.
  5. Can I shave over my tattoo if I want to swim? It’s generally recommended to wait until your tattoo is fully healed before shaving over it. Shaving too soon can irritate your skin and increase the risk of infection.

final Takeaway

Getting a tattoo is an exciting and personal decision, but it’s important to take proper care of your tattoo during the healing process. Waiting at least 2-3 weeks before swimming after getting a tattoo can help prevent complications and ensure that your tattoo looks its best for years to come. Remember to follow proper care instructions and talk to your tattoo artist and dermatologist if you have any concerns or questions about swimming after getting a tattoo.

Ombre Brows Healing Process: Day by Day Overview

The art of enhancing eyebrows has evolved significantly over the years, and one technique that has gained immense popularity is ombre brows. Offering a natural gradient effect that seamlessly transitions from a lighter start to a slightly darker tail, ombre brows have become a sought-after choice for those looking to achieve stunning, long-lasting brows. However, the journey to achieving picture-perfect ombre brows doesn’t end with the initial procedure; it’s just the beginning. The healing process plays a crucial role in determining the final outcome of your ombre brows, and understanding its intricacies is essential for anyone considering or undergoing the procedure. In this comprehensive guide, we shed light on the healing process, providing valuable insights, tips, and precautions to ensure your ombre brows heal beautifully and leave you with the brows of your dreams. Whether you’re a first-timer or someone looking to refresh their ombre brow experience, join us as we uncover the journey of ombre brow healing and unveil the secrets to achieving remarkable results.

What Are Ombre Brows?

Ombre brows, also known as powdered brows or microshading, are a semi-permanent makeup technique used to create a gradient effect on the eyebrows. Unlike traditional eyebrow tattooing, which results in harsh and solid lines, ombre brows offer a more subtle and natural look. By using a combination of lighter and darker pigments, the artist creates a soft transition from the front to the tail of the brow, mimicking the appearance of filled-in eyebrows.

Healing Process: Day by Day

Once you’ve had your ombre brows done, it’s important to be aware of the healing process and what you can expect during this time. Understanding the stages of healing will help you take better care of your brows and achieve optimal results. Let’s explore the various phases:

Initial Redness and Swelling

Immediately after the procedure, it is normal to experience some redness and swelling around the treated area. This is a natural response of your skin to the micro-pigmentation process. The intensity of redness and swelling varies from person to person and typically subsides within 24-48 hours.

Scabbing and Peeling

Around the third or fourth day, you may notice some scabbing and peeling of the treated area. This is a crucial part of the healing process as the old, dead skin sheds, revealing the fresh and healed skin underneath. It’s important not to pick or scratch the scabs, as this could lead to pigment loss or scarring.

Color Fading and Settling

In the weeks following the procedure, you may experience some color fading. This is completely normal and expected, as the top layer of the skin exfoliates and the pigment settles into the deeper layers. The final result will be more apparent after the healing process is complete.

Touch-Up Session

After approximately 4-6 weeks, it is recommended to schedule a touch-up session with your artist. This allows them to assess the healed results and make any necessary adjustments. The touch-up session ensures that your ombre brows last longer and maintain their desired shape and color.

How to Care for Your Ombre Brows during the Healing Process

Proper aftercare plays a vital role in the healing process of ombre brows. By following these essential care tips, you can facilitate optimal healing and prolong the longevity of your beautiful brows:

  • Keep the area clean: Gently cleanse your eyebrows twice a day using a mild cleanser or a recommended eyebrow cleanser. Avoid using harsh soaps or rubbing the area vigorously.
  • Avoid excessive moisture: During the first week, it’s important to avoid swimming, saunas, hot tubs, and excessive sweating. Moisture can interfere with the healing process and result in color loss.
  • Apply aftercare ointment: Follow your artist’s instructions on applying a thin layer of aftercare ointment to keep the area moisturized and protected. Be sure not to over-apply the ointment, as it can hinder the healing process.
  • Avoid sun exposure: Protect your ombre brows from direct sunlight and tanning beds during the healing process. UV rays can fade the pigment and affect the final outcome.
  • Avoid makeup and facial treatments: Refrain from using makeup, facial cleansers, or undergoing any chemical peels or laser treatments near the treated area until your brows are fully healed.

Pros and Cons of Ombre Brows

Pros:

  • Natural and soft appearance
  • Suitable for various skin types
  • Long-lasting results (up to 2 years)
  • Saves time on daily eyebrow makeup routine
  • Minimal discomfort during the procedure

Cons:

  • Semi-permanent, not permanent
  • Initial redness and swelling
  • Requires proper aftercare for optimal results
  • Color fading over time## Alternatives to Ombre Brows

How to Prepare for and Get Ombre Brows

Getting ombre brows requires careful preparation to ensure a successful procedure and healing process. Follow these step-by-step instructions to prepare for and get your ombre brows:

  • Do your research: Look for reputable artists and studios that specialize in ombre brows. Read reviews, view their portfolios, and schedule consultations to find the right fit for you.
  • Consultation: Meet with your chosen artist to discuss your expectations, desired shape, and color. They will assess your skin type, explain the procedure, and answer any questions you may have.
  • Preparation: Before the procedure, avoid using any retinol creams or undergoing chemical peels at least two weeks prior. These treatments can thin the skin and affect the outcome of your ombre brows.
  • Procedure Day: Arrive at the studio with clean skin and no makeup on the brow area. Your artist will numb the area and begin the ombre brow procedure, layering pigment to create the desired gradient effect.
  • Aftercare Instructions: Listen carefully to your artist’s aftercare instructions. Follow the provided guidelines for cleansing, applying ointment, avoiding moisture, and protecting from sun exposure.
  • Healing Process: Allow your brows to heal naturally without picking or scratching at any scabs that form. Avoid excessive sweating, swimming, and wearing makeup near the treated area until fully healed.
  • Touch-Up Session: Schedule a touch-up session with your artist around 4-6 weeks after the initial procedure. This allows them to perfect the shape, color, and fill in any areas that may have faded during the healing process.

Comparing Ombre Brows to Other Eyebrow Techniques

To help you make an informed decision, let’s compare ombre brows to other popular eyebrow techniques:

  • Ombre Brows vs. Microblading: While both techniques create semi-permanent eyebrows, ombre brows give a softer and more powdered effect, whereas microblading creates hair-like strokes for a bolder look.
  • Ombre Brows vs. Henna Brows: Ombre brows provide longer-lasting results compared to henna brows, which typically last up to six weeks. Henna brows are ideal for those who want to experiment with different shapes and colors before committing to a permanent option.
  • Ombre Brows vs. Traditional Tattooing: Ombre brows offer a more natural and subtle appearance compared to traditional eyebrow tattooing, which can result in harsh and solid lines. Traditional tattooing is a permanent solution, while ombre brows are semi-permanent.

Best Ombre Brows Artists and Studios

Choosing the right artist and studio for your ombre brows is crucial to achieving the best results. Here are a few renowned artists and studios known for their exceptional ombre brow work:

  • Brow Design International: With a team of highly skilled artists, Brow Design International offers top-notch ombre brow services. They prioritize client satisfaction and create natural-looking brows tailored to individual preferences.
  • PhiBrows Academy: The PhiBrows Academy is recognized globally for its advanced microblading and ombre brow techniques. Their trained artists adhere to strict standards, ensuring precision and artistic finesse in every procedure.
  • Lux Brows Studio: Lux Brows Studio specializes in creating customized ombre brows that enhance facial features. Their talented artists use cutting-edge techniques and high-quality pigments to deliver stunning and long-lasting results.
  • Anastasia Beverly Hills: Known for their expertise in eyebrow products, Anastasia Beverly Hills also offers professional ombre brow services. Their skilled artists masterfully blend pigments to achieve natural-looking gradients that complement each client’s unique style.
  • The Eyebrowdery: The Eyebrowdery is renowned for its exceptional semi-permanent makeup services, including ombre brows. Their artists employ meticulous attention to detail to create beautifully defined brows that frame the face effortlessly.

Conclusion

Ombre brows provide a fantastic option for individuals seeking well-defined and long-lasting eyebrows. This technique offers a soft, gradient effect that enhances facial features and eliminates the need for daily brow maintenance. By following proper aftercare instructions and consulting with a skilled artist, you can enjoy beautiful ombre brows that boost your confidence and streamline your beauty routine.

FAQs 

1. How long do ombre brows typically last? Ombre brows can last anywhere from one to three years, depending on various factors such as skin type, aftercare, and lifestyle. Regular touch-up sessions can help extend their lifespan.

2. Are ombre brows suitable for all skin types? Yes, ombre brows are suitable for most skin types, including oily, dry, and combination skin. However, it’s essential to consult with an experienced artist who can assess your skin and provide personalized advice.

3. Is the ombre brow procedure painful? Most artists apply a numbing cream before the procedure to minimize discomfort. While everyone’s pain tolerance varies, many individuals report minimal discomfort during the ombre brow procedure.

4. Can I still shape my ombre brows after the procedure? It’s best to avoid shaping or plucking your ombre brows yourself. Leave the shaping to a professional to ensure your brows maintain their desired shape and symmetry.

5. Can I wear makeup on my ombre brows? During the healing process, it’s recommended to avoid applying makeup directly on the treated area. Once fully healed, you can wear makeup as usual, but be gentle when removing it to avoid scrubbing the brow area.