HOW TO DO DIP NAILS AT HOME

Doing dip nails at home is not only a creative experience but also a fantastic way to express personal style. This process not only provides a sense of autonomy but also helps you save time and costs. If you’re unsure how to create dip nails at home, read this article to gain a better understanding of each step. Keep reading!

WHAT ARE DIP NAILS?

A dip powder manicure is a technique that involves the application of both color and a resilient acrylic finish to the nails. The process begins by applying a base, reminiscent of super glue, onto the nails, followed by a dipping step into a colored powder. After layering the powder through successive applications, an activator is then employed to solidify the manicure, transforming it into a robust shell-like coating. This method not only adds vibrant color to the nails but also provides a durable and protective finish, ensuring a long-lasting and aesthetically pleasing result.

WHY SHOULD I GET A DIP MANICURE?

Dip nail manicures boast remarkable durability. Typically, I can enjoy a set of dip powder nails for at least two weeks, even though I’m known for frequently peeling off regular polish. The use of the appropriate polishes in dip powder application results in a robust, thick layer that adheres firmly to the nails, rendering it nearly impervious to peeling. Despite my rough treatment of my nails, following these steps ensures minimal chipping, and if any occurs, it’s usually quite minor.

WHY SHOULD I DO DIP NAILS AT HOME?

The most advantageous aspect of performing your own dip manicures is the significant cost savings compared to visiting a salon. With a kit priced under $50, you can achieve numerous applications. This is approximately the cost of a single professional dip nails session Moreover, it’s a time-efficient process for me. I can complete my nails in an hour or two every few weeks while watching TV at night, a time when I would likely be using my phone or watching TV anyway. This is a much more convenient alternative to spending hours at a nail salon.

WHAT DO YOU NEED TO DO DIP NAILS AT HOME?

At-home nail dip kits typically include dip colors, bond, base, seal protect, top coat, and clear dip powder. If not using a kit, you’ll need to buy these items separately. Besides powder and liquid polishes, gather general supplies like a nail buffer, file, dust brush or lint-free towel, cuticle pusher, and alcohol. Optionally, consider a dip powder recycling system and cuticle oil.

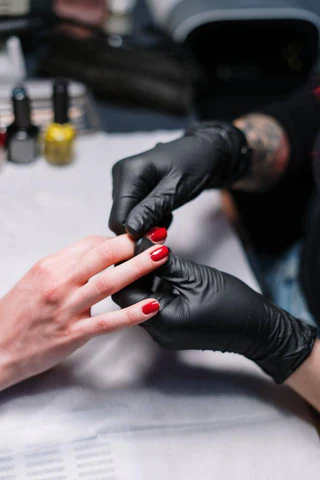
HOW TO APPLY DIP NAILS AT HOME 

Use polish remover as well as a cuticle pusher

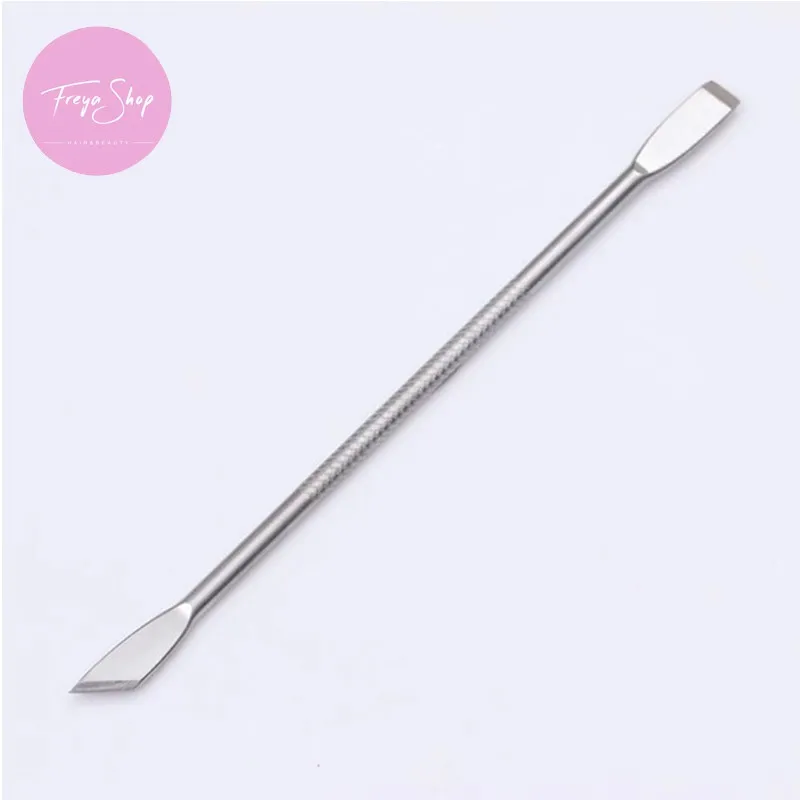
 If there is existing polish on your nails, employ a non-acetone nail polish remover on a lint-free pad to remove it. Use a cuticle pusher to delicately push back your cuticles. Then, gently eliminate any excess cuticle protruding with a cuticle trimmer or scraper. By following these steps, you create space for new nail growth, enhancing the longevity of your manicure before requiring a refill.

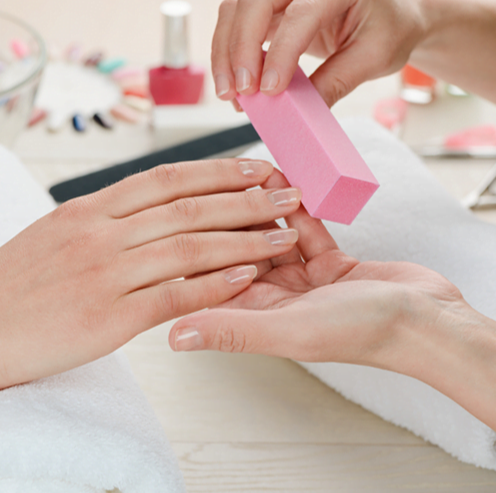
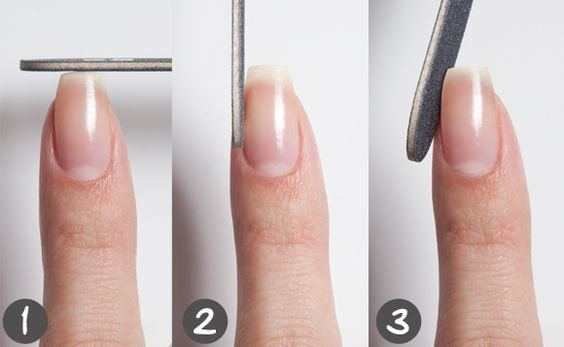
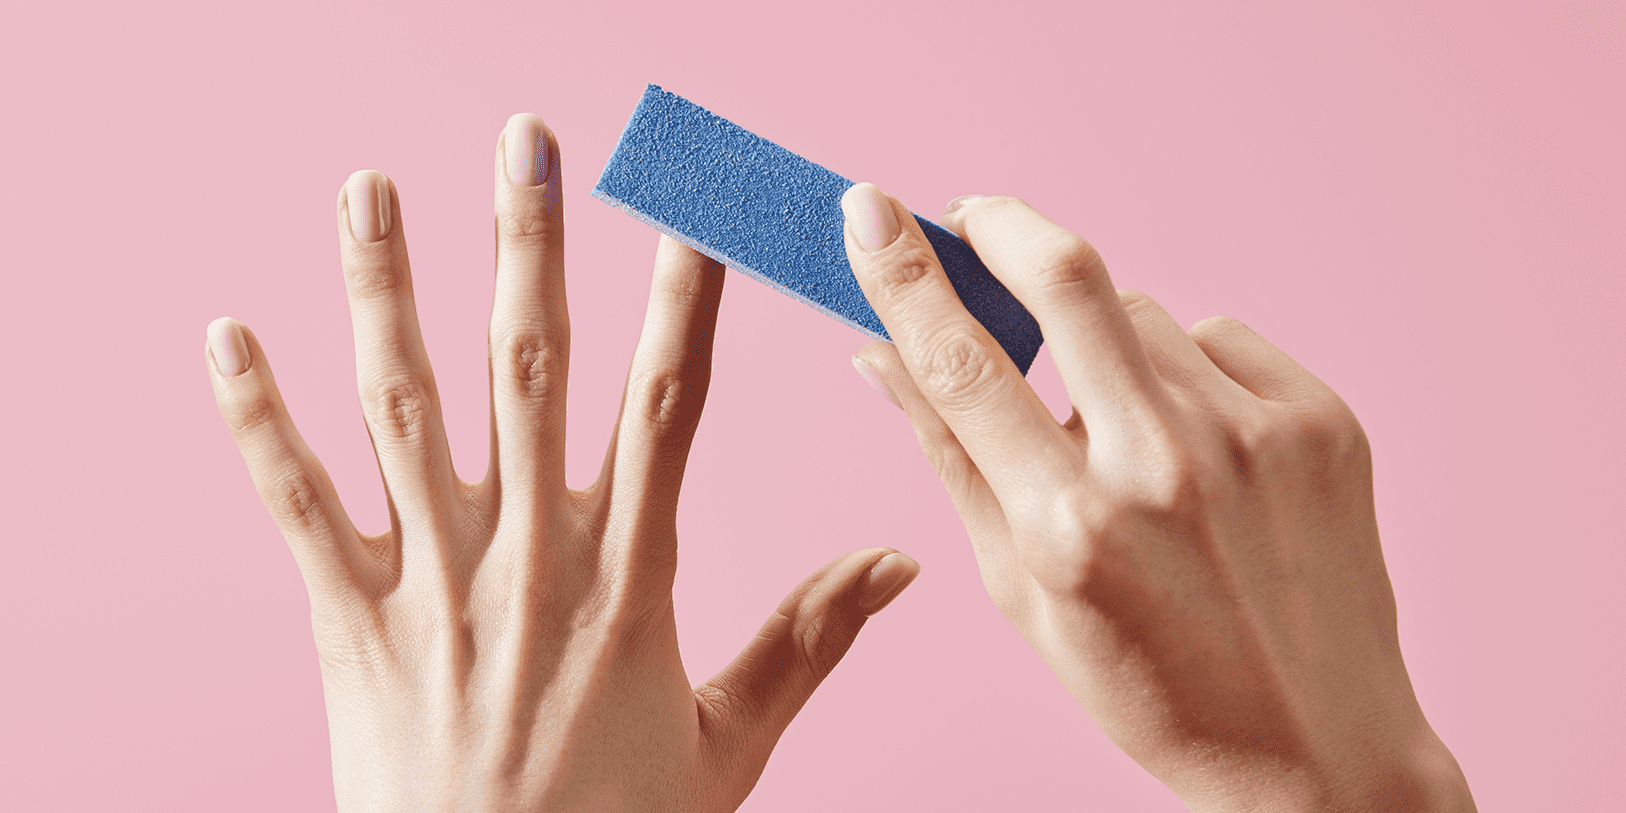
Buff the top surfaces of the nails

Regardless of whether your nails are natural, acrylic, or gel, ensure the surfaces are smooth by manually filing them. Utilize a 180 grit file or block, or opt for a natural nail stone. Clear away the filing residue using a nail brush or a makeup powder brush.

Pay special attention to buffing the grooves and the cuticle area for a polished finish.

File away any problematic areas

Inspect the edges of your nails for any signs of looseness or damage. Additionally, check for any lifting if you are performing a refill on a previous dip manicure. Employ a coarse nail file (100 or 180 grit) to address any such areas. If you don’t have tips applied already and wish to add them for added length, trim your natural nails to a short length. Utilize the nail file to smooth the edges for a polished finish.

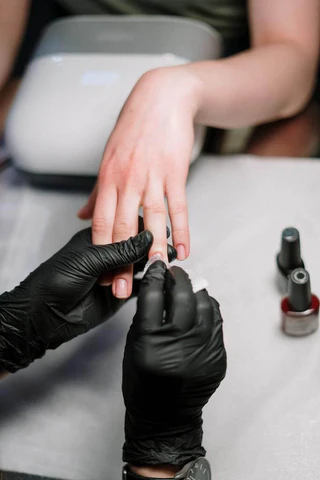
Sanitize your nails with alcohol

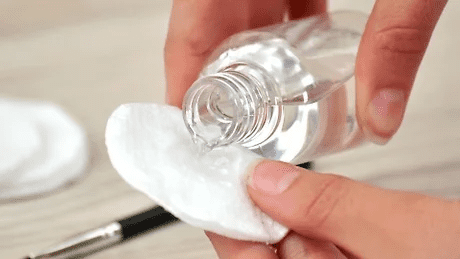
Moisten a paper towel or lint-free pad with alcohol or nail sanitizer, which can be in the form of an antiseptic spray or a pourable container. Gently rub the dampened towel over your nails and fingers, moving from the nearest knuckle to your cuticles and down towards your nails. This process effectively cleans and dehydrates the nail surface, ensuring they are properly prepared for a dip manicure. The goal is to avoid sealing in any bacteria or grime during the application.

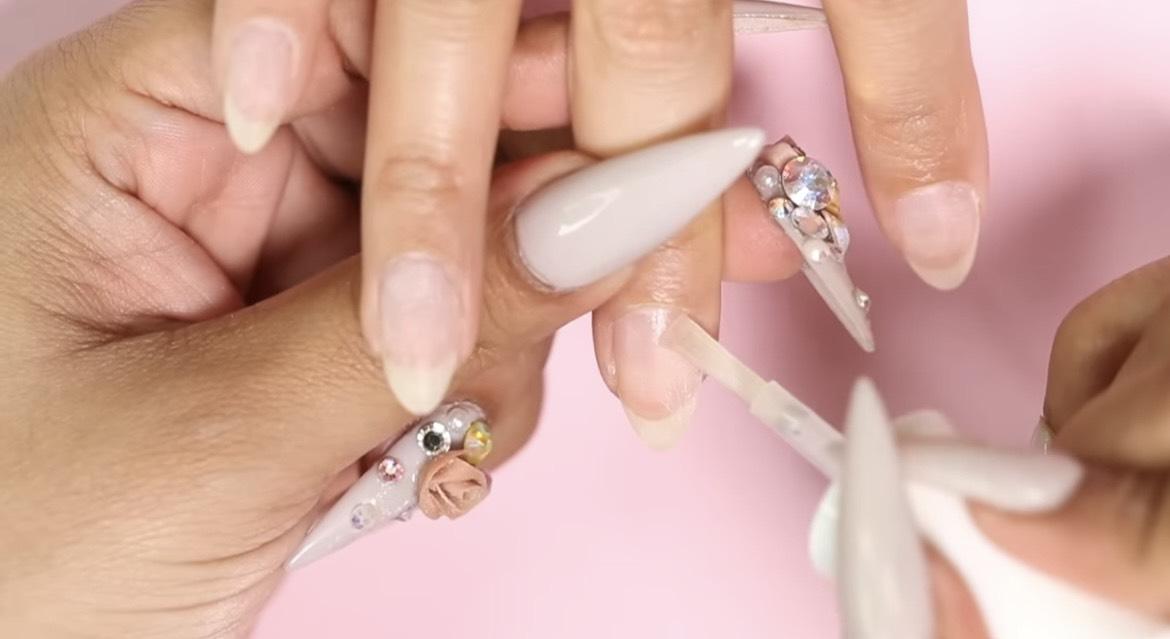
Find the right-sized tips

To lengthen your nails, select tips that cover no more than one-third of your nail bed. Ensure each tip spans the entire width of your nail, from groove to groove, without extending onto your skin. Apply tip resin to the wells of the tips. Gently but firmly hold each tip to the nail at a 45-degree angle for twenty seconds. In case you can’t find a nail tip of the right size, use a nail file to make minor adjustments for a secure fit. Pinch the sides of the tips briefly to adhere them to the curvature of your nail edges. Be cautious not to get resin on your fingers.

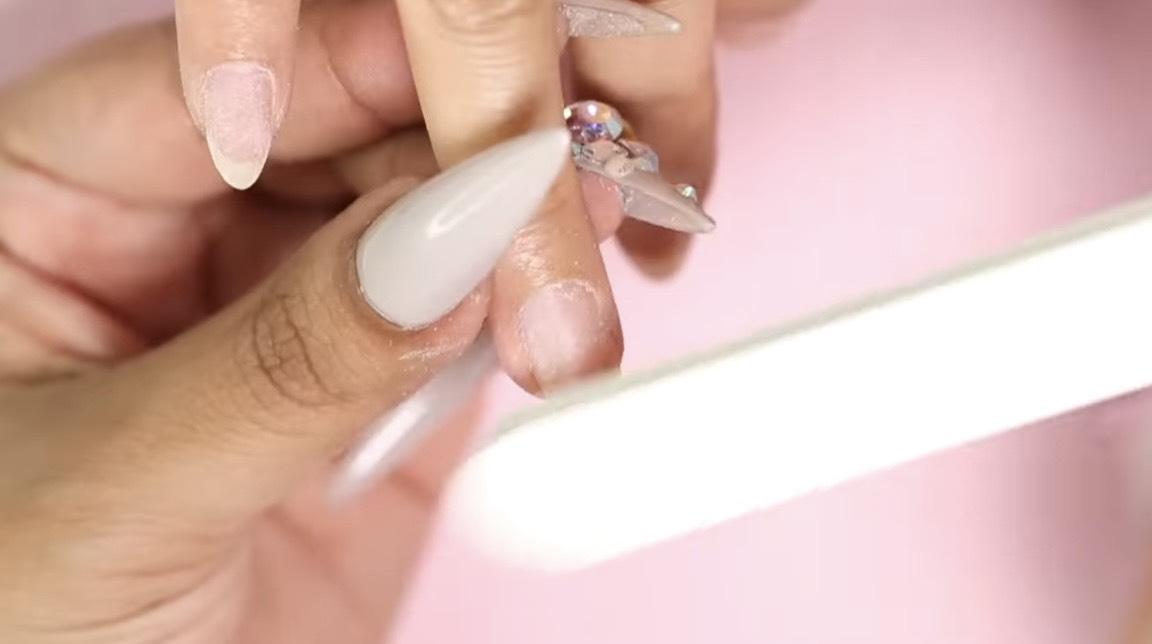
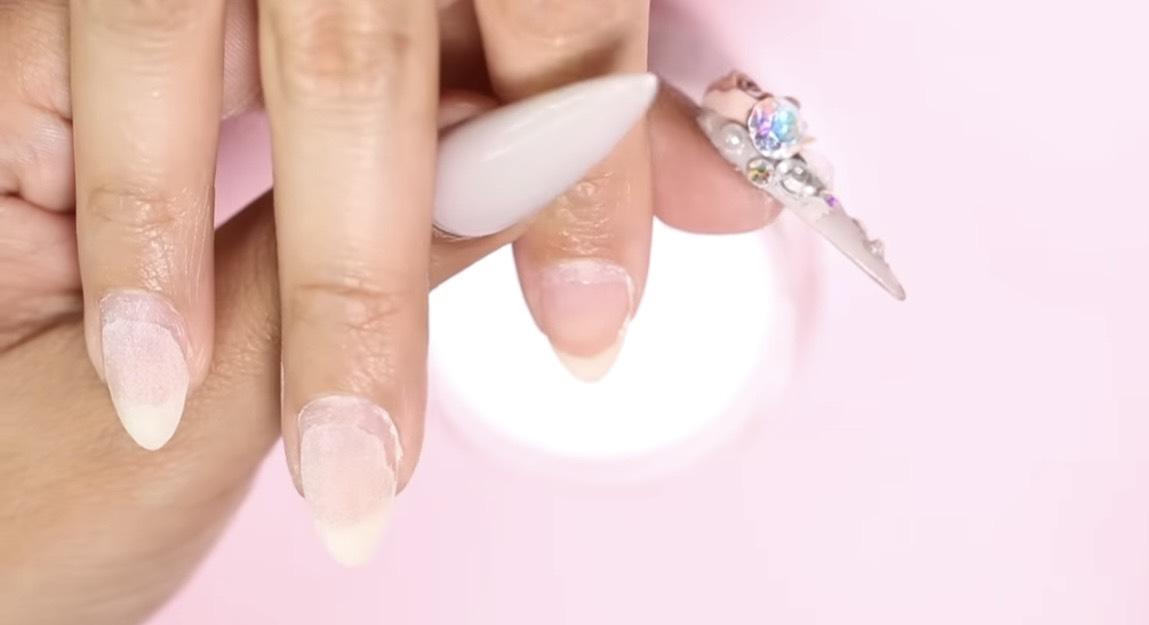
Trim and file the tips

File the edges of the tips evenly across. Buff the top surfaces of the tips to eliminate their shine. Proceed to buff the entire nails.

COATING YOUR NAILS WITH POWDER
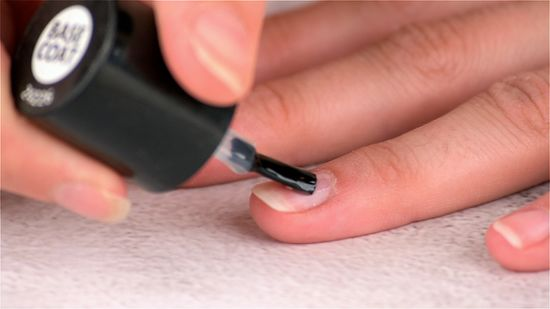
Paint on the bonder

Follow the steps outlined in this procedure for each nail individually. Apply the product in small strokes, beginning approximately 1/16” away from your cuticles. Ensure even spreading to prevent any buildup near the cuticle area. Allow it to sit for one minute.

Brush resin onto your nails

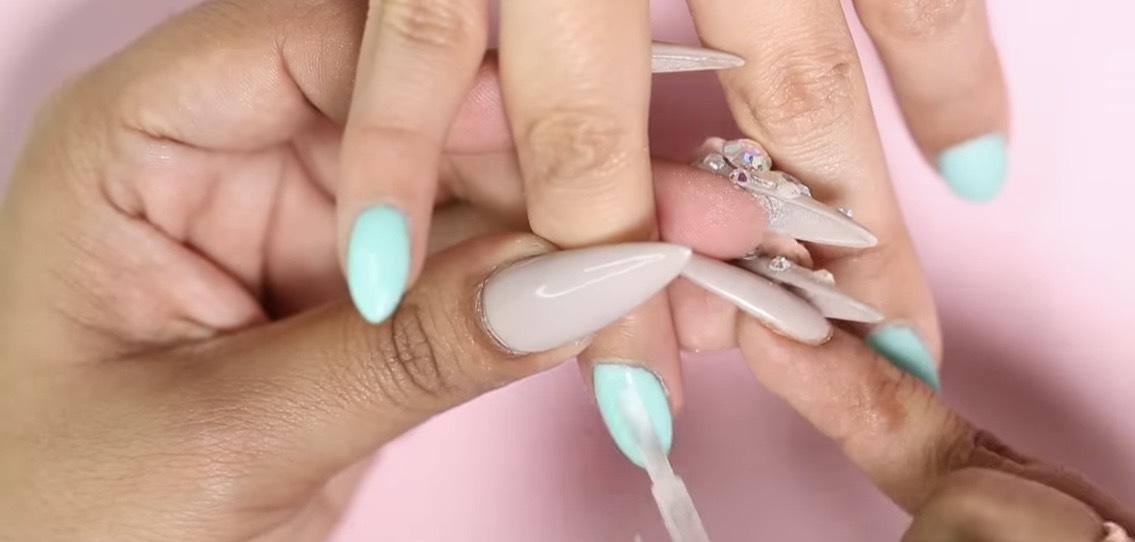
Apply the resin methodically and uniformly, using the brush applicator’s belly to dot it on rather than employing strokes similar to nail polish. Strive for an even and neat application, with particular attention to creating a clean edge just above the cuticle, as this will be the foundation for the powder adhesion. For a fill, if two weeks have passed since your last dip manicure, apply resin to your desired thickness, such as three to four coats. No additional powder application is necessary at this stage. If you’re conducting a manicure on your natural nails or it has been three or more weeks since your last dip manicure, apply a single coat of resin at this point.

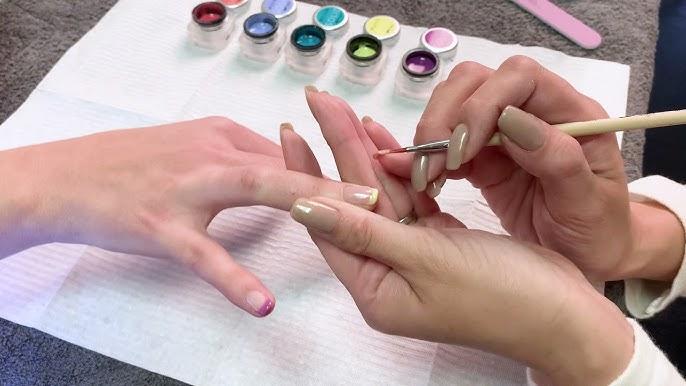
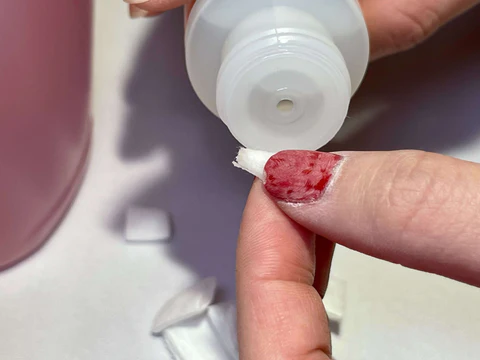
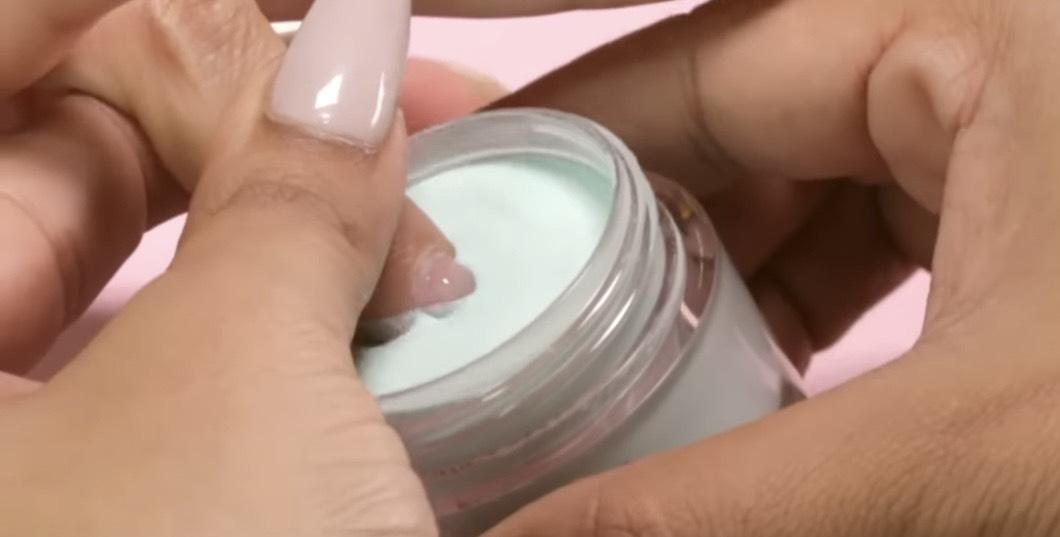
Dip your finger into the container of clear nail powder

Start by shaking the sealed container of powder thoroughly. After opening the container, use a nail stick or pusher to mix the powder. Gently push your finger forward into the container and roll it softly. Allow your finger to remain in the powder for five seconds. Lift your finger and tap the edge of the container. Then, using your other hand, tap the dipped finger to shake off excess powder back into the container. Once the nail has dried, employ a nail brush to eliminate any remaining excess powder over a paper towel. Avoid using colored powder at this stage. If you wish to add color, that step will come after applying more resin.

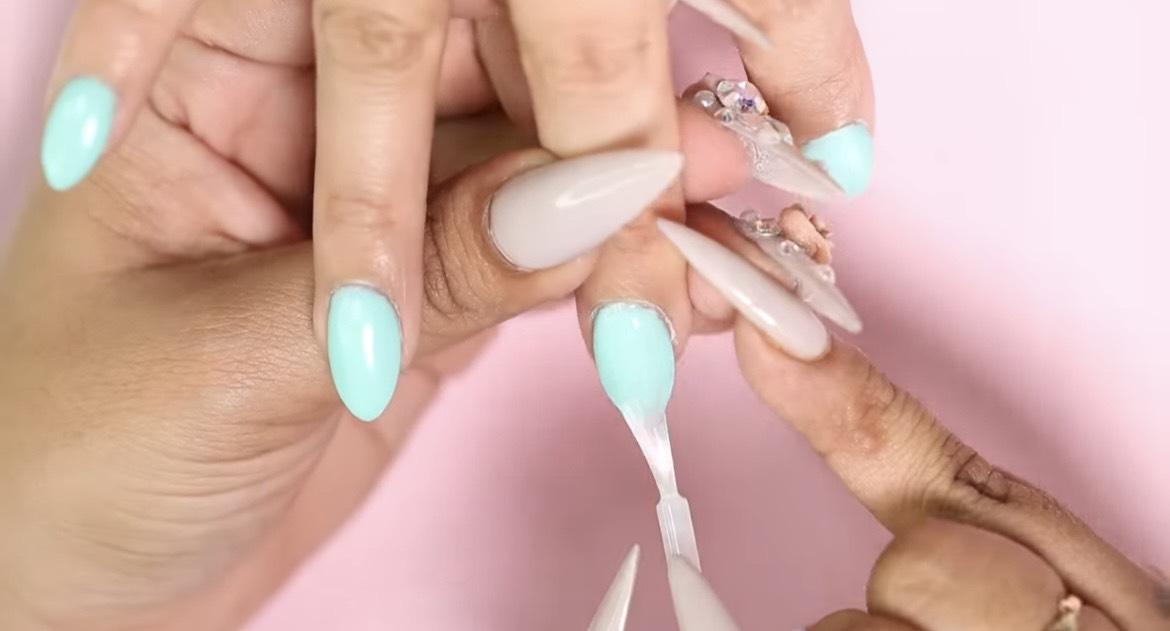
Apply more resin and powder

Cover the entire nail, including the tips, with a layer of resin. Apply it slowly and evenly across the nail surface. If you wish to incorporate colored powder, this is the appropriate stage to do so! Dip your finger into the nail powder once again, then eliminate any surplus powder. Follow up with a third and final application of resin. If you desire, you can repeat this step once more to attain a slightly thicker and stronger manicure.

CURING AND FINISHING THE NAILS

Brush on activator

Apply it using strokes, much like you would with regular nail polish. Let it sit on the nails for five seconds. Follow up with a second coat and allow that to sit for another five seconds.

File the nail edges to dull and shape them

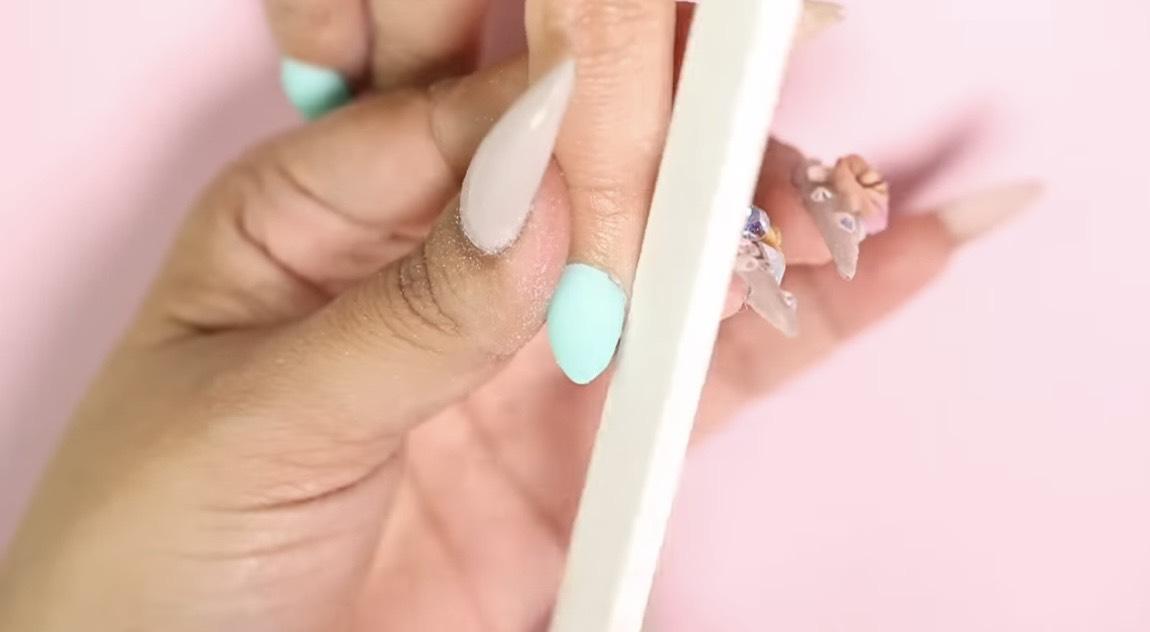
Employ a soft-grid file on the exposed edges and lateral sides of the nails.

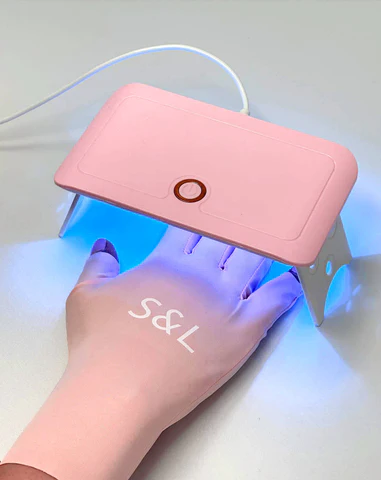
Finish with a top coat

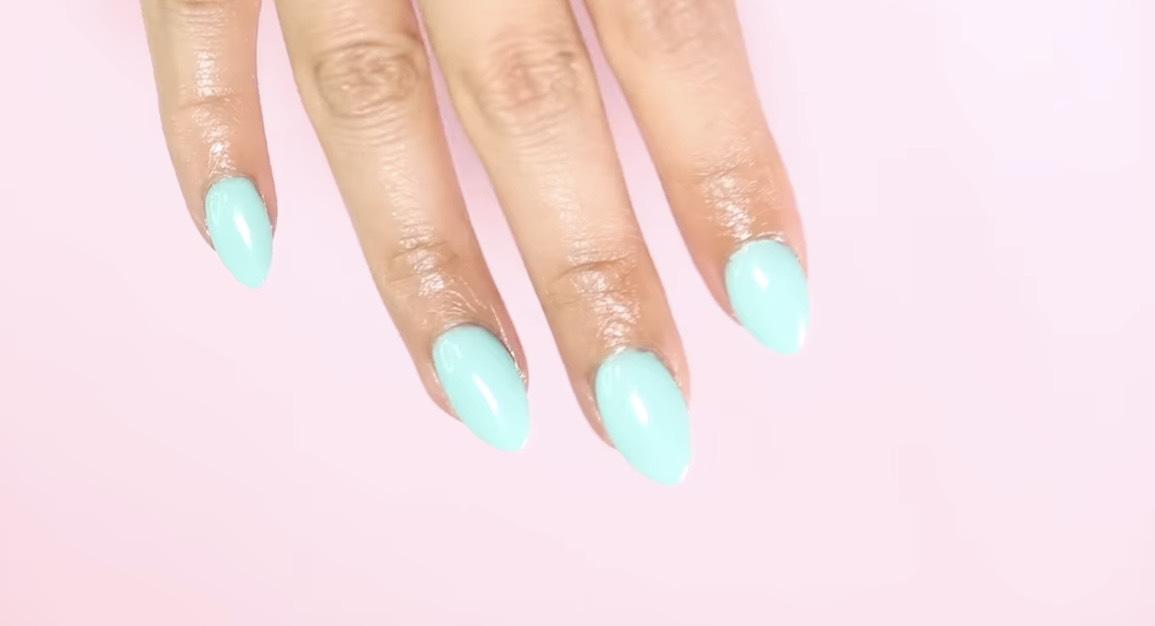
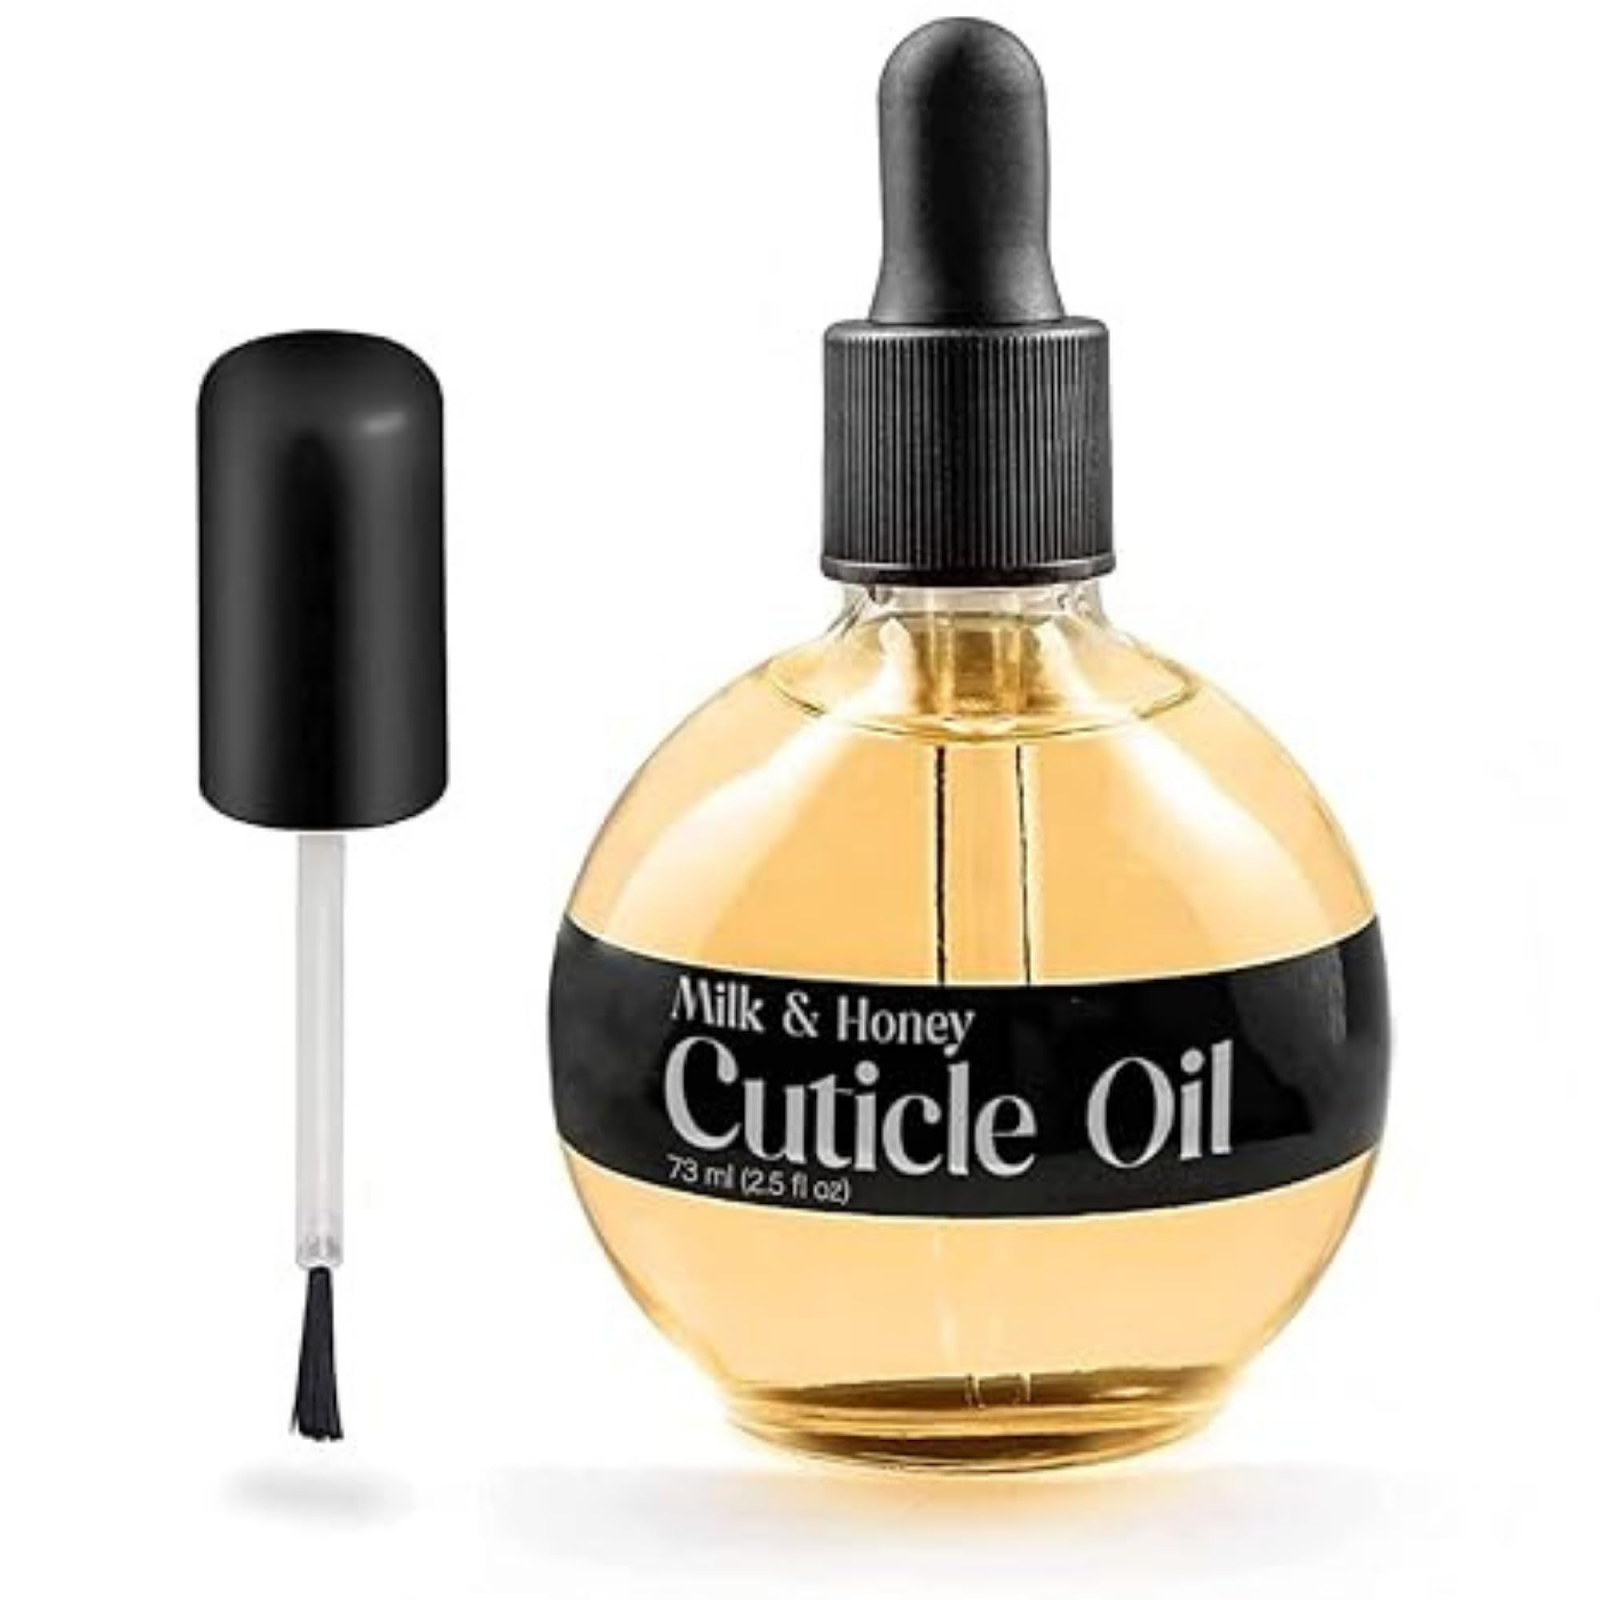
Ensure it’s a top coat specifically designed for acrylic nails. Keep your fingers still and allow your nails to air-dry for two minutes. Gently massage cuticle oil into the skin surrounding your fingernails. Apply the top coat just as you would regular nail polish.

Wash your hands

Ensure your nails are entirely dry beforehand. Use warm water, hand soap, and a nail brush, making sure to clean around and underneath the tips of your nails. Gently pat your nails dry with a towel.

Maintain your manicure

Follow these guidelines to extend the longevity of your manicure. Your manicure has the potential to last three to four weeks before requiring a fill. However, if you observe new nail growth near the cuticle area, you may choose to perform the fill as early as two weeks after your dip manicure. When applying colored polish over your manicure, be careful not to get it on your cuticles to prevent chipping and lifting of the polish. Additionally, mix the polish by rolling it between your hands instead of shaking it to avoid the formation of air bubbles that may contribute to chipping. If you use a fan for nail drying, opt for cool air rather than warm air. Consider using a blow dryer on the cool setting. To prevent chipping, reapply a clear top coat every few days. Massage cuticle oil onto your nails daily, if possible. When washing your hands, use mild soap instead of hand sanitizer. Hand sanitizer is potent and dehydrating, posing the risk of eroding your protective top coat

CONCLUSION

Doing dip nails yourself at home is not only an experience but it is also very interesting for those who want to explore and learn. You can start with the basic steps we have outlined in the article. Hopefully after reading our article, you will know how to dip your nails at home and create beautiful nails for yourself.

HOW TO APPLY GEL POLISH PERFECTLY: A SIMPLE DIY GUIDE FOR BEGINNERS

Ever dream of achieving salon-quality nails at home? Gel polish can be your secret weapon! It offers long-lasting shine, vibrant colors, and chip-resistant wear – all without the hefty price tag of a professional manicure. But achieving that perfect gel polish application can seem daunting at first. Fear not, aspiring nail artist! This guide will break down the process into simple steps, making you a gel polish pro in no time. Get ready to ditch the chipped nails and embrace stunning, long-lasting manicures you can create yourself!

WHAT DO YOU NEED TO APPLY GEL NAIL POLISH AT HOME?

CUTICLE OIL

Gel curing and especially gel polish removal can dry out your nails, cuticles, and surrounding skin. To maintain moisture in your skin and nail plate, it’s beneficial to invest in cuticle oil.

UV/LED LAMP

A UV/LED curing lamp is essential for gel nails, as it hardens the gel polish layers, making the nails more durable and chip-resistant. “Curing” refers to drying gel nails under a UV/LED lamp, where the light activates a chemical reaction that quickly dries the nails, preventing chipping or smudging immediately after application. This process is why gel manicures last longer than most other types of manicures.

CUTICLE PUSHER

A cuticle pusher is used to expose more of your nail bed, helping your manicure last longer by delaying the visible growth of your nails under the polish.

NAIL BUFF

A nail buffer is an essential part of your nail kit. It gently prepares your nail’s surface by smoothing and evening out imperfections, ensuring an easy and flawless application of gel polish.

NAIL FILE

A nail file shapes your nails and removes gel polish by smoothing the edges and grinding down the surface. This helps maintain the desired nail shape and prepares the nails for new polish.

To remove gel nails, use a medium grit file. For soak-off gel polish, use a 180 grit nail file to remove the hardened top coat before removing the polish.

Tip: you want to avoid damaging the natural nail underneath by using too coarse a nail file.

ACETONE

Acetone is used to clean your nails before applying gel polish and to remove the polish afterward. Any acetone with a content of 60 percent or more will work effectively.

Before application, acetone removes oils and residues to create a clean surface for the gel polish. During removal, it breaks down the gel polish for easy removal. Use cotton balls or lint-free nail wipes to apply the acetone, ensuring no fuzz is left on your nails.

UV GEL MANICURE GLOVES

Wearing UV gel manicure gloves protects your skin from the UV light used to cure gel polish. This is important because long-term exposure to UV light can damage your skin. The gloves shield your skin from unnecessary UV ray exposure.

NAIL CLIPPERS

Nail clippers are used to shape your nails before a gel manicure. Avoid clipping your nails after applying gel polish, as it can break the seal at the tip and cause the polish to peel off.

GEL TOP COAT

A gel top coat is crucial when applying gel polish as it seals in the color, delivering a glossy finish that safeguards nails from chipping and peeling.

GEL BASE COAT

A gel base coat is essential as it ensures the gel polish adheres securely to the natural nail, creating a smooth surface that enhances the durability of gel nails. This is why gel manicures have a longer lifespan compared to regular nail polish.

GEL POLISH

Now comes the enjoyable part—choose your favorite gel colors or try something new!

APPLY GEL NAIL POLISH: STEP BY STEP

CUT AND FILE NAILS

To achieve a stunning gel manicure, begin by shaping your nails. Trim them to your desired size and shape using a nail clipper, then use a nail file to smooth out the edges for flawless application.

 PUSH YOUR CUTICLES DOWN

Utilize a cuticle pusher to gently push back your cuticles, creating a cleaner and more visible nail surface. This tool also helps remove dead skin from the nail plate and promotes even cuticle maintenance. Avoid trimming your cuticles, as this can increase the risk of nail infections by exposing the nail bed.

BUFF YOUR NAILS

Gently buff your nails to smooth the surface and enhance their natural shine, preparing them to bond effectively with gel polish. Avoid excessive buffing, which can weaken and thin your nails.

CLEAN NAILS

Thoroughly cleanse your nails with rubbing alcohol to ensure the polish adheres directly to your natural nail. Any residues like cuticle oil or dust particles can cause premature lifting of the polish.

APPLY GEL BASE COAT

Start with a strong foundation! Apply a thin layer of gel base coat to each nail, ensuring it reaches all the way to the tips (capping the free edge) for extra chip resistance. Once all your nails are coated, cure them under a UV lamp or LED light according to the manufacturer’s instructions (typically 45 seconds to 1 minute). 

Don’t worry about the tacky feeling – this is normal for uncured gel polish. Just resist the urge to touch your nails, as that can mess up the application.

APPLY GEL POLISH

Now, for the fun part – color! Use thin coats to paint each nail, reaching close to the cuticle but avoiding your skin (a clean-up brush can be handy for minor mistakes). Two thin coats are ideal for most colors, but feel free to add more for extra vibrancy. Remember, thin is better than thick for a smooth, even finish. After each coat, cure your nails under the UV/LED lamp according to the manufacturer’s instructions (usually 45-60 seconds). That sticky feeling is normal, so resist touching your nails until you’re done!

APPLY GEL TOP COAT

Shine on! Finish your masterpiece with a thin layer of gel top coat, ensuring you cover the entire nail and cap the free edge for ultimate protection. Cure your nails under the UV/LED lamp for at least a minute (as per instructions) to completely dry and seal the polish. Some gels might leave a slightly tacky residue – no worries, a gentle wipe with a cotton ball soaked in alcohol will take care of that, revealing your perfectly polished nails!

HOW TO APPLY GEL POLISH ON ACRYLICS

When combining gel polish with acrylic nails, your nail art can remain intact for up to 6 weeks with minimal touch-ups. Before proceeding, familiarize yourself with the differences between gel and acrylic nails.

Here are the recommended steps to follow:

Begin by removing old polish using a non-acetone nail polish remover. This step is crucial to ensure thorough removal of any residual polish from the nail.

Clean and dry the nail completely to eliminate any residue that could affect the application. It’s important to avoid harsh chemicals that might react with the acrylic. Opt for gentle options like baby wipes or thorough hand washing.

Apply an acrylic-friendly base coat, followed by colored polish and a top coat. Treat acrylic nails similarly to natural nails when applying gel polish, using the steps outlined above. Ensure the base coat is compatible with acrylic to prevent staining.

HOW TO APPLY NAIL TIPS WITH GEL OVERLAY

You can apply gel polish to store-bought nail tips that are glued over your natural nails. The process resembles regular gel polish application but with a few key differences.

Start by pushing back your cuticles, gently buffing the nail surface, and ensuring they are clean. Apply a thin coat of nail glue to each nail and carefully place the nail tips, rocking them to eliminate any trapped air bubbles.

Adjust the size and shape of the nail tips as necessary. Afterward, buff and clean the nail surface before proceeding to apply gel polish. Begin with a base coat followed by at least two layers of color, curing each coat as you apply it.

Before applying the top coat, remove any tacky residue, lightly buff the top color layer, and clean it. Finally, apply and cure the top coat to seal and ensure long-lasting results.

HOW TO APPLY NAIL DECALS OVER GEL POLISH

Ready to level up? Explore Nail Art! Gel polish is perfect for nail art because it allows your designs to shine (literally!) for longer. Here’s a beginner-friendly option using nail decals:

Pick your base: Apply your desired gel polish color as the foundation for your artwork.

Decal magic: Choose your decal design and carefully cut out the section you want to use.

Water decals? Easy! Simply dip a water decal in water to separate it from the backing, then place it on your nail.

Smooth operator: Gently use a wooden stick or your finger to flatten the decal onto your nail. You can even add details or pops of color with extra polish.

Seal the deal: Once your design is perfect, cure it under the lamp for at least 30 seconds. Finish with a layer of gel top coat, cure again, and voila! Show off your artistic masterpiece!

HOW TO MAINTENANCE GEL NAIL POLISH AT HOME?

Prolong your Gel Mani Magic:

Hydration is key: Regularly apply cuticle oil to keep your nails and surrounding skin nourished. This helps prevent chipping and peeling.

Give it time to set: Avoid direct contact with water for at least an hour after your manicure. This allows the gel polish to fully cure and harden.

Gloves are your friend: Protect your nails when doing chores! Wear gloves for washing dishes, cleaning, or anything that involves harsh chemicals.

Shine it on: Apply a top coat every few days to add an extra layer of protection and boost the shine and longevity of your gel polish.

HOW TO REMOVE GEL NAIL POLISH AT HOME?

Removing gel nail polish is akin to removing acrylic nails, providing comfort and relief for your fingers. Ready for a Refresh? Here’s how to remove your gel polish safely:

Soften it Up: Soak cotton balls in 100% acetone and place them on each nail.

Seal the Deal: Wrap each fingertip snugly with aluminum foil to create a little pocket. This helps trap the acetone and speeds up the removal process.

Patience is Key: Relax and let the magic happen! Soak your nails for at least 10 minutes. The gel polish should be lifting or dissolving easily.

Buff and Moisturize: Once the polish is gone, gently buff your nails to remove any residue. Finish by pampering your nails and cuticles with a nourishing moisturizer or cuticle oil.

FAQ

1. Do I need to prep my nails before applying gel polish?

Absolutely! Gently push back your cuticles, buff your nails to remove shine, and clean them with alcohol wipes to remove any oils.

2. How thin should the gel polish layers be?

Thin coats are key! Multiple thin layers will create a smooth, opaque finish that’s less prone to chipping.

3. What if I accidentally get gel polish on my skin?

Don’t panic! Before curing, use a cotton swab dipped in acetone or alcohol to gently wipe away the mistake.

CONCLUSION

So there you have it! With a little practice and these handy tips, you’ll be well on your way to achieving salon-quality gel manicures from the comfort of your own home. Remember, start with prepping your nails properly, apply thin coats of gel polish, and cure them according to the instructions. Don’t forget to moisturize your nails and avoid harsh chemicals to extend the life of your manicure. Now get creative and have fun with different colors and even try some beginner-friendly nail art! With gel polish, your stunning nails are just a few steps away!