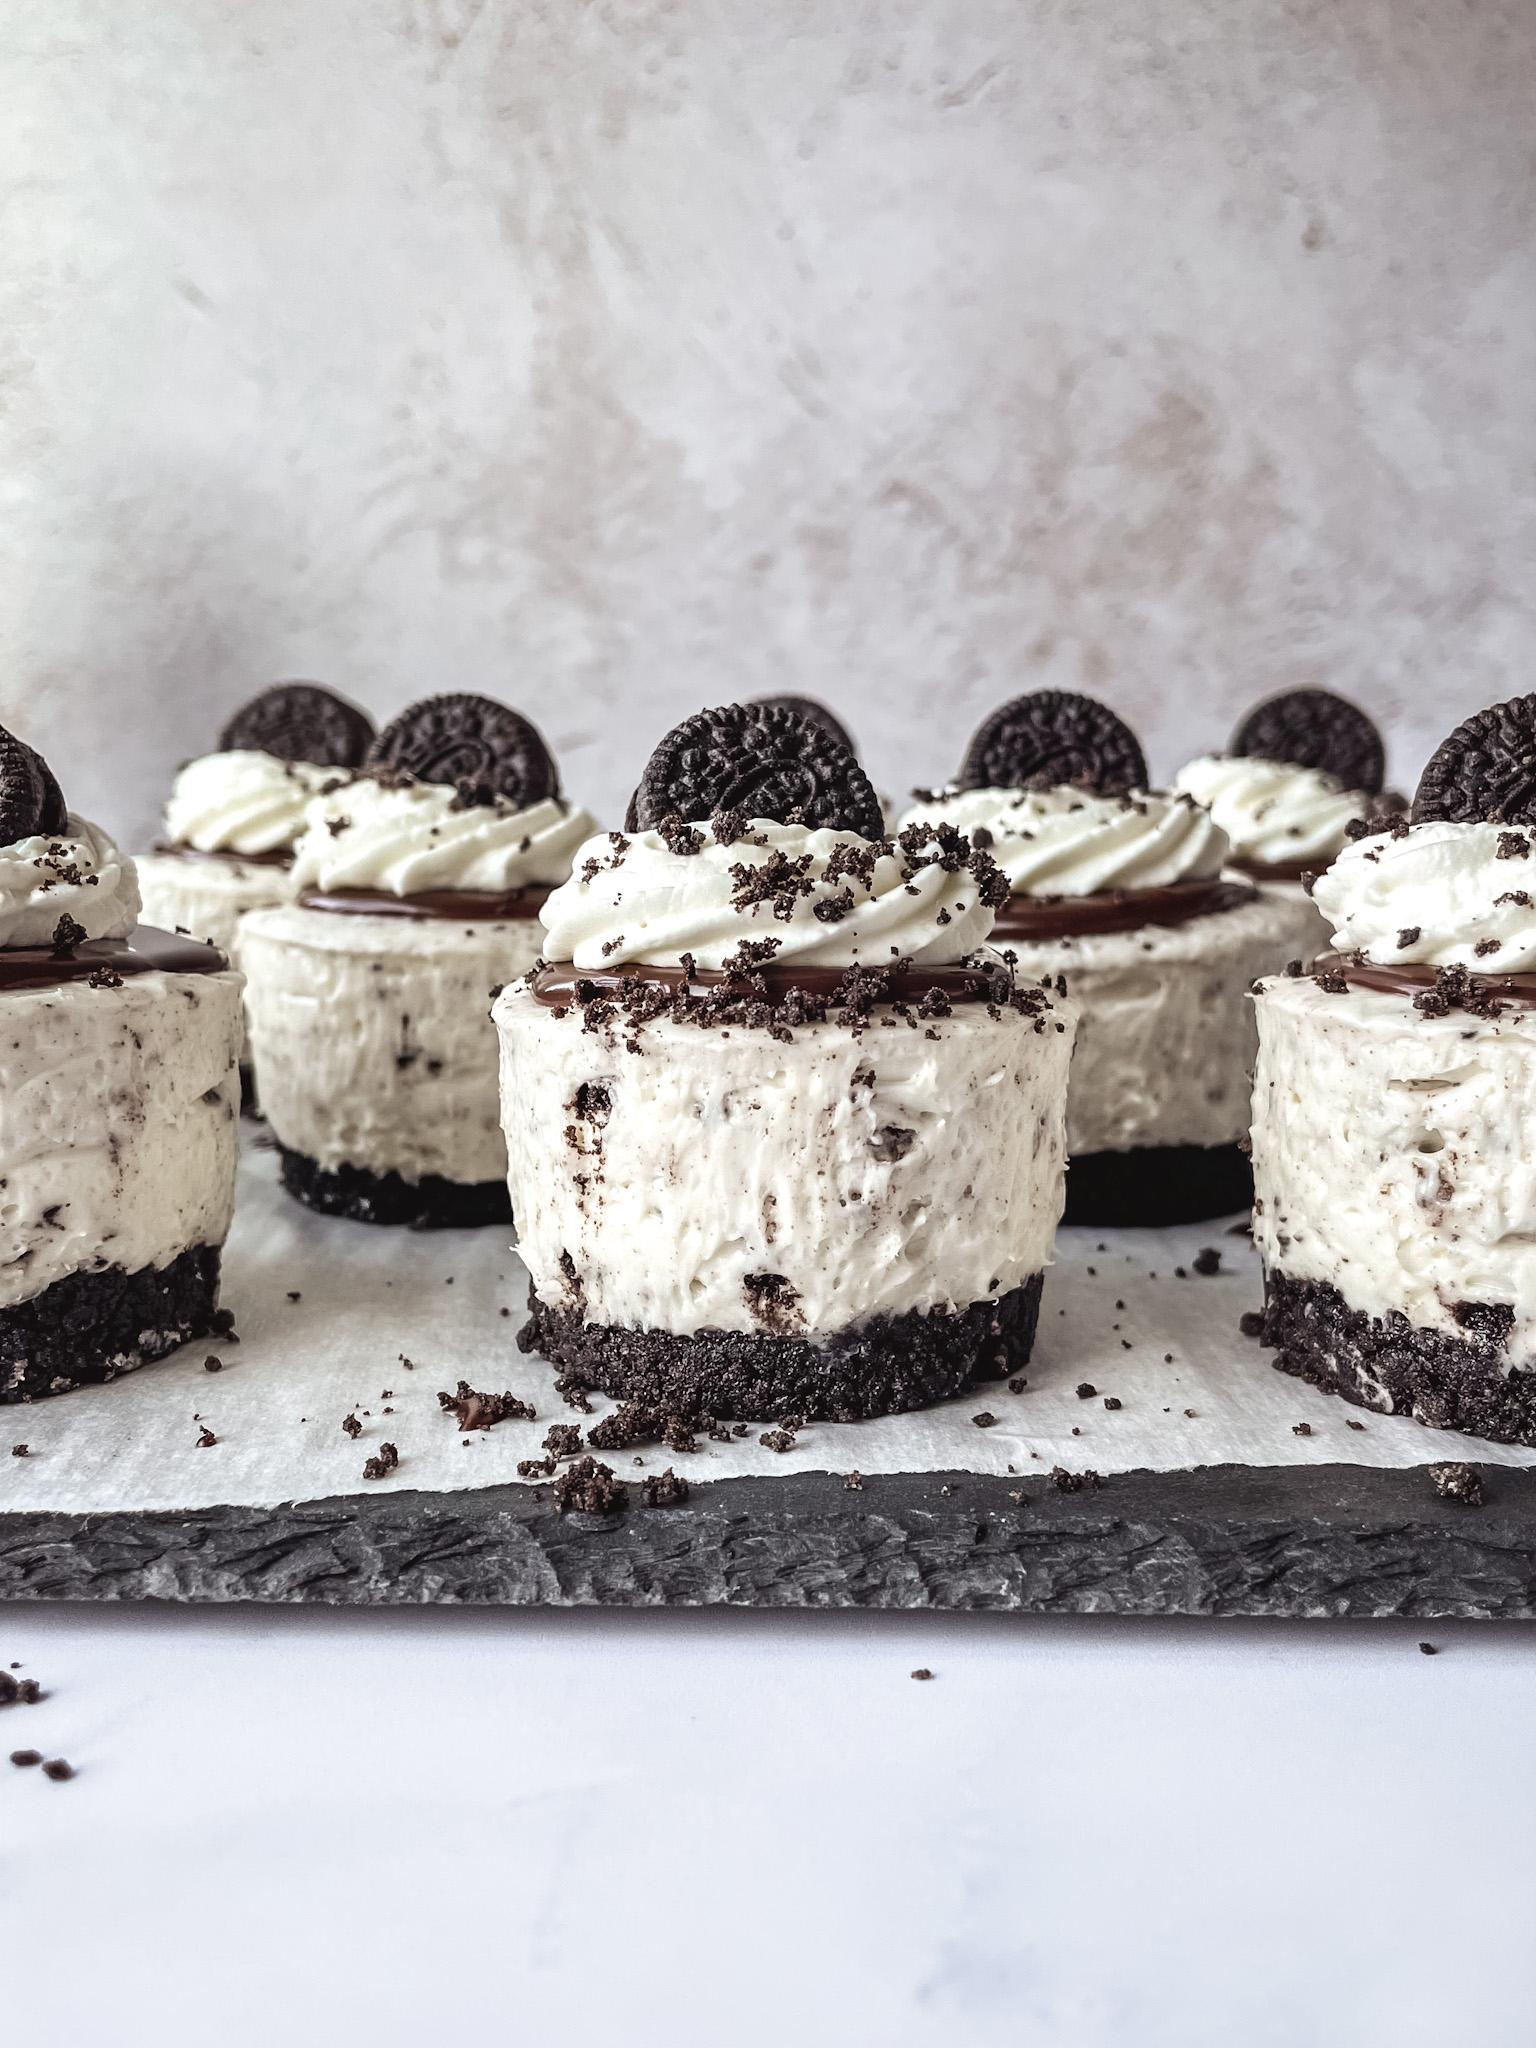
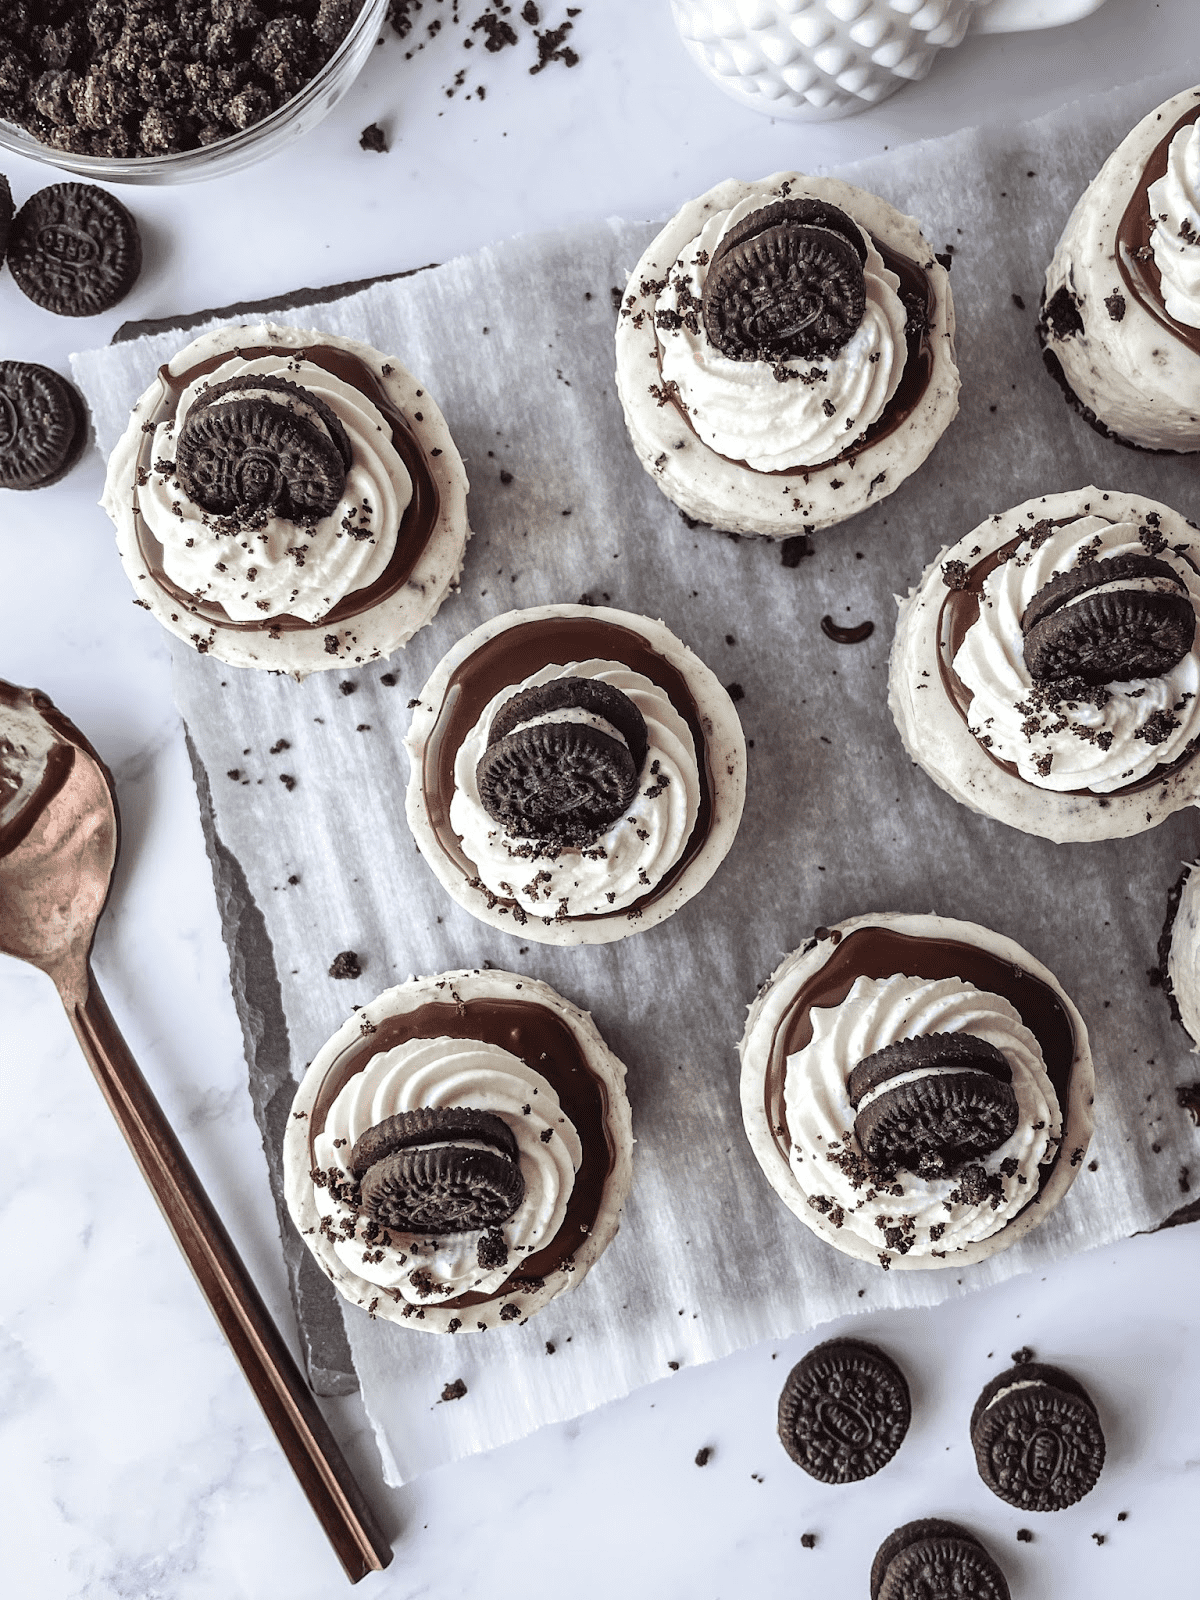
These No-Bake Oreo Cheesecakes have a crunchy Oreo biscuit base, a creamy 3-ingredient Oreo cheesecake filling, and are finished with a whipped cream star and cookie crumbles. Made with just 5 ingredients, they’re vegan, no-bake, and incredibly easy to make! Keep reading to learn how.
INGREDIENTS
For the base:
- 150g Oreo cookies
- 50g dairy-free butter or margarine
For the cheesecake filling:
- 260g dairy-free whipping cream (e.g., Elmlea Plant-Based Alternative Double Cream)
- 160g dairy-free cream cheese (see notes*)
- 8 Oreo cookies
For topping:
- 20g dairy-free whipping cream
- 4 Oreo cookies
INSTRUCTIONS
Make the base:
- Melt the dairy-free butter or margarine in a small saucepan over low heat. Once fully melted, remove from heat and transfer to a medium-sized, heatproof mixing bowl.
- Blend the Oreo cookies in a food processor until finely ground. Add the cookie crumbs to the melted butter and mix with a wooden spoon or spatula. The mixture should resemble wet sand and hold its shape when pressed.
- Divide the mixture evenly into a cookie cup tin, pressing it down firmly with clean hands. The more compact the base, the less likely it will crumble.
- Place the tin in the freezer while preparing the cheesecake filling.
Make the cheesecake filling:
- In a medium bowl, combine the dairy-free whipping cream and cream cheese. Whip on low speed at first, then increase to high speed. Whip for about 5 minutes until the mixture becomes thick and creamy. A stand mixer with a balloon whisk attachment works best, but a hand mixer can also be used.
- Blend the Oreo cookies into fine crumbs, then add them to the whipped mixture. Whip again until fully combined.
- Transfer the cheesecake filling into a piping bag fitted with a large round nozzle (or simply snip off the tip of a piping bag).
- Pipe the filling evenly into the prepared cookie cups, then smooth the tops with an offset spatula.
- Freeze for about 4 hours, or until firm to the touch. If using push-up tins, gently push up the bases to release the cheesecakes. If they haven’t set properly, they may not come out cleanly.
- Once firm, transfer the cheesecakes to the fridge to soften slightly while preparing the whipped cream topping.
Decorate
- Whip the dairy-free whipping cream on high speed until thick.
- Transfer the whipped cream into a piping bag fitted with an open star tip nozzle and pipe a swirl onto each cheesecake.
- Garnish with half an Oreo and a sprinkle of cookie crumbs. Enjoy!
NOTES
- Storage: Keep the cheesecakes in the fridge and enjoy within 2 days. Store them chilled until ready to serve.
- Best dairy-free cream cheese options: Recommended brands include Violife Original Cream Cheese and Sainsbury’s Free From Soft Cream Cheese, both of which are vegan-friendly.