Transforming Radiance: Before and After the Diamond Glow Facial

The diamond glow facial is well-known for giving the skin a dazzling, young shine while also reviving and rejuvenating it. We will demonstrate the striking changes in skin texture, tone, and general look as we go through the before and after experiences. The diamond glow facial uses a mix of exfoliation, extraction, and the injection of specialist serums to magically treat a variety of skin issues, including dullness, congestion, hyperpigmentation, and fine wrinkles. This facial treatment has the ability to result in significant and obvious improvements by gently exfoliating the skin and delivering nourishing nutrients deep inside the dermal layers.

This article will provide you useful insights into the possible advantages and effects of the diamond glow facial, whether you’re thinking about getting it for yourself or are just interested about the results. Prepare to be awed by the beauty-redefining before and after results of this cutting-edge skincare method as we reveal it.

A Diamond Glow Facial: How does It Work?

Diamond-tipped wands and a vacuum suction technique are used in a diamond glow facial, a minimally invasive cosmetic treatment, to exfoliate and moisturize the skin. A certified aesthetician or dermatologist will administer a serum to your skin throughout the procedure using a unique portable equipment. Then, they will use a diamond-tipped wand to extract impurities from your skin, clean up clogged pores, and remove dead skin cells. Your skin will feel clean, smooth, and invigorated when they employ vacuum suction to remove the dirt and serum. The outcome is a deeply cleaning and moisturizing treatment that may enhance your skin’s texture, tone, and general look.

Your geographic area, the aesthetician or dermatologist’s level of training, and the particular clinic or spa you choose may all affect the price of a diamond shine facial. For a single treatment, you should budget anything from $150 to $300. If you reserve many treatments at once, certain clinics could offer package packages or discounts.

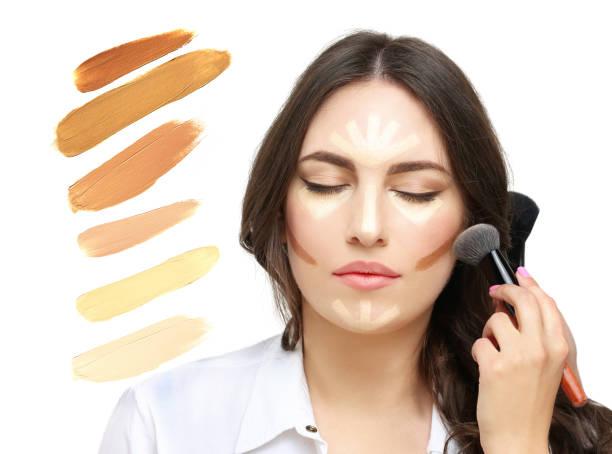
Let’s look at some before and after photographs to get a sense of the outcomes you might anticipate from a diamond shine facial:

Who is Diamond Glow Facial Beneficial for?

Anyone who wishes to enhance the look and health of their skin may benefit from a diamond shine facial. This therapy is especially beneficial for those who have:

  • Acne-prone or oily skin
  • Uneven, harsh, or dull skin tone
  • Wrinkles and fine lines
  • Skin discoloration or sun damage
  • Dehydrated or dry skin

You  should comprehend the special advantages of this procedure while deciding if a diamond facial is appropriate for your skin type. Diamond facials are mild and non-invasive, making them ideal for those with sensitive skin. However, those with different skin types, such as dry, oily, and combination skin, may also benefit from them. To find out whether a diamond facial is good for you and to make sure it is done properly and successfully, it is crucial to speak with a professional esthetician if you are thinking about getting one. In order to get the most out of your facial and keep your skin looking healthy and vibrant, it’s also important to follow a regular skincare regimen at home.

Advantages of Diamond Glow Facial

Exfoliation: Your skin becomes smoother and softer as a result of the diamond-tipped wand’s gentle removal of dead skin cells and pollutants.

Hydration: Your skin will feel hydrated and renewed after the treatment thanks to the serum’s ability to hydrate and nurture your skin.

Anti-aging: The exfoliating procedure may aid in lessening the visibility of wrinkles and fine lines, while the serum can promote the creation of collagen for skin that is firmer and more youthful-looking.

Improved texture and tone: A brighter, more radiant look may be achieved by the treatment’s thorough cleaning and moisturizing benefits, which can also enhance the texture and tone of your skin.

Diamond Glow Facial vs Hydra Facial: What’s the Difference?

Both hydra facials and diamond glow facials are well-liked cosmetic procedures intended to hydrate and refresh the skin. But there are some significant variations between these two approaches:

Method: Diamond shine facials exfoliate and moisturize the face using vacuum suction and wands with diamond tips, while hydra facials employ a specialized equipment that simultaneously fills the skin with serum and extracts impurities.

Intensity: Diamond shine facials often employ greater exfoliating methods to remove dead skin cells and clear pores, making them more intense than hydra facials.

Cost: Due to the greater degree of skill needed to complete the procedure, diamond shine facials are often a little more costly than hydra facials.

Your individual tastes and skin issues will ultimately determine which facial treatment you choose between a diamond shine facial and a hydra facial.

Side Effects of Diamond Glow Facial

Like any cosmetic surgery, diamond glow facials might have certain negative effects or hazards. These may consist of:

Bruising or irritation: Following the treatment, some individuals may suffer redness, irritation, or sensitivity; however, this normally goes away within a few hours to a day.

Redness or irritation: The exfoliating procedure used in a diamond glow facial might cause breakouts or acne flare-ups on certain individuals.

Infection: There is a danger of infection from the surgery if basic hygiene and sanitation measures are not followed.

Before receiving treatment, don’t forget to discuss any risks or side effects with your dermatologist or aesthetician.

Guidelines for Getting the Best Results from Diamond Glow Facial

It’s essential to adhere to the following advice to get the most from your diamond shine facial:

Perform research: Make sure to choose a physician or aesthetician who is qualified, skilled, and well-known for doing diamond shine facials.

Get your skin ready by: Prior to your treatment, refrain from using abrasive skincare products or exfoliants, and come at your appointment with a clean, makeup-free face.

Follow aftercare instructions: Your dermatologist or aesthetician will probably give you detailed aftercare guidelines to follow. In order to get the best results and reduce the possibility of adverse effects, it is crucial to carefully follow these directions.

Drink lots of water to stay hydrated and nurture your skin in the days following your treatment.

Conclusion

A diamond glow facial may be something to think about if you’re searching for a solution to revive your skin and obtain a more radiant complexion.

FAQs

  1. Do diamond glow facials hurt? Diamond shine facials shouldn’t hurt, however. During the exfoliation process, you can experience some little irritation or tingling, but it shouldn’t hurt.
  2. How long do diamond glow facial effects last? Depending on your skin type and lifestyle variables, the benefits of a diamond glow facial might last anywhere from a few days to a few weeks.
  3. Who is eligible for a diamond shine facial? While most individuals find diamond glow facials to be safe, not everyone may be a good candidate. Before receiving treatment, it’s crucial to talk through any worries or health issues with your dermatologist or aesthetician.
  4. What items should I stay away from using after getting a diamond shine facial? Following your diamond shine facial, you may be given special aftercare recommendations from your aesthetician or dermatologist, which may include avoiding particular skincare products or treatments for a while.
  5. How often is a diamond glow facial available? Your skin type and specific requirements will determine how often you get diamond shine facials. For best outcomes, most patients have the therapy every 4-6 weeks.

how to contour face: Makeup Artist tutorial

If you’re looking for a way to enhance your facial features and achieve a more defined look, then contouring is the answer. Contouring is a makeup technique that involves using darker and lighter shades to create shadow and highlight areas of your face. 

Read on to discover a step-by-step guide on how to contour your face and how tailor contour technique for your unique face shape.

What is Contouring?

Contouring is a makeup technique that has been around for decades. It involves using different shades of makeup to sculpt and define your facial features. By applying darker shades in the areas you want to recede, and lighter shades in the areas you want to emphasize, you can create the illusion of a slimmer nose, higher cheekbones, and a more defined jawline.

What’s the Difference Between Contouring and Bronzing?

Contouring and bronzing are both makeup techniques that enhance the structure and dimension of the face, but they serve distinct purposes and use different shades and placements. Contouring primarily focuses on creating shadows to define and sculpt the facial features. It typically involves using a matte, cool-toned product, often in a shade a few shades darker than your natural skin tone, to mimic the appearance of shadows in areas like the hollows of the cheeks, along the jawline, and on the sides of the nose. The goal is to create the illusion of more chiseled and defined features, making areas recede and appear slimmer.

On the other hand, bronzing is all about adding warmth and a sun-kissed glow to the face. It uses a warm-toned, matte or slightly shimmery product that’s often only a shade or two darker than your natural skin tone. Bronzer is typically applied to areas where the sun would naturally hit your face, such as the high points of the cheeks, the forehead, and the nose bridge. The aim is to create a healthy, radiant complexion and to mimic the effects of a sun-touched complexion. Unlike contouring, bronzing doesn’t aim to create shadows or alter the shape of your features but rather to add a healthy flush of color and warmth to your skin.

What You Need to Contour Your Face

  • Foundation
  • Concealer
  • Contour powder or cream
  • Highlighter
  • Blush
  • Angled brush
  • Beauty blender or makeup sponge
  • Powder brush

Here are some comparisons to help you choose the right products:

  • Powder vs. Cream: Powder contour is easier to use and blend, while cream contour provides a more natural finish and better coverage.
  • Angled Brush vs. Beauty Blender: An angled brush is great for precise application, while a beauty blender or makeup sponge is ideal for blending and creating a seamless finish.
  • Matte vs. Shimmer Highlighter: A matte highlighter creates a more natural look, while a shimmer highlighter adds a dewy finish and extra glow.

How to Contour Your Face

Step 1: Prepare Your Skin

Start with a clean, moisturized face. Apply your regular foundation or concealer to create a smooth base. This will even out your skin tone and provide a canvas for your contour and highlight.

Step 2: Choose the Right Contour Product

Select a contour product that is a few shades darker than your natural skin tone. It should have a matte finish and cool undertones. Contour products come in various forms, including cream, powder, and stick. Choose one that suits your preferences and skill level.

Step 3: Identify the Contour Areas

Determine the areas of your face you want to contour. The most common areas include:

  • Under the cheekbones: To create the illusion of higher cheekbones and a slimmer face.
  • Along the jawline: To define the jaw and create a more sculpted look.
  • Along the sides of the nose: To make the nose appear narrower.
  • Along the hairline: To add dimension and warmth to the forehead.
  • Under the chin: To minimize the appearance of a double chin.

Step 4: Apply the Contour

Using your chosen contour product, apply it to the areas you identified in step 3. Use a contour brush or a makeup sponge for precision. Apply the product sparingly at first; you can always add more if needed. Blend the contour into your skin using gentle strokes or circular motions. Make sure there are no harsh lines, and blend thoroughly for a natural look.

Step 5: Highlight

Now, it’s time to highlight the areas you want to bring forward. Use a highlighter that is a shade or two lighter than your skin tone. Common highlight areas include:

  • The tops of your cheekbones
  • The bridge of your nose
  • Your brow bone
  • The inner corners of your eyes
  • Your cupid’s bow (the area above your upper lip)
  • Apply the highlighter with a brush or sponge and blend it well. This will create contrast and make the contoured areas stand out more.

Step 6: Set with Powder

To ensure your contour and highlight stay in place, set your makeup with a translucent setting powder. Use a fluffy brush to apply the powder lightly over your entire face.

Step 7: Finish with Setting Spray (Optional)

For a long-lasting finish, you can use a setting spray to lock your makeup in place

Contouring Different face shapes

Oval Face

Contour: Apply contour shade along the sides of the forehead, under the cheekbones, and along the jawline to add dimension.

Highlight: Highlight the center of the forehead, tops of cheekbones, bridge of the nose, and chin for a balanced look.

Round Face

Contour: Apply contour along the sides of the forehead, under the cheekbones, and along the jawline to create angles and definition.

Highlight: Highlight the center of the forehead, tops of cheekbones, and chin to draw attention away from the roundness.

Square Face

Contour: Focus on softening the angles by applying contour to the sides of the jawline, along the hairline, and under the cheekbones.

Highlight: Highlight the center of the forehead, tops of cheekbones, and chin to balance the strong jawline.

Heart-Shaped Face

Contour: Apply contour along the hairline, under the cheekbones, and slightly along the jawline to balance the wider forehead.

Highlight: Highlight the center of the forehead, tops of cheekbones, and chin to enhance the lower half of the face.

Long or Oblong Face

Contour: Apply contour along the hairline, under the cheekbones, and at the chin to create the illusion of a shorter face.

Highlight: Highlight the center of the forehead, tops of cheekbones, and chin to add width to the face.

Diamond Face

Contour: Focus on softening the angles by applying contour to the sides of the forehead, under the cheekbones, and along the jawline.

Highlight: Highlight the center of the forehead, tops of cheekbones, and chin to balance the face’s angular features.

Triangle Face (Pear-Shaped)

Contour: Apply contour along the sides of the forehead, under the cheekbones, and along the jawline to balance the wider jaw.

Highlight: Highlight the center of the forehead, tops of cheekbones, and chin to draw attention away from the jaw.

Tips for perfect contouring

  • Choose the right shade of contour: It’s important to choose a shade that’s a few shades darker than your skin tone for a natural-looking effect.
  • Blend, blend, blend: Blending is the key to achieving a seamless and natural look.
  • Don’t overdo it: Less is more when it comes to contouring. Start with a little product and build up slowly until you achieve the desired effect.
  • Practice makes perfect: Contouring takes practice, so don’t get discouraged if you don’t get it right the first time.

FAQs

  1. Can I contour for everyday makeup? Yes, contouring can be adapted for everyday makeup, but the intensity can be adjusted. For a more natural look, use a lighter hand and subtle shades.
  1. Do I need to contour and highlight every time I wear makeup? Contouring and highlighting are optional steps in makeup. You can choose to contour and highlight when you want to enhance your features, but they are not required for every makeup look.
  1. How do I choose the right makeup brushes for contouring? Select brushes based on your preferences and the areas you want to contour. A contour brush with soft, dense bristles is great for precise sculpting. A smaller brush or sponge can be used for highlighting.
  2. Can contouring be used to change the shape of my face? Contouring can enhance and define your natural features, but it cannot drastically change the shape of your face. It is a makeup technique that adds dimension and highlights your existing bone structure.