Square short acrylic nails are currently trendy for young people, offering a range of options from simple and traditional to intricately patterned designs. They serve as a stylish alternative to longer, more elegant nail designs, making them more practical for various daily activities. Within this article, we present top designs for this nail type and provide you with additional ideas on how to incorporate unique patterns into your acrylic short square nails! Keep reading!
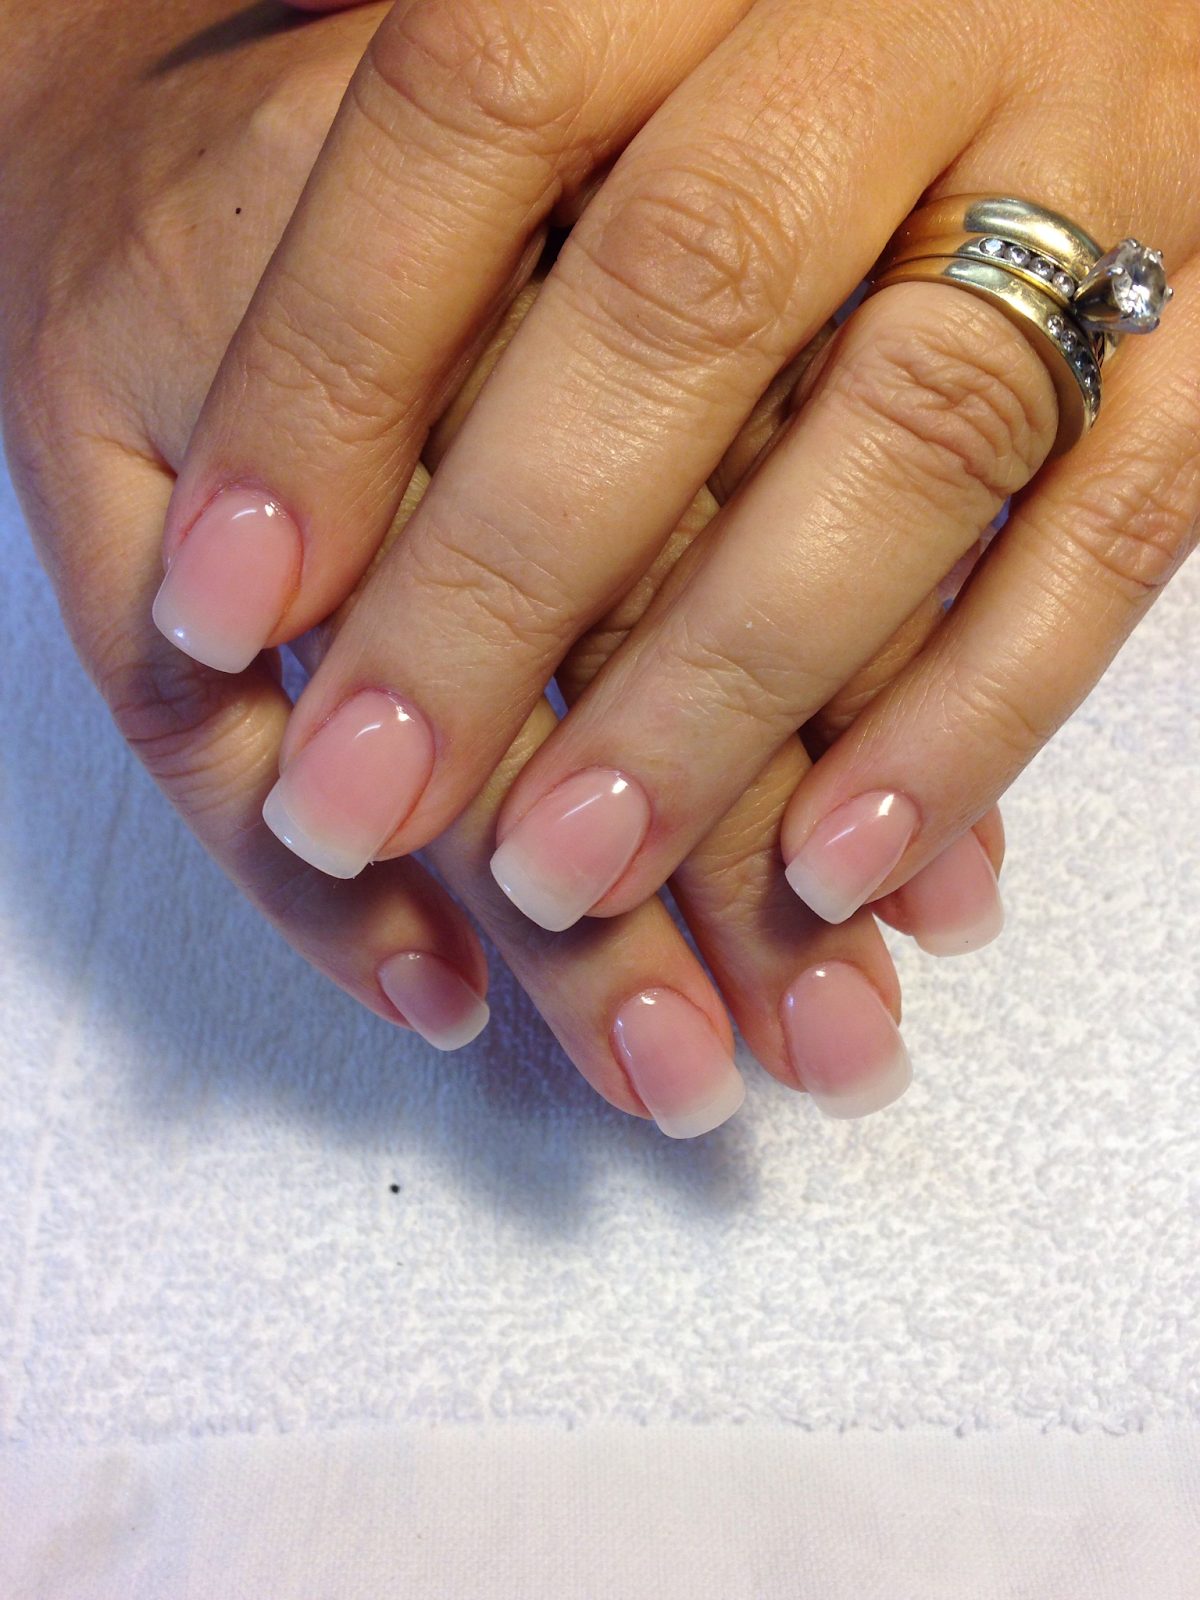
NUDE SQUARE ACRYLIC NAILS
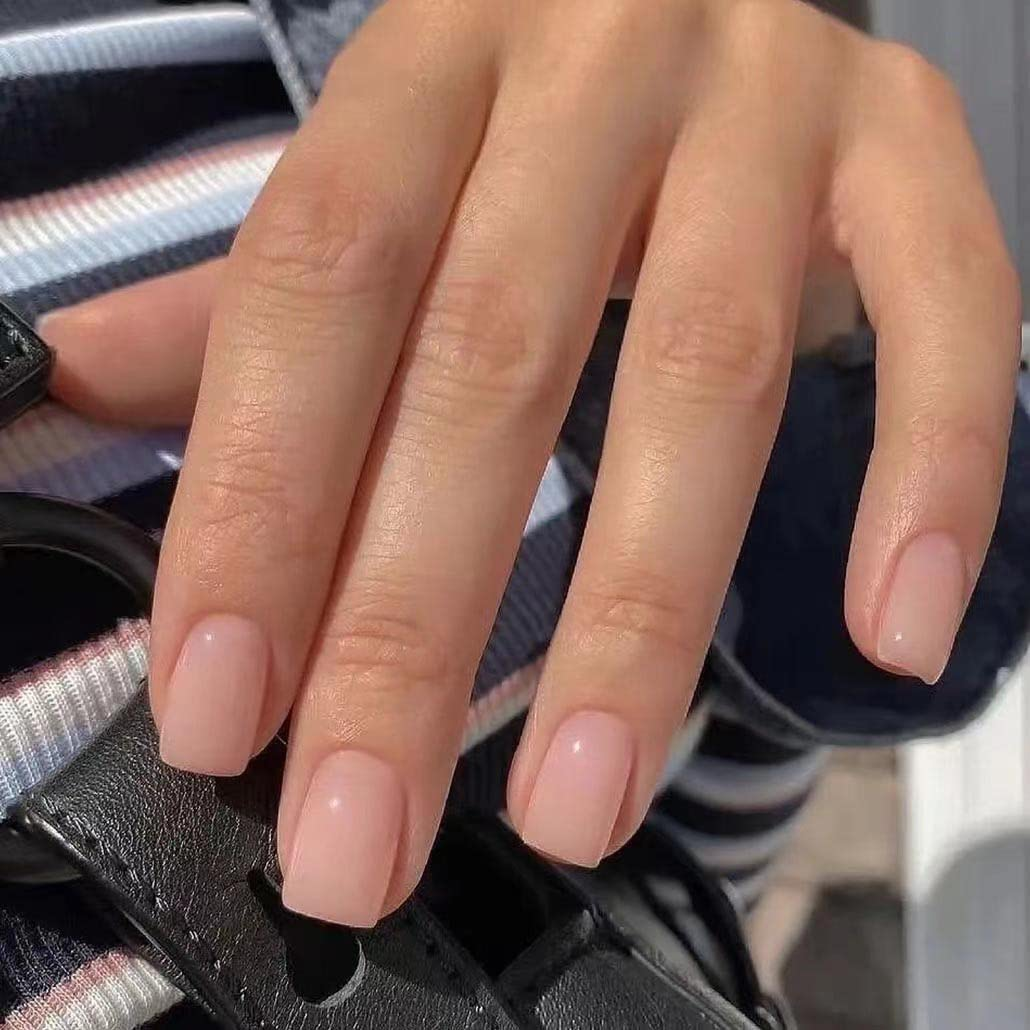
Begin with the essentials for your short square acrylic nails: nude nails. This rising acrylic nail trend is gaining popularity for its undeniable elegance. Short square nude nails offer a sophisticated and polished look. Moreover, this trend provides options in various skin tones beyond traditional pink acrylic nails.
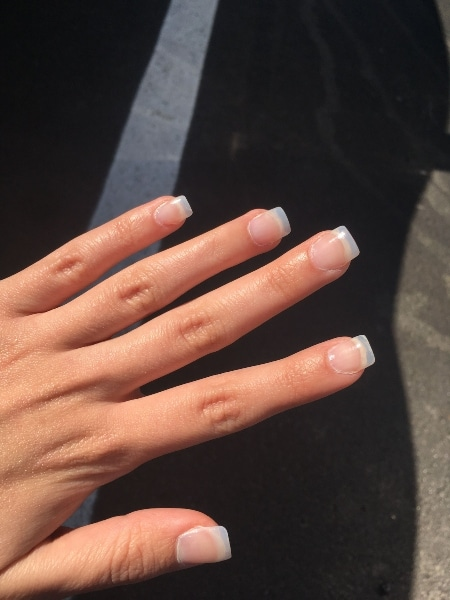
WHITE FRENCH TIP ACRYLIC NAILS

White French tips are making a comeback! Despite their simplicity, these square nails exude chic elegance, providing a feminine touch while keeping your nails short. An additional benefit is that French tips give a more natural appearance compared to other acrylic nails. Opt for this style if you aim for a beautiful look or want to stick to the traditional charm of the French manicure.
COLORED FRENCH TIPS ACRYLIC NAILS
If you appreciate the classic French tip but crave a touch of creativity, consider experimenting with different colors. What’s fantastic about this nail art is its ability to elevate square nails without being too extravagant. These acrylic nails and nail art styles are versatile, fitting seamlessly into any setting or outfit. For a subtler look, you can choose a light pink nail bed or a shade that closely matches your complexion.
GLITTER FRENCH TIPS ACRYLIC NAILS
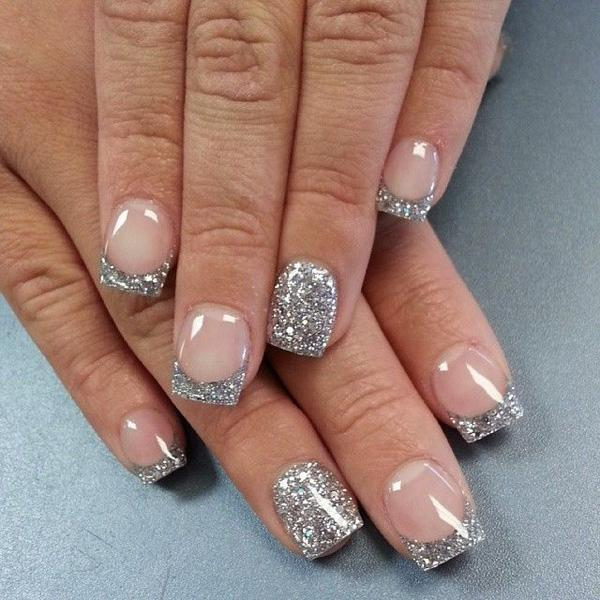
Embracing the French tips and acrylic nails trend can also involve incorporating glitter tips. The addition of glitter brings festivity and glamour to your acrylic nails without being too extravagant. Many people appreciate how the glitter tips can instantly elevate your appearance and complement any outfit you choose to wear. Take a look at the glamorous nail art featured on these square-shaped acrylic nails.
RED ACRYLIC NAILS
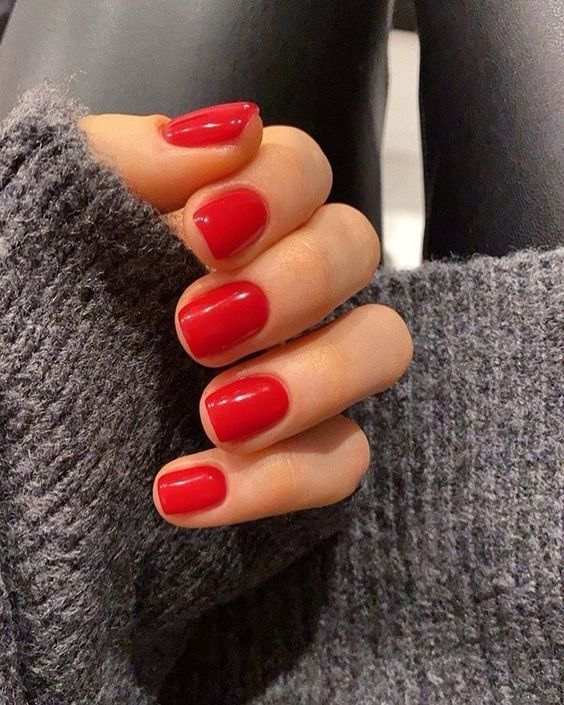
Square red acrylic nails are experiencing a resurgence in popularity, thanks to the recent trend known as the red nail theory. This trend suggests that red nails attract more male attention than other nail colors. If you’re looking to be asked out or ensure that you have your date’s undivided attention, painting your nails red might be the way to go. The square nails offer a modern twist on this classic look, providing a gorgeous vintage style that complements any outfit. Opting for a slightly longer length adds extra flair to your nails, making the guys do a double take.
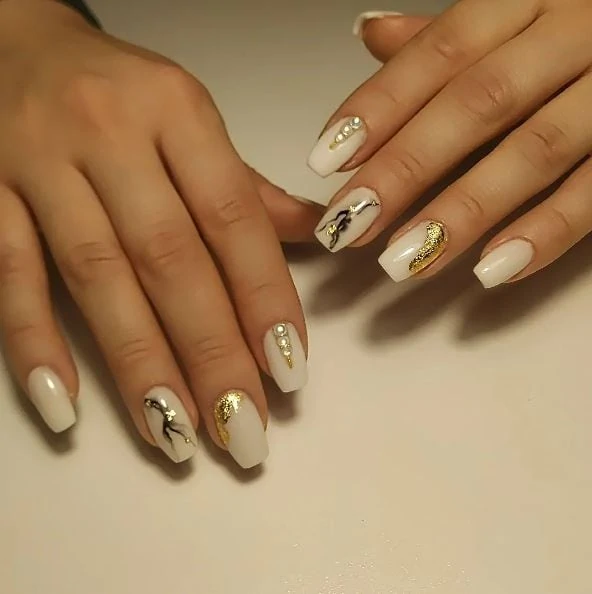
STATEMENT NAIL ACRYLIC NAILS
One of my favorite acrylic nail trends for short, square nails is painting a single nail in a bold or bright color, adding a touch of glitter for extra flair, or showcasing nail art. This simple yet elegant nail art style makes a statement while maintaining a sophisticated look.
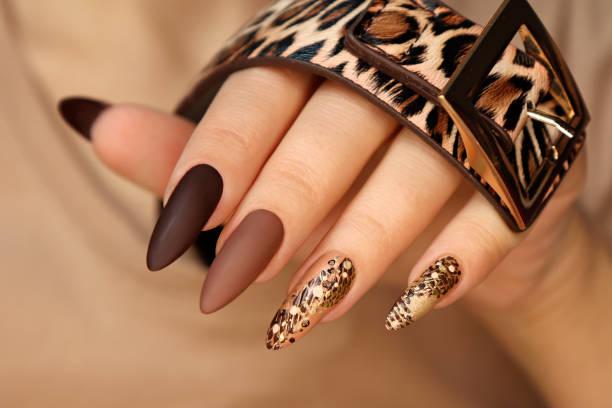
PATTERNED ACRYLIC NAILS
For those who love bold acrylic nail designs, patterns offer endless possibilities. Whether it’s animal prints, stripes, butterflies, polka dots, checkered, or more, you can explore a variety of interesting patterns to suit your personal style. The fun doesn’t stop at patterns—you can go wild with colors, choosing from a vibrant palette of pink, blue, purple, yellow, green, silver, and beyond. If you desire more space for creative expression, consider adding a bit more length to your acrylic nails.
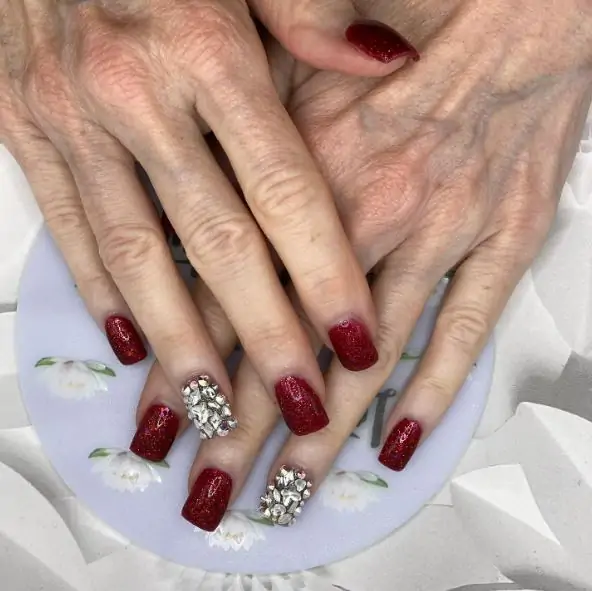
ACRYLIC NAILS WITH CHARMS
Contrary to the common association of nail charms with long square nails, this trend works equally well, if not better, with shorter nails. Shorter nails, at times, may go unnoticed, making the addition of charms to your acrylic set an excellent way to attract more attention to your nails. While pink is a popular base color for these nails, there’s no need to limit yourself—shades like purple, black, or grey can work equally effectively for these acrylics.
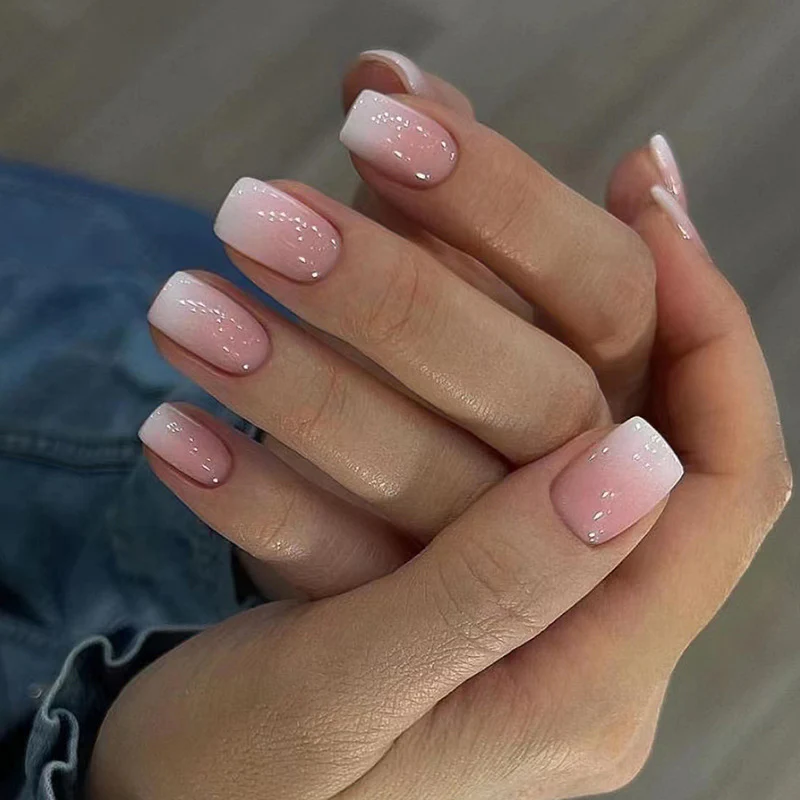
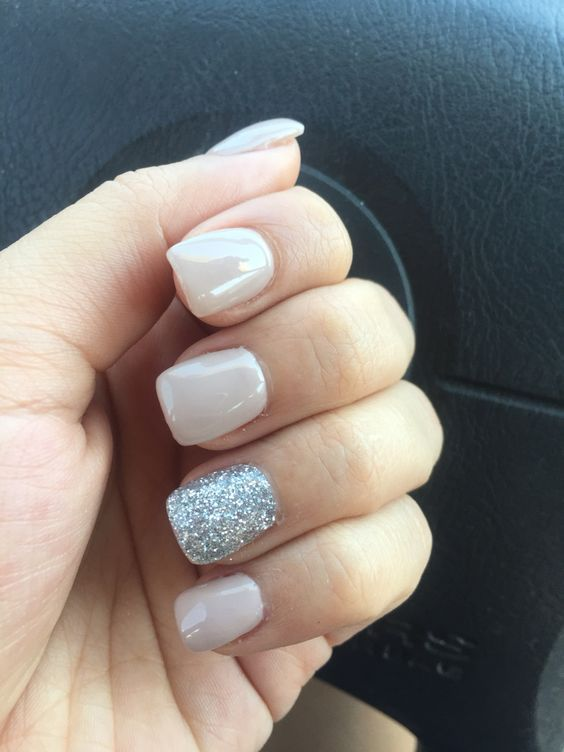
SUBTLE SPARKLE
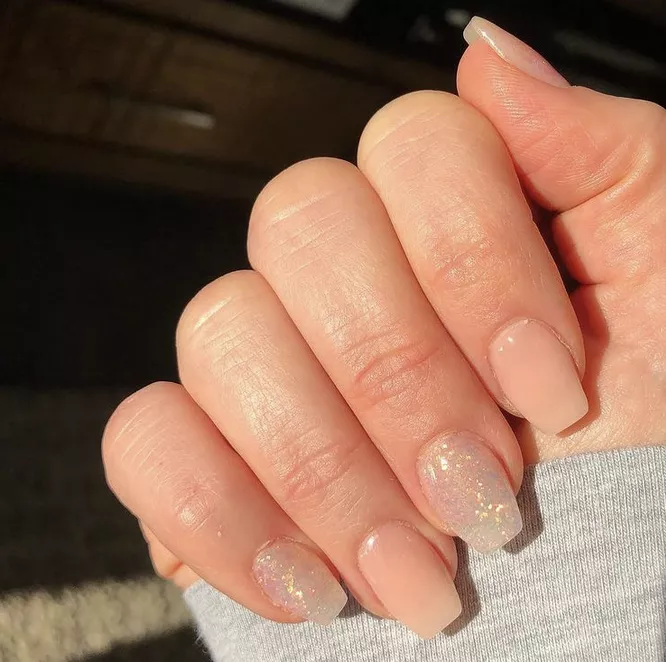
For strong, natural-looking nails that resist chipping for weeks, consider adding this simple nude manicure to your inspiration collection. Opt for a subtle nude polish or recreate the look by alternating with a neutral-toned holographic glitter.
CUTE SHORT ACRYLIC NAILS

Let your personality shine through with adorable nail art that exudes joy and positivity. Explore a myriad of color combinations, get inspired by your favorite themes, or opt for cheerful motifs such as vibrant rainbows. The beauty of cute nail art lies in its ability to reflect your unique style and bring a sense of happiness to your fingertips. You prefer bold and bright colors or subtle and sweet patterns, there are endless possibilities to infuse cuteness into your nail art, making every manicure a reflection of your vibrant personality.
SHORT NATURAL ACRYLIC NAILS
This natural look is versatile, suitable for various occasions, and adds a touch of class and timelessness. Whether your nails are short or long, the natural style complements all shapes and lengths, making it a practical and ageless choice. Wear it anywhere, with any outfit—this option is always a winner, regardless of your age.
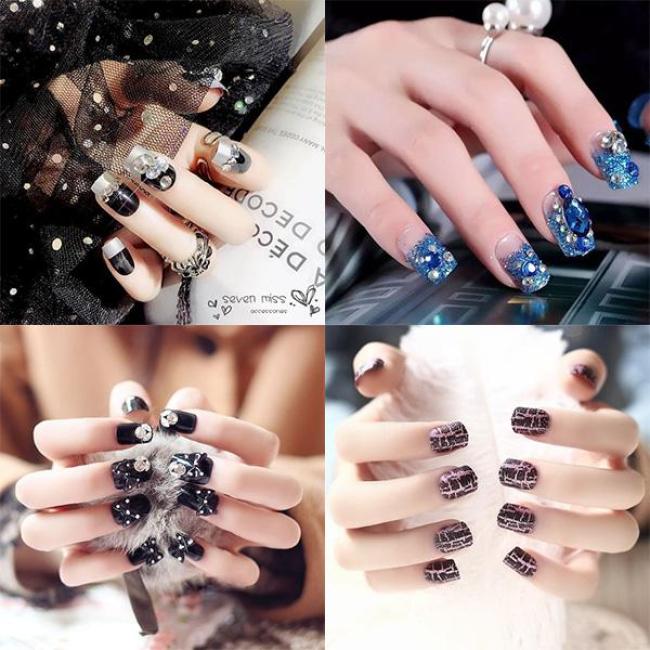
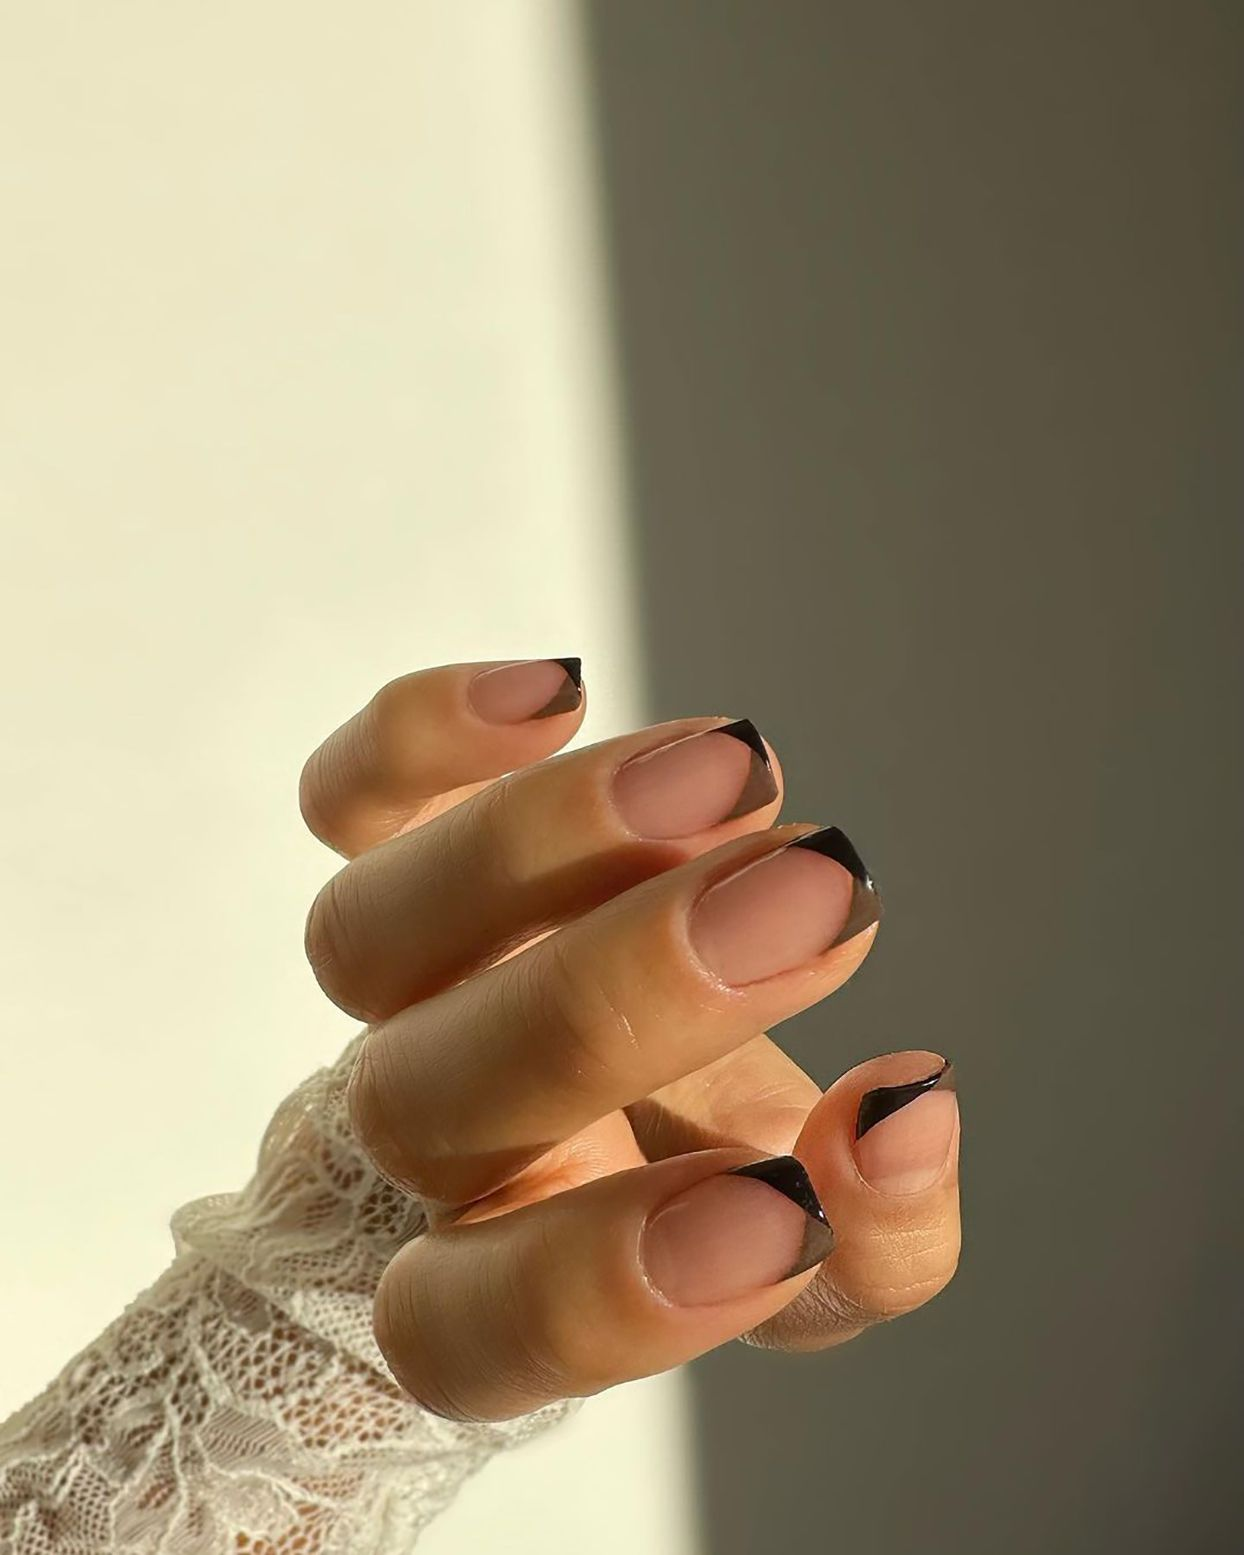
SHORT BLACK ACRYLIC NAILS
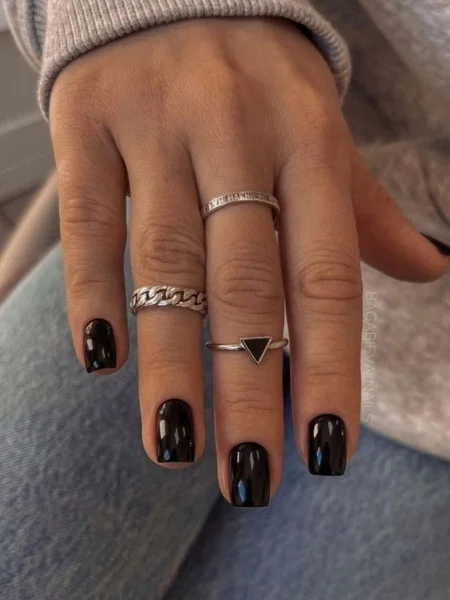
Make a bold statement with black nails— a color associated with power and sophistication. Instantly drawing attention to your hands, black nails showcase your nail length and shape effortlessly. With a rebellious feel, they are perfect for fashion-forward events and complement all skin tones. Versatile and stylish, black nails can be worn with any outfit. For an extra daring finish, add red to the tips or pair them with your favorite shade of red lipstick for an incredibly sexy look.
SHORT PINK ACRYLIC NAILS
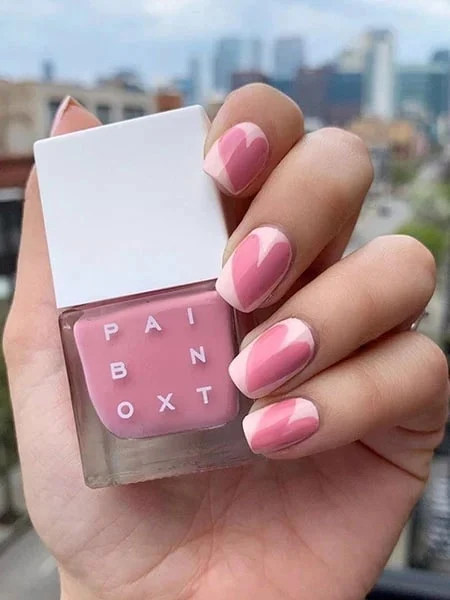
Pink nails are a timeless and versatile manicure choice, exuding femininity. Universally flattering and associated with love and womanhood, pink complements nails of all lengths and shapes, including short nails. Your manicure can range from simple to detailed, with various shades of pink to choose from. Get creative by focusing on the tips or experimenting with different shades on each fingernail.
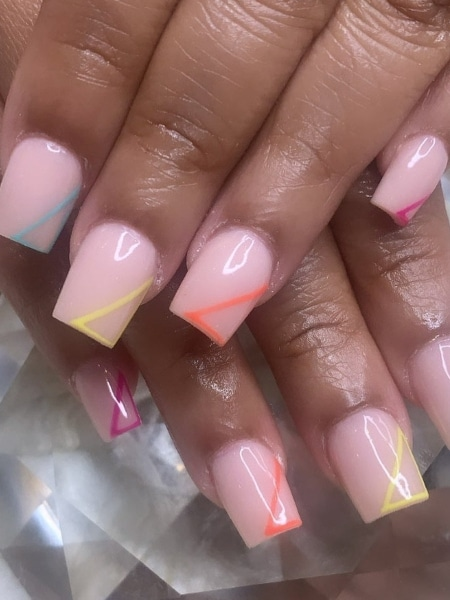
V-TIP SHORT ACRYLIC NAILS
Acrylic nails provide an ideal canvas for creative nail art, letting you express your style. Short nails are both stylish and practical, reducing the risk of snagging and breakage. To create the illusion of length, consider a V-tip manicure, a modern twist on the classic French manicure. This technique forms a V-shape at the tips, and you can choose colors like white and nude for a simple look or bold choices like red and pink.
SHORT BLUE ACRYLIC NAILS
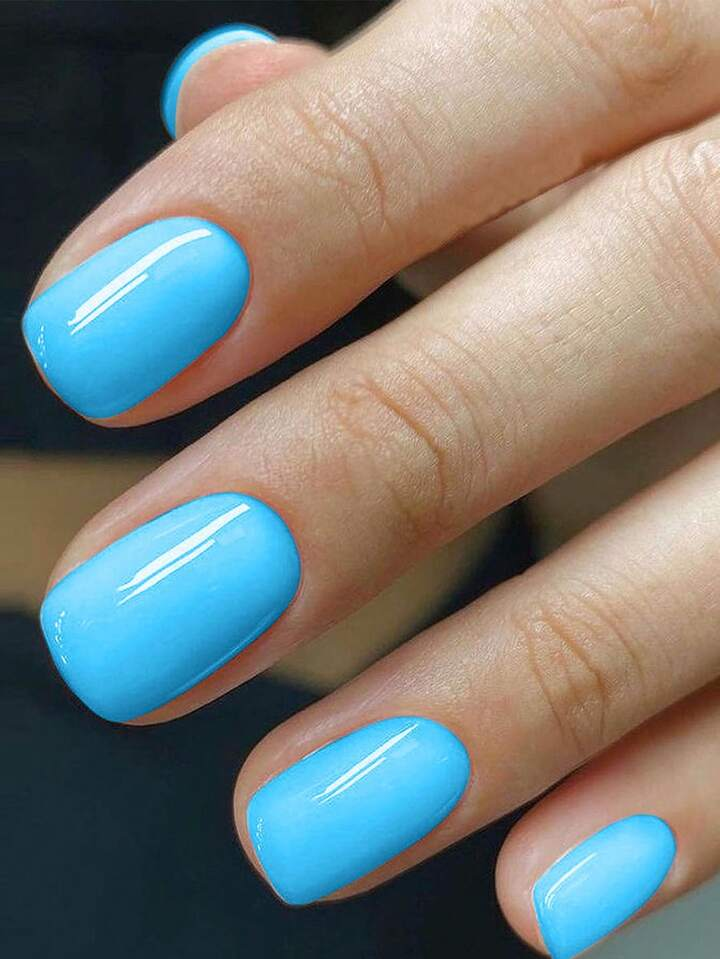
Blue, associated with tranquility, offers a range of shades from pastels to rich tones. Choose a hue that complements your skin tone or experiment with mixing and matching colors for a playful look. Blue acrylic nails provide a fun and easy-to-wear alternative to classic manicures like pink and red.
SHORT CLEAR ACRYLIC NAILS
Choosing clear acrylic nails is a great way to showcase your nail shape and length. Instead of opting for colored polish or intricate nail art, transparent nails offer an effortlessly interesting and fun look. Achieve this by using a clear or see-through polish, and experiment with different finishes like a reverse French tips manicure, leaving the tips clear. You can also add nail art over a transparent base for a stylish touch.
SHORT ACRYLIC OMBRE NAILS
Ombre nails blend colors in a playful way, experimenting with lighter and darker shades for a captivating finish. Whether you choose bold colors like reds and purples or a more subtle palette of whites, pinks, or nudes, ombre designs offer versatility. While often seen on long nails for impact, this technique works well on shorter nails too. Choose colors that complement your nail length and shape, ensuring a balanced and appealing look.
SHORT SPRING ACRYLIC NAILS
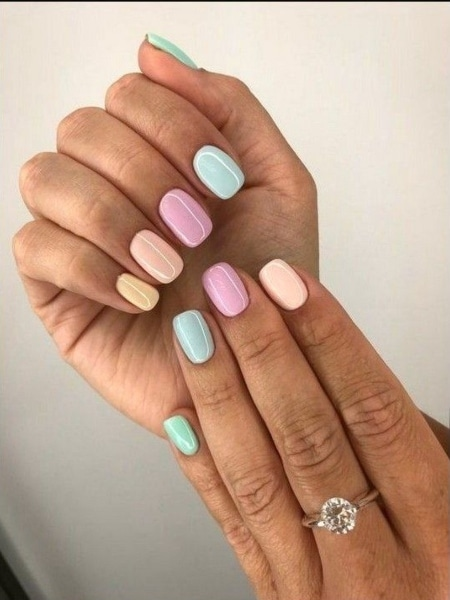
Spring is a season of renewal, making it the perfect time to infuse color into your manicure. Pastel hues are an excellent choice, with their soft and muted tones being universally flattering and easy to wear. Whether you have short or long nails, pastels complement all shapes and lengths. Try a single shade for a cohesive look or mix and match different colors. Enhance your pastel manicure with charming nail art like flowers, rabbits, or Easter eggs for a fresh and vibrant springtime feel.
SHORT PURPLE ACRYLIC NAILS
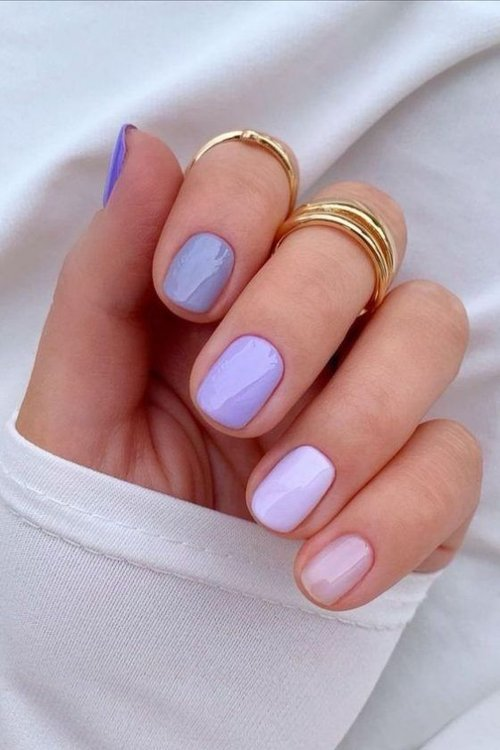
Purple nails offer a unique and stylish choice for those seeking a change. With various shades available, from subtle to bold, you can easily find the perfect tone to complement your skin tone. Purple, symbolizing power and sophistication, provides a refreshing alternative to traditional pinks. Opt for a light lilac for a versatile, everyday look, go bold with a deep purple, or create an ombre effect by combining both.
SHORT SUMMER ACRYLIC NAILS
Summer nails capture the essence of the season with vibrant colors, playful florals, and delightful symbols like ice-creams and fruits. Express your creativity, even with short nails, by experimenting with various shapes, from pointy to square. Opt for acrylic nails for durability, making them a great choice for those with weaker nails. Embrace the spirit of relaxation and fun with summer-inspired nail designs that instantly put you in a vacation mood.
SHORT MATTE ACRYLIC NAILS
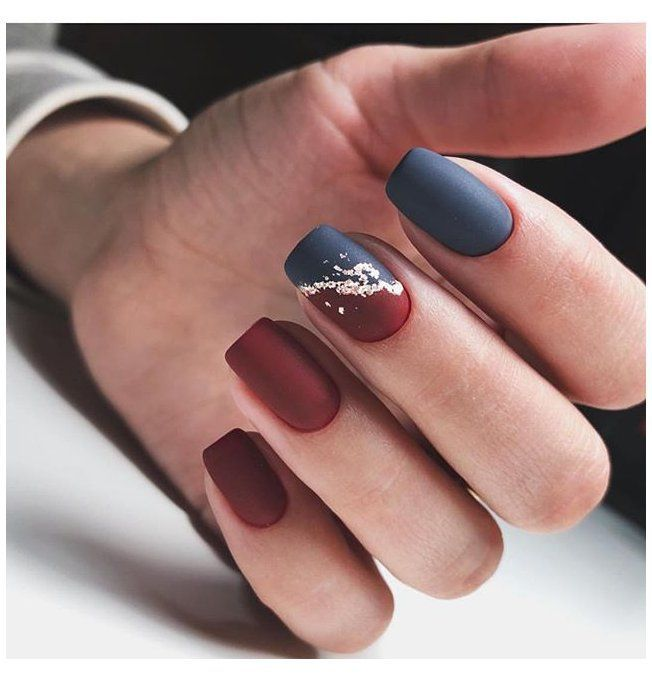
Matte nails offer a unique twist to the standard glossy finish, providing a smooth and flat appearance that adds interest to even simple manicures. Experiment with different colors, combining matte with glossy polish for contrast or trying a French tip with a matte base and shiny tips. This versatile style suits nails of all shapes and lengths, making it a great choice to draw attention to shorter nails.
SHORT GEL ACRYLIC NAILS
Gel nails offer strong and flexible options in various colors, lasting about two weeks, shorter than acrylic manicures. Quick-drying and less prone to chipping, they’re ideal for special occasions. However, be cautious about the removal process, UV exposure, and potential damage to nail beds if not done correctly.
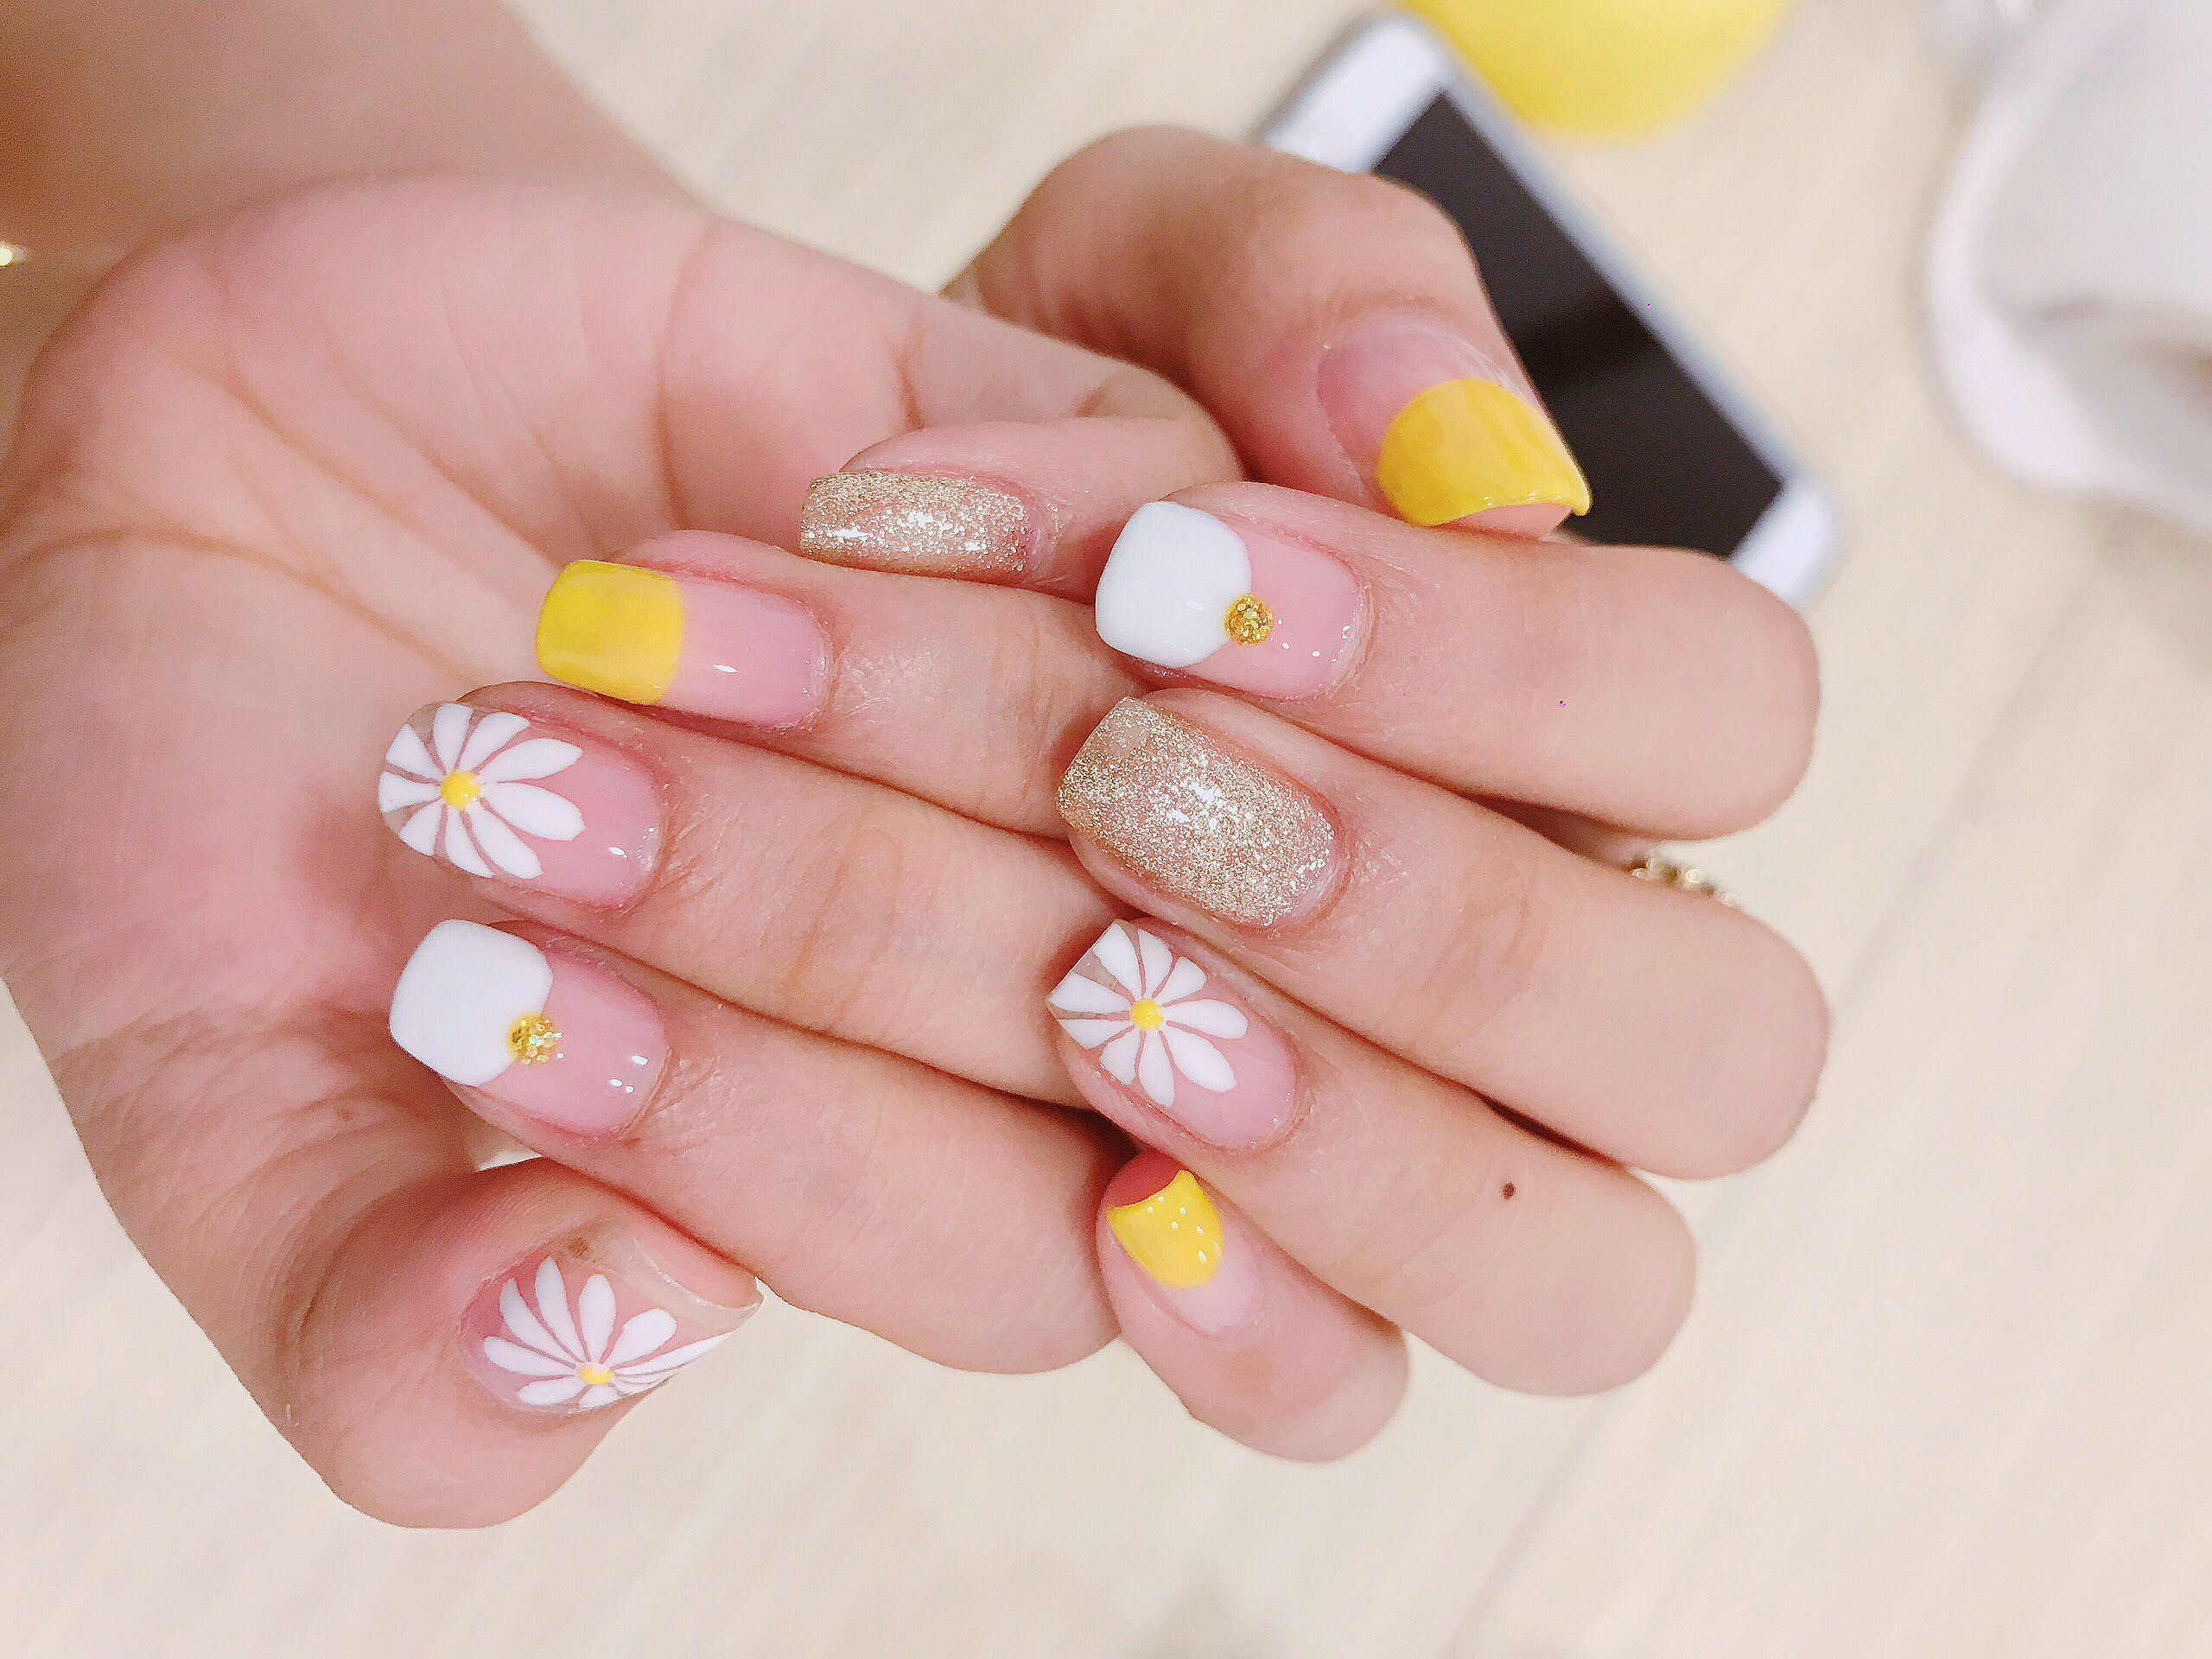
SHORT YELLOW ACRYLIC NAILS
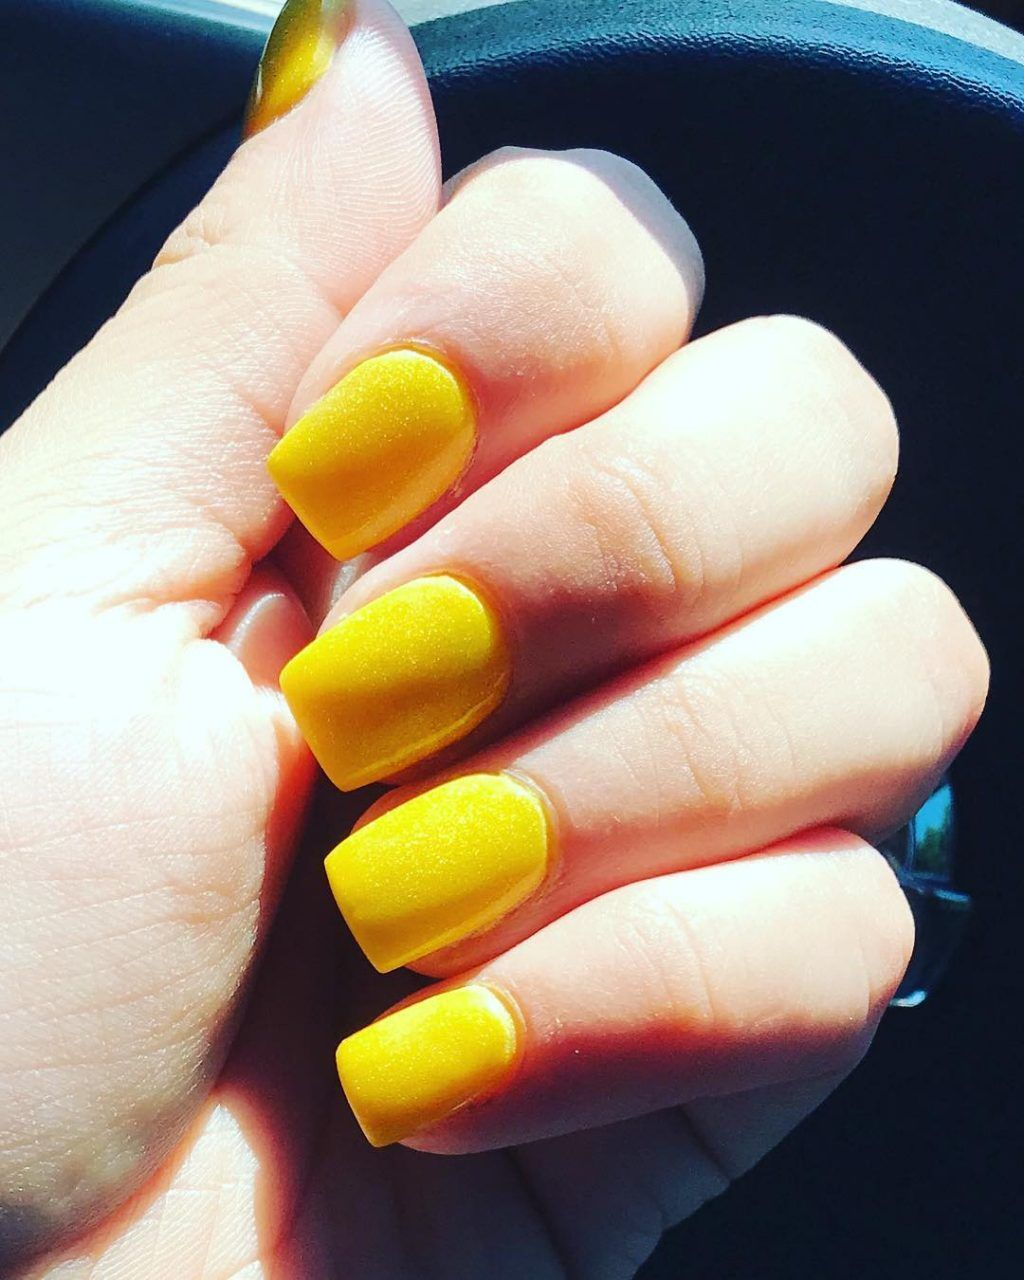
Yellow nails radiate cheerfulness and optimism, bringing a smile to your face. Symbolic of positivity, they encourage focusing on goals and looking on the bright side. Choose from muted to saturated shades that complement your skin tone, and explore nail art possibilities like florals or smiley faces. Yellow nails are a delightful option, especially for short nails that benefit from a touch of vibrant simplicity.
DARK BLUE ACRYLIC NAILS
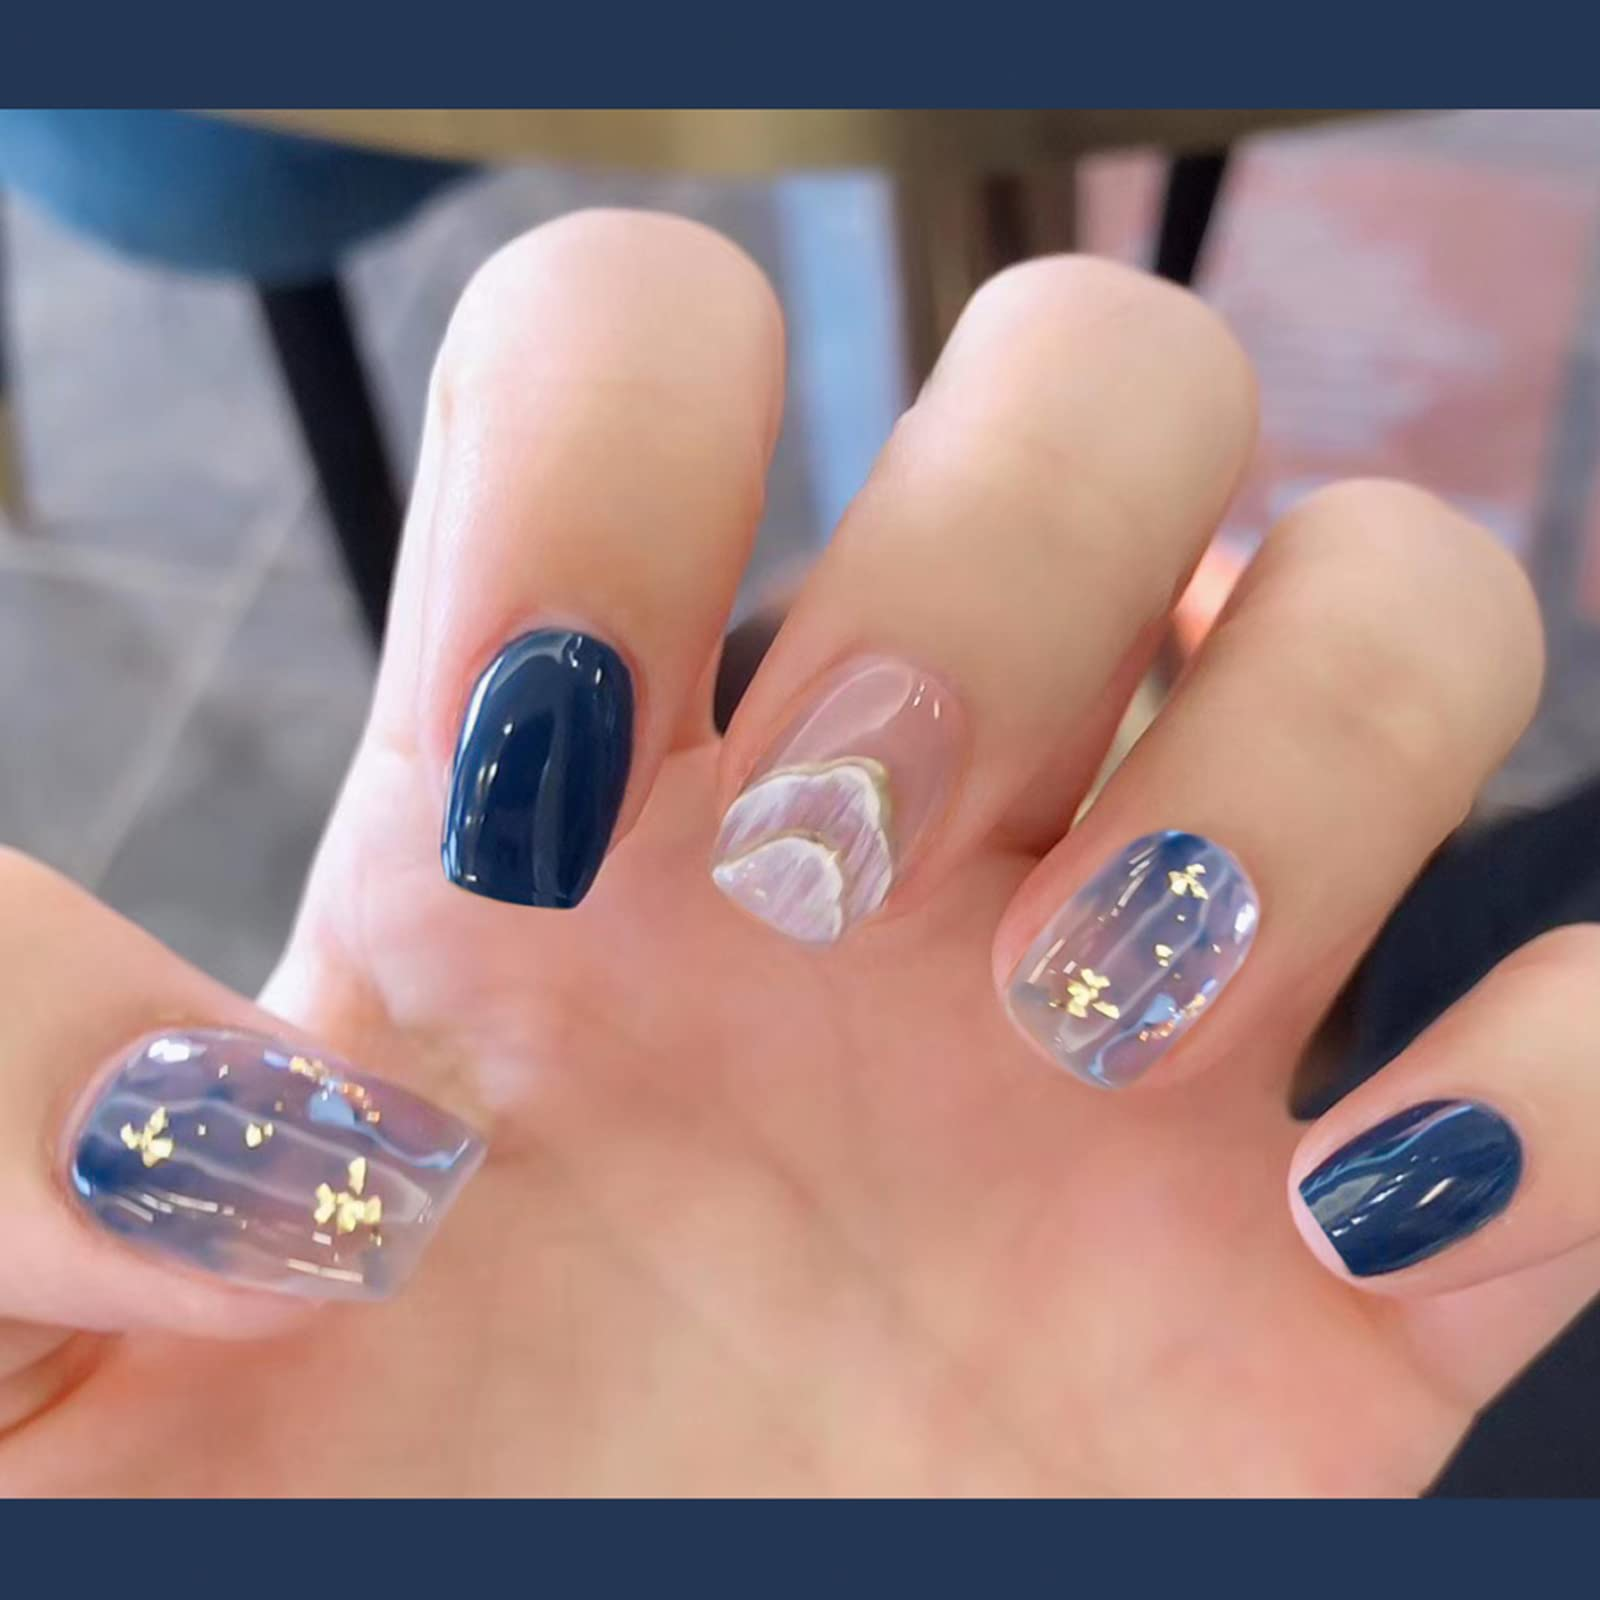
Opting for dark blue acrylic nails is a bold and attention-grabbing choice, especially compared to lighter shades. The richness and visibility of this color make it a daring yet stylish option throughout the year. Darker hues highlight your nail shape and length, particularly complementing short nails. Explore creative possibilities like the ombre effect with two shades of dark blue or pairing it with contrasting colors like white or black for added flair. Dark blue, associated with mystery and power, serves as an excellent base for cosmic nail art, allowing you to make a statement about your thoughts and feelings.
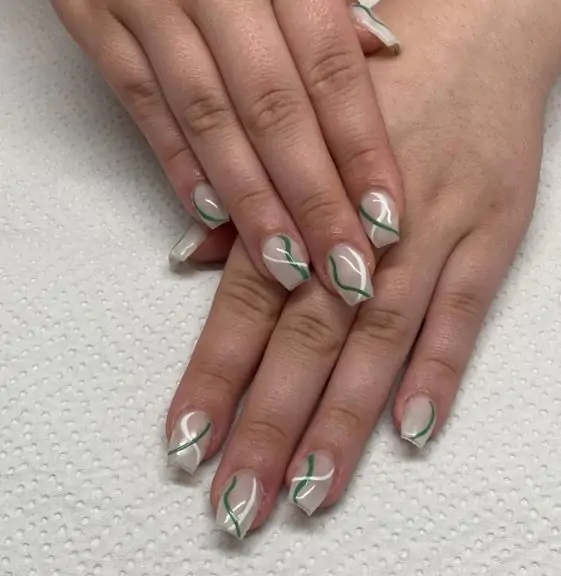
SHORT GREEN ACRYLIC NAILS
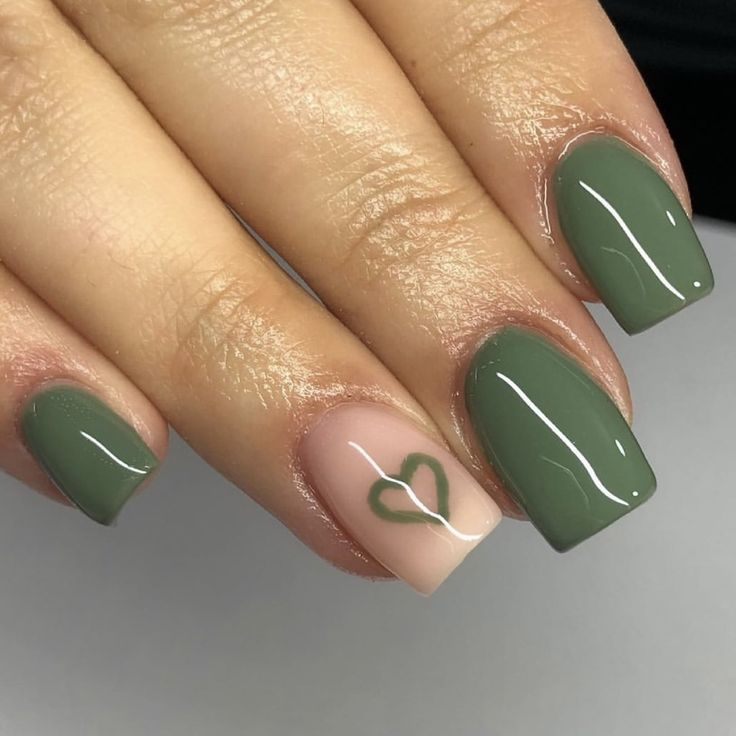
Green nails, symbolizing nature and growth, make a trendy and expressive statement. Choose pastel green for a subtle, universally flattering option, or go for the bold impact of emerald green. Darker green shades pair well with gold detailing for a luxurious finish, and you can create contrasting looks by combining green with purple or pink. The versatility of green allows for abstract patterns, swirls, or a modern twist on the classic French tips manicure, making green nails a lovable choice.
SHORT GRAY ACRYLIC NAILS
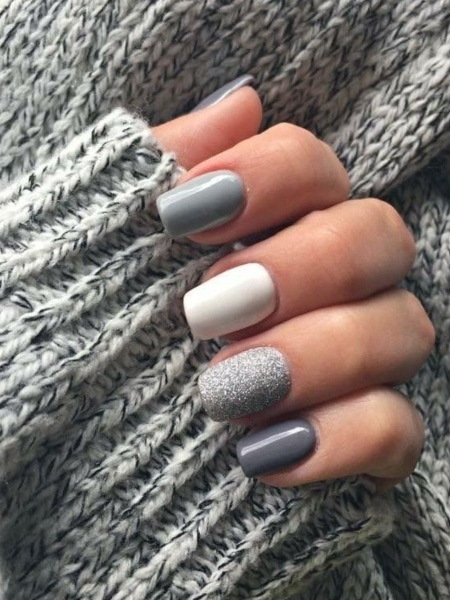
Gray nails complement all complexions with a range of shades from light to dark. A versatile alternative to black, gray pairs well with various colors, such as blues or reds, for a stylish contrast. This chic color can convey both a polished and edgy look, depending on your chosen nail shapes and artwork. Add a touch of shimmer by mixing gray polish with silver glitter for a dazzling finish.
LOVE-INSPIRED SHORT ACRYLIC NAILS
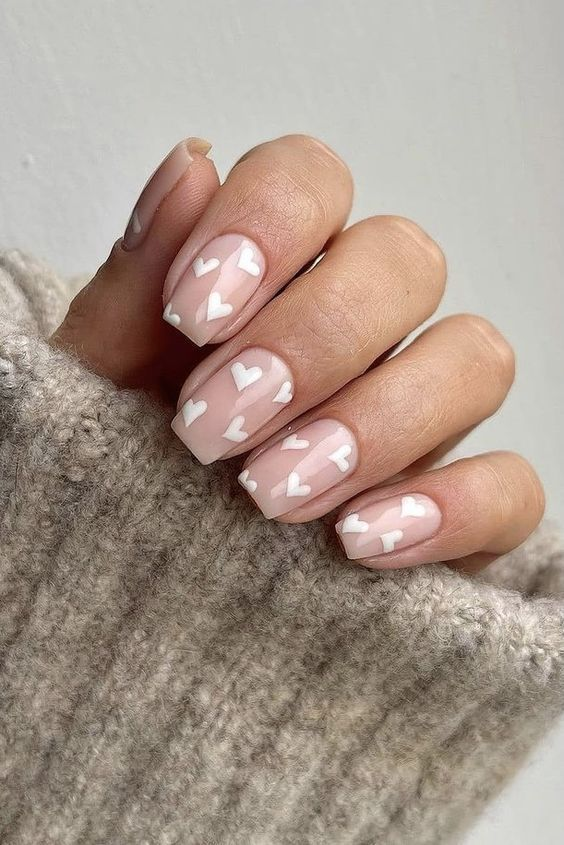
Celebrate love with a heart-inspired manicure. From a simple heart on a feature nail to various-sized hearts in different colors, the universally recognized symbol of love speaks volumes without words. Choose classic hues like white, pink, and red, or go for eye-catching combinations like green and purple. Alternatively, opt for a nude or natural base to emphasize the nail art. Whether it’s Valentine’s Day or any day you want standout nails, these designs are a perfect expression of love.
ARTY PATTERNS ON SHORT ACRYLICS NAILS
While longer nails offer more creative space, short nails can look great too—just avoid overwhelming them with too much detail. Opt for artistic patterns, mix and match colors, or choose a theme like horror-inspired nails for a unique and personalized touch.
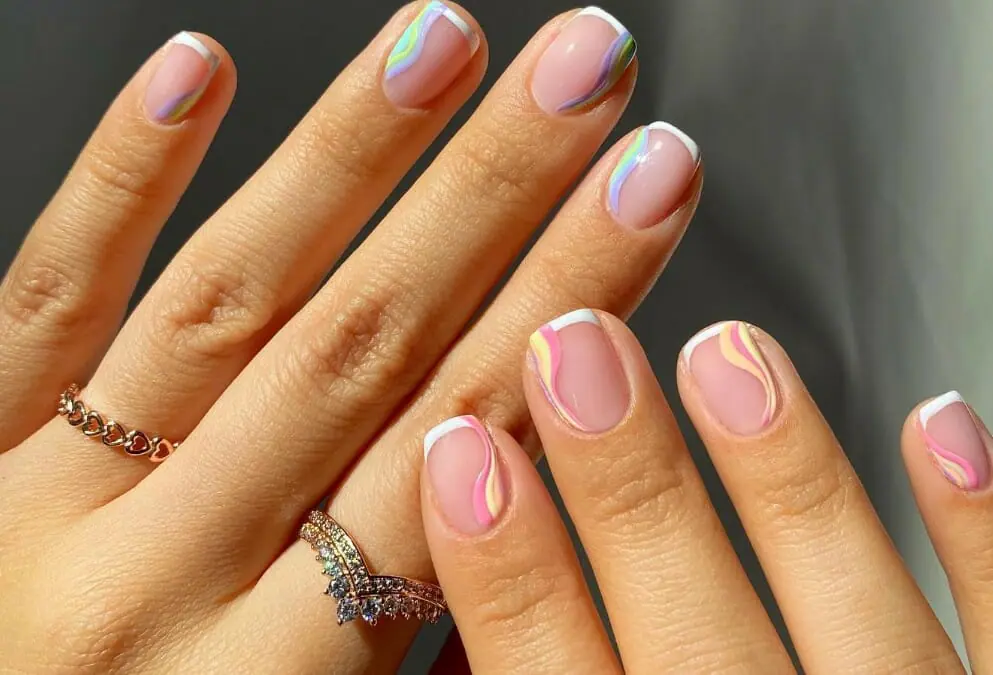
SHORT RAINBOW ACRYLIC NAILS
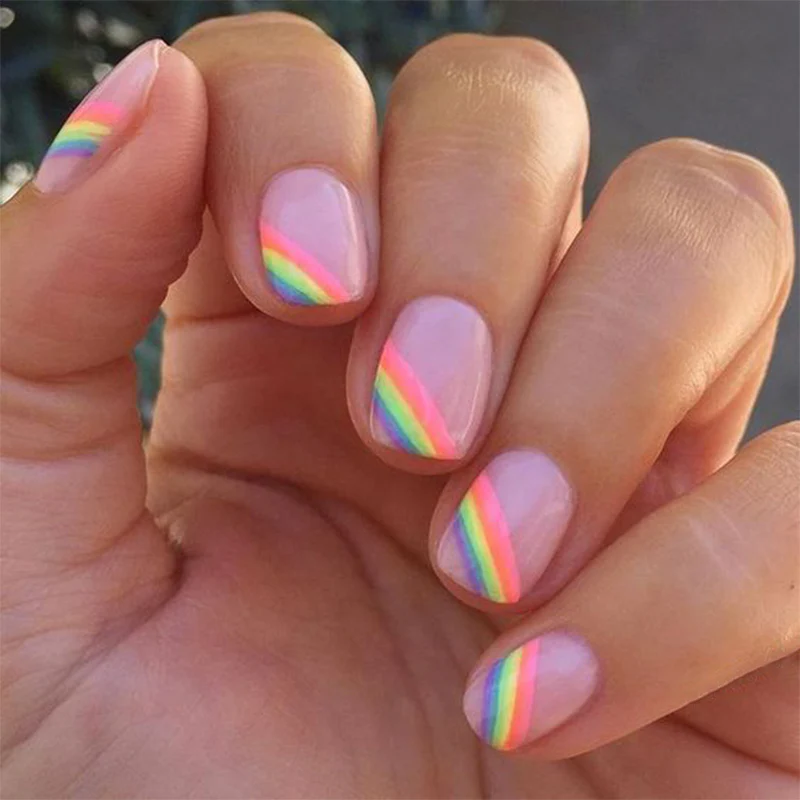
Rainbow nails symbolize hope, dreams, and beauty after challenges. They offer a visually stunning manicure, whether highlighting a feature nail, adorning every fingernail, or experimenting with placement. Ideal for short acrylic nails, rainbow nails bring positivity and vibrancy to your look, adding a beautiful and meaningful touch to your manicure.
SHORT BROWN ACRYLIC NAILS
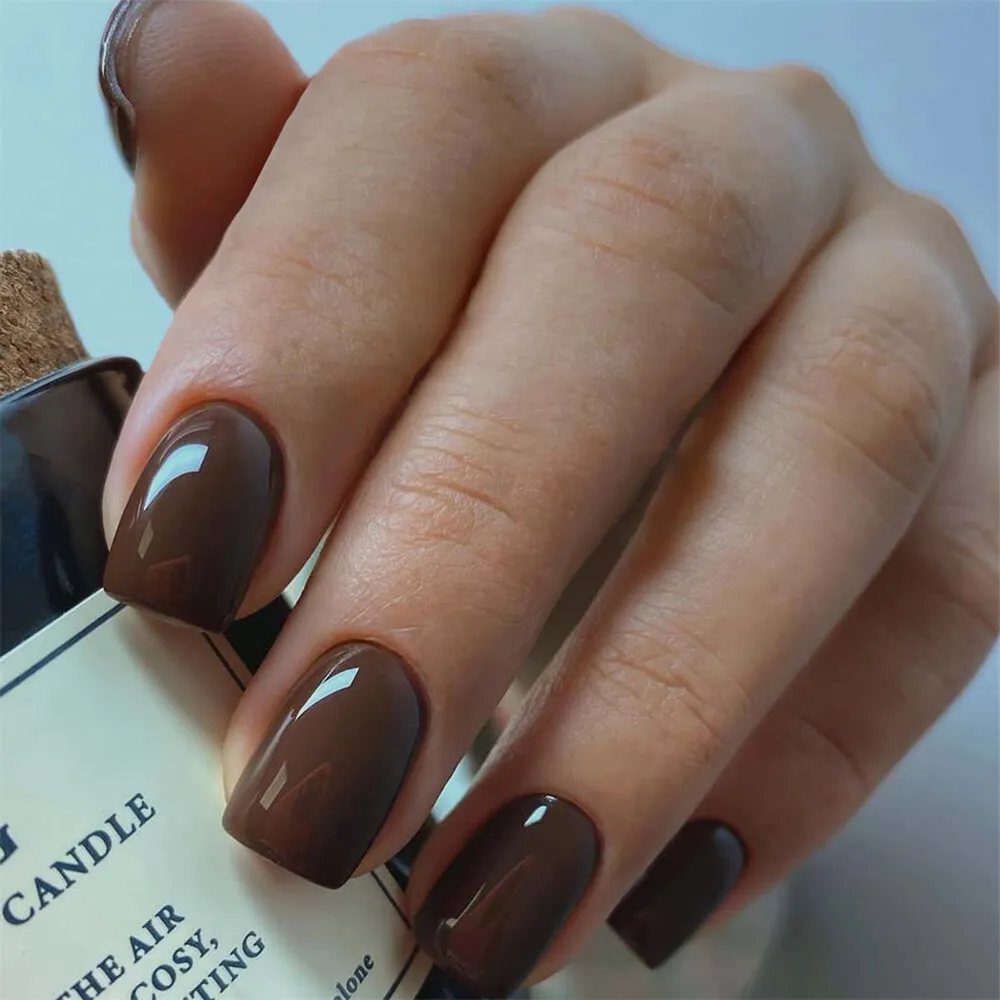
For an everyday, versatile look, go for short acrylic nails in brown. Acrylics offer strength and flexibility, and brown is a chic and easy-to-wear choice, not as harsh as black or burgundy. With various brown shades available, you can find the perfect match for your preference and skin tone. Get creative by experimenting with placements, patterns, or prints. Mixing and matching different brown shades will result in a stylish and chic manicure.
RED FRENCH TIP ACRYLIC NAILS
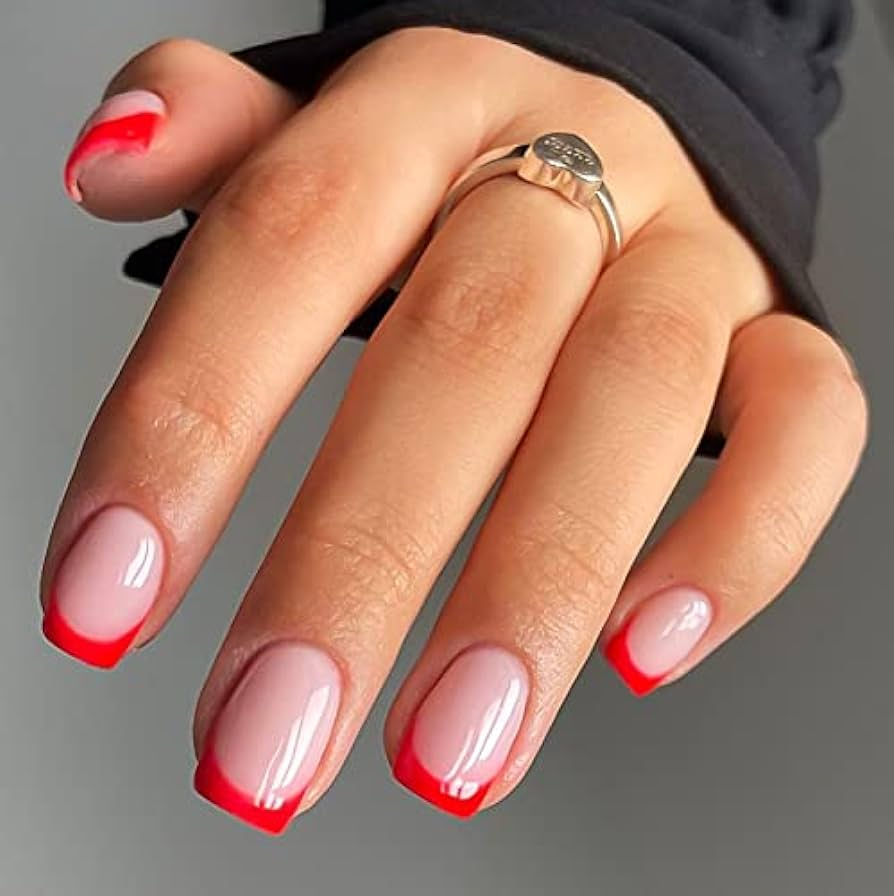
Red nails are a bold statement, commanding attention with their eye-catching hue. Associated with passion, seduction, and romance, red can subtly convey your feelings. If wearing an all-red manicure feels daunting, a modern twist is to focus the color on just the tips, offering a contemporary approach to French tip nails. Swap the traditional white tip for red, keeping the base in light pink, nude, or a natural color for a stylish and approachable look.
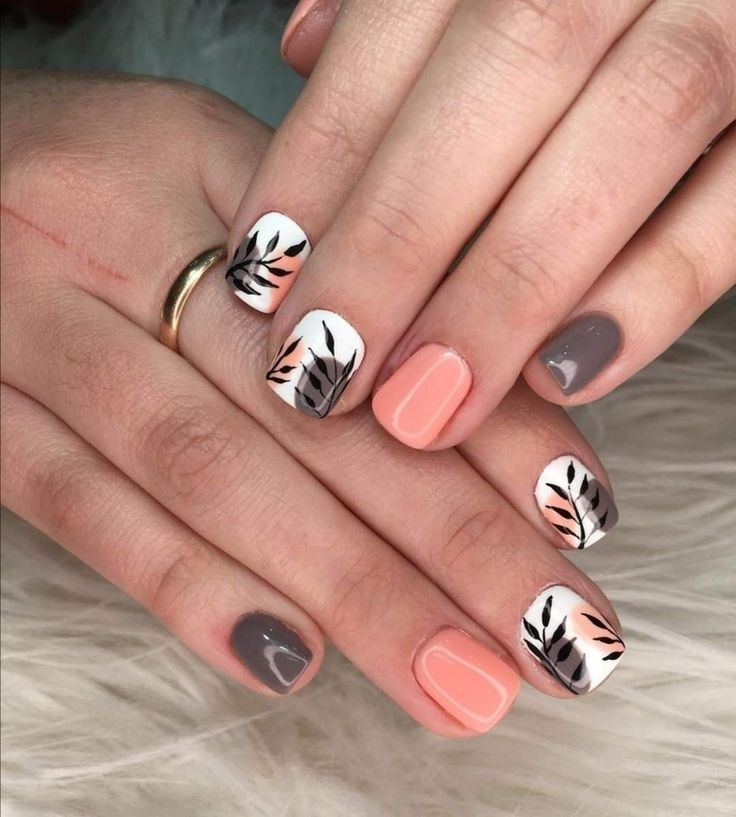
FLOWER ART ON SHORT ACRYLIC NAILS
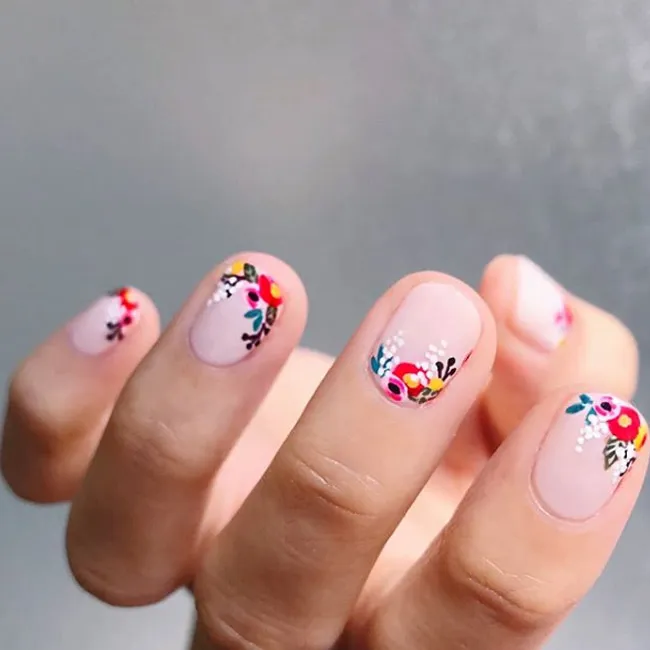
Flower nail art is a popular and girly choice known for its prettiness. The designs offer versatility in both style and color combinations. Classic options include whites and pinks, while bolder choices involve vibrant blues, greens, reds, and purples. You can also add symbolism by featuring your favorite flowers, such as roses or daisies. Flower nail art suits all lengths and shapes, making it a delightful complement to short acrylic nails.
SHORT LINE ART ACRYLIC NAILS
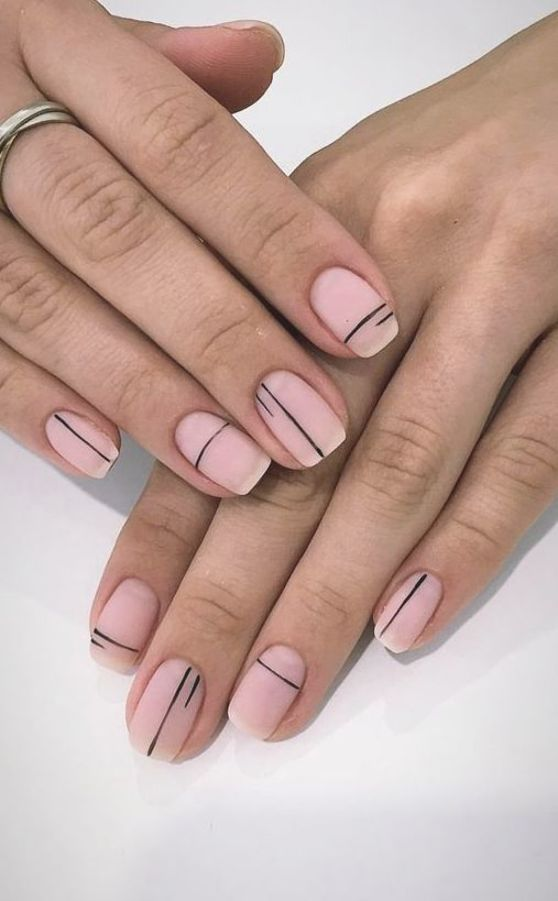
Line art presentsa fun and easy way to achieve your dream nails. Whether it’s an outline of a flower, a woman’s body, or abstract patterns with varying line lengths and placements, there’s an option for every skill level. For a subtle yet interesting and wearable look, stick to neutral colors like nudes and whites.
MIX AND MATCH SHORT ACRYLIC NAILS
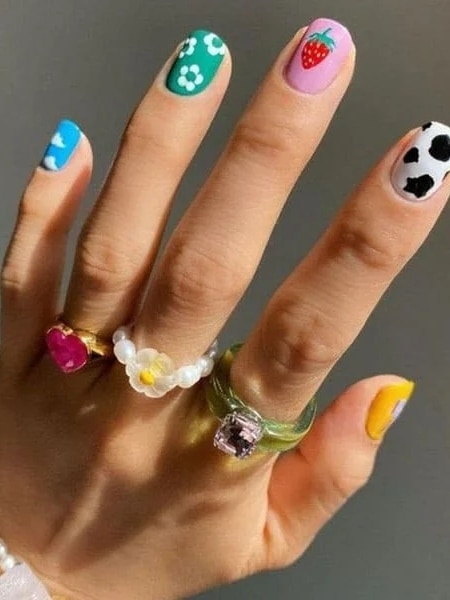
Mix and match nails are a bold and attention-grabbing option for those who love vibrant aesthetics. It’s a fantastic way to inject a pop of color into your look and experiment with various patterns, prints, and logos simultaneously. This versatile style can be adapted to suit your preferred nail length and shape, enhancing their appearance. While it may not be suitable for everyday wear, especially in conservative environments, mix and match nails are perfect for special occasions, allowing you to showcase your playful and adventurous side.
STRIPED SHORT ACRYLIC NAILS
Stripes are a timeless favorite in fashion and beauty for their easy-to-wear and fun nature. With numerous color combinations to explore, each look feels fresh and modern. Stripes complement short nails, and a simple yet stylish everyday look can be achieved with nudes and neutral hues. For a touch of retro flair, combine stripes with squiggles or go for a groovy color scheme with pinks, browns, and greens.
GINGHAM PRINT ON SHORT ACRYLIC NAILS
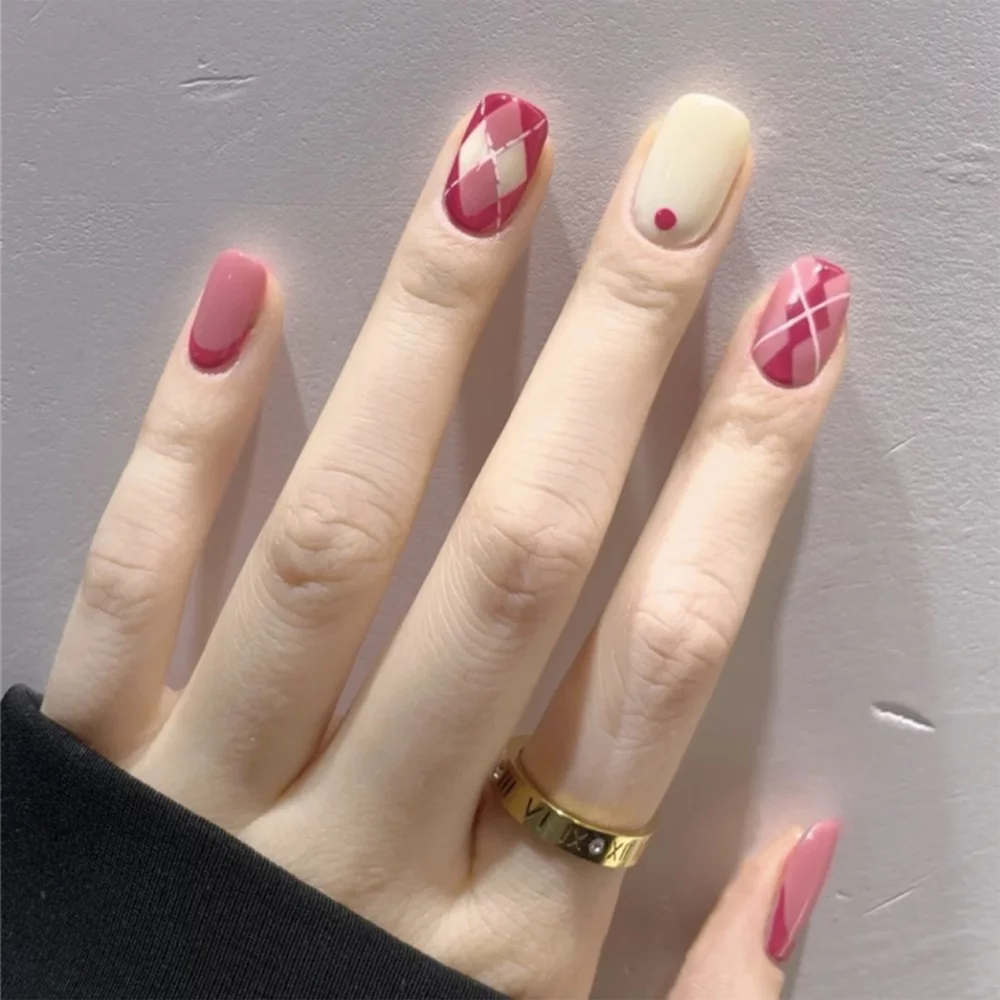
Gingham, a charming checkered or striped pattern, is versatile and pretty. Traditionally in white and bright colors, you can personalize it with your preferred hues. Transform your short nails by painting every nail or just a feature nail with a gingham print. Experiment with contrasts like gray and burgundy or opt for a classic monochromatic scheme with white and black. Pinks and reds also offer creative possibilities in this delightful pattern.
CONCLUSION
Our collection of 35 short square acrylic nail designs is an excellent choice for those seeking an elegant and sophisticated nail style without investing too much time and effort. These nails can be adorned with various designs and colors, suitable for any occasion. We hope you find the perfect design for your lovely hands!