The right hair color can dramatically enhance the beauty of your curls, boosting your confidence. However, choosing wisely is key. Factors like skin tone, eye color, and natural hair texture play a crucial role in selecting the perfect shade. This article presents 45 inspiring curly hair color ideas to help you find the ideal hue and technique to match your unique style.
IS IT OKAY TO DYE CURLY HAIR?
Dyeing curly hair is indeed possible without compromising its unique texture, but it requires a careful approach. Curly hair often demands specific care, and coloring can introduce additional challenges. To achieve optimal results and minimize damage, consulting with an experienced colorist is crucial. They possess the expertise to assess your hair’s specific needs and recommend suitable colors and techniques.
OUR TOP PICKS
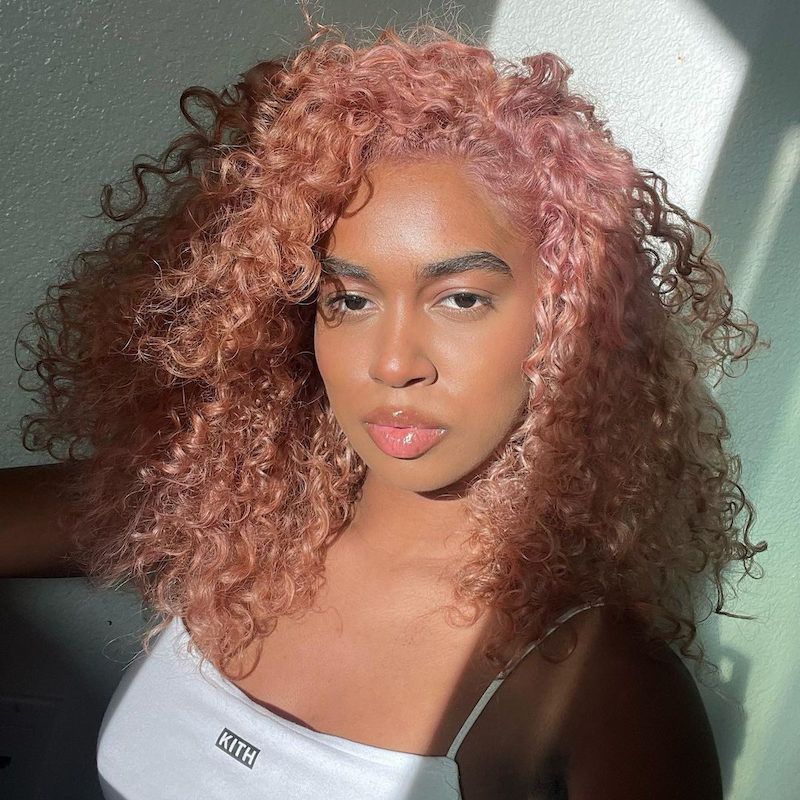
CHAMPAGNE ROSE
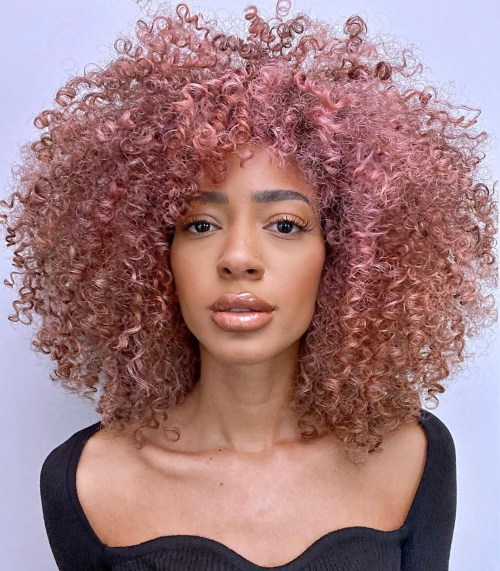
Whether you’re embracing your natural curls or styling them to perfection, elevate your ringlets with a shimmering champagne hue. The new Redken Shades EQ Gold Rose Hair Gloss in 010GRo Sparkling Wine adds a subtle rose-gold shimmer to lightened or blonde hair, creating a luxurious and iridescent effect. Consult your stylist to achieve this stunning, champagne-inspired look.
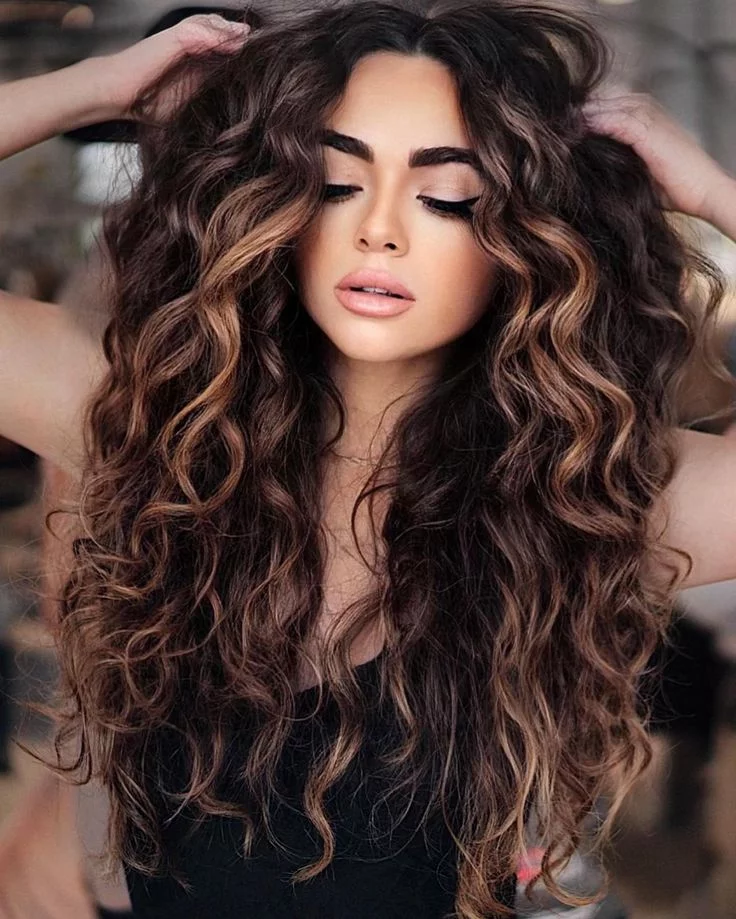
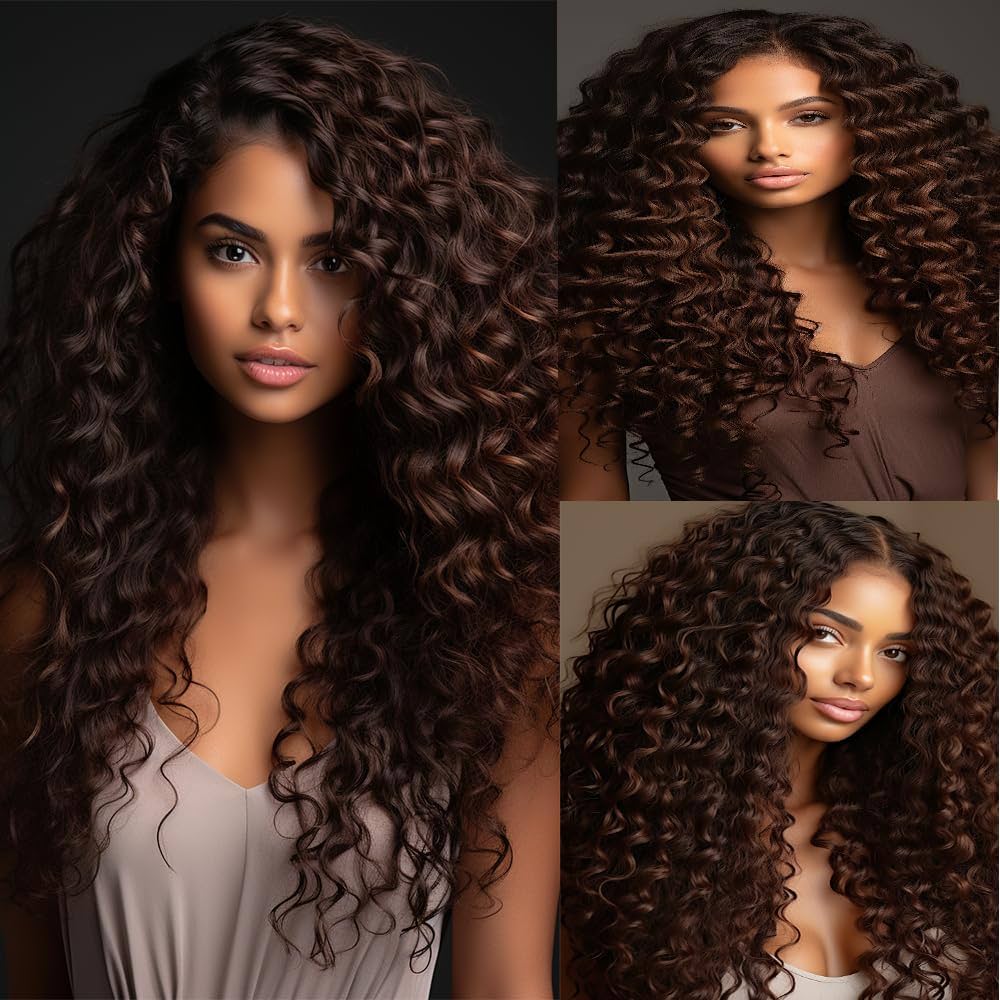
BROWN ROSE
Brown rose is a versatile shade that complements a wide range of complexions. This particular brunette rose hue, infused with subtle golden undertones, is especially flattering for those with darker skin tones. It creates a warm and harmonious contrast, enhancing the natural radiance of the skin.
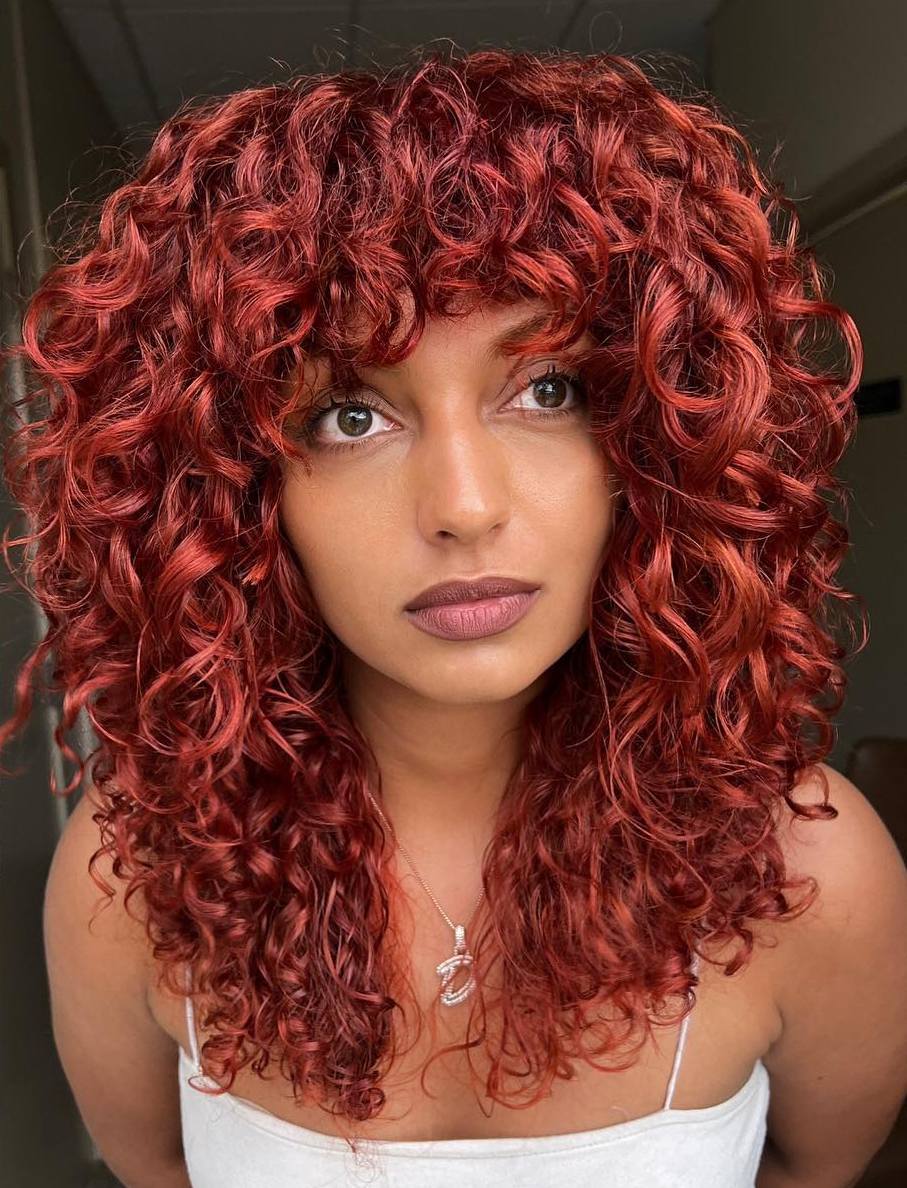
RED HOT
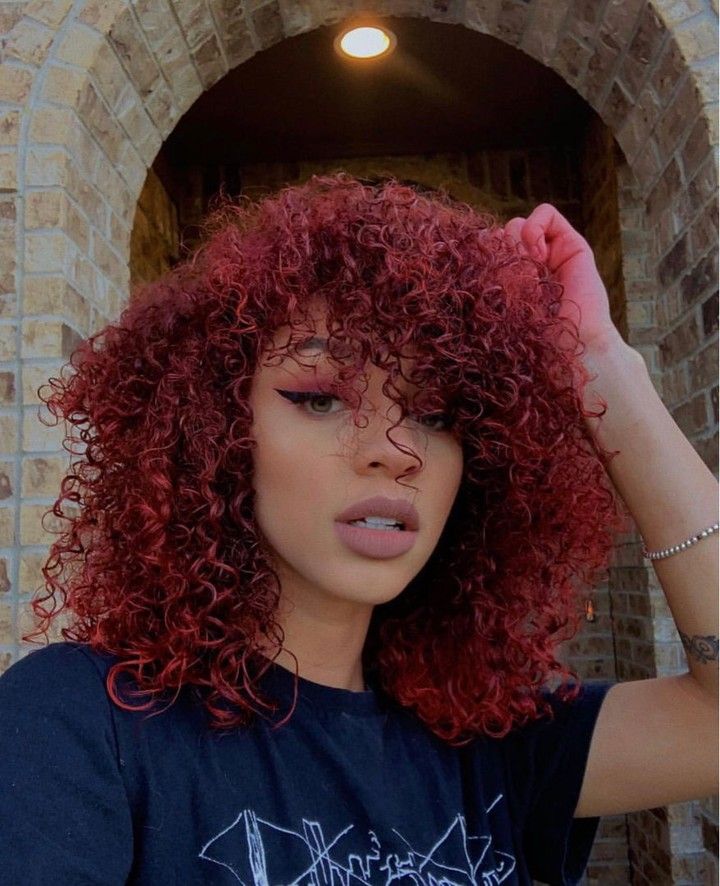
Contrary to the notion that curly hair can’t participate in trendy cuts, the curly wolf cut is a prime example of how to embrace curls in modern styling. With its layered texture and shape, this cut enhances natural curl patterns while allowing for personalized styling. The addition of a carefully crafted curly bang beautifully frames the face, proving that curly hair can be both fashionable and flattering.
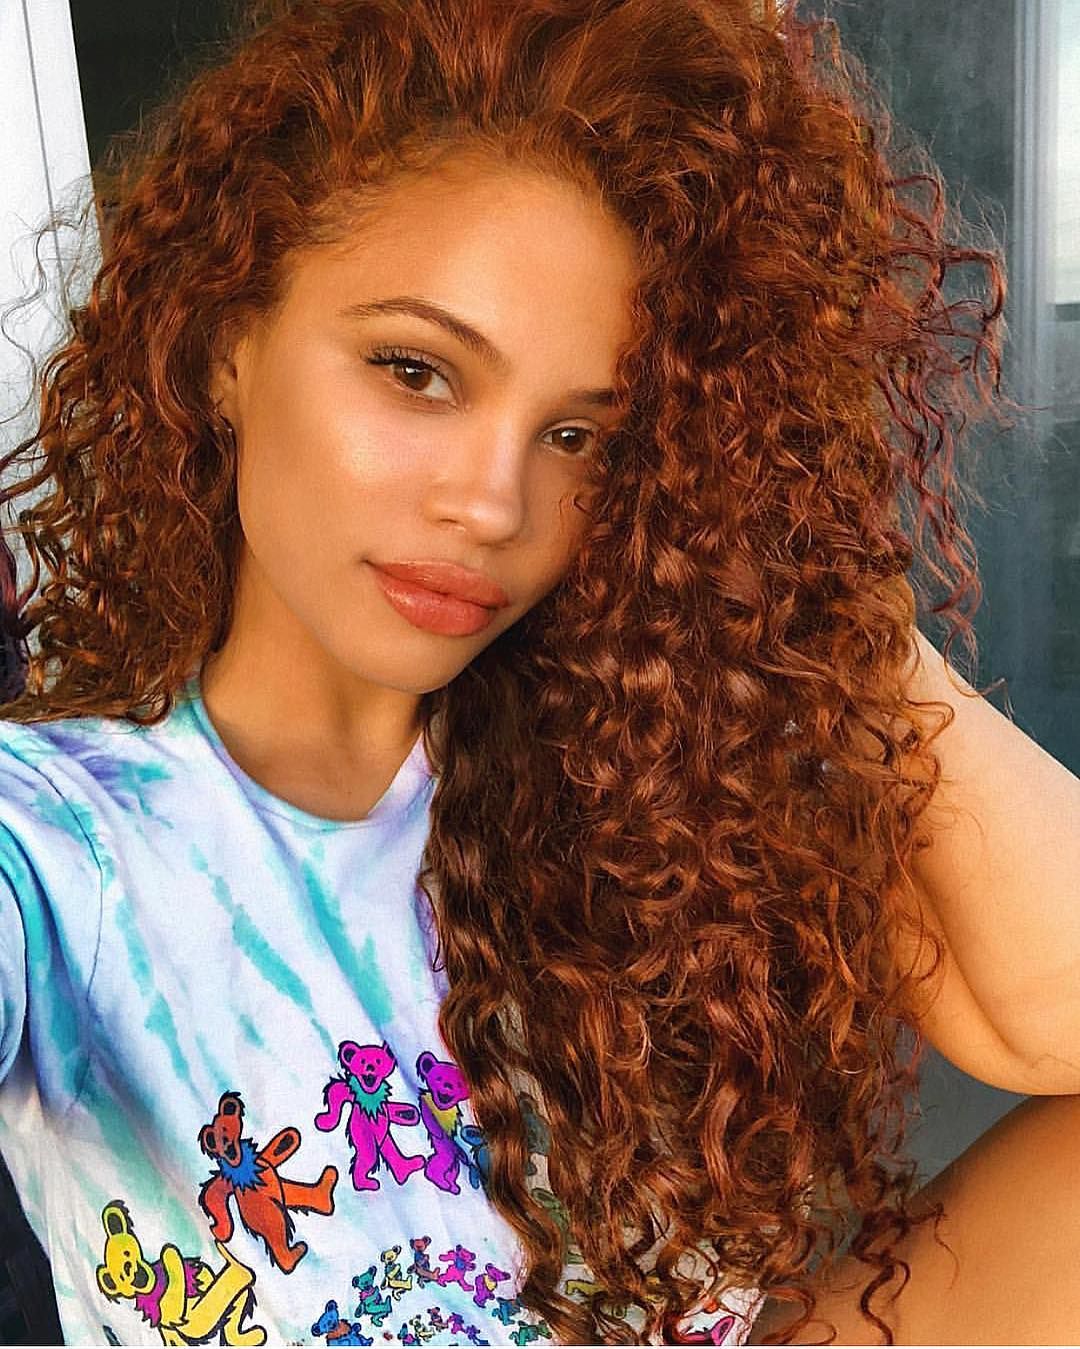
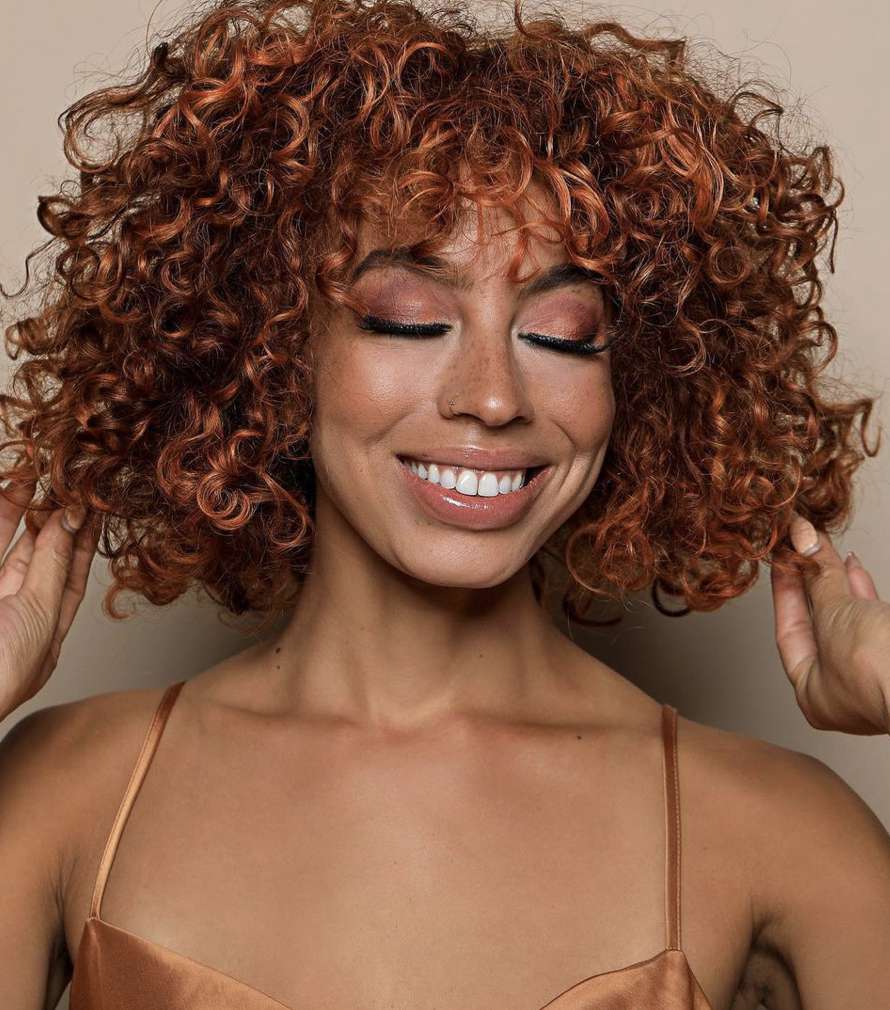
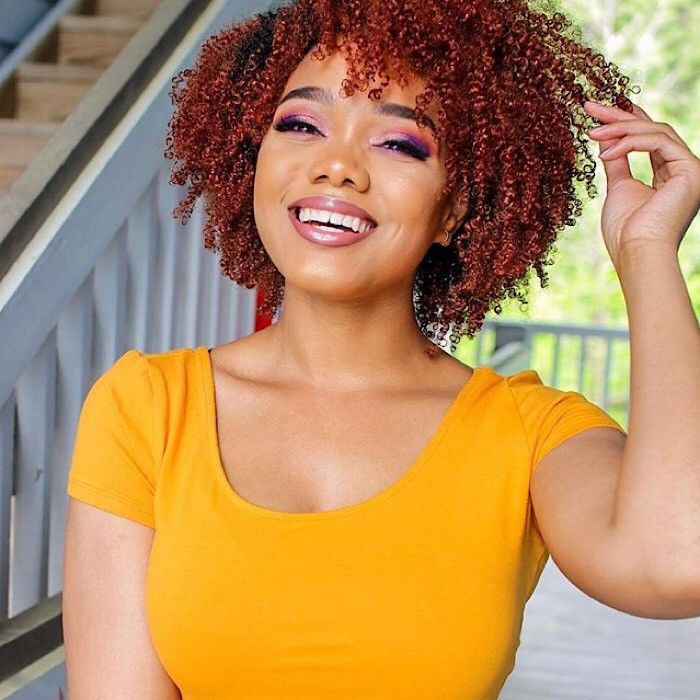
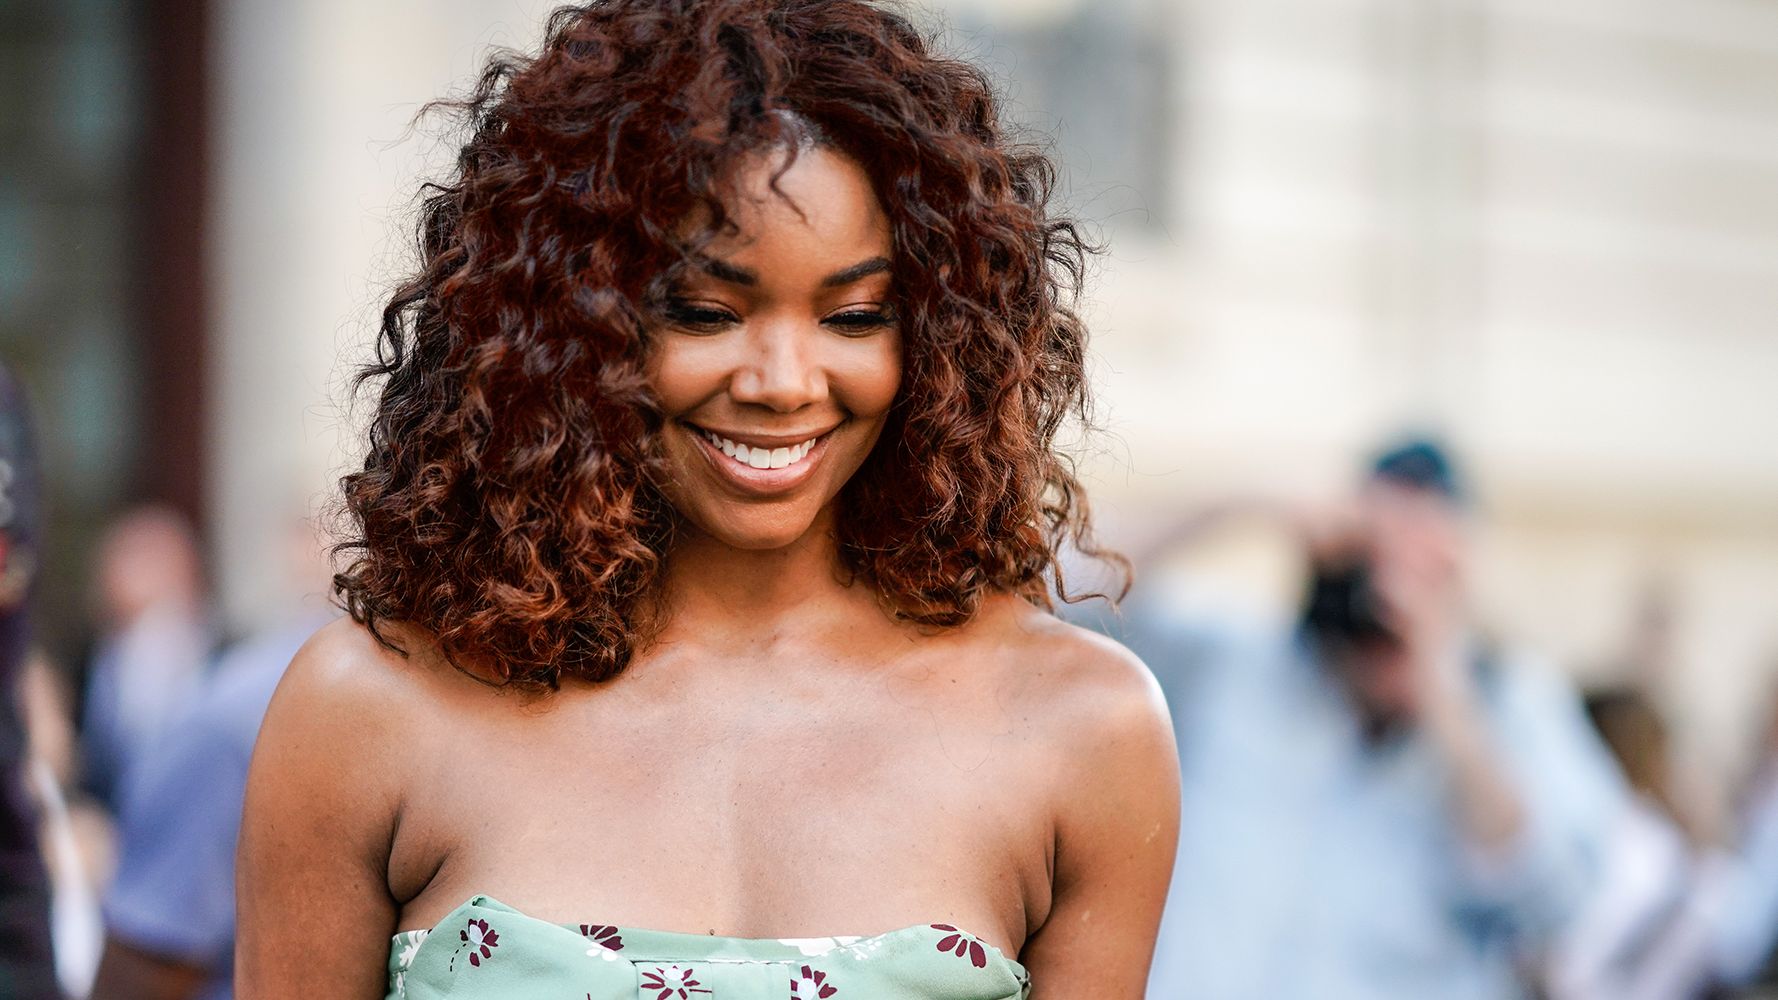
DARK AUBURN
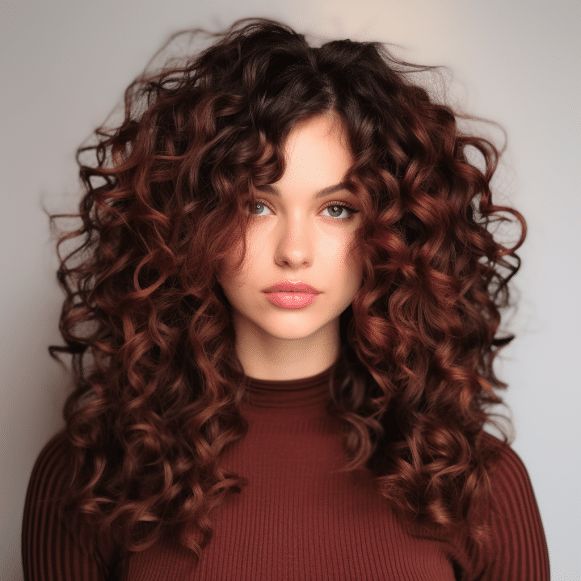
Imagine the intensity of fire engine red colliding with the warmth of brown. The result is a fiery auburn hue, a captivating blend of passion and earthiness. This color combination is so vibrant and compelling, it’s almost too much to bear.
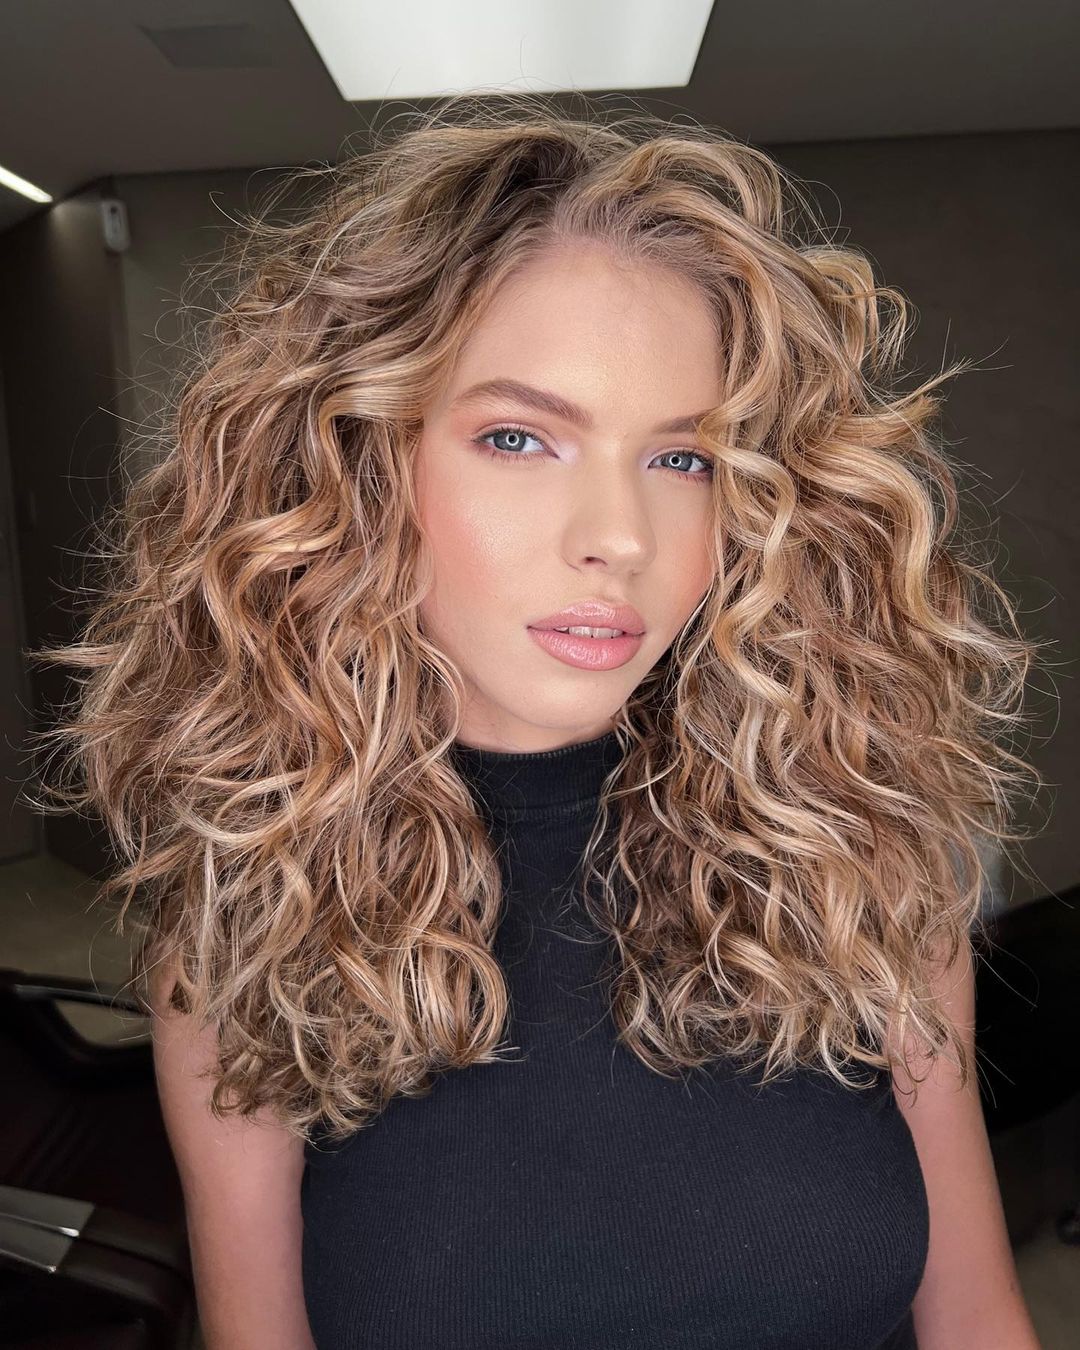
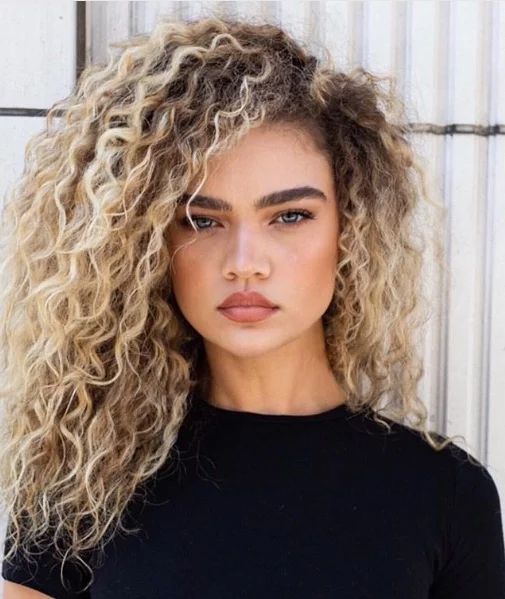
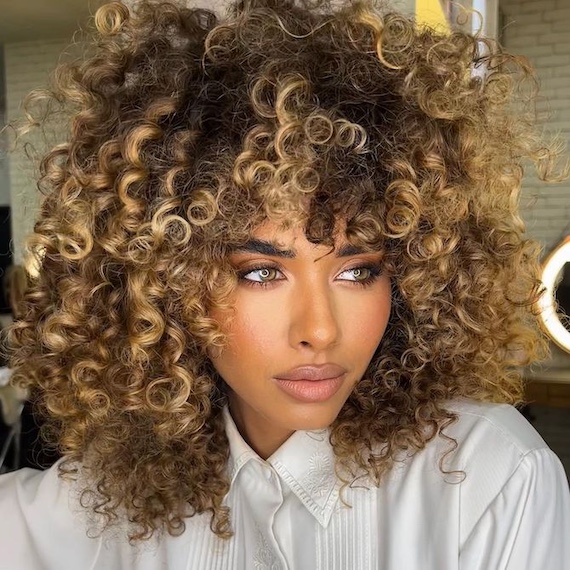
CREAMY GOLDEN BLONDE
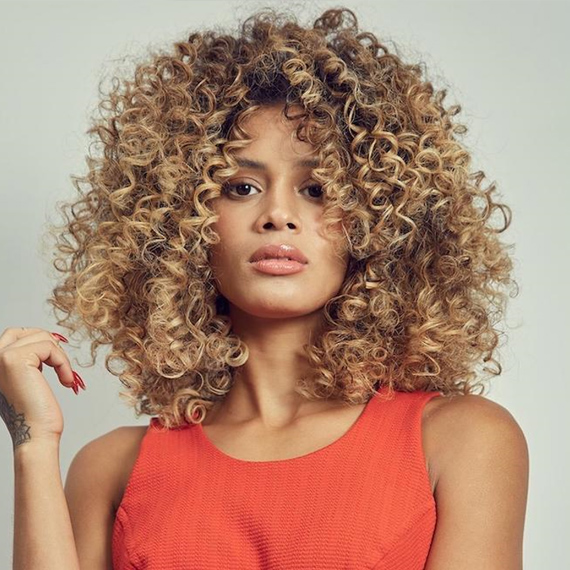
A harmonious blend of cool, beige, and golden tones creates a luminous look that effortlessly enhances your complexion. This brightened palette adds captivating depth and dimension to your twists, making them a standout feature.
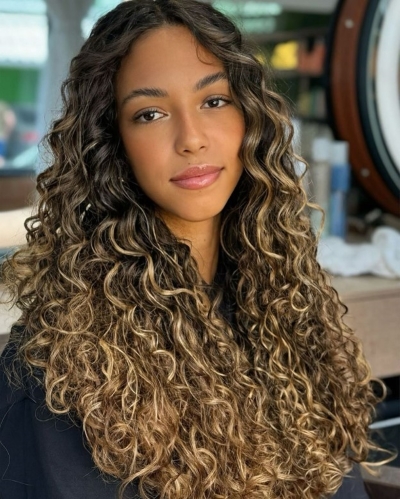
GINGERBREAD HIGHLIGHTS
Forget the notion that gingerbread hair is reserved for the holiday season. This brunette base infused with warm, reddish ginger tones offers a year-round glow, transforming your mane into a captivating blend of depth and radiance.
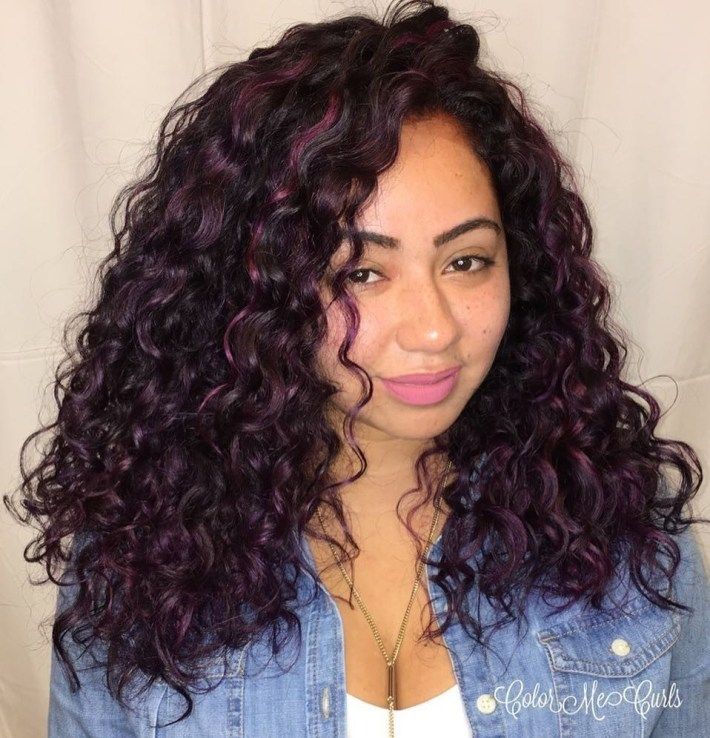
PURPLE
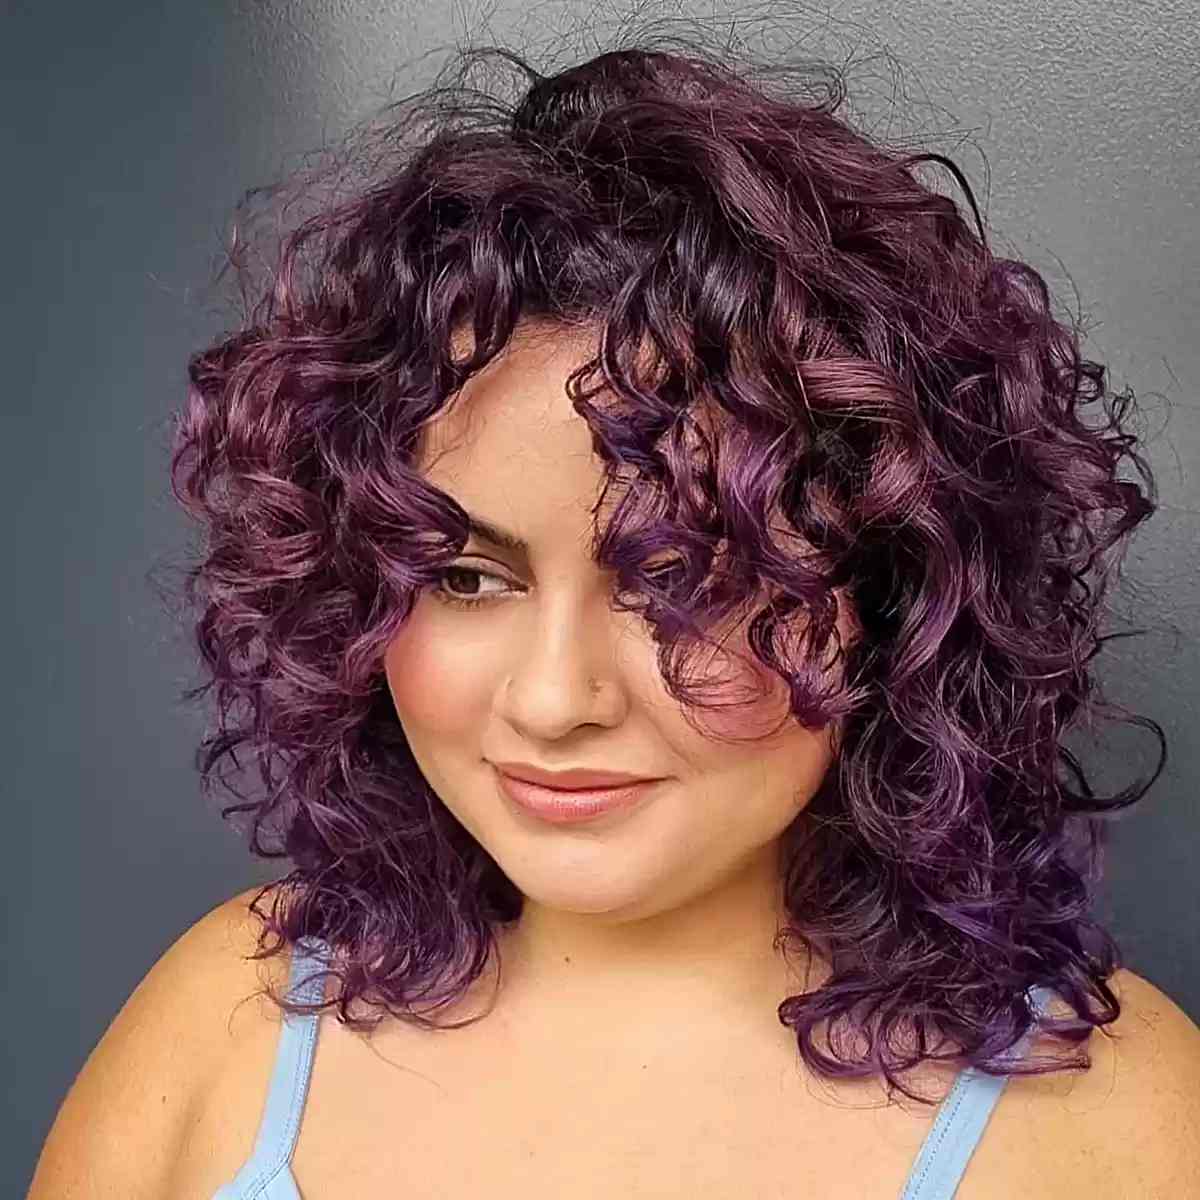
Fantasy hair doesn’t always have to be loud and bright. If you’re hesitant about colors appearing too artificial, a deep purple might be perfect. It’s so dark it can easily be mistaken for black, but with a magical transformation in sunlight, revealing its enchanting undertones.
LILAC BLONDE
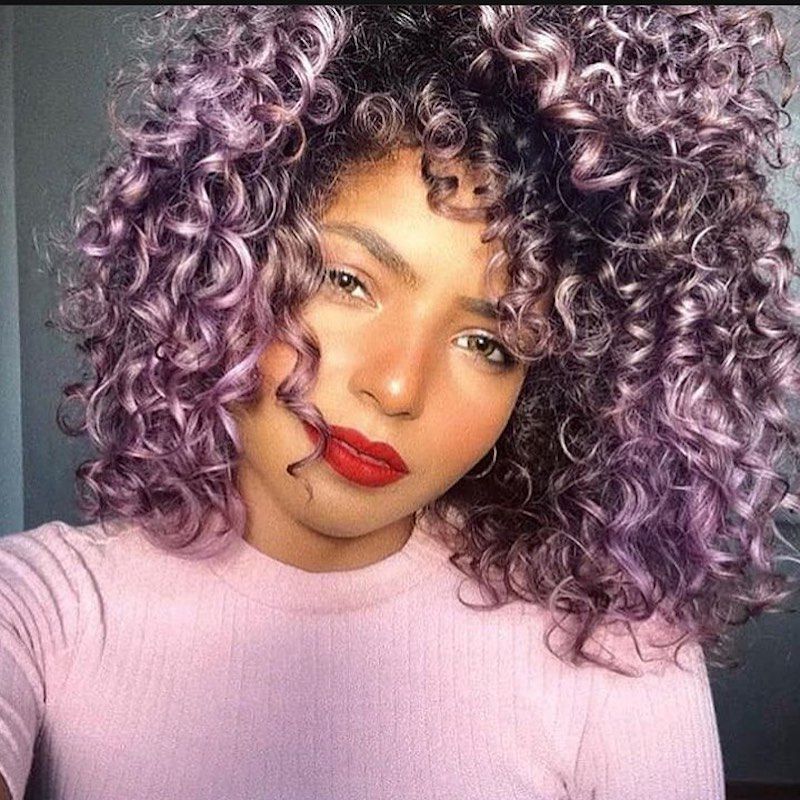
If you’re drawn to this enchanting hue but hesitant to commit to a permanent change, consider a temporary option like Biolage Professional Color Balm in Lavender. Perfect for those with light hair, this color depositing conditioner offers a subtle lilac tint without the long-term commitment, allowing you to experiment with this beloved shade.
PERIWINKLE
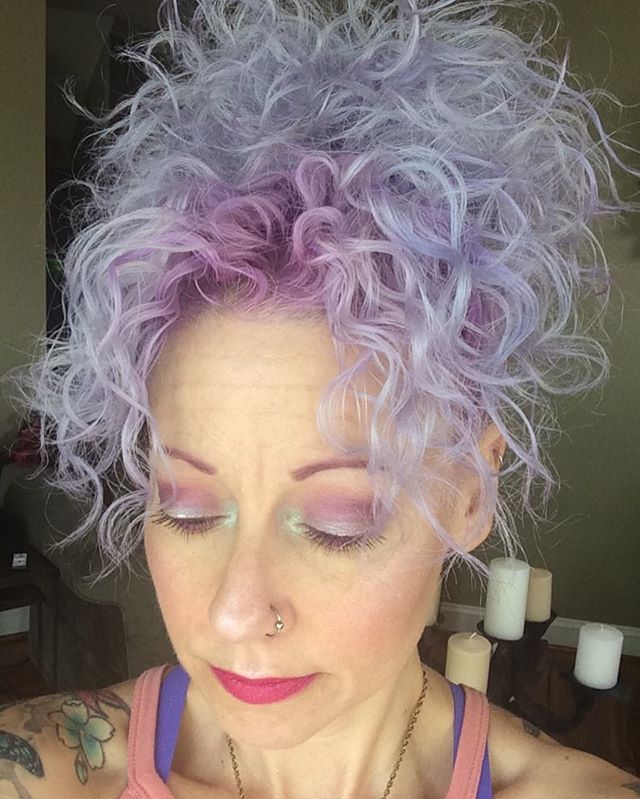
Channel your inner rebel princess with the emerging pastel purple-blue hue. This dreamy shade takes on a whimsical yet edgy character when paired with violet accents, creating a look that’s both playful and bold.
PASTEL RAINBOW
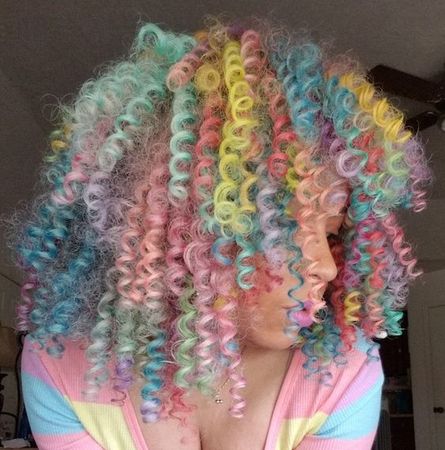
Yearning for a dash of whimsy? Pastel rainbow hair might be your perfect match. These ethereal hues can fade fast, but don’t let that dampen your spirits. Incorporate a system like Matrix Total Results Keep Me Vivid Shampoo and Conditioner into your routine to safeguard your vibrant color and let your pastel dreams last.
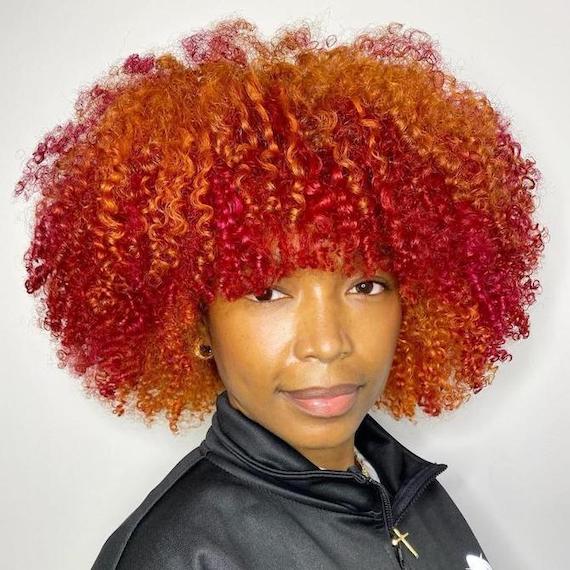
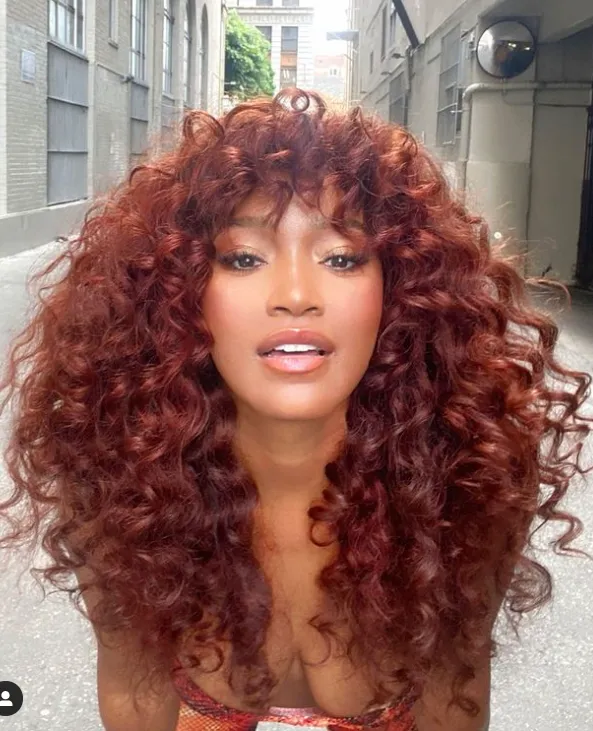
BLOODY MARY
Bloody Mary hair is a daring new trend that blends earthy and spicy tones for a truly unique look. This edgy style is perfect for those who aren’t afraid to make a statement, and we’re particularly obsessed with the bold contrast created by color-blocking the bangs.
PURE GOLD
Golden pigments have a unique ability to enhance the warmth of medium to olive skin tones, creating a radiant complexion. Pureology Color Fanatic Top Coat + Tone Gold is the perfect solution to maintain your salon-fresh golden hair color between appointments. This revitalizing formula refreshes your golden hues for up to six washes, ensuring your hair continues to shine with luxurious warmth.
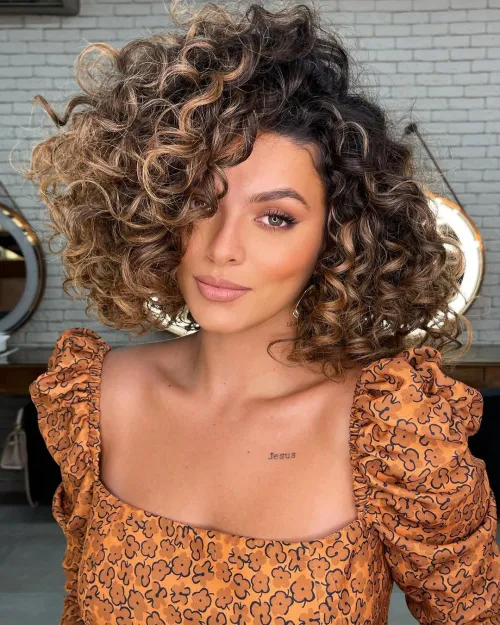
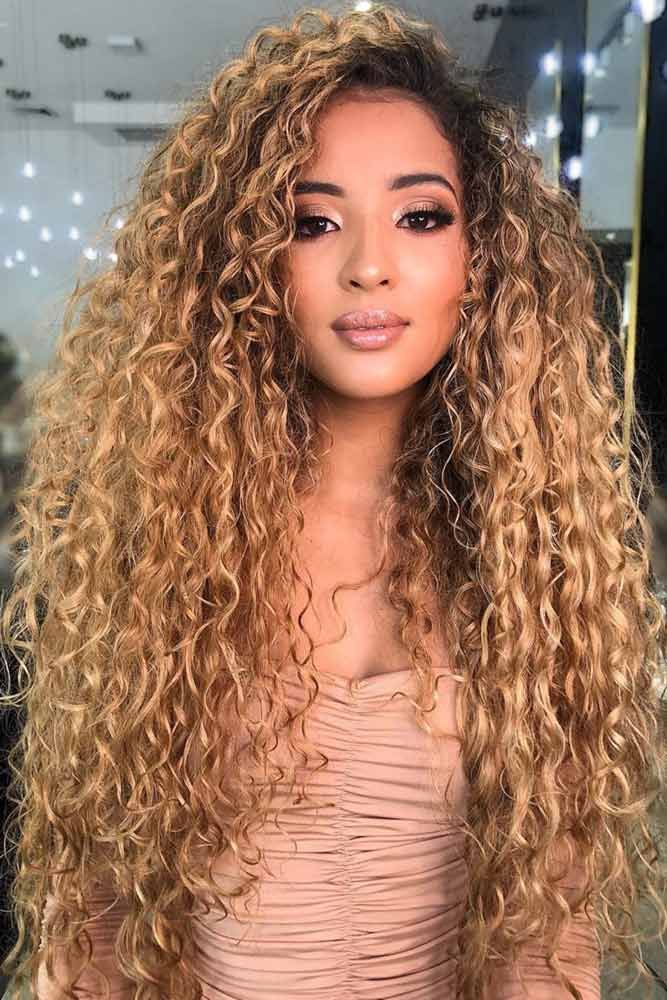
SUNFLOWER BALAYAGE
This balayage beautifully showcases the complementary nature of warm and cool blonde tones. Golden hues flatteringly frame the face, while cooler shades at the ends add a radiant touch that requires minimal upkeep compared to root maintenance.
COPPER MOCHA
Craving a captivating reddish-brown hue? Imagine a blend of fiery red, warm copper, and rich mocha – a truly unique color combination. To achieve this stunning look, ask your stylist to expertly mix Matrix Coil Color in shades 7M, 6CC, and 6RR. This harmonious trio will create a multi-dimensional, reddish-brown color that’s as beautiful as it is distinctive.
JET BLACK
Jet black hair doesn’t need color to shine. Unleash your curls’ full potential with L’Oréal Professionnel Serie Expert Curl Expression Definition Activator Gel. This hydrating formula effortlessly defines and revitalizes your spirals, banishing frizz and leaving them bouncy and full of life.
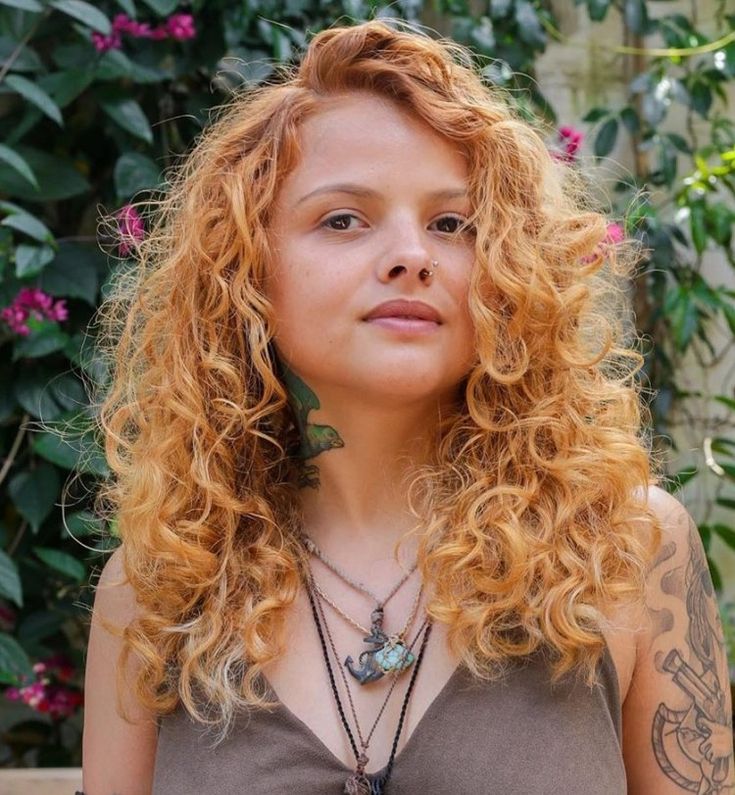
GINGER
Those blessed with natural ginger hair have always been the envy of many, but now, achieving a fiery mane is easier than ever. Ginger hair has surged in popularity, with even the biggest names in Hollywood embracing the trend. Whether you’re born with it or not, there’s no denying the allure of this vibrant hair color.
PLATINUM
Platinum hair color is elevated to a dazzling new level when paired with the edgy precision of a pixie cut and the carefree allure of tousled ringlets. This striking combination creates a bold and unforgettable look that effortlessly commands attention.
WHITE

White hair offers a luminous, natural beauty that’s a far cry from its platinum predecessor. To preserve its cool tones, combat brassiness with a purple shampoo like Kérastase Blond Absolu Bain Ultra Violet. This essential product will help maintain your white hair looking its pristine best.
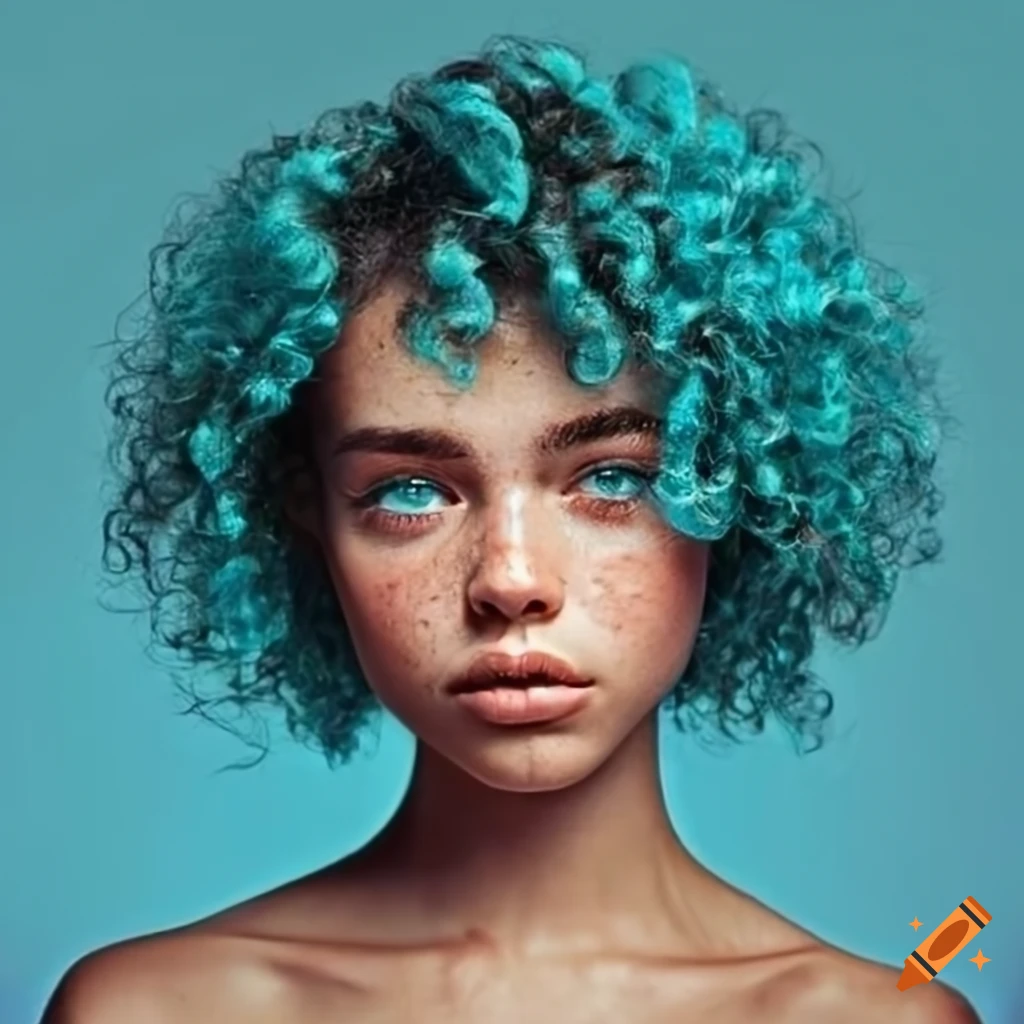
BLUE AND GREEN
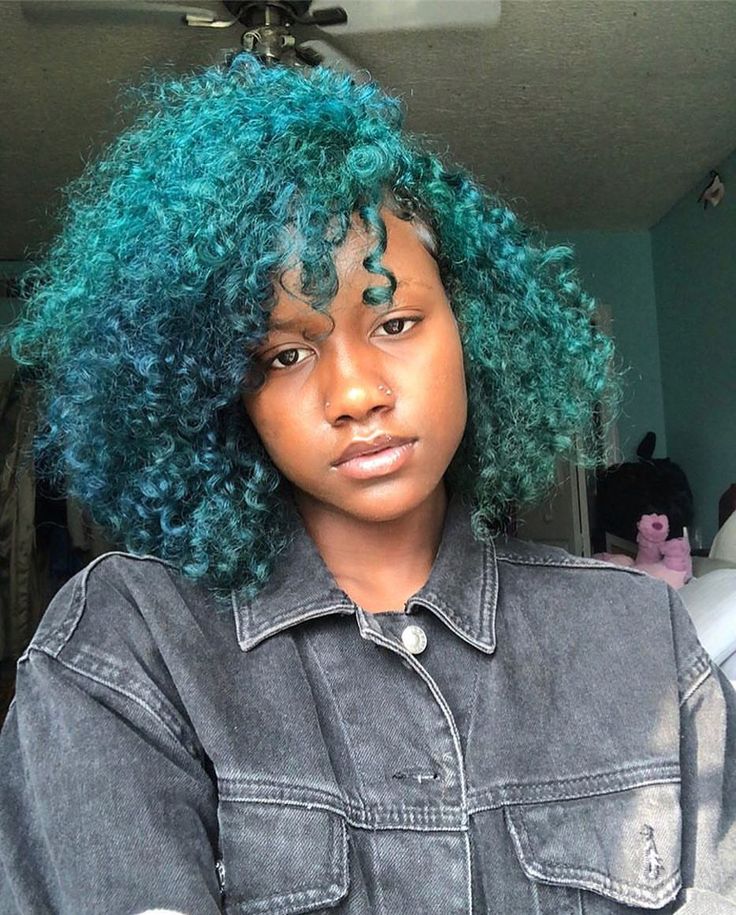
Embrace your inner mermaid with a mesmerizing blend of blue and green curls. This ethereal color palette is particularly stunning on curly hair, as the cascading ringlets mimic the fluid motion of ocean waves, creating a truly enchanting look.
TURQUOISE
For a bolder aquatic mermaid look, consider a deep turquoise hue. This darker shade, combined with your natural hair, creates a stunning contrast and adds a touch of mystery to the classic mermaid style.
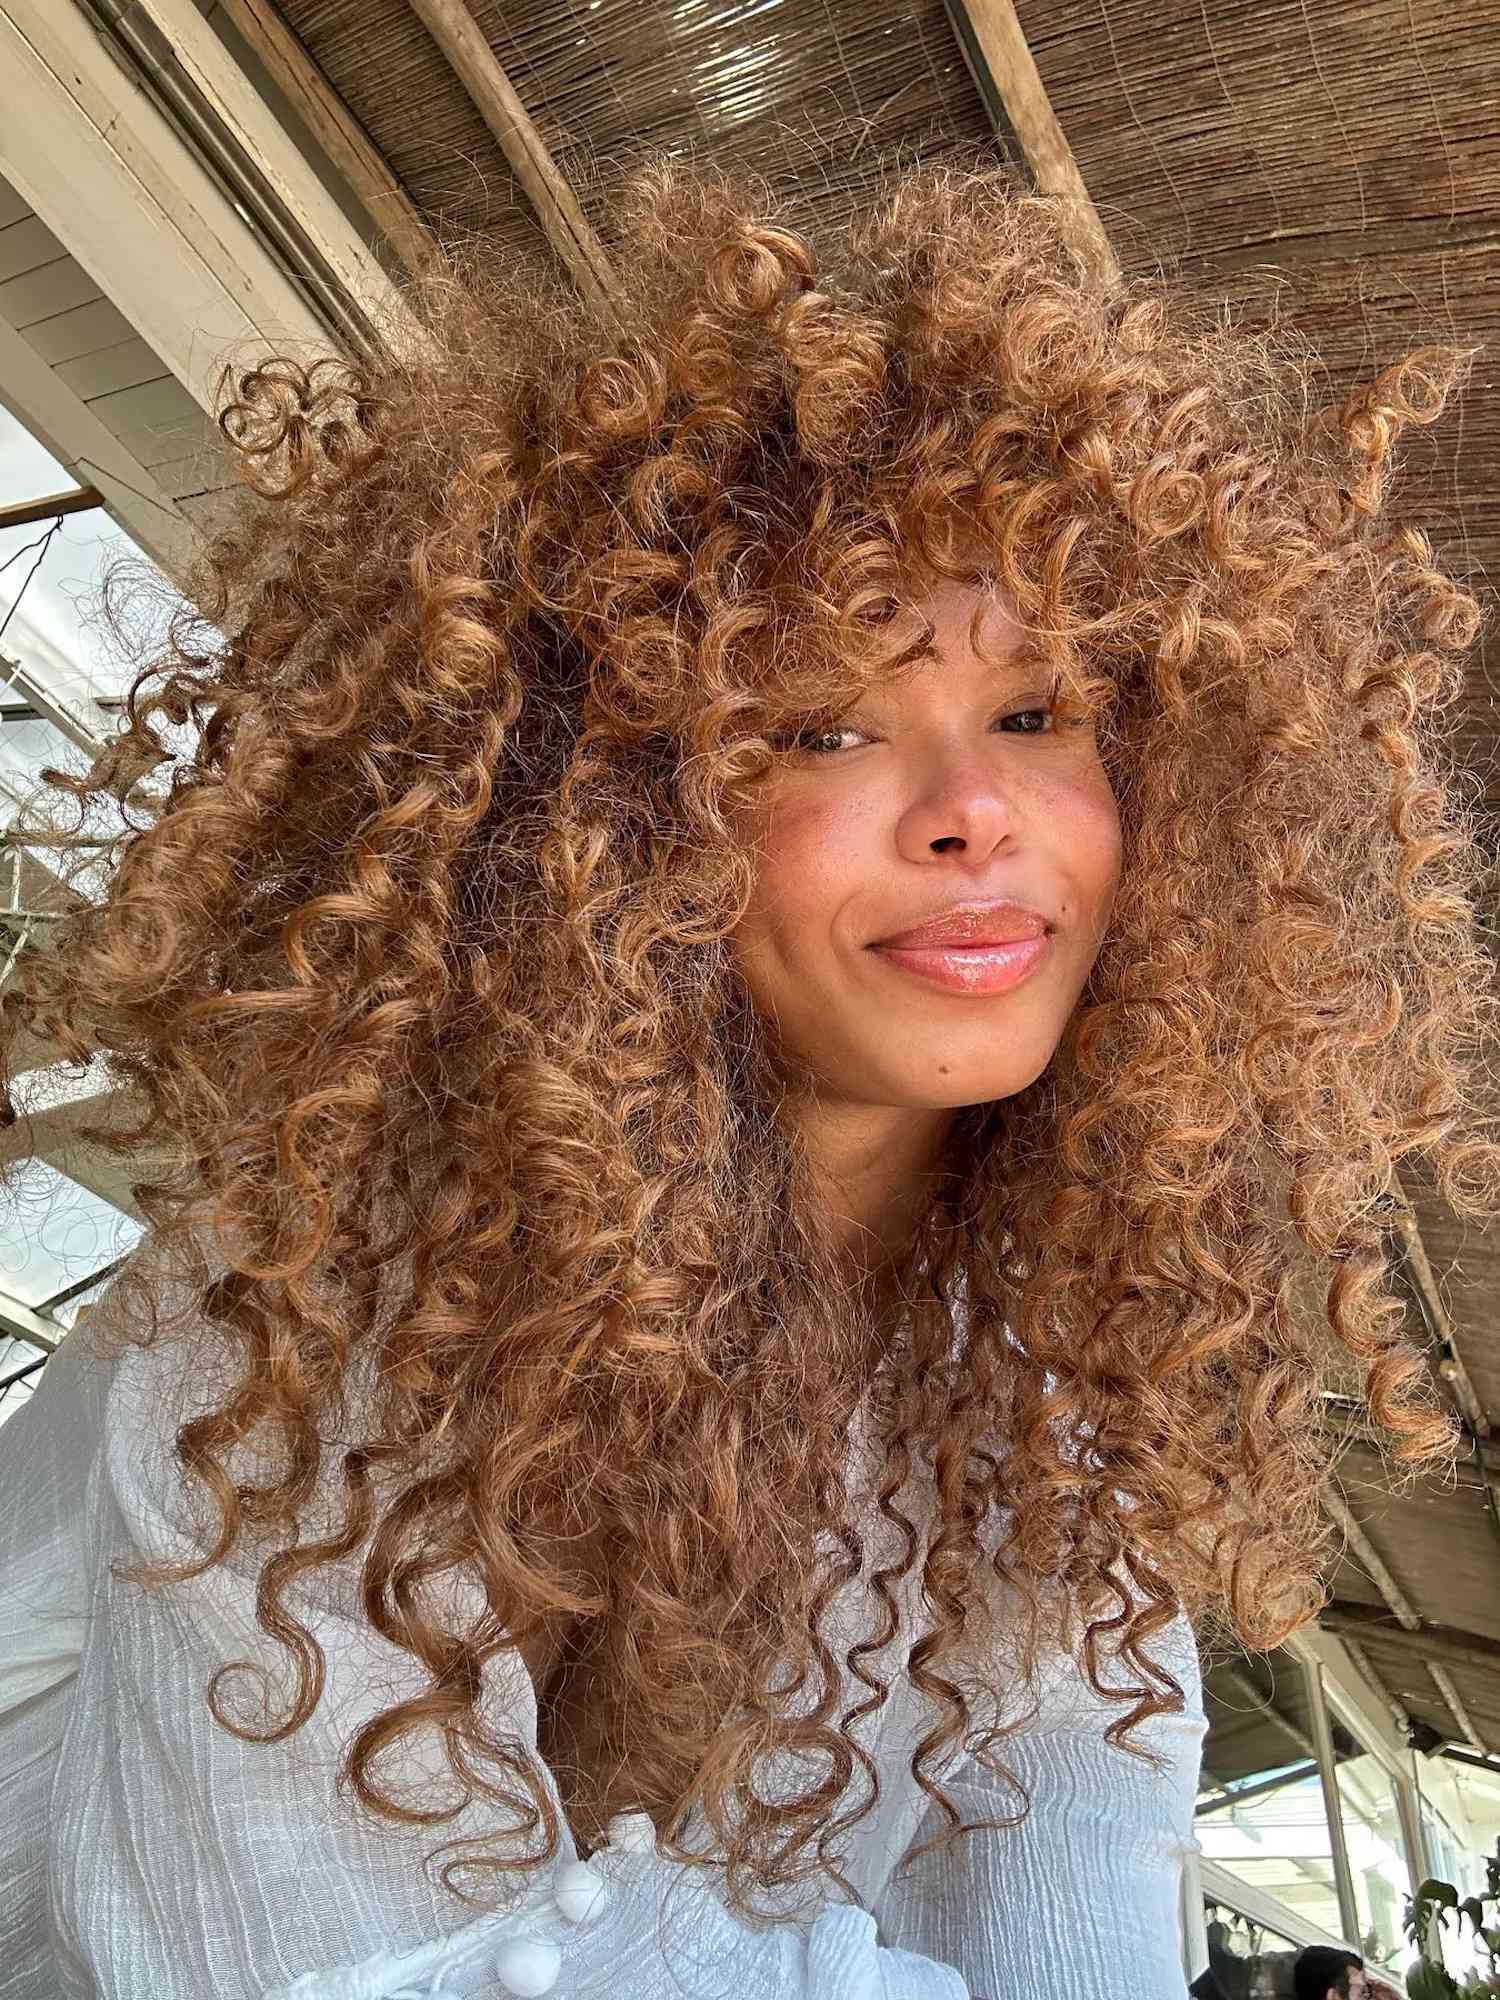
HONEY BLONDE
Honey blonde hair is as sweet and dreamy as a morning tea with honey. Enhance this natural beauty with Matrix’s A Curl Can Dream Light-Hold Gel. Infused with manuka honey, this gel defines your curls and coils without the crunch, leaving them soft and supple.
SILVER
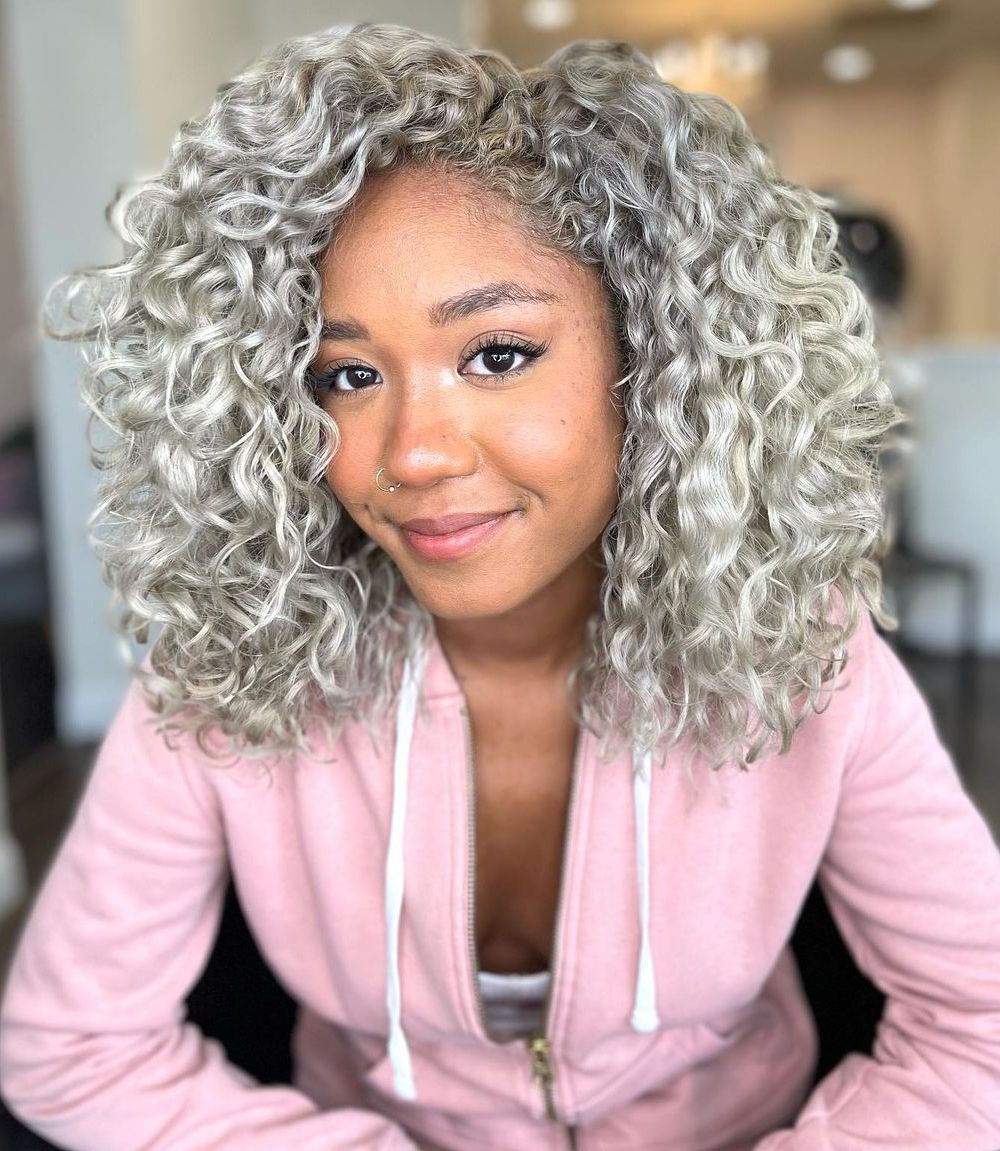
Gray hair is inevitable, but you can make the transition smoother with a little help. Consider letting your natural grays shine through with a silver dye or subtle silver highlights. A colorist can expertly blend your grays for a stylish and effortless look.
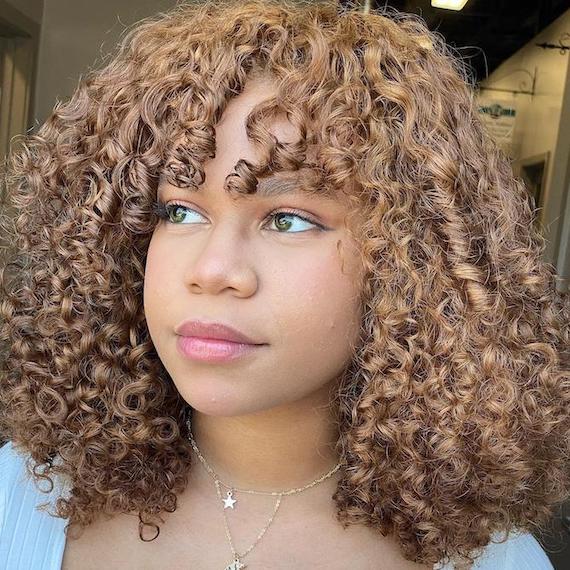
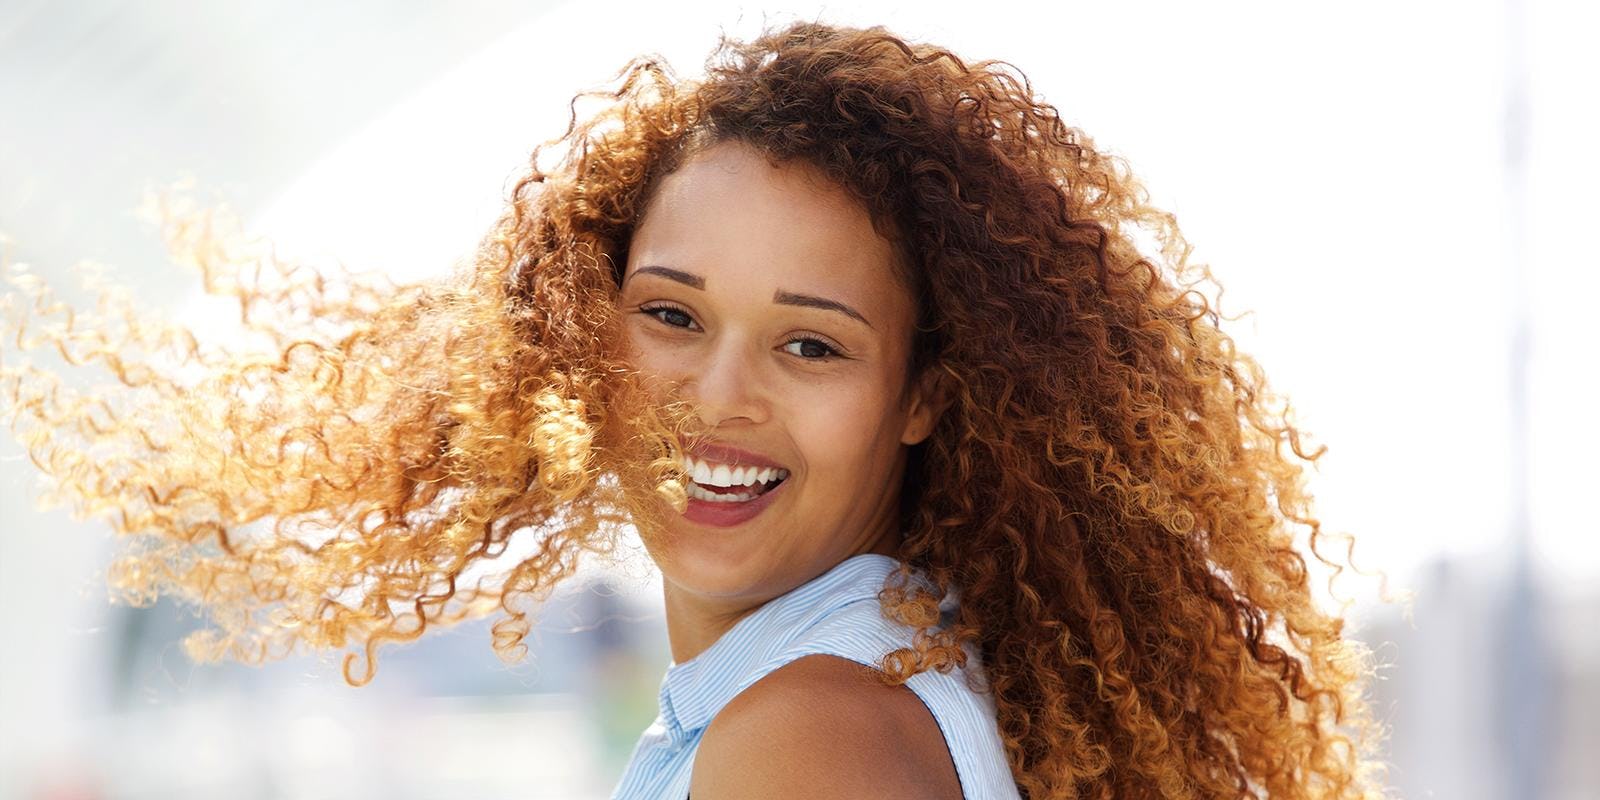
STRAWBERRY BLONDE
Tired of the same old red or blonde? Strawberry blonde could be your perfect compromise. This fresh hair color offers a subtle change for redheads, blending warm golden tones with hints of red for a vibrant yet understated look.
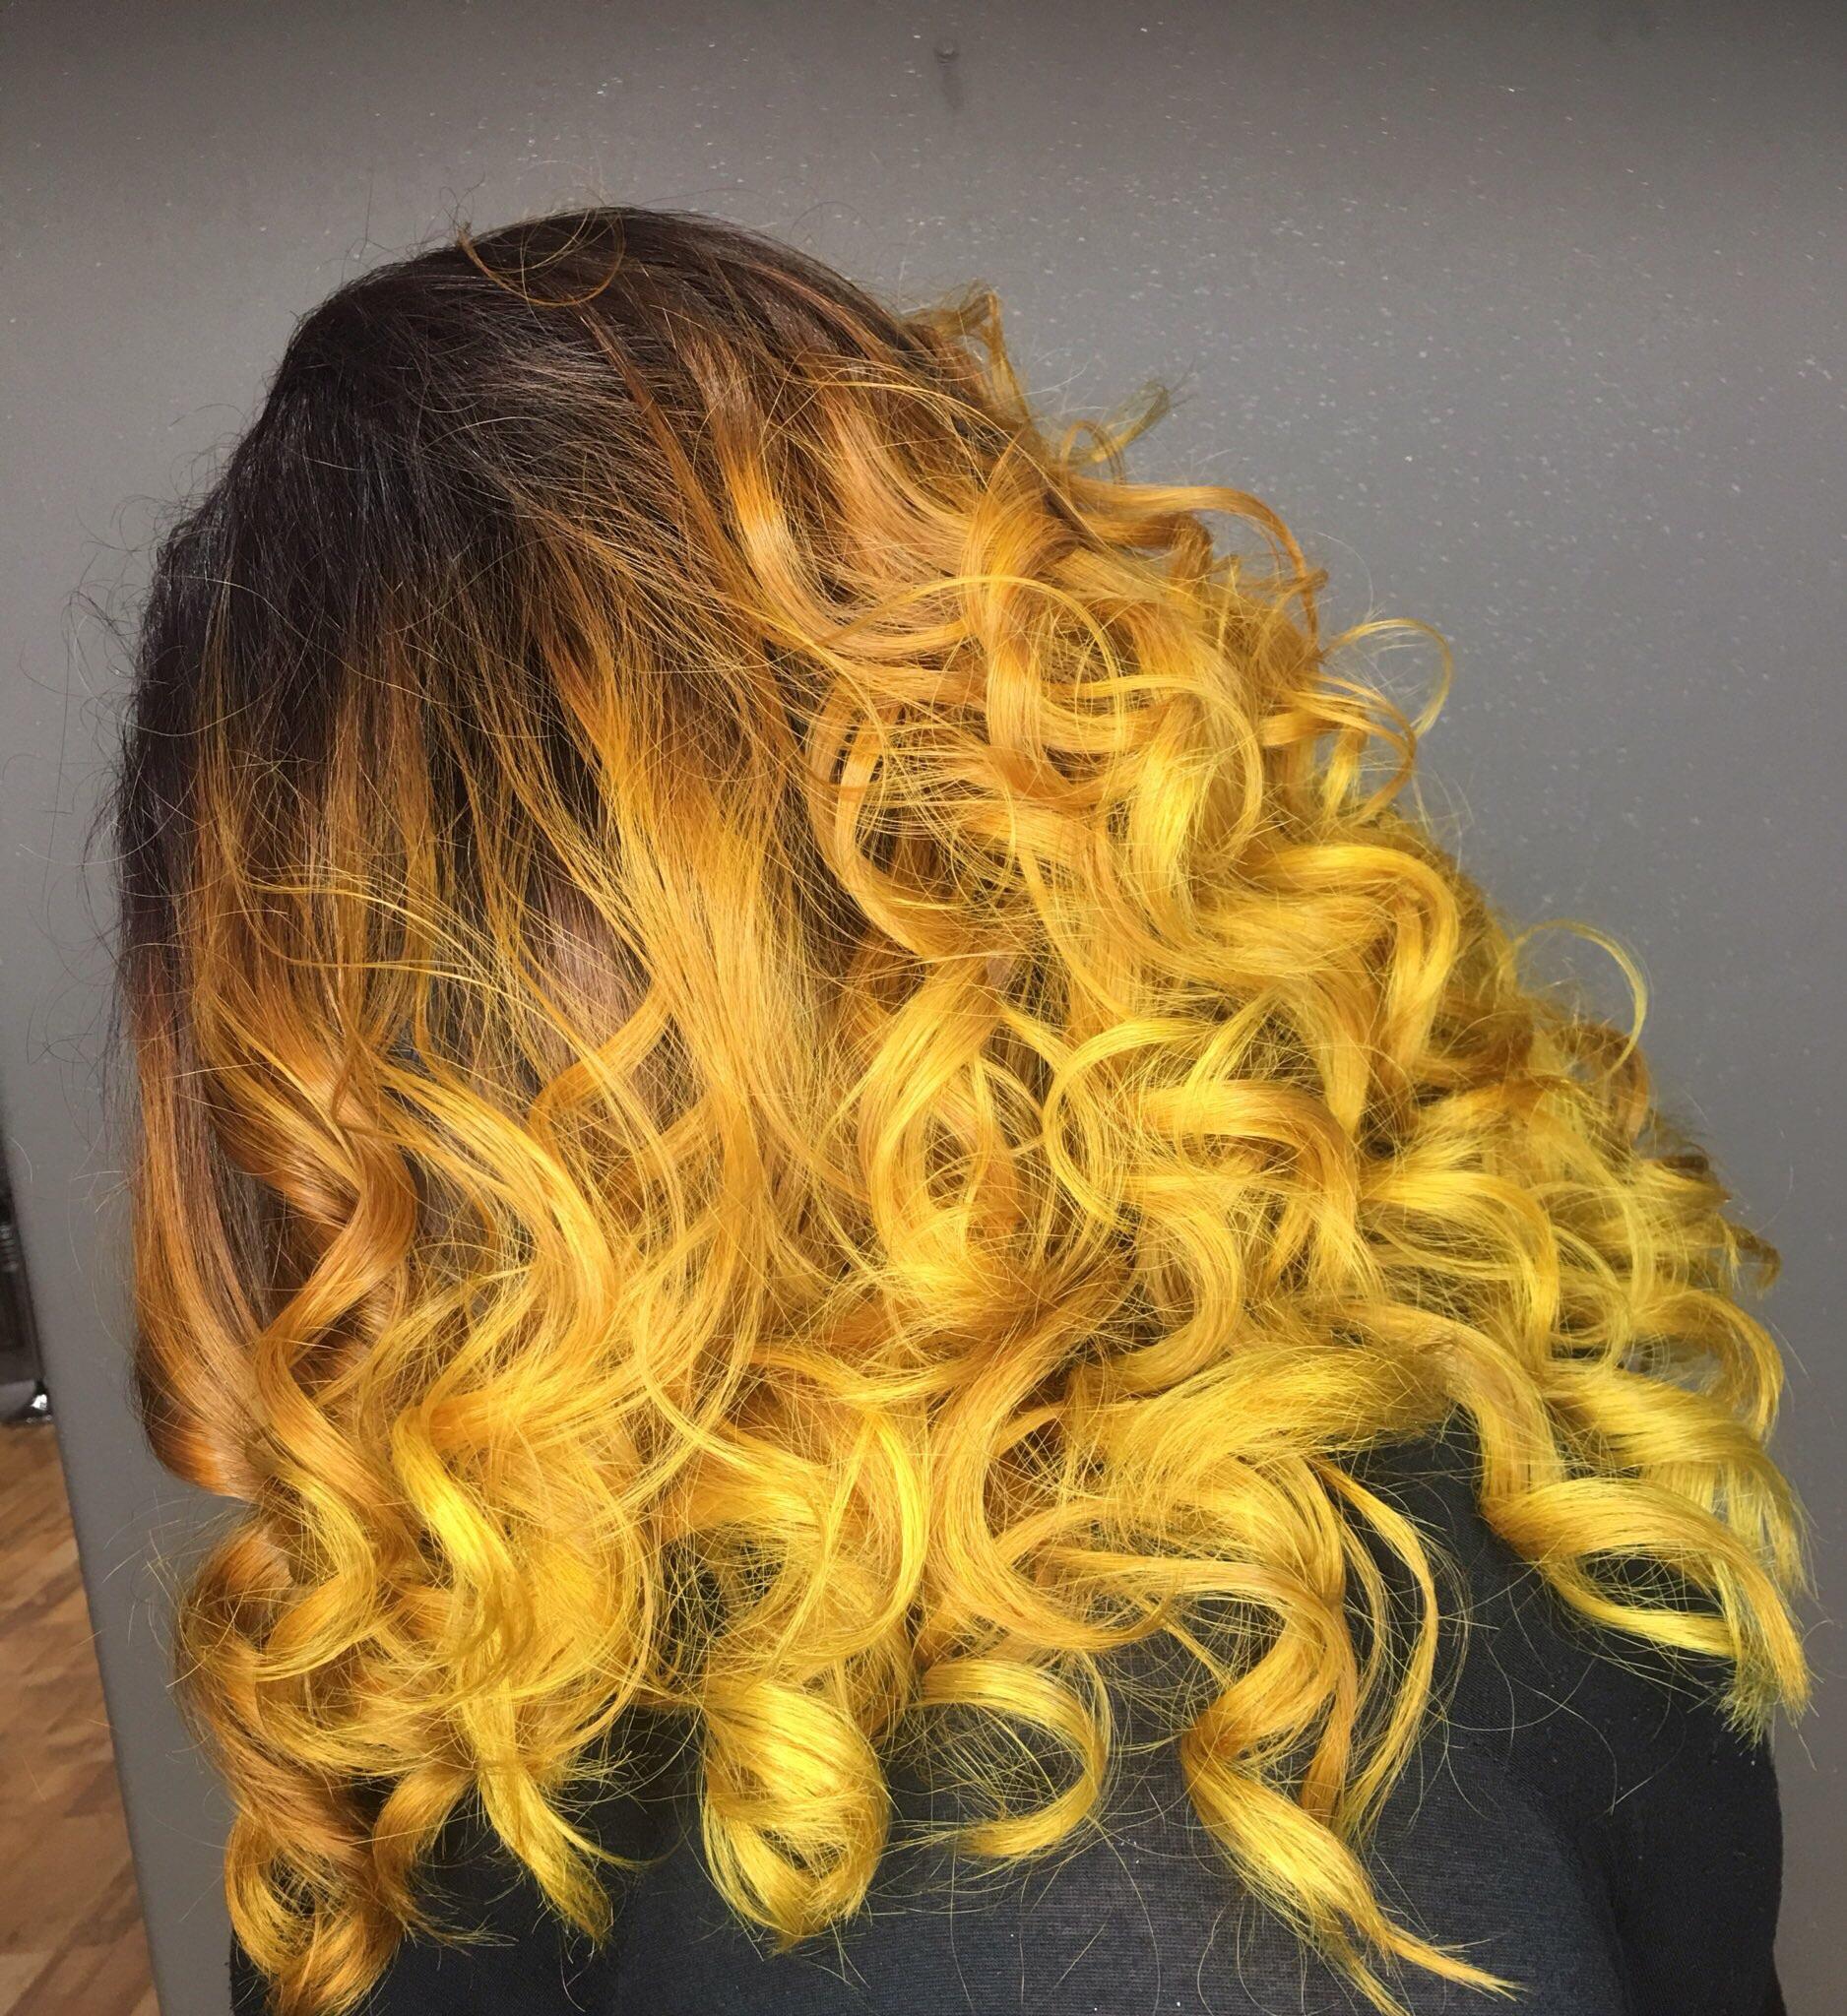
SUNNY YELLOW
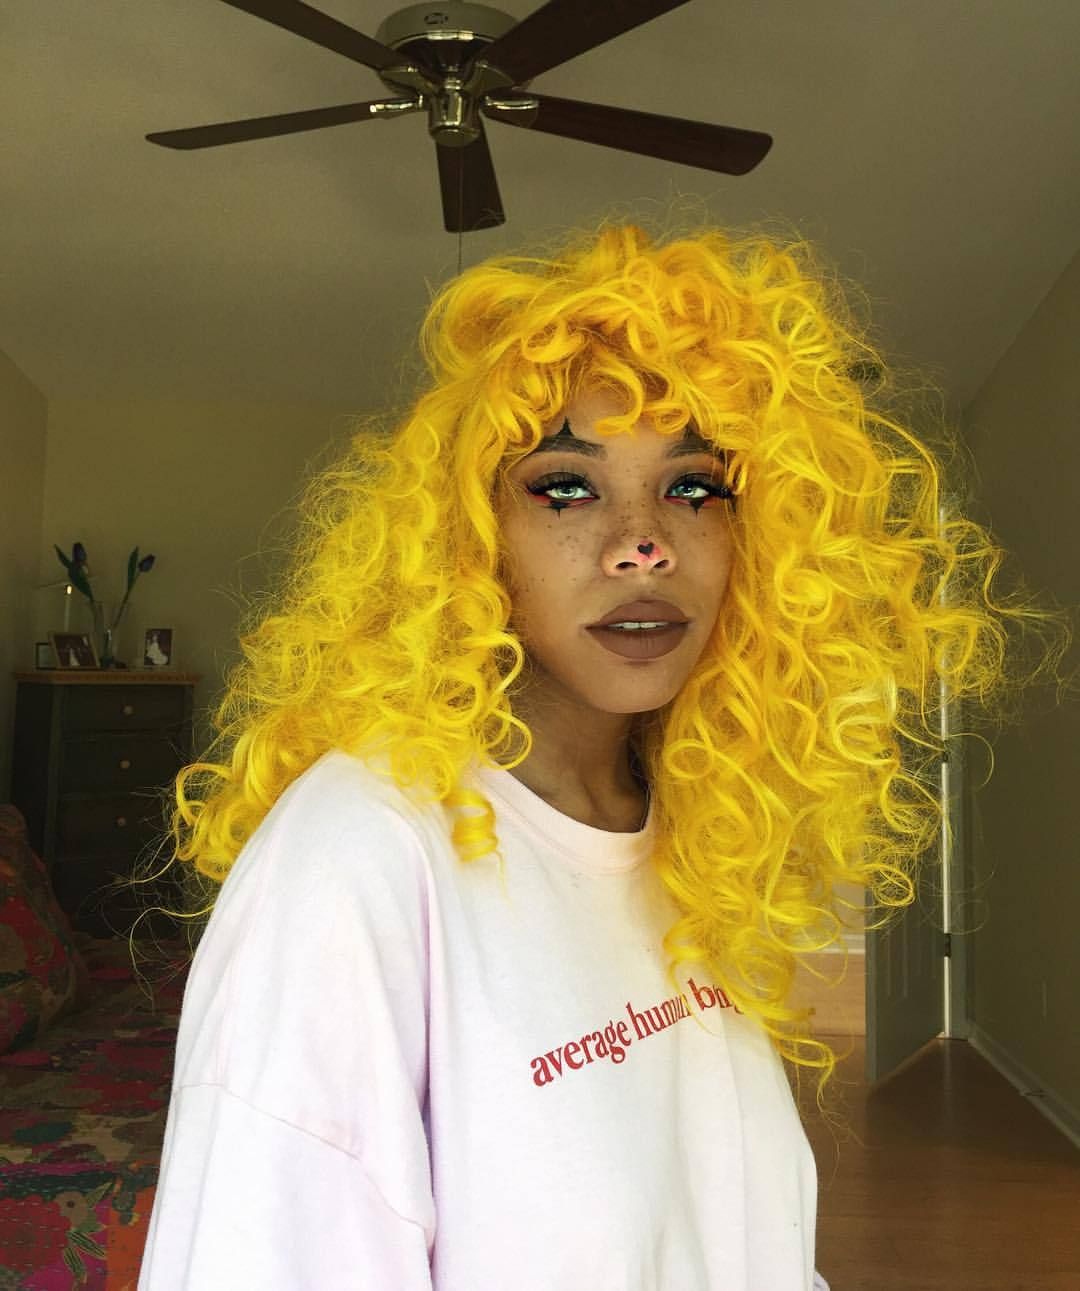
Illuminate your world with this vibrant shade of yellow. Known to evoke the warmth and energy of sunshine, this color has the power to uplift your spirits and boost your mood. A little sunshine can go a long way.
PEACH
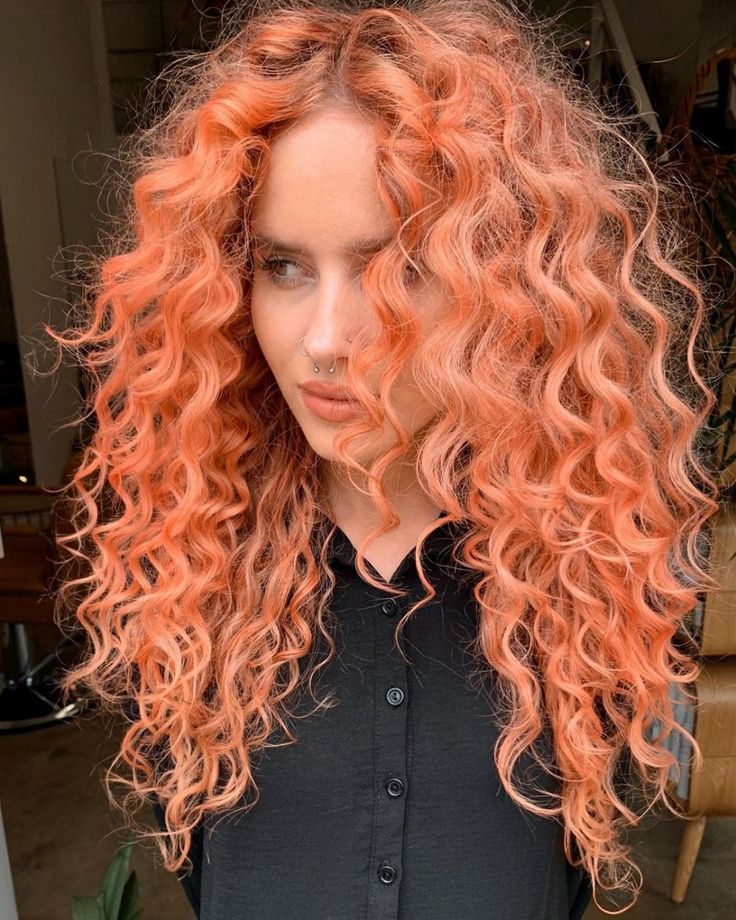
Peachy pink is a flirty shade that flatters fair-to-light skin tones. Its practicality lies in its resilience: even when faded or washed out, peach still looks effortlessly chic.
MAUVE HIGHLIGHTS
Mauve, a captivating blend of natural and fantasy, is a versatile choice for curly hair. To enhance your complexion, ask your colorist to concentrate the mauve shade around your face, allowing it to illuminate your skin tone.
ESPRESSO
Espresso hair color is a sophisticated blend of black and dark brown, creating a neutral, high-shine tone that’s far from dull. Enhance your hair’s luster with Redken’s Shine Flash Hairspray for an even more dazzling finish.
SMOKED OUT ROOTS
Smoked out roots create a seamless transition between your natural hair color and the dyed ends, minimizing the appearance of regrowth. This low-maintenance technique extends the time between salon visits, allowing your hair color to fade gracefully.
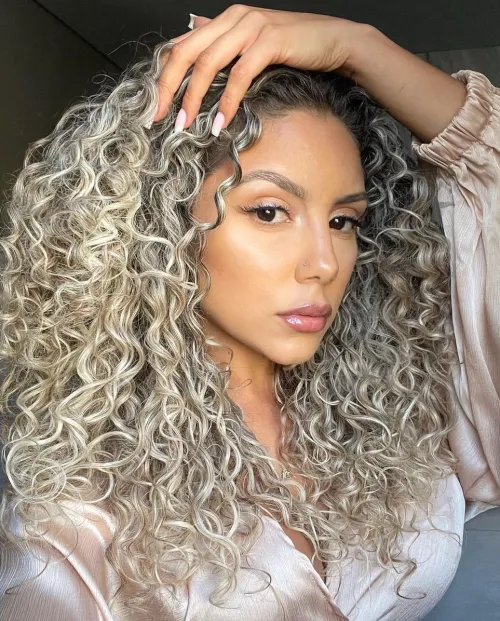
SUN-KISSED GREIGE
Imagine a sun-kissed masterpiece on curly or coily hair. A cool, sophisticated blend of gray and beige is infused with shimmering gold, creating an iridescent effect that’s both modern and enchanting.
GEMINI HAIR
Can’t decide on just one hair color? Half-and-half hair, also known as Gemini hair, is the perfect solution. This trendy dual-toned look lets you embrace two sides of your personality or simply enjoy the thrill of trying out different hair colors without commitment.
DEEP RUST
We typically avoid anything rusty, from forgotten nails to stagnant relationships. Yet, the vibrant electric rusty red hair color defies this aversion. It’s a bold, unexpected choice that commands attention, proving that sometimes, a little rust can be strikingly beautiful.
SUPER-FINE STREAKS
Whether you prefer bold, chunky highlights or a more subtle look, there’s a highlighting option for you. Fine, delicate streaks can add dimension to curly hair and strategically placed highlights can also help to disguise gray hairs.
SPICY CURRY
Transform your deep brunette curls into a vibrant masterpiece with a dash of daring. Introduce chunky highlights infused with warm curry tones, adding depth, dimension, and a touch of fiery elegance to your natural base.
GOLDEN SUNRISE
Achieve a stunning “Golden Sunrise” hair color by blending warm and cool golden tones for a sun-kissed ombre effect. This dimensional look is beautifully showcased when styled in shoulder-length layers, maintaining depth and richness.
ENGLISH TOFFEE
Toffee hair color is a stunning choice for those with lighter eye colors. To maximize its impact, use toffee as an accent rather than an all-over shade. This strategic approach will create a voluminous, eye-catching look that highlights your natural features.
CHOCOLATE ALMOND
Indulge in the rich allure of chocolate brown hair elevated by subtle streaks of creamy almond. This decadent combination offers a modern twist on a timeless look, making it a luxurious and effortless transition for brunettes seeking a fresh hair color experience.
HONEYCOMB

Want a sweeter look? Try honey-hued highlights to brighten dark curls and create the illusion of fuller hair. Biolage Professional Volume Bloom Shampoo is a lightweight option that adds natural volume and shine without damaging your hair.
CHESTNUT
Chestnut hair color is trending. Embrace the rich, reddish-brown shade for a full-headed transformation or subtly enhance your brunette base with chestnut streaks. This versatile hue adds warmth and depth to any hair color.
COPPER BRONZE
Copper and bronze hair colors complement each other, creating a bold and warm look. To maintain the vibrancy of your copper hair and prevent unwanted brassiness, consider incorporating a toning hair mask like Matrix Total Results Brass Off Custom Neutralization Hair Mask into your hair care routine.
GOLD-FOILED
Turn heads with a metallic hair look. Achieve the perfect base for your style with a strong-hold product like Mizani True Textures Sleek Holding Gel. It locks your hair in place, ensuring your metallic masterpiece stays flawless all day.
MAROON
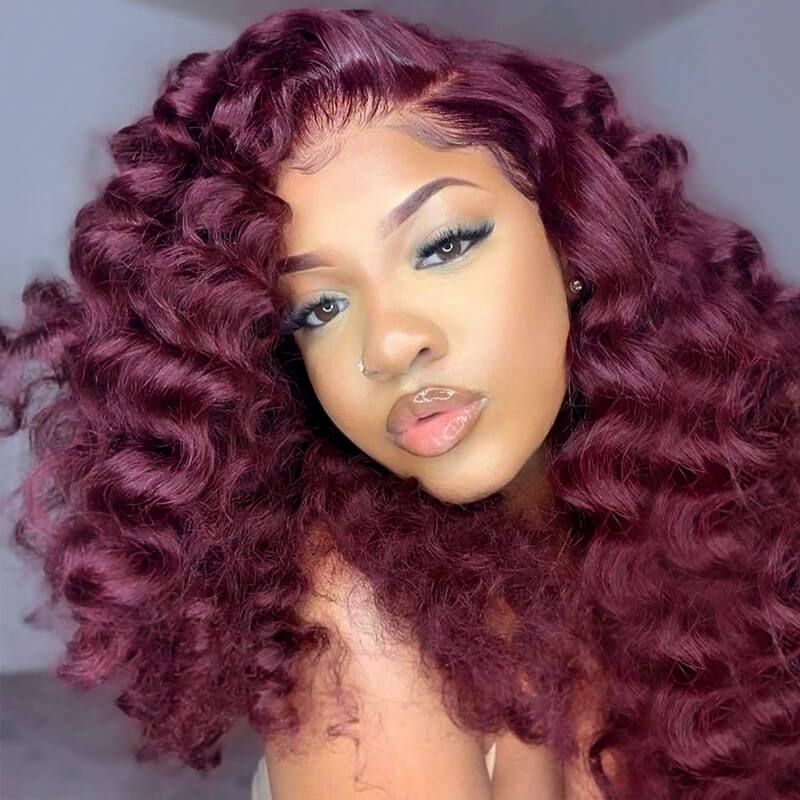
Maroon hair color is a popular choice for those seeking a vibrant yet professional look. This bold shade is perfect for the office, striking a balance between trendy and sophisticated. If your hair is naturally lighter, your colorist might need to darken your base first to achieve the desired rich maroon tone.
CHERRY COLA

Cherry cola hair color, a nostalgic blend of brown, violet, and red, is making a comeback. This versatile shade is perfect for year-round wear and offers a subtle, bleach-free way for dark-haired individuals to lighten their look.
PUMPKIN SPICE
Embrace the essence of fall with the captivating pumpkin spice shade. This universally flattering color, a perfect blend of sweet and spicy tones, is particularly stunning on darker skin tones.
AUTUMN LEAVES
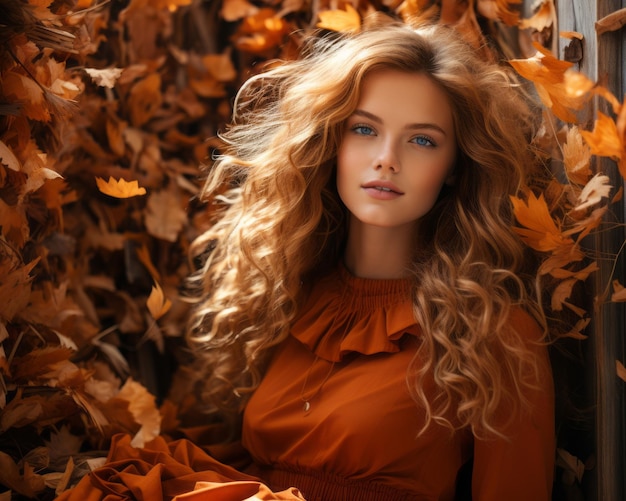
Autumn Leaves is a vibrant color scheme that evokes the essence of fall foliage. Blending maroon, red, and orange in an ombre effect, this style captures the beauty of changing leaves, bringing a touch of autumnal warmth to any season.
HOW CAN I CARE FOR CURLY HAIR COLOR?
To maintain vibrant and healthy color-treated coils, your colorist recommends a personalized care routine. This includes a color-safe, sulfate-free shampoo and conditioner tailored to your hair density, such as Pureology Hydrate for medium-to-thick hair or Hydrate Sheer for fine hair.
Additionally, incorporating a bond-repairing system like Redken Acidic Bonding Concentrate can strengthen and protect hair from damage.
To extend the life of your color and style, consider using a dry shampoo like Matrix Styling Refresher and a curl refresher spray like L’Oréal Professionnel Serie Expert Curl Expression, reducing the need for frequent washing and heat styling.
CONCLUSION
Inspired by these curly hair color ideas? Remember, every head of curly hair is unique, so it’s essential to consult with a professional colorist to find the perfect shade for you. Save your favorite looks and bring them to your next appointment for a personalized consultation.