As we step into 2025, the beauty industry continues to evolve, showcasing makeup trends that highlight creativity and self-expression. This year brings a captivating blend of natural aesthetics and bold styles, allowing for a diverse beauty narrative that celebrates individuality. Let’s explore some of the most striking makeup ideas for the year, each reflecting the season’s spirit and current trends.
The Timeless Glow
In the photograph, a hairstyle is displayed with loosely pinned-back locks and a delicate, wispy front quiff. The hair’s soft brown tones radiate natural warmth, perfectly highlighting the illuminated complexion.
This hairstyle radiates timeless elegance, making it ideal for those desiring a subtle yet sophisticated look. It embodies an effortless grace that suits any occasion and is particularly flattering for oval and heart-shaped faces.
To maintain this style, using a light-hold hairspray along with a nourishing hair serum can enhance its allure while keeping the hair hydrated and lustrous.
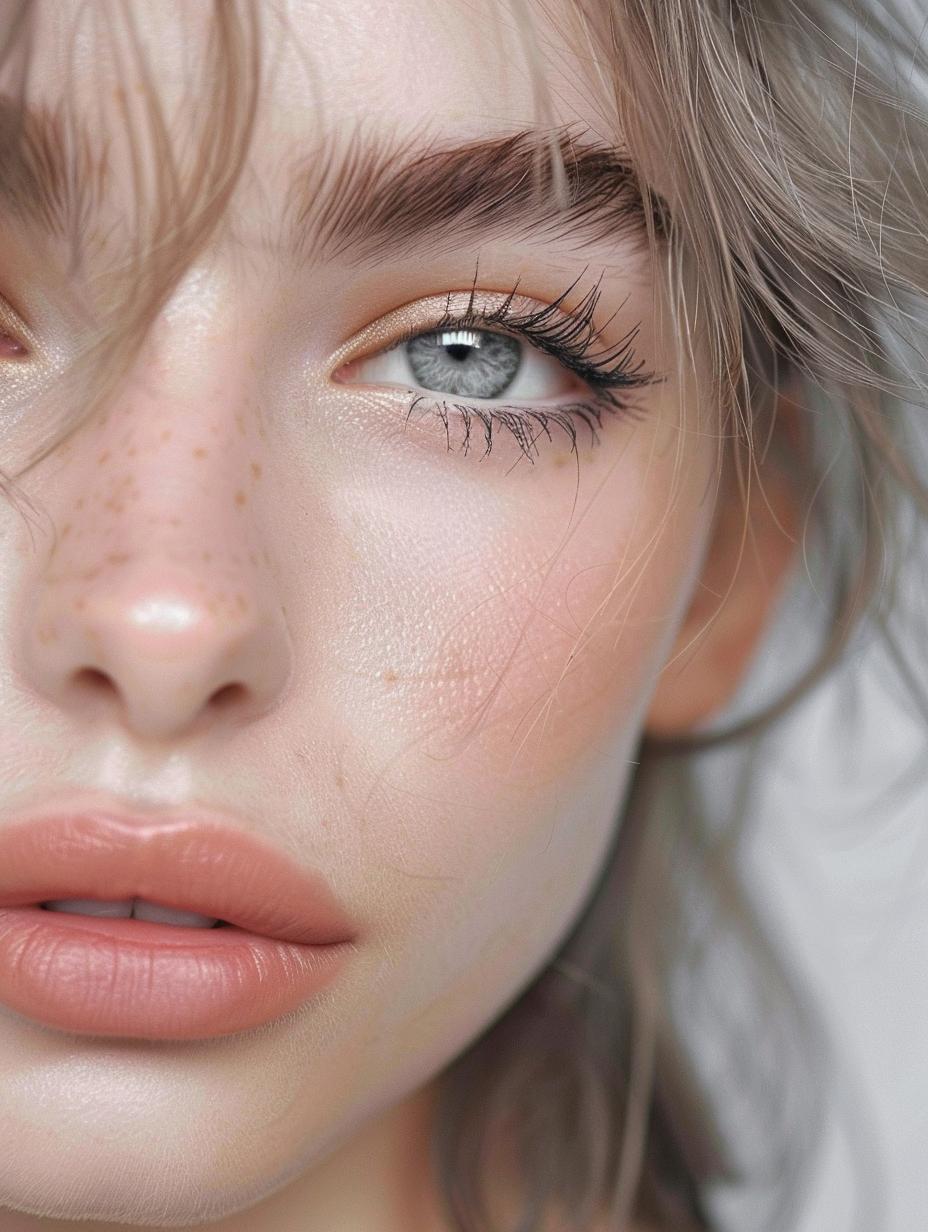
Soft Speckle
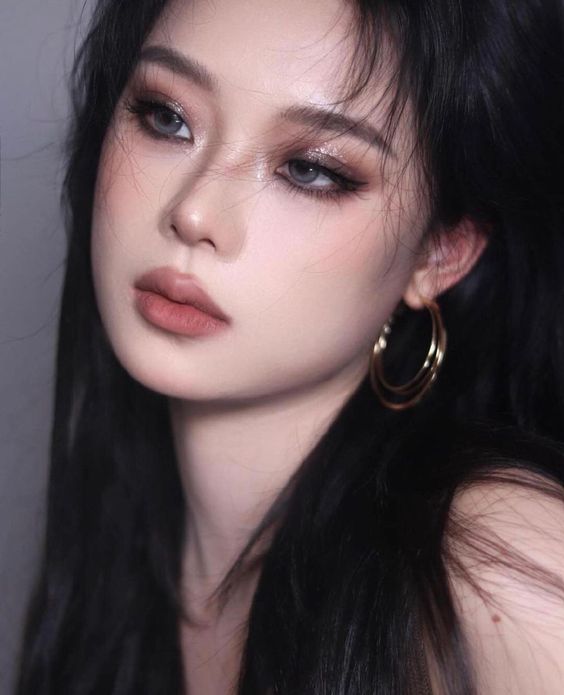
A face adorned with freckles is beautifully highlighted by a subtle enhancement of the eyes. The makeup remains minimal, embodying simple and natural beauty, with a soft brown eye pencil gently defining the eye shape.
This makeup is perfect for anyone looking to enhance their natural features without resorting to dramatic colors or heavy application. It’s an excellent choice for low-key occasions or an effortless everyday look, especially complementing hazel or brown eyes.
For care, use a nourishing eye cream to keep the delicate skin around the eyes smooth, and opt for a smudge-proof pencil for lasting, gentle definition.
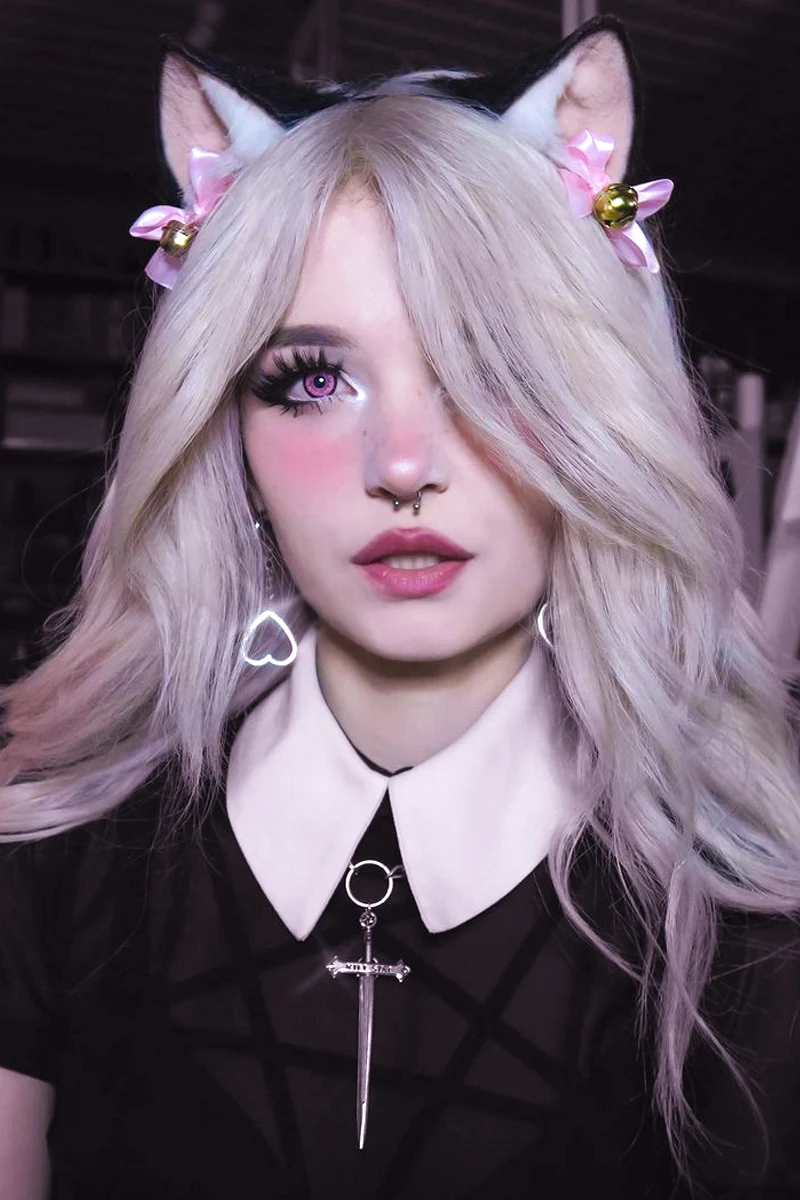
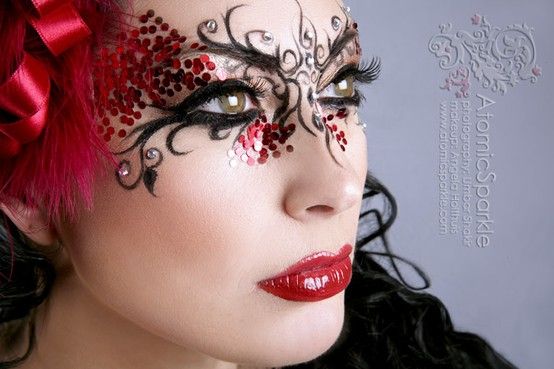
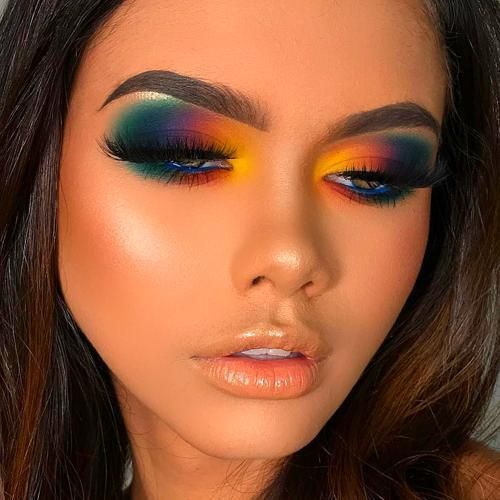
The Radiant Rave Spark

This striking eye makeup is an audacious masterpiece, perfect for a rave or masquerade. A vibrant blend of red and pink glitters forms a bold, mask-like outline around the eyes, beautifully complemented by a shimmering orange lip.
This daring makeup look is perfect for those bold at heart, ready to make a statement at a costume party or during Easter festivities. It embodies a confident and vibrant personality, appealing to everyone, regardless of face shape.
To maintain this striking appearance, choose high-quality, long-wearing makeup fixatives. And when the festivities come to an end, a gentle makeup remover is essential for caring for your skin.
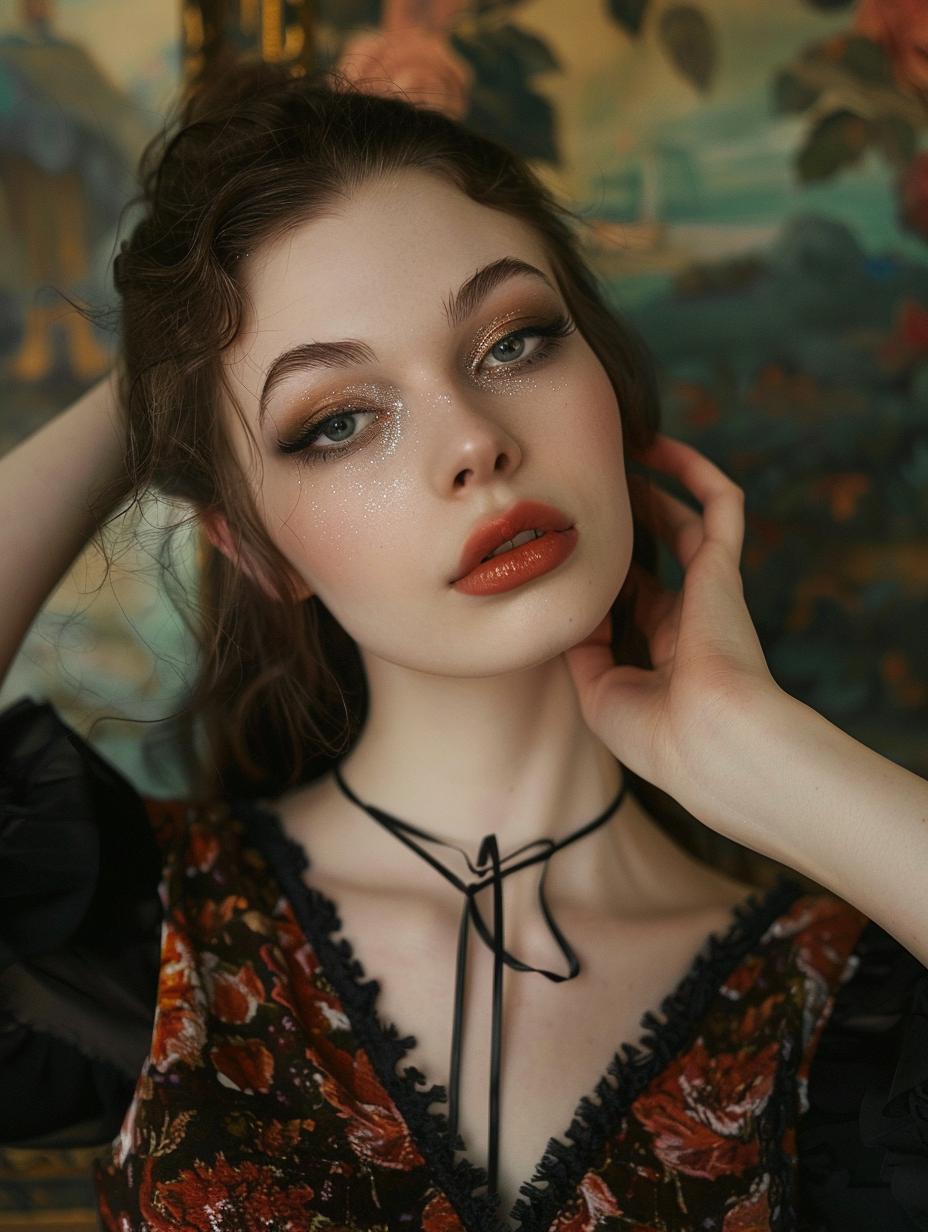
Smoldering Smoke
This image features a smoky eye with a twist, blending bronzed and gold hues for a sultry yet refined look. The addition of scattered freckles creates a delightful contrast between the bold eye makeup and the natural skin texture.
This makeup idea is perfect for evening occasions or when you desire a more dramatic look that still maintains an element of natural beauty. It particularly flatters darker eye colors by adding depth and intensity.
To keep this smoky eye flawless, choose an eyeshadow with excellent pigmentation and blendability, paired with a waterproof eyeliner to ensure the look remains smudge-free.
Sunset Serenity
The final look in this series is a romantic and aesthetic makeup style, radiating the warm glow of a sunset. The blend of peach and pink eyeshadow creates a serene and dreamy effect, making it perfect for any occasion, whether it’s a daytime gathering or an evening soiree.
This makeup is universally flattering, exuding warmth and softness. It pairs beautifully with hazel or brown eyes, as the warm tones enhance their natural richness.
To ensure longevity, apply a primer underneath the eyeshadow to keep the colors vivid. Pair it with a lip color that complements the warmth of the makeup for a cohesive and enchanting overall look.
These final three makeup ideas wrap up our exploration of the diverse beauty trends of 2025. Each look offers an opportunity to express individuality and elegance, from the gentle kiss of rosé to the striking impact of golden glamour. Regardless of your choice, each trend highlights the ever-evolving artistry within the world of makeup.
The Majestic Masquerade
A stunning towering updo is expertly styled to create a dramatic crown of elegance. Complementing this majestic hairstyle, the eye makeup is embellished with intricate bejeweled lashes that sparkle beautifully against a backdrop of glossy nude lips.
This look is a true showstopper, perfect for prom, masquerades, or any extravagant event. It particularly enhances angular features, adding softness and a touch of mystery to the face.
To maintain such an intricate hairstyle and makeup, use a strong-hold hair mousse alongside a gentle facial mist to keep everything in place while ensuring the skin stays hydrated.
These snapshots of 2025’s makeup ideas are just the beginning. Stay tuned as we delve into more trends that are set to define this year’s beauty scene.
Gilded Elegance

The image showcases luxurious eye makeup featuring rich golden eyeshadow, delivering a radiant shimmer reminiscent of the precious metal. The natural freckles add a charming touch to the look, while the lips are coated in a complementary glossy nude, making it perfect for any season.
This makeup idea is perfect for those who want a touch of opulence in their daily wear or for special occasions like prom or holiday parties. It flatters a variety of eye shapes, particularly enhancing the warmth of blue eyes.
To maintain this golden gaze, choose a high-quality eyeshadow that resists creasing, and pair it with a hydrating lip gloss to keep the lips looking plump and moisturized throughout the day.
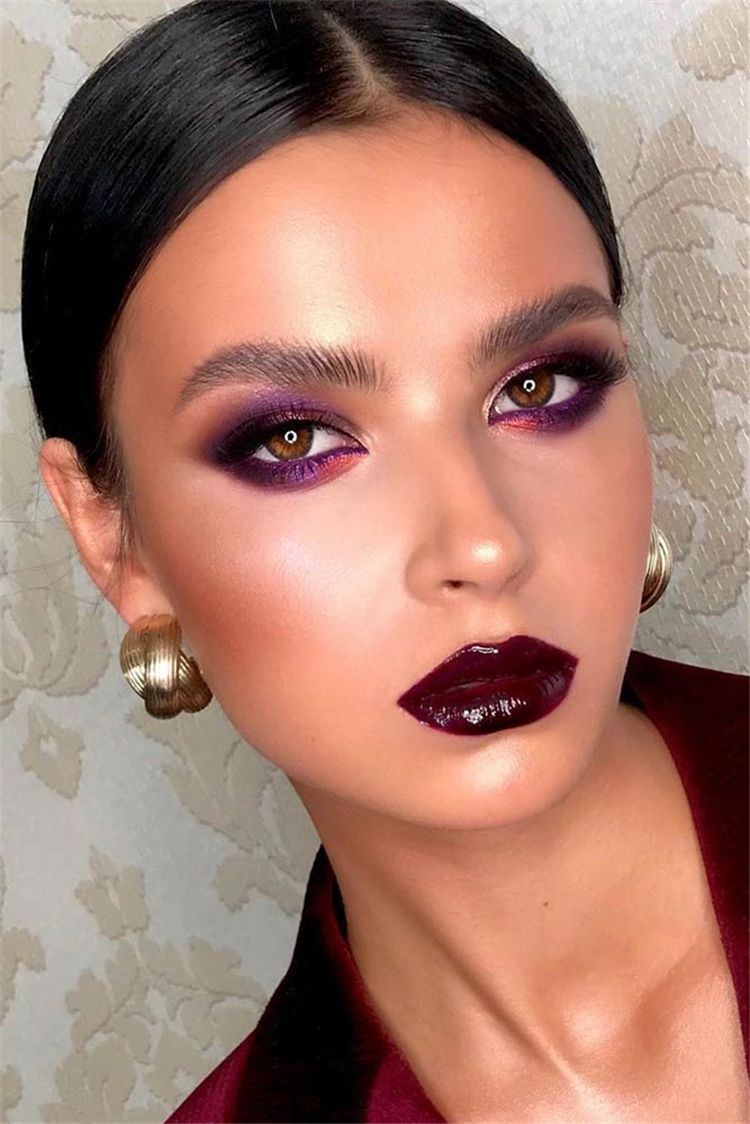
Golden Glamour

This image exudes classic glamour with a contemporary twist, showcasing golden eyeshadow that radiates luxury and sophistication. The bold, metallic eyes are beautifully balanced by a nude lip, creating a timeless look perfect for a prom or masquerade ball.
This makeup look is perfect for those looking to add a touch of aesthetic opulence to their ensemble. It particularly flatters blue or gray eyes, as the golden hues make them stand out magnificently.
To maintain that glistening allure, opt for a long-wearing, crease-proof metallic eyeshadow paired with a hydrating matte lipstick, allowing the eyes to remain the focal point of the look.
Ethereal Sparkle
This image showcases a mesmerizing eye makeup look, featuring delicate sparkles that encircle the eyes, complemented by a glossy coral lip. This enchanting combination is both aesthetic and fun, making it perfect for a prom or seasonal celebration.
This dreamy style is perfect for those who embrace a touch of fantasy in their makeup. Whimsical and enchanting, it particularly suits individuals with light eyes, as the sparkles enhance their brightness and clarity.
To maintain this sparkling beauty, opt for a gentle glitter adhesive and a hydrating, long-wearing lip gloss. For removal, a micellar water formulated for sensitive skin is ideal for gently cleansing away the makeup at the end of the day.
With these diverse and captivating makeup ideas for 2025, we’ve painted a vibrant picture of a year filled with creativity, personality, and beauty in all its forms. Whether you favor a natural look, the drama of a masquerade, or the bold statement of a rave, there’s something for every style and occasion.
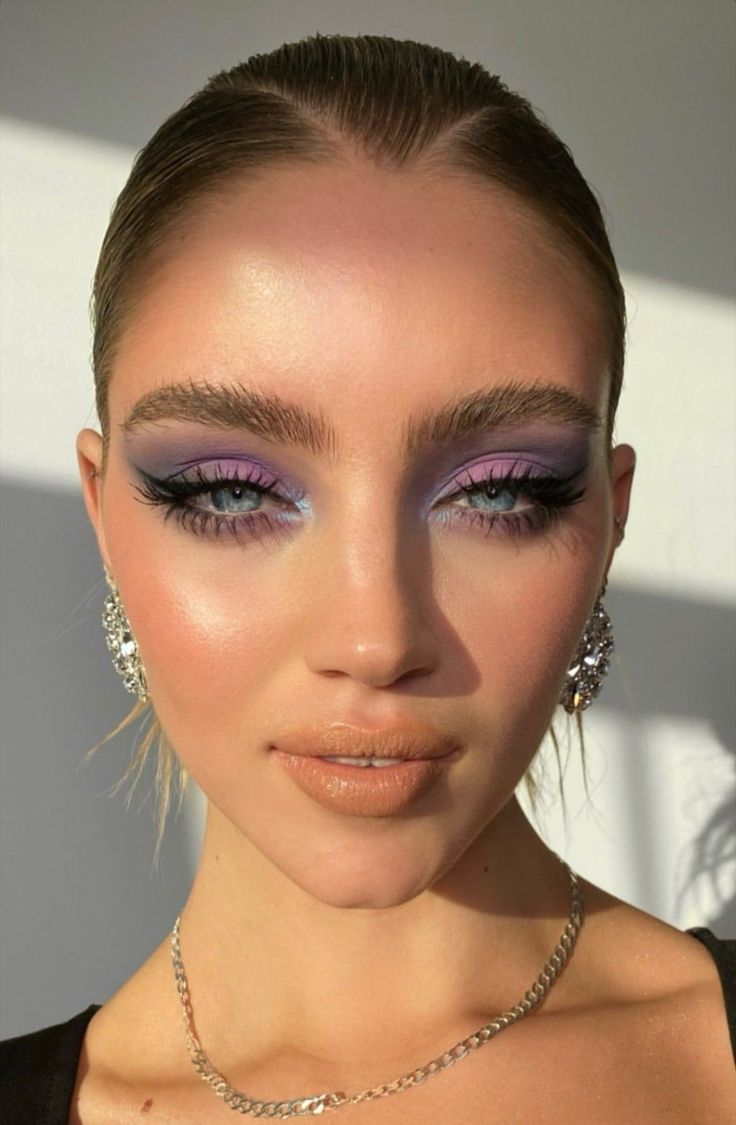
The Sunset Horizon Eye
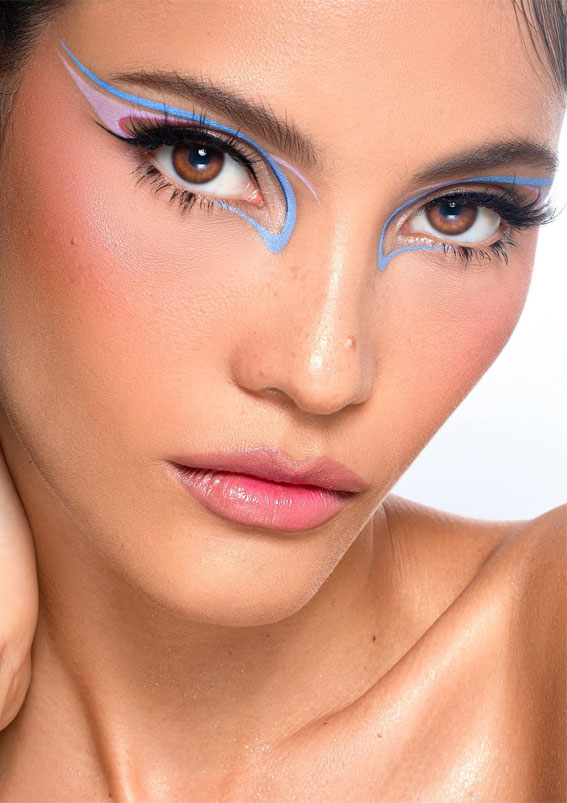
This eye makeup look embodies the vibrant hues of a sunset, featuring bold sweeps of orange and purple, expertly winged for a dramatic effect. The interplay between these warm and cool tones creates a fun and aesthetically pleasing allure, setting the stage for exciting makeup exploration in 2025.
This style is perfect for those who love to experiment and embrace bold colors. It serves as an expression of creativity and passion, making it ideal for occasions where a strong impression is essential. This look particularly accentuates almond and round eye shapes beautifully.
For lasting wear, apply an eyeshadow primer and setting spray to ensure the colors remain vibrant throughout the day or night. A gentle oil-based cleanser will effectively remove the makeup without irritating the skin.
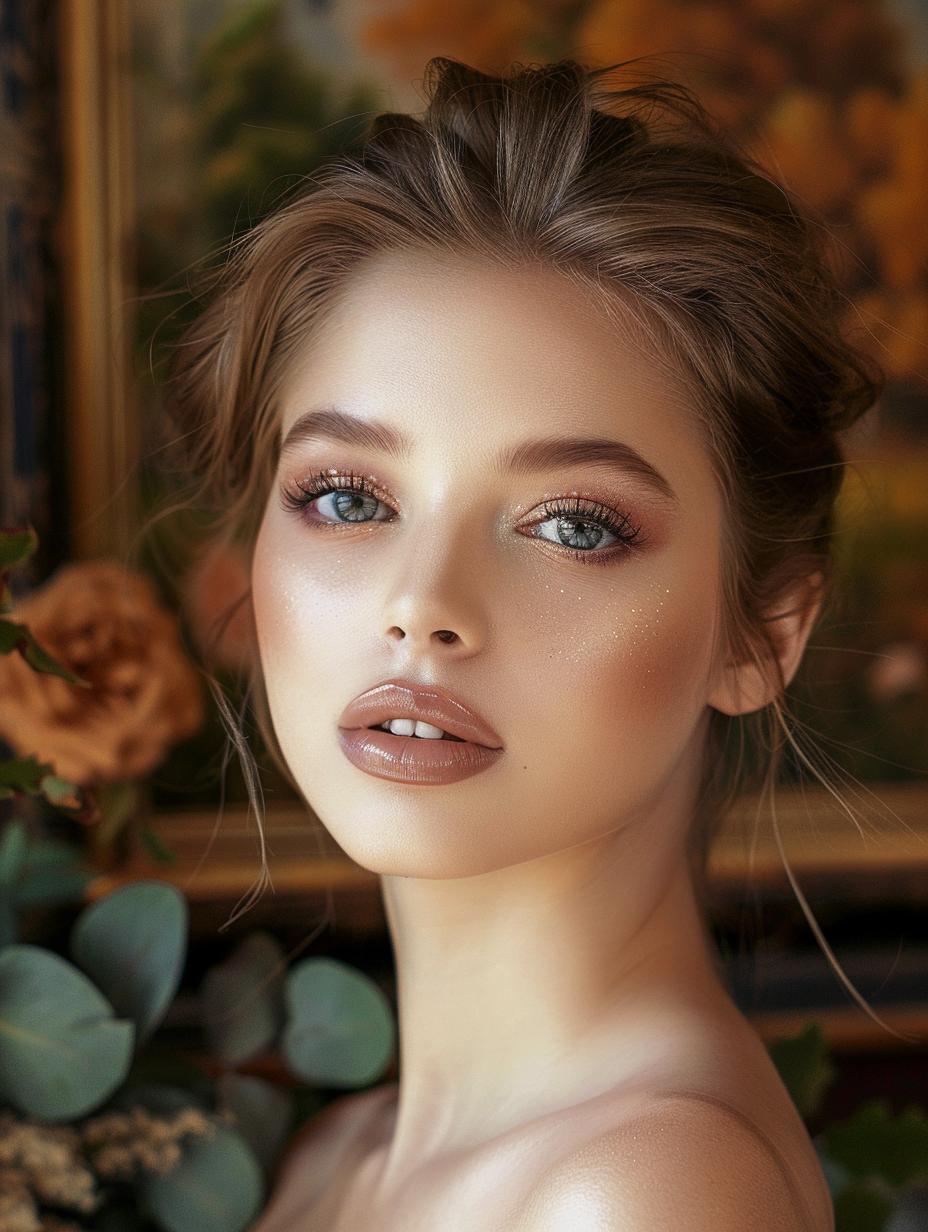
Enchanting Earth Tones
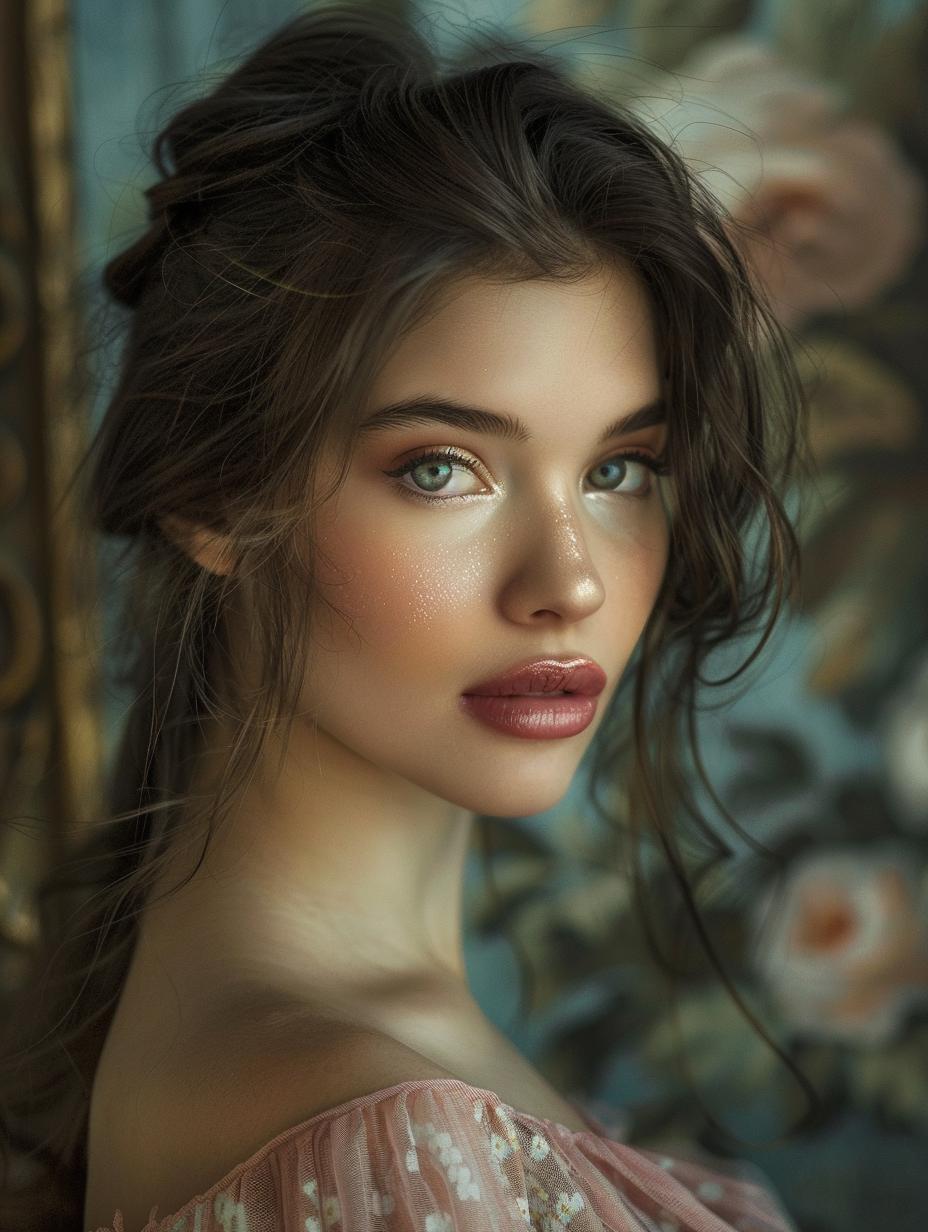
This portrait captures a captivating look that plays with earth tones, enhancing the eyes with soft browns and a touch of shimmer. The glossy rosewood hue on the lips beautifully complements the natural flush of the cheeks, creating a harmonious and elegant appearance perfect for any occasion.
This style is perfect for those looking to add a touch of sophistication to their daily makeup or for a season-inspired event. It beautifully suits individuals with green or brown eyes, as the earthy tones accentuate their natural hues, creating a mesmerizing effect.
To maintain this enchanting look, it’s best to choose long-wear cream eyeshadows that provide a rich, blendable color while resisting creasing. Pairing it with a lip gloss that offers both color and hydration ensures that your lips remain vibrant and moisturized throughout the day.
This combination not only enhances natural beauty but also adds a polished touch, making it suitable for any occasion, whether casual or formal.
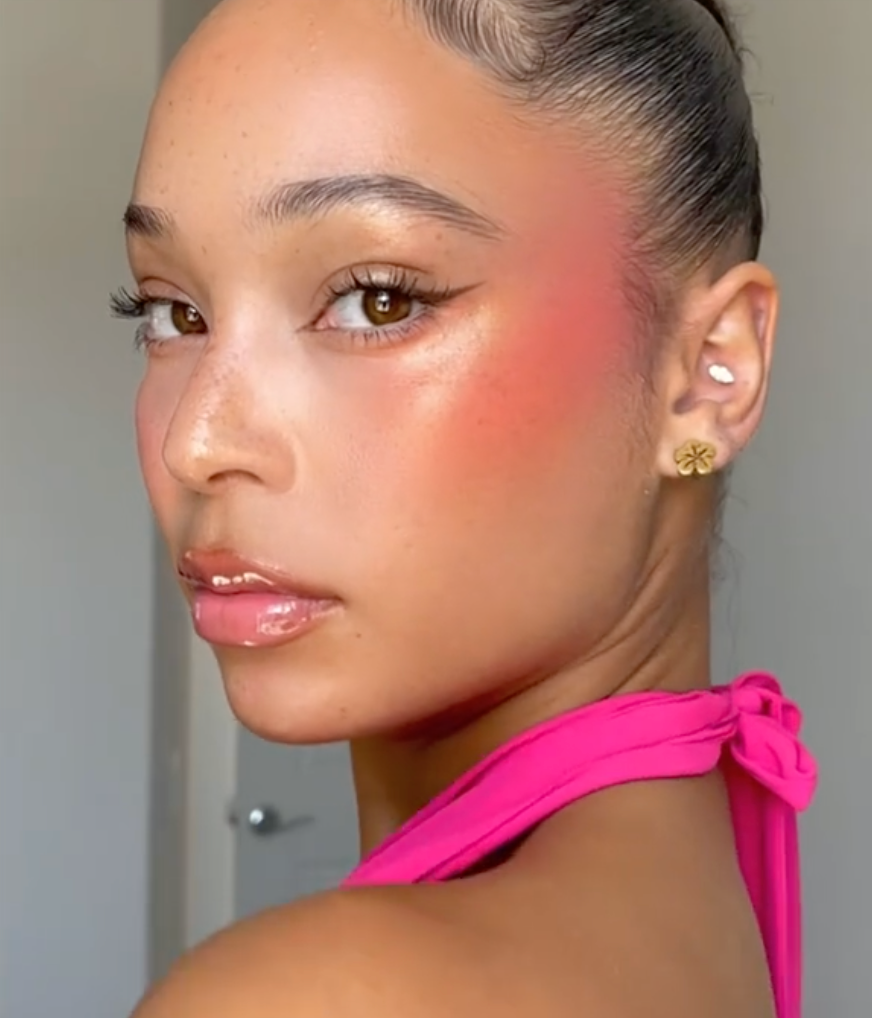
Festive Fervor
The final image presents a face transformed into a festive canvas, adorned with dots and swatches of bright red and orange that evoke the spirit of a masquerade. This vibrant makeup is a celebration of color, offering a fun and fresh take on traditional festive looks.
This expressive style is ideal for those who love the spotlight and want to make a statement at a rave or themed event. The eye-catching makeup complements any face shape, inviting admiration and wonder.
To maintain the vibrancy and placement of such vivid makeup, it’s essential to use high-quality, long-lasting face paint and set everything with a good setting spray. For removal, a cleansing balm is ideal, ensuring the skin is left clean and cared for after the celebration.
As we conclude our exploration of these innovative makeup ideas for 2025, it’s clear that the year encourages a beautiful blend of tradition and bold new styles. Each concept offers an opportunity to celebrate the unique beauty and personality of the individual, demonstrating that makeup is not just a tool for enhancement but a form of personal artistry and expression.
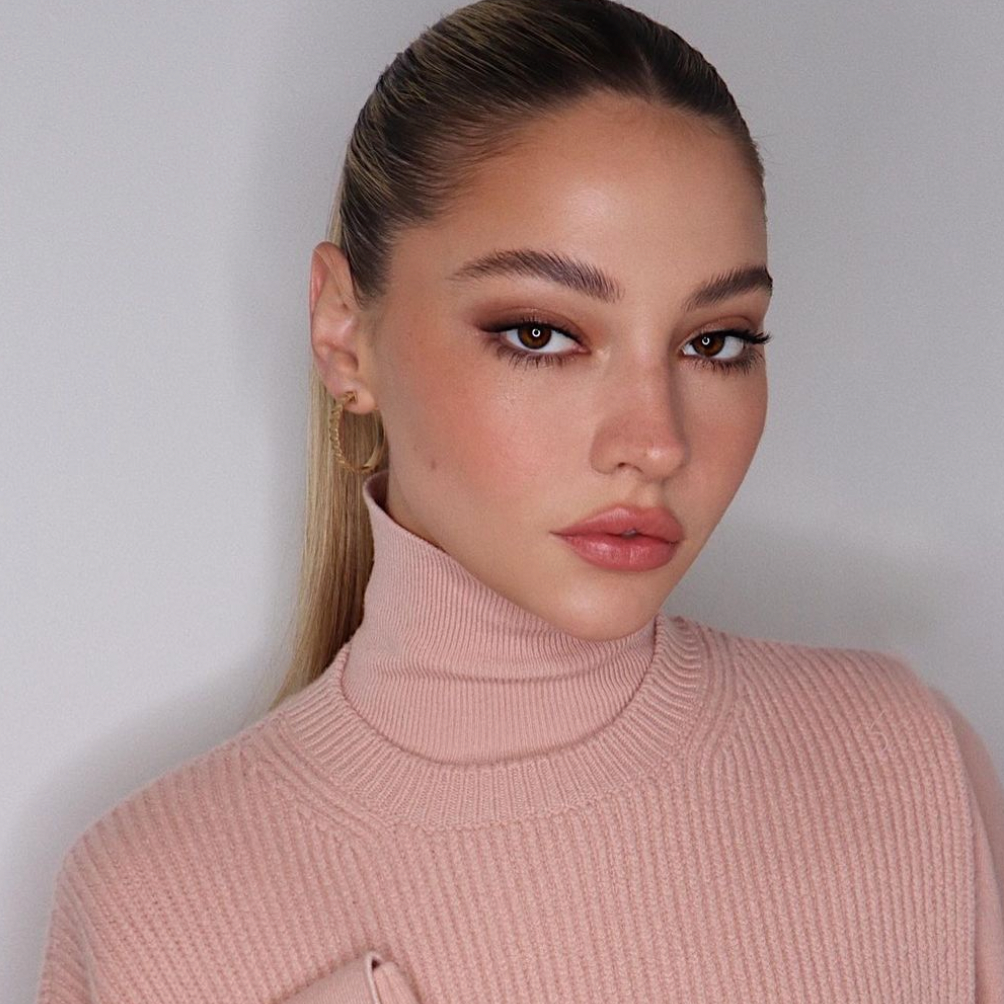
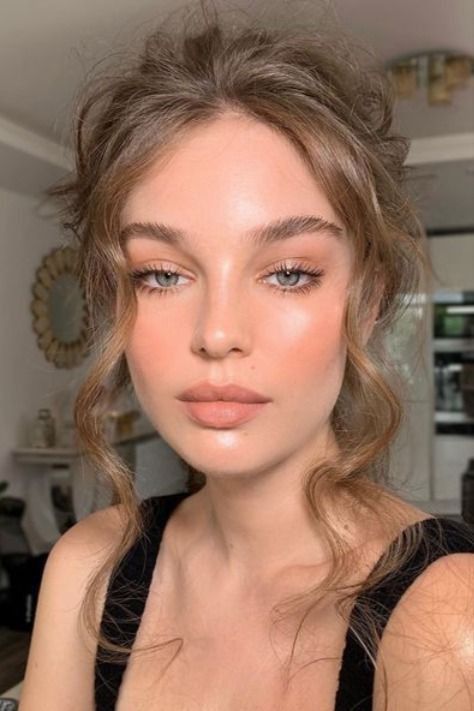
Radiant in Rosé
This portrait showcases a delicate and natural makeup look, featuring sheer pink blush and soft eyeshadows that evoke the gentle hues of rosé wine. The youthful, flushed cheeks and a touch of mascara create a simple yet elegant appearance, making it suitable for any occasion.
This style is ideal for those who appreciate understated beauty, making it perfect for an Easter brunch or any occasion where a natural, blooming appearance is desired. The soft pink tones are particularly flattering for green eyes, enhancing their vibrancy.
To maintain this fresh look, use a dewy setting spray and a multi-use stain for both lips and cheeks, ensuring a rosy glow lasts throughout the day.
The Minimalist Frost

This image presents a simple, natural look that highlights the eyes. The style features a light application of mascara and subtle eyeshadow, beautifully embracing the season’s beauty without being overly dramatic. The hair, in soft silver tones, flows freely, perfectly complementing the cool and understated makeup.
This minimalist approach is ideal for everyday wear or casual occasions, perfect for those who prefer a simple yet elegant aesthetic. It’s particularly flattering for individuals with pale or cool-toned skin and enhances the natural beauty of all face shapes.
For upkeep, choose a lightweight moisturizer and a delicate volumizing mascara that won’t weigh down the lashes. Those with silver hair should use color-protecting hair products to maintain the vibrancy of their hue.
The Whisper of Winter

In this portrait, the makeup evokes a winter vibe with a delicate touch of peach on the eyes, beautifully complementing the natural freckles and soft pink lips. The hairstyle, a tousled look in a platinum blonde hue, adds a touch of simple elegance to this fresh aesthetic.
This understated makeup and hair combination is ideal for low-key occasions or a fun day out. It conveys confidence without needing bold statements, making it suitable for those with fine features and all face shapes.
Maintaining this look requires minimal products: a nourishing lip balm, a tinted moisturizer for a dewy complexion, and a sea salt spray to add texture to the hair. Opt for hair products that enhance natural tones while protecting against winter’s harsh elements.
With these six captivating makeup ideas for 2025, we explore a spectrum that ranges from simple, natural beauty to bold, artistic expressions. Each look offers a unique way to embody the season’s trendiest styles, whether you’re attending prom, a masquerade, or seeking an everyday aesthetic.
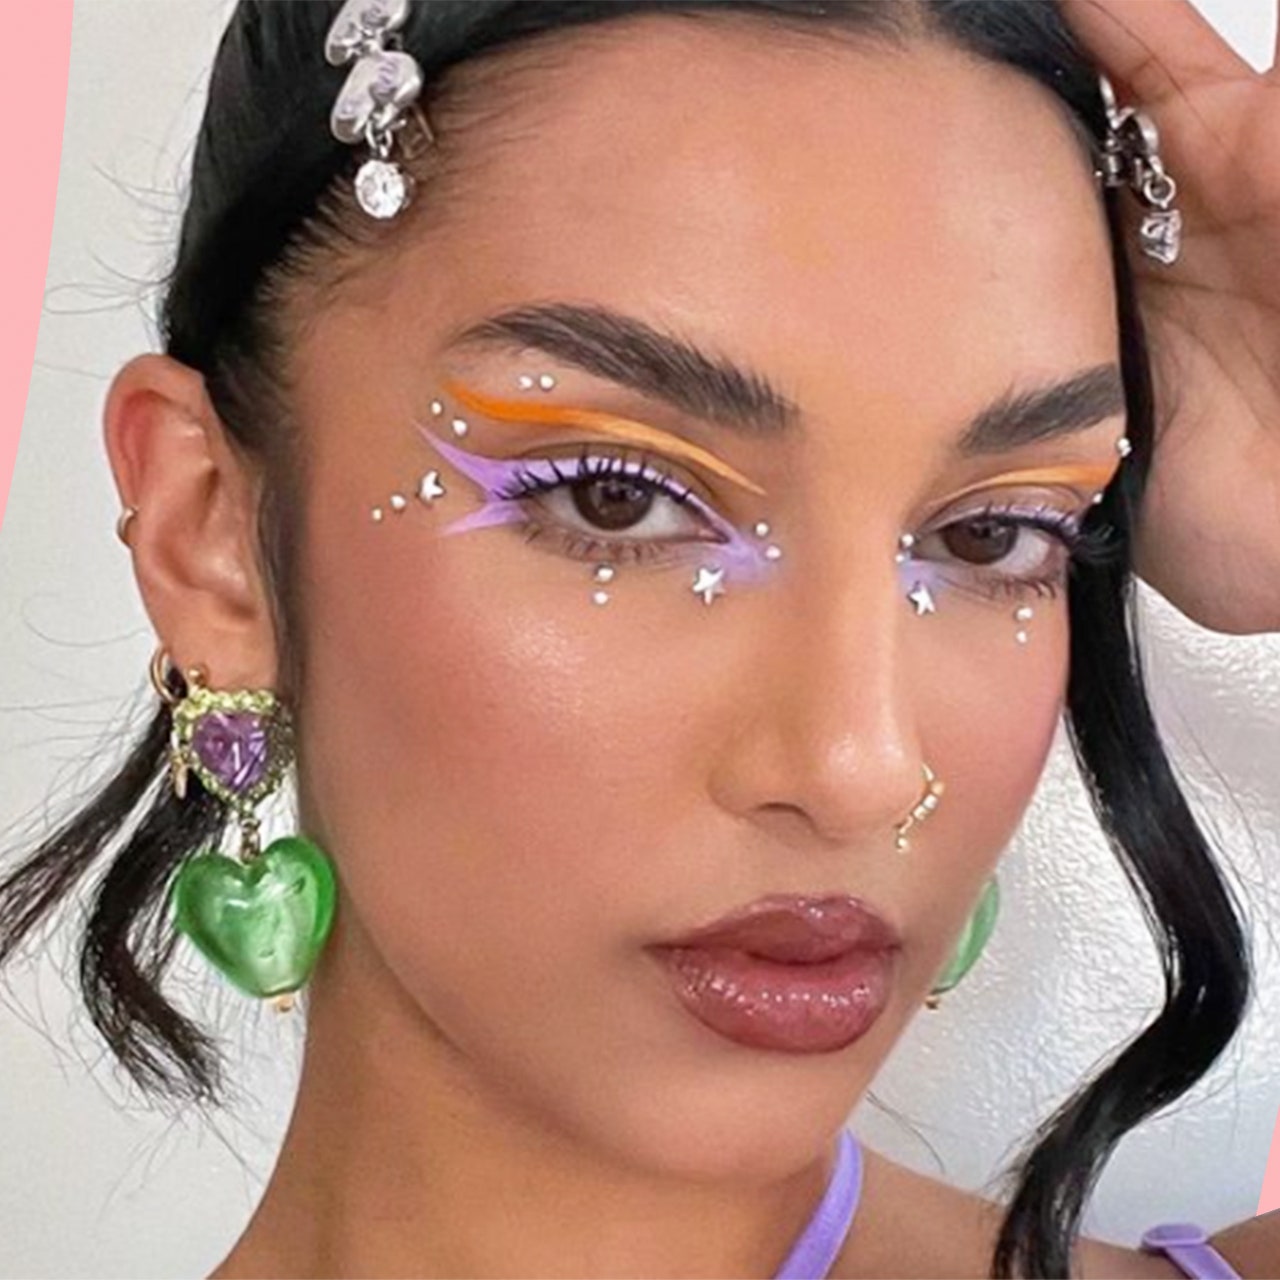
Bold and Beautiful
This striking makeup look bursts with color, showcasing bold orange and purple eyeliner that commands attention and embodies the adventurous spirit of makeup in 2025. It’s a fun and experimental style that perfectly suits lively occasions like raves or edgy fashion events, allowing individuals to express their unique personality and creativity.
This makeup trend is perfect for those who love to make a statement and can easily be tailored to enhance any eye shape. The vivid orange and purple eyeliner can illuminate brown eyes, making them appear more vibrant, while providing a striking contrast that can unexpectedly elevate blue or green eyes.
To keep these bold colors intact, it’s crucial to use a waterproof eyeliner, ensuring that they stay vivid throughout the day or night. A setting spray designed for longevity will help maintain the look, preventing smudging or fading. For removal, a specialized eye makeup remover is ideal to gently cleanse the delicate skin around the eyes without causing irritation.
The latest makeup trends for 2025 embrace versatility and creativity, encouraging individuals to express their unique styles. Whether you prefer a natural look or a more artistic approach, there’s a wealth of options to explore, making this year an exciting time for makeup artistry and self-expression.
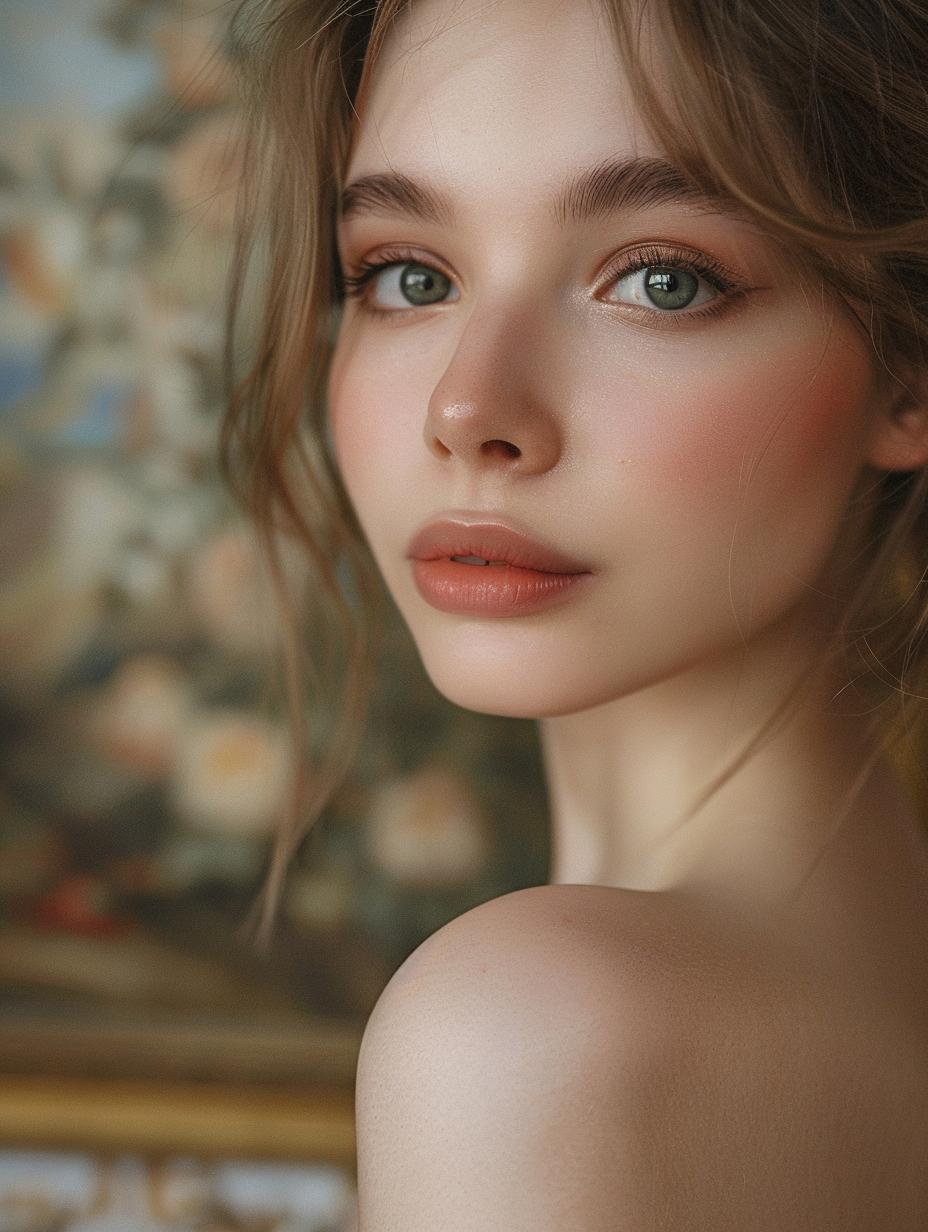
Peachy Perfection
The featured makeup look celebrates the effortless beauty of peach tones. This harmonious blend complements the natural eye color, enhanced by feathery lashes and perfectly groomed brows, embodying an easy, natural style suitable for any season.
This look is perfect for those seeking a fresh, simple makeup style that complements daytime events or casual occasions. It’s versatile and particularly enhances brown eyes, giving them a warm and inviting appearance.
To maintain this peachy glow, choose a long-lasting cream eyeshadow, a clear brow gel to set the eyebrows, and a nourishing mascara that conditions the lashes while providing a natural lift.
conclusion
In conclusion, the makeup trends of 2025 celebrate a beautiful spectrum of styles that range from understated elegance to bold artistry. Each look offers a unique way to express individuality, whether through soft, natural tones that enhance everyday beauty or striking, colorful designs that make a statement at special events.
As we move forward into the year, the essence of makeup as a form of self-expression remains at the forefront, encouraging us to embrace our unique beauty and experiment with new techniques. Whether you’re preparing for a casual outing, a festive celebration, or an everyday look, the possibilities are endless, making 2025 an exciting year for beauty enthusiasts everywhere.