HOW TO MAKE CORNSTARCH SLIME – 5 EASY RECIPES

Someone recently asked me about cornstarch slime. At first, I assumed they meant oobleck, but they clarified that they were talking about an actual slime made with cornstarch. Intrigued, we gathered our bin of oobleck and slime-making supplies and set out to experiment. After plenty of trial and error—along with rigorous testing by my kids—we came up with our top three cornstarch slime recipes!

Cornstarch is best known as the key ingredient in oobleck, a fascinating non-Newtonian fluid that changes its properties when mixed with water. But what happens when you combine it with something else—like glue? That question sparked our curiosity and sent us on a mission to experiment.

We tested all sorts of gloopy, gooey mixtures, and while some were complete disasters (yes, I may have glued my fingers together!), we discovered three recipes that actually worked. The first is incredibly simple, requiring just two ingredients, while the last one is unbelievably stretchy! No matter what kind of slime you’re looking for, we’ve got a cornstarch slime for you.

CORNSTARCH SLIME RECIPE 1 – THE EASY ONE

This first recipe is as simple as it gets—just mix cornstarch with glue! If you want to add color, mix a few drops of food coloring into the glue first for the best results.

How to Make It:
Start by adding cornstarch to the glue. We found that a 1:3 ratio works well, meaning for every ¼ cup of glue, you’ll need about ¾ cup of cornstarch. The measurements don’t have to be exact—our little helpers certainly weren’t precise!

The key to this recipe is patience. You’ll need to knead and work the mixture thoroughly until the stickiness fades and you’re left with a smooth, pliable slime. While this version isn’t the stretchiest or slimiest—it’s more like a stretchy playdough—it’s still a fun, hands-on activity for kids. Plus, it’s incredibly easy to make!

CORNSTARCH SLIME RECIPE 2 – A STRETCHIER OPTION

For our next experiment, we wanted something with more stretch. Regular slime has that classic, gooey pull, and we wanted to get as close as possible while still using cornstarch.

The Secret Ingredient? Glycerin!
After several attempts, we discovered that adding just one tablespoon of glycerin made a huge difference in the texture and stretchiness of the slime.

How to Make It:

  • Start with ¼ cup of glue and mix in a few drops of food coloring.
  • Add 1 tablespoon of glycerin and stir well.
  • Gradually mix in cornstarch, adding about ¼ cup at a time and stirring in between. You’ll need a total of ¾ cup of cornstarch to maintain the 1:3 glue-to-cornstarch ratio.

The glycerin transformed the consistency, making it much smoother and more elastic. While it still had a slight thickness to it, similar to soft dough, it behaved much more like traditional slime. This batch was a huge hit!

CORNSTARCH SLIME RECIPE 3 – THE SLIMIEST OF THEM ALL

When we first started making slime, we often heard from people struggling to get the texture just right. One of the most common issues? Using the wrong amount of contact lens solution, resulting in slime that was either too sticky or too stiff.

This got us thinking—was there a way to adjust the consistency without risking adding too much activator? That’s how we came up with our final, ultra-stretchy cornstarch slime!

How to Make It:

  • Mix ¼ cup of glue with 1 teaspoon of baking soda and a few drops of food coloring.
  • Add 1 teaspoon of contact lens solution and stir until the mixture starts to pull together into a sticky mass.
  • Instead of adding more contact lens solution to reduce stickiness, mix in ¼ cup of cornstarch and knead it well.

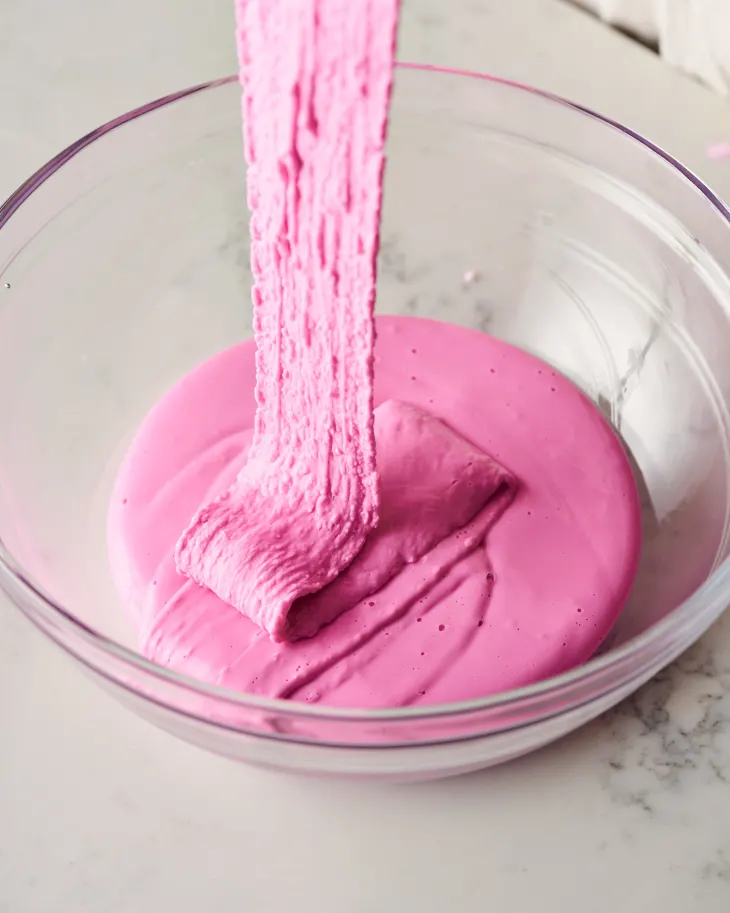
The result? A wonderfully stretchy, smooth slime without the risk of over-activating it. This one quickly became a favorite in our house!

CONCLUSION

Whether you’re looking for an easy, two-ingredient slime, a stretchier version, or the ultimate gooey creation, there’s a cornstarch slime recipe here for everyone. Happy experimenting!

OLD FASHIONED BRITISH CHRISTMAS CAKE

The British Christmas cake stands as a beloved culinary tradition, steeped in history and brimming with festive cheer. This iconic cake, often months in the making, is a testament to the enduring power of time-honored recipes and the joy of shared holiday experiences. Join us as we delve into the fascinating world of old-fashioned British Christmas cake, exploring its origins, unique characteristics, and the enduring appeal that continues to captivate generations.

INGREDIENTS

Fruit Mix

  • 1 pound currants
  • 6 ounces sultanas
  • 4 ounces raisins
  • 4 ounces mixed peel (candied peel, widely available in UK/Europe, or in some North American baking aisles)
  • 4 ounces glacé cherries (halved; not maraschino cherries)
  • ¾ cup dark rum or sherry (original recipe calls for 1 tablespoon)

Nuts and Dry Ingredients

  • 1 ounce almonds (chopped)
  • 1 ounce ground almonds (also known as almond flour)
  • 9 ounces plain flour (all-purpose flour)
  • 2 level teaspoons cocoa powder
  • 1 level teaspoon salt
  • 1 level teaspoon baking powder
  • 2 level teaspoons mixed spice

Wet Ingredients

  • 9 ounces butter (softened)
  • 4 eggs (beaten)
  • 9 ounces soft brown sugar
  • Finely grated zest of 1 lemon
  • 1 teaspoon coffee essence (optional)

Almond Icing (Optional)

  • 8 ounces ground almonds (almond flour)
  • 4 ounces caster sugar (superfine sugar)
  • 5 ounces icing sugar (confectioner’s sugar, sifted)
  • 2 ounces butter
  • 2 egg yolks (reserve whites for royal icing)
  • 1 teaspoon lemon juice
  • 3–4 tablespoons sieved apricot jam (to help icing stick)

Royal Icing (Optional)

  • 4 egg whites
  • 1½ pounds icing sugar (sifted)
  • 1 teaspoon lemon juice
  • 1 teaspoon glycerine (available at supermarkets, pharmacies, or cake supply stores)

INSTRUCTIONS

Step 1: Prepare the Fruit Mix

  • Combine currants, sultanas, raisins, mixed peel, and glacé cherries in a bowl.
  • Pour rum over the mixture, cover, and set aside for several hours or overnight.
  • If there is excess liquid after soaking, drain slightly, but leave a small amount for flavor.

Step 2: Prepare the Cake Batter

  • Preheat oven to 325°F (165°C or 150°C for fan ovens).
  • Grease an 8–10 inch (20–24 cm) cake pan, at least 2½ inches (6–7 cm) deep. Line with baking parchment.
  • In a large bowl, combine the soaked fruit mix with chopped and ground almonds.
  • Sift flour, cocoa powder, salt, baking powder, and mixed spice together.
  • In a separate bowl, cream butter and brown sugar until light and fluffy. Add lemon zest.
  • Gradually add beaten eggs, mixing well after each addition.
  • Fold in the dry ingredients, coffee essence, and fruit/nut mixture.

Step 3: Bake the Cake

  • Pour batter into the prepared pan, smoothing the top and creating a slight hollow in the center.
  • Bake at 325°F (165°C or 150°C for fan ovens) for 45 minutes. Reduce heat to 300°F (150°C or 140°C for fan ovens) and bake for another 40–60 minutes, or until a skewer inserted into the center comes out clean.
  • Cool in the pan for at least 1 hour, then transfer to a wire rack to cool completely.

Step 4: Storing the Cake

  • Wrap the cooled cake in foil and store in a cool, dry place for 6–8 weeks. Feed weekly with a small amount of rum for added flavor.

Step 5: Icing the Cake

Marzipan (Optional)

  • Combine ground almonds, caster sugar, and icing sugar.
  • Cut in butter until the mixture resembles breadcrumbs.
  • Mix egg yolks and lemon juice, then combine with the dry ingredients to form a stiff paste.
  • Divide paste in half. Roll one half to cover the top of the cake and the other into a strip to cover the sides.
  • Brush cake with sieved apricot jam, then apply marzipan. Smooth and seal edges. Let dry for several hours.

Royal Icing (Optional)

  • Beat egg whites lightly, then add lemon juice and glycerine.
  • Gradually add icing sugar until the icing reaches a thick, spreadable consistency.
  • Pour over the marzipan-covered cake, spreading evenly with a palette knife.
  • Allow to set in a cool, airy place overnight.

Enjoy your festive cake!