If you’re a Disney devotee, you probably have a collection of merchandise to showcase your superfan status, but why stop there? Bring your love for Disney to your manicure with your very own Disney-themed nails. With infinite possibilities for Disney nail art, the biggest challenge will be choosing just one design from the many iconic references available. Keep reading for the top Disney nail ideas that will spark your creativity.
SHORT DISNEY NAILS
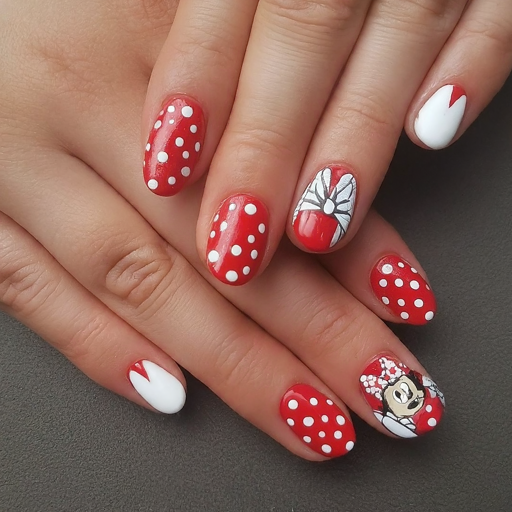
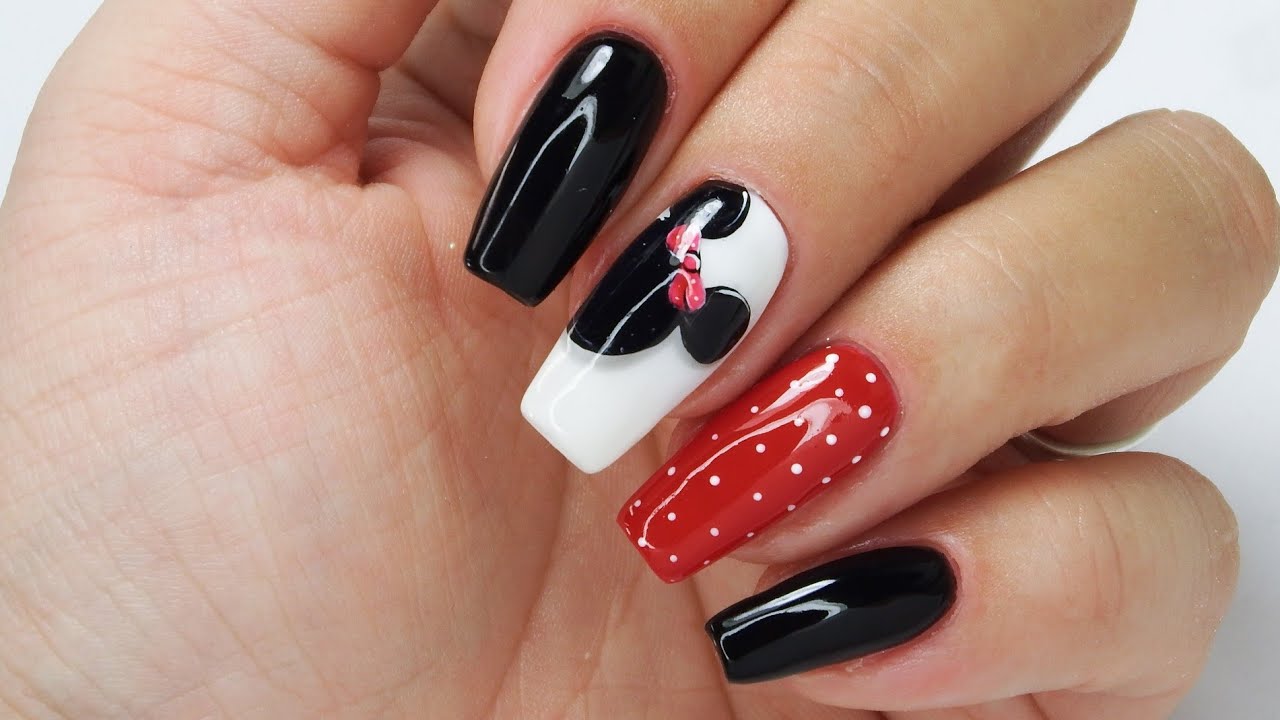
While many Disney nail designs are often showcased on longer nails, shorter nails can still be adorned with adorable Minnie Mouse-inspired looks. A red and white color scheme, featuring two white dots on each nail, can create a charming and playful effect that perfectly complements shorter nails.
DISNEY FRENCH TIP NAILS
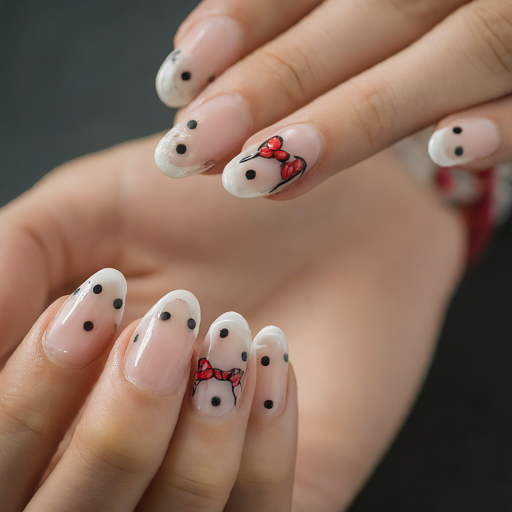
While we’re used to seeing classic white French tips, why not add a touch of Disney magic with Minnie Mouse-inspired designs? You can create a playful look by filling the French tip with iconic polka dots, or you can use the Minnie Mouse ears silhouette as a unique twist on the traditional shape.
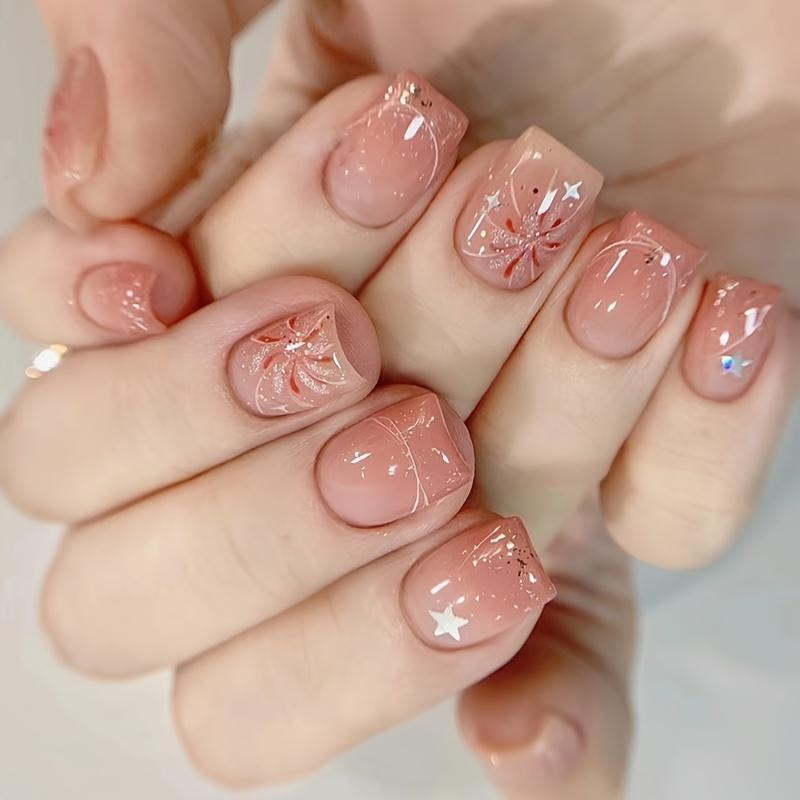
NEUTRAL DISNEY NAILS
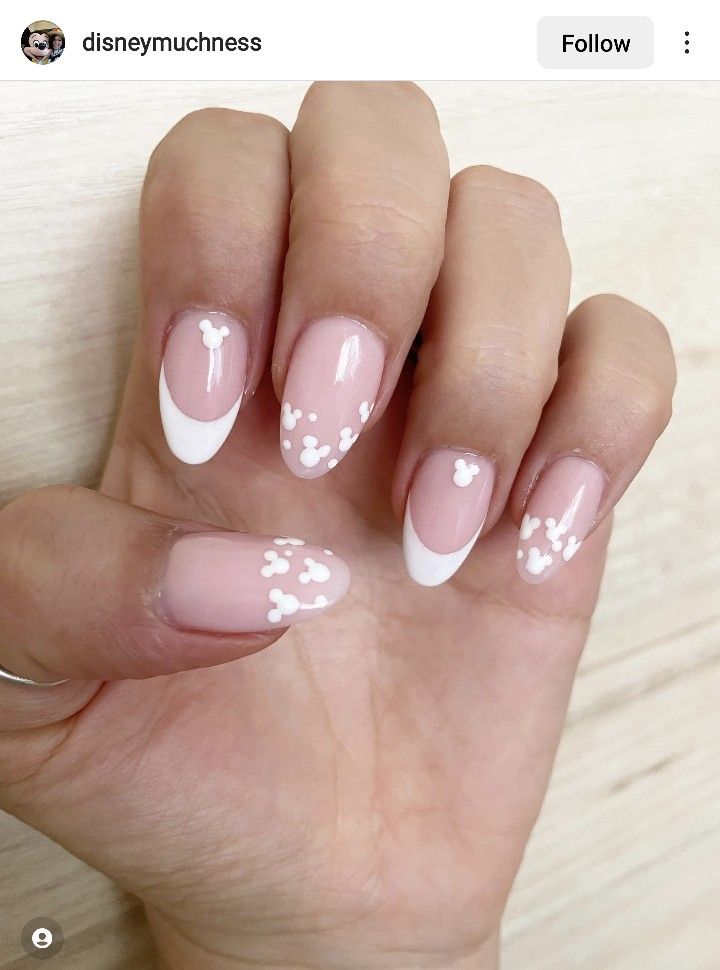
If you prefer a more subtle approach, you can opt for neutral-toned nails with minimalist Disney designs. Simply choose your favorite nude shade and add a touch of white to create delicate Mickey Mouse, Minnie Mouse, or Donald Duck silhouettes. This understated look allows you to showcase your love for Disney while maintaining a natural and sophisticated aesthetic.
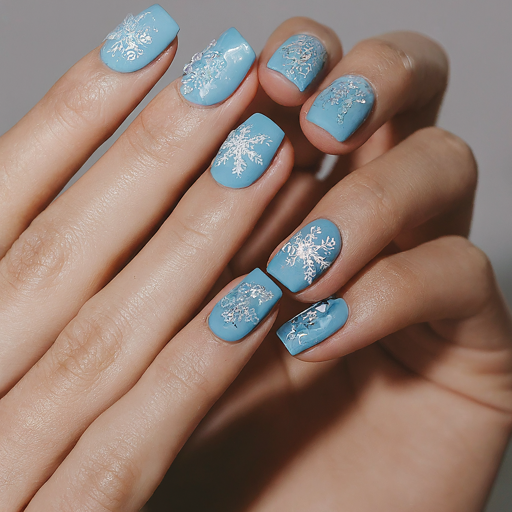
BLUE DISNEY NAILS
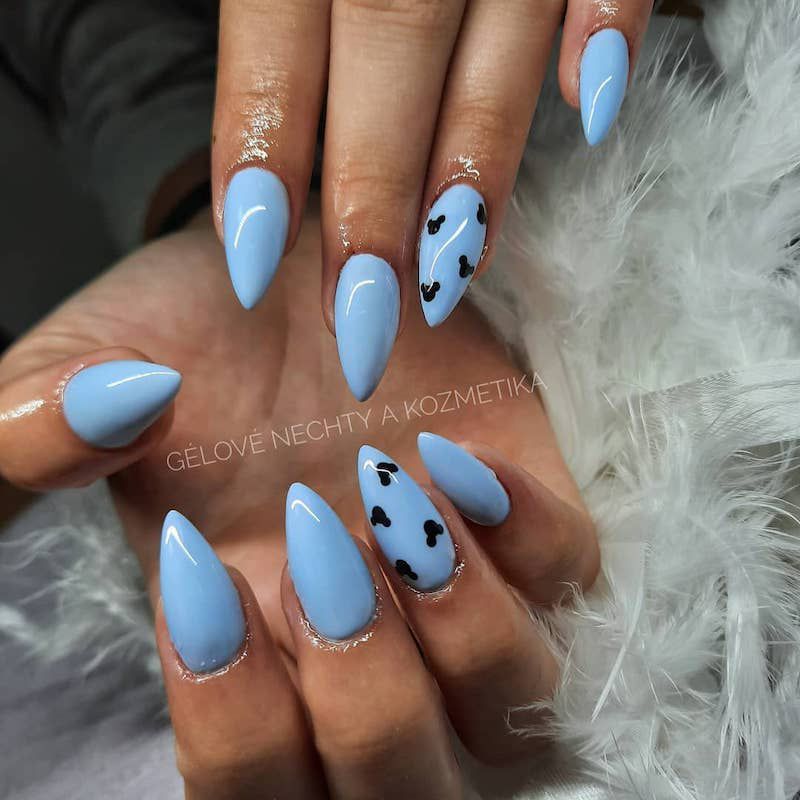
For a cool and calming vibe, blue Disney nails are the perfect choice. From Ariel’s underwater kingdom to Elsa’s icy magic, blue nails can transport you to a world of enchantment. We suggest going for an icy vibe and opting for a Frozen theme if you’re going to do blue Disney nails. Blue and Frozen just make sense, don’t you think?
FROZEN NAILS
Ice, ice, baby! These frosted blue tips adorned with tiny rhinestones are perfect for anyone looking to channel their inner Elsa. This design captures the essence of her magical, icy powers, offering a subtle yet elegant nod to the beloved queen of Arendelle.
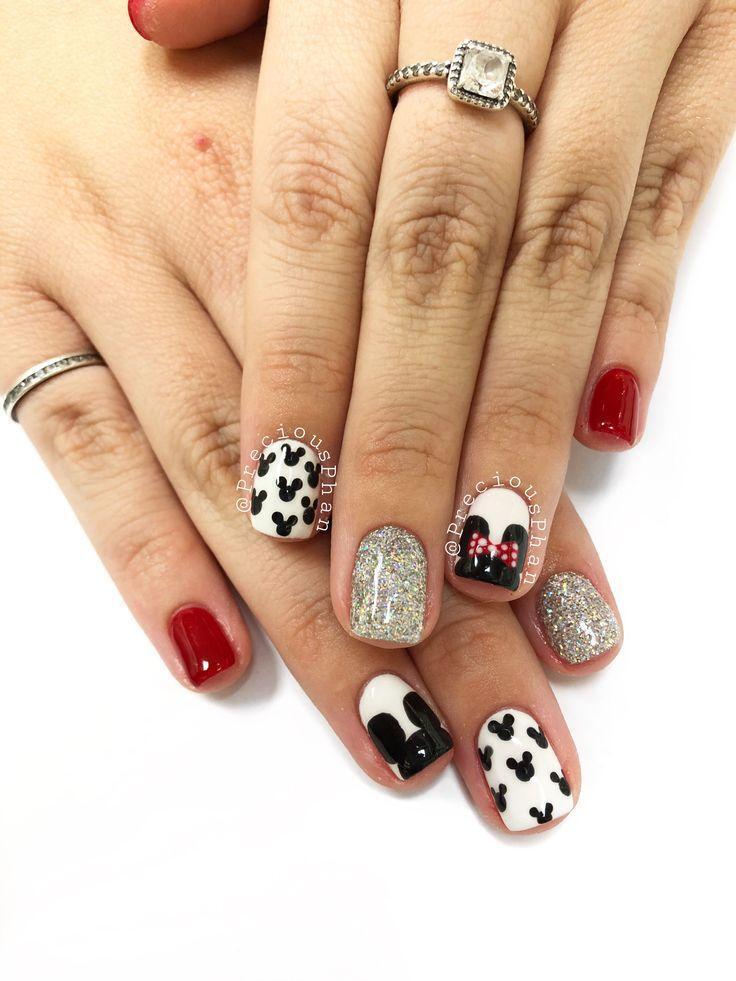
OLD SCHOOL MICKEY AND MINNIE NAILS
We love to see one of the earlier versions of Mickey and Minnie nails on this pastel manicure. Here, the detail is concentrated on the middle two nails, which feature detailed portraits of the characters atop pastel-hued nails.
FROZEN NAILS
Let’s embark on a journey through the icy realm of Elsa and Anna with Frozen-inspired nail designs that will surely captivate everyone. Opt for an icy blue shade as your base and add plenty of glitter to evoke a frosty sparkle. For an extra cold effect, hand-paint some delicate icicles.
DISNEY VILLAIN NAILS
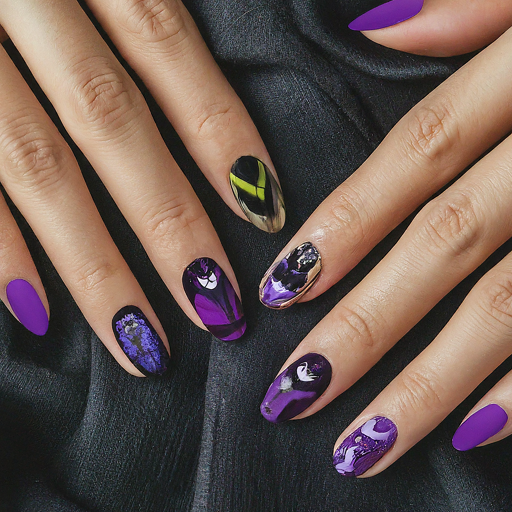
Every Disney story has its villain, so why not let them shine on your nails? Design a wicked Disney villain-inspired manicure with a deep purple or black base, and add intricate details that highlight their sinister personalities. This bold choice lets you showcase your love for Disney’s darker characters in a stylish and dramatic way.
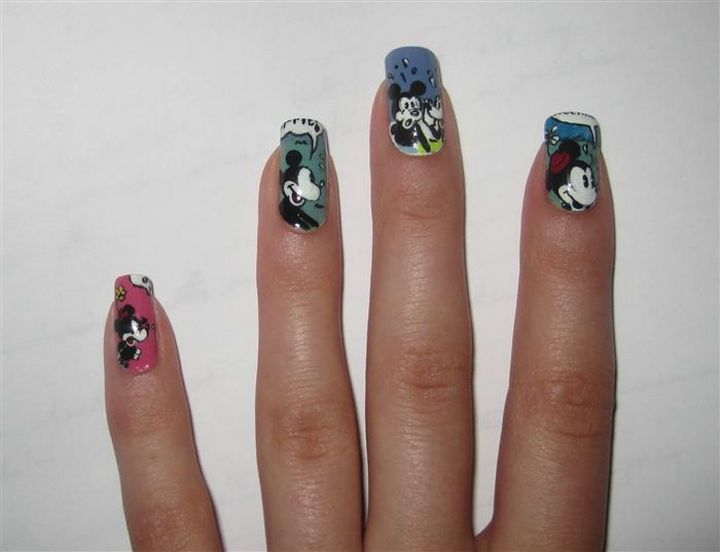
COLORFUL CHARACTERS

These nails feature a unique design on each finger, showcasing a variety of Disney characters from Goofy to Minnie. Along with these beloved characters, the look is enhanced with playful, pop art-inspired clip art such as rainbows and smiley faces, adding an extra layer of fun and creativity.
DISNEY BALLOON
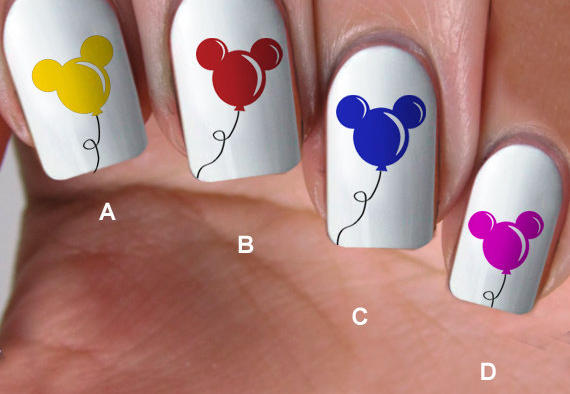
The translucent, Mickey-shaped balloon is one of Disney World’s most iconic symbols, making it an ideal element to incorporate into your manicure for a touch of Disney magic.
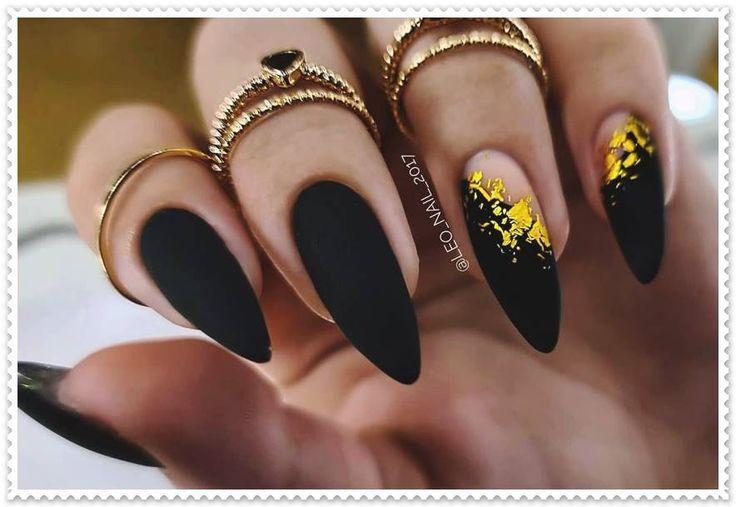
BLACK DISNEY NAILS
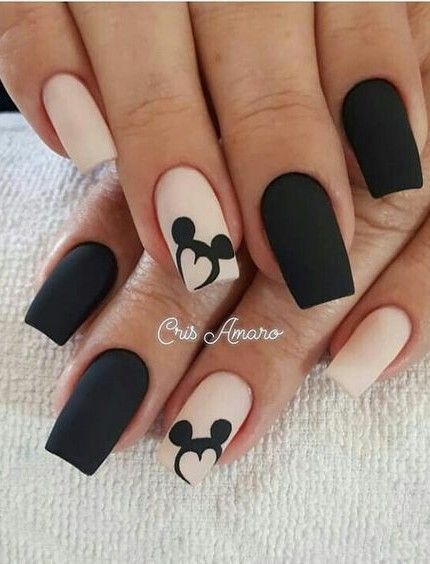
Feeling the magic of the original Disney days? Opt for black and white Disney nails! These nails are a wonderful homage to Walt Disney’s first sketches and characters. It’s a unique manicure that not many people will have seen before, as most fans focus on the latest characters. Let your true Disney love shine by going back to where it all began with this vintage-inspired manicure.
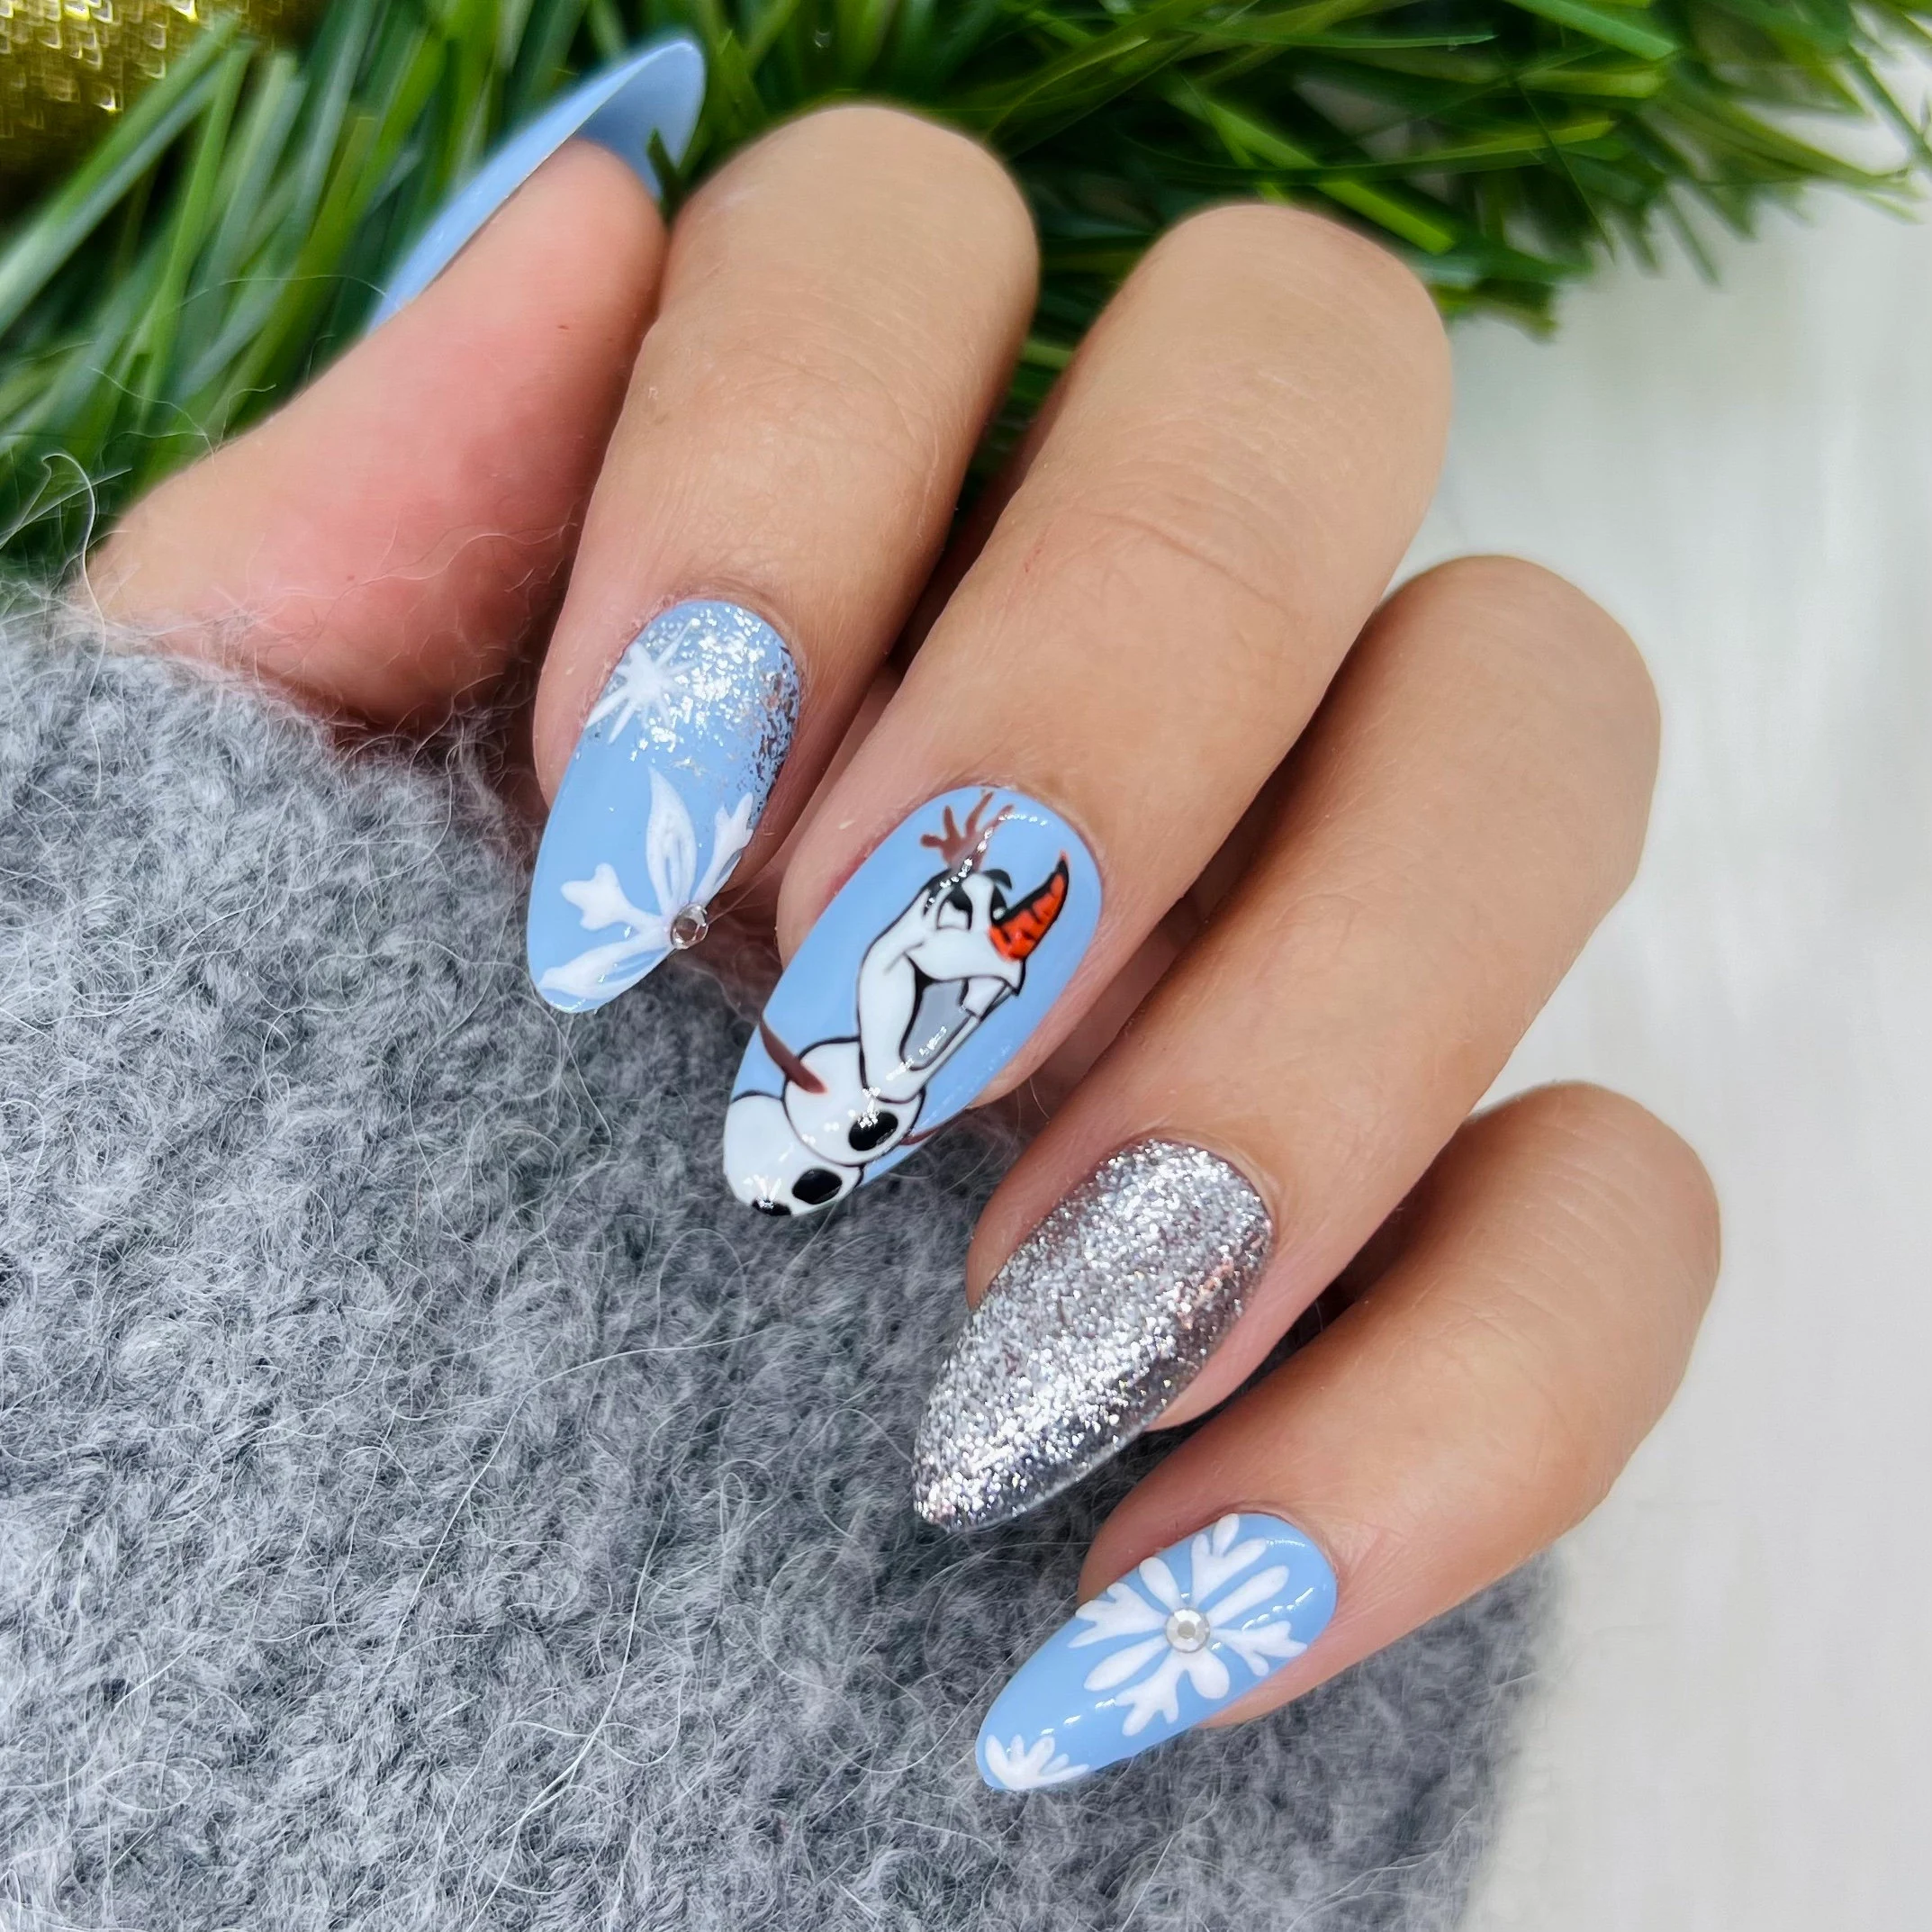
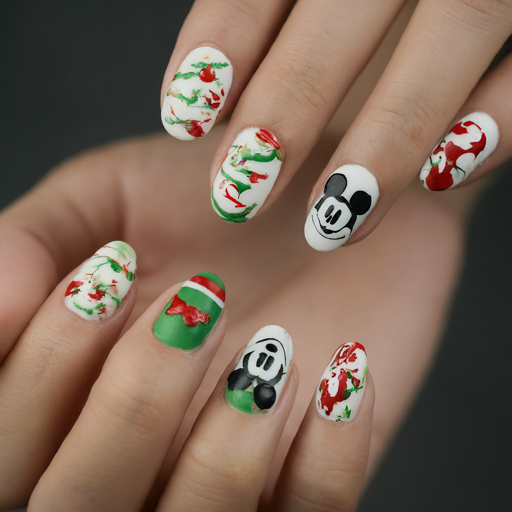
CHRISTMAS DISNEY NAILS
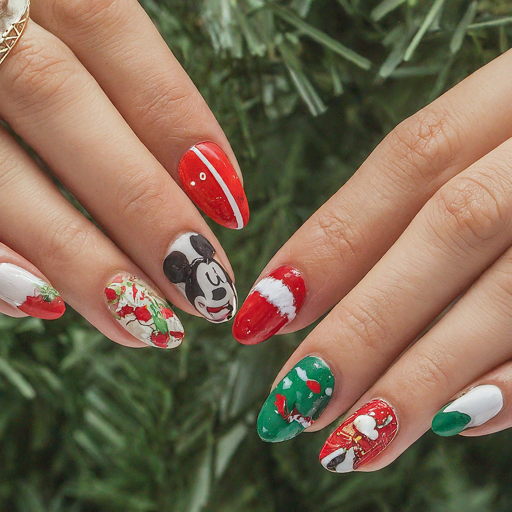
Add some extra joy and holiday spirit to your nails with Disney-inspired Christmas nail designs. Decorate your nails with Mickey and Minnie dressed in their festive outfits or go for a winter wonderland or feature some Frozen characters and snowflakes. These nails will make you feel like you’re celebrating the most magical time of the year in true Disney style.
ELSA NAILS

Since we’re already in Arendelle, let’s shine the spotlight on everyone’s favorite character, Elsa. If you adore her as much as we do, you’ll fall head over heels for these Elsa-inspired nails. We love the light blue polish combined with delicate falling snowflakes—truly capturing the essence of Frozen. To elevate this manicure even further, add some sparkling gems. This is a regal look fit for a queen.
STITCH NAILS
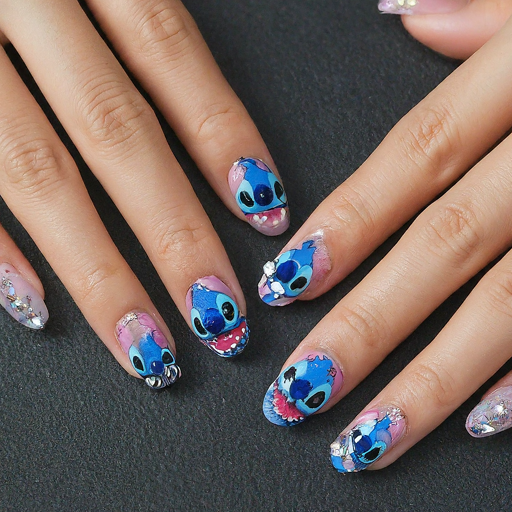
If you don’t adore Stitch, we might have a bone to pick with you! He’s just too irresistibly cute not to love. If you’re a fan like we are, you’ll definitely appreciate these Stitch nails. For a unique twist, try adding rhinestones to your Stitch-themed manicure. The unexpected touch of sparkle adds a special charm to the design—making it stand out and adding an element of surprise that no one would expect in a Stitch manicure.
MICKEY MOUSE NAILS
Speaking of the iconic Mickey Mouse, these nails are simply fabulous! The Mickey silhouettes scattered over a lovely nude base add a playful twist to our favorite nude pink manicure. These nails let you show off your Disney fandom while keeping your look polished and professional.
MINNIE MOUSE NAILS
Let’s turn our attention to the queen of polka dots and bows – Minnie Mouse! Known for her irresistible charm and signature style, Minnie deserves a special place on your nails. The combination of the hand-painted character with vibrant multicolored designs makes for a chic and playful manicure, perfect for true fans.
WINNIE THE POOH
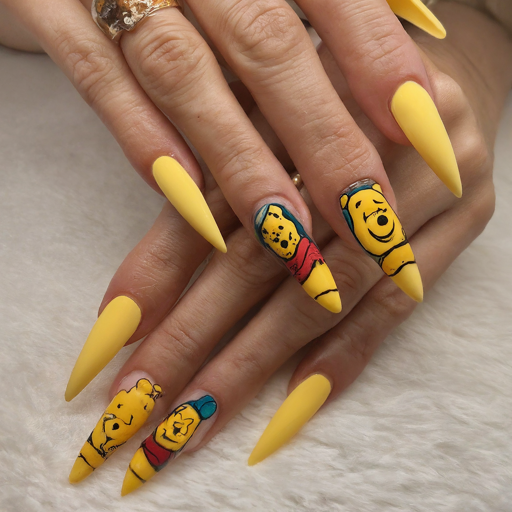
A childhood favorite gets a sophisticated twist with these acrylic nails featuring Winnie the Pooh. This design blends playful clip art and text art (we adore the “hunny” reference) with portraits of the beloved characters, creating a chic yet nostalgic look.
ABSTRACT MICKEY NAILS
Mickey Mouse is a character we tend to see often in reference to Disney. That said, you might often see Mickey Mouse nails, and you might want to try something different from everyone else. This is where abstract Mickey nails come in. One of our tips for creating abstract Mickey nails is to play into the season you are currently in.
CUTE DISNEY NAILS
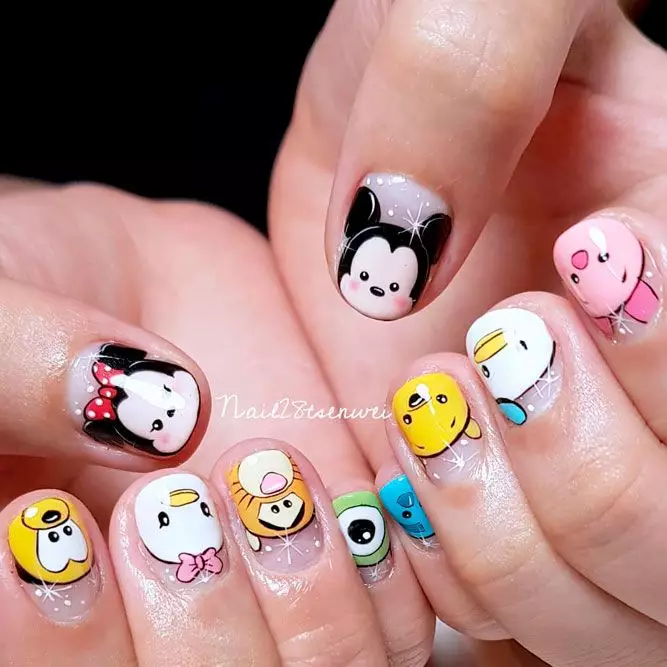
Dare we say that all Disney nails are inherently cute? Given their magical charm, there’s not much to change when it comes to making them adorable. However, these particular Disney nails stand out as our favorites because they feature a delightful mix of characters, including Mike Wazowski and the colorful balloons from Up!
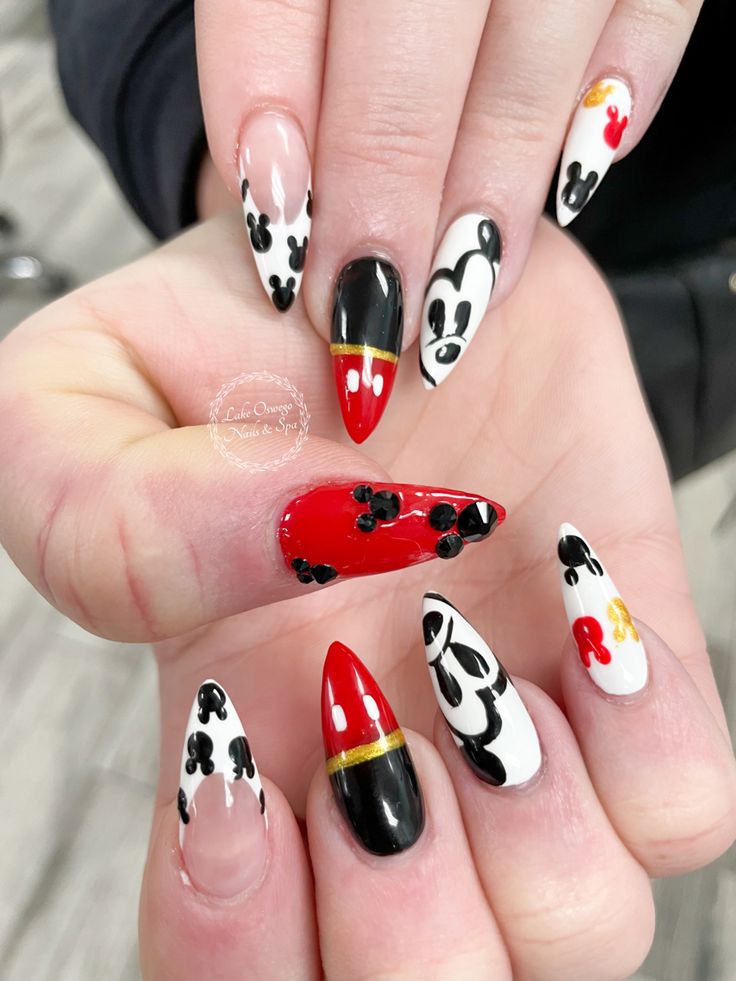
RED DISNEY NAILS
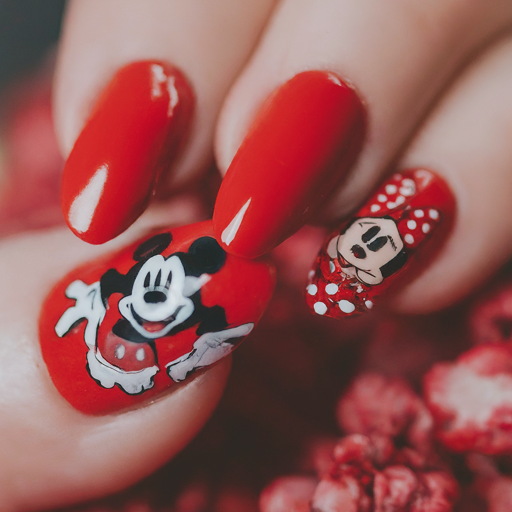
Red Disney nails are ready to make a statement! You can choose which characters to feature, but since Mickey and Minnie Mouse are so iconic with their red outfits, we suggest including them in your design. To add an extra touch of fun, consider swapping your standard red polish for a dazzling red glitter polish.
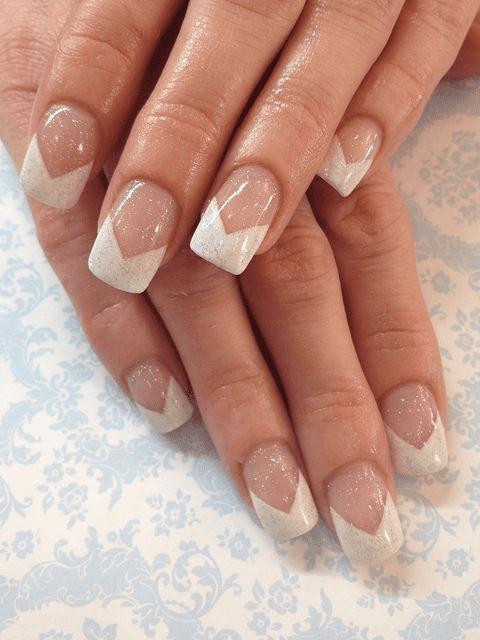
DISNEY THEMED ACRYLIC NAILS
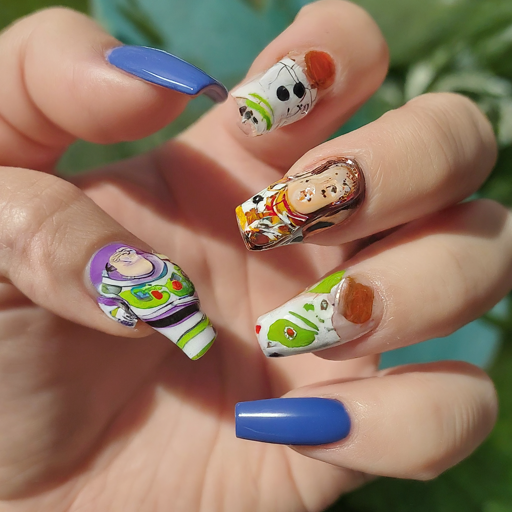
For those seeking a more durable and long-lasting manicure, acrylic nails are the perfect choice. Their strength and versatility allow for a variety of shapes and intricate Disney-themed designs. With longer nails, you have more space to experiment with fun and detailed designs, so consider this when choosing your nail shape and length
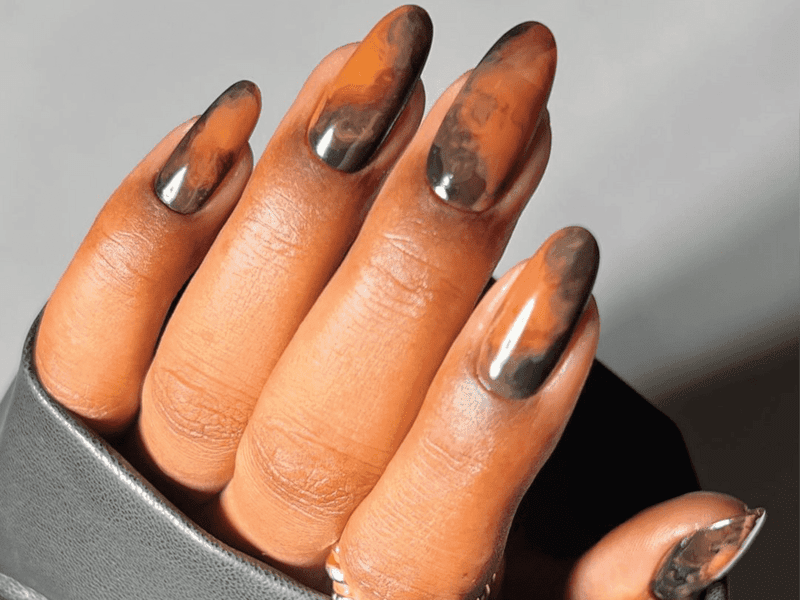
HALLOWEEN DISNEY NAILS
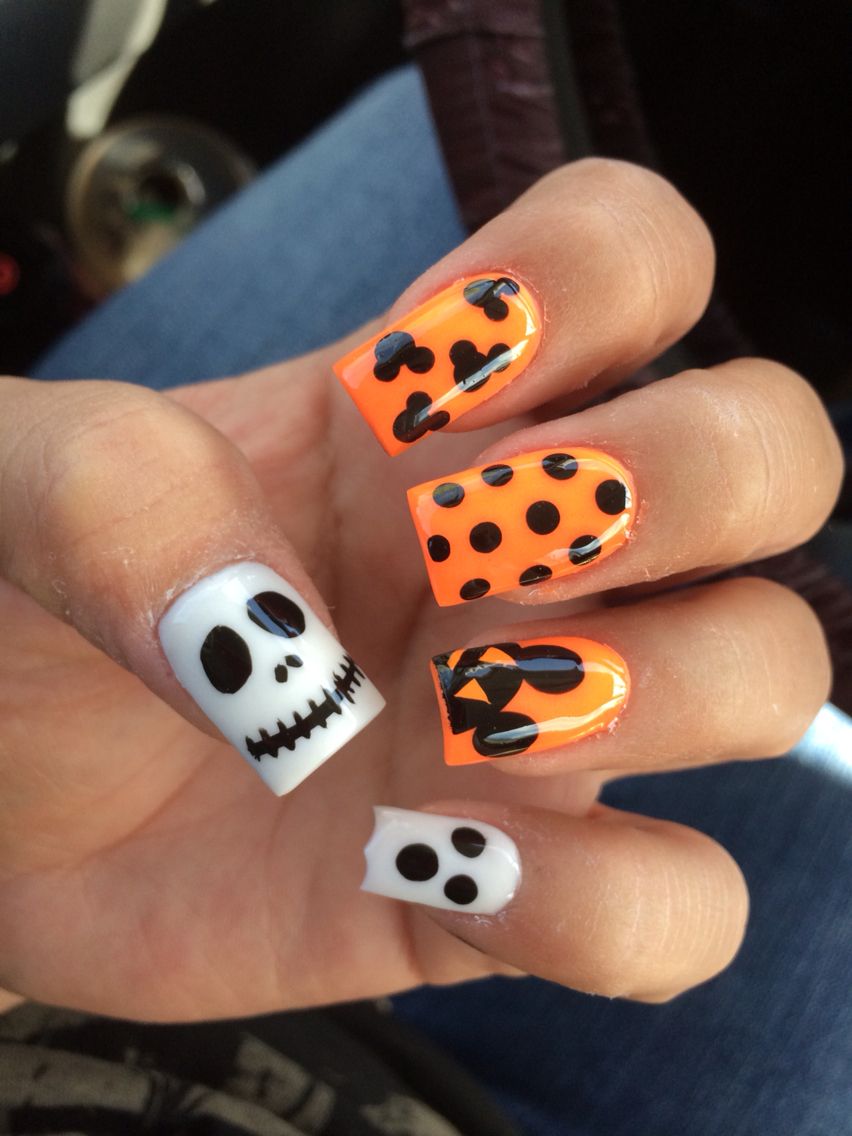
We actually love the combination of Disney designs with a Halloween vibe. Black and orange nails adorned with Disney-themed patterns are perfect for your Halloween celebrations. If you’re looking to skip the traditional Disney designs, consider a “Nightmare Before Christmas” manicure for a unique Halloween look.
LILO & STITCH
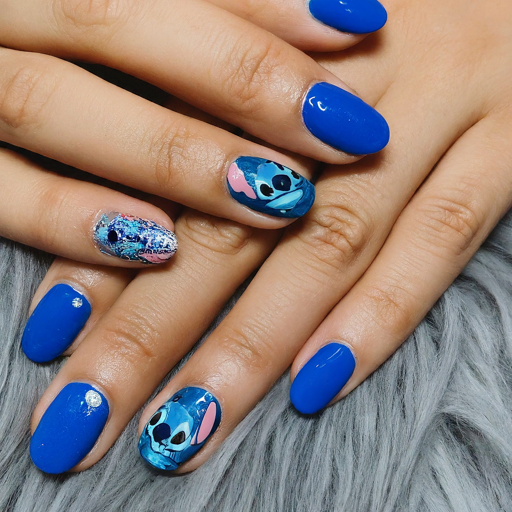
This Lilo & Stitch-inspired design is both detailed and striking in bold blue. We especially love how each nail features a unique design, and the addition of sparkling accents makes a powerful statement.
ENCANTO NAILS
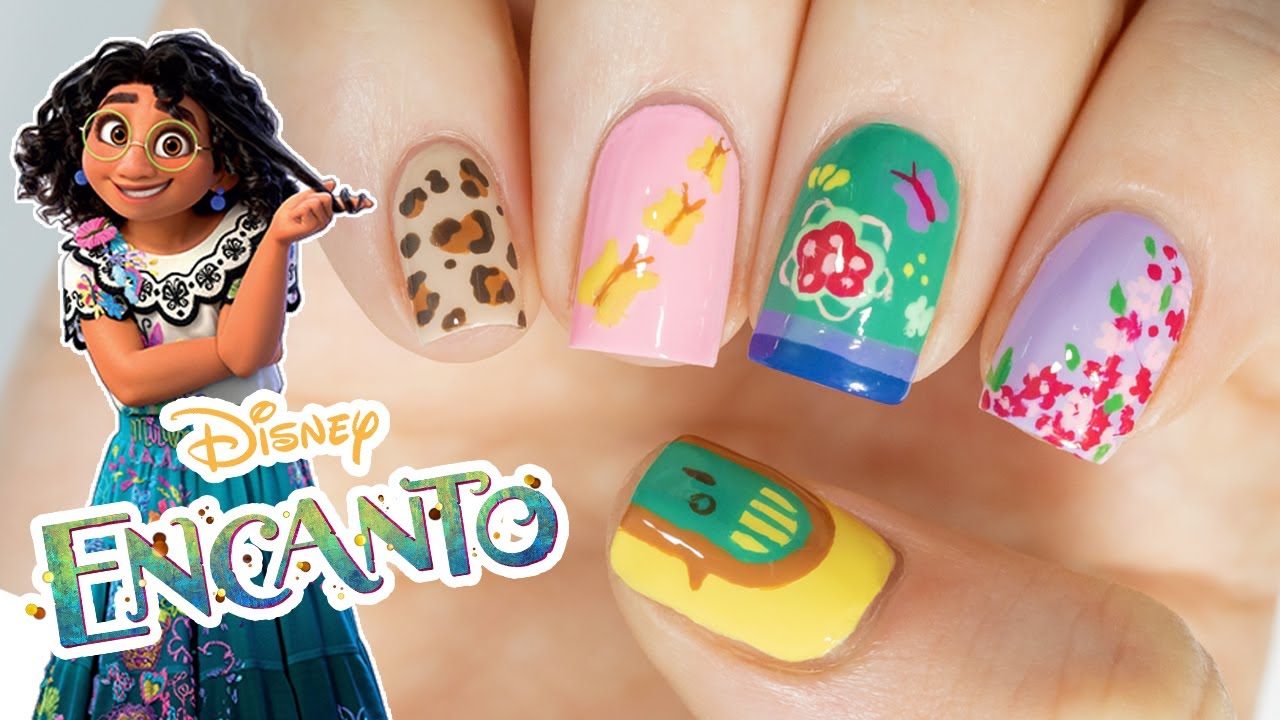
This nail art uses vibrant polish shades to make every detail stand out. If you’re not a fan of Encanto or simply want to avoid having “We Don’t Talk About Bruno” stuck in your head, you can easily customize this design to feature your own favorite themes or characters.
CONCLUSION
Disney nails are a magical portal to a world of wonder, where your fingertips become a canvas for beloved characters and whimsical designs. From the classic charm of Mickey and Minnie to the icy elegance of Frozen, there’s a Disney-inspired manicure to enchant every fan. Let your nails sparkle with the vibrant hues of Ariel’s underwater kingdom or the playful patterns of Lilo and Stitch.