BROWS ON FLEEK: BEFORE AND AFTER EYEBROW LAMINATION

Eyebrow lamination is a revolutionary technique that has taken the beauty industry by storm. It involves a semi-permanent treatment that reshapes and tames unruly brows, providing them with a smooth, polished appearance. If you’re tired of spending hours each morning with eyebrow pencils, eyebrow lamination might be the solution for you. Your eyebrows can appear thicker, fuller, and perfectly groomed, with a natural-looking curve that lasts for weeks. In this fascinating exploration, we delve into the transformative power of before-and-after eyebrow lamination.

WHAT IS BROW LAMINATION?

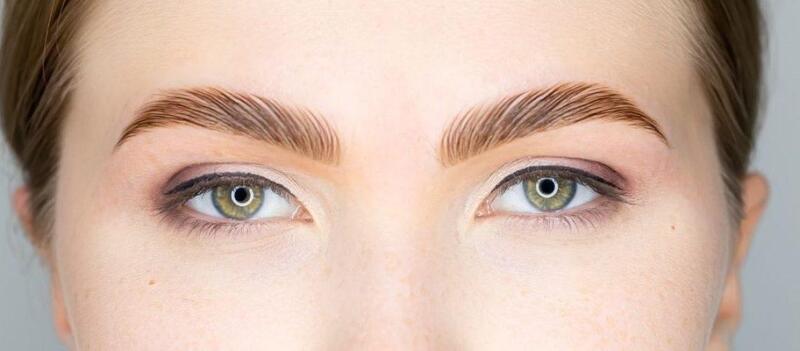
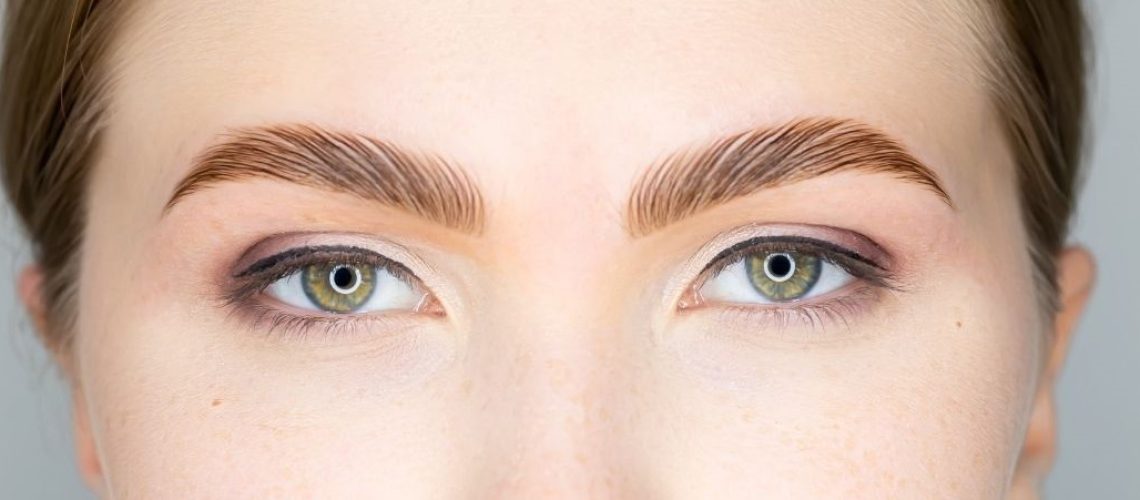
Imagine it as a perm for your eyebrows! Brow lamination is a process that uses special solutions to relax and reshape your brow hairs. This allows them to be brushed upward and held in position. The result is a fuller, lifted look, and it can even help control unruly or downward-growing hairs.

Think of brow lamination as a lash lift, but for your brows. Instead of using perming and setting solutions to create a curled effect, the solutions are applied to make your brow hairs stand upward, giving them a bushy and fluffy appearance.

WHAT ARE THE BENEFITS OF BROW LAMINATION?

The biggest advantage of laminated brows is undoubtedly the way they look. According to Sarah Maxwell, a brow and lash expert from Los Angeles, when done correctly, laminated brows have a more aesthetically pleasing shape. They appear fuller and more lifted. During the lamination process, you can also adjust the shape of your brows slightly, like raising the arch or lowering the tail, to achieve your desired look.

Unlike other brow treatments such as microblading, brow lamination is non-invasive and temporary. This makes it an excellent choice for those who are hesitant to commit to permanent brow services.

Not only do laminated brows look great, but they are also easier to manage. Maxwell explains that the hairs, especially if they were unruly before, become more manageable in their smooth shape. They appear as though they have been expertly brushed up and set in place, with the hairs lying in a vertical direction.

One of the key selling points of brow lamination is its longevity. The results can last up to eight weeks, which means you won’t have to spend time every morning brushing and setting your brows with gel. This allows for a lower maintenance daily routine.

HOW DO I PREPARE FOR A BROW LAMINATION?

Before we delve into what you can expect during your appointment, it’s crucial to be prepared. To avoid any unwanted skin reactions, it’s recommended to refrain from using retinol, alpha hydroxy acids (AHAs), or other exfoliating skincare products for at least 48 hours before your appointment. These substances can potentially react with the chemical lamination solution. Additionally, it’s best to avoid tweezing, threading, or waxing your brows prior to the appointment as advised by brow technicians.

If you have ultra-sensitive skin or have experienced reactions to hair dye in the past, it’s a good idea to request a patch test before your appointment. While not always necessary for lamination, it can help identify any potential allergies before the solution is applied to your eyebrows.

Inform your brow technician if you have any skin conditions such as psoriasis or eczema, if you have had sensitivities to specific chemicals in the past, if you have any eye conditions, or if you currently have sunburn. Based on these factors, your technician will assess whether it is safe for you to proceed with the treatment. This consideration is essential for your well-being and safety.

WHAT IS THE BROW LAMINATION PROCESS LIKE? 

CONSULTATION AND BROW MAPPING

You’ll discuss your desired brow shape and goals with the technician. They’ll assess your brows and recommend a suitable shape based on your facial features. Brow mapping involves lightly drawing the desired shape on your skin for precise placement.

CLEANSING AND BRUSHING

The technician thoroughly cleanses your brows to remove makeup and oils. They may gently brush your brows to reveal their natural direction and texture.

PERMING SOLUTION

A lifting cream, similar to a perm solution, is applied to your brows. This breaks down the hair’s bonds, allowing them to be reshaped. The technician covers your brows with plastic wrap to trap the heat and aid penetration.

NEUTRALIZATION

After a specific time, the perming solution is removed and neutralized with another solution. This sets the new shape of the brows in place.

BRUSHING AND STYLING

The technician brushes your brows again, directing them upwards and into the desired shape. They may trim any stray hairs to refine the shape.

SETTING SOLUTION

A setting solution is applied to lock the hairs in their new position. This ensures the shape holds for several weeks.

TINTING (OPTIONAL)

Some technicians offer brow tinting as an additional step to enhance the color and definition of your brows. This is optional and depends on your preference.

AFTERCARE INSTRUCTIONS

The technician will provide you with aftercare instructions to ensure optimal results and maintain the shape. This may involve avoiding water and makeup for a specific period and brushing your brows daily.

HOW LONG DOES BROW LAMINATION LAST?

The duration of your laminated brows depends on the natural hair cycle of your eyebrows. Similar to eyelashes, brow hairs go through a renewal process where old hairs shed and new ones grow in.

Typically, the growth cycle for most individuals is around 30 days. As a result, the effects of brow lamination can last anywhere from three to eight weeks.

For example, if you had your brows laminated in early November, you may find that the shape remains intact without much maintenance throughout December. However, by mid to late January, you might notice that a touch of clear brow gel is needed to keep them in place.

Interestingly, some individuals discover that they actually prefer the appearance of their brows a month or two after the initial lamination. This is a personal preference and may vary from person to person.

It’s important to keep in mind that individual experiences with brow lamination can differ based on factors such as hair growth rate and personal styling preferences. Regular touch-ups or maintenance appointments may be necessary to sustain the desired shape and look of your laminated brows.

EYEBROW LAMINATION BEFORE AND AFTER

BEFORE AND AFTER EYEBROW LAMINATION TREATMENT

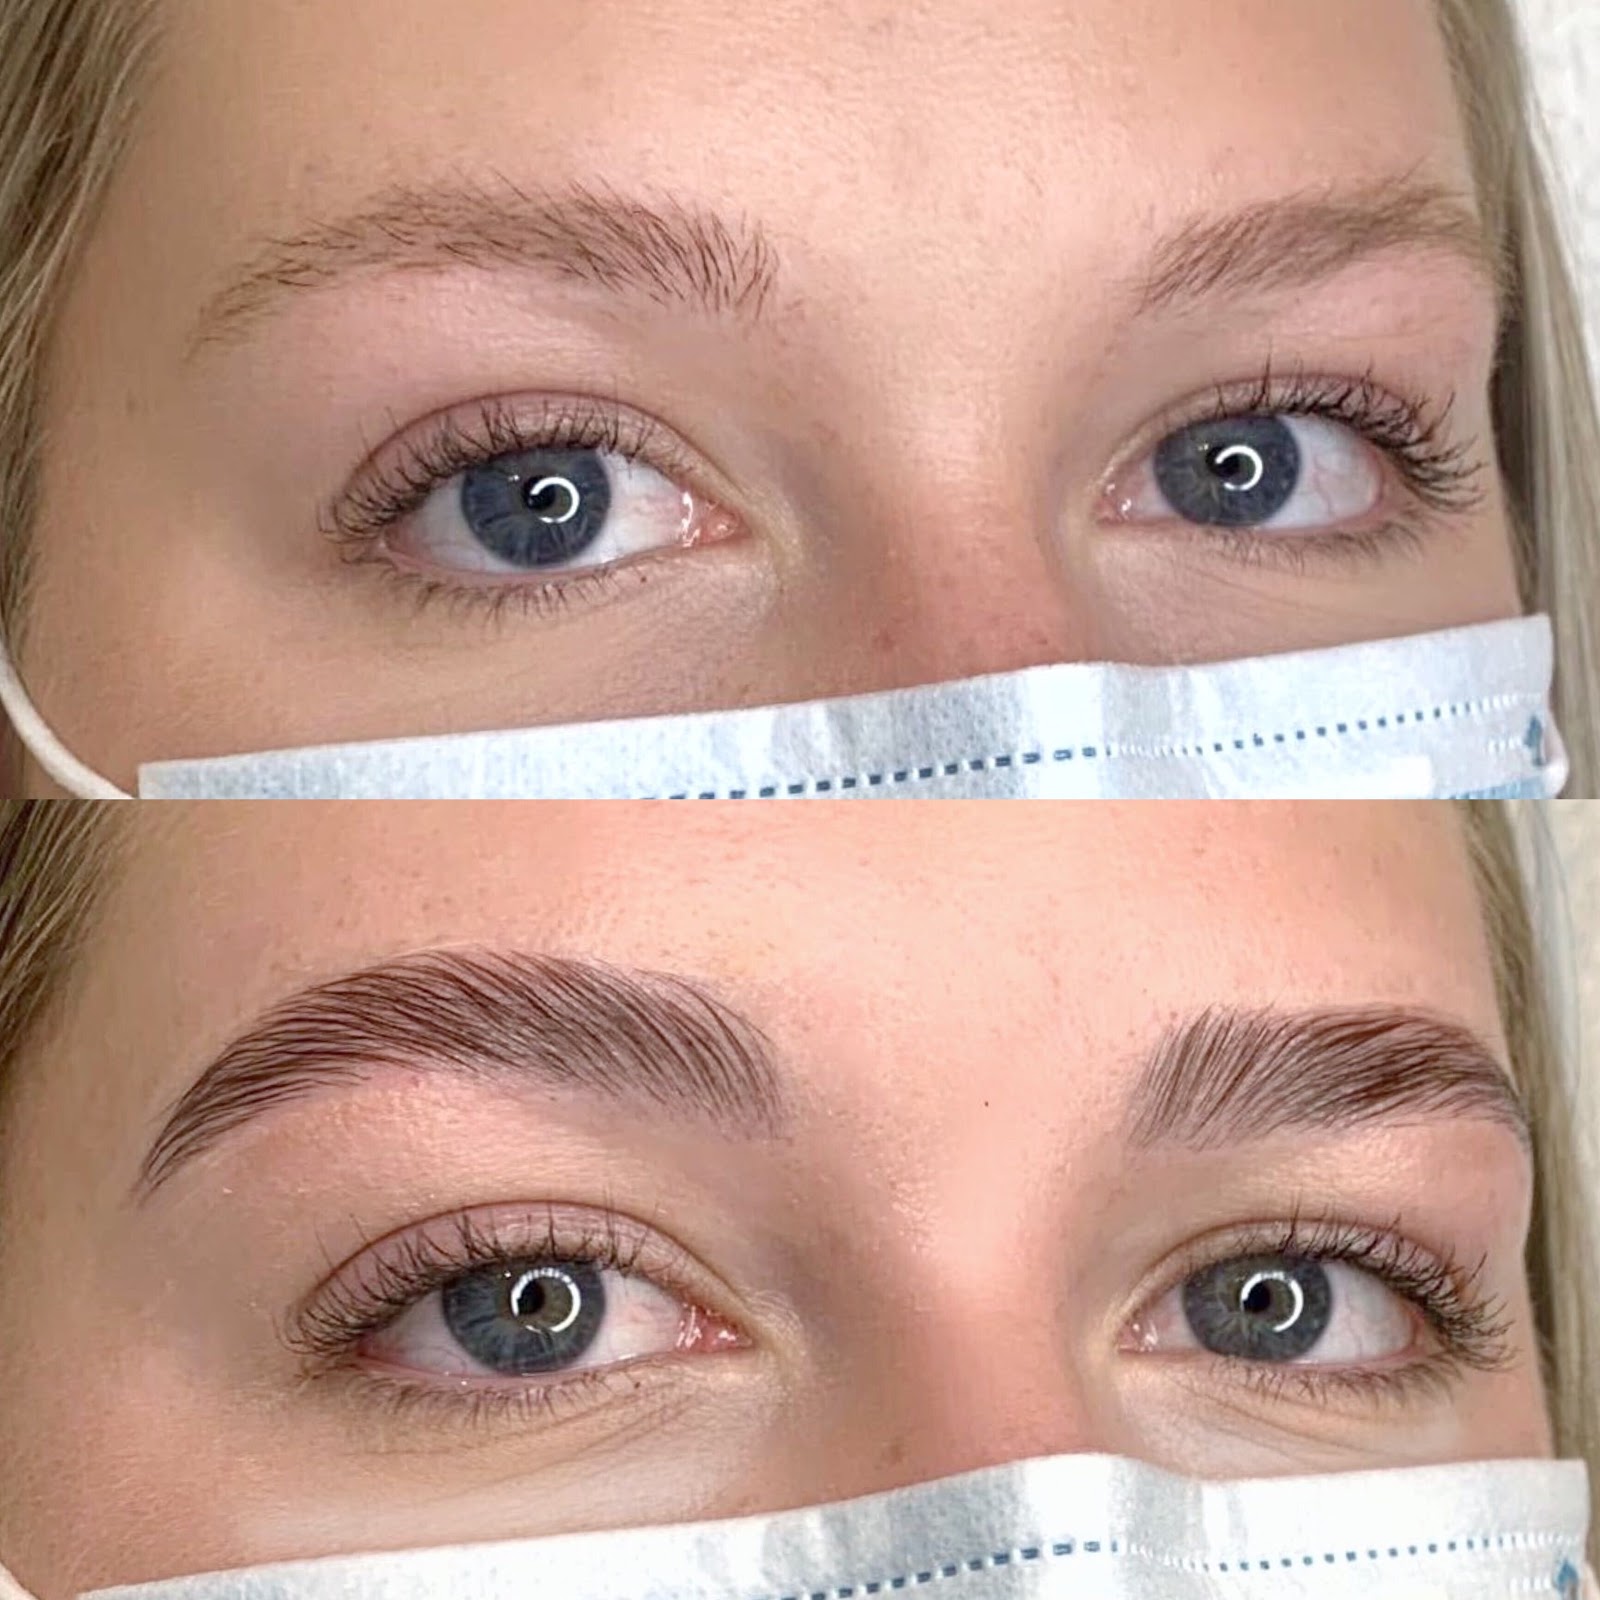
Sparse eyebrow brow lamination delivers truly remarkable before and after results. Prior to the treatment, your brows may be unruly and lacking shape and definition. However, once you undergo eyebrow lamination, you’ll experience a visible transformation. Your brows will become fuller, thicker, and impeccably groomed. Through the lamination process, the brow hairs are relaxed and reshaped, allowing them to be brushed and set in place. This results in a sleek and polished look, complete with a natural-looking arch that can last for weeks. The before and after images of sparse eyebrow brow lamination demonstrate the incredible difference it can make, elevating your overall appearance and instilling a newfound confidence.

ARE THERE ANY RISKS TO GETTING A BROW LAMINATION?

While brow lamination is generally considered safe, like any beauty treatment, there are potential risks to be aware of. It’s important to understand that everyone’s skin and hair react differently, so what works for one person may not work for another. Some potential risks of brow lamination include skin irritation or allergic reactions to the lamination solution. This is why it’s recommended to avoid certain skincare products and undergo a patch test if you have sensitive skin or a history of allergic reactions. 

Additionally, if the lamination process is not performed correctly or by an inexperienced technician, there is a risk of over-processing or damaging the brow hairs. It’s crucial to choose a reputable professional who has expertise in brow lamination to minimize these risks. By discussing any concerns or allergies with your technician beforehand and ensuring a skilled practitioner performs the treatment, you can mitigate the potential risks associated with brow lamination.

FAQ

1. Is lamination good for your eyebrows?

Not necessarily. Brow lamination offers numerous benefits however there are potential risks associated with the treatment.

2. Who should not get brow lamination?

If you have skin sensitivities, allergies to cosmetic products, or any open wounds or infections near your brows, it is recommended to delay the brow lamination treatment.

3. Is eyebrow lamination painful?

No. The treatment isn’t painful.

CONCLUSION

Eyebrow lamination can work wonders in transforming your brows from ordinary to extraordinary. The before and after results are truly remarkable. Before the treatment, you may have unruly or sparse brows, lacking shape and definition. However, after undergoing eyebrow lamination, you’ll witness a visible transformation. Your brows will appear fuller, thicker, and perfectly groomed. The lamination process relaxes and reshapes the brow hairs, allowing them to be brushed and set in place, resulting in a sleek, polished look with a natural-looking arch. Whether you want to tame unruly brows or achieve a more defined shape, eyebrow lamination is a game-changer that enhances your overall appearance and boosts your confidence.

HOW TO DO MAKEUP FOR BRIDE: A STEP-BY-STEP GUIDE TO DIY WEDDING MAKEUP

A wedding day is a moment people daydream about and meticulously plan well in advance before meeting the person they will eventually marry. When the moment finally arrives, numerous aspects need careful consideration and execution, including selecting the ideal make up for bride. This process involves various steps, such as preparing the skin for a radiant appearance, deciding on the makeup artist, and scheduling time for a trial-run application (or two). It also entails mastering the art of applying makeup that complements the desired look for the bride on her wedding day.

DO A RESEARCH

The internet is brimming with beauty inspiration for your wedding day. If you’re uncertain about the kind of look you want, initiate some research. Explore your favorite celebrity’s latest red carpet appearances through a search engine or visit a professional makeup artist’s Instagram page to peruse photos of their clients.

You can also turn to TikTok or YouTube for comprehensive tutorials that you can recreate. Kim suggests identifying someone with similar facial features for a more personalized guide. Following makeup trends that don’t compliment your face may result in an awkward appearance. Don’t replicate a look just because it’s trending online. Instead, ensure that you genuinely like the chosen style.

CONSIDER YOUR THEME

Your final appearance will be significantly shaped by your overall aesthetic. Prior to applying your makeup, it’s crucial to decide whether a natural, sun-kissed glow, or a blend of both aligns better with you and your event. Taking into account your color scheme, floral decorations, venue, and ambiance. Aligning your makeup with the overarching theme enhances the harmonious and elegant atmosphere of your wedding day.

DETERMINE THE RIGHT SHADES

To achieve a smoother end result, it’s essential to determine which color will best complement your skin tone, whether it’s a warm bronze tone or a cool blue tone. Attention should be paid to the importance of finding the right shade for your skin, suggesting the possibility of mixing different shades to create the perfect combination. Instead of relying on guesswork, consider seeking advice from a professional who can determine the color that best suits your skin tone.

STAY OUT OF THE SUN

In the countdown to your wedding day, one crucial piece of beauty advice is to stay out of the sun. Prolonged exposure to sunlight can lead to skin damage, including sunburn, premature aging, and uneven skin tones, all of which might affect your desired wedding day look. To maintain a radiant and flawless complexion, it’s advisable to minimize sun exposure in the weeks leading up to the big day. Consider using sunscreen with a high SPF, wearing protective clothing, and seeking shade whenever possible. By taking these precautions, you can help ensure that your skin looks its best and remains picture-perfect for your wedding, allowing you to confidently showcase your natural beauty on this special occasion.

PRACTICE MAKEUP FREQUENTLY

In the buildup to your wedding, one valuable beauty tip is to practice your makeup frequently. Regularly experimenting with different looks allows you to refine and perfect the ideal style that enhances your features and complements your wedding theme. Schedule trial runs to familiarize yourself with the application process, ensuring that your chosen makeup look not only suits your preferences but also stands up to the demands of the long-awaited day.

Frequent practice not only builds your confidence in achieving the desired outcome but also enables you to identify any potential challenges and address them well in advance. With each practice session, you’ll gain valuable insights into the products and techniques that work best for you, ensuring that you step into your wedding day with the expertise to create a stunning and long-lasting makeup look.

BOOK A VIRTUAL APPOINTMENT

In the modern landscape of wedding preparations, booking a virtual appointment has become an invaluable step, especially in the era of convenience and technology. Prior to your wedding, consider scheduling virtual appointments with key vendors, such as your wedding planner, photographer, or even beauty professionals. These virtual consultations provide a convenient and efficient way to discuss details, share ideas, and make crucial decisions without the need for in-person meetings. 

Whether it’s finalizing the event timeline, reviewing photography preferences, or discussing your desired bridal look, virtual appointments allow for seamless communication from the comfort of your own space. Embracing this digital approach not only streamlines the planning process but also accommodates busy schedules, ensuring that every detail is meticulously addressed, and your vision for the perfect wedding day is brought to life.

PREP YOUR SKIN

On your wedding day, stick with your tried-and-true skincare routine! A clean, familiar canvas is key to achieving natural, beautiful makeup. Skip experimenting with new products and simply cleanse, moisturize (lightly!), and gently exfoliate (if you normally do). Leave any blemishes alone unless you have a trusted spot treatment, and you’re all set for a picture-perfect complexion.

CHOOSE FAMILIAR PRODUCT

When it comes to your wedding day, selecting familiar makeup products is key. The familiarity of these products offers a sense of comfort and confidence since you already know how they perform on your skin. Opting for tried-and-true makeup items ensures that you avoid any potential surprises or adverse reactions that could occur from experimenting with new products. By sticking with the cosmetics you are familiar with, you can trust that they will provide the desired results and enhance your natural beauty. It’s essential to feel at ease and radiate confidence on your special day, and relying on familiar makeup products plays a significant role in achieving that peace of mind.

HOW TO DIY YOUR OWN BRIDAL MAKEUP

STEP 1: PREP YOUR SKIN

Whether you’re applying your makeup on your own or relying on a professional, on your wedding day, start by washing your face and applying a light moisturizer. Stick to your regular skincare routine; now is not the moment for drastic changes. If you usually exfoliate, choose a gentle exfoliating cleanser instead of a harsh scrub. Address any blemishes by lightly dabbing on an appropriate product like Visine, but avoid unnecessary interventions. The goal is to have a clean and soft canvas, providing the perfect base for achieving naturally beautiful skin with your makeup.

Consider your skin’s undertones, whether they lean towards cool or warm, when selecting colors that both match and complement. To identify your undertone, try a simple trick. Place a piece of silver and a piece of gold jewelry on the back of your hand. If the gold appears to blend seamlessly, you likely have warm undertones. Conversely, if the silver seems to harmonize better, you probably have cool undertones.

STEP 2: KNOW THAT PRIMER IS REQUIRED

From the moment you start applying your makeup until you bid farewell to your guests, a multitude of events will unfold. To make sure your makeup withstands the ceremony, dancing, tears, and toasts, consider incorporating a primer into your routine. While occasional touch-ups may still be necessary, they will be significantly reduced. Moreover, a primer serves to even out fine lines, and wrinkles, and conceal open pores. Apply a small amount after moisturizing, but before your foundation, ensuring even coverage across your face and eyelids. This sets the stage for a flawless base for all that follows.

STEP 3: APPLY FOUNDATION

For those with a cool undertone, seek out foundations with a rosier, redder, or blue base. If your undertone leans warm, opt for a foundation with a yellow or golden base. To verify if the shade is suitable, apply a small amount on the center of your lower jawline using a Q-tip. If it seamlessly blends in, you’ve found the right match.

Apply your foundation in thin layers, starting from the center of your face and blending outward with a foundation brush. Ensure a seamless finish, paying particular attention to blending beneath your jaw and along your neck to avoid visible lines. Avoid caking on the foundation, as it can give an overdone appearance and may lead to smearing or streaking.

STEP 4: ADD CONCEALER 

Applying concealer before the foundation can lead to much of it rubbing away during the foundation blending process. To address red areas or dark circles, use a concealer brush to apply a liquid concealer, matching your skin tone or going one shade lighter, to problematic areas. Dot the concealer and gently pat the brush against your skin to spread it. If needed, use a makeup sponge dampened with water to blend the concealer further.

For concealing blemishes, start by applying foundation, followed by concealer, and set it with powder. If the blemish is still visible, add more concealer and powder. Ensure you pat the concealer onto the blemish rather than rubbing to achieve a seamless finish.

STEP 5: APPLY HIGHLIGHTER

Highlighter might not be a staple in everyone’s makeup collection, but its purpose is to enhance specific facial features, making eyes appear larger and adding a radiant, youthful dewy look. However, using too much or a formulation with sparkle or glitter can lead to photo disasters, so apply it with a light touch. Highlighters are available in both liquid and powder forms.

When using a liquid highlighter, apply it with a brush after your foundation, forming a check mark shape. Begin near your inner eye, angle down toward your nostril, and then move up your cheekbone, blending toward your temple. Repeat the process above your brows, down the center of your nose, on the center of your forehead, and on your chin.

For powder highlighter, apply it after powdering and brush it under your brows, lightly in the corner of your eyes, and on the tops of your cheekbones. Avoid using powder highlighter under your eyes or over your mouth to prevent a sweaty appearance in photos.

STEP 6: SET YOUR BASE

Now, you face a decision. You can either opt for a cream blush instead of a powder blush or set your base with powder. If you choose the latter, begin by using a translucent powder to set your base and manage any shine. When it comes to powder, remember that less is more; aim for a luminous look rather than a heavy one. With a medium-sized brush, lightly dust over your forehead, the sides of your nose, and on your chin.

Following this, apply a powder bronzer that’s a shade or two darker than your foundation. Brush it in the shape of a 3 on both sides of your face. Begin at your hairline, move down the side of your face, then under your cheekbone, back to the side of your face, and finally below your jaw.

Keep pressed powder handy for those moments when certain areas shine and need a quick dab before a photo or while in the restroom.

STEP 7: BRING COLOR TO YOUR EYES

Wedding experts typically advise against a heavily dramatic eye, suggesting instead the use of eyeliners in shades other than black, along with paler or muted eye shadows that complement your eye color. Highlighters can also be applied to create the illusion of larger eyes. Experiment with brown, grey, and green eyeliners, applying them to both your upper and lower eyelids to enhance your eyes. For a longer-lasting effect, use a cream eye shadow on your eyelids, reserving powder for the crease of your eye. Apply a powder highlighter in the corners of your eyes and under your brow.

Consider the following color recommendations based on your eye color: bronze shades for green eyes, mocha for hazel eyes, navy and dark brown for blue eyes, and purples and grays for brown eyes. If you want to line your eyes with eye shadow, dampen an eyeliner brush with water and brush it into the eye shadow for a defined look.

STEP 8: ADD MASCARA

Given that tears are likely, it’s essential to use waterproof mascara for your wedding day. If you’re not accustomed to wearing false eyelashes regularly, your wedding day is not the ideal time to start. Instead, ensure you have a reliable eyelash curler, a volumizing mascara, and a lengthening mascara. Prior to applying mascara, curl your lashes for added lift. When applying mascara, begin at the root of your eyelashes and wiggle the wand from side to side as you move up to the top. Opt for black mascara, as it complements everyone.

Complete your eye makeup by framing your face with a brow powder slightly darker than your natural color. Brush it along the natural line of your eyebrows, working outward toward the end of your eyes. This final touch will enhance your overall look on your special day.

STEP 9: CREAT LIPS

Much like your facial skin, well-moisturized lips are crucial before applying makeup to prevent dryness or cracks that may emphasize lines once color is added. To achieve this, use a lip hydrator, allowing it to absorb for a couple of minutes before applying color. Select a shade that complements your blush and consider the following tips. While many lipsticks claim lasting hours, opting for a lip stain is a more reliable choice on your wedding day.

For fair skin with cool undertones, consider nude, light mocha, and light mauve. If you have warm undertones, explore sand, nude peach, or shell, steering clear of bright pinks, dark bronzes, and deep mochas. If your skin tone is medium with cool undertones, opt for rosy pink, pomegranate, or cranberry; for warm undertones, go with bronze, copper, and cinnamon, avoiding nudes. Deep skin with cool undertones can experiment with raisin, wine, or ruby red, while warm undertones may prefer honey, ginger, or a coppery bronze, avoiding shades close to orange.

CONCLUSION

In conclusion, mastering the art of bridal makeup involves careful consideration and skill. These 8 tips provide valuable insights to help you become the most beautiful bride on your special day. Remember, when it comes to achieving a flawless finish, exploring techniques like air brush make up can elevate your bridal look to new heights. With attention to detail and a touch of creativity, you’re sure to radiate confidence and beauty as you walk down the aisle on your unforgettable day.