Shoulders often considered hard-working heroes for shouldering everything from carrying groceries to enthusiastically waving to friends, may sometimes feel like twisted pretzels, weighed down by pain and tightness. But worry not, shoulder-sore souls! This guide is your ticket to freedom, providing 12 simple yet effective stretches on how to stretch shoulders, designed to melt away tension and restore your shoulders to supple, pain-free comfort.

SHOULDER RAISES
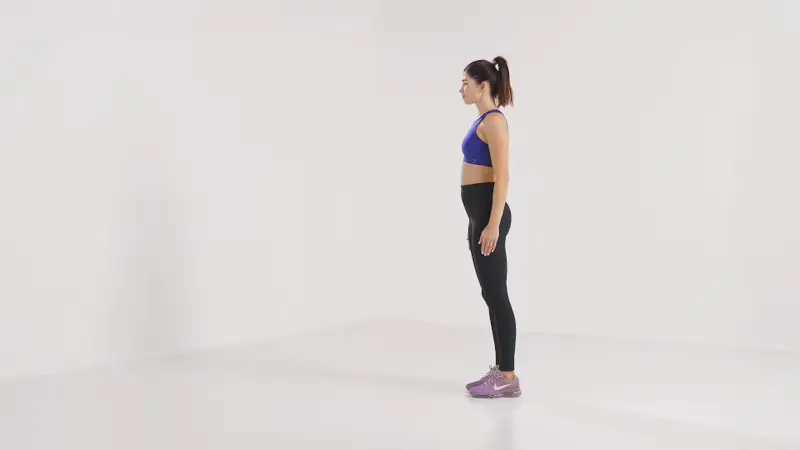
- Whether you’re in a standing or sitting position, maintain a straight back with your arms by your side.
- Gradually elevate your shoulders towards your ears, holding the position for a few seconds.
- Then, gently lower your shoulders back down.
- Repeat this sequence five times for an effective shoulder exercise.
NECK STRETCHES
Performing a neck stretch:
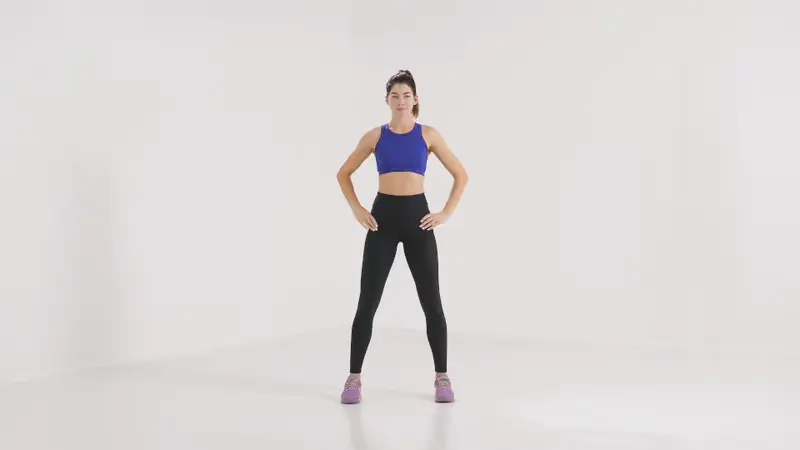
- Stand with your feet hip-width apart.
- Allow your arms to hang down by your sides.
- Keep your gaze forward.
- Tilt your head to the right, attempting to touch your right ear to the right shoulder.
- Experience the stretch on the left side of your neck and shoulder.
- Tilt your head to the left, aiming to touch your left ear to the left shoulder.
- Feel the stretch in the right side of your neck and shoulder.
- Hold each position for 10 seconds.
- Repeat this sequence three times on each side.
SHOULDER ROLLS
- Stand with your feet hip-width apart.
- Allow your arms to hang down at the sides of your body. Inhale as you lift your shoulders towards the ears.
- Move the shoulders back, squeezing the shoulder blades together.
- Exhale and lower the shoulders back.
- Move the elbows forward, experiencing the stretch at the back of the shoulders.
- Repeat this sequence 10 times to enhance shoulder mobility and relieve tension.
EAR TO SHOULDER
- Sit with an upright spine and incline your head towards your right shoulder.
- Move as far as comfortable without straining or lifting your left shoulder.
- Intensify the stretch by gently pulling your head down with your right hand.
- Maintain this position for 30 seconds.
- Repeat the same steps on the opposite side to achieve a balanced stretch.
PENDULUM STRETCH
- Stand with your feet hip-width apart. Incline your body forward, directing your gaze towards the ground.
- For support, place your right hand on a table or chair.
- Allow your left arm to hang freely. Initiate gentle, small circular motions with the left arm, letting gravity guide most of the movement.
- Continue this motion for 30 seconds to 1 minute.
- Reverse the direction of the circular motion.
- Repeat the entire sequence, now using the other arm.
CROSS-ARM STRETCH
- Extend your left arm across the front of your body, positioning it around chest height. Provide support to your left arm using the elbow crease of your right arm, or use your right hand to grasp your left arm.
- Maintain a forward-facing position as you stretch out your shoulder.
- Hold this stretch for 30 seconds.
- Repeat the same steps on the opposite side for a balanced stretch.
CROSS-BODY ARM SWINGS
- Stand with your feet hip-width apart.
- Inhale as you lift your arms out to the sides, engaging the shoulder blades.
- Exhale and gradually bring the arms towards each other.
- Cross the right arm under the left while keeping both arms straight.
- Inhale and swing the arms back out to the sides, squeezing the shoulder blades together.
- Exhale, gently bringing the arms in toward each other again. This time, cross the left arm under the right while maintaining straight arms.
- Repeat this sequence 10 times to promote shoulder mobility and flexibility.
STANDING ARM SWINGS
- Stand with your arms at your sides, palms facing your body.
- Swing your arms forward, raising them as high as possible without lifting your shoulders.
- Lower your arms back down and extend them as far back as you can while keeping the rest of your body still.
- Repeat this dynamic movement for 1 minute to enhance flexibility and promote shoulder mobility.
CROSS-BODY SHOULDER STRETCH
The cross-body shoulder stretch is effective in extending the back of the shoulder. Follow these steps to perform the stretch:
- Stand with your feet hip-width apart.
- Extend your right arm straight out.
- Bring the right arm across your body, pointing the hand to the floor on the opposite side of the left leg.
- Bend your left arm at the elbow.
- Hook the left forearm under the right arm, providing support above the right elbow.
- Utilize the left forearm to gently pull the right arm further in and across the body, creating a stretch in the back of the right shoulder.
- Hold this position for 20 seconds, then repeat the stretch on the other side.
STANDING ARM LIFTS
- Create fists with your hands and position them in front of your hips.
- Inhale while lifting your arms overhead, bringing your hands together above your head.
- Lower them back down to the original position.
- Repeat this sequence 10 times for an effective exercise.
CHILD’S POSE
Child’s Pose is a gentle yoga posture designed to stretch the back of the shoulders. Follow these steps to practice the pose:
- Kneel on the ground or on a mat.
- Bring the big toes together.
- Spread the knees apart.
- Sit up straight.
- Inhale and extend the arms above the head.
- Exhale and bow forward toward the floor, reaching the arms out in front.
- Touch the ground with the palms.
- Lower the elbows to the ground.
- Sit back, bringing the lower back toward the heels.
- Feel the stretch in the back of the shoulders.
- Breathe deeply and maintain the position for 1 minute or longer.
RAGDOLL POSE
Ragdoll Pose, a forward-bend yoga position, can be beneficial for relieving tension in the shoulders. Here’s how to perform Ragdoll Pose:
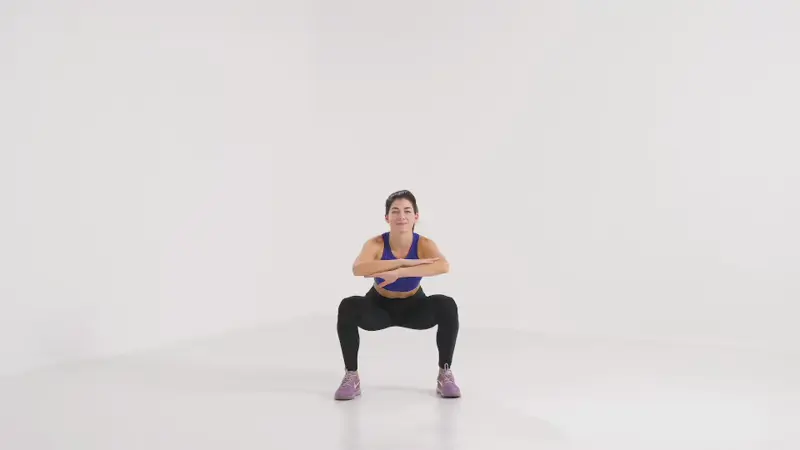
- Stand with your feet hip-width apart.
- Slightly bend the knees.
- Fold forward, aiming to touch your toes.
- Maintain the stomach against the bent knees to provide support to the lower back.
- Place each hand on the opposite arm’s elbow.
- Allow the crown of your head to point toward the floor.
- Let your head hang freely, releasing tension in the neck and shoulders.
- Stay in this pose for 1 minute or longer.
WHAT CAUSES SHOULDER STRETCHES
Shoulder stretches are a good idea because they help our shoulders stay flexible and less stiff. You know, when we do a lot of sitting or repeating the same movements, it can make our shoulders feel tight and uncomfortable. So, these stretches are a friendly way to give our shoulders a little break and make them feel better.
Sometimes, if we sit a lot or do things that stress our shoulders, like carrying heavy bags or staying in one position for too long, our shoulders can get a bit grumpy. That’s where shoulder stretches come in! They target the muscles in our shoulders and upper back, making them more flexible and happy. By doing these stretches, we encourage better blood flow and decrease the chances of our shoulders getting hurt.
So, whether you’re doing some exercises or just want to make sure your shoulders feel comfy, these stretches are like a mini vacation for them. They help us stand tall, feel less achy, and keep our shoulders in good shape.
BENEFITS OF EXERCISE
When a muscle stretches, both its fibers and the surrounding fascia, which are connective tissue bands, reach their full length. This stretching process enhances the muscle and fascia’s ability to extend during various activities.
Engaging in shoulder stretches offers several potential health benefits. Stretching can reduce tension, alleviate pain, enhance mobility, lower the risk of muscle and joint injuries, and improve overall posture. Research indicates that stretching alone is as effective as combining it with strength training for individuals aiming to alleviate chronic neck pain, often associated with shoulder tension.
A consistent 4-week stretching program could effectively reduce neck and shoulder pain. The researchers observed improvements in neck function and enhanced quality of life among office workers experiencing chronic, moderate-to-severe neck pain due to the stretching program. If you consistently do these movements, you can even lose weight.
HOW TO PREVENT SHOULDER STRETCHES
Doing stretches regularly can stop your shoulders from getting stiff. It’s also good to do lots of exercise. Yoga is a kind of exercise that might make you feel less stressed and more flexible.
When you’re using a computer, try to lift the screen so it’s at your eye level. This way, you won’t have to bend your neck and shoulders too much, and it helps avoid shoulder tension.
Remember to sit up straight! If you see yourself slouching, try doing the shoulder roll exercise mentioned earlier to fix your shoulders.
Keeping good posture while sitting or standing, especially when you’re at a desk for a long time, can help prevent your shoulders and neck from feeling tense in the future.
FAQ
1. What are the red flags for shoulder pain?
Warning signs to be aware of include: experiencing trauma, pain, or weakness, or suddenly losing the ability to actively raise the arm (with or without trauma); these could indicate a potential acute rotator cuff tear.
2. How can I self-test my shoulder pain?
Begin by placing your hand on the opposite shoulder. Gradually use the left hand to push the right shoulder upward. If there is pain, it indicates a positive result for impingement.
3. How long does shoulder pain last?
Full recovery from mild shoulder pain may typically require four to six weeks.
CONCLUSION
Whether dealing with shoulder pain due to desk work, physical activities, or stress, these stretches offer a versatile approach to alleviating discomfort and promoting relaxation. Consistent practice of these shoulder stretches, combined with proper posture and lifestyle adjustments, can lead to long-term benefits, fostering a more comfortable and pain-free experience in daily activities. Remember, it’s essential to listen to your body and consult with a healthcare professional if you have persistent or severe shoulder issues.