There are several types of nail extensions available, each offering its own set of benefits and drawbacks. Whether you’re considering dip powder nails, gel nails, or acrylics, it’s important to know what to look for when deciding which option is best for you. Before diving into the details, let’s explore the pros and cons of dip nails, gel nails, and acrylics to help you make an informed choice.
WHAT ARE GEL NAILS?
Gel nails are created using a gel formula that is cured under UV or LED light. They’re much more flexible than traditional acrylics, making them less prone to breakage.
While applying gel nails can be a bit challenging due to the sticky residue left behind, which must be wiped off with alcohol, they are highly durable once set and typically last 2-3 weeks.
Unlike hard gel extensions, which are ideal for salon use, gel polish is easier to apply and suitable for both at-home and professional applications.
Disadvantages of Gel Nails
Time-consuming application: The process can take a while, as each nail needs to be shaped individually and cured under UV or LED light.
UV/LED light exposure: Some individuals may be sensitive to UV or LED light used during the curing process, which can cause skin irritation. To reduce this risk, it’s recommended to apply sunscreen to your hands before exposure.
Harsh chemicals: Some gel brands may contain harsh chemicals like BHA, so it’s best to avoid those when possible.
WHAT ARE DIPPED NAILS?
Dip powder nails, or dipped nails, are made using finely milled acrylic powder and are bonded with a special adhesive called cyanoacrylate.
The powder is applied to the nail and sealed with a top coat. Dip powder nails are known for being both flexible and durable, making them longer-lasting than other types of artificial nails. When applied properly, they are also resistant to chipping and breaking.
The dipping method is particularly suited for home use. Unlike hard gels and acrylics, which require skill and experience to sculpt the nails, dip nails don’t involve sculpting, making them easier to apply.
In addition, dip powders are flexible, durable, odorless, non-toxic, and don’t require curing lights.
Disadvantages of Dip Nails
Hygiene concerns: While dip powders are great for home application, if you’re getting them done at a salon, ensure your fingers aren’t being dipped into shared powder pots, as this can lead to infections.
Messy application: The process of applying dip powder nails can get a bit messy.
WHAT ARE ACRYLIC NAILS?
Traditional acrylic nails are created by combining a liquid monomer with a powder polymer, typically applied with a brush and then shaped to the desired look.
Acrylic nails are the most popular type of artificial nails due to their durability, longevity, and relatively simple application process. However, if not applied correctly, they can cause significant damage to your natural nails.
Disadvantages of Acrylic Nails
Toxic smell: Liquid monomers often contain harsh chemicals like MMA, which can be harmful to your health, potentially causing allergies or asthma.
Harsh chemicals: Some types of acrylics contain dangerous substances such as formaldehyde and toluene. While it hasn’t been definitively proven, toluene has been linked to potential health issues.
Lack of flexibility: Unlike gel or dip powder nails, traditional acrylics are quite rigid. This means that if they hit something hard, they are more likely to break due to their stiffness.
Bacterial or fungal infections: Improper application or trauma to the nails can lead to gaps between the acrylic and the natural nail, creating a breeding ground for bacteria or fungi.
Acrylic nail removal: Removing acrylic nails is a lengthy process, requiring soaking the nails in 100% acetone for 30-40 minutes. It’s recommended to have a professional handle the removal, as attempting it on your own can risk damaging your nails.
DIPPED NAILS VS GEL NAILS – WHAT’S THE DIFFERENCE
Dipped nails and gel nails are both popular options for fake nails, but how do they differ? Let’s break it down.
APPLICATION PROCESS
Both dip powder and gel nails are great for home use. However, applying hard gel (gel extensions) can be much trickier for a DIY project.
Gel nails usually take longer to apply than dip nails because gel polish or hard gel needs to be cured under an LED or UV light.
For a gel manicure, the process includes prepping the nails, applying a base coat, gel polish color, a top coat, and curing under a lamp.
A dip powder manicure involves prepping the nails, applying a base coat, dipping them in powder, adding a top coat, and using an activator.
Traditional acrylics include prepping the nail, applying acrylic powder and liquid with a brush, and finishing with nail polish and a top coat.
UV/LED LIGHT EXPOSURE
Dip powder nails don’t need UV or LED light to set, unlike gel nails, which require curing under these lights.
LASTING POWER
Gel polish: If done right, gel polish can last 2-3 weeks.
Hard gel extensions: They can last more than 3 weeks but usually need a fill-in after 3-4 weeks.
Dip powder nails: When applied properly, they can last over 3 weeks without chipping.
Acrylic nails: Acrylics are very strong and can also last over 3 weeks without cracking or chipping.
NAIL DAMAGE
If not applied or removed properly, all three types—gel, dip powder, and acrylics—can harm your natural nails. This can range from mild irritation to more serious issues like infections or allergies, depending on the person and the process used.
COST AND TIME
Gel polish: Costs $35-$50 and takes about 45 minutes to an hour. In the U.S., the average price is $40.
Hard gel extensions: Cost around $80 and take 1-1.5 hours. Prices may rise if you add decorations like rhinestones.
Dip nails: Typically cost $40-$50 and take about 45 minutes.
Acrylic extensions: Cost between $75-$100 and take 1-1.5 hours in a salon.
REMOVAL PROCESS
For gel nails and dip powder nails, the removal process is similar: first, file off the top coat, then soak the nails in acetone for 15-20 minutes. For acrylic nails, removal takes longer. You need to soak them in acetone for 30-40 minutes and then file them off.
CONCLUSION
So, what’s the verdict? It really comes down to your preferences. If you’re looking for something quick and easy to do at home, both a gel polish manicure and a dip powder manicure are great options. If you prefer to visit the salon for a full set of extensions, then gel or acrylic nail extensions might be more your style.
Acrylic allergy: If you’re allergic to acrylics, none of these options will work for you since they all contain acrylic. In that case, you could try a regular polish manicure or a shellac manicure. While these won’t last as long, they are gentler on your nails in the long run. Whatever you decide, remember to care for your nails and give them a break every now and then!
18 STYLISH SHORT ACRYLIC NAILS WITH A PLAYFUL TWIST FOR THE SUMMER SEASON
Sun’s out, fun’s out, and it’s time for your nails to join the party! Summer is all about embracing vibrant colors, playful patterns, and carefree vibes. This season, ditch the ordinary and level up your acrylics with a touch of whimsy. Get ready to dive into 18 stunning acrylic nail ideas that will turn your fingertips into tiny works of art. We’re talking sunshine hues, beachy accents, and unexpected details that will make your nails the center of attention (in the best way possible). So, grab your favorite iced latte, settle in, and prepare to be inspired for your next summer mani!
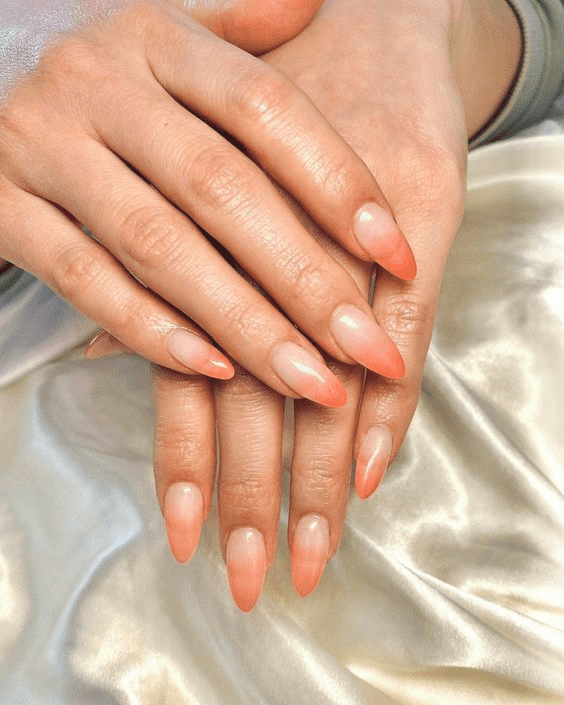
PEACHY NUDE ELEGANCE
This timeless trend is perfect for those who crave a polished look with a hint of sweetness. Opt for a soft, creamy peach acrylic that complements your skin tone. The beauty lies in its simplicity. Keep the length natural or slightly elongated for a flattering silhouette. To elevate the look, add a subtle touch of shimmer with a pearlescent finish or a single, delicate Swarovski crystal placed near the cuticle. This mani exudes understated glamour that will seamlessly transition from work to weekend soirées, making it the ideal choice for the busy bee who wants to look effortlessly put-together.
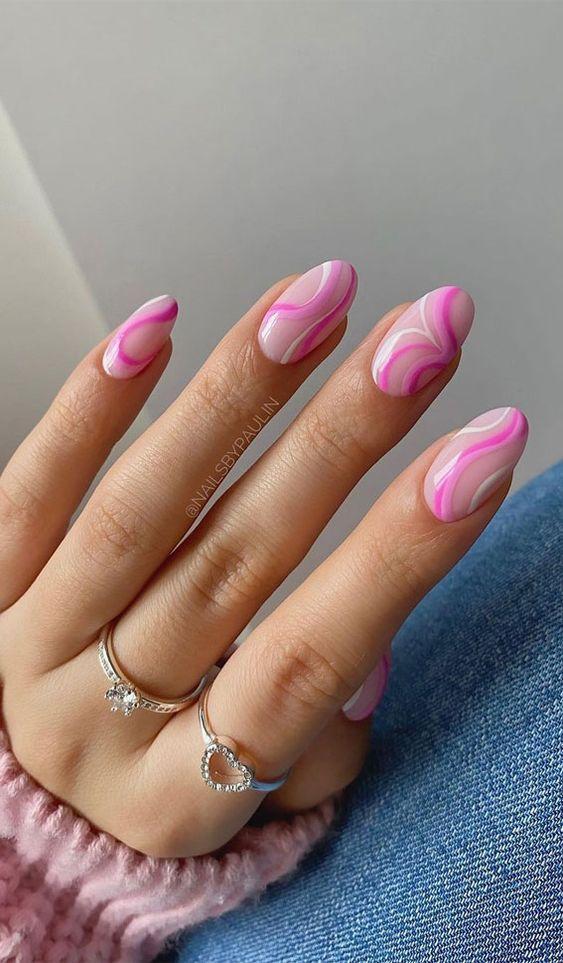
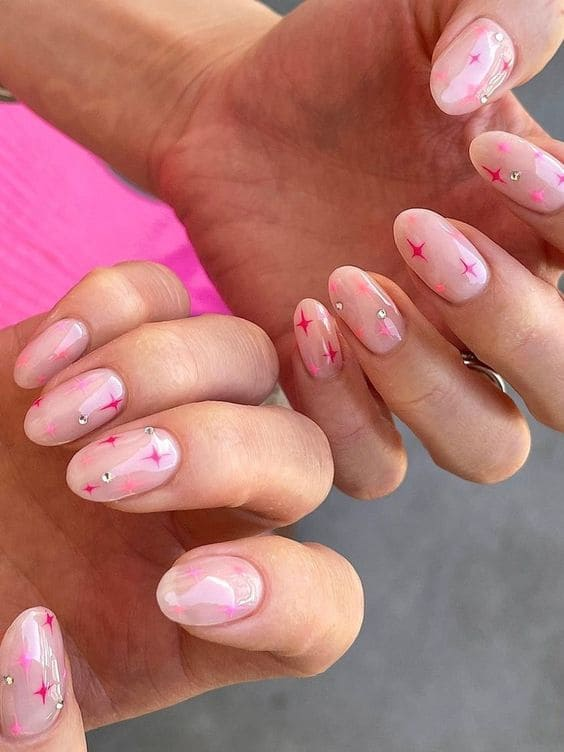
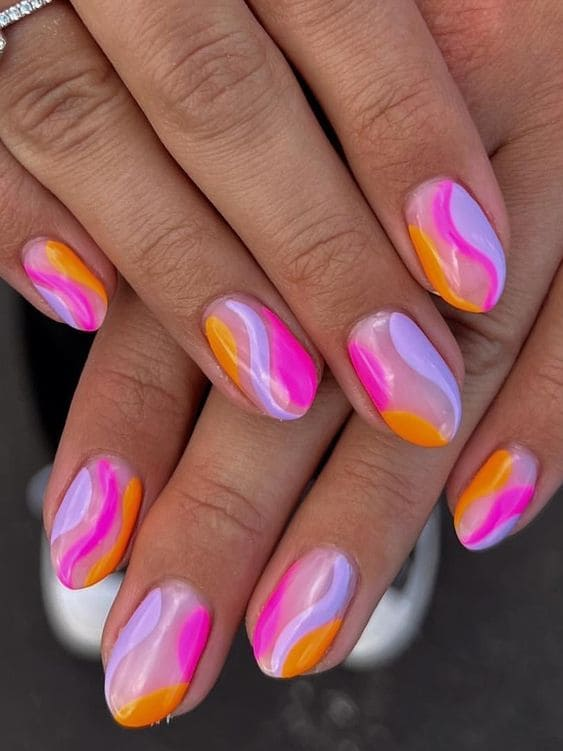
PINK NAIL WITH SWIRLS
Inject a dose of fun and femininity with playful pink swirls! This adorable design is perfect for the girly girl at heart. Choose a bubblegum pink or a soft babydoll shade as your base. Let your creativity loose with the swirls! You can create thin, wispy lines for a delicate touch, or go for bolder, more graphic swirls for a statement look. Experiment with different colors for the swirls – think cotton candy blues, sunshine yellows, or even a touch of glittery silver. Don’t be afraid to get imperfect – the beauty of swirls lies in their free-flowing nature. Finish the look with a glossy topcoat to make your pink paradise shine!
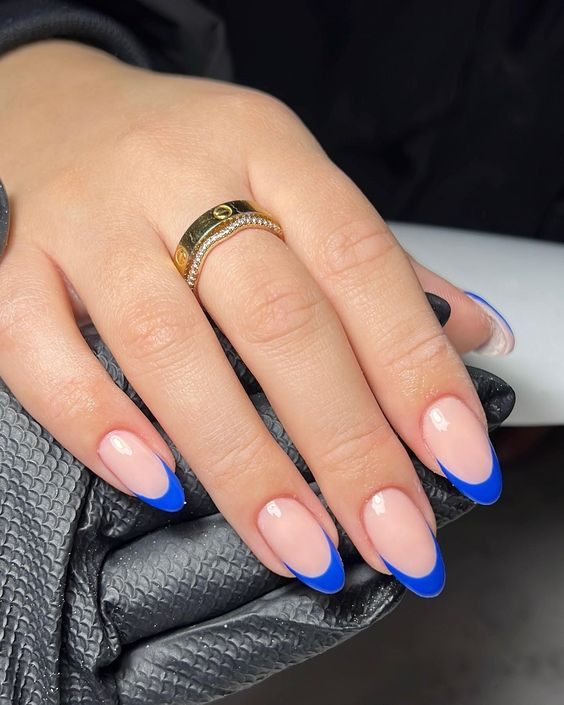
BLUE FRENCH TIPS
Ditch the traditional white and opt for a spectrum of blues to suit your mood. Baby blue offers a sweet and whimsical touch, perfect for summer days. Channel nautical vibes with a crisp navy blue or add a touch of luxury with a deep royal blue. Feeling bold? Don’t be afraid to experiment with trendy shades like cobalt or teal. The beauty of blue French tips lies in their versatility. Keep the line thin and delicate for a minimalist look, or go for a thicker, bolder tip for a more dramatic effect. Pair your blue tips with a clear base for a clean and modern look, or add a touch of shimmer with a glittery nude base. This timeless design with a playful pop of color is sure to turn heads.
MIXED DOTS
This design offers endless possibilities for personalization, allowing you to express your unique style. Choose a neutral base color like beige, blush pink, or even a cool gray to make your dots pop. Then, unleash your inner artist! Use a dotting tool or a toothpick dipped in different polishes to create a symphony of dots in various sizes and colors. Play with a rainbow palette for a vibrant look, or keep it monochromatic for a sophisticated feel. You can even incorporate metallic dots for a touch of glam. Feel free to arrange the dots randomly for a carefree vibe, or create geometric patterns or constellations for a more structured look. Mixed dots are all about having fun and letting your creativity shine!
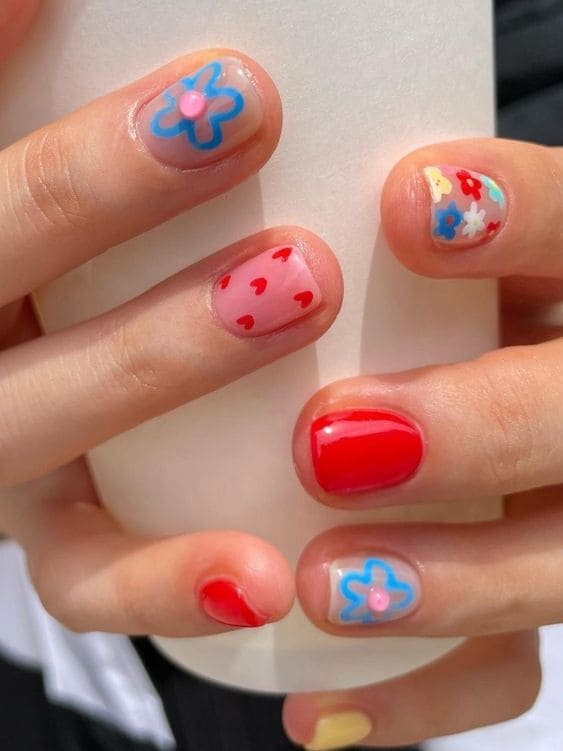
“SMALL GARDEN” ON THE FINGERS
Start with a soft milky white or light pale green as a base to represent the ground. Then the fun begins! Use acrylic sculpting techniques or small nail art tools to create delicate 3D flowers in a variety of shapes and sizes. Think daisies, roses or even miniature succulents. Add a touch of whimsy with tiny sculpted ladybugs or a glitter dew drop (made with clear rhinestones). Don’t forget to bring the garden to life with some brightly colored blades of grass made with thin lines of green acrylic.
For added realism, use a fine brush to create subtle shadows on your flowers and leaves. Seal your miniature world with a glossy topcoat for a final touch of magic. These “mini garden” nails are perfect for nature lovers who want to take a piece of the outdoors with them wherever they go. This summer flower nail design is really suitable for those who are looking for simplicity but still attractiveness.
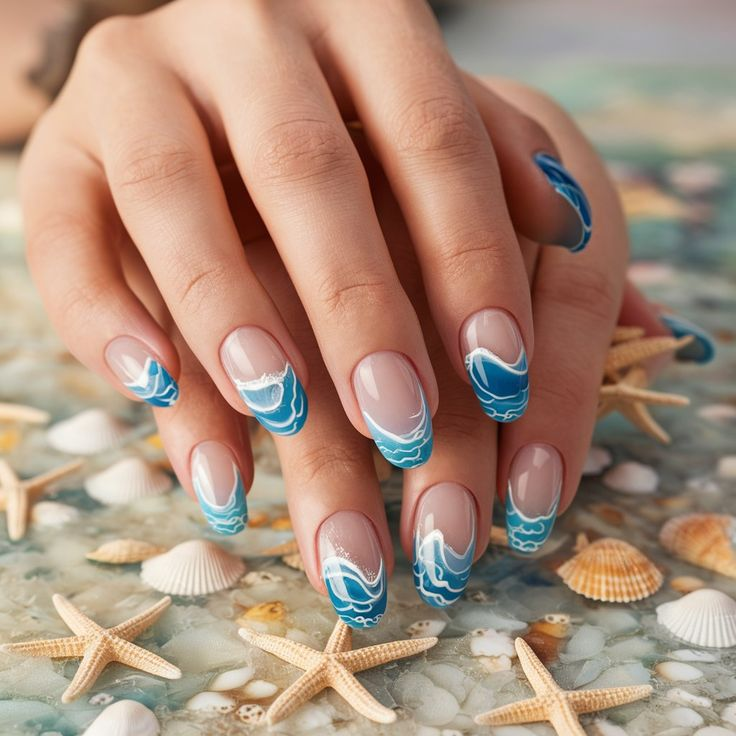
ABSTRACT OCEAN BLUE
Start with a gradient of blues, blending from a light, ethereal sky blue at the base to a deep, mysterious navy at the tips. Let the colors blend organically, mimicking the way water shimmers and changes hue. Don’t be afraid to add wispy white streaks to represent crashing waves or swirling silver glitter for a touch of moonlight reflecting on the water. You can even incorporate tiny flecks of gold to mimic shimmering sunlight filtering through the waves. The beauty of this design lies in its abstract nature – there are no rules! Let your creativity flow and create an ocean scene unique to you. Finish with a glossy topcoat to enhance the depth and dimension of your tiny aquatic masterpiece. These abstract ocean blue nails are perfect for the dreamer who longs for the tranquility and beauty of the sea.
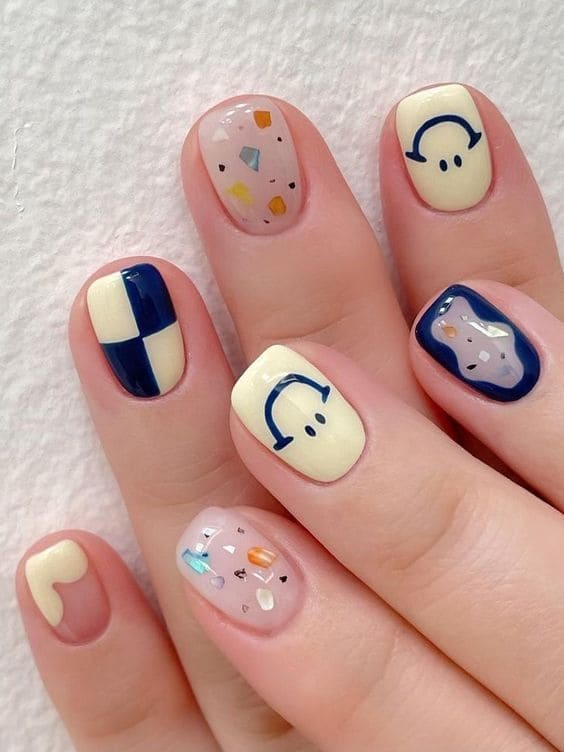
EXPRESSIVE FACE EMOJIS
Expressive face emojis transcend language and cultural barriers, allowing us to convey a wide range of emotions with a simple click. From the ubiquitous grin of a smiley face to the dramatic tears of a weeping emoji, these little digital icons pack a powerful punch. They can be playful and lighthearted, adding a touch of humor to our messages. They can also be deeply empathetic, offering silent support during tough times. No matter the emotion, there’s an expressive face emoji to perfectly encapsulate how we’re feeling, making communication in the digital age a breeze.
Y2K RETRO CHIC
This trend is all about embracing the fun, futuristic vibes of the early 2000s. Think chrome finishes, holographic accents, and bold, geometric patterns. Let your nostalgia run wild with chunky glitter in playful colors like hot pink and lime green. Don’t be afraid to experiment with French tips in metallic shades or tiny rhinestones strategically placed to form stars or peace signs. Remember, the Y2K aesthetic is all about excess and self-expression. So crank up the volume on your favorite Britney Spears song, grab your butterfly clips, and get ready to rock some seriously eye-catching nails that are a total throwback to the good ol’ days.
WHIMSICAL EMOJI FUN
This trend ditches the seriousness and embraces lighthearted characters that bring a smile to your face. Think of your favorite emojis – the sunglasses emoji for a carefree vibe, the rainbow for a touch of optimism, or even the cheeky monkey for a bit of mischievous charm. You can have a single emoji as the star of the show, or create a vibrant collage across all ten fingers. Get creative with color! Turn a classic smiley face into a technicolor masterpiece or add a glittery explosion behind a celebratory emoji. The possibilities are endless! So go ahead, unleash your inner child and let your nails be a canvas for pure emoji fun!
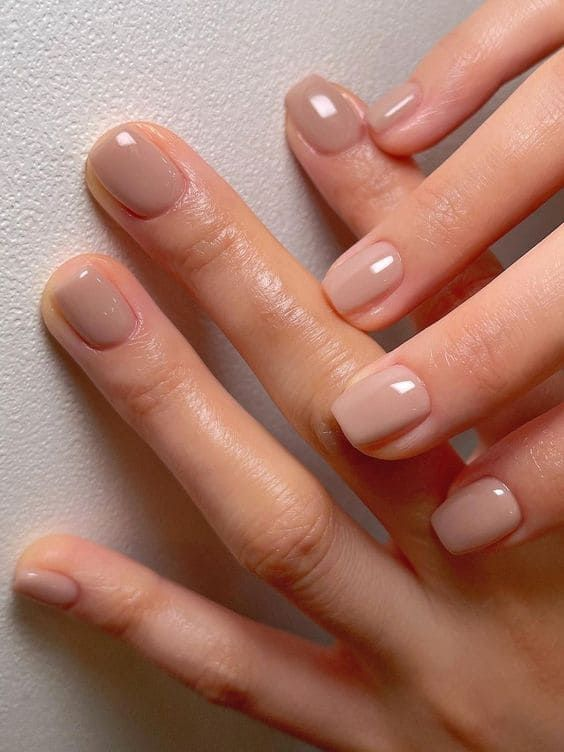
CHIC NEUTRAL TONES
Chic neutral tones in nail design are the epitome of understated elegance and timeless sophistication. These shades, which include soft beiges, creamy nudes, subtle grays, and muted taupes, effortlessly complement any outfit and occasion. The beauty of neutral tones lies in their versatility and ability to create a polished, refined look without being overpowering. Whether you opt for a classic, glossy finish or a modern matte, these colors provide a perfect canvas for subtle embellishments like delicate nail art or minimalistic accents. Chic neutral tones are ideal for those who appreciate a clean, sophisticated aesthetic that exudes confidence and grace.
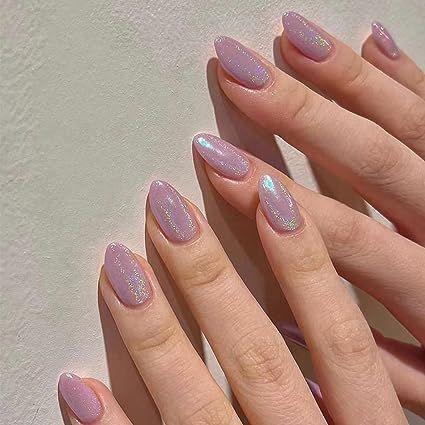
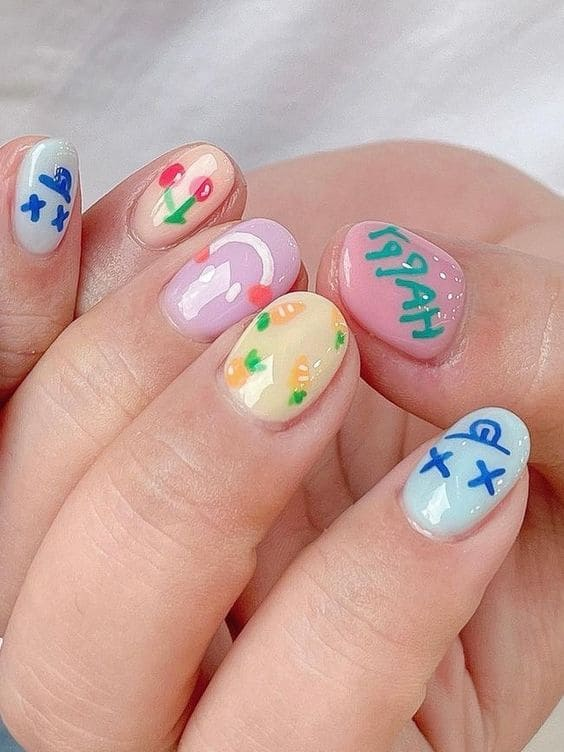
PASTEL HARMONY MIX
Pastel Harmony Mix nails blend the soft, soothing shades of pastels to create a serene and visually appealing manicure. This style features a palette of light, muted colors such as lavender, mint green, baby blue, and pale pink, seamlessly combined to achieve a harmonious and cohesive look. The delicate hues can be applied in various patterns, from ombre gradients to alternating colors on each nail, offering a gentle yet playful aesthetic. These pastel tones evoke a sense of calm and elegance, making them perfect for both casual and formal settings. Pastel Harmony Mix nails are a delightful choice for those who appreciate subtle beauty and the charm of soft, coordinated colors.
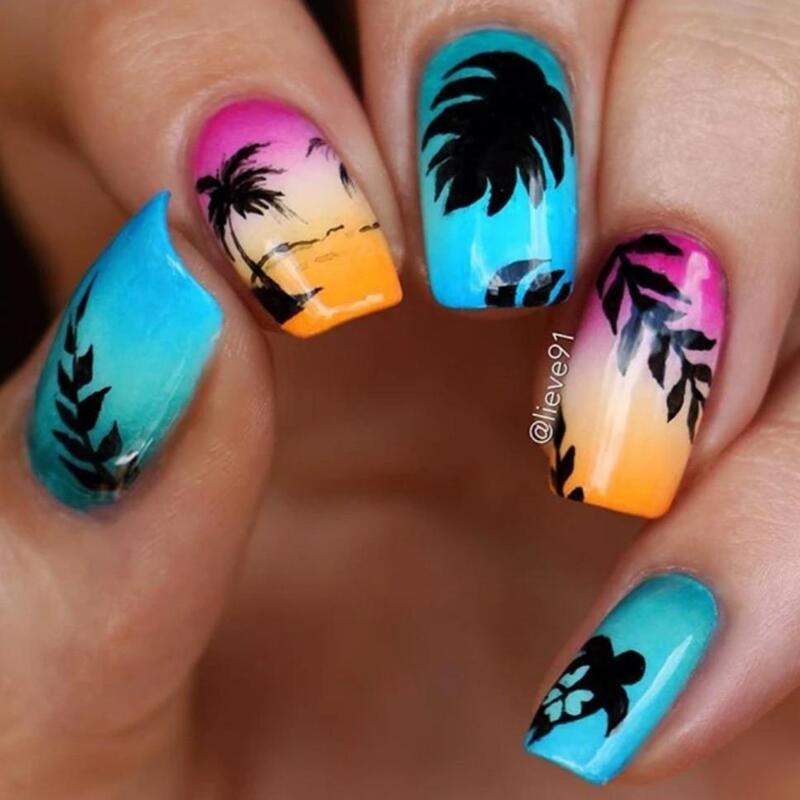
TROPICAL ISLAND FUSION
Tropical Island Fusion nails transport you to a paradise of vibrant colors and exotic patterns, capturing the essence of a lush, tropical getaway. This style incorporates a lively mix of bright hues like turquoise, coral, lime green, and sunny yellow, often paired with intricate designs inspired by island motifs such as palm leaves, hibiscus flowers, and ocean waves. The combination of bold colors and detailed artistry creates a striking, eye-catching manicure that exudes fun and adventure. Perfect for summer or any time you want to add a splash of tropical flair to your look, these nails bring a burst of warmth and joy to your fingertips. Tropical Island Fusion nails are ideal for those who love to make a statement with their nail art, embracing the vibrant and carefree spirit of island life.
SOFT MUTED SHADES
Soft muted shades in nail design offer a perfect blend of subtlety and sophistication, ideal for those who prefer a more understated look. These gentle, toned-down colors, such as dusty rose, sage green, lavender gray, and pale mauve, provide a calming and elegant aesthetic that suits any occasion. The muted nature of these shades makes them incredibly versatile, allowing them to complement various styles and outfits seamlessly. Whether you choose a single color for a minimalist look or combine several muted tones for a more intricate design, these shades bring a touch of quiet elegance to your nails. Soft muted shades are perfect for creating a refined and polished appearance without being overly bold, making them a favorite choice for everyday wear and special events alike.
BOLD VIBRANT PALETTE
A bold vibrant palette in nail design is all about making a striking statement with intense, eye-catching colors. This style embraces vivid hues such as electric blue, fiery red, neon pink, and bright orange, creating a dynamic and energetic look that demands attention. These bold colors can be used individually for a powerful monochromatic effect or combined in creative patterns, gradients, and nail art for an even more eclectic and lively appearance. Perfect for those who love to express their personality through bold fashion choices, a vibrant palette adds excitement and flair to your nails. Whether you’re attending a party, a special event, or simply want to brighten your everyday look, bold vibrant nails are sure to make a lasting impression and reflect your fearless, confident style.
NEON ACCENT BURST
Neon Accent Burst nails bring a dynamic and electrifying touch to any manicure, combining the understated elegance of neutral or muted base colors with striking bursts of neon. This style features vibrant accents in hues like neon yellow, hot pink, electric blue, and fluorescent green, strategically placed to create a captivating contrast. Whether it’s a bold stripe, a geometric pattern, or a splash of neon on a single nail, these bright accents add a modern and edgy twist to your look. Perfect for those who want to experiment with color without overwhelming their entire nail design, Neon Accent Burst nails offer a balance between subtlety and boldness. This trend is ideal for making a statement at parties, festivals, or simply adding a pop of excitement to your everyday style, showcasing your fun and adventurous spirit.
VIVID INDIE HUES
Vivid Indie Hues nails celebrate individuality and creativity with a palette of rich, unconventional colors that stand out from the mainstream. This style incorporates a diverse range of striking shades such as deep teal, vibrant magenta, mustard yellow, and burnt orange, often paired with eclectic patterns and unique designs. These bold, non-traditional colors bring a sense of artistic flair and personal expression to your manicure, making each nail a canvas for showcasing your distinct style. Perfect for those who embrace a bohemian or indie aesthetic, Vivid Indie Hues nails are ideal for adding a touch of originality and vibrancy to your look. Whether you choose to mix and match these colors or create intricate nail art, this style is all about breaking the mold and celebrating your unique personality.
PRETTY PINK BLUSH
Pretty Pink Blush nails offer a delicate and feminine touch, perfect for those who love a soft, romantic aesthetic. This style features various shades of pink, from pale blush and baby pink to dusty rose and soft coral, creating a charming and elegant look. The gentle hues of pink can be worn alone for a classic, understated manicure or combined with subtle embellishments like glitter, floral patterns, or lace designs for added sophistication. Ideal for weddings, date nights, or any occasion where you want to exude grace and beauty, Pretty Pink Blush nails bring a sense of warmth and tenderness to your fingertips. This versatile and timeless color palette enhances your natural beauty and adds a touch of sweetness to your overall style.
FRESH MILKY WHITE ELEGANCE
Fresh Milky White Elegance nails epitomize sophistication and purity with their clean, minimalist aesthetic. This style features a pristine milky white base that exudes timeless elegance and versatility. The soft, creamy white shade can be worn on its own for a chic and polished look or enhanced with delicate details such as subtle shimmer, fine lines, or minimalistic nail art. Perfect for any occasion, from weddings and formal events to everyday wear, Fresh Milky White Elegance nails offer a refined and classy appearance that complements any outfit. This understated yet luxurious choice highlights the beauty of simplicity, making your nails look effortlessly graceful and impeccably groomed.
WHAT EXACTLY ARE ACRYLIC NAILS?
Acrylic nails are a popular type of artificial nail enhancement that involves a combination of liquid monomer and powder polymer to create a hard, protective layer over the natural nails. This mixture forms a dough-like consistency that is applied to the nail and then shaped and sculpted to the desired length and form before it hardens. Acrylic nails are known for their durability and strength, making them a preferred choice for those looking to extend their nails or add intricate designs.
They can be customized with various colors, finishes, and nail art, providing endless possibilities for personal expression. Once applied, acrylic nails require regular maintenance, including fills every two to three weeks to keep them looking fresh and to address nail growth. This versatile nail enhancement is favored for its ability to transform short or brittle nails into long, elegant, and resilient extensions.
CAN I GET REALLY SHORT ACRYLIC NAILS?
Short acrylic nails are a fantastic option for those who crave beautiful nails but also prioritize practicality. They offer all the benefits of acrylics – strength, durability, and endless design possibilities – in a manageable length. Whether you prefer a classic look or something more playful, communicate your desired length and shape to your nail technician. They can create a customized set of short acrylics that are perfect for your lifestyle and taste!
WHAT IS THE BEST ACRYLIC NAIL SHAPE FOR SHORT NAILS?
When it comes to short acrylic nails, achieving the illusion of length and complementing your natural nail beds are key. Here are the top contenders for the best shape:
Oval: This universally flattering choice combines roundness with slightly pointed tips, mimicking your natural curve and creating a lengthening effect.
Almond: Similar to oval but with a narrower, more pointed tip, almond nails add sophistication to short fingers. Opt for a slightly shorter almond point to avoid looking too dramatic on a smaller nail bed.
Round: A classic and chip-resistant choice, round nails are perfect for short nail beds because they follow the natural curve and minimize snagging. They also create a softer, more approachable look.
Squoval: Offering a balance between edgy and soft, the squoval is a great option for short nails. The subtle square edges add a touch of personality while remaining practical for daily activities.
Remember, the best shape for you depends on your personal style and preferences. Consider your daily routine and how much fingertip freedom you need. Don’t be afraid to discuss options with your nail technician – they can help you find the perfect balance of length, shape, and functionality for your short acrylic nails!
HOW LONG DO SHORT ACRYLIC NAILS LAST?
While acrylic nails can generally last a dependable 2-3 weeks, how long they stay flawless depends on you and your daily routine. Factors like your natural nail growth rate and how carefully you treat your nails can influence their lifespan. Even the type of acrylic used can play a role in how long they last before needing a fill or a complete refresh.
CONCLUSION
So there you have it! With these 18 playful and vibrant acrylic nail ideas, you’re sure to find the perfect design to turn your fingertips into sunshine-ready masterpieces. From sweet and whimsical to cool and refreshing, there’s a style to match every personality and summer adventure. Remember, these are just starting points – don’t be afraid to mix and match elements or unleash your creativity to create a look that’s uniquely you. With acrylic nails as your canvas, the possibilities for summer nail art are endless. So have fun, embrace the bold and the beautiful, and get ready to show off your stunning summer nails wherever you go!