How to Apply Nail Polish – Tips and Tricks for a Perfect Manicure

Are you tired of smudged, chipped, or uneven nail polish? Applying nail polish may seem like a simple task, but it requires some techniques and proper tools. In this article, we will share expert tips and tricks that will help you achieve a perfect manicure at home, whether you’re a beginner or an experienced DIYer.

Choosing Your Nail Polish

The first step to a flawless manicure is selecting the right nail polish. Here are some essential factors to consider:

Quality and Brand

Not all nail polishes are created equal. It’s essential to choose high-quality brands that offer long-lasting results, vibrant colors, and easy application. Some popular brands include OPI, Essie, Sally Hansen, and Zoya. Cheaper polishes may contain harmful chemicals that can damage your nails or cause allergic reactions.

Color

Choosing the right nail polish color depends on your skin tone, occasion, and personal style. Bold colors like red, pink, or black are timeless and suitable for any occasion. Muted colors like nude, beige, or pastels are perfect for a more subtle look. If you’re unsure about which color to choose, go for a classic shade like French manicure or clear polish.

Finish

Nail polish finishes vary from glossy to matte, metallic, or glittery. Glossy polishes are the most common and give a shiny finish that reflects light. Matte finishes give a flat, velvety look that is becoming increasingly popular. Metallic and glitter polishes are perfect for special occasions or adding extra glam to your nails.

Preparing Your Nails

Remove Old Polish

Remove old nail polish with acetone-free nail polish remover and a cotton pad. Acetone-based removers can dry out your nails and cuticles, leading to brittleness and peeling. Gently rub the pad on your nails until all traces of old polish are gone.

File and Shape Your Nails

Use a nail file to shape your nails to your liking. Round or oval shapes are most common, but you can also try square or stiletto shapes. Avoid using metal files that can damage your nails and opt for softer materials like glass or cardboard.

Buff Your Nails

Buffing your nails helps to remove any ridges or impurities on the surface, making it easier for the polish to adhere. Use a fine-grit buffer and gently move in one direction, avoiding back and forth motion that can weaken your nails.

Apply Cuticle Oil

Apply cuticle oil or cream around your nail bed to moisturize and soften your cuticles. This will make it easier to push them back with a cuticle pusher or orange stick.

Applying Nail Polish

Now that your nails are clean and prepared, it’s time to apply the nail polish. Follow these steps for a professional-looking manicure:

Apply Base Coat

Start by applying a base coat that will protect your nails from staining and help the polish adhere better. Apply a thin layer from the base to the tip of each nail, taking care not to get it on your skin. Let it dry before moving to the next step.

Apply First Coat of Polish

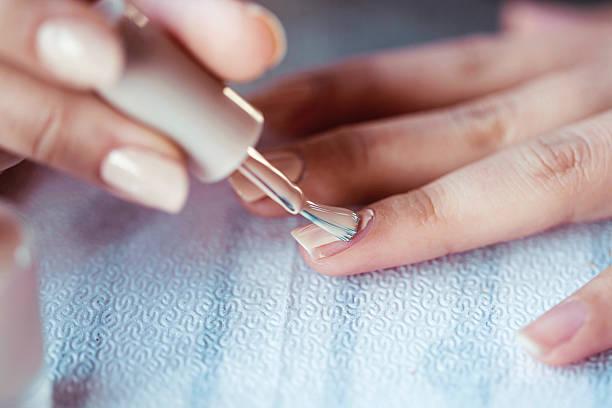
Dip your brush into the polish bottle and wipe off any excess on the edge. Start at the middle of your nail and move towards the tip, then go back to the base and move to the sides. Apply a thin, even layer and avoid overloading the brush. Repeat this step for each nail and let it dry completely before applying the second coat.

Apply Second Coat of Polish

Once the first coat is dry, apply a second coat using the same technique as before. This coat will give more depth and vibrancy to the color and make it last longer. Let it dry completely before moving on to the next step.

Apply Top Coat

Finish your manicure by applying a top coat that will seal the polish and add shine. Apply a thin layer from the base to the tip of each nail, taking care not to smudge the polish. Let it dry completely before touching anything.

Tips and Tricks

  • Use a flat brush to apply the polish, which will give you more control and precision.
  • Apply the polish in thin layers to avoid streaks, bubbles, or clumps.
  • Wait for each layer to dry completely before applying the next one to prevent smudging or peeling.
  • Apply the polish in a cool, dry room to prevent sweating or humidity from affecting the drying process.
  • Use quick-drying drops or sprays to speed up the drying time and prevent accidental smudging.
  • Clean up any mistakes or excess polish around your nails with a small brush dipped in acet one-free nail polish remover or a cotton swab dipped in nail polish remover.

FAQs

  1. How long should I wait between coats of nail polish? You should wait at least one minute between coats to allow the first coat to dry completely. For best results, wait two to three minutes before applying the second coat.
  2. Can I apply nail polish without a base coat? While you can technically apply nail polish without a base coat, it’s not recommended. A base coat helps protect your nails from staining and provides a smooth surface for the polish to adhere to. It also extends the life of your manicure by preventing chipping and peeling.
  3. How many coats of nail polish do I need? Most nail polishes require two coats for full opacity and vibrancy. However, some sheer or light colors may require three or four coats. Always check the instructions on the bottle and use your judgment based on how much coverage you want.
  4. How can I prevent my nail polish from chipping? To prevent your nail polish from chipping, make sure to apply a top coat that will seal the polish and add an extra layer of protection. Also, avoid doing activities that can chip your nails, such as washing dishes or typing on a keyboard, for at least an hour after you’ve applied the polish.
  5. How can I remove stubborn nail polish stains from my nails? If you have stained nails from dark or pigmented nail polishes, you can try soaking them in warm water with a few drops of lemon juice or vinegar. You can also use a whitening toothpaste or baking soda mixed with water to scrub the stains away gently. If all else fails, give your nails a break and let them grow out naturally.

Final Takeaway

Applying nail polish may seem like a simple task, but it requires some techniques and proper tools to achieve a flawless result. By following these expert tips and tricks, you can enjoy a perfect manicure that lasts longer and looks more vibrant. Remember to choose high-quality nail polish brands, prepare your nails properly, and use thin layers of polish for best results. Don’t forget to add a top coat and wait for each layer to dry completely before moving on to the next. With a little practice and patience, you’ll become a pro at applying nail polish in no time!

Before and After Teeth Whitening: Transform Your Smile!

A radiant and confident smile can leave a lasting impression, but years of consuming stain-causing foods and beverages can gradually dim its brilliance. If you find yourself wishing for a brighter smile, teeth whitening might be the solution you’re looking for. Teeth whitening is a popular cosmetic dental procedure that can effectively remove stains and discoloration, revitalizing your smile and boosting your self-confidence. Join us to explore the incredible transformations achieved through before and after teeth whitening treatments, empowering you to make an informed decision about this smile-enhancing procedure. Whether you opt for professional dental treatments or at-home solutions, get ready to discover the secret to unlocking a dazzling smile that lights up any room!

How Does Teeth Whitening Work?

Teeth whitening is a cosmetic dental procedure that involves the removal of stains and discoloration from the surface of the teeth. This process can be achieved through various methods such as over-the-counter whitening products, professional in-office treatments, or at-home DIY kits.

The primary goal of teeth whitening is to remove extrinsic stains that appear on the surface of teeth caused by external factors such as food, drinks, and smoking. There are two main types of whitening agents: hydrogen peroxide and carbamide peroxide. These agents penetrate the enamel layer of the teeth, breaking down the staining compounds, and leaving behind a brighter, whiter smile.

When to Consider Teeth Whitening?

There are several reasons why someone may consider teeth whitening. Some common motives include:

  • Discoloration due to aging
  • Yellowing caused by tobacco use
  • Staining from certain foods and drinks
  • Discoloration from medication use

It is essential to consult with a dentist before deciding to undergo any teeth whitening treatment. They can help determine the cause of the discoloration and recommend the best options for your specific case.

Pros and Cons of Teeth Whitening

Like any cosmetic procedure, teeth whitening has its advantages and disadvantages. Before deciding to undergo any treatment, it is essential to weigh the pros and cons carefully.

Pros:

  • Boosts self-confidence
  • Improves appearance
  • Non-invasive and painless
  • Quick results

Cons:

  • Can cause sensitivity or discomfort
  • Not effective for intrinsic stains
  • Temporary results
  • Overuse can damage teeth enamel

Alternatives to Teeth Whitening

If you are hesitant about undergoing teeth whitening treatments, there are other alternatives available that can still improve the appearance of your teeth.

Veneers

Veneers are thin shells made of porcelain or resin that are placed over the front surface of the teeth, providing an instant solution for a bright and even smile.

Bonding

Bonding involves applying a tooth-colored resin material to the teeth to correct imperfections such as chips or gaps.

Crowns

Crowns are a more invasive alternative that involves covering the entire tooth with a cap made of porcelain or metal.

Step-by-Step Guide to At-Home Teeth Whitening

For those who prefer to whiten their teeth in the comfort of their own home, here is a step-by-step guide to using an at-home whitening kit:

  • Brush and floss your teeth thoroughly before starting.
  • Apply a small amount of whitening gel to each tooth in the tray provided.
  • Wear the tray for the recommended amount of time provided by the manufacturer.
  • Remove the tray and rinse your mouth with water thoroughly.
  • Clean the tray with a soft-bristled brush and cool water.

It is essential to follow the instructions provided by the manufacturer carefully to avoid any complications or damage to your teeth.

Comparisons: In-Office vs. At-Home Whitening

There are two primary types of teeth whitening treatments: in-office and at-home. Here is a comparison of the two:

In-Office Whitening

In-office teeth whitening is performed by a dental professional and involves the use of a high-concentration whitening gel that is applied to the teeth and activated with a special light. This method can provide dramatic results in just one sitting but is also more expensive.

At-Home Whitening

At-home whitening, on the other hand, involves the use of whitening kits that can be purchased over-the-counter or from a dentist. This method may take longer to achieve desired results, but it is also less expensive and more convenient.

Tips for Maintaining White Teeth

After undergoing any teeth whitening treatment, it is essential to take steps to maintain the results. Here are some tips for keeping your teeth white:

  • Avoid tobacco products
  • Limit staining foods and drinks
  • Practice good oral hygiene habits
  • Use a straw when drinking beverages that can stain teeth
  • Attend regular dental check-ups

The Best Teeth Whitening Products

There are several teeth whitening products available on the market, ranging from toothpaste to DIYkits to professional treatments. Here are some of the best options:

Crest 3D White Whitestrips

These easy-to-use whitening strips are applied directly to the teeth and contain hydrogen peroxide to remove stains and discoloration.

Philips Sonicare DiamondClean Toothbrush

This electric toothbrush features five brushing modes and can help remove surface stains while promoting overall oral health.

Opalescence Go Whitening Trays

These at-home whitening trays come pre-filled with a hydrogen peroxide gel and can easily be worn on-the-go for quick and convenient results.

Professional In-Office Treatments

For those looking for more dramatic and immediate results, professional in-office treatments performed by a dental professional may be the best option.

Conclusion

Teeth whitening is a popular cosmetic dental procedure that involves the removal of stains and discoloration from the surface of teeth. Whether through over-the-counter products, at-home DIY kits, or professional treatments, several options are available to achieve a brighter, whiter smile. Before deciding to undergo any treatment, it is important to consult with a dentist and weigh the pros and cons carefully. Remember to maintain good oral hygiene habits and limit staining foods and drinks to keep your teeth looking their best.

FAQs

  1. Is teeth whitening safe? Teeth whitening is generally considered safe when performed correctly and under the guidance of a dental professional. However, overuse or misuse of whitening products can damage teeth enamel and cause sensitivity or discomfort.
  2. How long does teeth whitening last? The duration of teeth whitening results varies depending on the individual and the type of treatment used. Generally, results can last anywhere from six months to two years.
  3. Can teeth whitening be done during pregnancy? It is recommended to avoid teeth whitening during pregnancy as there is limited research on its safety during this time.
  4. Can teeth whitening damage dental restorations? Teeth whitening products may not be effective on dental restorations such as fillings or crowns and can even cause damage to them. It is important to consult with a dentist before undergoing any whitening treatment.
  5. How often can I whiten my teeth? Overuse of whitening products can lead to sensitivity and enamel damage. It is recommended to follow the instructions provided by the manufacturer carefully and consult with a dental professional before deciding to undergo any additional treatments.