how to curl your hair with a curling iron

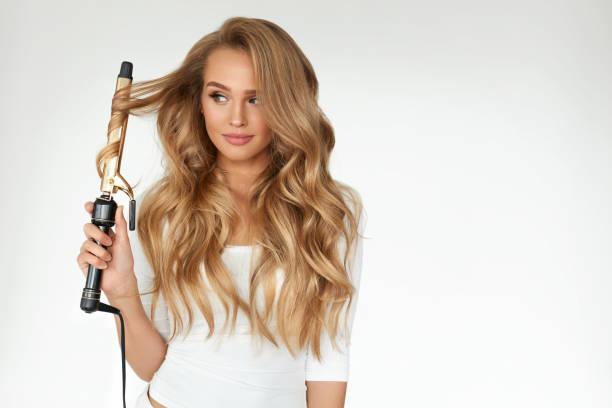
Curling hair is a popular hairstyle choice for both casual and formal occasions. While there are many different methods and tools to achieve curls, using a curling iron is one of the most effective and long-lasting options. 

This article provides you everything about how to curl hair with curling iron, including important information, step-by-step instructions, special tips and tricks, and key facts. So let’s get started!

What to know before you curl

Before jumping into the steps on how to curl your hair with a curling iron, it’s important to have a good understanding of the tool itself. A curling iron is a heated styling tool that creates curls by wrapping sections of hair around a heated barrel. The heat breaks down the hydrogen bonds in the hair, allowing it to reshape into a curled form. Curling irons come in various sizes, from thin barrels for tighter curls to thicker barrels for looser waves.

When using a curling iron, remember that heat can cause damage to your hair. It’s essential to always use a heat protectant product and not to apply too much heat for an extended period of time. Additionally, using a high-quality curling iron with adjustable heat settings can help minimize damage and give you more control over the level of heat applied to your hair.

What You’ll Need:

  • A curling iron
  • Heat protectant spray
  • Hair Brush or comb
  • Hair clips or pins
  • Hairspray (optional)

how to curl hair with curling iron for beginners

Step 1: Prep Your Hair

Start with clean, dry hair. To keep your locks safe from heat, spritz on some heat protectant spray. Use a comb or hairbrush to ensure your hair is knot-free and ready to roll.

Step 2: Heat Up Your Curling Iron

Plug in your trusty curling iron and give it some time to heat up. The temperature you choose depends on your hair type – thicker hair can handle higher heat, while fine hair should go for a lower setting. Always begin with a lower heat setting and adjust as needed to prevent any hair harm.

Step 3: Section Your Hair

Divide your hair into sections. If your hair is on the thicker side, you may want more sections, but remember that smaller sections will give you more defined curls. Use clips or pins to keep those sections separate.

Step 4: Start Curling

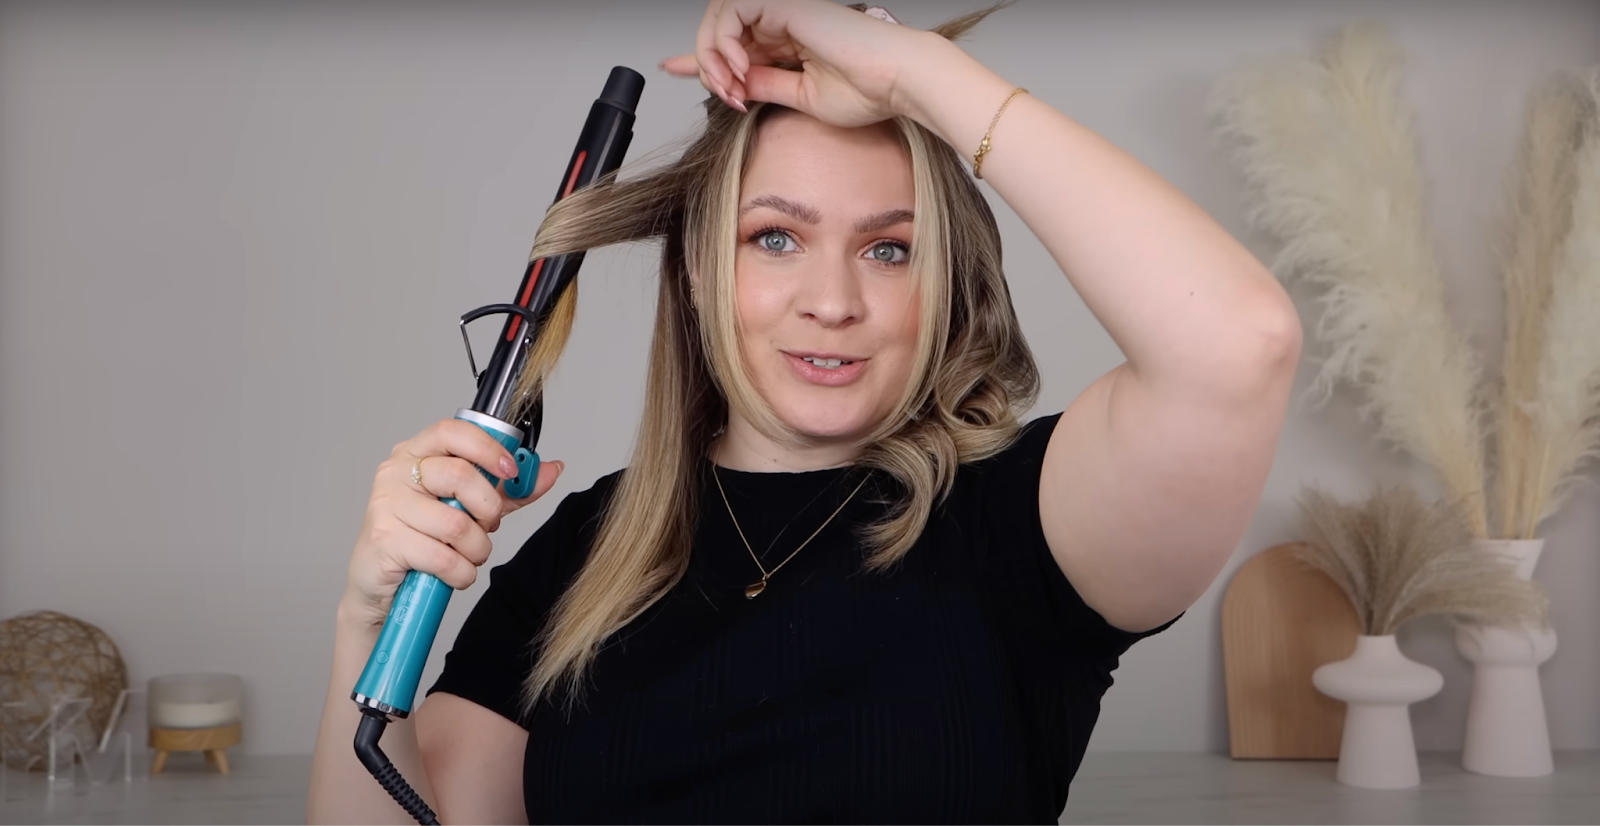
Take a small section of hair, roughly an inch wide, and hold your curling iron vertically. You can start close to the roots for some extra volume or leave a bit of space if you prefer a looser look. Wrap your hair around the curling iron’s barrel, ensuring that the ends are tucked under the clamp.

Step 5: Hold and Release

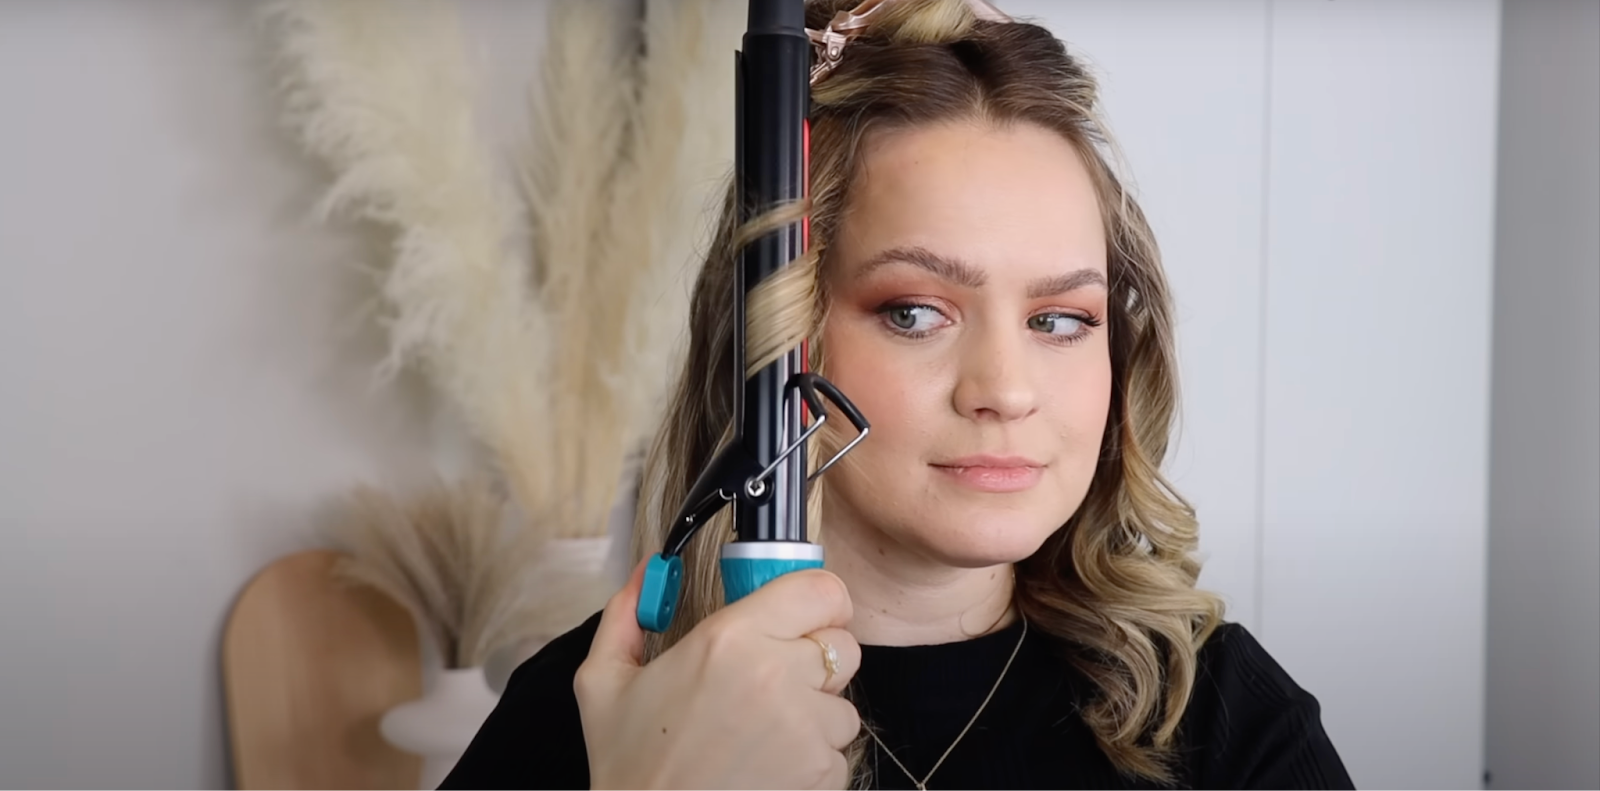
Hold your hair in place for about 5-10 seconds – the exact time can vary based on your hair type and the curl you’re going for. Release the curl by opening the clamp and gently sliding the curling iron out. Hold the curl for a few seconds to let it cool while it sets.

Step 6: Keep Curling

Continue curling different sections of your hair, working from the bottom layers to the top. Remember to curl away from your face for a more natural look. Mix it up by curling in different directions for added texture.

Step 7: Final Touches

Once you’ve curled all your sections and the curls have cooled down, use your fingers to gently separate and tousle your curls for a more relaxed look. If you want your curls to stay put, a touch of hairspray will do the trick.

Step 8: Finish the Look

Style your newly curled hair any way you like. Leave it down, put it up in an updo, or add some fun accessories for extra pizzazz.

Remember, curling your hair with a curling iron might take a bit of practice, so don’t worry if you don’t get it perfect on your first try. With a little time and patience, you’ll be a curling pro in no time!

Special Tips & Tricks

  • For a more natural and effortless look, alternate the direction of each curl, curling some sections towards your face and others away from your face.
  • If you have fine or thin hair, use a lower heat setting to avoid damaging your hair.
  • If you’re looking for more volume, start curling your hair at the root instead of the ends.
  • To achieve a looser and more beachy wave, use a larger barrel and wrap bigger sections of hair around the curling iron.
  • Don’t forget to clean your curling iron regularly to remove any product buildup and maintain its performance.

Key Facts

  • The smaller the barrel of a curling iron, the tighter the curls will be.
  • Curling irons with ceramic or tourmaline barrels are less damaging and create smoother, shinier curls.
  • It’s essential to let your hair cool down before brushing or running your fingers through it to ensure the curls stay intact.
  • Using a heat protectant is crucial to minimize damage and keep your hair healthy.
  • With proper care and maintenance, a high-quality curling iron can last for several years.

FAQs

1. What type of curling iron should I use?

When choosing a curling iron, it’s important to consider the size and shape of the barrel. Smaller barrels (around 1 inch) create tighter and more defined curls, while larger barrels (around 2 inches) create looser and more voluminous curls. You can also choose between a clip or clipless curling iron, depending on your personal preference.

2. How do I protect my hair from heat damage?

Before using a curling iron, make sure to apply a heat protectant product to your hair, such as a spray or serum. This will help minimize damage and keep your hair healthy.

3. Can I use a curling iron on wet hair?

No, you should never use a curling iron on wet hair as it can cause severe damage. Make sure your hair is completely dry before using a hot tool like a curling iron.

4. How long should I hold the curling iron on each section of hair?

This depends on the thickness and texture of your hair, as well as the desired level of curl. As a general rule, hold the curling iron for 8-10 seconds for fine hair, 10-15 seconds for medium hair, and up to 20 seconds for thick hair.

5. How can I make my curls last longer?

To ensure your curls stay in place for as long as possible, apply a small amount of hairspray after each section of hair is curled. You can also use a texturizing spray or mousse before curling to give your hair more grip and hold.

Conclusion

Curling your hair with a curling iron may seem intimidating at first, but with the right tools and techniques, anyone can achieve beautiful curls. Remember to always prioritize the health of your hair by using heat protectant products and not applying too much heat for an extended period of time. With practice and patience, you’ll be a pro at curling your hair with a curling iron in no time!

K-tip Hair Extensions – Everything You Need to Know

K-tip hair extensions continue to grow in popularity thanks to their natural appearance and minimal damage to natural hair. If you’re considering K-tip extensions, there’s a lot you’ll want to know first about how they work, their pros and cons, cost, installation, and proper care and maintenance. This in-depth guide will cover everything you need to know about K-tip extensions to help you decide if they’re the right choice for you.

What Are K-Tip Hair Extensions?

K-tip hair extensions are a semi-permanent type of hair extension that are bonded to your natural hair using keratin protein. The extensions get their name from the small “k” shaped keratin bead at the end, which is used to bond the extension to your natural hair.

Unlike other bonding methods like glue or clips, K-tip extensions use a gentle keratin bond to fuse the extensions to your hair. This creates a strong hold that can last up to 6 months with proper care. The keratin bond is designed to minimize damage to your natural hair.

K-tip extensions are made with real human hair and are available in a variety of textures and colors to blend with your natural hair. The individual extensions come in small strands or wefts that can provide length, volume, thickness, or highlights to your current hair.

How Do K-Tip Hair Extensions Work?

  • Your stylist sections out a small row of your natural hair, usually 1-2 inches wide.
  • They apply a small drop of keratin bonding adhesive to the tip of the extension.
  • Using a special heat clamp, they bond the keratin bead at the end of the extension to your natural hair near the root.
  • The clamp uses heat to melt the keratin adhesive, fusing the extension to your hair.
  • This process is repeated until the desired number of extensions have been installed to achieve your hair goals.
  • Once installed, the keratin bonds remain strong through washing, brushing, styling, and other daily wear and tear.

The bonds are small and discrete, so they blend in seamlessly with your natural hair. And unlike other extensions like tape-ins or sewn-in wefts, K-tip extensions don’t require braids or cornrows that can damage your hair.

Benefits of K-Tip Hair Extensions

Natural-Looking Results

The keratin bonds are tiny, only 2-3mm wide, and well-disguised along the hair shaft. This makes the bonds less visible for a seamless blend with your natural hair. You can even wear your hair up without the bonds being detectable.

Long-Lasting Wear

With proper care, K-tip hair extensions can last 4-6 months before needing to be removed. The keratin bonds are durable enough to last through your daily hair washing, styling, and environmental exposure.

Versatile Styling

K-tip extensions move and behave just like your own hair, meaning you can still enjoy all your favorite hairstyles. Curling, straightening, and updos are all possible without compromising the bonds.

Low Maintenance

You care for K-tip extensions the same way you care for your own hair – with regular washing, drying, and styling. No special cleansers or treatments are needed. The keratin bonds are strong enough to withstand your hair’s regular maintenance.

Minimizes Damage

The keratin bond adheres the extensions to your hair without the need for glues, braids, or chemical treatments that can damage hair. The gentle bonding method leads to less hair breakage and shedding.

Good for Fine or Thin Hair

The discrete keratin beads make K-tip extensions ideal for those with fine or thin hair. The bonds lie flat and are less noticeable on hair with less volume.

Adds Volume and Fullness

K-tip extensions are an excellent way to add thickness and fullness to thin or limp hair. More density at the roots helps create the appearance of naturally voluminous hair.

Provides Length

If your goal is longer hair, K-tip extensions are a great solution. Several inches of length can be added instantly and safely to take your hair past your shoulders or even to your waistline.

Safe Removal

K-tip extensions can be safely removed at home by a professional stylist when it’s time for them to be replaced. The keratin bonds dissolve away, allowing the extensions to be removed without damage to your natural hair.

Who Are K-Tip Extensions Good for?

K-tip extensions are suitable for most hair types and textures, including:

  • Fine, thin hair
  • Short hair needing extra length and volume
  • Medium length hair wanting increased thickness and density
  • Long hair that needs a boost in fullness or highlights

Both women and men can benefit from K-tip extensions. When fitted and installed properly by a trained stylist, K-tip extensions are comfortable to wear and blend seamlessly with your natural hair.

People with hair that is weak, damaged, or chemically-treated should consult with their stylist first. Very curly or super straight hair may not be ideal for K-tip extensions which work best on hair with a natural texture.

How Much Do K-Tip Hair Extensions Cost?

The exact cost of K-tip extensions can vary greatly based on several factors:

  • Hair quality – Synthetic vs. real human hair, Remy human hair, virgin hair, etc.
  • Hair length – Pricing increases for longer hair extensions.
  • Amount of hair – More extensions equals higher cost.
  • Your stylist – Prices vary by salon.
  • Your location – Larger cities are often more expensive.

Some typical price ranges for K-tip extensions include:

  • Synthetic hair – $150 to $400
  • Real human hair – $250 to $800
  • Remy or virgin human hair – $500 to $1,200

It’s ideal to budget around $250 to $500 for a quality set of K-tip hair extensions installed by an experienced stylist. Be wary of very cheap extensions which are likely low quality.

Most salons offer free consultations where they can assess your hair’s needs and provide a price quote for the suggested amount of extensions.

What to Expect

The installation process for K-tip hair extensions takes 2 to 3 hours in most cases. Here’s what to expect during the salon visit:

Hair Assessment

Your stylist will examine the health and condition of your natural hair to recommend the amount of extensions needed. They also determine if your hair is suitable for K-tip extensions.

Sectioning the Hair

Your hair is divided into rows, usually 1 to 2 inches wide, and the top section clipped away. The extensions will be bonded to the bottom section first.

Bonding Extensions

Your stylist bonds each extension to your natural hair near the roots using the keratin adhesive and heat clamp. Row by row, extensions are fused to add length and fullness.

Smoothing Cuticle

Once bonded, your stylist will use a flat iron to seal the cuticle and smoothen the bonds and your natural hair together for decreased visibility.

Blending and Finish Work

The stylist carefully blends your natural hair with the extensions and makes any finishing trims for an even look from root to tip.

How to Care for K-Tip Extensions

Caring for your new K-tip extensions involves many of the same practices as caring for your own hair:

Gentle Handling

Avoid tugging, pulling, or twisting the bonds to prevent them from loosening or your hair tangling. Use a soft brush and handle gently.

Cleanse Regularly

Use a sulfate-free shampoo meant for extensions 1-2 times per week. Rinse thoroughly and air or blow-dry. Avoid wet brushing.

Limit Heat Styling

Allow hair to air dry when possible and keep heat tools on medium settings to maintain the integrity of the bonds.

No Chemical Processing

Avoid perms, dyes, bleaches or other chemical treatments while wearing the extensions to prevent bond damage.

Protect From Friction

Wear hair down or in loose styles more often than tight ponytails. The tension can weaken bonds over time. Sleep with hair in a loose braid.

Schedule Maintenance

Make occasional touch-up appointments with your stylist to check the health of your extensions and bonds every 6-8 weeks.

How Long Do K-Tip Extensions Last?

With proper maintenance and care, K-tip extensions typically last 4 to 6 months before needing removal and/or replacement.

Factors that affect the lifespan of your extensions include:

  • Your natural hair health and condition
  • Chemical processing or heat damage during wear
  • Frequency of washing, brushing and styling
  • How gently you care for the extensions
  • Exposure to environmental elements like sun, chlorine and pollution

Setting touch-up appointments with your stylist every 6 to 8 weeks ensures your extensions stay in optimal condition for maximum wear.

How to Remove K-Tip Extensions

K-tip extensions should only be removed by a trained stylist. Never attempt to remove them on your own.

Bond Dissolving

Your stylist applies a keratin remover solution to dissolve the bonds holding the extensions in place.

Gentle Detangling

Working from the bottom up, the stylist gently detangles and separates your natural hair from the extensions.

Sliding Off Extensions

Once loosened from the bonds, the stylist is able to slide off the extensions handily and smoothly.

Final Cleanse

A deep cleansing shampoo removes any remaining adhesive residue from your hair and scalp.

The removal process takes only 15 to 30 minutes and allows the extensions to be lifted away without breakage or loss of your natural hair when done properly.

Are Keratin Tip Extensions Safe?

K-tip extensions are considered generally safe for most people when applied by a qualified stylist. However, there are some risks to be aware of:

  • Potential allergic reaction to the keratin adhesive bonding, especially if you have an allergy to other keratin hair products.
  • Hair breakage or damage with improper installation or removal.
  • Headache or discomfort from wearing excessively heavy extensions.

To minimize risk, have a consultation with an experienced stylist who can determine if K-tip extensions are a suitable option for you. Take care of the extensions properly during wear, and have them removed promptly when needed.

Talk to your doctor before getting extensions if you have very fine hair or a history of skin irritation or allergies. Follow your stylist’s recommendations closely for ideal results and safety.

Are K-Tip Extensions Worth It?

For many people, the benefits of K-tip extensions are well worth the investment. You can achieve longer, thicker, more voluminous locks – often in just one salon visit.

The key is choosing a high quality of hair and having the extensions properly installed and cared for by a knowledgeable stylist. With proper maintenance, K-tip extensions can give you your desired look for months at a time.

If you want an instant hair transformation through safe, non-damaging methods, then K-tip extensions offer a lightweight, natural-looking way to get the long flowing locks you’ve always wanted. Take the time to find an experienced stylist and schedule a consultation to see if K-tip extensions make sense for achieving your hair goals.

FAQs

  1. Do K-tip extensions damage your hair? When installed properly by a trained stylist, K-tip extensions do not typically cause damage to your natural hair. The keratin bonds lie flat against the cuticle without using glues or chemicals, minimizing damage during application and removal. Can you reuse K-tip extensions? In most cases, K-tip extensions cannot be reused. The process of removing the bonds tends to damage the keratin beads at the tip, so the hair cannot be rebonded.
  2. How often should I get K-tip extensions retightened? Expect to have your K-tip extensions tightened or reapplied every 4 to 6 months. Schedule appointments with your stylist every 6 to 8 weeks to check that the bonds remain secure. They can reinforce any bonds that appear loose. Proactive maintenance helps the extensions last their maximum lifespan before needing full removal and replacement.
  3. Can I color or perm K-tip extensions? It’s not recommended. Chemical processing can greatly reduce the life of your K-tip extensions and damage the bonds. However, your stylist may be able to apply semi-permanent color or highlights, but this risks the wear and integrity of the extensions.
  4. Can I wear K-tip extensions in the pool or ocean? Yes, K-tip extensions are waterproof and can be worn while swimming. Chlorine and saltwater will not dissolve the keratin bonds. However, always wash hair with freshwater and deep condition after swimming to remove drying chemicals and minerals that can damage the hair over time.
  5. How long does the K-tip extension process take? The installation process takes 2 to 3 hours depending on the amount of extensions being applied. K-tip extensions don’t require the tight braids necessary with many other extensions, so the bonding method is relatively fast. Removal takes just 15 to 30 minutes.