
Beyond mastering complexion products like foundation and concealer for a flawless finish, enhancing your eyes is one of the best ways to elevate your look. A fantastic way to do this is by exploring and experimenting with various eyeshadow styles.
So, Beauties, it’s time for an eye makeup roundup! I love scrolling through magazines, Pinterest, and Instagram for makeup inspiration—it’s an excellent way to discover stunning looks to recreate.
Today, I’m excited to share some of my favorites that showcase the latest trends, along with a few impressive yet simple options for those of you just starting out!
If you’re feeling uninspired by your current eye makeup routine or simply seeking some fresh eyeshadow ideas, this post is perfect for you! Whether you’re a makeup novice or a seasoned pro, this roundup will provide you with plenty of fun ideas to try out!
Every gal needs a diverse selection of eyeshadow looks to match different occasions and seasons! So, without further delay, here are some of my current favorites that will undoubtedly enhance the beauty of your eyes!
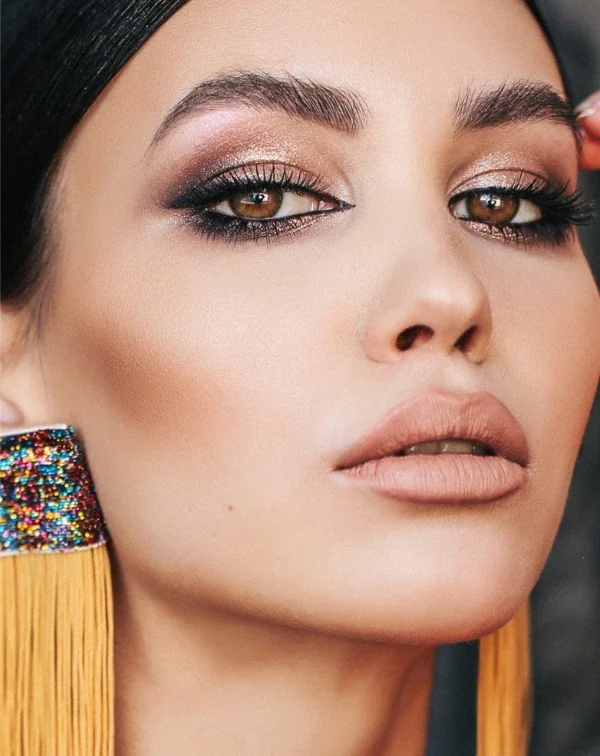
ADD DIMENSION TO YOUR EYES WITH DREAMY METALLICS
Illuminating eyeshadow looks are guaranteed to draw all eyes to you! This style is perfect for adding a captivating touch to your evening makeup and pairs beautifully with subtle, understated lips.
To achieve this look, you’ll need an iridescent eyeshadow for the center of your lid, a neutral shimmer, and a soft matte black.
Start with a shimmery peachy nude shade on your lid, then blend the soft black into the outer corners and crease to create depth and dimension. Extend the eyeshadow around the outer corners, paying special attention to the lower lash line. Finally, apply the iridescent eyeshadow to the center of your eyelid for that enchanting “lit-from-within” effect—pat it on and gently blend it out for a seamless finish!
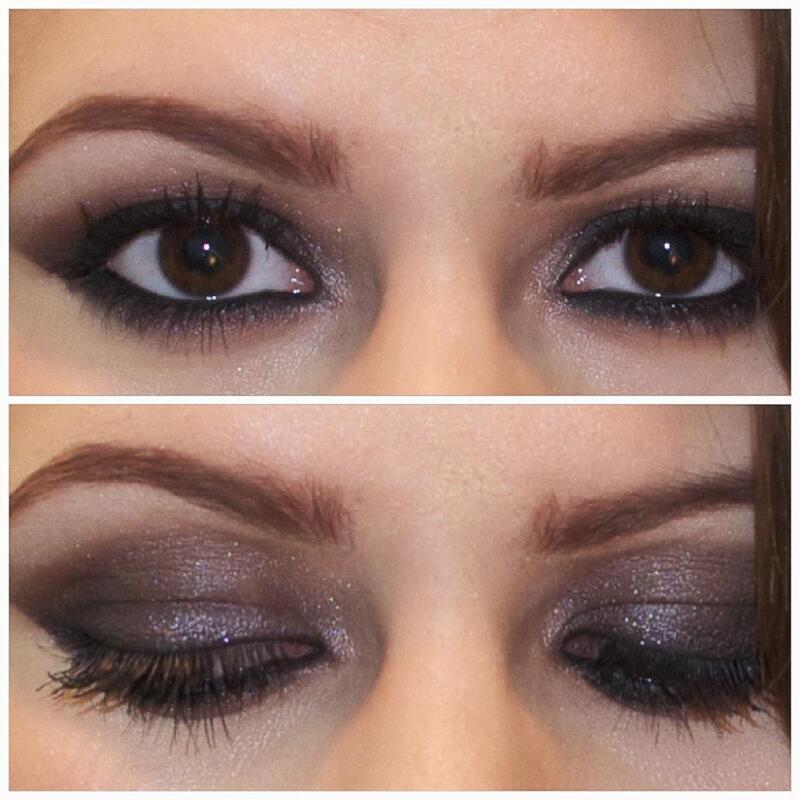
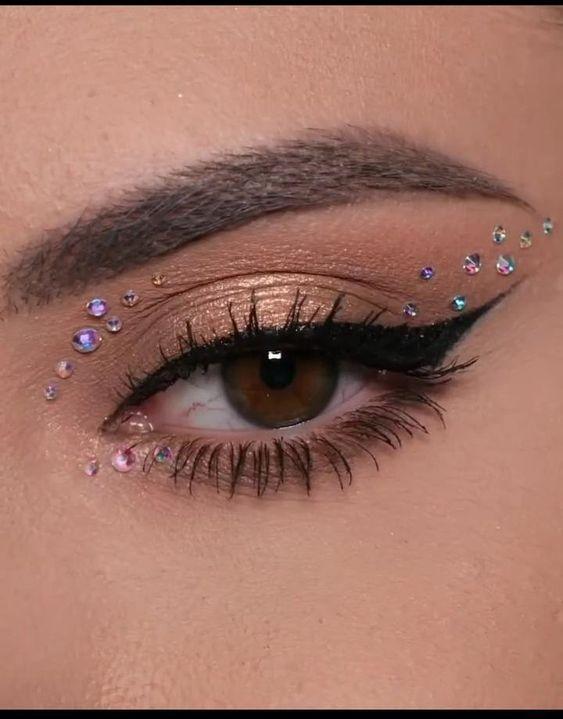
BE SEDUCTIVE WITH METALLICS & CRISP-LINED INNER CORNERS
This eyeshadow makeup look is both glamorous and seductive, making it a perfect choice for a special occasion or a romantic date night! To create this effect, you’ll need a soft bronze eyeshadow, along with shades of brown and black. Additionally, have a black liquid liner on hand, and consider using a black pencil liner for your lower waterline, plus some mascara.
Start by applying the bronze eyeshadow to your lids, blending the brown into the crease, and using the black in the outer corners. I recommend creating an outer “V” shape with the black that sweeps into the outermost portion of the crease for added dimension.
For the black liner, focus on applying it in a sharp, triangular shape at the inner corners of your eyes. A liquid liner with a fine applicator tip will help you achieve precision, but keep some Q-tips nearby to clean up any mistakes. Begin by drawing a thin line along the upper lash line before moving to the lower.
Don’t forget to apply the bronze and black shades to your lower lash line, and use the black pencil liner if you want to define your lower waterline. Finally, finish off with mascara on both upper and lower lashes, or opt for false lashes for extra volume!
TWO ELECTRIFYING COLORS GIVE DOUBLE THE INTENSITY
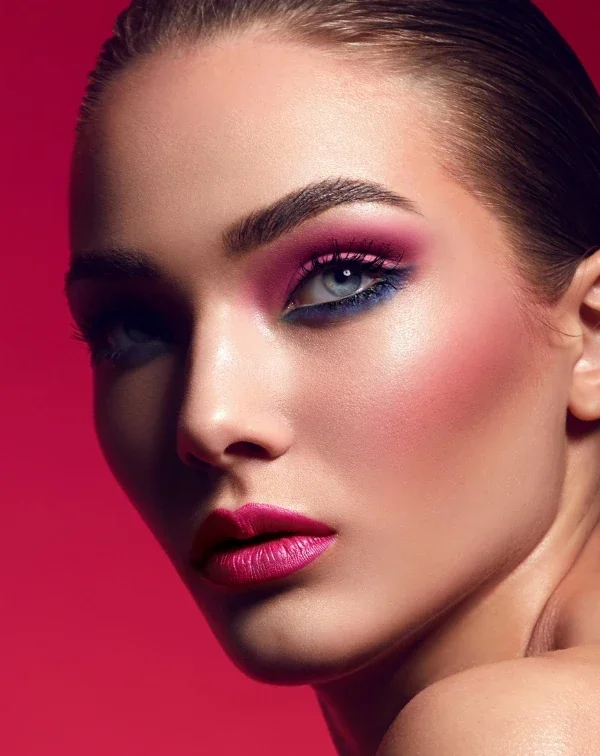
Bright, vibrant pink makes a bold, eye-catching statement that is anything but ordinary! Pair it with a deep metallic blue for an incredibly stunning look that will leave a lasting impression. If you have blue eyes, this is a perfect way to incorporate blue eyeshadow without overwhelming your features.
To achieve this look, start by sweeping a bold pink onto your lid, building the pigment beyond your crease for added impact. You can also use a slightly darker pink to add depth in the crease, blending it both horizontally and vertically for a seamless transition.
Next, use either a cream eyeshadow or dampen your makeup brush with a bit of water before dipping it into your blue powder eyeshadow. Apply the blue along the entire length of your lower lash line for a striking contrast. Finish with black liner and a few coats of lengthening mascara on both your upper and lower lashes for a complete, dramatic effect!
TRY RHINESTONES FOR A SHOW-STOPPING GAZE
This is one of those eyeshadow looks you absolutely must try when you’re feeling extra fancy and want to make a statement! It’s glamorous and perfect for anyone looking to showcase their exceptional makeup skills. Plus, it’s a unique and stunning way to elevate your eye makeup!
To create this look, start with a cut crease. Keep the rest of your makeup simple with nude lips, light highlighting, and minimal blush. Here’s how to master the cut crease technique:
Begin by applying a light, semi-shimmery eyeshadow over the concealer, beneath your brow, and at the inner corners of your eyes. Then, apply rhinestones along the shape of your cut crease; it’s helpful to map out their placement before you start applying them.
Finally, don’t forget to add winged liner and lashes to complete the look and maximize its impact!
DAZZLE WITH A VIBRANT YELLOW & PURPLE PALETTE
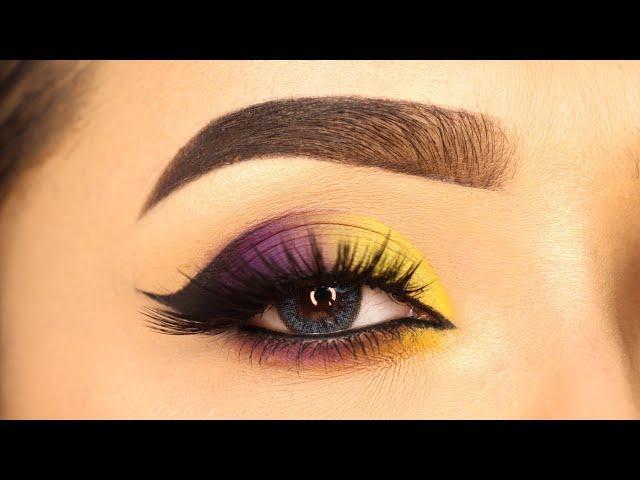
To effortlessly add vibrant hues to your eyeshadow look, try using complementary colors. In this case, yellow and purple work beautifully together!
Purple eyeshadows—from lilac to lavender, plum, mauve, amethyst, and violet—look stunning on every skin tone! For a playful twist, apply a metallic violet eyeshadow along your lower lash line as an eye-catching accent.
Start by blending a matte yellow eyeshadow on your lids and in the crease. Then, sweep a metallic violet shade along your bottom lash line. To enhance the look, use purple eyeliner; a liquid or gel eyeliner with an angled brush is ideal. Extending the wing of the liner will help elongate your eyes beautifully!
Finish with mascara on both your upper and lower lashes, or opt for false lashes for extra drama!
KEEP IT SIMPLE WITH A POP OF COLOR
This is a fantastic way to add color without being overwhelming! If you’re seeking a quick and easy eyeshadow look, this one is definitely for you!
Pair it with pink blush and glossy lips for a lovely summer vibe—perfect for those hot months, ladies!
Start by tracing your inner lower lash line with a bright, vibrant metallic blue, leaving the outer third clean and concentrating the color on the inner portion for a striking effect. You can either dampen your brush before dipping it into the eyeshadow or use a cream eyeshadow for a similar result.
Finally, curl your lashes and apply mascara to both your upper and lower lashes to define your look!
GO BARBIE PINK GLAM & ADD A DRAMATIC CAT EYE
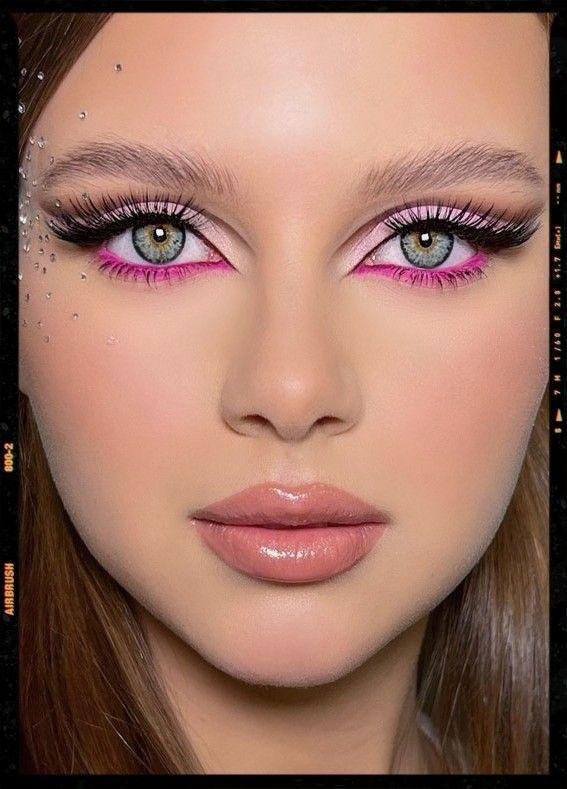
Isn’t this Barbie pink eyeshadow look just fabulous? Get creative and put a playful twist on your traditional cat eye! This makeup is all about having fun and layering different shades of pink for a gorgeous gradient effect. Remember, blending is key—the goal is for each shade to transition seamlessly into the next.
Start by applying a soft pink shade to the inner lid area, then use a bolder mid-tone pink for the center of your lid. Finish with a slightly darker rose shade on the outer crease and outer corner of your eye.
For the eyeliner, I recommend using a gel formula with an angled brush for precision. Create your wing at the outer corner of your eye, then connect it back to the lash line and apply it along the rest of your upper lash line.
For your lower lash line, mirror the colors you used on the upper lid. You can add a hint of soft pink to the inner section (optional), then sweep the mid-tone pink along your entire lower lash line. Use the rose shade on the lower outer corner, and apply black eyeliner from the outer to the inner eye.
To give this look an extra pop, add a white liner (or a nude one) to your lower waterline; this will instantly brighten your eyes and make them appear larger. Finally, finish with mascara or add some lashes for a more dramatic, glamorous effect!
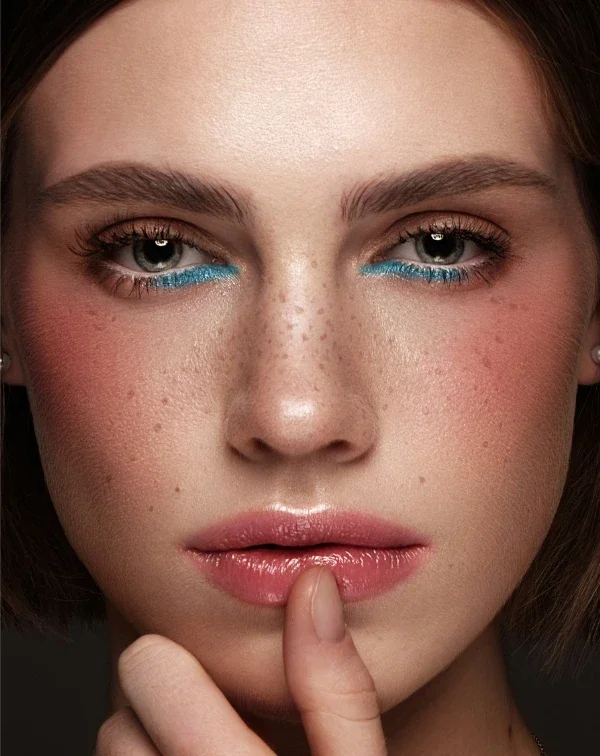
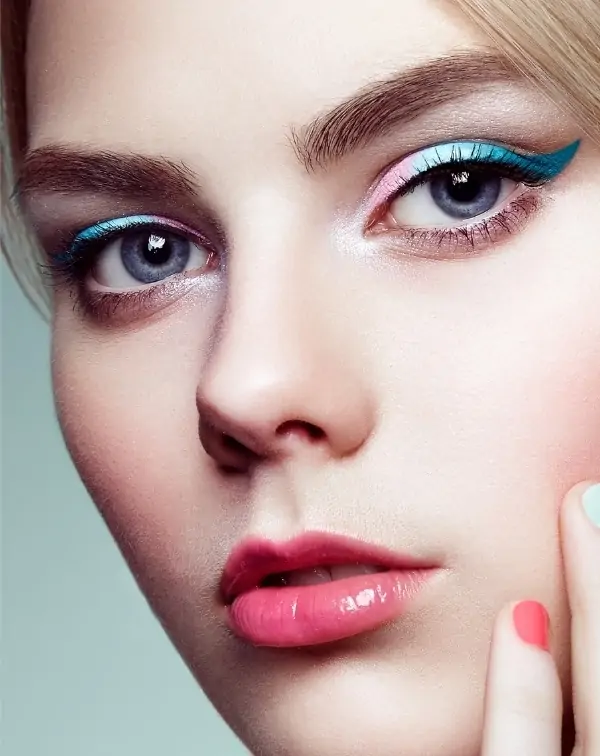
NEUTRAL EYESHADOW WITH A SPLASH OF COLOR CAN INSTANTLY ADD FLAIR TO NATURAL EYE MAKEUP LOOKS
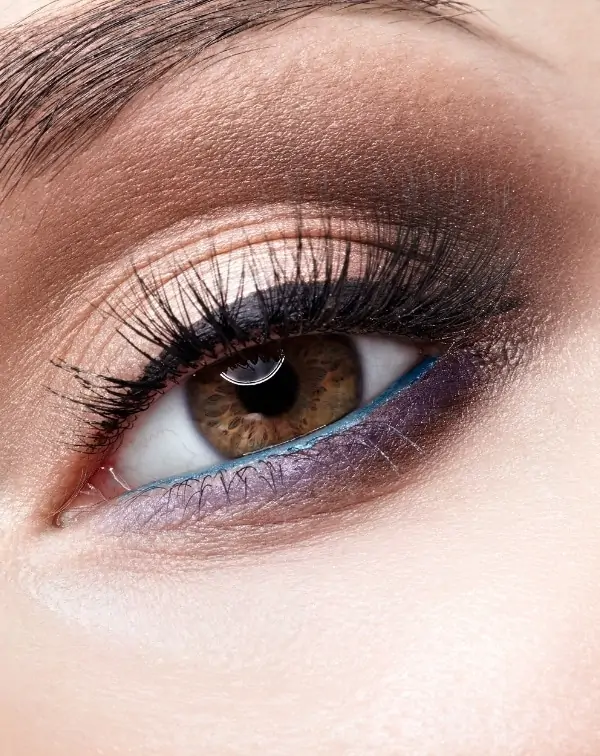
Natural eyeshadow looks are perfect for those who prefer a subtle, softer vibe. However, adding a bright blue to the waterline along with a lovely purple under the lower lash line elevates the look, giving your eyes an instant pop of creativity!
To create this look, start with a simple contouring technique using a neutral palette with brown and light shimmery shades. Apply the brown to the outer corner of your eyes, sweeping it gently through the outer crease.
Blend the eyeshadow down from the outer corner into the outer portion of the lower lash line for a seamless transition.
Next, apply black eyeliner (ink or gel) along the upper lash line. Finish the look with mascara or add some false lashes for added drama!
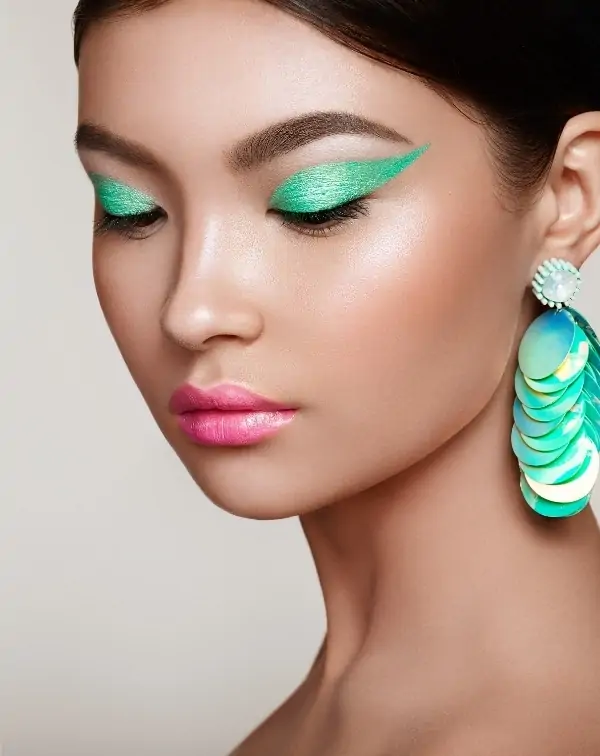
GO BRIGHT & ULTRA COLORFUL
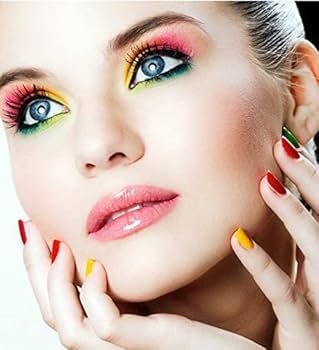
This pop of light green paired with playful pink creates a vibrant and eye-catching look! Surprisingly, this unexpected color combination works beautifully in an eye makeup style like this.
Start by applying a subtle highlighter just under your brows, choosing a shade that is about one tone lighter than your skin. Focus the bright pink shade on your lids, extending it slightly beyond the crease—especially beneficial if you have hooded or semi-hooded eyes. For beginners, using a green eyeliner pencil along your lower lashes can make application easier.
Next, add your lashes, ensuring to clean up and conceal the edge of the lash band with a liquid liner for a seamless finish. Complete your look by adding a touch of mascara to your lower lashes, and you’re all set for your close-up, Beauties!
BRING OUT BABY BLUES WITH BURSTING WARM CORAL AND GOLD HUES
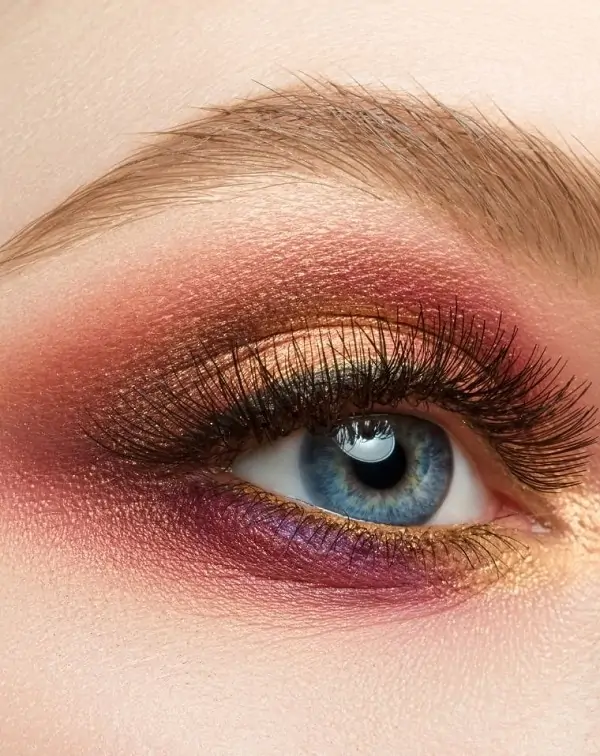
If you’re looking to make a bold statement, this sizzling twist on the popular sunset eyeshadow look is perfect for you! Featuring tropical shades that seamlessly blend into one another, this look creates a stunning gradient effect.
For this particular style, shades of reddish tones, coral, pinkish purple, and gold come together beautifully. The striking combination of coral and orangish-gold provides a captivating contrast that truly enhances blue eyes!
According to color theory, which I delve into in detail in my eyeshadow guide, warm eyeshadow colors with orange and yellow undertones create a dramatic pop against cool baby blue eyes. This is a fantastic way to make your eye color stand out!
THIS COMBINATION OF GREEN AND YELLOW IS PERFECT FOR GREEN-EYED BEAUTIES
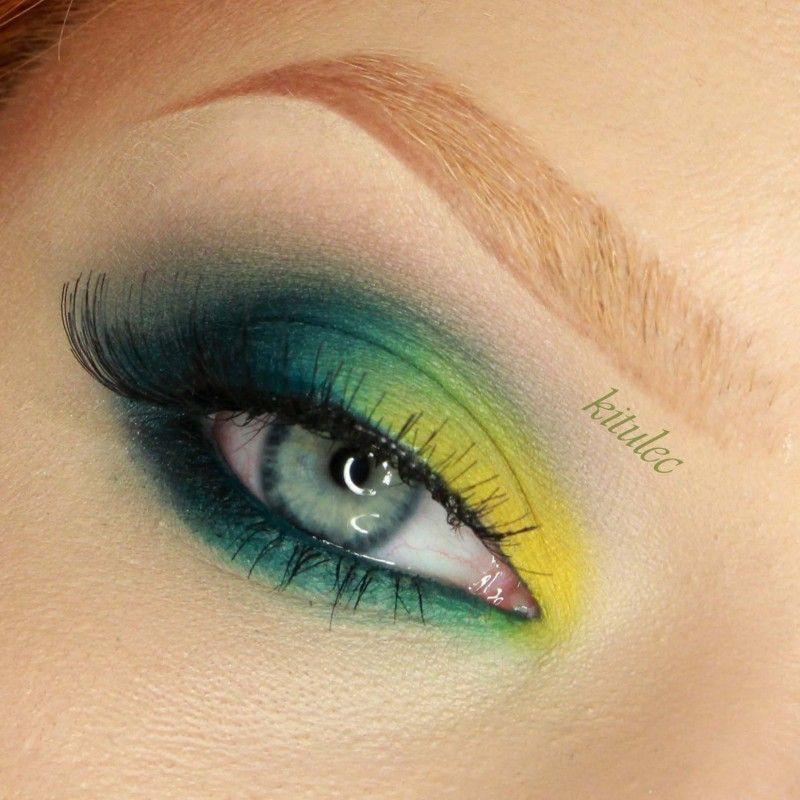
Green eyes often feature subtle golden flecks in the iris, making both green and yellow fantastic color choices to create harmony in your look. For this style, you can apply a white or ivory shade under the brow and at the inner corner to brighten the eyes. Alternatively, you might choose to skip the third color entirely and go for a bi-color look instead.
Begin by applying a touch of eyeliner on the upper lid and smudge it out for a softer effect. Extend the green eyeshadow from the outer corner of the eye at about a 45-degree angle for a striking finish. Finally, enhance your lashes with a volumizing mascara or opt for false lashes, and don’t forget to add a little mascara to your lower lashes for a complete look!
MAKE A GREEN ENVY GRAPHIC EYESHADOW IMPACT
Graphic winged eyeshadow looks are a fantastic way to showcase your makeup creativity! This style focuses on bold shapes and vibrant colors. For this look, it’s best to use a cream eyeshadow for easy application, and if you need extra staying power, set it with a powder shadow after you’ve completed the design.
For beginners, I suggest using a piece of tape angled at the outer corner of your eyes to outline the wing’s edge. Position the tape upward and outward from each eye for precision.
Start by drawing the outer edge extending from your lash line with an angled or fine brush, placing it right next to the tape. Once you’ve drawn the lines on both eyes, compare them to ensure they match.
To maintain symmetry, break the shape into sections. First, create a straight line connecting the outermost point of your initial line back to the center of your eyelid at the lash line, forming a sharp, triangle-like shape. Next, move to the inner eye at the lash line and draw a curved line that connects to the triangle you just created. Finally, fill in the shape completely and finish off with a coat of mascara for added drama!
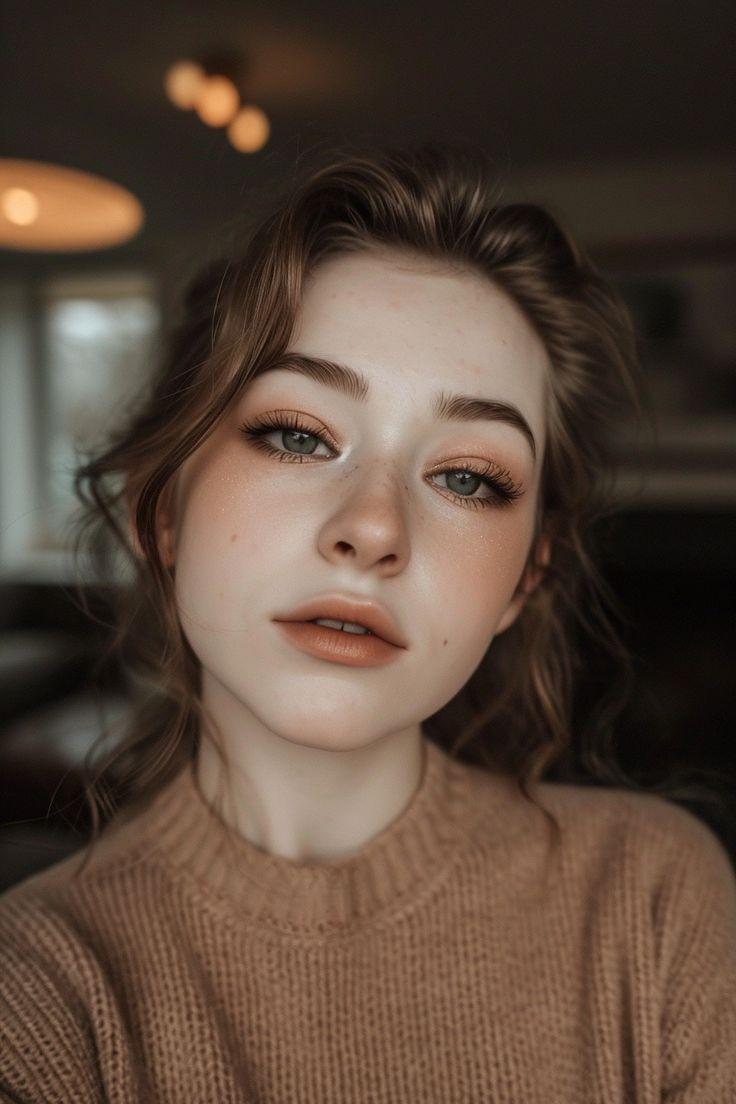
YOU CAN NEVER GO WRONG WITH A ROMANTIC MONOCHROMATIC LOOK…
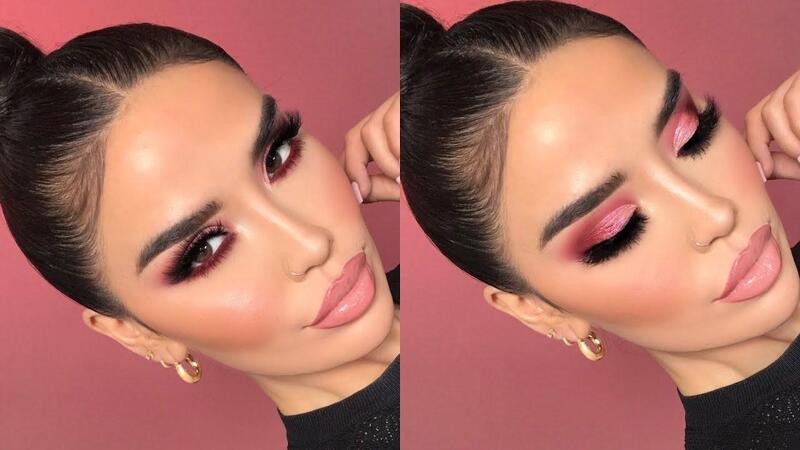
If you’re not yet acquainted with monochromatic makeup, it’s all about centering your look around a single color, which simplifies the process and creates a cohesive appearance. This approach involves using the same color for your eyes, lips, and cheeks! The key to mastering this look is to keep the blush light and well-blended, ensuring it diffuses seamlessly without harsh lines. For those with dark brown hair and warm undertones, vibrant berry shades can be a great choice to enhance your complexion, just as showcased in the image above.
TRY PRETTY IN PINK EYESHADOW MAKEUP LOOKS
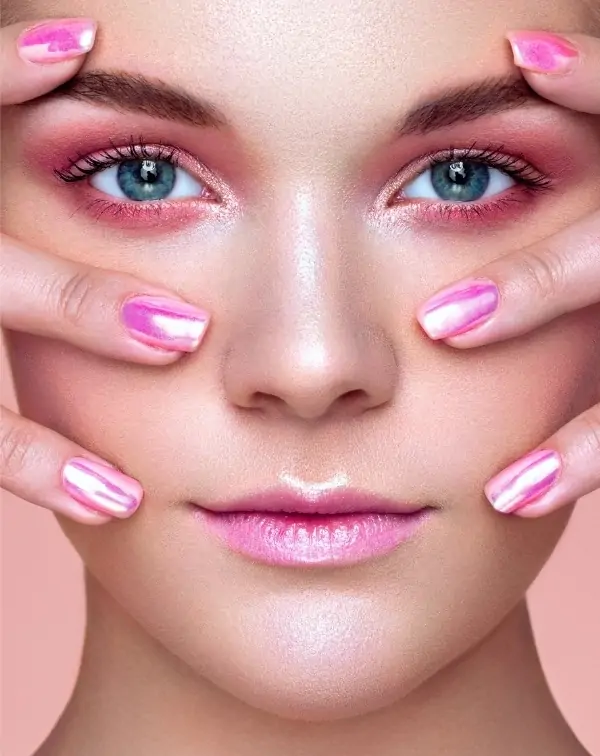
If rich berry shades feel a bit too daring for you, consider opting for softer pinks instead! Start by applying your lightest matte shade under your brows to create a highlight. Next, use a light pink eyeshadow on your mobile lid, then transition to a deeper, darker pink for the entire crease. Blend this darker pink so it extends beyond the crease, sweeping upwards and outwards at the outer corner of the eye to achieve a beautiful lifting effect!
Make sure to bring this eyeshadow down and around, connecting it to the lower lash line. Apply it directly beneath your lower lashes and blend it inwards, stopping just before the inner corners. For an extra touch of brightness, use a pale shimmery pink in the inner corners of your eyes. Finish off your look with a coat of mascara!
WHAT DO YOU GET WHEN YOU COMBINE A GRADIENT STYLE WITH A WINGED LOOK?
Many of the same tips for Look #12 apply here too, Beauties! Just remember to incorporate a light shimmer for highlighting under the brow and at the inner corners of your eyes. For the wing, you won’t need to extend it as far as in Look #12 (which reached near the tail of your brows). Instead, aim for a more subtle wing. 😉
Start with the outer edge using a dark blue cream shadow. When drawing your next line, avoid extending it all the way to the center of your lash line. Instead, connect it at a point just beyond your iris. For beginners, look in the mirror and locate the outer edge of your iris. Imagine a line extending straight up from that point to your lash line, and make a tiny dot there.
Next, draw a line from the outermost point of your first line to this tiny dot. Then, switch brushes and work with the inner pink, blending backward to the light blue and finally to the dark blue. This approach will ensure the dark blue section acts as a guide for where to stop.
Finish the look by applying a pink shimmery powder eyeshadow under the outer two-thirds of your lower lash line. Then grab your mascara and apply it to both your upper and lower lashes, gals!
PLAY UP YOUR GREENS OR HAZELS WITH AN EMERALD HALO
A halo eyeshadow look featuring gold and emerald green is absolutely stunning for hazel or green eyes! If you have either of these eye colors, you definitely need to give this makeup style a try.
Not familiar with the halo technique? It involves carefully placing light and dark eyeshadow colors to frame the eyes, with a focus on applying the lighter shade to the center of your lids. This creates the illusion of rounder, larger, and brighter eyes.
Start by using a shimmering gold on the center of your lids to enhance the subtle hues in your iris and achieve that brightening effect. For the center of the lower lid, opt for a gold-toned pencil liner instead of eyeshadow. However, for the emerald green, stick with eyeshadow for a more vibrant look.
Add a touch of black liner to your upper lash line for definition, making sure to keep it thin and close to the roots of your lashes to create the appearance of fuller, denser lashes. Finally, finish with a few coats of mascara on your upper lashes, and you’re all set!
CONCLUSION
In conclusion, the world of eyeshadow offers a diverse array of stunning looks that can transform your gaze and elevate your overall makeup game. From vibrant color combinations to soft, natural finishes, there’s an eyeshadow style for every occasion and personal preference. Whether you prefer the bold drama of graphic wings, the subtle elegance of a halo effect, or the playful charm of monochromatic hues, experimenting with different techniques and shades allows you to express your creativity and enhance your unique features.


