25 BEST FALL MAKEUP LOOKS TO TRY THIS SEASON

With the crispness of fall in the air, we’re greeted by an array of new beauty inspirations straight from the fashion week runways to carry us through the colder months.

It’s that time of year when you sift through galleries of runway looks, saving screenshots of models adorned with glitter accents, rosy cheeks, and more. The fall 2024 beauty trends are particularly exciting, offering plenty of opportunities for those eager to experiment with their makeup.

Ready to explore? We’ve compiled insights from the runways and consulted with top makeup artists to bring you the most anticipated fall 2024 makeup trends. Plus, we’ve included expert tips and must-have products, making it easy for you to stay on trend and recreate these looks yourself.
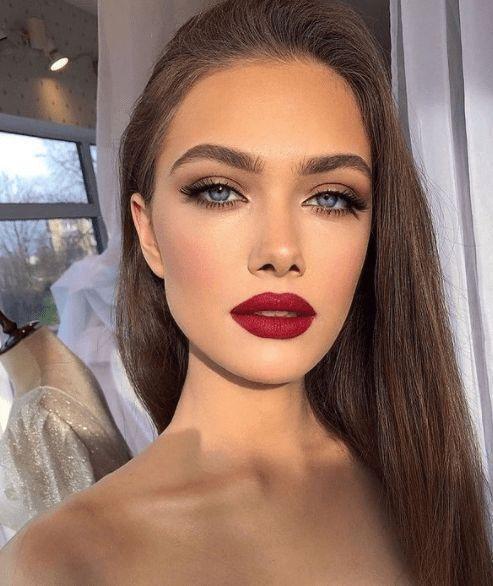
RED LIPS

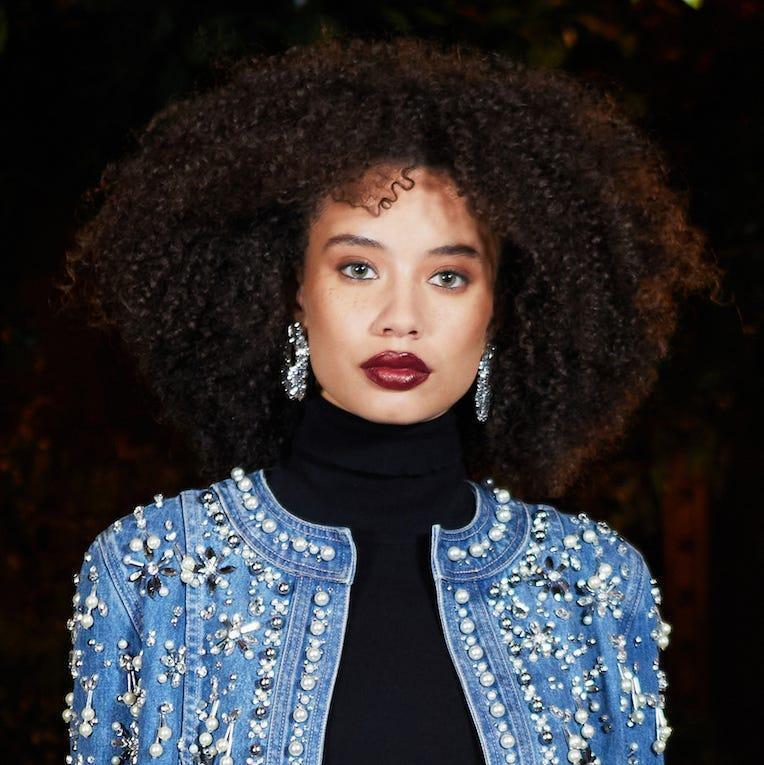
“Per brands like Thom Browne, Molly Goddard, and Richard Quinn, punchy, bright red lips are back in full force,” says celebrity makeup artist Tomy Rivero. “Women now feel empowered to wear a red lip throughout the day, leaving behind the idea that a bold red lip should be reserved for evening wear or special occasions. Plus, the accent fits right in with the trendy mob wife aesthetic.” This fall makeup idea is perfect for those who want to make a statement.

SOFT LIPS

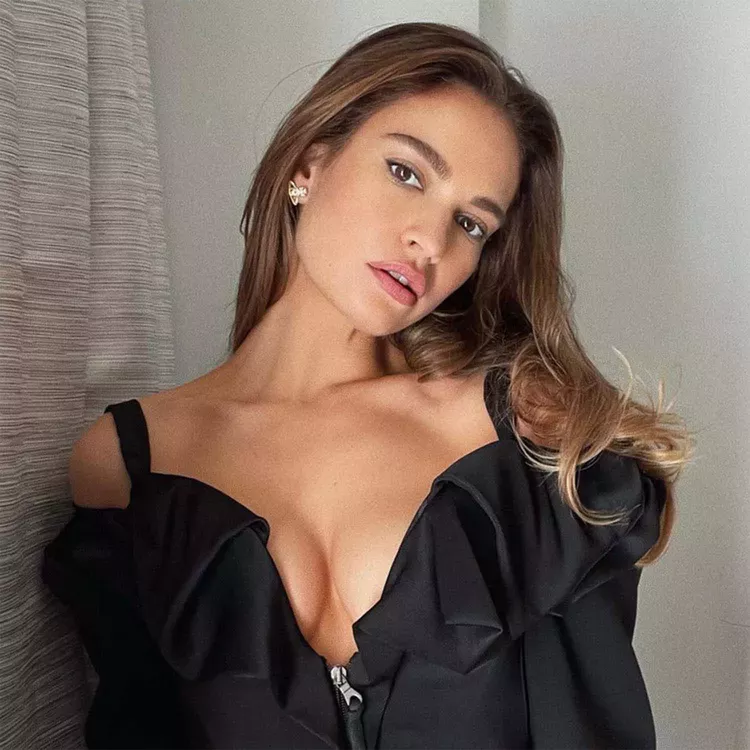
For a soft, ethereal look, begin with a mattifying primer to create a dewy, blurred canvas. Complete the look with a lipstick that complements your natural lip color.
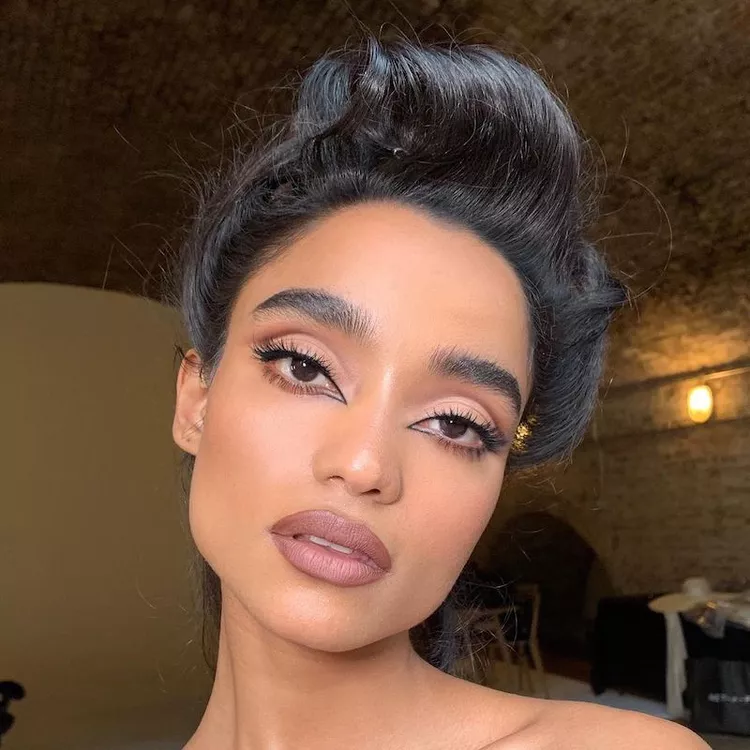
RASPBERRY POUT

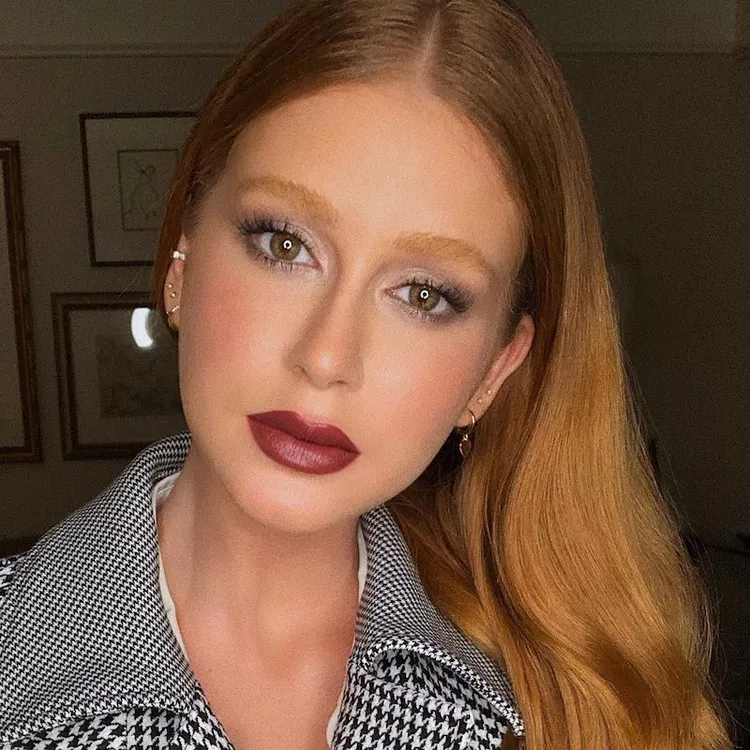
A raspberry lip and muted gray eyeshadow create a cool-toned makeup look that’s perfect for fall. A raspberry lip and muted gray eyeshadow create a cool-toned makeup look that’s perfect for fall. A bold red lip and a subtle shimmery eyeshadow create a glamorous and sophisticated look that’s perfect for special occasions.

GLITTER PLAY

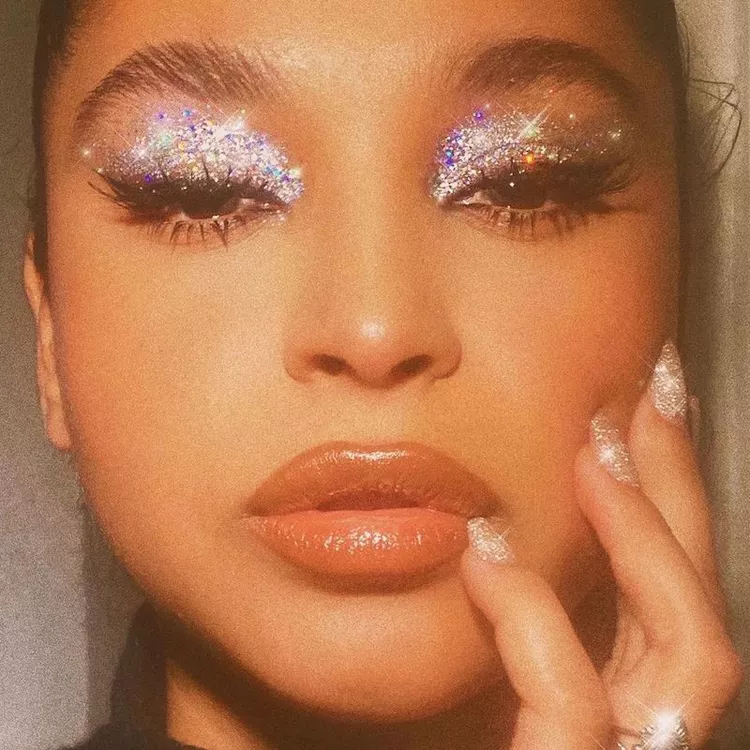
Glitter eyes add a touch of fun to any look. We love the playful combination of glitter and liquid liner. Silver is a versatile choice that complements almost any outfit.
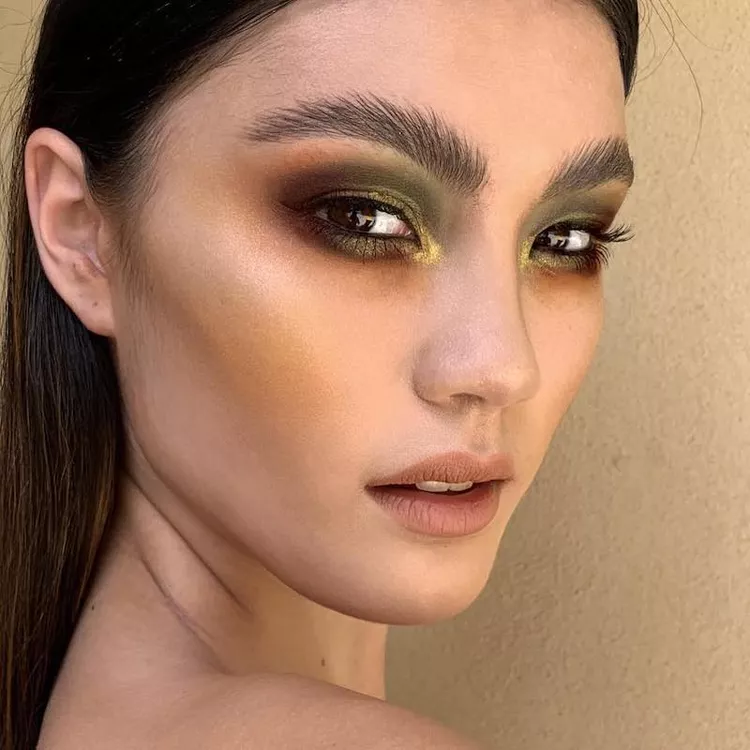
GRANNY SMITH GREEN

For a unique fall makeup look, try soft, iridescent green eyeshadow with a touch of gold. Pair it with peach blush and nude lips for a stunning, unexpected combination.
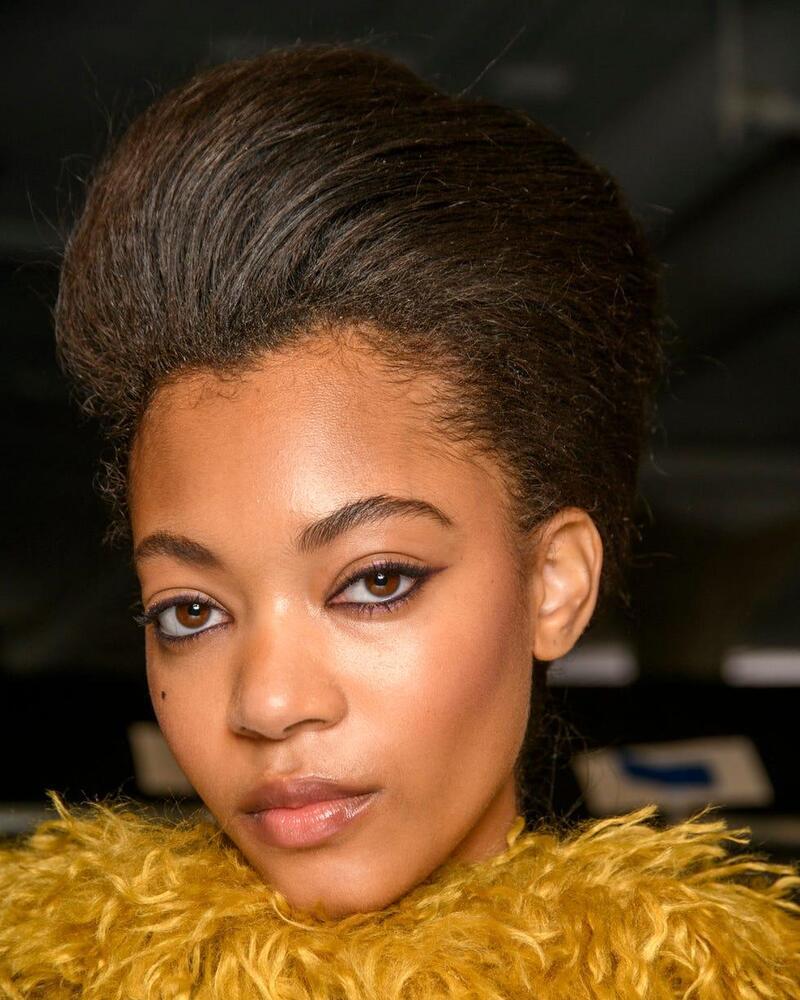
SUBTLE CAT EYE

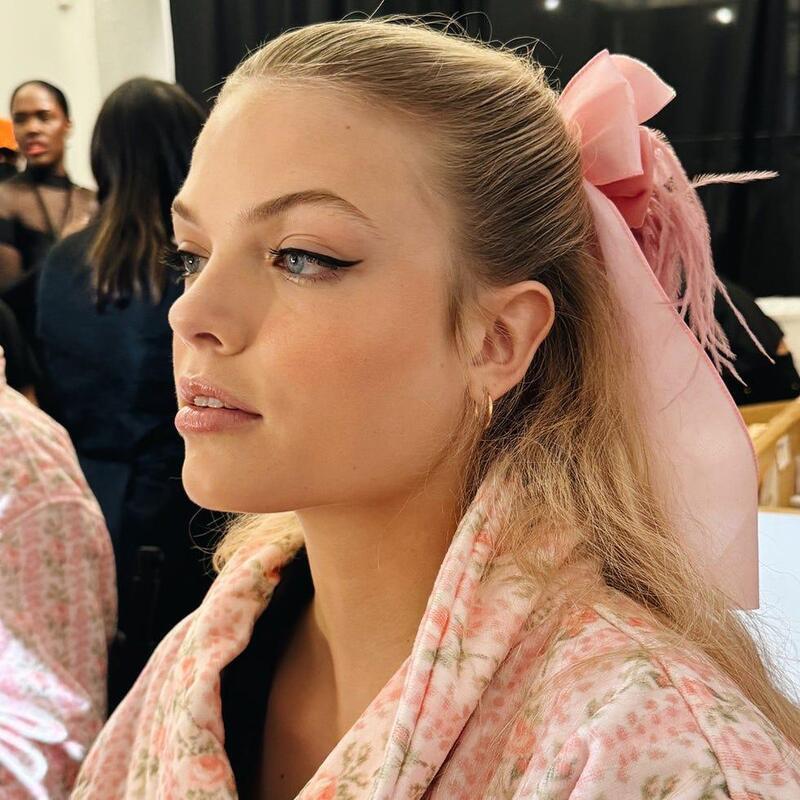
One of the standout makeup trends from fall 2024 was the subtle cat eye. This look was often paired with minimal makeup for a refined and feminine effect. At LovesShackFancy, Bobbi Brown Global Pro Artist Amy Conway embraced the coquette girl trend by using soft pink tones and creating a delicate winged eye with gel liner.

CHRISTIAN COWAN

For a high-glam look, emphasize your eyes with sleek eyeliner, voluminous lashes, and face gems, inspired by the models at Christian Cowan. Makeup artists Lori Taylor Davis and Doniella Davy used Half Magic’s decals at the inner corners of the eyes to create a dazzling, three-dimensional effect.

LUXE LINER

The flawlessly blended eyeliner in this look is incredibly satisfying. The peachy-nude shadow and lips create a perfect fall makeup combination that you’ll want to wear again and again. Victoria Beckham Beauty’s Satin Kajal Liner is easy to apply and provides long-lasting results.
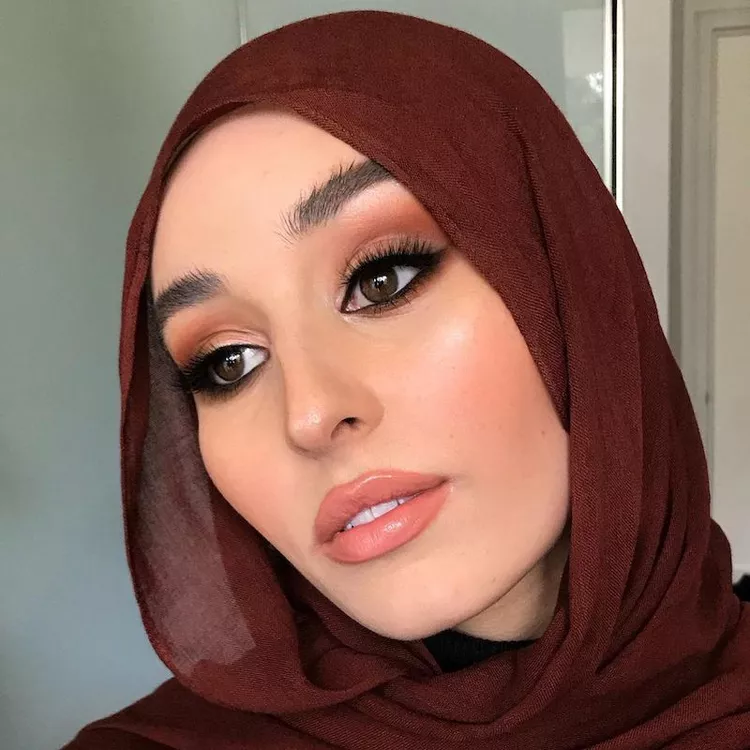
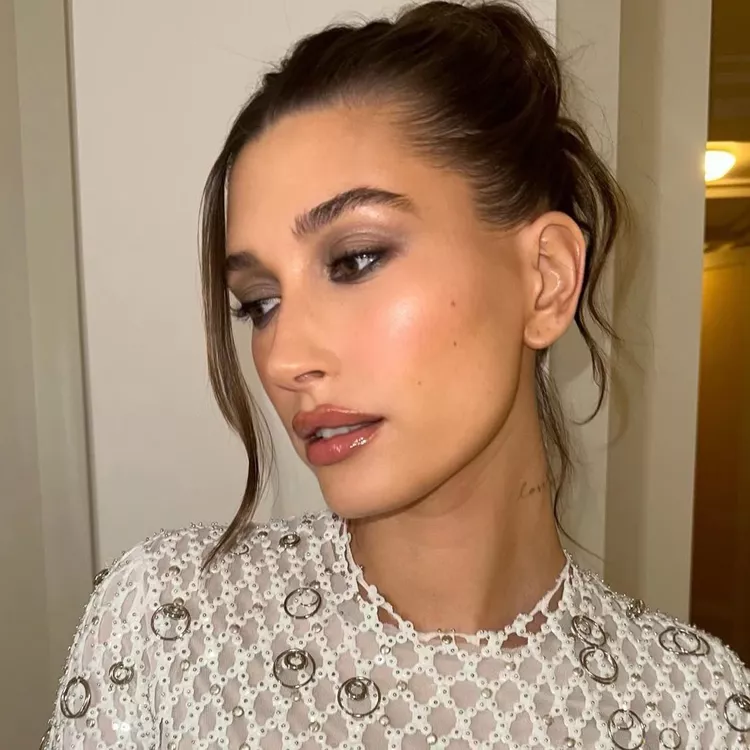
BRONZE BEAUTY

Smoky bronze eyes, shimmering glossy lips, and smoky eyeliner are the perfect combination for a fall makeup look. To keep your skin looking fresh and radiant all day, mist your face with Evian’s Brumisateur.
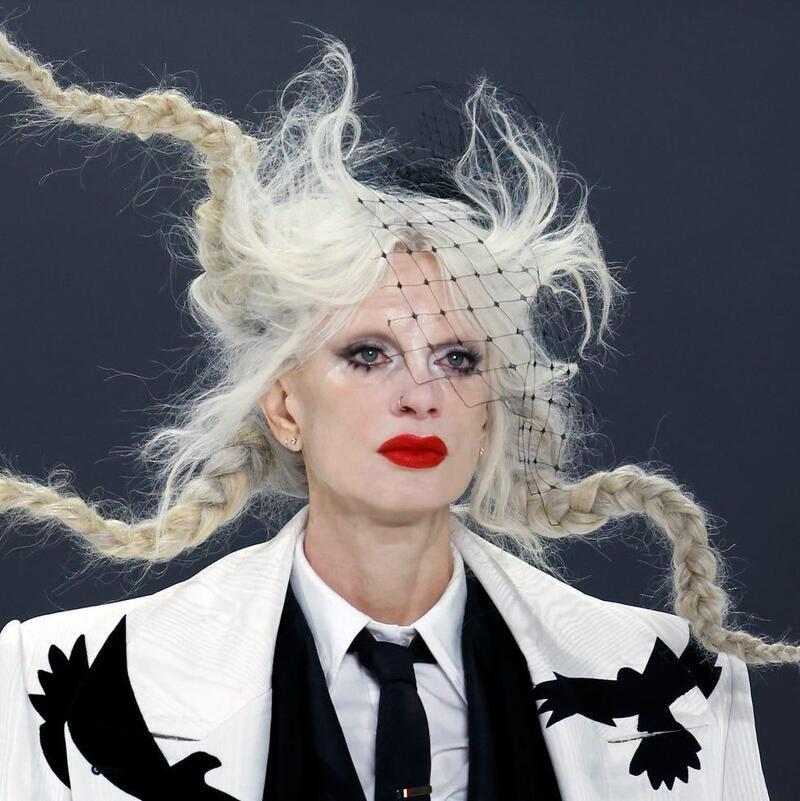
MOD METALLIC

For fall, metallic silver eyelids, generous coats of mascara, and nude lips are the perfect combination. Add a touch of black liner to your lids to craft an abstract shape if you’re feeling adventurous.

DOUBLE WING

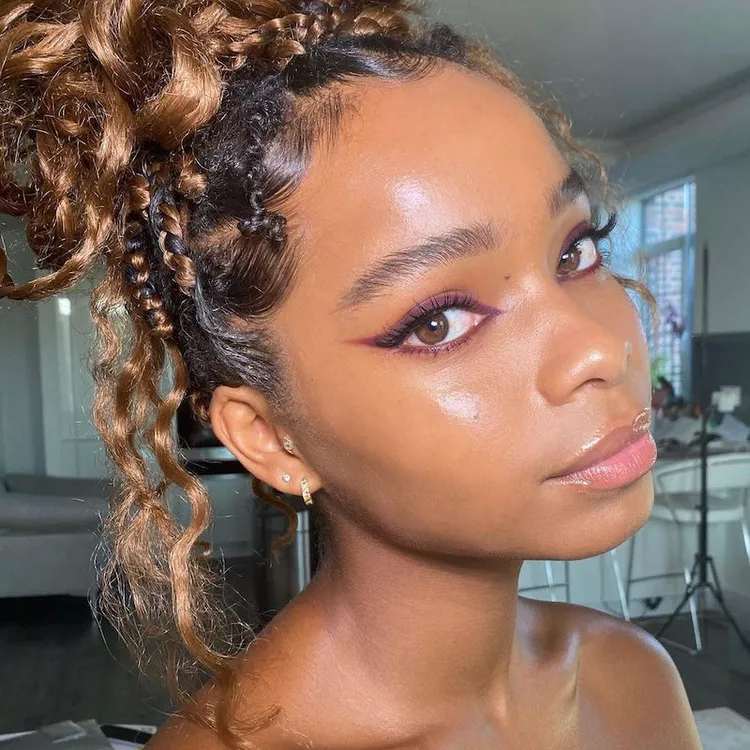
A radiant complexion combined with black and purple winged liner demonstrates the stunning impact of layering eyeliners and experimenting with wing shapes. And let’s not forget those flawless brows! For a glowing finish, try Armani Beauty’s Neo Nude Foundation, which offers a lightweight, dewy look while keeping your skin hydrated.
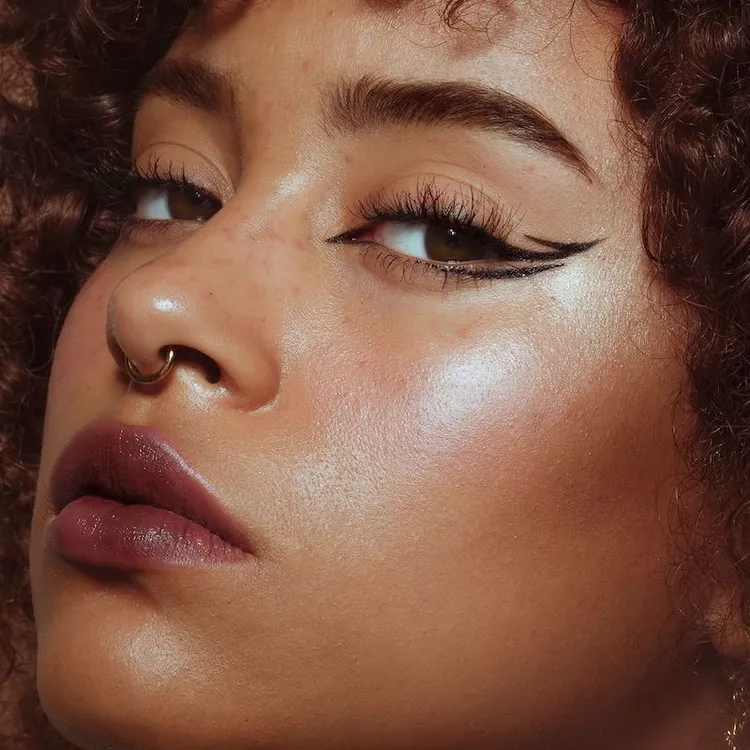
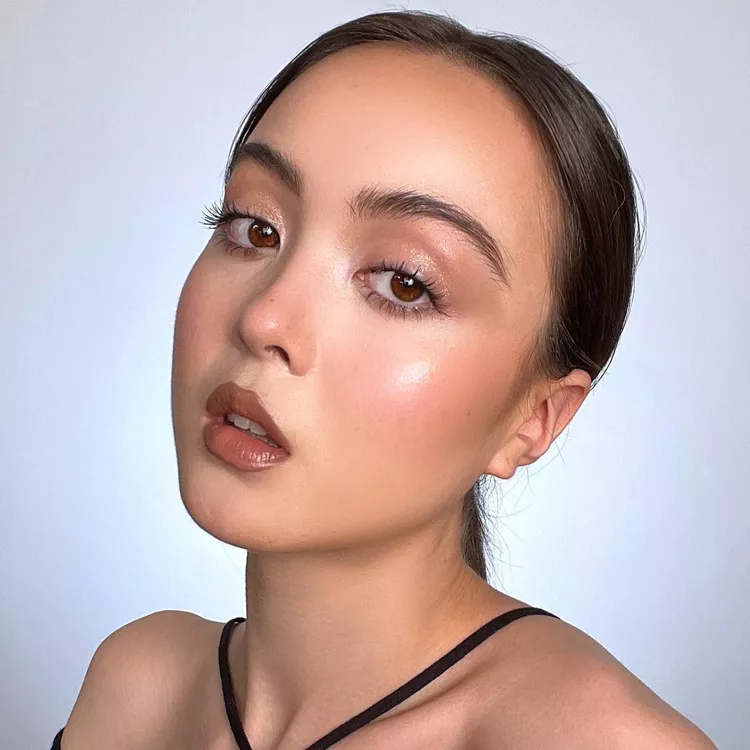
NATURALLY DEFINED

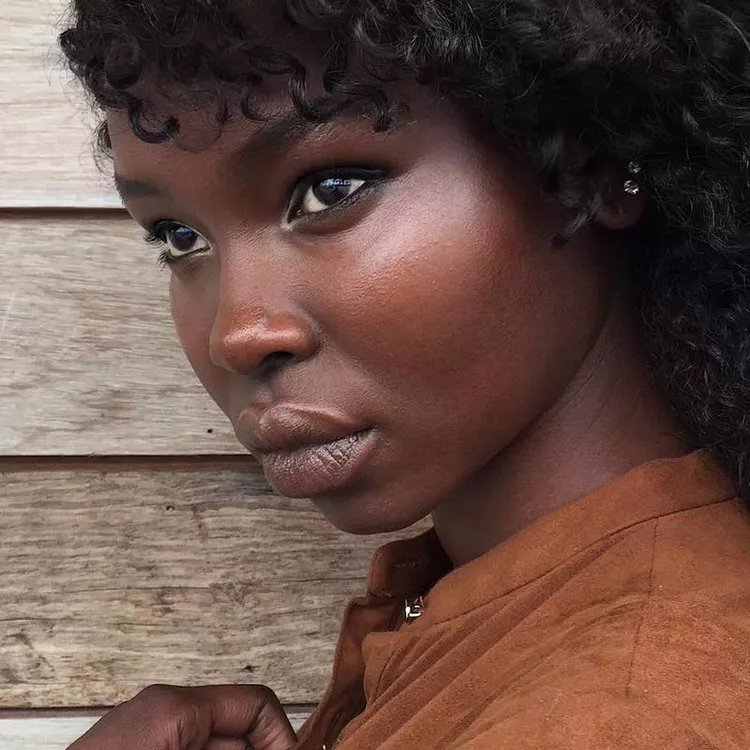
A defined black eyeliner paired with a subtle highlight on the cheeks is a perfect everyday look. Adding a touch of highlight to the inner corners of the eyes enhances the effect beautifully. Finish with a soft, neutral lipstick, and you’ve achieved a chic, fall-ready makeup look that’s perfect for any day of the week.

BOLD AND BLUE

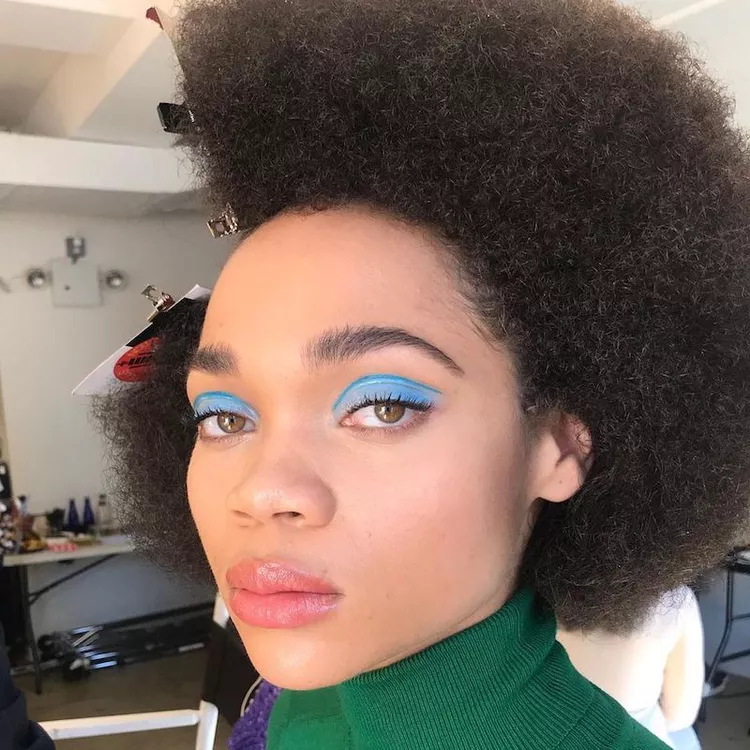
Bold colors can be a year-round staple, and this striking blue on the lids is a perfect example. For a stunning effect, keep the application simple while ensuring the color payoff looks expertly crafted, as if you spent hours perfecting it.

PURPLE SMOKE

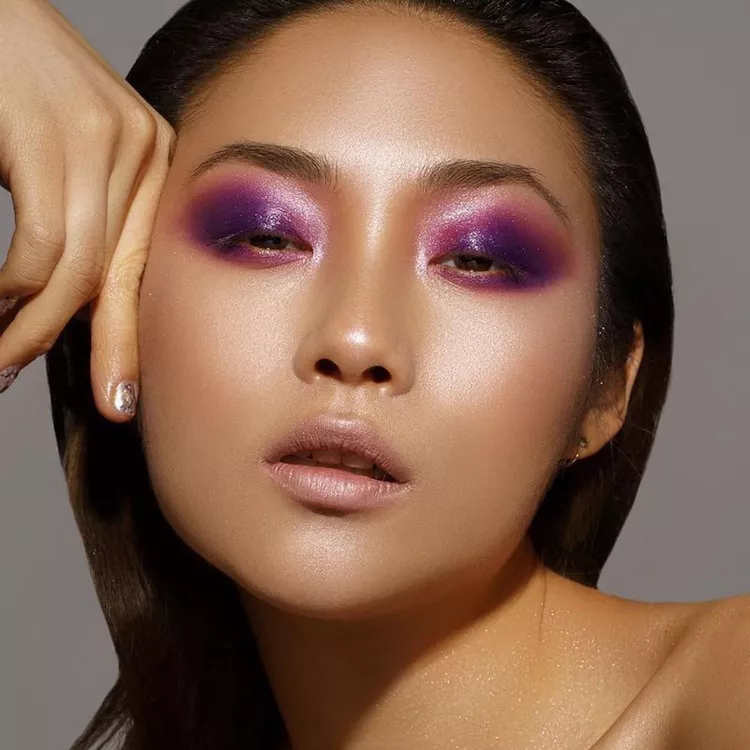
Vivid, deep violet and purple shadows create a smoky eye that truly stands out. When paired with soft, natural skin and lips, this eye-catching look complements any fall wardrobe beautifully.

MAUVE LINES

Matte mauve lipstick combined with delicate liquid eyeliner on the inner corners introduces fall hues and a fresh twist on eye makeup. Lining the inner corners not only defines your eyes but is also surprisingly simple to achieve.

EMERALD FRAME

Enhance your fall eyeshadow look with a jewel-toned shade like emerald green for a bold and vibrant effect. Adding a smoky touch to the lower lashline elevates the look, while dewy skin and a soft lip provide a perfect balance. For flawless coverage, apply concealer under the eyes and blend with a brush like Anisa Beauty’s Angled Concealer Brush for optimal results.

OLIVE SMOKE

Give the classic smoky eye a fresh twist by blending three earth-toned shadows for a fall-inspired look. The combination of forest green, rust, and gold creates a vibrant and stunning eyeshadow effect that captures the essence of the season.

BERRY SHARP

Berry lips, glowing skin, and razor-sharp winged eyeliner—this look exudes major fall vibes. The precise liquid liner pairs beautifully with the softer lip stain and highlighted skin, creating a stunning seasonal effect.

Diffused Shadows

For a more toned-down version of the ’90s grunge aesthetic, Allen recommends a ‘messy, textured eyeshadow’ trend. This look, achieved by applying wet or dry shadow with a brush or fingertips, creates a smoldering, slightly undone effect that adds a touch of coolness and attitude to the eyes.

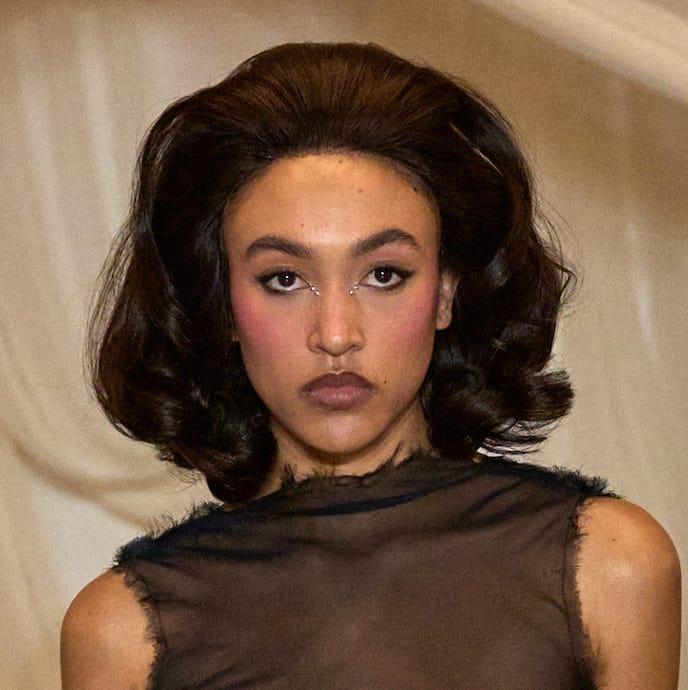
PINK CHEEKS WITH MAUVE LIPS

While summer and spring often feature a flushed cheek, this fall version offers a fresh twist, especially when paired with mauve lips. Start by lining the lips, then apply a matching lipstick. Blot to remove some color, achieving a more natural, understated effect.

SUN-KISSED AND SMOKEY

We adore this lighter, sun-kissed twist on the smoky eye, featuring smudgy lids and radiant skin. For choosing the right bronzer, Jamie Greenberg (a celebrity makeup artist based in California) suggests: “The best rule is figuring out if you have cool or warm undertones. That’s how you choose what kind of bronzer you use. You should like go 2-3 shades darker than your skin.”

ALLOVER TAN

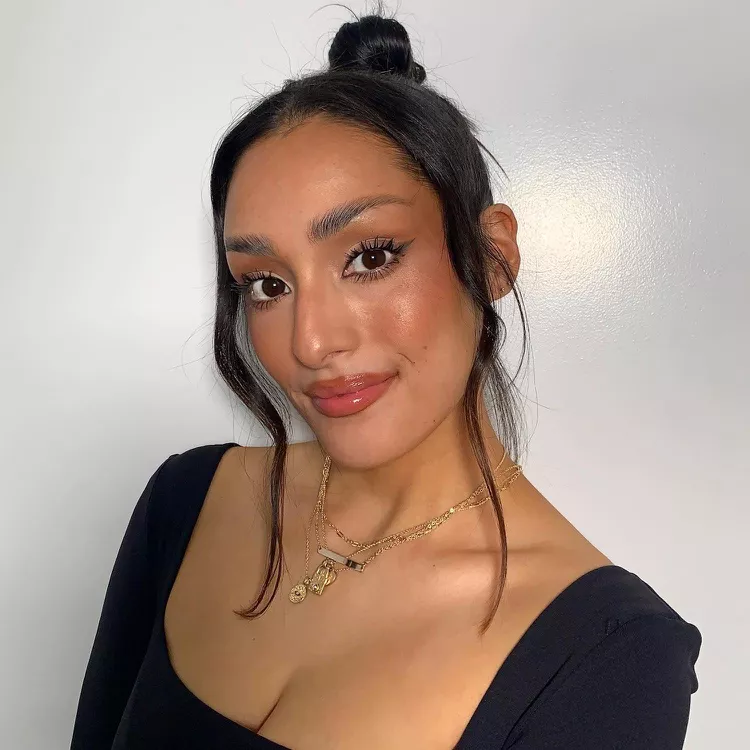
We love a monochromatic makeup look, especially for fall. This one features bronzer concentrated on the apples of the cheeks, with matching bronze tones highlighting the lids and lips for a cohesive, seasonal effect.

Son Jung Won

According to Marc Reagan, Bobbi Brown Global Pro Artist, ‘Son Jung Won’s latest look pays homage to the ’60s with a modern twist. By combining a radiant, natural base with a striking, elongated eye, we’ve captured the essence of new-wave French style.’

All Dolled Up

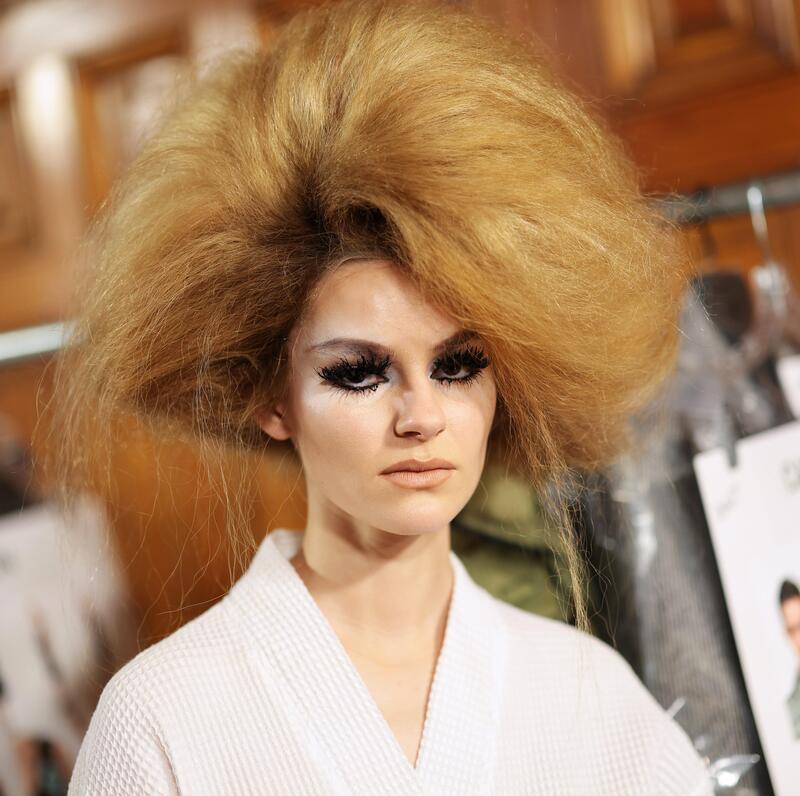
This fall, long, flowing lashes are getting a dramatic upgrade. Inspired by the iconic looks of Diana Ross and paper dolls, veteran makeup artist Diane Kendal layered black nail polish onto Duo false lashes to create an ultra-thick, glossy fringe for Marc Jacobs’ show.
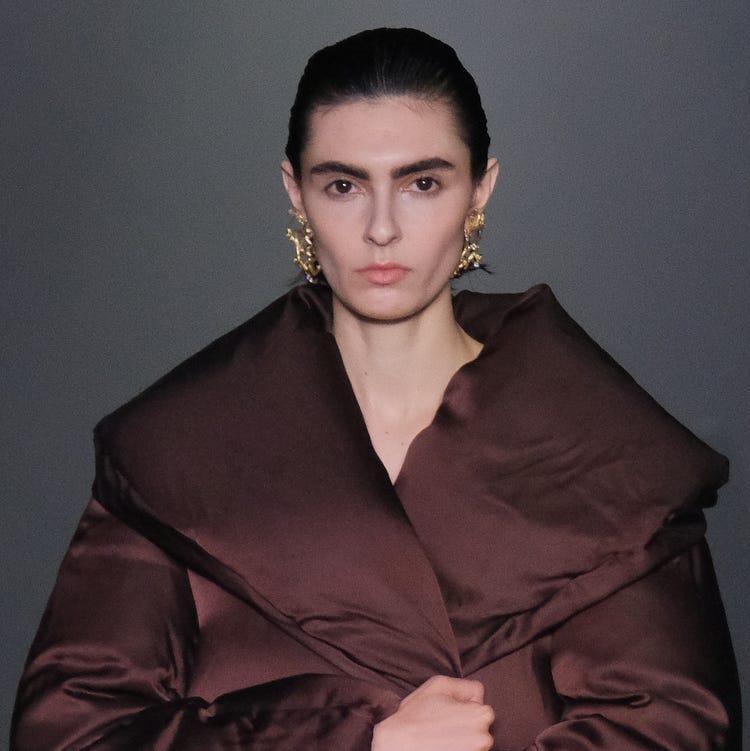
L’Agence

If you prefer a darker, more dramatic lip, deep, vampy scarlet was a popular choice during New York Fashion Week, including at L’Agence.

CONCLUSION

From bold red lips to smoky eyes, the possibilities are endless. Experiment with different colors, textures, and techniques to find your perfect fall aesthetic. Remember, the key to a great makeup look is confidence. So embrace the season’s beauty and step into fall with style.

HOW TO DO MAKEUP FOR BRIDE: A STEP-BY-STEP GUIDE TO DIY WEDDING MAKEUP

A wedding day is a moment people daydream about and meticulously plan well in advance before meeting the person they will eventually marry. When the moment finally arrives, numerous aspects need careful consideration and execution, including selecting the ideal make up for bride. This process involves various steps, such as preparing the skin for a radiant appearance, deciding on the makeup artist, and scheduling time for a trial-run application (or two). It also entails mastering the art of applying makeup that complements the desired look for the bride on her wedding day.

DO A RESEARCH

The internet is brimming with beauty inspiration for your wedding day. If you’re uncertain about the kind of look you want, initiate some research. Explore your favorite celebrity’s latest red carpet appearances through a search engine or visit a professional makeup artist’s Instagram page to peruse photos of their clients.

You can also turn to TikTok or YouTube for comprehensive tutorials that you can recreate. Kim suggests identifying someone with similar facial features for a more personalized guide. Following makeup trends that don’t compliment your face may result in an awkward appearance. Don’t replicate a look just because it’s trending online. Instead, ensure that you genuinely like the chosen style.

CONSIDER YOUR THEME

Your final appearance will be significantly shaped by your overall aesthetic. Prior to applying your makeup, it’s crucial to decide whether a natural, sun-kissed glow, or a blend of both aligns better with you and your event. Taking into account your color scheme, floral decorations, venue, and ambiance. Aligning your makeup with the overarching theme enhances the harmonious and elegant atmosphere of your wedding day.

DETERMINE THE RIGHT SHADES

To achieve a smoother end result, it’s essential to determine which color will best complement your skin tone, whether it’s a warm bronze tone or a cool blue tone. Attention should be paid to the importance of finding the right shade for your skin, suggesting the possibility of mixing different shades to create the perfect combination. Instead of relying on guesswork, consider seeking advice from a professional who can determine the color that best suits your skin tone.

STAY OUT OF THE SUN

In the countdown to your wedding day, one crucial piece of beauty advice is to stay out of the sun. Prolonged exposure to sunlight can lead to skin damage, including sunburn, premature aging, and uneven skin tones, all of which might affect your desired wedding day look. To maintain a radiant and flawless complexion, it’s advisable to minimize sun exposure in the weeks leading up to the big day. Consider using sunscreen with a high SPF, wearing protective clothing, and seeking shade whenever possible. By taking these precautions, you can help ensure that your skin looks its best and remains picture-perfect for your wedding, allowing you to confidently showcase your natural beauty on this special occasion.

PRACTICE MAKEUP FREQUENTLY

In the buildup to your wedding, one valuable beauty tip is to practice your makeup frequently. Regularly experimenting with different looks allows you to refine and perfect the ideal style that enhances your features and complements your wedding theme. Schedule trial runs to familiarize yourself with the application process, ensuring that your chosen makeup look not only suits your preferences but also stands up to the demands of the long-awaited day.

Frequent practice not only builds your confidence in achieving the desired outcome but also enables you to identify any potential challenges and address them well in advance. With each practice session, you’ll gain valuable insights into the products and techniques that work best for you, ensuring that you step into your wedding day with the expertise to create a stunning and long-lasting makeup look.

BOOK A VIRTUAL APPOINTMENT

In the modern landscape of wedding preparations, booking a virtual appointment has become an invaluable step, especially in the era of convenience and technology. Prior to your wedding, consider scheduling virtual appointments with key vendors, such as your wedding planner, photographer, or even beauty professionals. These virtual consultations provide a convenient and efficient way to discuss details, share ideas, and make crucial decisions without the need for in-person meetings. 

Whether it’s finalizing the event timeline, reviewing photography preferences, or discussing your desired bridal look, virtual appointments allow for seamless communication from the comfort of your own space. Embracing this digital approach not only streamlines the planning process but also accommodates busy schedules, ensuring that every detail is meticulously addressed, and your vision for the perfect wedding day is brought to life.

PREP YOUR SKIN

On your wedding day, stick with your tried-and-true skincare routine! A clean, familiar canvas is key to achieving natural, beautiful makeup. Skip experimenting with new products and simply cleanse, moisturize (lightly!), and gently exfoliate (if you normally do). Leave any blemishes alone unless you have a trusted spot treatment, and you’re all set for a picture-perfect complexion.

CHOOSE FAMILIAR PRODUCT

When it comes to your wedding day, selecting familiar makeup products is key. The familiarity of these products offers a sense of comfort and confidence since you already know how they perform on your skin. Opting for tried-and-true makeup items ensures that you avoid any potential surprises or adverse reactions that could occur from experimenting with new products. By sticking with the cosmetics you are familiar with, you can trust that they will provide the desired results and enhance your natural beauty. It’s essential to feel at ease and radiate confidence on your special day, and relying on familiar makeup products plays a significant role in achieving that peace of mind.

HOW TO DIY YOUR OWN BRIDAL MAKEUP

STEP 1: PREP YOUR SKIN

Whether you’re applying your makeup on your own or relying on a professional, on your wedding day, start by washing your face and applying a light moisturizer. Stick to your regular skincare routine; now is not the moment for drastic changes. If you usually exfoliate, choose a gentle exfoliating cleanser instead of a harsh scrub. Address any blemishes by lightly dabbing on an appropriate product like Visine, but avoid unnecessary interventions. The goal is to have a clean and soft canvas, providing the perfect base for achieving naturally beautiful skin with your makeup.

Consider your skin’s undertones, whether they lean towards cool or warm, when selecting colors that both match and complement. To identify your undertone, try a simple trick. Place a piece of silver and a piece of gold jewelry on the back of your hand. If the gold appears to blend seamlessly, you likely have warm undertones. Conversely, if the silver seems to harmonize better, you probably have cool undertones.

STEP 2: KNOW THAT PRIMER IS REQUIRED

From the moment you start applying your makeup until you bid farewell to your guests, a multitude of events will unfold. To make sure your makeup withstands the ceremony, dancing, tears, and toasts, consider incorporating a primer into your routine. While occasional touch-ups may still be necessary, they will be significantly reduced. Moreover, a primer serves to even out fine lines, and wrinkles, and conceal open pores. Apply a small amount after moisturizing, but before your foundation, ensuring even coverage across your face and eyelids. This sets the stage for a flawless base for all that follows.

STEP 3: APPLY FOUNDATION

For those with a cool undertone, seek out foundations with a rosier, redder, or blue base. If your undertone leans warm, opt for a foundation with a yellow or golden base. To verify if the shade is suitable, apply a small amount on the center of your lower jawline using a Q-tip. If it seamlessly blends in, you’ve found the right match.

Apply your foundation in thin layers, starting from the center of your face and blending outward with a foundation brush. Ensure a seamless finish, paying particular attention to blending beneath your jaw and along your neck to avoid visible lines. Avoid caking on the foundation, as it can give an overdone appearance and may lead to smearing or streaking.

STEP 4: ADD CONCEALER 

Applying concealer before the foundation can lead to much of it rubbing away during the foundation blending process. To address red areas or dark circles, use a concealer brush to apply a liquid concealer, matching your skin tone or going one shade lighter, to problematic areas. Dot the concealer and gently pat the brush against your skin to spread it. If needed, use a makeup sponge dampened with water to blend the concealer further.

For concealing blemishes, start by applying foundation, followed by concealer, and set it with powder. If the blemish is still visible, add more concealer and powder. Ensure you pat the concealer onto the blemish rather than rubbing to achieve a seamless finish.

STEP 5: APPLY HIGHLIGHTER

Highlighter might not be a staple in everyone’s makeup collection, but its purpose is to enhance specific facial features, making eyes appear larger and adding a radiant, youthful dewy look. However, using too much or a formulation with sparkle or glitter can lead to photo disasters, so apply it with a light touch. Highlighters are available in both liquid and powder forms.

When using a liquid highlighter, apply it with a brush after your foundation, forming a check mark shape. Begin near your inner eye, angle down toward your nostril, and then move up your cheekbone, blending toward your temple. Repeat the process above your brows, down the center of your nose, on the center of your forehead, and on your chin.

For powder highlighter, apply it after powdering and brush it under your brows, lightly in the corner of your eyes, and on the tops of your cheekbones. Avoid using powder highlighter under your eyes or over your mouth to prevent a sweaty appearance in photos.

STEP 6: SET YOUR BASE

Now, you face a decision. You can either opt for a cream blush instead of a powder blush or set your base with powder. If you choose the latter, begin by using a translucent powder to set your base and manage any shine. When it comes to powder, remember that less is more; aim for a luminous look rather than a heavy one. With a medium-sized brush, lightly dust over your forehead, the sides of your nose, and on your chin.

Following this, apply a powder bronzer that’s a shade or two darker than your foundation. Brush it in the shape of a 3 on both sides of your face. Begin at your hairline, move down the side of your face, then under your cheekbone, back to the side of your face, and finally below your jaw.

Keep pressed powder handy for those moments when certain areas shine and need a quick dab before a photo or while in the restroom.

STEP 7: BRING COLOR TO YOUR EYES

Wedding experts typically advise against a heavily dramatic eye, suggesting instead the use of eyeliners in shades other than black, along with paler or muted eye shadows that complement your eye color. Highlighters can also be applied to create the illusion of larger eyes. Experiment with brown, grey, and green eyeliners, applying them to both your upper and lower eyelids to enhance your eyes. For a longer-lasting effect, use a cream eye shadow on your eyelids, reserving powder for the crease of your eye. Apply a powder highlighter in the corners of your eyes and under your brow.

Consider the following color recommendations based on your eye color: bronze shades for green eyes, mocha for hazel eyes, navy and dark brown for blue eyes, and purples and grays for brown eyes. If you want to line your eyes with eye shadow, dampen an eyeliner brush with water and brush it into the eye shadow for a defined look.

STEP 8: ADD MASCARA

Given that tears are likely, it’s essential to use waterproof mascara for your wedding day. If you’re not accustomed to wearing false eyelashes regularly, your wedding day is not the ideal time to start. Instead, ensure you have a reliable eyelash curler, a volumizing mascara, and a lengthening mascara. Prior to applying mascara, curl your lashes for added lift. When applying mascara, begin at the root of your eyelashes and wiggle the wand from side to side as you move up to the top. Opt for black mascara, as it complements everyone.

Complete your eye makeup by framing your face with a brow powder slightly darker than your natural color. Brush it along the natural line of your eyebrows, working outward toward the end of your eyes. This final touch will enhance your overall look on your special day.

STEP 9: CREAT LIPS

Much like your facial skin, well-moisturized lips are crucial before applying makeup to prevent dryness or cracks that may emphasize lines once color is added. To achieve this, use a lip hydrator, allowing it to absorb for a couple of minutes before applying color. Select a shade that complements your blush and consider the following tips. While many lipsticks claim lasting hours, opting for a lip stain is a more reliable choice on your wedding day.

For fair skin with cool undertones, consider nude, light mocha, and light mauve. If you have warm undertones, explore sand, nude peach, or shell, steering clear of bright pinks, dark bronzes, and deep mochas. If your skin tone is medium with cool undertones, opt for rosy pink, pomegranate, or cranberry; for warm undertones, go with bronze, copper, and cinnamon, avoiding nudes. Deep skin with cool undertones can experiment with raisin, wine, or ruby red, while warm undertones may prefer honey, ginger, or a coppery bronze, avoiding shades close to orange.

CONCLUSION

In conclusion, mastering the art of bridal makeup involves careful consideration and skill. These 8 tips provide valuable insights to help you become the most beautiful bride on your special day. Remember, when it comes to achieving a flawless finish, exploring techniques like air brush make up can elevate your bridal look to new heights. With attention to detail and a touch of creativity, you’re sure to radiate confidence and beauty as you walk down the aisle on your unforgettable day.