Do you have dark underarms that make you self-conscious when wearing sleeveless tops or swimsuits? You’re not alone. Many people struggle with dark underarms, whether it’s due to genetics, hormonal changes, or skin irritation from shaving or using certain products.
The good news is that there are ways to lighten underarms and achieve a brighter, more even tone.
So, scroll down and check out how to get rid of dark underarms as well as some helpful tips and tricks along the way.
Understanding Dark Underarms

Before we dive into how to lighten underarms, let’s first understand why they may appear darker than the rest of your skin.
why are my underarms dark?
- Genetics: Just like how some people are more prone to freckles or moles, some individuals may have naturally darker underarms due to their genes.
- Hormonal changes: Pregnancy, menopause, and certain medications can cause hormonal changes that may darken the skin in some areas, including the underarms.
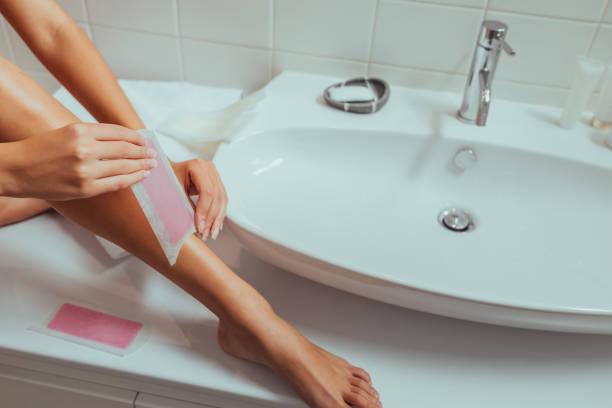
- Shaving: Shaving can irritate the skin and lead to the appearance of dark underarms as the hair grows back.
- Deodorants and antiperspirants: Some deodorants and antiperspirants contain ingredients such as alcohol, fragrance, and aluminum that can irritate the skin and cause discoloration.
- Friction: Constant rubbing of the underarms against tight clothing can lead to darkening of the skin.
- Dead skin cells: Just like any other part of our body, dead skin cells can accumulate on our underarms, leading to a darker appearance.
By understanding the causes of dark underarms, you can better address the issue and find the right solution for you.
What Not to Do When Trying to Lighten Underarms
- Avoid harsh chemicals: It may be tempting to use strong bleaching agents or acids on your underarms, but this can cause more harm than good. These products can irritate the skin and lead to more discoloration.
- Don’t over-exfoliate: While exfoliating can help remove dead skin cells, overdoing it can cause irritation and damage to the skin.
- Skip the lemon juice: Lemon juice is a popular home remedy for lightening underarms, but it can also cause irritation due to its high acidity level.
Now that we have a better understanding of dark underarms let’s move on to the methods for lightening them.
how to lighten underarms naturally
If you prefer natural remedies over store-bought products, here are some options for lightening underarms using ingredients you may already have in your kitchen.
Coconut Oil and Lemon Juice
Coconut oil is known for its moisturizing properties, while lemon juice has natural bleaching abilities. Together, they can help lighten underarms without causing irritation.
How to Use:
- Mix equal parts coconut oil and lemon juice.
- Apply the mixture onto clean underarms and leave on for 15 minutes.
- Rinse off with warm water and pat dry.
- Repeat daily for best results.
Baking Soda and Water
Baking soda has exfoliating properties that can help remove dead skin cells and reveal brighter skin underneath.
How to Use:
- Mix 1 tablespoon of baking soda with enough water to form a paste.
- Apply the paste onto damp underarms and gently massage in circular motions.
- Leave on for 5 minutes, then rinse off with warm water.
- Pat dry and apply a moisturizer.
- Use this method 2-3 times a week.
Cucumber and Turmeric
Cucumber has a cooling effect on the skin, while turmeric has anti-inflammatory properties that can help soothe any irritation or redness in the underarms.
How to Use:
- Blend 1 cucumber into a paste.
- Mix in 1 teaspoon of turmeric powder.
- Apply the mixture onto clean underarms and leave on for 20 minutes.
- Rinse off with warm water and pat dry.
- Repeat 2-3 times a week.
Apple cider vinegar
Using apple cider vinegar to lighten underarms is a popular natural remedy. It is believed that the acetic acid in apple cider vinegar can help exfoliate and lighten the skin in the underarm area
How to use
- Mix equal parts of apple cider vinegar and water to create a solution.
- Do a patch test on a small area of your skin to ensure you don’t have an adverse reaction.
- Apply the diluted apple cider vinegar to your underarms using a cotton ball or a clean cloth. Gently rub it into the skin and let it sit for a few minutes.
- Rinse off the apple cider vinegar with warm water.
Olive oil
Olive oil is a natural moisturizer and exfoliator, which can help to lighten dark underarms. It is also rich in antioxidants, which can help to protect the skin from damage.
How to use
- Mix together equal parts olive oil and brown sugar to create a paste.
- Apply the paste to your underarms and scrub gently for 1-2 minutes.
- Rinse off with warm water and pat dry.
- Repeat this process 2-3 times per week.
Store-Bought Products for Lightening Underarms
If you prefer ready-made products, there are many options available in the market specifically designed for lightening underarms. Here are two popular choices:
Whitening Deodorants
Many deodorant brands now offer whitening versions that claim to lighten underarms with regular use. These products typically contain ingredients like licorice, vitamin C, and niacinamide, which have brightening effects on the skin.
When choosing a whitening deodorant, make sure to read the label and avoid products with harsh chemicals or fragrances that may irritate your skin.
Body Scrubs
Body scrubs are another popular option for lightening underarms. These products usually contain exfoliating ingredients like sugar, salt, or coffee grounds, as well as moisturizing agents like coconut oil or shea butter.
Make sure to choose a scrub with gentle exfoliants and avoid ones with harsh chemicals that can damage the delicate skin in your underarms.
Professional Treatments for Lightening Underarms
For those looking for more immediate and long-lasting results, there are also professional treatments available for lightening underarms. However, these tend to be more expensive, so it’s essential to do your research and consult with a dermatologist before undergoing any treatment.
Chemical Peels
Chemical peels are a popular treatment for lightening underarms. This procedure involves applying a chemical solution to the skin, which exfoliates the top layer and reveals brighter, smoother skin underneath.
Chemical peels can be done at various strengths, so make sure to discuss your concerns and goals with a professional before undergoing the treatment.
Laser Therapy
Laser therapy is another option for lightening underarms. This treatment uses beams of light to target and break down melanin (pigment) in the skin, resulting in a lighter appearance.
Laser therapy typically requires multiple sessions, and it may cause some discomfort and redness in the treated area.
FAQs
Q: Can shaving cause dark underarms?
A: Shaving can irritate the skin and lead to the appearance of dark underarms as the hair grows back. If you have sensitive skin, consider using alternative hair removal methods like waxing or depilatory creams.
Q: Is it safe to use lemon juice on my underarms?
A: While lemon juice has natural bleaching properties, its high acidity level can also cause irritation and damage to the skin. It’s best to use it in moderation or opt for other gentler natural remedies.
Q: Are there any foods that can help lighten underarms?
A: Some people believe that eating certain fruits like papaya, pineapple, and kiwi can help lighten underarms due to their high vitamin C content. However, there is no scientific evidence to support this claim.
Q: Can deodorants cause dark underarms?
A: Some deodorants and antiperspirants contain ingredients like alcohol, fragrance, and aluminum that can irritate the skin and lead to discoloration. Consider switching to a more gentle and natural deodorant if you experience any irritation or darkening.
Q: How long does it take to see results from lightening underarms?
A: Results may vary depending on the method or product used. Natural remedies may take a few weeks to see noticeable changes, while professional treatments may show results after just one session.
Final Takeaway
Dark underarms can be a source of insecurity for many people, but there are various methods available for lightening them. Whether you prefer natural remedies, store-bought products, or professional treatments, it’s essential to choose options that are gentle and suitable for your skin type.
Remember to also address any underlying causes of dark underarms, such as hormonal changes or skin irritation, to achieve long-lasting results. With consistent care and patience, you can achieve brighter, smoother underarms and feel more confident in your own skin.