It’s no wonder rib tattoos are becoming increasingly popular. For those seeking a more discreet tattoo, the rib area is ideal—it’s easily hidden unless you’re in a swimsuit. This makes the rib cage the perfect canvas to unleash your creativity and go bold.
Additionally, rib tattoos enhance the body’s natural silhouette. A design placed along the side can sit beautifully against the bones, while a tattoo that stretches from the back to the front can accentuate the waistline.
Ultimately, the perfect tattoo is a combination of three key elements: the design, the meaning, and the placement. When these come together, the result is a stunning and timeless piece of art.
In this post, you’ll discover a curated collection of rib tattoos for women that meet all these standards. If you’re in search of ink that will leave a lasting impression, keep reading!
Flower rib tattoos for women
Flowers are a popular choice in feminine tattoos, often symbolizing beauty, positivity, and life. However, the meaning can differ depending on the specific flower.
For a delicate and feminine tattoo on the rib cage, flowers are an excellent choice. You can customize the design to follow the contours of your bones, allowing for a natural flow. Whether large or small, floral tattoos are equally stunning, offering endless possibilities for creativity. Below, you’ll find a collection of beautiful flower rib tattoos for women. Keep scrolling to discover the perfect design for your next ink!
CHERRY BLOSSOM RIB TATTOO

Cherry blossoms are an excellent tattoo choice for women, thanks to both their symbolism and aesthetic appeal.
These delicate flowers bloom briefly, making them a symbol of life’s fleeting nature and a reminder to live each moment to its fullest. Visually, cherry blossoms are small and graceful, yet when they bloom in clusters, they create a stunning display of pink beauty, making them irresistibly charming.
RED FLOWER TATTOO
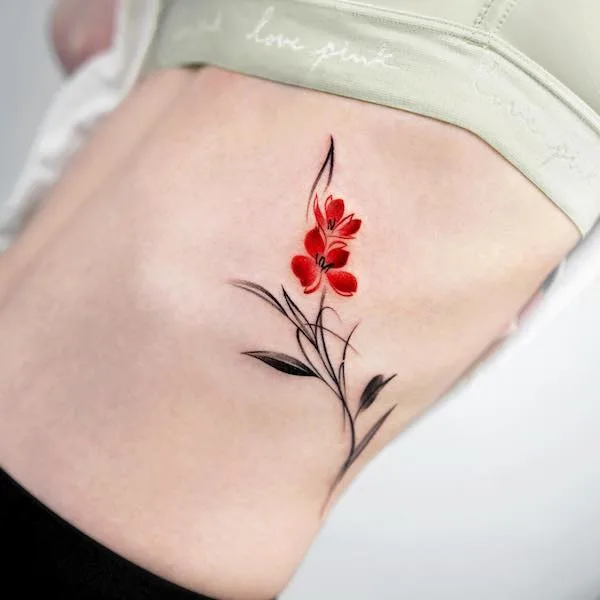
Despite their deeper meaning, red spider lily tattoos can serve as the perfect motif to express your personality. Their unique shape and striking appearance make them a standout design, offering a bold and memorable way to showcase individuality. Whether for their symbolism or aesthetic appeal, they make a powerful statement.
MINIMALIST FLOWER OUTLINE RIB TATTOO

Outline tattoos are perfect for those who appreciate simplicity over complexity. A small flower rib tattoo like this may not be bold or flashy, but it’s the understated elegance that makes it timeless. Its clean lines and minimalist design ensure it remains a classic, offering subtle beauty that lasts.
SMALL GIRLY FLOWER TATTOO
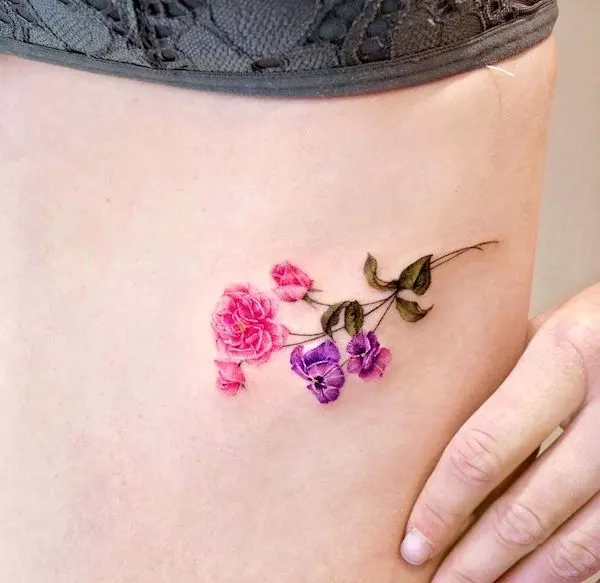
The skin on the rib cage is quite thin, so if you’re sensitive to pain, opting for a smaller tattoo might be a better choice.
However, small doesn’t have to mean simple. This tiny flower tattoo proves that—it’s packed with intricate details, a realistic portrayal of the flowers’ anatomy, vibrant colors, and thoughtful shading. When all these elements come together, even a small tattoo can be absolutely stunning.
ABSTRACT BLACK FLOWER RIB TATTOO
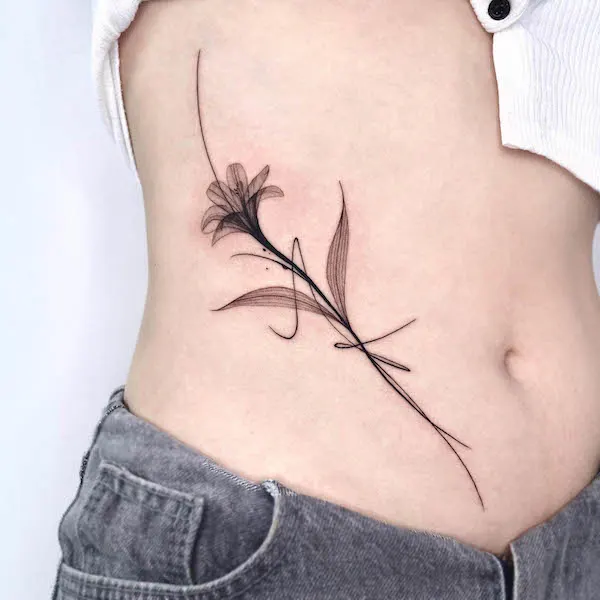
In nature, flowers are rarely black, which is why I never imagined they could look so striking in black and grey.
A radiologist once examined flowers under an x-ray, and though the images were black and white, every intricate detail was brought to the forefront.
This lily tattoo is inspired by that experiment, offering a perfect blend of simplicity and finely crafted details. It’s an ideal choice for those who appreciate minimalist art with just the right amount of depth.
RED SPIDER LILY RIB TATTOO

Unlike most flowers, the red spider lily carries a darker symbolism. It represents themes of death and reincarnation, making it a powerful choice for those who have a deep understanding of life and its cycles. A red spider lily tattoo is a meaningful and introspective design, perfect for someone who embraces these profound concepts.
SMALL BLACK ROSE RIB TATTOO

Roses are generally symbols of beauty and passion, but their meaning can change depending on their color. A black rose, for instance, is a clever choice. With its lack of color, it leaves more room for interpretation, sparking curiosity and allowing others to form their own meanings.
BLUE ROSE RIB TATTOO

While most roses are pink and red, blue roses are quite rare, making them a unique and striking choice. Beyond their meaning, this tattoo encompasses everything you’d want in body art: intricate details, flawless coloring, shading, and texture. If you’re a sweet girl with an edgy side, this blue rose tattoo is the perfect way to showcase both your gentleness and boldness.
SIMPLE ROSES OUTLINE RIB TATTOO

While most fine line tattoos are typically done in black, they can also feature vibrant colors. For instance, this rib tattoo incorporates pink, red, purple, and green, which could symbolize the various possibilities in life or different facets of the wearer’s personality. The placement along the rib cage also beautifully complements the body’s natural shape, enhancing the overall design.
DELPHINNIUM RIB TATTOO FOR WOMEN

In the language of flowers, delphinium symbolizes joy and encouragement. It is often used to honor the memory of someone who has passed away. Additionally, as the birth flower of July, it holds special significance for those born in that month, making it a meaningful and personal tattoo choice.
Small and simple rib tattoos for women
The rib cage can be a tricky area to tattoo. The bony structure and the angles of the bones make it challenging to place long, straight lines effectively.
That’s why opting for a smaller tattoo is often more ideal. It’s easier to execute, and once you find a meaningful design, the size becomes less important. Below, you’ll find a collection of stunning small rib tattoos for women. Keep scrolling to discover more!
DEVINE ONE-WORD TATTOO

Want to keep it simple? Choose a word that represents your values and who you are. For example, the one-word tattoo “divine” speaks volumes about the wearer’s personality and how she sees herself. It’s not just personal but also empowering, serving as a constant reminder of self-worth and strength.
MOON AND RABBIT RIB TATTOO

In Chinese folklore, the jade rabbit lives on the moon, serving as the companion to the moon goddess. When combined with these two elements in a tattoo, it evokes the tale beautifully.
However, even if you’re not familiar with the story, this small rabbit tattoo remains undeniably cute and girly, making it a charming and whimsical design on its own.
HELPING HAND

A helping hand can make all the difference during tough times, as symbolized in this small rib tattoo. The red thread signifies the strong bond between two people, adding depth and emphasis to the design. Together, the tattoo advocates for mental health, kindness, and the power of friendship, offering a meaningful message of support and connection.
BLOSSOMING RIB TATTOO FORR WOMEN

Every flower begins as a small bud, and this rib tattoo beautifully captures the growth of a flower in four stages. It serves as a reminder that life is a journey, and it’s perfectly okay to start as a beginner. Each stage of growth reflects progress, patience, and the beauty of personal development.
BLACK FISH RIB TATTOO

Fish symbolize wealth, wisdom, and freedom, and a fish tattoo embodies these same qualities. The fluid movement of a fish adds a sense of flow to the design, making it a perfect choice for those who aim to break free from rules and limitations. It’s a tattoo that represents both inner strength and the desire for boundless freedom.
BIRDS RIB TATTOO

There are no strict rules when choosing a motif for rib tattoos, but if you want your tattoo to feel realistic and lively, consider opting for moving animals like birds or fish. Their fluid motion and natural elegance can bring energy and life to the design, making it truly stand out on your ribcage.
SCORPION RIB TATTOO FOR WOMEN

Scorpion tattoos aren’t just for Scorpios; they hold a unique charm that appeals to many. Known for their sting, powerful claws, and poisonous tail, scorpions send a clear message: don’t mess with them. If you want to embody your badass vibes and make a bold statement, a scorpion tattoo is the perfect choice.
Plant tattoos on the rib cage
Plant tattoos often feature leaves, vines, and branches, typically done in black and fine lines. If you lean towards minimalist designs, plant tattoos are an excellent choice.
You can also adjust the composition to fit the natural flow of your bones, making them a perfect decoration for the rib cage. Below is a curated collection of plant rib tattoos for women. Keep scrolling to find the design that suits you best.
PORCELAIN LEAVES RIB TATTOO
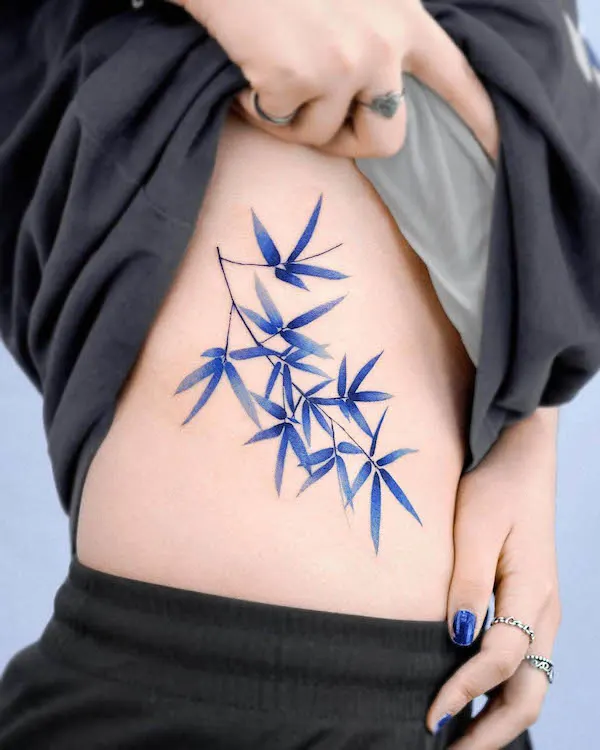
In nature, bamboo leaves are green, but by switching the color to blue, this rib tattoo stands out in a unique and striking way. The unconventional color choice adds a bold twist to the traditional design, making it a standout piece of body art.
DAINTY NAME TATTOO

Name tattoos are not only simple but also deeply personal, often representing yourself or a loved one. However, if a full name tattoo feels too specific, consider opting for initials instead. They offer the same simplicity but with a more subtle, less literal touch.
SIMPLE VINE TATTOO ON THE RIB CAGE

Vine tattoos are a popular choice for the rib cage, and for good reason. Their simplicity beautifully complements the shape of the ribs, with the natural curves enhancing the wearer’s charm.
If a small vine tattoo feels too simple for you, consider adding flowers to it. This adds an extra touch of detail and flair, creating a more dynamic and eye-catching design.
LEAVES RIB CAGE TATTOO

Plant tattoos are incredibly popular, and this stunning design under the boob perfectly showcases why. By layering the leaves to follow the natural curves of the body, the tattoo becomes a beautiful decoration that enhances the silhouette. It’s a design that’s not only alluring and unique but also exudes a touch of sexiness, making it a bold and captivating choice.
STEP BY STEP
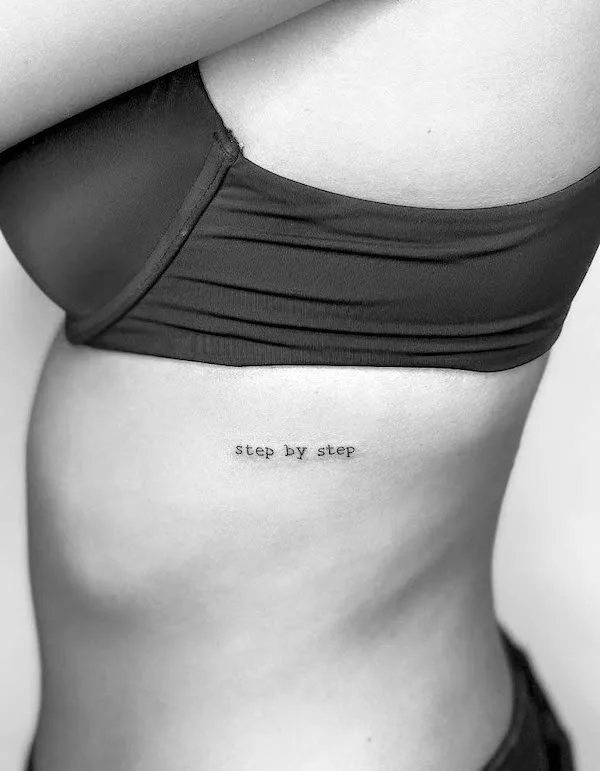
Take your time. Every small step matters.
FULL SIDE FLORAL TATTOO

Feeling adventurous? Go for a full side tattoo. With ample space, the tattoo artist has the freedom to get creative and design something truly unique.
However, full side tattoos can sometimes feel too intricate or overwhelming. By keeping the entire design in black, this rib tattoo retains its elegance and femininity, offering a bold yet refined look.
CONCLUSION
In conclusion, rib tattoos offer a unique canvas for expressing personal meaning and creativity. Whether you opt for simple, minimalist designs or bold, detailed artwork, the rib cage’s shape and contours can enhance the tattoo’s impact. From flowers and animals to meaningful symbols, the possibilities are endless. Ultimately, the best tattoo is one that resonates with you, combines beauty with significance, and complements your body in a way that feels uniquely yours.


